30 April 2022

Clearly Besotted Teasers | Just a Note

Hello there and welcome to day four of the Clearly Besotted May 2022 Teasers, release day is tomorrow but I still have two more teasers to share with you, so I hope you are enjoying them! Today, I am using the super cute Stationery Plushies set. This is absolutely adorable with stationery items with smiley faces and also a lovely desk scene too. I didn't use that on my project but it would be amazing to colour!

PLEASE NOTE: This post contains affiliate links. Please see below for my full disclosure.


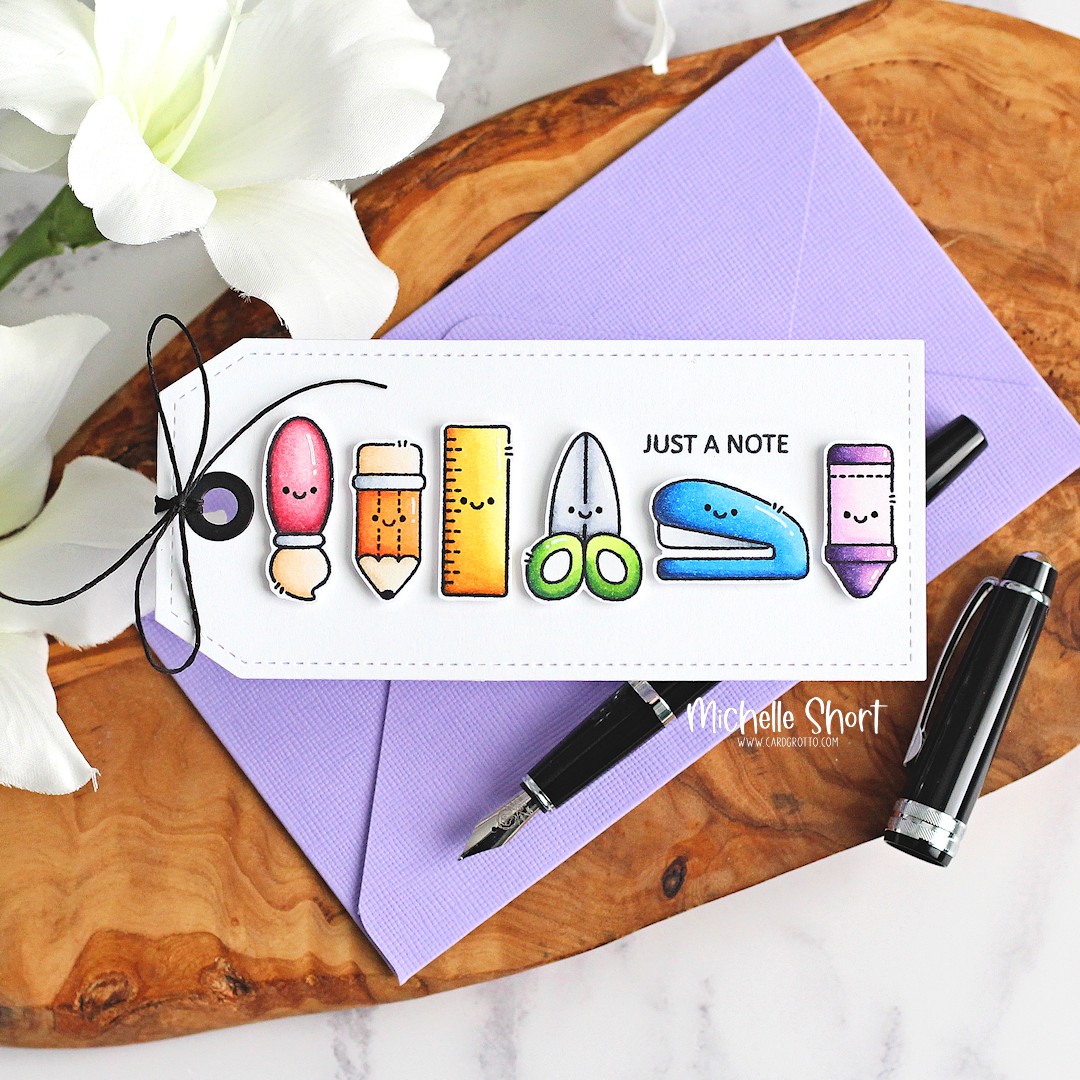
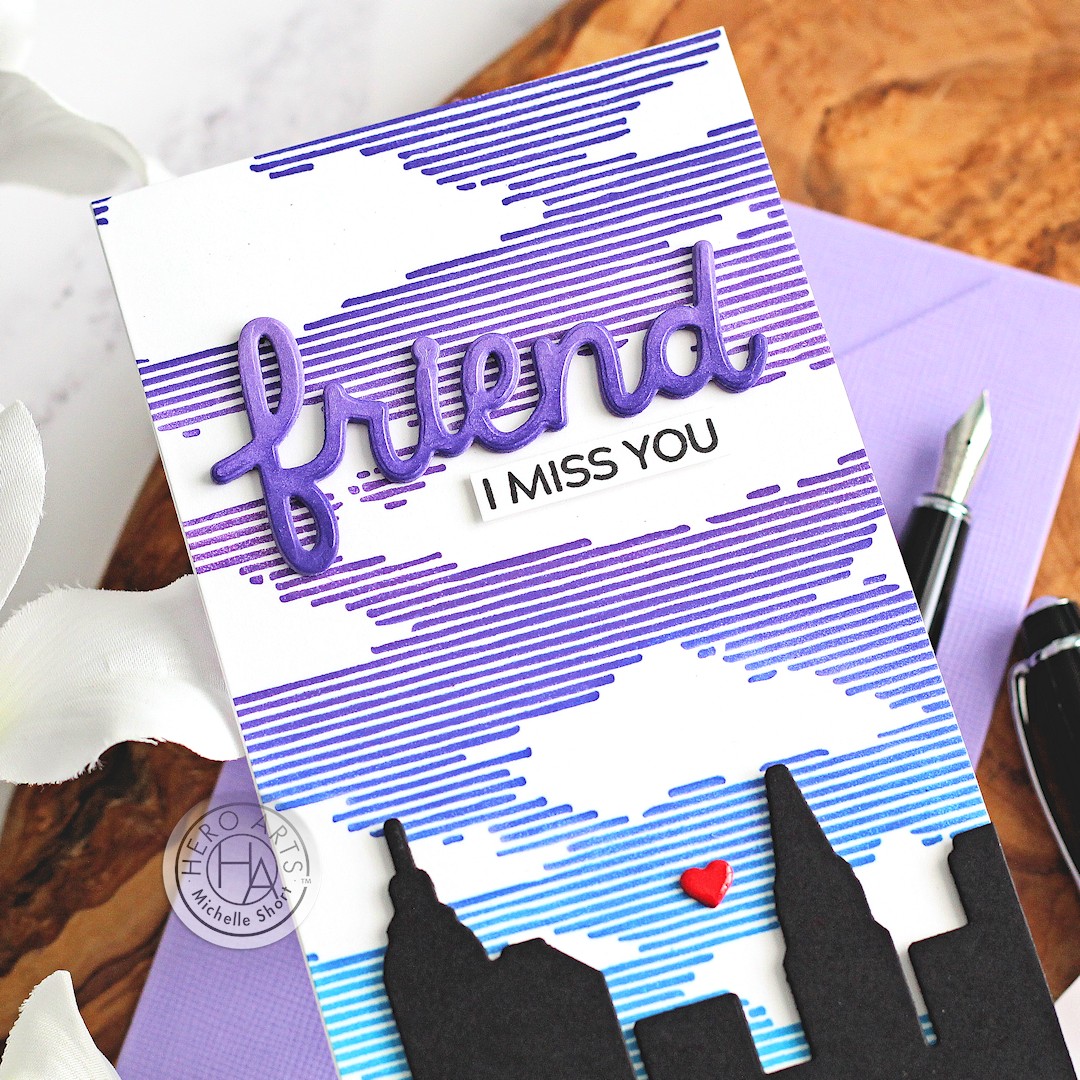
I started off by stamping the stationery images from the Clearly Besotted Stationery Plushies Stamp Set on to white cardstock with Memento Tuxedo Black Ink. I then coloured them using Copic Markers (the colours that I used are listed below the supplies area for reference) and fussy cut them out with scissors. 


I took the Clearly Besotted Tag Along Die Set and first partially cut the top part of one of the tags from white cardstock. I then moved the die down and partially cut the bottom so that they met in the middle. This was so that I could extend the length of the tag for my images to fit on. I die cut the hole reinforcer from black cardstock and adhered that on top. 


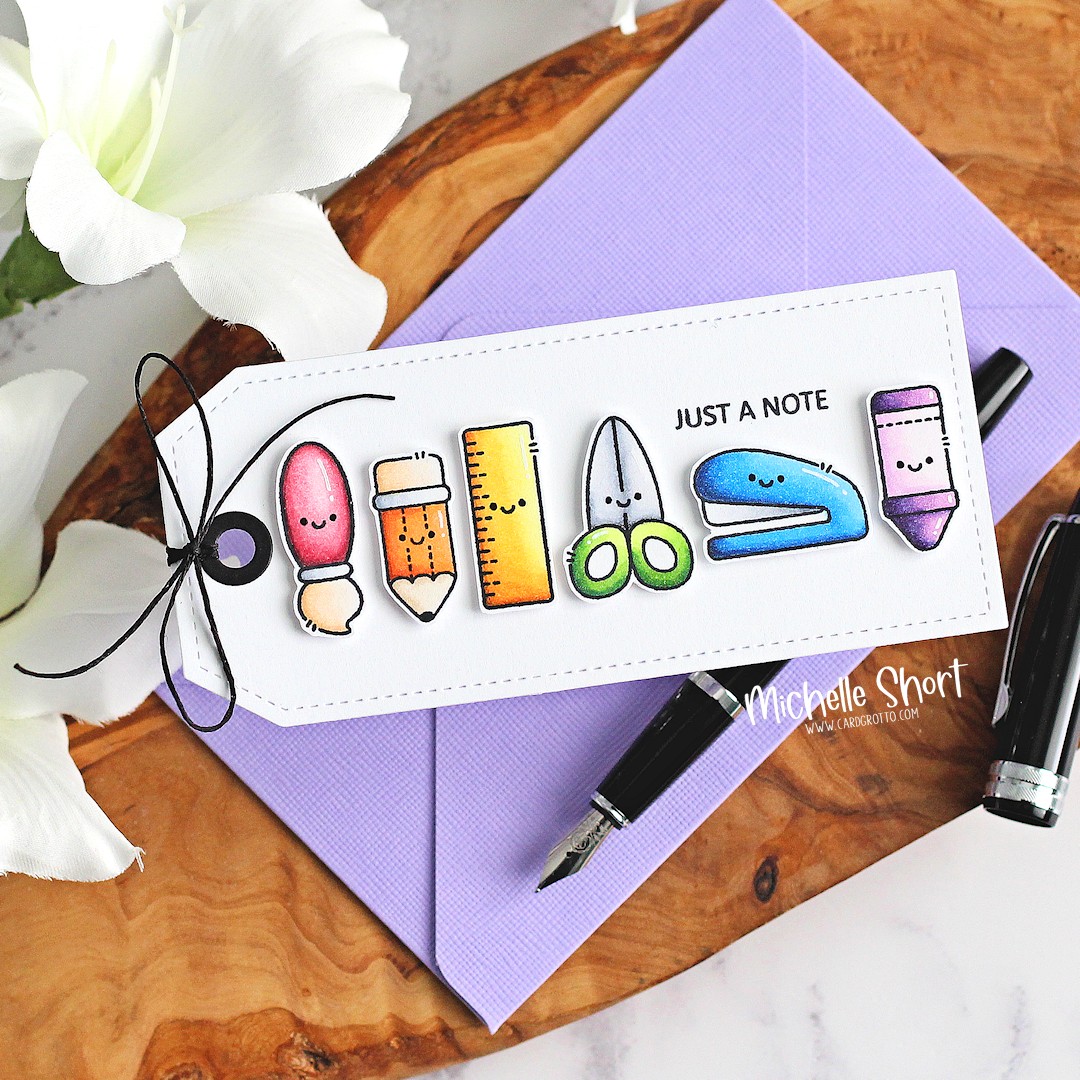
I took the sentiment from the Clearly Besotted Tiny Type Stamp Set and stamped that on to the tag with Memento Tuxedo Black Ink and then added the images on top with thin foam tape. I added twine through the top of the tag and tied in a bow at the front. To finish off, I added white gel pen highlights and black glaze pen to their eyes. 
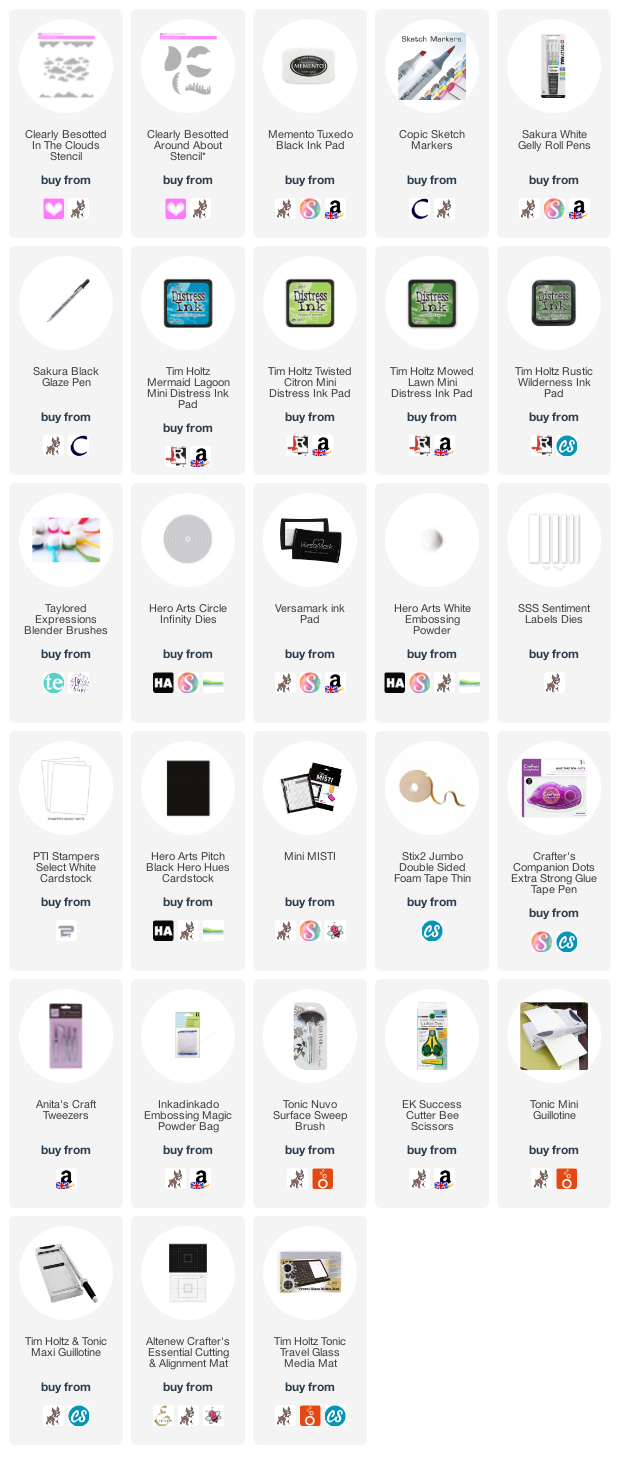
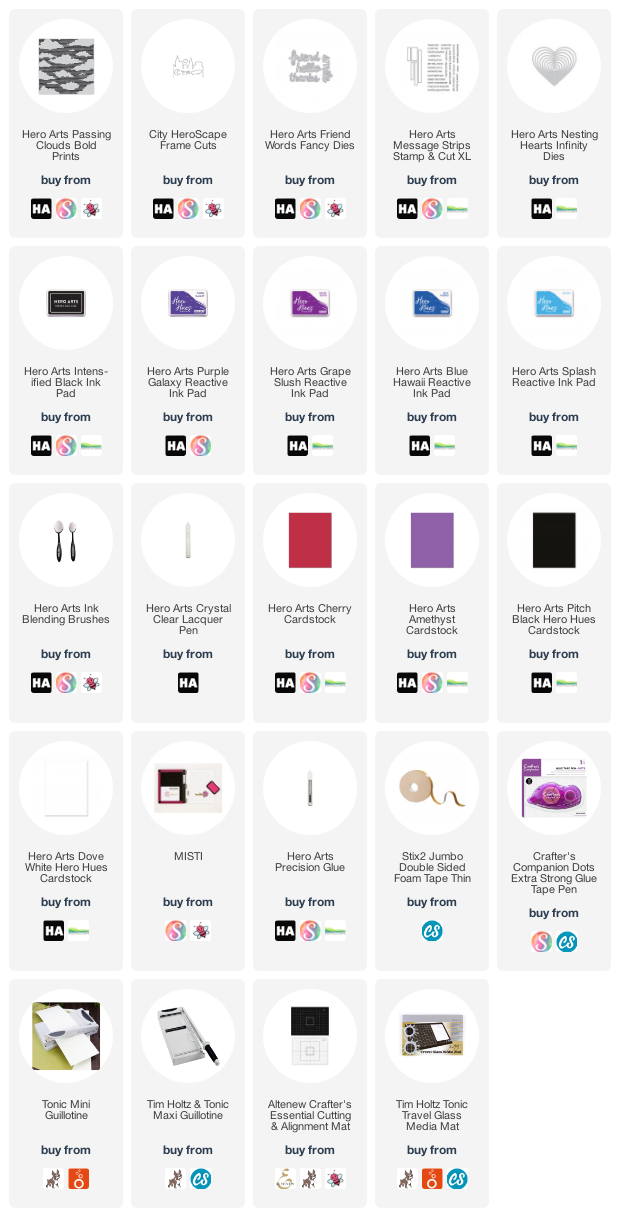
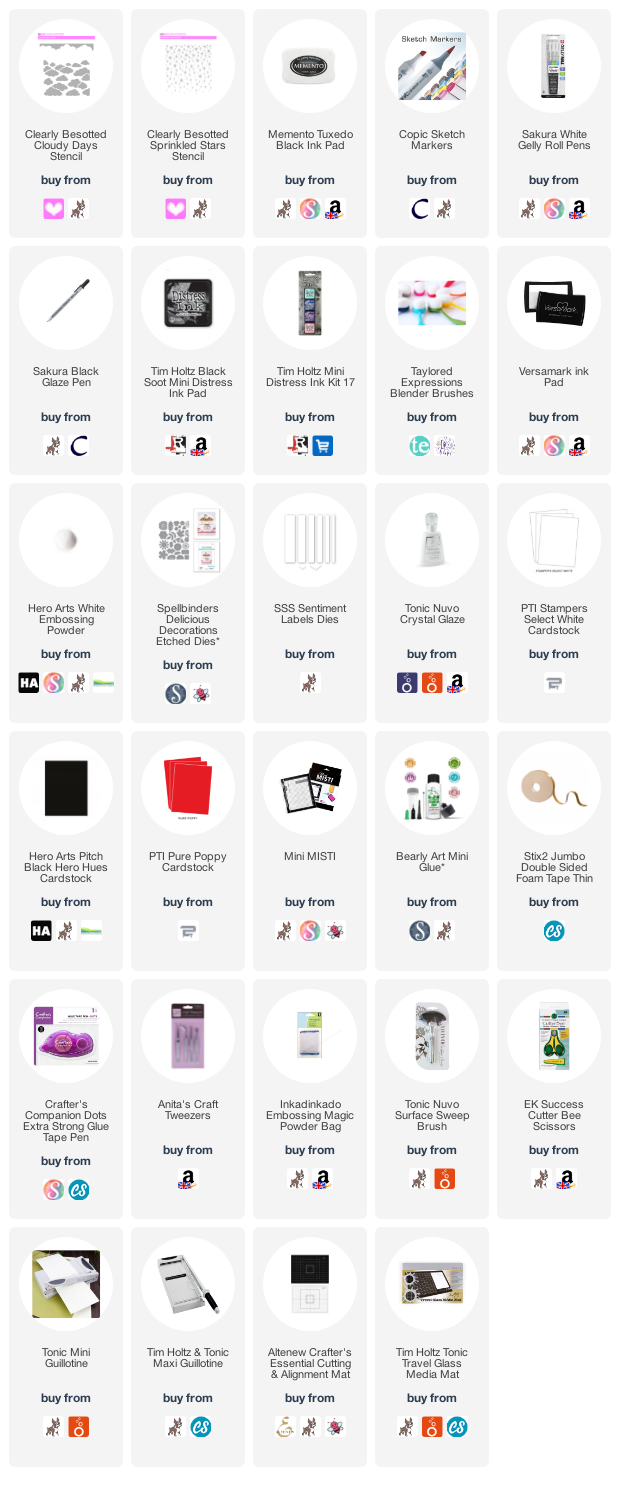
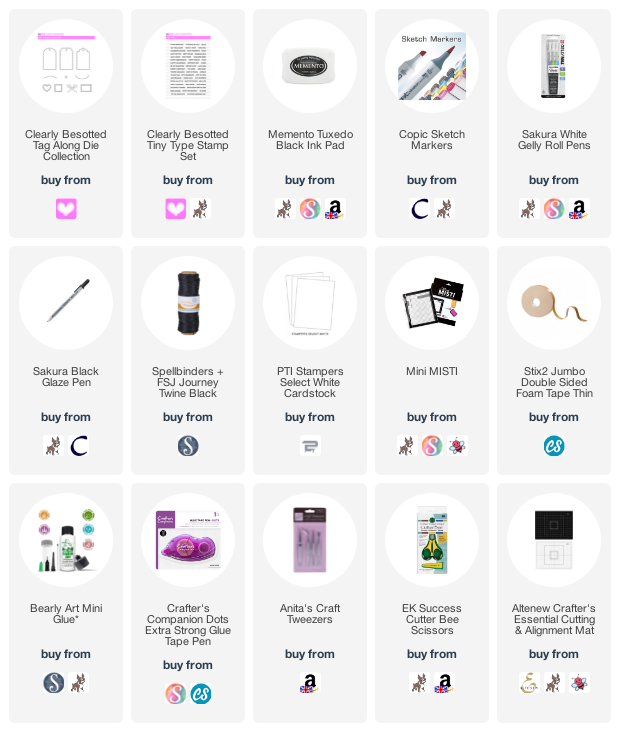
SUPPLIES:


Here are the links to what I have used on the project. Affiliate links are used on some products. This means that if you make a purchase after clicking on my link, I receive a small commission with no extra cost to you. I truly appreciate your support when using these links. Please click on the logo below the product to shop at your favourite store. All products were personally purchased except those from Clearly Besotted, Hero Arts or those marked with an asterisk (*) which were kindly sent to me to use. You can read my full disclosure here.


COPIC MARKERS: R59, R85, R83, R81, RV00, C5, C3, C1, E53, E51, E50/E53, E51, E50, C5, C3, C1, YR18, YR16, YR15, YR12, E44, E43, E41/YR27, Y17, Y15, Y11/C5, C3, C1, G29, YG17, YG23, YG01/B39, B18, B16, B12, C5, C3, C1/V09, V17, V15, V12, V01, V000. 

I thought this would be nice to just send a little note to a friend or it could go on a card too. For more inspiration using the new sets, please head over to the Clearly Besotted Blog and my fabulous teamie Keren. We also have Alberto, Francine and Kitty guesting with us. Thanks so much for stopping by today, I really do appreciate it. See you tomorrow for release day! 

29 April 2022

Hero Arts | May 2022 My Monthly Hero Countdown to Creativity

Hello there and welcome as we countdown to creativity for the release of the Hero Arts May 2022 My Monthly Hero Kit. Release day is Monday, 2nd May 2022 and we will be sharing sneak peeks all weekend long! 

This month's kit is called In the Kitchen and if you love baking or cooking or have loved ones that do, this kit is for you! It features a fun kitchen plate cover die, a background cling (which I will be using for my release hop card) and a clear stamp set full of fun sentiments (plus lots more!). 

PLEASE NOTE: This post contains affiliate links. Please see below for my full disclosure.


For my card today, I focused on the cover plate die in the kit, which I die cut from Hero Arts Dove White Cardstock. I then coloured it using Copic Markers (I do find that my colouring can get a bit messy with these kind of die cuts but went with it as it was so fun to colour!). 


In the kit, you also get some extra Fancy Dies, one being the toast, so I couldn't resist coluring that and popping it in the toaster. So cute! I took an A2 white card base and added ink blending to the front using Hero Arts Pool Party Reactive Ink. The sentiment from the clear stamp set was then stamped on top with Hero Arts Intens-ified Black Ink


I cut an additional kitchen scene from white cardstock and adhered it to the card base, I then added the one I coloured on top, using Hero Arts Precision Glue. I wanted to neaten up the edges and add a border, so I die cut a Hero Arts Nesting Rectangle Infinity Die from a panel of white cardstock and adhered that on top. To finish off, I added a yellow enamel dot to the flower from the Hero Arts Sunset Enamel Dots set. 

SUPPLIES:


Here are the links to what I have used on the project. Affiliate links are used on some products. This means that if you make a purchase after clicking on my link, I receive a small commission with no extra cost to you. I truly appreciate your support when using these links. Please click on the logo below the product to shop at your favourite store. All products were personally purchased except those from Clearly Besotted, Hero Arts or those marked with an asterisk (*) which were kindly sent to me to use. You can read my full disclosure here.


For more inspiration using the kit, please head over to the Hero Arts Blog. Be sure to leave a comment over there too, for a chance to win a kit! Thanks so much for stopping by today, I really do appreciate it. Have a wonderful rest of the day!  

Clearly Besotted Teasers | Spell Book

Hello there and welcome to day three of the Clearly Besotted May 2022 release teasers. Not long to go until release day, all of the new products release on 1st May 2022 at 8pm BST. Today I am using a new set called Spell Book. This is such a cute set featuring lots of cute kitties reading their magical/fantasy books. 

PLEASE NOTE: This post contains affiliate links. Please see below for my full disclosure.


I started off my card by stamping the pile of books, one of the kitties and two book worms from the Clearly Besotted Spell Book Stamp Set on to white cardstock with Memento Tuxedo Black Ink. I then coloured them using Copic Markers (the colours that I used are listed below the supplies area for your reference) and then fussy cut them out with scissors. 


I took a panel of white cardstock and using the Taylored Expressions Rectangle Masking Stencil and ink blending brushes, I blended Tim Holtz Distress Inks at the bottom. I used Black Soot and Villainous Potion, fading up to whte at the top. The panel was adhered to an A2 white card base with tape runner and then the images added on top with thin foam tape and tape runner. 


I added Crystal Glaze to the glasses on the book worms and then black glaze pen to the kitty's eyes. To finish off, I added white gel pen highlights, sparkles and dots around the images to give a magical feel. I then did what I rarely do and left it without a sentiment. There are some great sentiments in the set, but I thought it looked nice without one and I can stamp one on the inside when I send it. 

SUPPLIES:


Here are the links to what I have used on the project. Affiliate links are used on some products. This means that if you make a purchase after clicking on my link, I receive a small commission with no extra cost to you. I truly appreciate your support when using these links. Please click on the logo below the product to shop at your favourite store. All products were personally purchased except those from Clearly Besotted, Hero Arts or those marked with an asterisk (*) which were kindly sent to me to use. You can read my full disclosure here.


COPIC MARKERS: Kitty - C10, C8, C7, C6, C5, C3. Hat - V09, V17, V15, V12, YR27, Y17, Y08, Y06, Y02. Book worms - G29, YG17, YG23, YG01, B000. Books - R89, R39, R37, R35/R59, R85, R83, R81/YR18, YR16, YR15, YR12/YR27, Y17, Y15, Y11/G29, YG17, YG23, YG01/B18, B16, B12/V17, V15, V12. 

There are some images in the set that aren't magical/fantasy themed, if you just wanted the reading aspect only. For more inspiration using the release, please head over to the Clearly Besotted Blog and to my amazing teamie Keren. Next up is our wonderful guests Alberto, Francine and Kitty. Thanks so much for stopping by today, I really do appreciate it. I hope you have a lovely day! 

28 April 2022

Spellbinders | Pie Perfection!

Hello there, today I have three cards to share with you using the new Spellbinders Pie Perfection Collection by Tina Smith. This is such a fun collection as you can create pies of all different shapes, size, fillings and decorate them too! I had a lot of fun making these, be careful though, they can make you hungry! ;)

PLEASE NOTE: This post contains affiliate links. Please see below for my full disclosure.


SWEET BIRTHDAY WISHES

I had to start by creating my favourite pie of all time – lemon meringue! This uses the Perfect Pies Etched Dies Set

I die cut the pieces from Spellbinders AlabasterBeeswax and Snowdrift Cardstock. I took Distress Inks and added ink blending to them for some definition - Gathered Twigs for the pie crust, Wild Honey for the filling and Antique Linen for the meringue. The pieces were then adhered together with Bearly Art Glue.


I took the lemon slices and leaves from the Delicious Decorations Etched Dies Set and die cut them from Beeswax and Saffron Cardstock for the lemon slices, and Rainforest and Fern for the leaves. They were adhered to the pie and then I worked on my banner element. I took a panel of cardstock and using a craft knife and ruler, cut a fishtail banner at the bottom.

I added ink blending to it (Wild Honey Distress Ink) and then adhered it to an A2 white card base with foam tape. The pie was added on top with thin foam tape. The sentiment, from Perfect Pie Sentiments & Fillings Clear Stamp Set, was heat embossed on to Onyx Cardstock and added to the card. To finish off, I added Gold Mix Color Essential Gems and a little Sparkle Dust Glitter to the meringue for the caramelised sugar look.

FOR YOU PIE BOX

This card features the cutest little box that you can add pies in to. Perfect for a little treat for a friend! I die cut The Bakers Box Etched Dies from Snowdrift Cardstock. It is really easy to assemble, I just adhered with a little double-sided tape and added acetate in the opening. 

The Sky View Pies Etched Die Set was cut from Alabaster Cardstock. I added ink blending with Gathered Twigs Distress Ink before adding Diamond Dust to resemble sugar. It was then popped in the box and the box tied with Licorice Twist Twine, adding on a sentiment banner with the Perfect Pie Sentiments & Fillings Clear Stamp Set. The box was embellished with an apple slice and leaves die cut using the Delicious Decorations set.

I die cut a Nestabilities Essential Square from Rainforest Cardstock and then ran it through the Platinum 6 with the Picnic Checkerboard Stencil to emboss it. I added ink blending to the sides with Rustic Wilderness Distress Ink and then adhered it to a 4 ¼” x 4 ¼” white card base. The pie box was adhered on top. To finish off, I added Glaze n’ Glue to the pips in the apple slice. 

BERRY SWEET

I couldn’t resist making a cherry pie for my last card today. I die cut the elements from Serve a Slice Etched Dies from Alabaster, Wild Berry, Snowdrift, Portobello and Fern Cardstock. I added ink blending with Gathered Twigs, Antique Linen and Seedless Preserves Distress Inks before adhering together with Bearly Art Glue.


I took the plate and fork from the Dish it Up Etched Dies Set and cut them from Onyx and Mirror Silver Cardstock respectively. I also die cut the hearts from Delicious Decorations from Pink Sand Cardstock. I took a white A2 card base and stamped the sentiment on top from the Perfect Pie Sentiments & Fillings Clear Stamp Set using black ink.

The plate was adhered above the sentiment, followed by the pie with thin foam tape. The fork was added on next and then the hearts, which were layered up three die cuts high. To finish off, I added Glaze n’ Glue to the hearts and cherry for some added shine. 

SUPPLIES:


Here are the links to what I have used on the projects. Affiliate links are used on some products. This means that if you make a purchase after clicking on my link, I receive a small commission with no extra cost to you. I truly appreciate your support when using these links. Please click on the logo below the product to shop at your favourite store. All products were personally purchased except those from Clearly Besotted, Hero Arts or those marked with an asterisk (*) which were kindly sent to me to use. You can read my full disclosure here.


Sorry if I have made you hungry reading this post! It is such a fun collection though! For more inspiration, please head over to the Spellbinders Blog. Thanks so much for stopping by today, I really do appreciate it. I hope you have a wonderful rest of the day! 

Clearly Besotted Teasers | You're Ace!

Hello there and welcome to day two of the Clearly Besotted May 2022 Teasers (products release 1st May 2022). Today I have a mini circle card to share with you using the new Good Sport set. This is such a fun set with lots of different characters playing sports. I am a fan of tennis, so that adorable bunny with her racquet caught my eye! 

PLEASE NOTE: This post contains affiliate links. Please see below for my full disclosure.


I started off by stamping the bunny from the Clearly Besotted Good Sport Stamp Set on to white cardstock with Memento Tuxedo Black Ink. I also stamped the ball, which is a separate image. They were coloured with Copic Markers (the colours that I used are listed below the supplies area for reference) and then fussy cut out with scissors. 


I die cut three circles from the Hero Arts Nesting Circles Infinity Dies Set from white cardstock. Two the same size and one slightly smaller. On the smaller one, I placed the Clearly Besotted In The Clouds Stencil and using an Ink Blending Brush, blended on Tim Holtz Mermaid Lagoon Distress Ink for the sky. I then added ink blending at the bottom with Tim Holtz Distress Inks in Twisted Citron, Mowed Lawn and Rustic Wilderness


I wanted some added interest, so I took the grass layer from the Clearly Besotted Around About Stencil, placed it on top and added in some blades of grass. I stamped the movement marks on next and then adhered the the bunny and ball on top with thin foam tape. I cut a small slither off of one of the larger circles and also scored it towards the top to make a hinge. It was adhered to the other circle to make a card base. 


The image panel was then added on top with more thin foam tape. I took the sentiments from the set and stamped them on to black cardstock with Versamark Ink. I applied white embossing powder and heat set. They were cut in to strips and added to the card with more thin foam tape. To finish off, I added black glaze pen to the bunnies eyes and white gel pen highlights to the images. 

SUPPLIES:


Here are the links to what I have used on the project. Affiliate links are used on some products. This means that if you make a purchase after clicking on my link, I receive a small commission with no extra cost to you. I truly appreciate your support when using these links. Please click on the logo below the product to shop at your favourite store. All products were personally purchased except those from Clearly Besotted, Hero Arts or those marked with an asterisk (*) which were kindly sent to me to use. You can read my full disclosure here.


COPIC MARKERS: Bunny - W7, W5, W3. Hat - V09, V17, V15, V12. Racquet - C5, C3, C1, V09, V17, V15, V12. Ball - YG23, YG01, YG00, YG000. 

There are so many different sports represented in the set - tennis, football/soccer, rugby or American football, hockey, badminton, baseball, basketball - something for everyone! For more inspiration using the new sets, please head over to the Clearly Besotted Blog, Keren and our guests this month - Alberto, Francine and Kitty. Thank you so much for stopping by, I do have another post up later (sorry for the double posts) but in the mean-time, I wish you a wonderful day! 

27 April 2022

Hero Arts | Friend, I Miss You

Hello there, I am over on the Hero Arts Blog today, sharing a card using Passing Clouds Bold Prints. This is such a fun stamp as you can use it in different ways. I thought it would make a fun, bright, vibrant sky for a friendship card. 

PLEASE NOTE: This post contains affiliate links. Please see below for my full disclosure.


The Hero Arts Passing Clouds Bold Prints was stamped on to white cardstock with Purple Galaxy, Grape Slush, Blue Hawaii and Splash Reactive Inks. It was added to a mini slimline card base and then to cover the gap at the bottom (since the background is 6") I die cut the Hero Arts City HeroScape Frame Cuts from Pitch Black Cardstock and adhered it with foam tape. 


I die cut the friend word from Hero Arts Friend Words Fancy Dies and added that to the stop of the card, along with a sentiment from Hero Arts Message Strips Stamp & Cut XL. To finish off, I added a little heart using the Hero Arts Nesting Hearst Infinity Dies

SUPPLIES:


Here are the links to what I have used on the project. Affiliate links are used on some products. This means that if you make a purchase after clicking on my link, I receive a small commission with no extra cost to you. I truly appreciate your support when using these links. Please click on the logo below the product to shop at your favourite store. All products were personally purchased except those from Clearly Besotted, Hero Arts or those marked with an asterisk (*) which were kindly sent to me to use. You can read my full disclosure here.


For the full details on how I made the card, please head over to the Hero Arts Blog. Thanks so much for stopping by today, I really do appreciate it. Wishing you a wonderful rest of the day! 

Clearly Besotted Teasers | Bee-Witched By You

Hello there and welcome to the start of the Clearly Besotted May 2022 release teasers. There are six new stamp sets releasing on 1st May 2022 at 8pm BST. From now until then, we (the Design team and guests) will be sharing teasers with you using the new sets. My card today features the new Beewitched By You stamp set featuring the most adorable bees!

PLEASE NOTE: This post contains affiliate links. Please see below for my full disclosure.


I started off by stamping the bees from the Clearly Besotted Beewitched By You Stamp Set on to white cardstock with Memento Tuxedo Black Ink. I coloured them with Copic Markers (the colours that I used are listed below the supplies list for reference) and then fussy cut them out with scissors. I took a panel of cardstock and placed the Clearly Besotted Cloudy Day Stencil on top. 


Using ink blending brushes, I then blended on Tim Holtz Distress Inks in Black Soot, Villainous Potion and Prize Ribbon. With the Cloudy Day Stencil still in place, I then placed over the Clearly Besotted Sprinkled Stars Stencil and used the same inks to add some stars amongst the clouds. Both were moved down the panel as I went to cover the top of the card. The panel was adhered to an A2 white card base with tape runner and the bees added on top with foam tape.


The sentiment from the set was stamped on to black cardstock with Versamark Ink. I applied white embossing powder and heat set. It was cut in to a strip and added to the card with foam tape also. I die cut hearts from the Spellbinders Delicious Decorations Etched Die Set, stacked them up three high and adhered them to the card, adding Crystal Glaze to the top for some added shine. I also added this to the wand. To finish off, I added white gel pen highlights and stars. 

SUPPLIES:


Here are the links to what I have used on the project. Affiliate links are used on some products. This means that if you make a purchase after clicking on my link, I receive a small commission with no extra cost to you. I truly appreciate your support when using these links. Please click on the logo below the product to shop at your favourite store. All products were personally purchased except those from Clearly Besotted, Hero Arts or those marked with an asterisk (*) which were kindly sent to me to use. You can read my full disclosure here.


COPIC MARKERS: Bees - YR27, Y17, Y15, Y11, C10, C8, C7, C6, C5, B00, B0000. Purple hat - V09, V17, V15, V12. 

I think this card would be good for a few different occasions but I thought the sentiment worked well with the bees. For more inspiration using the sets, please head over to the Clearly Besotted Blog and then my wonderful teamie Keren. After that, please visit our wonderful guests Alberto, Francine and Kitty. Thank you so much for stopping by, I have another post up later but in the mean-time, wishing you a wonderful day! 

20 April 2022

VIDEO | MFT Sunshine Friends Tag

Hello there, I was over on the My Favorite Things YouTube channel yesterday, sharing a tag using the adorable Sunshine Friends set. What a cute set! I love that bear but those bees with smiling faces? They stole my heart! Although I have made a tag today, if you moved the sentiment from the back of the tag to the the front, you could easily add this on to a card. 

PLEASE NOTE: This post contains affiliate links. Please see below for my full disclosure.


I started off by stamping the bear and bees from the MFT Sunshine Friends Stamp Set. I stamped them on to white cardstock with MFT Extreme Black Ink. I then coloured them using Copic Markers (the colours that I used are listed below the supplies area) and then die cut them out using the MFT Sunshine Friends Die-namics


I took the MFT Trendy Tag Die-namics and die cut it twice from white cardstock. On one, I masked off the top part of the tag and added ink blending to the bottom with Tim Holtz Twisted Citron and Mowed Lawn Distress Inks and an ink blending brush. I moved the tape to cover the grass and then added ink blending above with Tim Holtz Mermaid Lagoon Distress Ink. 


I stamped the sentiment from the Sunshine Friends set on to the other tag with more Extreme Black Ink. I then added a little ink blending with Mermaid Lagoon Distress Ink. One of the bees was then adhered on top using MFT On-Point Precision Glue. It was then adhered to the other tag, back to back. 


On the front, I adhered the bear and other bee using foam tape. I tied twine through the top of the tag and tied in a bow. To finish off, I added white gel pen highlights and then also a few dots around the images too, for some added interest. I then added Nuvo Crystal Glaze to the centre of the flower and the bear's nose. 

VIDEO:

Here is the video showing how I made the tag:


If you are viewing this post via email subscription, you can watch the video HERE on YouTube. 

SUPPLIES:


Here are the links to what I have used on the project. Affiliate links are used on some products. This means that if you make a purchase after clicking on my link, I receive a small commission with no extra cost to you. I truly appreciate your support when using these links. Please click on the logo below the product to shop at your favourite store. All products were personally purchased except those from Clearly Besotted, Hero Arts or those marked with an asterisk (*) which were kindly sent to me to use. You can read my full disclosure here.


COPIC MARKERS: Bees - YR27, Y17, Y15, Y11, C10, C7, C5, B00, B0000. Bear - E49, E79, E77, E74, E71, E70, R20, R83. Flower - YR27, Y17, Y15, Y11, BG13, BG11, BG10, G29, YG17, YG23, YG01. 


Thank you so much for stopping by today, I really do appreciate it. I hope you have a wonderful day! 

18 April 2022

Spellbinders | Through the Garden Gate

Hello there, today I have two projects to share with you using the new Spellbinders Through the Garden Gate Collection by Susan Tierney-Cockburn. If you haven't seen Susan's collections before, these die cut flowers are like no other! They are made to be molded and shaped to look like realistic flowers. The dimension on them is beautiful and although you can use them on cards/tags and other projects, I think they would look stunning framed as a home décor piece too! 

PLEASE NOTE: This post contains affiliate links. Please see below for my full disclosure.

I have made a card using the Hollyhock and a tag using the Forget-Me-Nots. You can cut the layers of these flowers from coloured cardstock or from white and add colour on to them. I decided to add ink blending to the Hollyhock pieces and for the Forget-Me-Nots, use coloured cardstock. 

I started off by die cutting the layers of the Spellbinders Hollyhock Etched Dies from 110lb white cardstock (80lb would have been better!). I then added ink blending to them with Tim Holtz Distress Inks. I used Picked Raspberry and Seedless Preserves on the flower petals, Mustard Seed for the stamens and Twisted Citron, Mowed Lawn and Rustic Wilderness on the leaves. 

I made sure to add ink blending to both the front and back of flowers, as you will see both! I then shaped the flowers, following Susan's video tutorial. I cut two stem pieces and ink blended those too. I cut one piece smaller, so that I could extend the stem just slightly to fit the size of my card better. It was then adhered to a mini slimline card base (6.25" x 3.25") with Bearly Art Glue. The flowers and leaves were then added on top. 

I took the sentiment, from Spellbinders Yana's Tiny Sentiments Glimmer Hot Foil Plate & Die Set and foiled it on to Spellbinders Onyx Cardstock with Spellbinders Silver Glimmer Hot Foil Roll. It was then die cut using the Spellbinders Swallowtail Tags Etched Dies and added to the card with thin foam tape, adding a little bow made from Spellbinders Black Twine at the top. To finish off, I added a ladybug from the Forget-Me-Not set and added Nuvo Crystal Glaze to it. 

I couldn't resist creating a little tag too! I started off by die cutting the tag from the Spellbinders Create a Decorative Tag Die Set from white cardstock. I then die cut the Spellbinders Forget-Me-Nots Etched Dies from Spellbinders Cardstock in Raindrop and Beeswax. The leaves and stem were cut from Rainforest

I added a tiny bit of Tim Holtz Wilted Violet Distress Ink to the tips of the flower petals. I then added Rustic Wilderness to the leaves. I shaped and assembled the flowers using Susan's video tutorial, adhering the layers with Bearly Art Glue. I didn't have any Prills to add to the centres (like she suggests), so I coloured Spellbinders Crystal Mix Color Essential Gems with a black Copic Marker and added them to the centres of the flowers. 

I took the ladybug from the set and added ink blending to it using Tim Holtz Festive Berries Distress Ink (as I did for the card). Using a Copic Multiliner, I then coloured the black areas black. It was added to the tag using thin foam tape and then I added Tonic Crystal Glaze on top. I tied twine through the top of the tag and then finished off with a few more gems.  

SUPPLIES:


Here are the links to what I have used on the projects. Affiliate links are used on some products. This means that if you make a purchase after clicking on my link, I receive a small commission with no extra cost to you. I truly appreciate your support when using these links. Please click on the logo below the product to shop at your favourite store. All products were personally purchased except those from Clearly Besotted, Hero Arts or those marked with an asterisk (*) which were kindly sent to me to use. You can read my full disclosure here.


I really enjoyed creating these projects. I think these flowers are so pretty! I have two cards that I made  using previous collections from Susan - Oriental Lilies, which you can see here and Poinsettia, which you can see here

Thanks so much for stopping by today, I really do appreciate it. I hope you have a wonderful day! 

16 April 2022

Spellbinders | Essential Glimmer Solid Shapes

Hello there, I am over on the Spellbinders Blog this week, sharing three cards using the new Essential Glimmer Solid Shapes Collection. These Glimmer Hot Foil Plates are solid so that you can use your waste/reverse foiling/negative foiling/scraps to get more use out of them and different looks. You can use them as just a solid base or because they are shapes, use them as that shape, which I think is pretty cool! 

PLEASE NOTE: This post contains affiliate links. Please see below for my full disclosure.


For two of my cards, I used the scrap/reverse pieces that I had already foiled. For the other, I used a new piece but that also means that I have extra for other cards, Win-win! I have used the circle, rectangle (in a slightly different way!) and square today but there is also an oval. I found that I got great results by heating up the Glimmer Hot Foil System platform twice and also using the hinge method for foiling - by taping down the plates to the foil and cardstock using Best Ever Craft Tape. I did also require an extra shim at times but as you can see, I got great results!

THANKS BLOOMS

I started off my card by taking the negative of the foil that I had used on a card previously. It was foiled using Matte Silver Glimmer Hot Foil Roll using the Diagonal Glimmer Stripes Glimmer Hot Foil Plate. I took the scrap/reverse piece and placed it down on to a panel of white cardstock. The Essential Glimmer Solid Circle Glimmer Hot Foil Plate was then added on top and secured in place with Best Ever Craft Tape

As mentioned above, I heated the plate up twice on the platform and then ran it through the Platinum 6 with an added shim. It is always like magic when you remove the foil from the cardstock to reveal the beautiful foil underneath! The panel was adhered to an A2 white card base with tape runner. 

I die cut Be Bold Blooms Etched Dies from Spellbinders Cardstock – Cosmic Sky, Raindrop, Rainforest and Peridot. They were assembled and adhered to the card with Bearly Art Glue. I die cut the thanks from Yana’s Layered Script Sentiments three times from Snowdrift cardstock and layered them one on top of another on the card. To finish off, I added Silver Mix Color Essential Gems.

FOR YOU BUTTERFLY

For my next card, I wanted to create a different shape. I took the negative of a piece of foil that I used on a card previously. It was foiled using Rose Gold Glimmer Hot Foil Roll using Magnolia Glimmer Blooms Glimmer Hot Foil Plate & Die Set. I then foiled it on to white cardstock using the Essential Glimmer Solid Rectangle Glimmer Hot Foil Plate using the same method as above. 

I took the middle size die from So Many Butterflies and die cut the panel out. I also die cut it a further three times, from plain white cardstock, so that I could layer them up for added dimension before adhering them to an A2 white card base. 

I foiled the sentiment from Yana’s Tiny Sentiments on to Onyx Cardstock with Rose Gold Foil. It was cut into a strip and added to the card with thin foam tape. To finish off, I added a few black pearls, securing in place with Bearly Art Glue

HAPPY BIRTHDAY PEONY

I started off by foiling the Glimmering Peony Glimmer Hot Foil Plate on to white cardstock with Matte Gold Glimmer Hot Foil Roll. I will save this image for a later card. I just needed the scrap/reverse for my card today. It was foiled on to more white cardstock using the Essential Glimmer Solid Square Glimmer Hot Foil Plate using the same method as I have been.

Using a guillotine, I cut the image out and placed it on to a 4 ½” x 4 ¼” white card base with thin foam tape. I foiled the sentiment from Celebrate You Glimmer Sentiments with the same foil and cut into strips. They were added to the card with more thin foam tape. To finish off, I added Gold Mix Color Essential Gems

SUPPLIES:


Here are the links to what I have used on the projects. Affiliate links are used on some products. This means that if you make a purchase after clicking on my link, I receive a small commission with no extra cost to you. I truly appreciate your support when using these links. Please click on the logo below the product to shop at your favourite store. All products were personally purchased except those from Clearly Besotted, Hero Arts or those marked with an asterisk (*) which were kindly sent to me to use. You can read my full disclosure here.


I hope I might have inspired you on using the Essential Glimmer Solid Shapes Collection. Thank you so much for stopping by today, I really do appreciate it. I hope you have a wonderful day! 

End of code