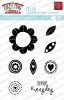
Hello there, I am back with another post today. Please see below for my Clearly Besotted teaser post.
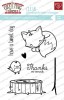
This afternoon I have my second post as Guest Designer for The Greeting Farm. For my card today, I am using the super cute Cuddly Thanks stamp set to create a scene.

I started off by stamping the fox from the set using black ink, on to a white panel of cardstock. I then masked him off and stamped the log image under him so it looks like he is sitting on it. The sentiment, also from the set, was stamped in the top right hand corner.

The panel was then coloured using Copic Markers. I also added a little black glaze pen tot he fox's nose. The panel was then adhered to an A2 card base with foam sheet.
VIDEO:
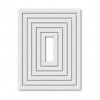
SUPPLIES:
Here are the links to what I have used on the card and in the video. Please click on the picture or wording to be taken to where I purchased
it. Affiliate links are used on some products. This means that if you make a
purchase after clicking on my link, I receive a small commission with no extra
cost to you. I truly appreciate your support when using these links.


COPIC MARKERS: Fox - E19, E09, E08, E15, E13. Log - E29, E27, E25, E23. Grass - YG67, YG17, YG23, YG10, YG01. Sky - B01, B00, B000, B0000, 0.
I wanted to keep the card very simple to keep the focal point as the image. Thanks so much for visiting me today and a big thank you goes to The Greeting Farm for having me guest with them. For more inspiration using their products please head over to their blog and You Tube channel.