Showing posts with label Videos. Show all posts

29 August 2025

VIDEO | Pinkfresh Studio Whispers of Poinsettia

Hello there, I was over on the Pinkfresh Studio YouTube channel yesterday, sharing a card using Whispers of Poinsettia, which was a definite favourite of mine from the August 2025 release! 

PLEASE NOTE: This post contains affiliate links. Please see below for my full disclosure.


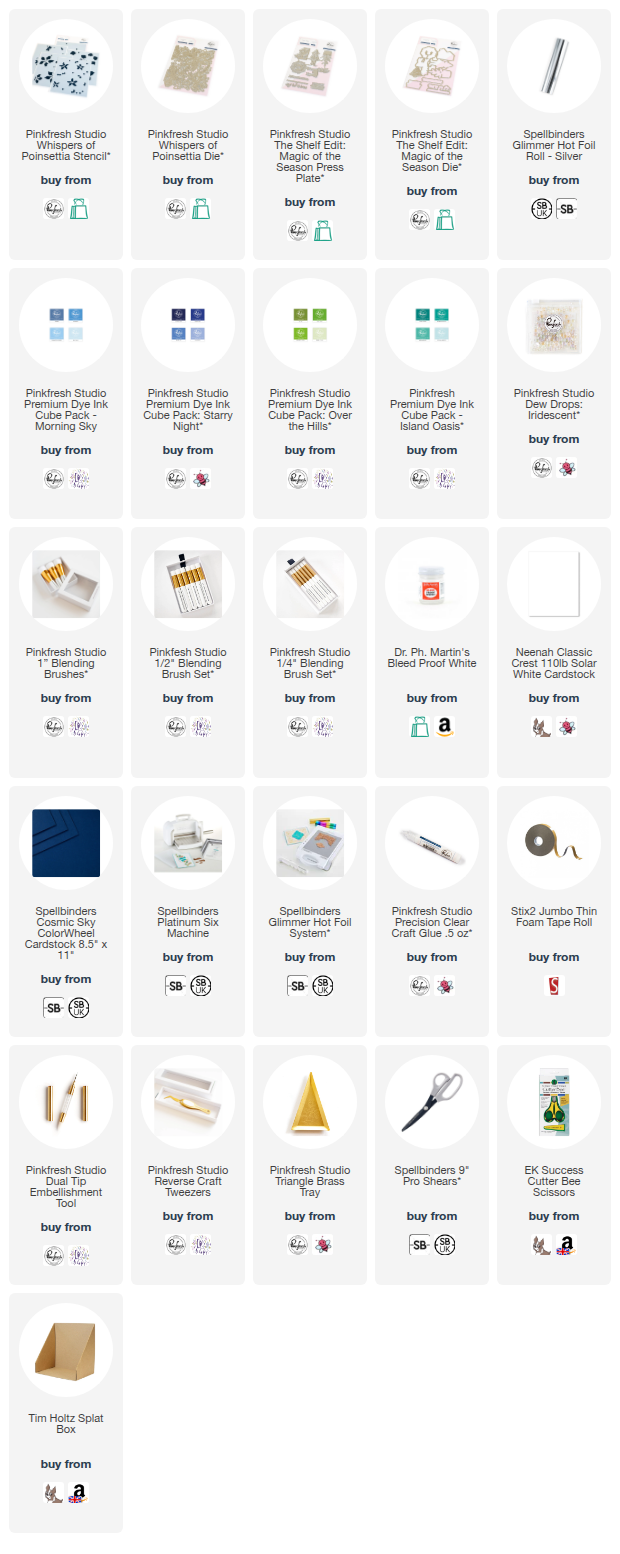
I started off my card by adding ink blending to the Pinkfresh Studio Whispers of Poinsettia Stencils. I used Pinkfresh Studio Summer Shower, Seaside, Sapphire and Stargazer Inks for the petals, and Pinkfresh Studio Grassy Knoll, Key Lime and Mermaid Cove for the leaves. I then die cut it out using the Pinkfresh Studio Whispers of Poinsettia Die. Watch the video below to see which layers of the stencil I missed out! 

I wanted just part of the image for my card, so using my scissors, I cut away one of the poinsettias. I added ink blending to a US A2 sized card base made from Spellbinders Cosmic Sky ColorWheel Cardstock using Pinkfresh Studio Sapphire and Stargazer Inks. I then splattered Dr Ph. Martin's Bleed Proof White on top. 

The poinsettia piece was adhered on top using thin foam tape. I hot foiled the sentiment from Pinkfresh Studio The Shelf Edit: Magic of the Season Press Plate using Spellbinders Silver Foil and the Glimmer Hot Foil System. It was die cut out using the coordinating die and adhered to the card. To finish, I embellished with Pinkfresh Studio Iridescent Dew Drops

VIDEO:

Here is the video showing how I made the card:

If you are viewing this post via email subscription, you can watch the video HERE on YouTube. 

SUPPLIES:


Here are the links to what I have used on the project. Affiliate links are used on some products. This means that if you make a purchase after clicking on my link, I receive a small commission with no extra cost to you. I truly appreciate your support when using these links. Please click on the logo below the product to shop at your favourite store. All products were personally purchased except marked with an asterisk (*) which were kindly sent to me to use. You can read my full disclosure here.


Whilst not traditional, I love the poinsettias in blue! Thank you so much for stopping by today, I really do appreciate it. I hope you have a wonderful day and a great weekend! 

28 July 2025

VIDEO | Layered Hydrangeas

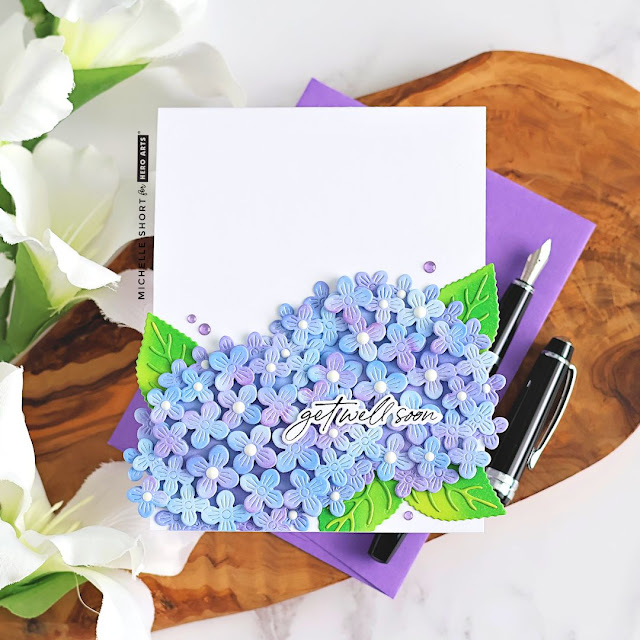
Hello there, today I have a card (and video) to share using the Hero Arts Layered Hydrangeas Etched Dies from the new Seaside Blooms Collection which released last week. This set is so pretty! There are different layers to the hydrangeas and you can customise them as much or as little as you like! 

PLEASE NOTE: This post contains affiliate links. Please see below for my full disclosure.


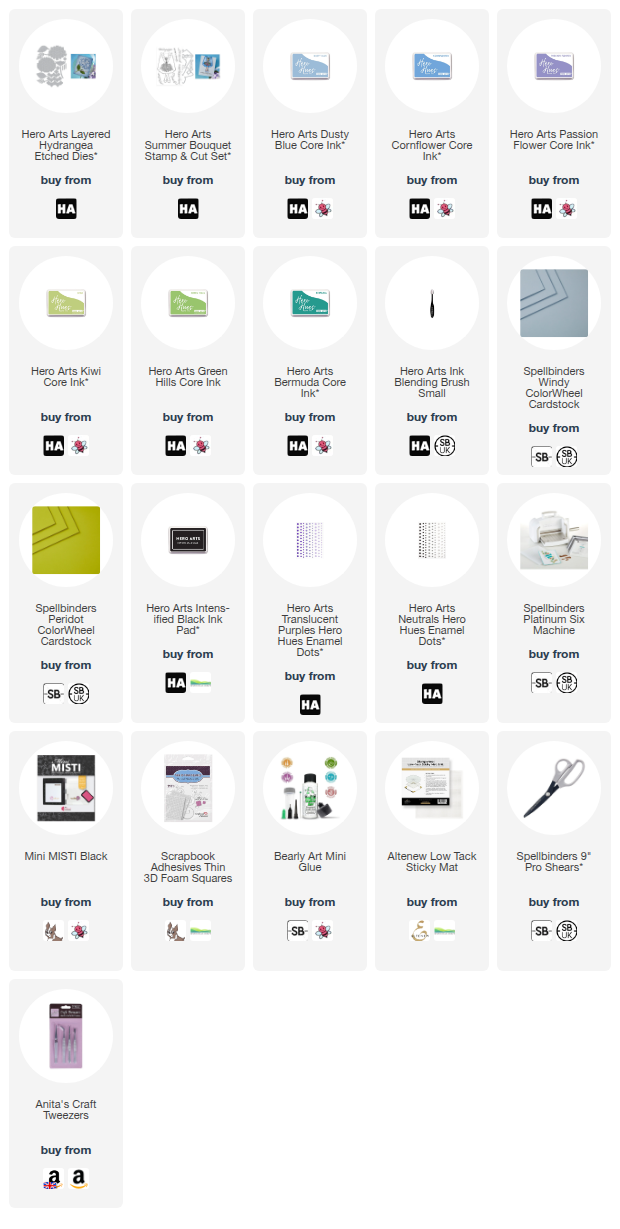
I started off my card by die cutting the Hero Arts Layered Hydrangea Etched Dies from Spellbinders Windy ColorWheel Cardstock for the flowers themselves. I used this colour for all three layers. The leaves were cut from Spellbinders Peridot ColorWheel Cardstock


I added ink blending to the flowers using a Small Blending Brush and Hero Arts Core Inks in Dusty Blue, Cornflower and Passion Flower. For the leaves, I used Hero Arts Kiwi, Green Hills and Bermuda Core Inks. I adhered the leaves first onto a US A2 sized white card base with liquid glue. I then adhered the base layer of the hydrangeas on top, cutting off the excess from the bottom of the card with scissors. 


I adhered the second layer of the hydrangeas with thin foam squares, followed by the third layer. Whilst you can do, I did not add the third layer to all the flowers, so that I had varying heights throughout the bloom. I stamped a sentiment from the Hero Arts Summer Bouquet Stamp & Cut onto white cardstock using Hero Arts Intens-ified Black Ink


It was die cut out using the coordinating die and then I die cut another of the die and adhered it behind the stamped one for added dimension. It was adhered onto the card using liquid glue. I added Hero Hues Translucent Purples Enamel Dots around the flowers and then finished off by adding Hero Arts Neutrals (white) Enamel Dots to the centres of some of the flowers. 

VIDEO:

Here is the video showing how I made the card:


If you are viewing this blog post via email subscription, you can watch the video HERE on YouTube. 

SUPPLIES:


Here are the links to what I have used on the project. Affiliate links are used on some products. This means that if you make a purchase after clicking on my link, I receive a small commission with no extra cost to you. I truly appreciate your support when using these links. Please click on the logo below the product to shop at your favourite store. All products were personally purchased except marked with an asterisk (*) which were kindly sent to me to use. You can read my full disclosure here.


I really love those hydrangeas! And I love that you can use them in different ways! Thank you so much for stopping by today, I really do appreciate it. I hope you have a wonderful day! 

22 April 2025

VIDEO | Hot Foiling vs. Letterpress

Hello there, today I have two cards to share using the same design but different techniques - one uses hot foiling and the other, letterpress. I thought it would be fun to see which one I liked best. 

PLEASE NOTE: This post contains affiliate links. Please see below for my full disclosure.


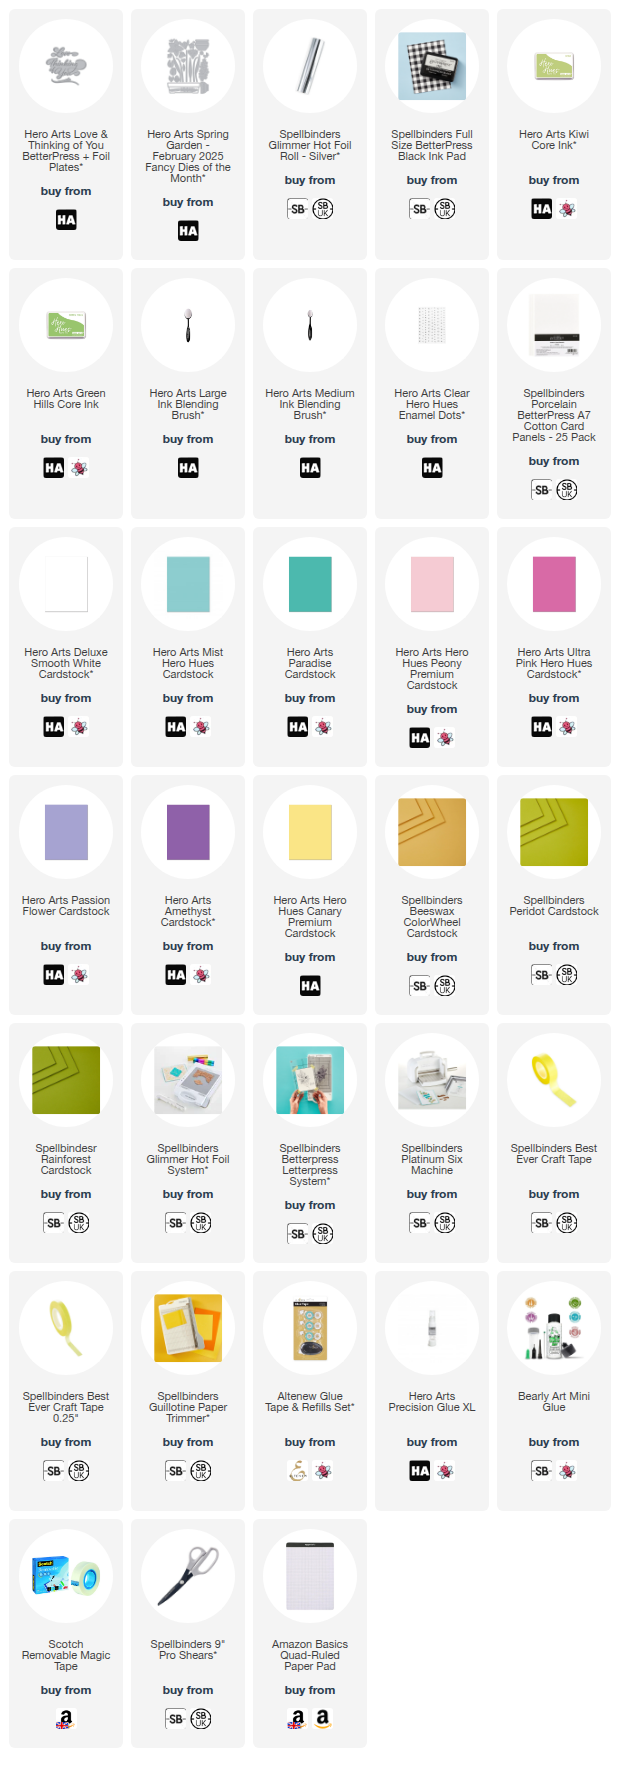
The plate I am using for my sentiment is from the Hero Arts Love + Thinking of You BetterPress + Foil Plates set. These plates are designed to both hot foil and press. You can watch the video below to see the process for both techniques. 


For my first card, I hot foiled the sThinking of You sentiment onto Hero Arts Deluxe Smooth White Cardstock using Spellbinders Silver Glimmer Hot Foil Roll and the Glimmer Hot Foil System


I then cut the panel down to 4.25" x 5.5". Using Ink Blending Brushes, I blended Hero Arts Kiwi and Green Hills Core Inks at the bottom of the panel. It was then adhered to an A2 sized white card base. 


The panel was cut to 4.25" x 5.5" (although this time in a landscape orientation) and I added ink blending with the same Hero Arts Kiwi and Green Hills Core Inks at the bottom. It was then adhered to an A2 sized white card base. 


For both cards, I die cut flowers from the Hero Arts Spring Garden - February 2025 Fancy Dies of the Month set. I used Hero Arts Mist & Paradise Cardstock for the crocus, Hero Arts Peony & Ultra Pink Cardstock for the tulips, Hero Arts Passion Flower & Amethyst Cardstock for the hyacinths, Hero Arts Canary & Spellbinders Beeswax Cardstock for the daffodils, and Spellbinders Peridot and Rainforest Cardstock for the leaves and stems. 


The flower layers were adhered together using liquid glue and then adhered to the cards with thin foam tape. The stems and leaves were adhered with liquid glue only. I cut the stems and leaves overhanging off the bottom of the cards with scissors, but left the sides overhanging slightly. To finish, I embellished with Hero Arts Clear Enamel Dots

VIDEO:

Here is the video showing how I made the cards:


If you are viewing this post via email subscription, you can watch the video HERE on YouTube. 

SUPPLIES:


Here are the links to what I have used on the projects. Affiliate links are used on some products. This means that if you make a purchase after clicking on my link, I receive a small commission with no extra cost to you. I truly appreciate your support when using these links. Please click on the logo below the product to shop at your favourite store. All products were personally purchased except marked with an asterisk (*) which were kindly sent to me to use. You can read my full disclosure here.


Which do you like best? I know it's not an exact comparison as the sentiments are a different colour but I do think I like the pressed one slightly better. However, I think that may be more to do with the design of the card, than the actual sentiment itself, although I do think the black pops a little more than the silver! Thank you so much for stopping by today, I really do appreciate it. I hope you have a wonderful day! 

9 April 2025

VIDEO | Use Up Your Leftovers!

Hello there, today I have a card and video to share with you using up some of my leftovers that I made when creating these cards. Do you keep leftover pieces that you don't use?

I usually keep die cuts and sentiments. I do have the odd stamped image too. I keep them in little pockets labelled in my drawer. In the video below, I share a look at how I do this to try and remember to actually use them up! 

PLEASE NOTE: This post contains affiliate links. Please see below for my full disclosure.


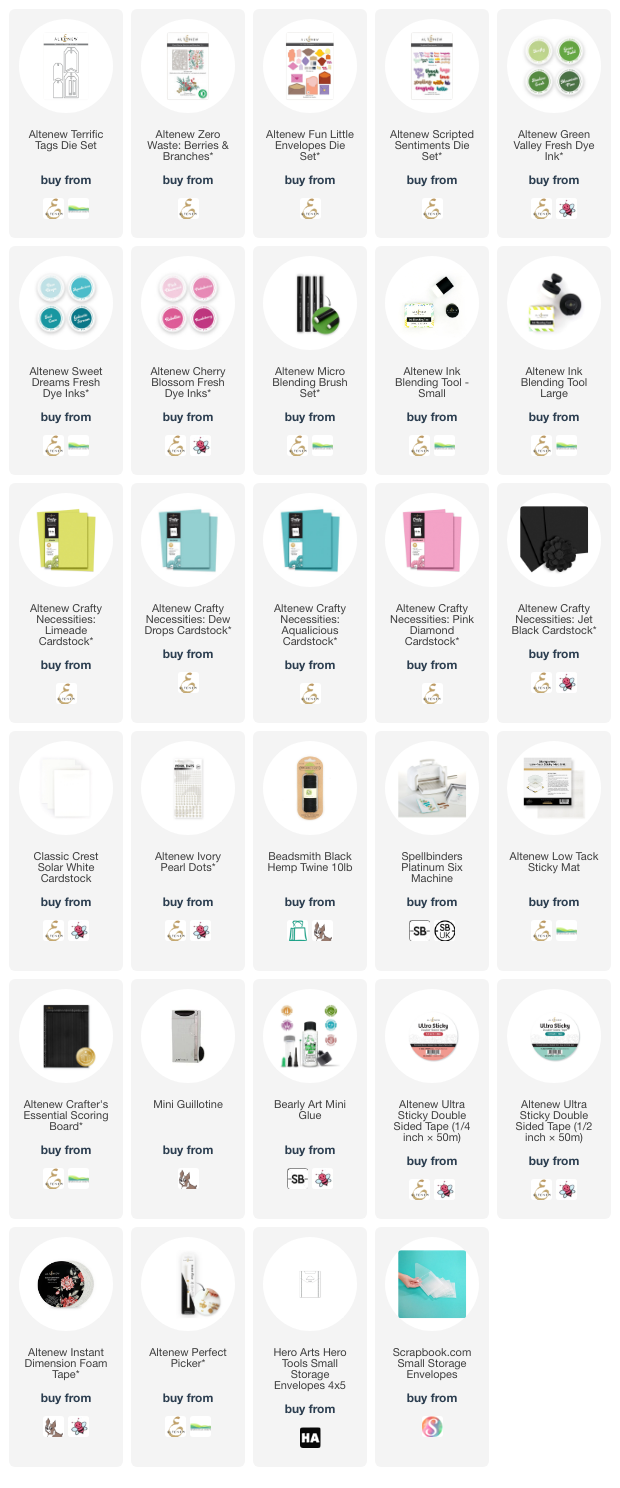
I started off by creating the tag for my card. I die cut an Altenew Terrific Tag Die from white cardstock and then cut the length of it down a little with my mini guillotine. I then found some foliage that I cut from the Altenew Zero Waste: Branches & Berries Die that I cut from Altenew Crafty Necessities: Limeade, Dew Drops and Aqualicious Cardstock. 


The aqua pieces already had ink blending on using Altenew Sweet Dreams Fresh Dye Inks but the green ones didn't. So I grabbed my Altenew Green Valley Fresh Dye Inks and added a little to the foliage. I then die cut an Altenew Fun Little Envelope from white cardstock and assembled it, adhering with double-sided tape. The sentiment, from the Altenew Scripted Sentiments Die Set, was die cut five times from Altenew Crafty Necessities: Jet Black Cardstock and adhered one on top of another for dimension. 


I adhered the foliage to the tag first, using liquid glue. I then adhered the envelope on top. I had already cut some of the hearts from the Fun Little Envelopes set from Altenew Crafty Necessities: Pink Diamond Cardstock, so added those to the envelope for some added colour. The sentiment was adhered below. I finished off by threading black twine through the top of the tag and tying in a bow. To embellish, I added a few Altenew Ivory Pearl Dots


Whilst I loved the tag as is, I know that not everyone uses tags on their own, so I wanted to show how to add it to a card. I took a US A2 sized white card base (4 1/4" x 5 1/2") and using my Altenew Scoring Board and stylus, scored lines every 1/2" down the front panel. Using an Altenew Large Blending Brush, as well as a Small Blending Brush for added intensity, I blended Altenew Pink Diamond Fresh Dye Ink at the bottom of the card. Not only does this match the pink from the heart, but it also brings out the scoring lines and helps ground the tag, which was adhered on top using Altenew Instant Dimension Foam Tape

VIDEO:

Here is the video showing how I made the card:


If you are viewing this blog post via email subscription, you can watch the video HERE on YouTube.

SUPPLIES:


Here are the links to what I have used on the project. Affiliate links are used on some products. This means that if you make a purchase after clicking on my link, I receive a small commission with no extra cost to you. I truly appreciate your support when using these links. Please click on the logo below the product to shop at your favourite store. All products were personally purchased except marked with an asterisk (*) which were kindly sent to me to use. You can read my full disclosure here.


It feels nice to use up some of my leftover pieces! Thank you so much for stopping by today, I really do appreciate it. I hope you have a wonderful day! 

11 March 2025

VIDEO | Faux Velvet 3D Embossing

Hello there, today I am giving 3D embossing a faux velvet look. I am a huge fan of embossing folders and I am always trying to find new ways to give them a different look. This is a variation of a technique that I use often - highlighting the raised areas with white pigment ink but it adds an extra step that gives a soft velvety look. 

PLEASE NOTE: This post contains affiliate links. Please see below for my full disclosure.


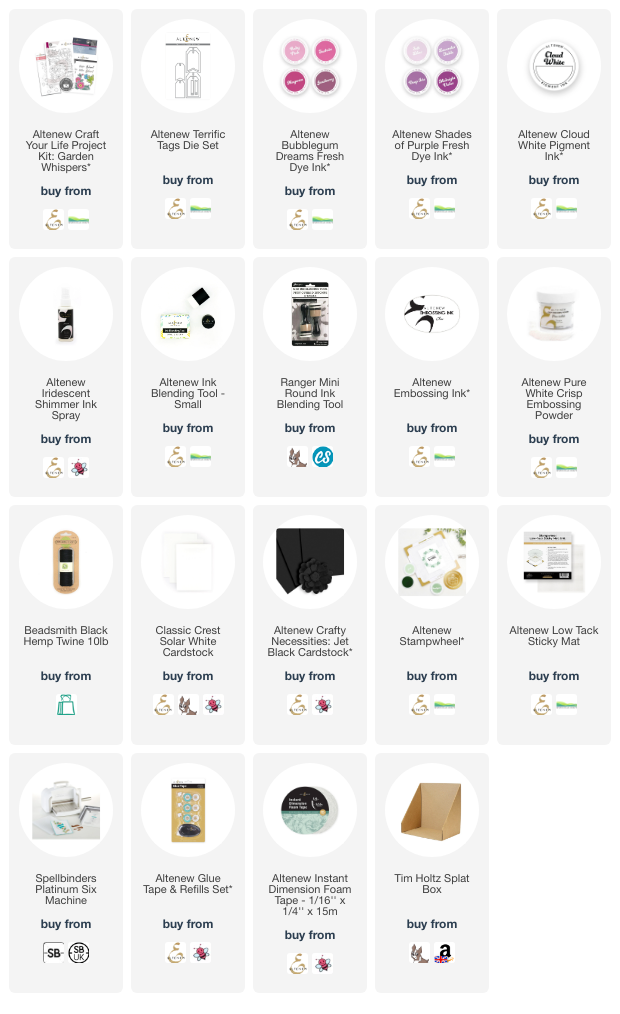
I started off by die cutting one the larger tags from the Altenew Terrific Tags Die Set from white cardstock. I then added ink blending on top using Altenew Bubblegum Dreams Fresh Dye Inks (the three lightest shades) using an Altenew Small Blending Brush


I blended Midnight Violet, from the Altenew Shades of Purple Fresh Dye Ink Collection, on top to give some extra darkness to the tag. I placed it inside the Altenew Garden Whispers 3D Embossing Folder and ran it through my die cutting machine. 


I smooshed Altenew Cloud White Pigment Ink onto the mat and picked it up using a Blending Tool (with a sponge applicator). I then pounced the tool onto the raised areas in layers. The white intensifies the more layers you add. I wanted to pounce/dab the tool onto the embossing, rather than swiping, to transfer the texture of the sponge and give a mottled look. I then placed the tag into my Splat Box and misted it with Altenew Iridescent Shimmer Ink Spray


This really brings out the white ink on the tag and gives a lovely soft velvety texture/look. I heat set the ink and then set the tag aside to dry while I stamped my sentiment, from the Altenew Garden Whispers Craft Your Life Project Kit, onto Altenew Crafty Necessities: Jet Black Cardstock using Altenew Embossing Ink. I applied Altenew Pure White Crisp Embossing Powder and heat set. It was die cut out using the coordinating die. 


I cut another tag from white cardstock and adhered it behind the embossed one. I threaded twine through the top of the tag and tied in a bow. I added Altenew Instant Dimension Foam Tape 1/4" onto the back of the sentiment and adhered it onto the tag to finish. 

VIDEO:

Here is the video showing how I made the tag:


If you are viewing this blog post via email subscription, you can watch the video HERE on YouTube. 

SUPPLIES:


Here are the links to what I have used on the project. Affiliate links are used on some products. This means that if you make a purchase after clicking on my link, I receive a small commission with no extra cost to you. I truly appreciate your support when using these links. Please click on the logo below the product to shop at your favourite store. All products were personally purchased except those marked with an asterisk (*) which were kindly sent to me to use. You can read my full disclosure here.


I am definitely going to try this technique again, it really gives a softness to the project. Thank you so much for stopping by today, I really do appreciate it. I hope you have a wonderful day! 

17 February 2025

VIDEO | Selective Stencilling with Gold Hero Wax

Hello there, today I have a card (and video) to share using selective stencilling along with faux gold gilding with Hero Wax. The great thing about stencils is that you can use the whole stencil, or it is really easy to omit areas to get the look you want! 

PLEASE NOTE: This post contains affiliate links. Please see below for my full disclosure.


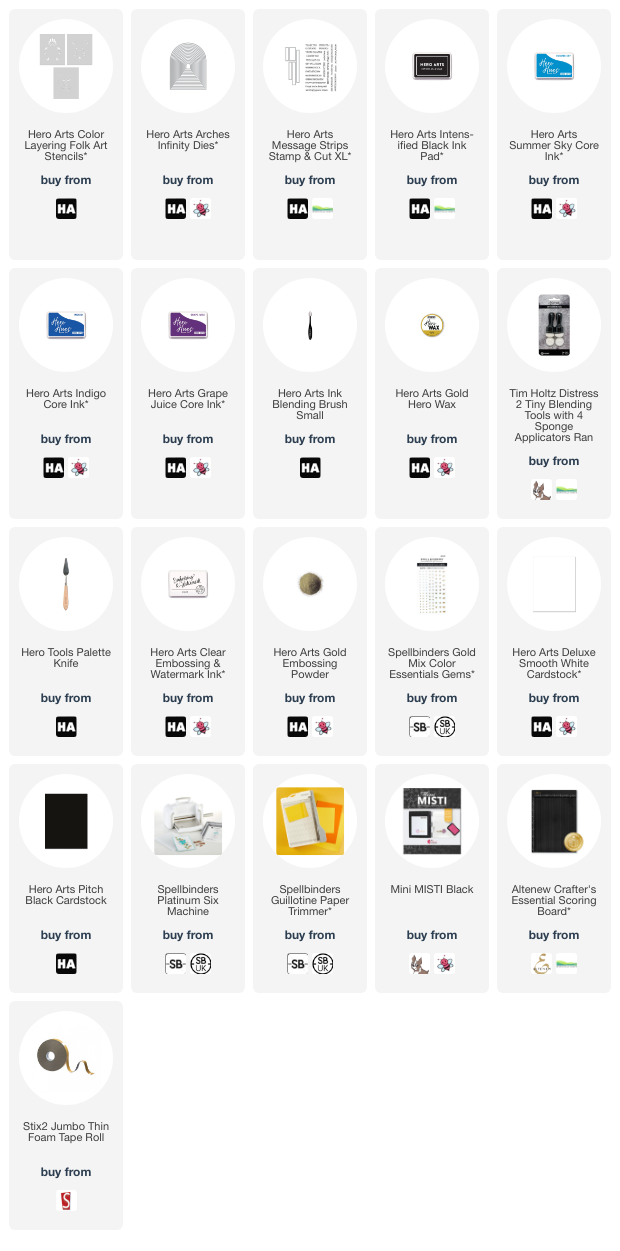
I started off my card by taking the Hero Arts Color layering Folk Art Stencils and adding memo tape to the areas that I didn't want to add ink blending to. They were then placed on top of panel of Hero Arts Deluxe Smooth White Cardstock. I started off with the leaf/stems stencils and added ink blending to them using Hero Arts Intens-ified Black Ink with a Hero Arts Small Ink Blending Brush


For the last stencil, I first added a layer of Hero Arts Summer Sky Core Ink to the petals, followed by Hero Arts Indigo Core Ink, this time just to the base of the petals. I then went in with Hero Arts Grape Juice Core Ink to darken them even more. 


Leaving the stencil in place, I then pounced/dabbed Hero Arts Gold Hero Wax on top using a Tim Holtz Tiny Blending Tool. The sponge texture of this made it so that I did not get a harsh line at the top of the wax and it gave a smooth transition to the ink blending underneath. I then removed the stencil and set it aside to dry (which did not take long!). 


Once dry, it was cut into an arch using the Hero Arts Arches Infinity Dies. I cut the bottom off of the panel and then created a shaped card base. I cut two more arches from Hero Arts Pitch Black Cardstock and on one, added a score line towards the top to create a hinge. I added adhesive to the hinge and adhered it to the back of the other arch to create the card base. 


The stencilled panel was adhered on top with thin foam tape. I stamped a sentiment from Hero Arts Message Strips Stamp & Cut XL onto Hero Arts Pitch Black Cardstock using Hero Arts Clear Embossing & Watermark Ink. I applied Hero Arts Gold Embossing Powder and heat set. It was adhered to the card with more thin foam tape. To finish, I embellished with Spellbinders Gold Mix Color Essentials Gems

VIDEO:

Here is the video showing how I made the card: 


If you are viewing this post via email subscription, you can watch the video HERE on YouTube. 

SUPPLIES:


Here are the links to what I have used on the project. Affiliate links are used on some products. This means that if you make a purchase after clicking on my link, I receive a small commission with no extra cost to you. I truly appreciate your support when using these links. Please click on the logo below the product to shop at your favourite store. All products were personally purchased except those from Clearly Besotted and those marked with an asterisk (*) which were kindly sent to me to use. You can read my full disclosure here.


I really love how much shine the gold wax adds to the stencilling! Thank you so much for stopping by today, I really do appreciate it. I hope you have a wonderful day! 

21 October 2024

VIDEO | Hot Foiling Tips

Hello there, today I have a card to share using hot foiling. I know hot foiling isn't for everyone but I do have some tips to share if you are struggling to get a good impression (I share them in the video). The card itself uses a non-traditional holiday colour scheme ... I always love purple! 

PLEASE NOTE: This post contains affiliate links. Please see below for my full disclosure.


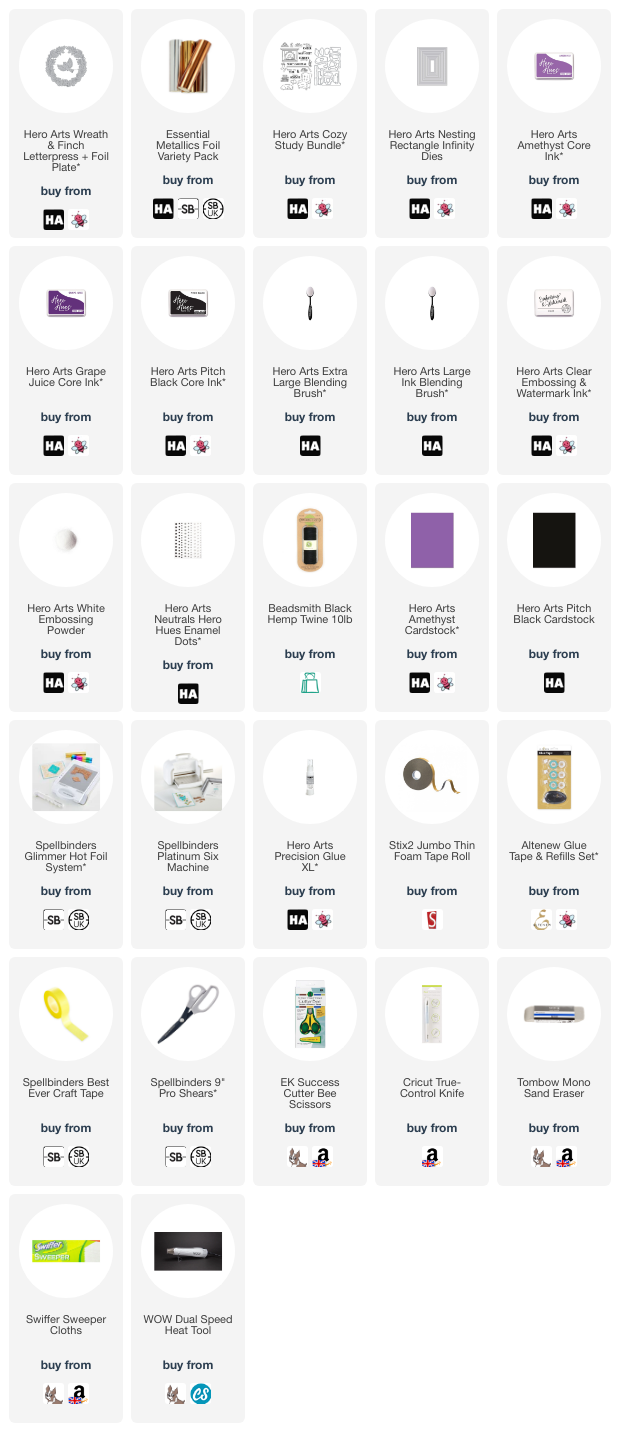
I started off by taking a panel of Hero Arts Amethyst Cardstock and placed a piece of Spellbinders Silver Glimmer Hot Foil on top of that, shiny side up. I then placed the wreath from the Hero Arts Wreath & Finch Letterpress + Foil Plate on top, facing down. I held everything in place with Best Ever Craft Tape. I placed it on my Spellbinders Glimmer Hot Foil System to heat up (plate side down) and once ready, ran it through my Platinum Six

I did get a little over-foiling, so I removed that with a craft knife. I then foiled the finch in the same way. I die cut the wreath panel using the largest die in the Hero Arts Nesting Rectangle Infinity Dies set and then added ink blending around the edges with Hero Arts Core Inks and Blending Brushes. 

I used Amethyst to start with, followed by Grape Juice and then Pitch Black. It was adhered to a US A2 sized card base made from more Amethyst Cardstock. I fussy cut the finch out with scissors and adhered a bow made from black twine behind him. They were adhered to the card using foam tape. 

I stamped the sentiment from the Hero Arts Cozy Study Stamp & Die Bundle onto Hero Arts Pitch Black Cardstock using Hero Arts Clear Embossing & Watermark Ink. I applied Hero Arts White Embossing Powder and heat set. It was cut out using the coordinating die and adhered to the card with thin foam tape. To finish, I embellished with Hero Arts Black Enamel Dots

VIDEO:

Here is the video showing how I made the card:

If you are viewing this post via email subscription, you can watch the video HERE on YouTube. 

SUPPLIES:


Here are the links to what I have used on the project and in the video. Affiliate links are used on some products. This means that if you make a purchase after clicking on my link, I receive a small commission with no extra cost to you. I truly appreciate your support when using these links. Please click on the logo below the product to shop at your favourite store. All products were personally purchased except those from Clearly Besotted, Hero Arts or those marked with an asterisk (*) which were kindly sent to me to use. You can read my full disclosure here.


Definitely more of a Halloween colour scheme but hopefully still pretty! Thank you so much for stopping by today, I really do appreciate it. I hope you have a great day and a wonderful week ahead! 

20 September 2024

VIDEO | Make 3D Embossing Shine!

Hello there, today I have a fun technique to share - making 3D embossing shine with one metallic ink pad! I shared a similar technique of using the back of embossing folders with black ink in the past (you can see that HERE) but this time, I thought I would use metallic ink to add lots of shine. 

PLEASE NOTE: This post contains affiliate links. Please see below for my full disclosure.


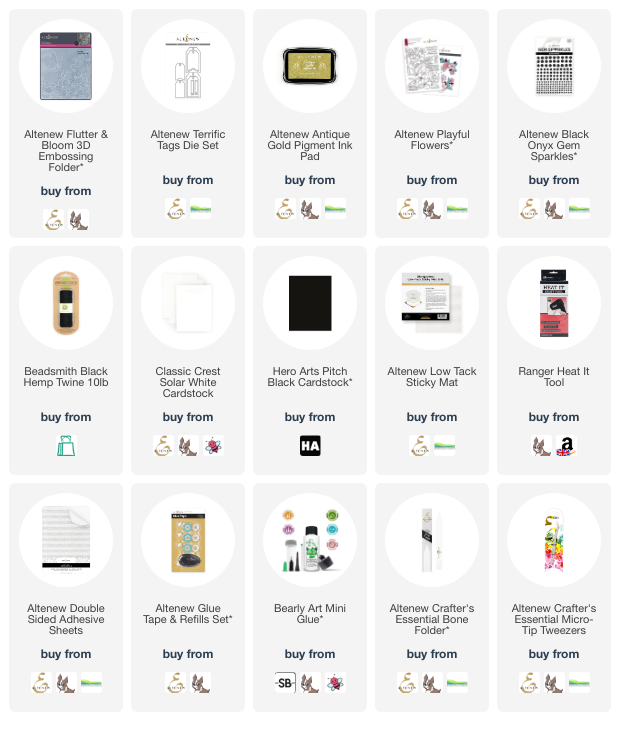
I started off my tags by die cutting two using the Altenew Terrific Tags Die Set - one from white cardstock and one from black cardstock. I placed them inside the Altenew Flutter & Bloom 3D Embossing Folder but made sure to face the front of the tag to the back of the embossing folder, since it is the back we are using today. 

I placed the tags on an Altenew Sticky Mat and then using Altenew Antique Gold Metallic Ink, I swiped it on top of the tag. Anywhere there is raised area (in this case, the outside edges) the ink will go. Since this is a 3D embossing folder, there are different levels of embossing/debossing so some of the ink goes inside the images (butterfly and flowers) but most of it is on the raised areas which is the outside. 

For the tag made from white cardstock, I wanted the outside raised areas to be opaque with the ink so using the corner of the ink pad, I went over these areas multiple times until no white cardstock was showing through. On the tag made with the black cardstock, I wanted some of the cardstock to show through (kind of like an engraved look), so I didn't press too hard. I then dried both with a heat tool (this did take a long time since there are multiple layers of ink!). 

I die cut the 'hello' die from the Altenew Playful Flowers Die Set from both white cardstock and black cardstock. I added Altenew Double-Sided Adhesive Sheet to the back of the cardstock before die cutting them three times. They were layered up one on top of another, so that the words are three die cut layers high.

I cut the tags again from sold cardstock and adhered them to the back of the embossed/debossed tags. This covers the embossing on the back and gives me somewhere to write a personal message. The sentiments were then adhered on top. I added twine through the top of the tags and tied in bows and then to finish, embellished with Altenew Onyx Black Gem Sparkles

VIDEO:

Here is the video showing how I made the tags:

If you are viewing this blog post via email subscription, you can watch the video HERE on YouTube. 

SUPPLIES:


Here are the links to what I have used on the projects. Affiliate links are used on some products. This means that if you make a purchase after clicking on my link, I receive a small commission with no extra cost to you. I truly appreciate your support when using these links. Please click on the logo below the product to shop at your favourite store. All products were personally purchased except those from Clearly Besotted, Hero Arts or those marked with an asterisk (*) which were kindly sent to me to use. You can read my full disclosure here.


I hope you will give the technique a try, it is a fun one and doesn't require many supplies! Thank you so much for stopping by today, I really appreciate it. I hope you have a wonderful day! 

9 September 2024

VIDEO | Using Cardstock Scraps to Create Mini Scenes

Hello there, today I have two tags to share using the Altenew Winter Village Die Set. The dies are so tiny that it is a perfect opportunity to use up cardstock scraps. 

Whilst I try not to be, I am a bit of a hoarder when it come to cardstock! I do keep lots of little bits of cardstock because they come in handy for things like this! How about you? Do you keep little bits of cardstock? 

PLEASE NOTE: This post contains affiliate links. Please see below for my full disclosure.


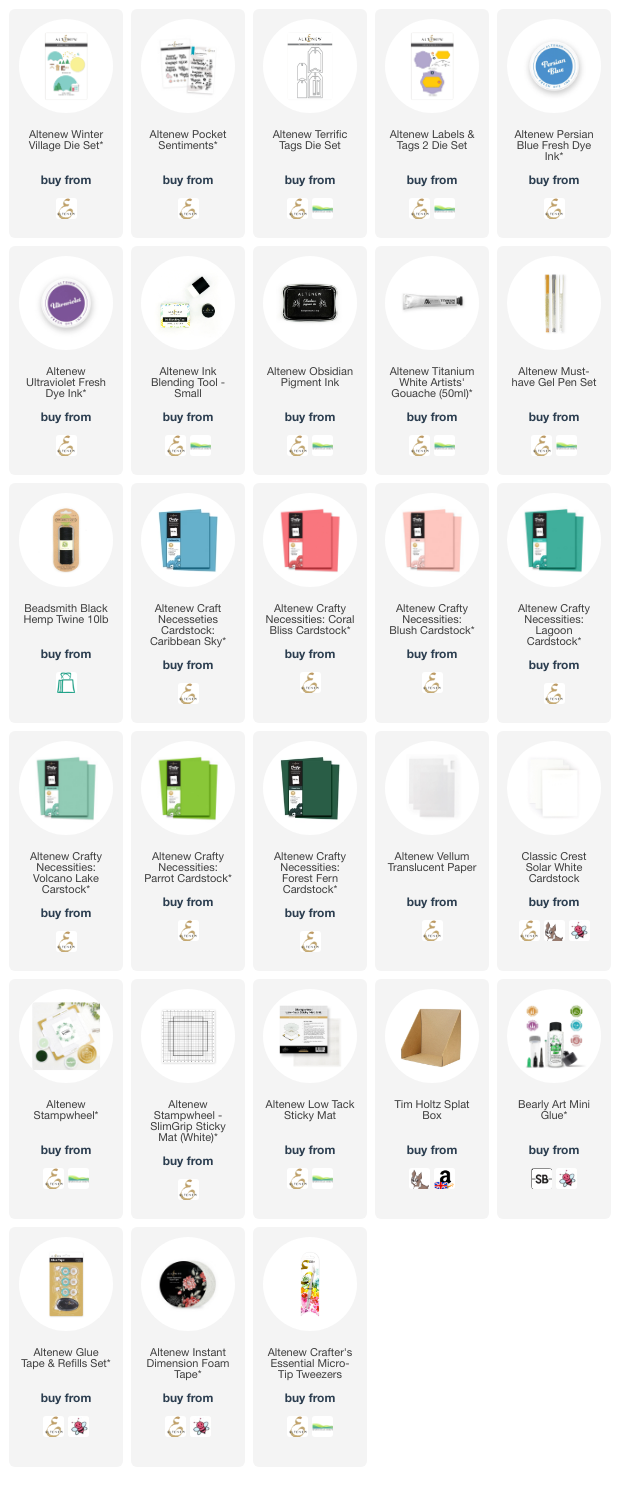
For the tags, I started off by die cutting two of the medium sized Altenew Terrific Tags Dies from Altenew Caribbean Sky Cardstock. I then added ink blending on top with Altenew Persian Blue and Ultraviolet Fresh Dye Inks. I focused the ink towards the top of the tags and faded it to the colour of the cardstock towards the bottom. 


I placed the tags in my Splat Box, mixed Altenew Titanium White Artists' Gouache with a little water and splattered it onto the tags to create snow fall. I then set them aside to dry while I worked on the scenes. 


I die cut another two tags from white cardstock and cut them down further using the landscape die in the Altenew Winter Village Die Set, to create snowbanks. They were adhered to the bottom of the tags using Altenew Glue Tape. I then die cut the houses from Altenew Blush and Volcano Lake Cardstock and the roof and doors from Altenew Coral Bliss and Lagoon Cardstock. 


The pieces were adhered together using Bearly Art Glue and then I added a little vellum behind the windows. The trees were cut from Altenew Parrot and Forest Fern Cardstock. The trees were adhered to to the tags flat and the houses adhered with Altenew Instant Dimension Foam Tape


I stamped the 'happy holidays' sentiment from the Altenew Pocket Sentiments Stamp Set onto white cardstock using Altenew Obsidian Pigment Ink twice. They were die cut out using the coordinating dies and adhered to the tags. I added twine through the top of the tags and tied in bows and then to finish, added white gel pen dots of snow to the trees and houses. 

VIDEO:

Here is the video showing how I made the tags:


If you are viewing this blog post via email subscription, you can watch the video HERE on YouTube. 

SUPPLIES:


Here are the links to what I have used on the projects. Affiliate links are used on some products. This means that if you make a purchase after clicking on my link, I receive a small commission with no extra cost to you. I truly appreciate your support when using these links. Please click on the logo below the product to shop at your favourite store. All products were personally purchased except those from Clearly Besotted, Hero Arts or those marked with an asterisk (*) which were kindly sent to me to use. You can read my full disclosure here.


Thank you so much for stopping by today, I really do appreciate it. I hope you have a wonderful day! 
End of code