29 June 2016

VIDEO | Updated Raskog Cart Organisation

Hello there, a while ago I shared how I am organising my Raskog Cart. Well, a few months ago I decided to change it up a bit. I absolutely love this cart from Ikea. It wasn't cheap, but it is so worth it in my opinion. It holds a lot of stuff.


So like I said, a few months a go I changed it around a bit. The main thing I did was to move my 6x6" paper pads from the cart and put them elsewhere in my room. This gave me a whole shelf to play with (the middle shelf). I also changed up the top shelf too.
 

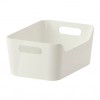
The top shelf is the one that I access the most. This holds my most used pens, paint brushes, pencils and new goodies. I love the Ikea Skurar pots for my pens and pencils and the Variera tub for my new items. I keep my new items in one place so that not only will it encourage me to use them before I put them away, it means I know what I have bought that month so I can film a haul video with them.


The next shelf down is what I am calling my mixed media shelf. I have another of the Variera tubs in here holding my sprays. I have a lot of the Heidi Swapp Color Shine ones, as well as stamp cleaner, mister bottles and my new Distress Paints. On this shelf, I also have my new alcohol inks, as well as mediums and tools.

 
The bottom shelf holds my Cuttlebug and the tools I need for it - cutting plates and also some large embossing folders and a steel rule die.


VIDEO:

Here is the video showing the cart and it's contents up close:
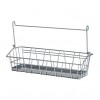
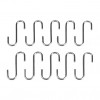
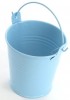


SUPPLIES:

Here are the links to the products that I shared in the video. Please click on the picture or wording to be taken to where I purchased it. Affiliate links are used on some products. This means that if you make a purchase after clicking on my link, I receive a small commission with no extra cost to you. I truly appreciate your support when using these links.


I am so very glad that I bought the cart. I really do love it! Do you have one? I would love to know what you keep on yours! Thanks so much for visiting me today. I hope you have a great day!

27 June 2016

Thank You Sow Much

Hello there, if you have been following me for a while you will know how much I like pigs. Well, I think I have mentioned it once or twice ;) So of course when the Hog Heaven set came out from MFT, I had to grab it!
 

I started off by cutting a piece of white cardstock using the MFT Wonky Stitched Rectangles dies. I then stamped the pig on to it and again on masking paper. I cut out the one on the masking paper and placed it over the stamped panel. I also cut a cloud border from masking paper. This was placed on the panel also. I then used my Copic airbrush system to colour the sky, moving the cloud piece down as I airbrushed the sky.
 
 
I then took the masks off and coloured the rest of the panel using Copic Markers (the colours I used are listed below the supplies list). The panel was adhered to a white A2 card base with foam tape. To finish off, I added Spectrum Noir Sparkle Clear Overlay pen to the heart.
 
SUPPLIES:
Here are the links to what I have used on the card. Please click on the picture or wording to be taken to where I purchased it. Affiliate links are used on some products. This means that if you make a purchase after clicking on my link, I receive a small commission with no extra cost to you. I truly appreciate your support when using these links.


Copic Markers - Pig: R22, R21, R20, R30, R00, R000. Heart: R89, R59, R39, R29, R27. Grass: YG67, YG17, YG23, YG03, YG01. Sky: B01, B00, B000, B0000.
 
I got to use my new super duper air compressor at last. My mum kindly bought it for me for my birthday since I had complained I was getting through air cans so quickly. I absolutely love it! Lucky me for having such a wonderful mum! Thanks so much for visiting me today. I hope you have a great day and a great week!

26 June 2016

Feel Better Soon

Hello there, today I have a card to share using the super cute Reverse Confetti Bear Hugs set. I apologies that it is two get well cards in a row, but I couldn't resist this cutie!
 

I started off by cutting a piece of white cardstock using the LF Stitched Journaling Card die. I then stamped the koala on to this, along with the sentiment. I coloured the koala with Copic Markers.
 
 
I took a piece of paper from the MFT Lucky Prints paper pad and adhered this to the front of an A2 card base. The image panel was then added on top with foam tape. To finish off, I added a little Glossy Accents to the koalas nose.
 

SUPPLIES:
Here are the links to what I have used on the card. Please click on the picture or wording to be taken to where I purchased it. Affiliate links are used on some products. This means that if you make a purchase after clicking on my link, I receive a small commission with no extra cost to you. I truly appreciate your support when using these links
COPIC MARKERS: Koala - W8, W6, W5, W3, W1, E42, E41. Flower: R85, R83, R81, YG03. Ground: T3, T1. Shadow: B000, 0.
 
Thanks so much for visiting me today, I really do appreciate it. I hope you have a great weekend!

23 June 2016

Under The Weather

Hello there, today I have another card to share using the June Clearly Besotted release. This time I am using the adorable Under The Weather stamp set.


I started off with a piece of white cardstock. I ran this through my Cuttlebug first using a SSS Stitched Rectangle die and then the SSS Tri Square die. I then stamped the sentiment on this panel using black ink.


I took a white A2 card base and placed the aperture panel over the top. I traced faint lines around the aperture windows using a pencil so I knew where to colour and stamped the images. I stamped three of the critters from the set into the squares and then coloured them using Copic Markers. The panel was then added over the top using foam tape.

SUPPLIES:
Here are the links to what I have used on the card. Please click on the picture or wording to be taken to where I purchased it. Affiliate links are used on some products. This means that if you make a purchase after clicking on my link, I receive a small commission with no extra cost to you. I truly appreciate your support when using these links.


COPIC MARKERS: Mouse - W5, W3, W1, W0, R12, R00. Hot water bottle & cushion - V25, V22, V20. Plaster - E13, E02. Giraffe - Y38, Y19, Y15, YR12, E30, E59, E57, E55. Blanket - R29, E24, E22. Thermometer - C1. Baer - E39, E35, E33, E31, R12. Blanket - BG23, BG13, BG11. Backgrounds - B00, B000, B0000.

This is so sweet and I am sure it would make anyone who wasn't feel well, much better! Thanks so much for visiting me today. I have been playing with the new stamps for July this week. Oh my goodness! I love them, I cannot wait for you to see them! Have a great day!

21 June 2016

Birthday Bear

Hello there, I am back to share a male birthday card with you. I love these bears from MFT and I think they are especially good for male birthday cards.
 

I started off by cutting a square panel of cardstock using the SSS Stitched Square dies. I stamped the bear from the Birthday Bears set and then made a mask for him and added this on top. I then stamped the cake so that it looked like he was holding it. The mask was then removed. 
 
 
The sentiment, from the same set, was stamped to the side. The image panel was then coloured using Copic Markers. It was added to a 5x5" white card base using foam sheet.


SUPPLIES:

Here are the links to what I have used on the card. Please click on the picture or wording to be taken to where I purchased it. Affiliate links are used on some products. This means that if you make a purchase after clicking on my link, I receive a small commission with no extra cost to you. I truly appreciate your support when using these links.


 COPIC MARKERS: Bear - T7, T6, T5, T3, T1, R12, R00. Cake - E50, E55, E57, B24, B26. Ground - W5, W3, W1. Background - B00, B000, B0000.
 
A really simple card but I do like how it turned out. I am always happy to have another male card in the card box too! Thanks so much for visiting me today. I hope you are having a great week so far. See you soon! :)
End of code