30 June 2022

Clearly Besotted Teasers | There's No Place Like Home

Hello there and welcome to day four of the Clearly Besotted July Teasers. Release day is tomorrow at 8pm BST but I have one last teaser to share with you today before sharing my release preview video tomorrow. Today I am using two new sets - Plushies In Oz and Picture It Oz. As the names suggest, the sets are Wizard of Oz themed. 

PLEASE NOTE: This post contains affiliate links. Please see below for my full disclosure.


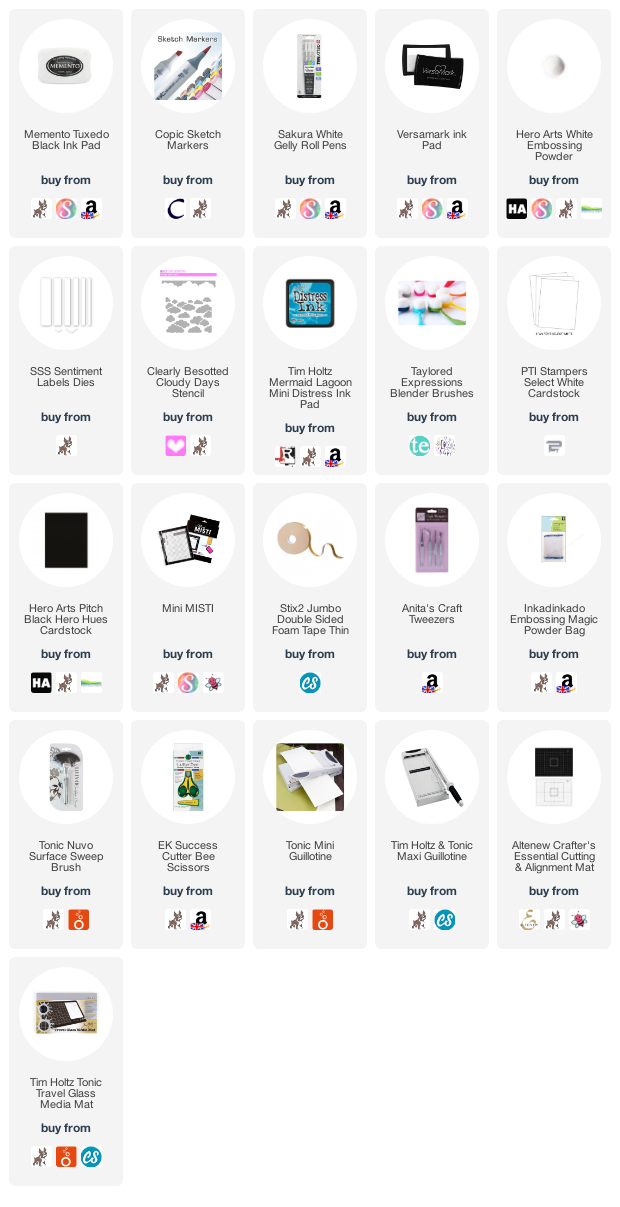
I started off by stamping the Emerald City/Yellow Brick Road background image from the Clearly Besotted Picture It Oz Stamp Set on to white cardstock with Memento Tuxedo Black Ink. I then stamped the characters from the Clearly Besotted Plushies In Oz Stamp Set. The images were coloured using Copic Markers (the colours that I used are listed below the supplies for reference) and then fussy cut out with scissors. 

I took a panel of white cardstock and placed the Clearly Besotted Cloudy Day Stencil on top. Using ink blending brushes and Tim Holtz Mermaid Lagoon Distress Ink, I blended clouds on to the background. The panel was adhered to a 4.75" x 4.75" white card base with thin foam tape. The background image was then added on top, followed by the characters. 

I took the sentiment from the Plushies In Oz set and stamped it on to black cardstock with Versamark Ink. I applied white embossing powder and heat set. It was cut in to a strip and adhered to the card with more thin foam tape. To finish off, I added white gel pen dots, highlights and sparkles using  a white gel pen. 

SUPPLIES:


Here are the links to what I have used on the project. Affiliate links are used on some products. This means that if you make a purchase after clicking on my link, I receive a small commission with no extra cost to you. I truly appreciate your support when using these links. Please click on the logo below the product to shop at your favourite store. All products were personally purchased except those from Clearly Besotted, Hero Arts or those marked with an asterisk (*) which were kindly sent to me to use. You can read my full disclosure here.


COPIC MARKERS: Emerald City - G17, G05, G14, YG23, YG01. Rainbow - R39, R37, R35, R32/YR18, YR16, YR15, YR12/Y17, Y15, Y13, Y11/YG17, YG23, YG01/B06, B04, B02, B00/V17, V15, V12. Rocks- W5, W3, W1. Grass - G29, YG17, YG23, YG03, YG01. Yellow Brick Road - YR27, Y17, Y15, Y13, Y11. Dorothy - E55, E53, E51, E50/B98, B95, B93, B91/C5, C3, C1/R39, R37, R35. Toto - E49, E79, E77, E74, R20. Tin Man - C7, C5, C3, C1, R37, R35. Scarecrow - E59, E57, E55/G28, G48, G43/E44, E43, E42, E41. Lion - YR24, YR23, Y21, YR31, YR30. 

My card ended up pretty busy but how could I not add all the characters on the yellow brick road?! If you are a fan of the Wizard of Oz, you are going to love these sets! For more inspiration using the new release, please head over to the Clearly Besotted Blog, Keren, Francine and Alberto. Thank you so much for stopping by today, see you tomorrow for release day! 

29 June 2022

Clearly Besotted Teasers | Sea You Soon

Hello there and welcome to day three of the Clearly Besotted July 2022 Teasers. Not long to go now, the release hits the shops on Friday, 1st July 2022 at 8pm BST. Today I have a card to share with you using two new sets - Deep Blue Corners and Balloon Bunch Sea. These sets were made to work separately but I thought I would combine them today to create an underwater scene. 

PLEASE NOTE: This post contains affiliate links. Please see below for my full disclosure.


I started off my card by stamping the corner image and starfish from the Clearly Besotted Deep Blue Corners Stamp Set on to white cardstock with Memento Tuxedo Black Ink. I then stamped the octopus from the Clearly Besotted Balloon Bunch Sea Stamp Set, followed by the shell balloon (masking off the top of his head before stamping). They were coloured using Copic Markers (the colours that I used are listed below the supplies area for reference) and then fussy cut out with scissors. 


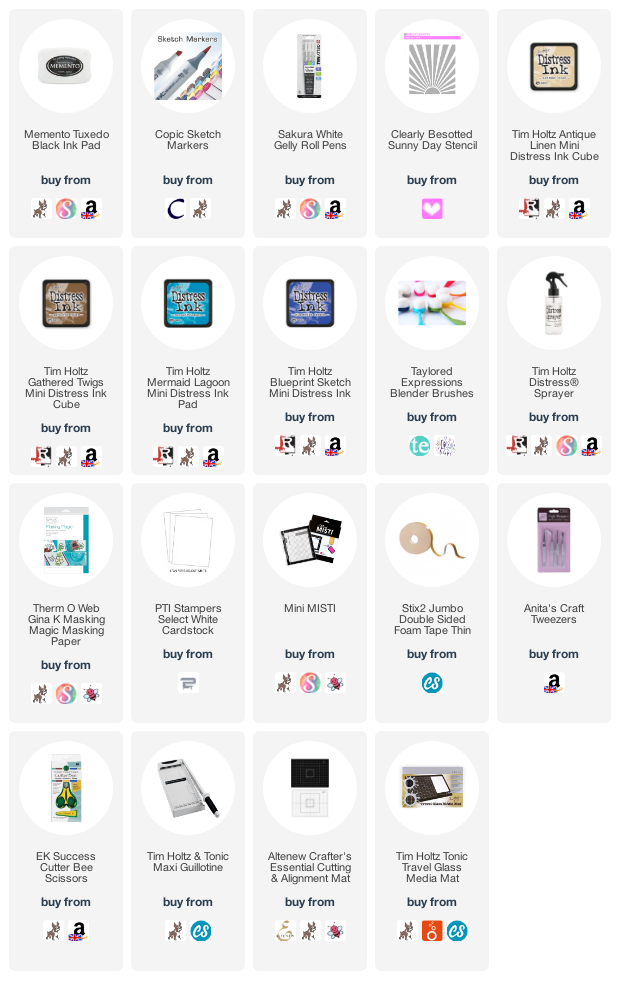
I took a panel of white cardstock and using ink blending brushes, I blended Tim Holtz Distress Inks on top. For the sand, I used Antique Linen and Gathered Twigs, for the ocean/sea, I used Mermaid Lagoon and Blueprint Sketch. I then took the Clearly Besotted Sunny Day Stencil and placed it upside down on my panel. I then blended on more of the blue ink to create some darker areas and therefore create light rays in the water. 


The panel was splattered with water and set aside to dry. Once dry, I stamped the sentiment from Balloon Bunch Sea on top and then adhered to a white 5.5." x 4" card base with thin foam tape. The images were then added on top with more foam tape. To finish off, I added a few dots to the sand for some texture and then highlights and dots to the images with a white gel pen. 

SUPPLIES:


Here are the links to what I have used on the project. Affiliate links are used on some products. This means that if you make a purchase after clicking on my link, I receive a small commission with no extra cost to you. I truly appreciate your support when using these links. Please click on the logo below the product to shop at your favourite store. All products were personally purchased except those from Clearly Besotted, Hero Arts or those marked with an asterisk (*) which were kindly sent to me to use. You can read my full disclosure here.


COPIC MARKERS: Octopus - V09, V17, V15, V12, V01. Shell balloon - E44, E43, E41, E40. Crab - R89, R39, R37, R35, R32. Starfish - YR24, YR23, YR31. Coral - RV69, RV66, RV55, RV52, Y17, Y15, Y11. Seaweed - G29, YG17, YG23, YG01. Rocks/stones - N5, N3, N1, N0. Sand - E35, E33, E31.

That octopus looks so happy with his balloon! For more inspiration using the new release, please head over to the Clearly Besotted Blog, Keren, Francine and Alberto. Thanks so much for stopping by today, see you tomorrow for day four. Have a lovely day! 
28 June 2022

Clearly Besotted Teasers | Want Some Lemonade?

Hello there and welcome to day two of the Clearly Besotted July 2022 Teasers. Today I am using the super cute Lovely Lemonade set. There is a funny story behind this card; My lovely teamie Keren mentioned that the set completely reminded her of THIS song/YouTube video. I had never seen or heard it before but oh goodness, I was singing it for the next week! Haha! So although there are a few different critters in this set, I HAD to use the duck! :)

PLEASE NOTE: This post contains affiliate links. Please see below for my full disclosure.


I started off my card by stamping the lemonade stand and duck from the Clearly Besotted Lovely Lemonade Stamp Set on to white cardstock with Memento Tuxedo Black Ink. I coloured them using Copic Markers (the colours that I used are listed below the supplies list for reference). I then fussy cut them out using scissors. 


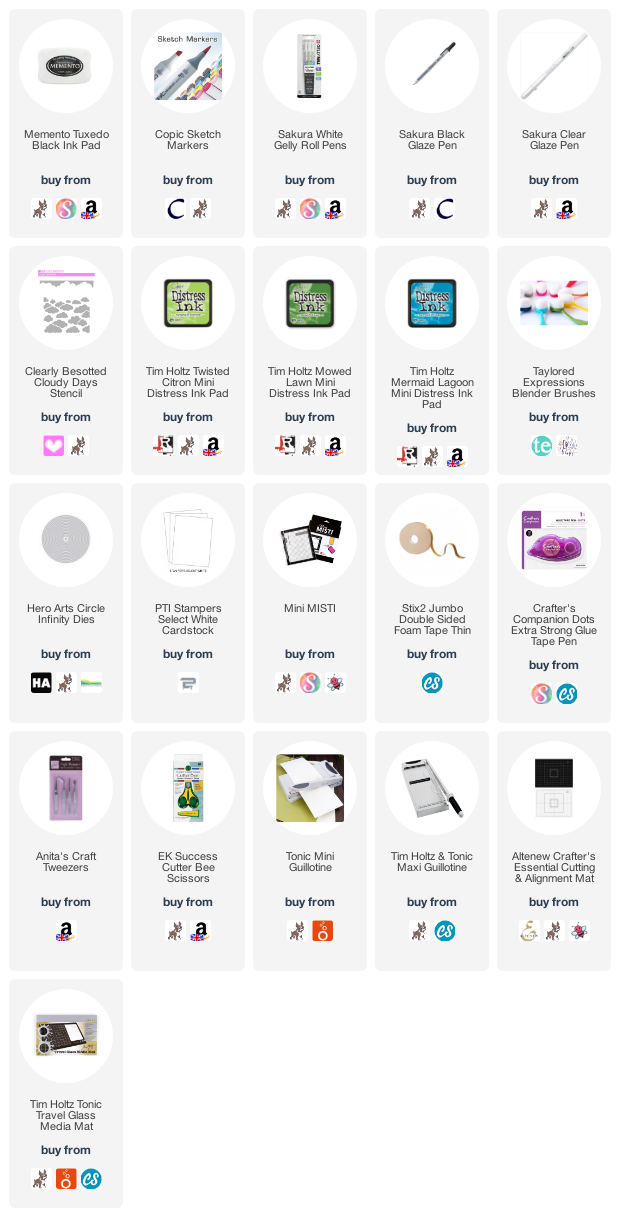
I took Hero Arts Nesting Circle Infinity Dies and die cut three circles, two the same size and one slightly smaller. On the smaller one I added ink blending with Tim Holtz Distress Inks and ink blending brushes. I used Twisted Citron and Mowed Lawn for the grass and then for the sky, I placed the Clearly Besotted Cloudy Day Stencil down first and then added ink blending with Mermaid Lagoon Distress Ink


I made a circle card base with the two larger circles (I made the card base the same as what I made in this video HERE) and then added the inked panel on top with thin foam tape. The images were then added on top with more thin foam tape. To finish off, I added Sakura Black Glaze Pen to the duck's eyes, Clear Glaze Pen to his beak and then white highlights to the lemons. 

SUPPLIES:


Here are the links to what I have used on the project. Affiliate links are used on some products. This means that if you make a purchase after clicking on my link, I receive a small commission with no extra cost to you. I truly appreciate your support when using these links. Please click on the logo below the product to shop at your favourite store. All products were personally purchased except those from Clearly Besotted, Hero Arts or those marked with an asterisk (*) which were kindly sent to me to use. You can read my full disclosure here.


COPIC MARKERS: Duck - YR27, Y17, Y15, Y11/YR18, YR15, YR12. Lemons - Y19, Y08, Y06, Y04, Y02, YG01, YG00/YG17, YG23, YG01. Lemonade stand - E57, E55, E53, E51. 

I decided to leave a sentiment off this card. I do not do that very often, but I thought it worked okay without and I can write a personal message inside. For more inspiration using the new release, please head over to the Clearly Besotted Blog, Keren, Francine and Alberto. Thanks so much for stopping by today, I really appreciate it. I hope you have a great day! 

27 June 2022

Clearly Besotted Teasers | Ahoy Matey

Hello there and welcome to day one of the Clearly Besotted July 2022 Teasers. The July 2022 release hits the shops on the 1st July 2022 at 8pm BST and from now until then, we will be sharing teasers with you using the new sets. My card today uses the new Pirate Pals set, which features adorable monkeys dressed up as pirates. 

PLEASE NOTE: This post contains affiliate links. Please see below for my full disclosure.


I started off my card by stamping the island image, as well as one of the monkeys from the Clearly Besotted Pirate Pals Stamp Set on to white cardstock with Memento Tuxedo Black Ink. I coloured them using Copic Markers (the colours that I used are listed below the supplies area for reference) and then fussy cut them out with scissors. 


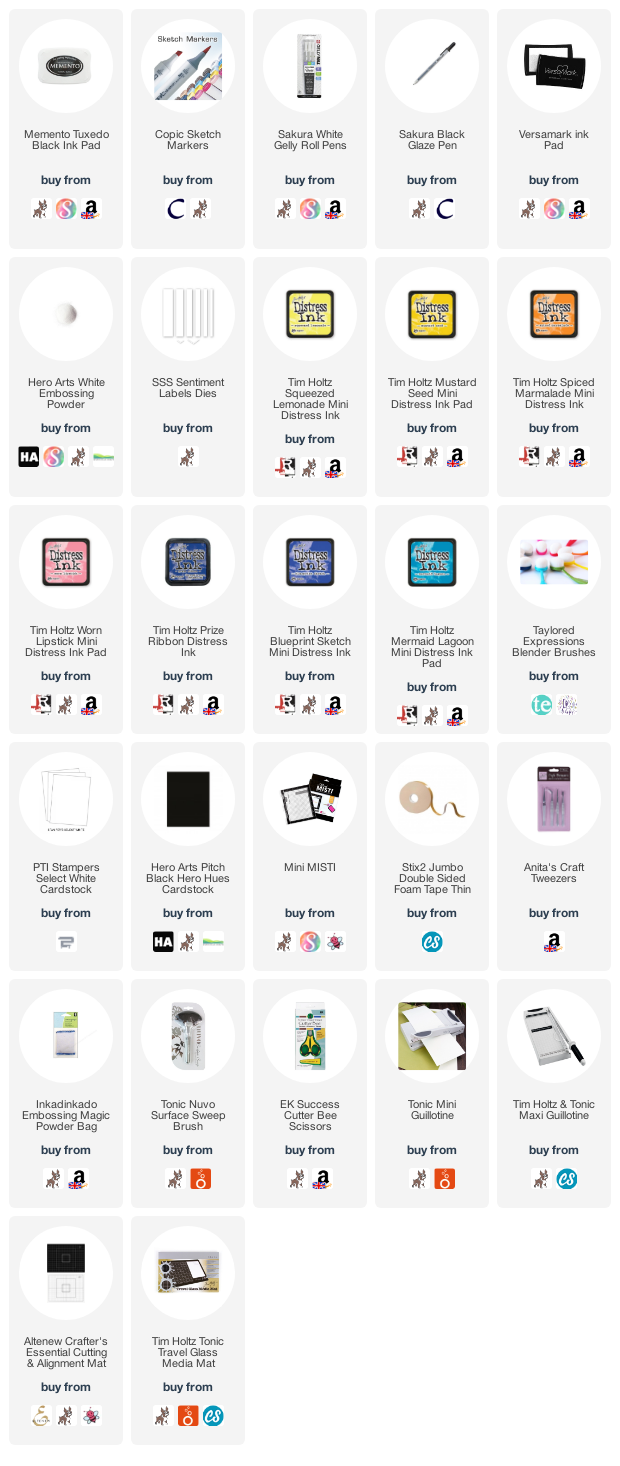
I took a panel of white cardstock and using Ink Blending Brushes, applied Tim Holtz Distress Inks for the ocean and sky. For the sky I used Squeezed Lemonade, Mustard Seed, Spiced Marmalade and Worn Lipstick. For the water, I used Prize Ribbon, Blueprint Sketch and Mermaid Lagoon. The panel was then adhered to a white 5.5" x 4" card base using thin foam tape. 


The island and monkey were then added on top, again with thin foam tape. I took the sentiments from the set and stamped them on to black cardstock with Versamark Ink. I applied white embossing powder and heat set. They were cut in to a strip and added to the card with more thin foam tape. To finish off, I added white gel pen highlights and dots. 

SUPPLIES:


Here are the links to what I have used on the project. Affiliate links are used on some products. This means that if you make a purchase after clicking on my link, I receive a small commission with no extra cost to you. I truly appreciate your support when using these links. Please click on the logo below the product to shop at your favourite store. All products were personally purchased except those from Clearly Besotted, Hero Arts or those marked with an asterisk (*) which were kindly sent to me to use. You can read my full disclosure here.


COPIC MARKERS: Monkey - E59, E57, E55, E53, E51, E50, R02, R01/R89, R39, R37, R35, R32. Sword - Y26, YR24, YR23, YR31/C5, C3, C1. Sand - E44, E43, E42, E41. Grass - G29, YG17, YG23, YG03, YG01, YG00. Tree - E55, E23, E21, G29, YG17, YG23, YG03, YG01. 

This set really is very cute! For more inspiration using the new release, please head over to the Clearly Besotted Blog and my amazing teamie Keren. We also have our fabulous resident guests with us this month - Francine and Alberto. Thanks so much for stopping by today. As always, I really do appreciate it. I hope you have a lovely day! 
25 June 2022

VIDEO | MFT Circle Scene Card

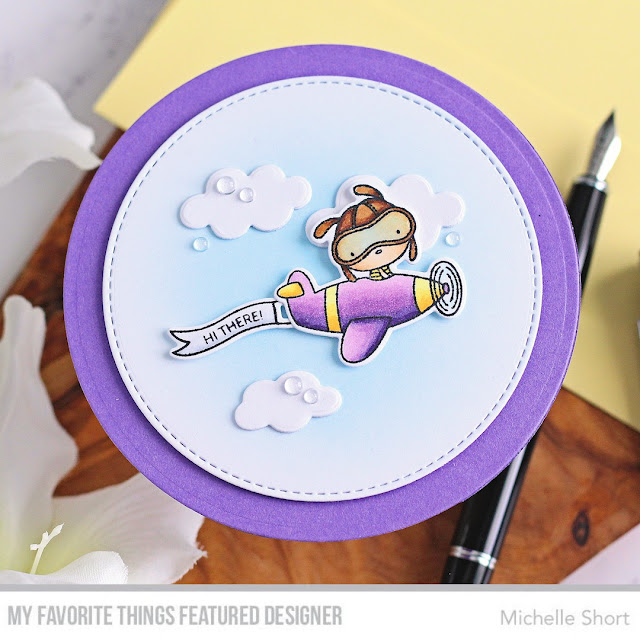
Hello there, I was over on the MFT YouTube channel yesterday sharing a circle scene card using the Parachute Pals set. These images are pretty small (but oh so adorable!), so I thought a circle card would work nicely! 
PLEASE NOTE: This post contains affiliate links. Please see below for my full disclosure.


I started off by stamping the bunny in the plane and banner images from MFT Parachute Pals Stamp Set on to white cardstock with black ink. I then coloured them using Copic Markers (the colours that I used are listed below the supplies area for reference). I die cut them out using the MFT Parachute Pals Die-namics


I also die cut the cloud from the set and also the MFT Cutest Clouds Ever Die-namics. I cut each of the clouds twice, so that I could layer them up for a little dimension. I then cut an MFT A2 Stitched Circle STAX Die-namics from white cardstock. I added a small amount of Tim Holtz Mermaid Lagoon Distress Ink to the centre, fading to white at the edges. The clouds were adhered on top with MFT On-Point Precision Glue and the images with thin foam tape.


For the card base, I die cut two circles from MFT Grape Jelly Cardstock using MFT A2 Circle STAX Die-namics. I added a score line to one to make a hinge and also cut off a little from the bottom to help the card stand up. The hinge was adhered to the other circle to make the card base (I show it better in the video). The image panel was then added on top with more thin foam tape. To finish off, I added a few Raindrops and then Tonic Crystal Glaze to his goggles.

VIDEO:

Here is the video showing how I made the card:


If you are viewing this blog post via email subscription, you can watch the video HERE on YouTube. 

SUPPLIES:


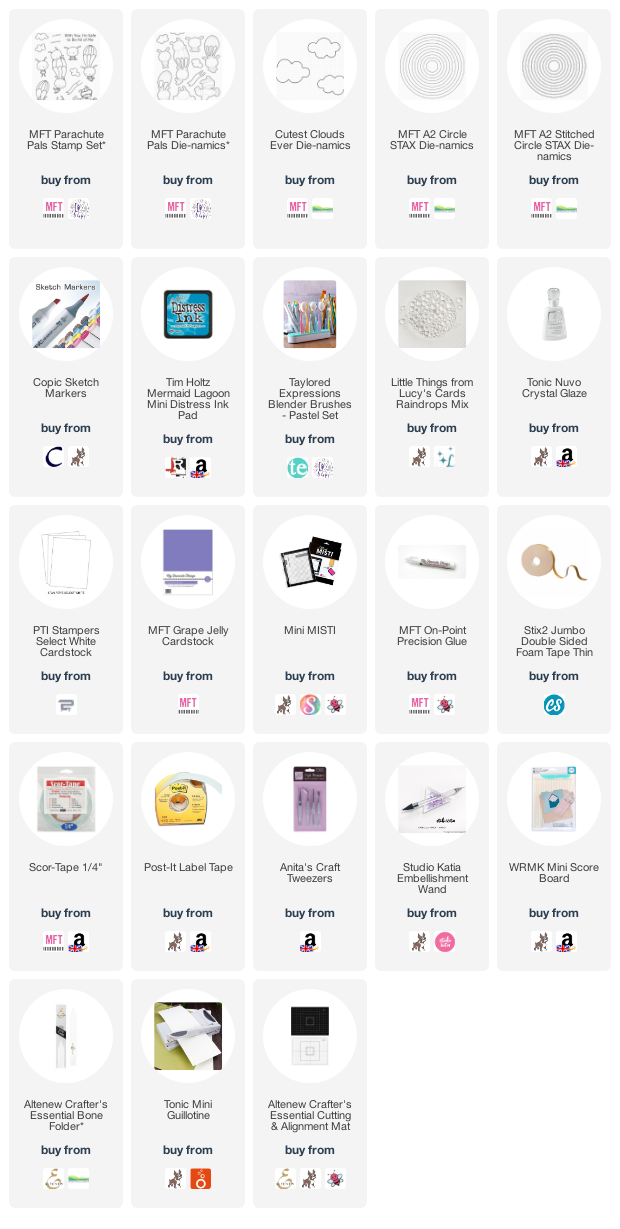
Here are the links to what I have used on the project. Affiliate links are used on some products. This means that if you make a purchase after clicking on my link, I receive a small commission with no extra cost to you. I truly appreciate your support when using these links. Please click on the logo below the product to shop at your favourite store. All products were personally purchased except those from Clearly Besotted, Hero Arts or those marked with an asterisk (*) which were kindly sent to me to use. You can read my full disclosure here.


COPIC MARKERS: Bunny - E53, E51, E50. Googles - E57, E55, B000. Hat - E59, E57, E55. Top - Y15. Plane - V109, V17, V15, V12, V01, Y17, Y15, Y11. 

Thank you so much for stopping by today, I hope you are well and have a great day and weekend!

24 June 2022

Hero Arts | Using Inkers to Colour Embossing Paste

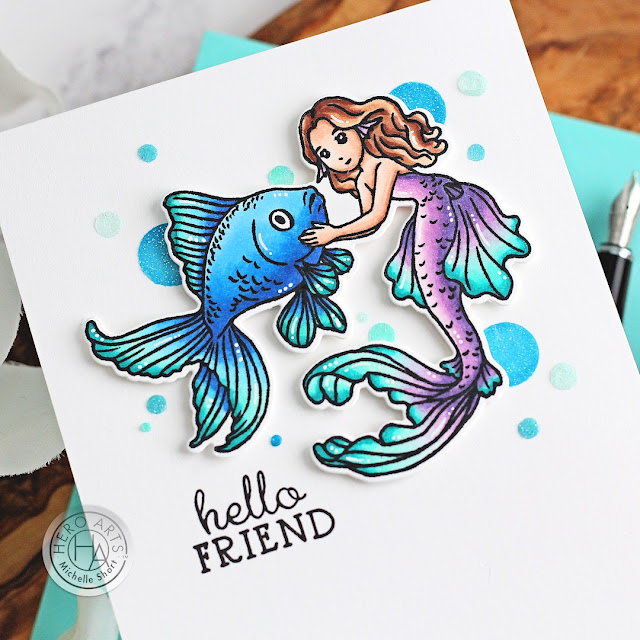
Hello there, I am over on the Hero Arts Blog today sharing a card using the new Inkers to colour embossing paste. If you haven't already seen, Hero Arts have released a new Hero Hues Core Ink line and each ink now has a matching Inker (you can read more about the new release on my previous post HERE). These are reinkers to ink up your ink pad once dry but there are all sorts of wonderful things you can do with them too! 

PLEASE NOTE: This post contains affiliate links. Please see below for my full disclosure.


Over on the Hero Arts Blog, I share a few different ways that you can use Inkers - to colour embossing paste, wax and create sprays, but for my project today, I am colouring glitter paste with them. The sparkle in the paste still shows through beautifully and so you can create really fun looks!


I used Mist, Paradise, Periwinkle (mixed with Paradise) and Deep Ocean Core Inkers to colour Hero Paste Glitter. I added a drop of the Inker to a palatte knife full of paste and mixed them together. Using the Waves Scenic Stencil and also a hand made circle stencil, I added circles of the paste to create bubbles on to the panel. The image from Mermaid Wishes was then added on top to create the underwater scene. 

SUPPLIES:


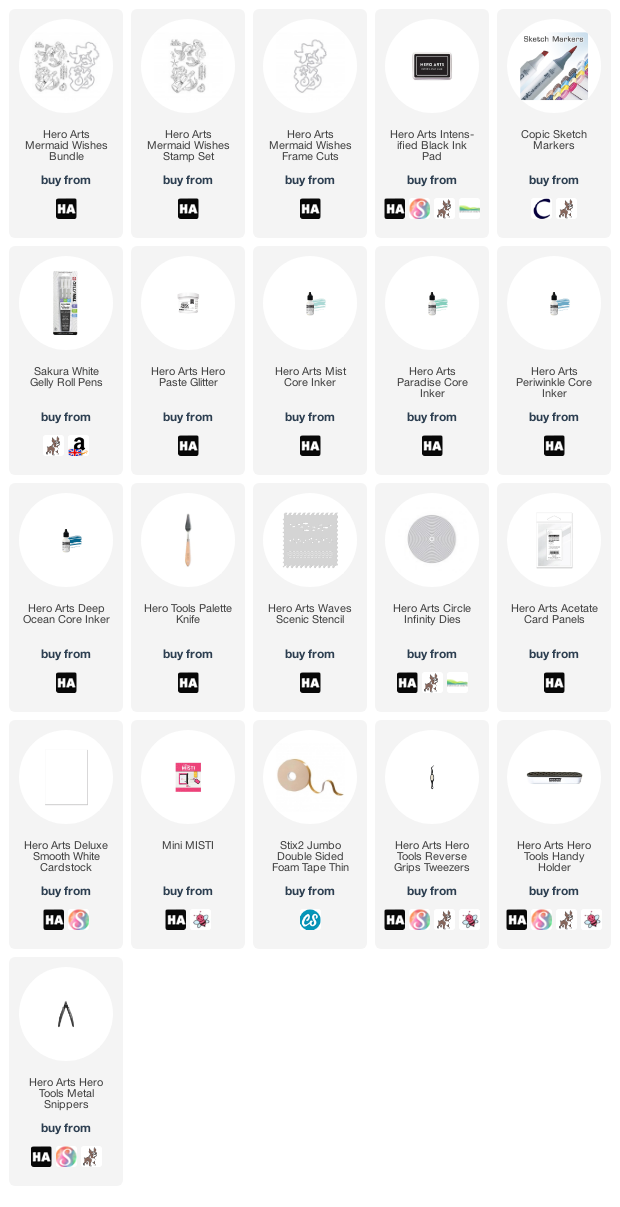
Here are the links to what I have used on the project. Affiliate links are used on some products. This means that if you make a purchase after clicking on my link, I receive a small commission with no extra cost to you. I truly appreciate your support when using these links. Please click on the logo below the product to shop at your favourite store. All products were personally purchased except those from Clearly Besotted, Hero Arts or those marked with an asterisk (*) which were kindly sent to me to use. You can read my full disclosure here.


For more details on how I made the card, plus a look at my Inkers experiments, please head over to the Blog post HERE. Thank you so much for stopping by today, I really do appreciate it. Wishing you a wonderful day!

20 June 2022

Hero Arts | Color Week Release Blog Hop + Giveaway

Hello there and welcome to Color Week at Hero Arts. Not only have we revamped two of our ink pad lines (and combined them in to one), we have new colours of inks, cardstock and now reinkers for all of the new line too! Over the week, there will be blog posts on the Hero Arts Blog with more information and sharing ideas using the new products, but today, we are kicking off with a fun blog hop with a fabulous giveaway too. I will share more information on the hop and the new products a little later but first, let's get on to the project that I am sharing with you today. 

PLEASE NOTE: This post contains affiliate links. Please see below for my full disclosure.


My focus for my project today is on the new Hero Arts Amethyst Core Ink, which matches the already released Amethyst Cardstock and is a beautiful colour. This particular ink pad is a dye formula (some of the Core Ink colours are dye based and some are hybrid. I will get on to that a little later!). 


I started off by taking a 3.25" x 4.5" panel of Hero Arts Deluxe Smooth White Cardstock. Starting at the bottom and using Post-It Tape, I masked off a section at the bottom for my darkest saturation of colour. Using the Amethyst Core Ink direct to paper, I swiped it over that section multiple times. 


I removed the Post-It Tape and moved it further up to create another section, for this section I used a Hero Arts Extra Large Ink Blending Brush to apply the ink. I did this for the rest of the panel, moving up with a slightly less saturation of ink until I got to the top and used the lightest touch. I wanted to show you how light you can get the ink and also how dark! 

I didn't get a perfect Ombre but I did like the finished result none-the-less, although I did go back and add more saturation to the darkest layer at the bottom and it did bleed slightly which was a shame. I should have used a new piece of Post-It Tape, but you live and learn! 


The panel was adhered to a white A2 card base with thin foam tape. I die cut the 'hello' from Hero Arts Friends Words Fancy Dies three times and stacked them on top of each other using Hero Arts Precision Glue. For the top layer, I applied Hero Arts Clear Embossing & Watermark Ink towards the bottom, applied Hero Arts Gold Embossing Powder and heat set. 


The sentiment from Hero Arts Let's Celebrate was heat embossed too and added below the hello with foam tape. To finish off, I die cut three butterflies from Hero Arts Classic Vellum Layering Paper using the Hero Arts Butterfly Confetti Fancy Die. They were added to the card and finished off with a gold gem in the centre. 

SUPPLIES:


Here are the links to what I have used on the project. Affiliate links are used on some products. This means that if you make a purchase after clicking on my link, I receive a small commission with no extra cost to you. I truly appreciate your support when using these links. Please click on the logo below the product to shop at your favourite store. All products were personally purchased except those from Clearly Besotted, Hero Arts or those marked with an asterisk (*) which were kindly sent to me to use. You can read my full disclosure here.


NEW CORE INK COLOR SYSTEM

Announcing our new Core Ink line! Adding color to your projects could not be easier. This essential collection is the ideal ink for your everyday stamping and cardmaking. It includes fresh new colors and popular existing formulas to create a tightly designed color system. Each Core Ink pad features a new look with a palette on the underside of the lid. By popular demand, we are excited to now offer matching Inkers for every color! The Hero Hues line is rounded out with cardstock, specifically selected to work well with the Core Ink spectrum.


There are 57 Core Ink Pads and Inkers in the new Hero Hues Core Ink system. Six of the colours are brand new (shown in the photo above). The other colours are existing ones - some of these have new names and other's their name has stayed the same. 

This new line is a mash up of the previous Shadow Ink line and Bold Ink lines. That means that although they are called Core Inks, some of the colours have the dye formula and some have the hybrid (part dye and part pigment) formula. This is because some colours just work better in some formulas than others. Each of the inks will be clearly labeled accordingly with what formula they are. 

Also releasing today are 12 new cardstock colours. A lot of these match with the existing colours of ink and are so lovely! You can find out more about the new launches and how the system works here.

COLOR ME ORGANIZED PROMOTION


If you purchase any 6 Core Ink Pads or Ink Pad + Inker Bundles, you will receive a free pack of Core In Pad Labels. Promotion runs from June 20th to 26th June. These labels can be purchased separately HERE too. 

BLOG HOP:


As mentioned, this blog post is part of a fun, inspirational blog hop with prizes. For the hop, you should have arrived here from the amazing Seeka. Next on the hop is the fantastic Lydia. If you get lost along the way, or want to start the hop from the beginning, please head over to the Hero Arts Blog

GIVEAWAY:

We will be giving away one set of the six NEW colors of ink - Core Ink Pads and Inkers - to one lucky commenter. We encourage you to comment on every blog in the hop - the more blogs you comment on, the more chances to win! Comments for contest entry close Sunday, June 26 at 11:59pm PT, and the winner will be announced on the Hero Arts blog the following week.

Thank you so much for stopping by to see me today. I really do appreciate it. I will be sharing a little more about the new Inkers later in the week but in the mean-time, I hope you enjoy the rest of the hop and have a great week ahead!

16 June 2022

Simon Says Stamp | Sunflower Field

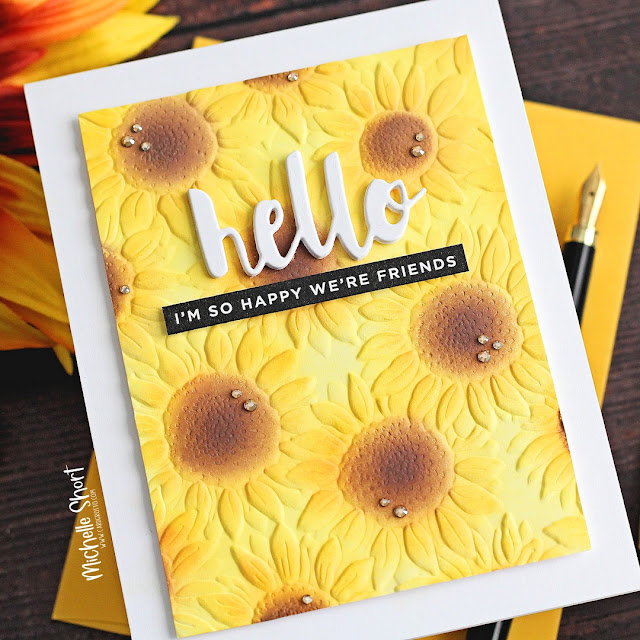
Hello there and happy Thursday to you! Today I have a card to share with you using the new Sunflower Field Embossing Folder & Die Set from the new Simon Says Stamp Let's Chill Release which is out today. This folder is so pretty! I think it would look beautiful just embossed in white but for today's card, I added some colour to it. 

PLEASE NOTE: This post contains affiliate links. Please see below for my full disclosure.


I started off by running the new Simon Says Stamp Sunflower Field Embossing Folder & Die Set through my die cutting machine (the embossing folder only!) with a panel of Tim Holtz White Heavystock inside. I then added ink blending to it with Tim Holtz Squeezed Lemonade and Mustard Seed Distress Oxide Inks using Simon Says Stamp Blending Brushes.


Using Altenew Mini Ink Blending Brushes, I added on Tim Holtz Dried Marigold Distress Ink, followed by Tim Holtz Gathered Twigs Distress Ink for the flower centres. The panel was adhered to an A2 white card base with thin foam tape. I then took the Simon Says Stamp Painted Hello Die and die cut it four times from white cardstock. 


They were stacked one on top of another with Bearly Art Glue and then adhered to the card. I took a Simon Says Stamp CZ Design Happy Reverse Sentiment Strips sheet and die cut the sentiment using a Simon Says Stamp Sentiment Label Die. I painted the edges with a Memento Tuxedo Black Pen and then adhered to the card with black thin foam squares. To finish off, I added a few Spellbinders Gold Mix Color Essential Gems

SUPPLIES:


Here are the links to what I have used on the project. Affiliate links are used on some products. This means that if you make a purchase after clicking on my link, I receive a small commission with no extra cost to you. I truly appreciate your support when using these links. Please click on the logo below the product to shop at your favourite store. All products were personally purchased except those from Clearly Besotted, Hero Arts or those marked with an asterisk (*) which were kindly sent to me to use. You can read my full disclosure here.


There is a die in this set that cuts out one of the sunflowers. I didn't use it today as I wanted the whole background but it is really helpful to have! Thank you so much for stopping by today, I very much appreciate it. I hope you have a wonderful day! 

15 June 2022

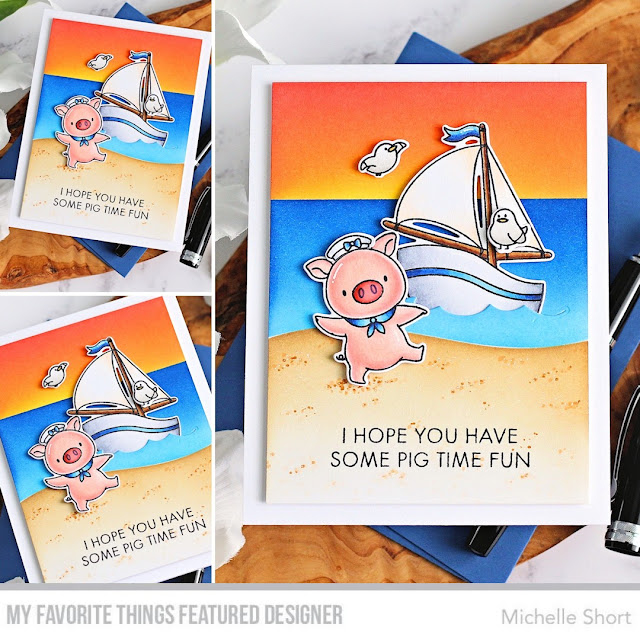
VIDEO | MFT Pig Time Fun

Hello there, I was over on the My Favorite Things YouTube Channel yesterday sharing a card made with the new Pig Time Fun set that was released this month. Pigs are my favourite animal, so of course, I fell in love with the cuteness of this set! 

PLEASE NOTE: This post contains affiliate links. Please see below for my full disclosure.


I started off by stamping the images from the MFT Pig Time Fun Stamp Set on to white cardstock with MFT Extreme Black Ink. I then coloured them with Copic Markers (the colours that I used are listed below the supplies area for reference) and then die cut them out using the MFT Pig Time Fun Die-namics


I took a 3.75" x 5" panel of white cardstock and masked off the bottom section. Above it, I added ink blending for the sky. Using Ink Blending Brushes, I applied Tim Holtz Distress Inks in Squeezed Lemonade, Mustard Seed, Wild Honey, Dried Marigold and Worn Lipstick for a sunset look. I removed the masking and then covered up the sky before placing the MFT Drifts & Hills Stencil below. I ink blended in-between for the ocean using Tim Holtz Distress Inks in Mermaid Lagoon and Prize Ribbon. 


The stencil was cleaned and then flipped over to mask off the water and then I added ink blending for the sand with Tim Holtz Distress Inks in Antique Linen and Gathered Twigs. I added some dots on top with Copic Markers (E55, E53, E50) as well as white gel pen 0.5 for some added texture. I also stamped the sentiment from the set on top. 


I took the wave die from the MFT Friends with Fins Die-namics set and die cut it in to the water, this made an opening for the boat to slot in to to create movement in the ocean and it not be so flat. The panel was then adhered to an A2 white card base with thin foam tape. The seagulls and pig were then added on top. To finish off, I added white gel pen highlights to the images, followed by Nuvo Crystal Glaze to the pig's nose. 

VIDEO:

Here is the video showing how I made the card:


If you are viewing this blog post via email subscription, you can watch the video HERE on YouTube. 

SUPPLIES:


Here are the links to what I have used on the project. Affiliate links are used on some products. This means that if you make a purchase after clicking on my link, I receive a small commission with no extra cost to you. I truly appreciate your support when using these links. Please click on the logo below the product to shop at your favourite store. All products were personally purchased except those from Clearly Besotted, Hero Arts or those marked with an asterisk (*) which were kindly sent to me to use. You can read my full disclosure here.


COPIC MARKERS: Pig - R22, R21, R20, R00, R000, B39, B18, B16, B12. Sailboat - C5, C3, C1/E51, E50/E59, E57, E55/B39, B18, B16, B12. Seagulls - W3, W1, W0, Y17. 

As I mention in the video, I think it would look good if I had some highlights in the water but I was worried that I was going to ruin it at that point. I might still try though! Thank you so much for stopping by today, I really do appreciate it. I hope you have a great day! 

14 June 2022

Spellbinders | Birthday Celebrations

Hello there, today I have three cards to share with you using the new Spellbinders Birthday Celebrations Collection. This collection is releasing today to celebrate Spellbinders 20th Birthday. It is jam packed full with lots of new products for all kinds of celebrating. 

PLEASE NOTE: This post contains affiliate links. Please see below for my full disclosure.


As mentioned, I am sharing three cards today using six products from the collection - three die sets, one embossing folder and two sentiment sets. I love that all of these products mix and match so easily! My first card uses the new Spellbinders Color Block Balloons Etched Dies. These can be used a few different ways - you can colour block them as the name suggests, but there is also a solid version, so you can just use that or add bits of the colour blocking on top too - so fun!


I die cut the pieces for the three balloons in Spellbinders Peridot, Waterfall, Teal Topaz, Raindrop and Cosmic Sky Cardstock. I did also cut the solid shape from white so that I could easily adhere the layers on top. All of the layers were adhered with Bearly Art Glue. I cut the strings from Spellbinders Silver Fox Cardstock and they were adhered to the back of the balloons with tape. 


I took a panel of white cardstock and ran it through my di cutting machine with the Spellbinders Head in the Clouds Embossing Folder. It was then adhered to a white 4" x 5.5" card base with tape runner adhesive. The balloons were adhered on top with thin foam tape and more Bearly Art Glue for the strings. I took the sentiment from the Spellbinders Birthday Unboxing Sentiments Clear Stamp Set and stamped it on to white cardstock with Versafine Clair Nocturne Ink. 


I die cut it out using the coordinating die for the Spellbinders Birthday Unboxing Glimmer Hot Foil Plate & Die Set. This does not completely line up (since it is made for the foil plate) but it almost does, I just had to cut a little bit off at the 'y' and 'd'. It was added to the card with more thin foam tape. Since this card is for my nephew, I wanted to personalise it with his age. I die cut the 8 from the Spellbinders Be Bold Lowercase Alphabet & Numbers Etched Dies set three times and stacked them up on to the smaller balloon. To finish off, I embellished with enamel dots. 


My next card uses the new Spellbinders Topsy Turvy Cake Etched Dies which were cut from Spellbinders Purple Mist, Lilac Blossom, Royal Amethyst and Chamomile Cardstock. The second to top layer was cut from PTI Harvest Gold Cardstock. I cut the icing from Spellbinders Snowdrift Cardstock and then adhered and assembled the layers with Bearly Art Glue


I took a 6.25" x 3.25" panel of white cardstock and ran it through my die cutting machine with the new Spellbinders Party Spots Embossing Folder. It was then adhered to a mini slimline card base with tape runner adhesive. The cake was adhered on top with thin foam tape. 


I foiled the sentiment from the Spellbinders Birthday Unboxing Glimmer Hot Foil Plate & Die Set on to white cardstock with Spellbinders Matte Gold Glimmer Hot Foil Roll. It was die cut out with the coordinating die and added to the card with more thin foam tape. I die cut the stars in the Topsy Turvy Cake set from gold glitter cardstock and added them with thin foam tape to finish. 


My final card for today uses the new Spellbinders Stylized Happy Birthday Etched Dies which were cut from white cardstock four times with Altenew Double-Sided Adhesive Sheet on the back. I then die cut the shadow pieces from vellum. I stacked up three of the words on to the shadow and then one on the back (with the adhesive on both sides) so that I could adhere it to the card easily. 


I took a panel of white cardstock and added ink blending to it with Tim Holtz Distress Oxide Inks. I used Twisted Citron, Peacock Feathers, Prize Ribbon and Villainous Potion. I then ran it through my die cutting machine with the Spellbinders Party Spots Embossing Folder.


I adhered it to an A2 white card base with thin foam tape and then added the happy birthday on top. To finish off, I added a few Lucy's Little Things Raindrops. 

SUPPLIES:


Here are the links to what I have used on the projects. Affiliate links are used on some products. This means that if you make a purchase after clicking on my link, I receive a small commission with no extra cost to you. I truly appreciate your support when using these links. Please click on the logo below the product to shop at your favourite store. All products were personally purchased except those from Clearly Besotted, Hero Arts or those marked with an asterisk (*) which were kindly sent to me to use. You can read my full disclosure here.


I hope I have inspired you with this new collection. I absolutely love it! Perfect for so many occasions. I am always on the look out for sets that work well for masculine cards and this collection definitely fits the bill for me! Thank you so much for stopping by today, I really do appreciate it. Have a great day! 
End of code