Showing posts with label Stamping Bella. Show all posts

28 December 2019

Merry Everything & Happy Always

Hello there, today I have my last Christmas card of the season to share with you. I actually did create  a few more that I haven't shared, but didn't manage to get photographs of them all. I couldn't get a great photograph of this one but as I love the image so much, I had to share!
 

I started off by taking a 4" x 5.25" panel of white cardstock and stamped Stamping Bella Petunia Loves Christmas on to the top portion. I then stamped the sentiment from the Stamping Bella Winter Holiday Sentiment Set below. I coloured Petunia and the wreath with Copic Markers (the colours that I used are listed below the supplies area) and then added shadow beneath her for the ground.
 
 
The panel was added to a 5" x 7" card base made from SSS Lavender Cardstock with foam tape. To finish off, I added Nuvo Crystal Glaze to the berries on Petunia's head.
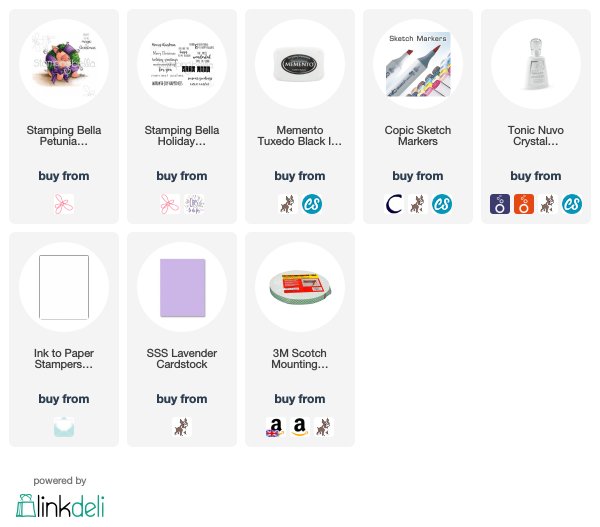
 
SUPPLIES:
 
Here are the links to what I have used on the card. Affiliate links are used on some products. This means that if you make a purchase after clicking on my link, I receive a small commission with no extra cost to you. I truly appreciate your support when using these links. Please click on the logo below the product to shop at your favourite store. All products were personally purchased except those from Clearly Besotted, Hero Arts or those marked with an asterisk (*) which were kindly sent to me to use. You can read my full disclosure here.
 
 
COPIC MARKERS: Petunia - R32, R30, R00, R000. Bow - V09, V17, V15, V12, V01. Wreath & Holly - G46, YG67, YG17, YG25, YG03. Berries - R89, R37, R27, R24. Ground - W5, W3, W1.
 
Right! Now time to move on to New Year cards :) Thanks so much for visiting me today, I really do appreciate it. I hope you have a fantastic weekend!

12 March 2018

Libra Zodiac Girl

Hello there, today I have a little bit of a different project to share with you. I made a little art frame for my mum for Mother's Day yesterday, using the Stamping Bella Uptown Zodiac Girl Libra stamp. I thought the words matched my mum beautifully and although my mum doesn't have long hair now, she did when she was younger so the image does somewhat look like her.
 

I started off by cutting my piece of white cardstock to 6.5" x 6.5" and using a Stamp-a-ma-jig for placement, I stamped the girl first, followed by the wording and then the Libra word on top. The zodiac girl was then simply coloured using Copic Markers. The colours I used are listed below the supplies section. I decided to keep the colour scheme neutral for this one, as you can see.
 
 
Once the colouring was completed. I simply added the piece in to a 6" x 6" shadow box frame. I thought it would just be something different as a little present for her. Since it is a little bit difficult photographing something behind glass, I did take a photo with the piece not behind the glass for you to see too.
 
 
SUPPLIES:

Here are the links to what I have used on the card. Affiliate links are used on some products. This means that if you make a purchase after clicking on my link, I receive a small commission with no extra cost to you. I truly appreciate your support when using these links. Please click on the logo below the product to shop at your favourite store. Products marked with an asterisk (*) were kindly sent to me to use.
 
 
COPIC MARKERS: Skin - E13, E11, E00, E0000, E50. Hair - E49, E57, E27, E25, E23, E21. Dress: C10, C9, C8, C7, C6, C5, C3, C1. Shadow below feet - W1, W0. Scales - YR31, Y28, Y26.
 
Thank you so much for visiting me today, I really do appreciate it. I hope you are all doing well. Have a great day!

21 December 2017

The Littles Christmas

Hello there, today I have two cards to share using two stamps from Stamping Bella. I just love their Christmas images and couldn't resist The Littles Christmas Collection - so cute! My first card uses the Santa's Loot Stamp.


I started off by taking a piece of cardstock that was cut using one of the MFT A2 Stitched Rectangles dies and stamping the image on to this at the top. I then stamped the 'Merry Christmas' sentiment from the Winter Holiday Sentiments set below it. The image was coloured using Copic Markers (the colours used are listed below in the supplies section).
 

The panel was simply adhered to a red A2 card base with foam sheet and DST. To finish off, I added a little SN Sparkle Pen to the white parts of Santa's outfit.


SUPPLIES:

Here are the links to what I have used on the card. Affiliate links are used on some products. This means that if you make a purchase after clicking on my link, I receive a small commission with no extra cost to you. I truly appreciate your support when using these links. Please click on the logo below the product to shop at your favourite store. Products marked with an asterisk (*) were kindly sent to me to use.


COPIC MARKERS: Santa - E13, E11, E00, E000, W3, W1, W00, R89, R37, R29, R27, R24, C10, C8, C6, C5, C3, C1, C0. Bag - E57, E55. Reindeer - E47, E44, E43, E42, E41. Ground - W3, W1, W0.


My next card uses the super cute Elf With A Reindeer On Top Stamp. I used the same products as the above card and stamped the image on to the cardstock panel, along with the same sentiment. The image was also coloured using Copic Markers.


The panel was added to a red A2 card base with foam sheet and DST and then I again, added SN Sparkle Pen to parts of the image.
 

SUPPLIES:

Here are the links to what I have used on the card. Affiliate links are used on some products. This means that if you make a purchase after clicking on my link, I receive a small commission with no extra cost to you. I truly appreciate your support when using these links. Please click on the logo below the product to shop at your favourite store. Products marked with an asterisk (*) were kindly sent to me to use.
 
 
COPIC MARKERS: Elf - E13, E11, E00, E000, R20, YG23, YG03, YG01, C4, C2, C0, R89, R37, R24. Reindeer - E44, E43, E42, E41. Present - R89, R37, R24, YG23, YG03, YG01. Ground - W3, W1, W0.
 
I do apologise that the photos are so rubbish. The lighting here is pretty bad at the moment. It was rather a rush getting the cards sent off to the recipients too! Thanks so much for stopping by to visiting me today. I hope you are having a wonderful week!

27 September 2017

Under The Sea

Hello there, today I am back with my final card for Stamping Bella this month. Today I am using the Under The Sea Backdrop, along with the creatures and the sentiment set. Aren't these sea creatures just adorable?!
 

I started off by taking a piece of cardstock that was cut using the Femme Frames die. I then stamped the Under The Sea Backdrop on to it and coloured it with Copic Markers (the colours I used are listed below the supplies section). I then stamped the sentiment on to this using Black Ink.
 
 
I took the Under The Sea Creatures and stamped these on to more white cardstock with black ink. I coloured them with Copic Markers and then cut them out with the coordinating dies. I added the background piece flat on to a white card base (with ATG) and then added the creatures on top with foam tape. To finish off, I added a little Crystal Glaze to the bubbles.
 
SUPPLIES:
Here are the links to what I have used on the card. Affiliate links are used on some products. This means that if you make a purchase after clicking on my link, I receive a small commission with no extra cost to you. I truly appreciate your support when using these links. Please click on the logo below the product to shop at your favourite store. Products marked with an asterisk (*) were kindly sent to me to use.
 
 
COPIC MARKERS: Sea - B05, B04, B02, B00. Sand - E44, E43, E42, E41. Seaweed/plants - YG17, YG23, YG03, YG01. Turtle - YG17, YG23, YG01, YG63, YG67, YG99. Octopus - V06, V05, V04, V01. Fish - YR16, YR15, YR12, C1, C0. Starfish - Y21, Y32, Y12, YR12.
 
I am so sad that my month with Stamping Bella is up but I have had a great time! A big thank you goes to Em for having me back! For more inspiration using Stamping Bella stamps and dies, please head over to the blog. Thanks so much for visiting me today. I hope you have a great day!

20 September 2017

Especially For You

Hello there, today I have another card to share with you as part of me guest designing with Stamping Bella. One of my favourite lines of theirs is Petunia (the pig). Isn't she just adorable? I love her! My card today uses the super cute Especially For you Petunia.
 

I started off by cutting a circle using the SSS Stitched Circles Dies. I then stamped Petunia inside the circle. The image was then coloured using Copic Markers (the colours I used are listed below the supplies section). I took the sentiment from the Kitty & Mousie set and stamped this on to black cardstock with Versamark ink. I applied white embossing powder and heat set. This was then cut in to two strips.
 
 
I die cut a square from MFT Itsy Bitsy Polka Dots Pastel Paper using the Stitched and Pierced Squares dies set from CraftStash. This was added on to a white 5.25 x 5.25 card base with ATG. I then added the image circle on top with foam tape. The sentiment pieces were then added with more foam tape to finish.
 
SUPPLIES:
Here are the links to what I have used on the card. Affiliate links are used on some products. This means that if you make a purchase after clicking on my link, I receive a small commission with no extra cost to you. I truly appreciate your support when using these links. Please click on the logo below the product to shop at your favourite store. Products marked with an asterisk (*) were kindly sent to me to use.
 
 
COPIC MARKERS: Pig - R32, R21, R20, R12, R11, R00, R000. Grass & leaves - YG17, YG23, YG03, YG01. Chick - Y38, Y19, Y15, Y13, Y00. Sky - B000, B0000, 0.
 
I do hope Stamping Bella continue to make more stamps with Petunia! For more inspiration, please head over to the Stamping Bella Blog. Thanks so much for visiting me today. I hope you have a great day!

13 September 2017

New Beginnings

Hello there, today I am back sharing a card as part of Stamping Bella's Wonderful Wednesdays With feature. My card today uses the beautiful Tiny Townie Fairy Garden Fairy House.
 

I started off by taking a panel of white cardstock and cutting it using the ME Femme Frames Die. I then stamped the house in the middle with Memento Tuxedo Black Ink. I stamped the sentiment in the top left. The image panel was coloured with Copic Markers (the colours I used are listed below the supplies section).
 
 
The panel was added to a white A2 card base with foam sheet and DST. I then added little dots of Copic Spica pen to the flowers and I also added Nuvo Crystal Glaze to the windows for some added shine.
 
SUPPLIES:
Here are the links to what I have used on the card. Affiliate links are used on some products. This means that if you make a purchase after clicking on my link, I receive a small commission with no extra cost to you. I truly appreciate your support when using these links. Please click on the logo below the product to shop at your favourite store. Products marked with an asterisk (*) were kindly sent to me to use.
 
 
COPIC MARKERS: House - E44, E43, E42, E41, B41. Leaves - YG17, YG23, YG01. Flowers - V28, V25, V22, V20, Spica 13 Lilac. Grass - YG17, YG23, YG03, YG01. Sky - B01, B00, B000, B0000.
 
I love creating cards like these. So very simple but I love that the focus is on the image itself and of course, I loved colouring it in! For more inspiration using this set, please head over to the Stamping Bella Blog. Thanks so much for visiting me today. I really do appreciate it. I hope you have a fabulous day!

6 September 2017

Let's Be Mermaids!

Hello there, I am super excited as this month I get to guest with Stamping Bella for their Wonderful Wednesday's With feature. My card today uses the beautiful Tiny Townie Mermaid, along with a fabulous sentiment from the Under The Sea Sentiments Set.
 

I started off by taking a piece of white cardstock and stamping the mermaid and two seaweed/water plants on to it using Memento Tuxedo Black Ink. I then coloured the image using Copic Markers The colours I used are listed below the supplies section). After seeing Michele Boyer colour her mermaid tail in two colours, I thought I would give it a go too and I really like how it came out!
 
 
I took the sentiment from the Under The Sea Sentiments Set and stamped this in the top right hand corner. I then simply adhered the panel on to a white A2 card base with foam sheet and DST.
 
SUPPLIES:
Here are the links to what I have used on the card. Affiliate links are used on some products. This means that if you make a purchase after clicking on my link, I receive a small commission with no extra cost to you. I truly appreciate your support when using these links. Please click on the logo below the product to shop at your favourite store. Products marked with an asterisk (*) were kindly sent to me to use.
 
 
COPIC MARKERS: Mermaid skin - E13, E11, E00, E000, E0000, R00. Hair - E27, E25, E23, E21. Flower - BV11, BV01, BV00, Y13, Y11, E50. Top - BG13, BG11, BG10. Tail - BG13, BG11, BG10, BV11, BV01, BV00, BV0000. Sand - E44, E43, E42, E41. Seaweed/plants - YG23, YG01. Sea background - B000, B0000.
 
How fun is that sentiment? I love it! Thanks so much for visiting me today. For more inspiration using Stamping Bella stamps and dies, please head over to the blog here. I hope you have a great day!

31 May 2017

Best Birthday Bunny

Hello there, you may remember my Stamping Bella Wonderful Wednesday from last week where I said it was my last week. Well, guess who cannot count? Yes, it's me! ;) There are actually five Wednesday's in May so I get to share another card with you! :)
 

I started off by stamping the bunny from the Bunny Wobble and The Peony Stamp Set on to a panel of white cardstock, cut using the ME rectangle Femme Frames die. I them took the sentiment from the Petunia Has A Party Stamp Set and stamped this beside her. I coloured the bunny and flower with Copic Markers, adding a little shading around the image, as well as a ground for her to sit on.
 
 
I took a piece of paper from the Doodlebug Swiss Dot Rainbow Petite Prints Paper Pad and added this to the front of a white A2 card base. I then added the image panel on top with foam tape. To finish off, I added Nuvo Glitter Drops in Blizzard to the centres of the flowers in the bunny's hair/fur and then I added dots on to the peony.
 

SUPPLIES:

Here are the links to what I have used on the card. Please click on the picture or wording to be taken to where I purchased it. Affiliate links are used on some products. This means that if you make a purchase after clicking on my link, I receive a small commission with no extra cost to you. I truly appreciate your support when using these links. Please click on the shop logo below the product to shop at your favourite store.

 
COPIC MARKERS: Bunny - N4, N2, N1, N0, R00, R000. Flowers - BG57, BG53, BG11, Y11, Y00. Peony - BG57, BG53, BG11. Leaves - G43, G40. Ground - W3, W2, W0. Shadow - B0000, 0.
 
Ok, so now that is my last post for Stamping Bella this month! I will be back later in the year with another guest month, but of course, I will be using more Stamping Bella stamps before then! Thanks so much for stopping by today. I hope you have a great day!

24 May 2017

Magical Day

Hello there, today I have my final card to share as part of my guest design Stamping Bella Wonderful Wednesdays With spot. I know I used them two weeks ago, but I couldn't resist using the unicorns again. They are just too adorable!
 

I started off by cutting a panel of white cardstock using the rectangle Mama Elephant Femme Frames die. I then stamped one of the unicorns from the Set of Unicorns. The sentiment is from the Unicorn Sentiments set. I then coloured the unicorn and butterfly with Copic Markers. I added a cloud of colour behind the unicorn using the lightest of the Copic Marker shades in blue, pink-violet, pink-red and purple. It is difficult to see in the photo but I then added dots of colourless blender to add to the magical feel.
 
 
The panel was adhered to a white A2 card base with foam tape. To finish off, I added clear Wink of Stella to the butterfly and the unicorn's wings. I then added three teeny tiny pearls from Lucy's Glossy Eggshell Mix (they are beautiful!).
 
SUPPLIES:
Here are the links to what I have used on the card. Please click on the picture or wording to be taken to where I purchased it. Affiliate links are used on some products. This means that if you make a purchase after clicking on my link, I receive a small commission with no extra cost to you. I truly appreciate your support when using these links. Please click on the shop logo below the product to shop at your favourite store. Products marked with an asterisk (*) were kindly sent to me to use.
 
 
COPIC MARKERS: Unicorn - E40, E41, Y11, Y00, Y000, YG11, YG40. Ground - W1, W0. Background - B000, B0000, R000, R0000, V000, V0000, BV000, BV0000, 0.
 
For more inspiration please do head over to the Stamping Bella blog. A huge thanks to Em for having me guest again. I have loved it! Thanks so much for visiting me today. I hope you have a great day!

17 May 2017

Succulent Chicks

Hello there, I am back today to share a card using the super cute Stamping Bella Succulent Chicks stamp set. Oh my goodness! These chick are adorable!

 
I started off by taking panel of white cardstock and cutting the SSS Tri Square Die in to it. I took the sentiment from the Kitty & Mousie Celebrate A Birthday stamp set (I had to do a bit of masking/selective stamping to get the words I wanted) and stamped this below the windows. I took another piece of white cardstock and placed this behind the window piece. I  then traced around the inside of the windows with a pencil so that I knew where to stamp.
 
 
I took three of the four chicks that come in the set and stamped these in the windows. They were coloured using Copic Markers. I added the image panel to an A2 yellow card base with ATG and then added the window piece on top with foam tape.
 
SUPPLIES:
Here are the links to what I have used on the card. Please click on the picture or wording to be taken to where I purchased it. Affiliate links are used on some products. This means that if you make a purchase after clicking on my link, I receive a small commission with no extra cost to you. I truly appreciate your support when using these links. Please click on the shop logo below the product to shop at your favourite store.
 
 
COPIC MARKERS: Chicks - Y17, Y15, Y13, Y11, YR16, YR15. Succulents - G28, G24, G21, R02, R12, R00. Plant Post - E19, E08, E13. Background - B00, B000, B0000.
 
For more inspiration using this set, as well as the other sets from Stamping Bella, please visit their blog. The Stamping Bella Design Team are amazing! Thanks so much for visiting me today. I hope you have a great rest of the day! I will be back later with a fun Hero Arts blog hop.

10 May 2017

Unicorns Leaping Over Rainbows

Hello there, today is Wednesday so that means another Wonderful Wednesday with Stamping Bella! Today I have a card to share using the Set Of Unicorns and Unicorn Sentiments sets. How adorable are those unicorns?!
 

For my card, I started off by cutting three circles using one of the dies from the Hero Arts Circle Infinity Dies set. I cut two from white cardstock and then a third from vellum. I then taking two of the dies, I made a frame from white cardstock too. I cut one of the cardstock pieces and the vellum piece using the cloud die from the Mama Elephant Landscape Border Dies. I then cut a Lawn Fawn rainbow from white cardstock.
 
 
On the solid circle piece that was left, I blended over blue Copic Markers to create a sky. I then coloured the rainbow using Copic Markers also. I stamped the unicorn from the Set Of Unicorns set with Memento Tuxedo Black Ink. She was coloured using Copic Markers and I added Spica glitter pens to her hair ... because all unicorns have sparkly hair right?! :)
 
 
I fussy cut the unicorn out with scissors and then layered everything up on to a white A2 card base. The circle frame piece was added with foam tape. The sentiment was stamped with black ink on to the card base and then I finished off the card with Sparkling Stars confetti from Little Things from Lucy's Cards.
 
SUPPLIES:
Here are the links to what I have used on the card. Please click on the picture or wording to be taken to where I purchased it. Affiliate links are used on some products. This means that if you make a purchase after clicking on my link, I receive a small commission with no extra cost to you. I truly appreciate your support when using these links. Please click on the shop logo below the product to shop at your favourite store.
 
 
COPIC MARKERS: Unicorn - E41, E40, V09, V06, V05, V04, V01, Spica 13 Lilac, Spica 01 Lavender. Sky - B01, B00, B000, B0000, 0. Rainbow - R89, R37, R27, R24, YR04, YR16, YR14, Y17, Y15, Y13, YG07, YG05, YG03, B04, B02, B00, B69, B66, V17, V15.
 
How fun is that sentiment? I love it! For more inspiration using Stamping Bella products, do head over to their blog. Thanks so much for visiting me today. I hope you have a great day!

3 May 2017

Love Story

Hello there, this month I have the absolute pleasure of guest designing for Stamping Bella for their Wonderful Wednesday's feature. As you all know, I love Stamping Bella images, they are just so much fun to colour and of course, I love to colour!
 

For my card today, I am using the gorgeous Love Story Squidgies stamp set. I love that the couple come in two sizes. I have used the larger of the two and made an 6.75"x4.75" card. I started off by taking a piece of white cardstock and stamping the couple on to it using Memento Tuxedo Black Ink. I then stamped the sentiment next to them. They were coloured using Copic Markers ( I was heavily inspired by the amazing colouring on the packaging by Elaine).
 
 
I made the card base from white cardstock and then added a layer of purple Bazzill cardstock to the front (sorry, I do not know what colour it is). I then added the panel on top with foam tape. To finish off, I added Periwinkle Jewel Drops to the centres of the pink flowers and White Blizzard Glitter Drops to the purple flowers (I applied it with a paintbrush).


SUPPLIES:

Here are the links to what I have used on the card. Please click on the picture or wording to be taken to where I purchased it. Affiliate links are used on some products. This means that if you make a purchase after clicking on my link, I receive a small commission with no extra cost to you. I truly appreciate your support when using these links. Products marked with an asterisk (*) were kindly sent to me to use.


COPIC MARKERS: Girl - Skin: E13, E11, E00, E000, R20. Hair: E25, E23, E21, E31. Dress & Shoes: C3, C1, C0, C00. Veil: BG70, BG10, BV13, BV11, BV00, R21, R11. Boy - Skin: E13, E11, E00, E000, R20. Suit & Hat: 110, C10, C9, C8, C7, C6. Hat Band & Bow Tie: BV13, BV11, BV00. Shoes: W10, W8, C7. Ground - C5, C3, C1, C00.

I have someone in mind to give this card to later in the year. I love being able to tailor make cards for different people. The person receiving the card might not always know that, but it is lovely to be able to do it! Thanks so much for visiting me today. For more inspiration using Stamping Bella stamps, please pop over to their blog. I hope you have a great rest of the day!

16 April 2017

Happy Easter

Hello there and happy Easter to you! Today I have a card to share using the adorable Hoppy Easter Bunny Wobble stamp from Stamping Bella. I thought the image would be really cute for an Easter card to my mum.


I started off by stamping the image on to a piece of white cardstock, using Memento Tuxedo Black Ink. The individual egg and grass are separate stamps, so I masked these off as I went to create a little trail of eggs. The sentiment in the set reads 'hoppy Easter' which is cute but I wanted a 'happy' one so I took the sentiment from the Easter Bunny Chick set instead.


The image was coloured using Copic Markers. I then added clear Wink of Stella to the eggs and then for the chocolate ones, I added on white dots with a gel pen. I took a white 5.25" square card base and added a piece of Doodlebug patterned Paper on to the front panel. The image piece was then added on top with foam sheet.


SUPPLIES:

Here are the links to what I have used on the card. Please click on the picture or wording to be taken to where I purchased it. Affiliate links are used on some products. This means that if you make a purchase after clicking on my link, I receive a small commission with no extra cost to you. I truly appreciate your support when using these links.


COPIC MARKERS - Bunny: C5, C3, C1, C0, R00, R000. Daffodils: Y35, Y18, Y13, Y11. YG17, YG23, YG03. Bag: BG57, BG53. Easter Eggs: R85, R83, R81. E25, E23, E51. Grass: YG17, YG23, YG03, YG01. Sky: B00, B000, B0000, 0.

I am sure I have said this many times but I love Stamping Bella images! They are so lovey to colour! Thanks so much for popping by today. I hope you enjoy the rest of the Easter weekend.
End of code