Hello there, I am back today to share a new craft room tour with you. My last one was done back in March 2014 and since I have changed a few bits around since filming that video, I thought I would do another one. I love watching these videos (and I am obsessed with craft storage) so I hope you do too! For the video without the pictures/chat, please scroll down :)
I have been told that my room looks bigger in photos and on camera than it actually is. My room is fairly small - 2.6m x 2m and it has the boiler in it (the room used to be a bathroom) so a whole corner of the room is taken up with that (in a cupboard). Saying that, I am incredibly lucky and grateful to have any size room. I am constantly changing how I store items, I need things stored/organised in a way that helps my creative process when crafting.
The main bulk of my room (one side of it) is my two desks. These desks are pretty big and I like the depth of them. One is my workspace in terms of my computer, where I blog/study etc. The other side is my crafting side. I have a few shelves above my desk, the one on the computer side holds cables in Gorjuss tins. The ones above my craft desk hold washi tape, embossing folders and plates, colouring pencils, Zig Clean Color Real Brush pens and a few storage items.
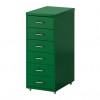
Underneath my desks I have the Helmer drawer units from Ikea. These are great if you have a smaller space. They are not very wide by pretty deep. They hold a lot of my supplies - inks pads (distress and most used), tools, envelopes, adhesives, colouring mediums etc.
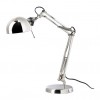
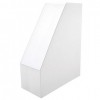
I like to keep my main crafting desk fairly clutter free. I have a lamp from Ikea on there, I have a Daylight bulb in it and this helps when filming videos. I have my Copic Markers (plus glitter pens) in Color Cubbies from Studio 3 Solutions (sadly I believe that they are currently out of business). I also have an acrylic letter rack that holds Copic colour charts, a notebook, Martha Stewart Mini Scoring Board and a little notebook that I write down what products I have used when creating. A large portion of my desk is taken up by my tool carousel. I love this thing, it holds a ton ... scissors, glue, tape runner, bone folder, rulers, corner punches etc.
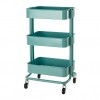
I then have my Raskog, I LOVE this also! On the top shelf I have tools I reach for a lot - pens, kitchen paper, masking tape, post-it tape, stamp press, masking paper, foam tape and my swatch book (you can see this in more detail
here). The middle shelf holds paper pads, and the bottom shelf holds my Cuttlebug and cutting plates.
On the other side of my room/the other wall, there is a cabinet from Ikea (sadly no longer sold) that holds my stamps, dies and 8.5"x11" cardstock (you can see more on that
here). There is also a drawer at the bottom where my ink pads live, as well as some sprays and stamp cleaner.
I also have stackables units. These are great because you can change around the configuration of drawers. The top one holds my 12x12" paper and cardstock and the bottom one holds my embellishments. On the top of them both, I have some magazines and reference books, as well as my camera and stencil storage (you can see more on that
here).
SUPPLIES:
Here are the links to what I am using as storage in my room. Please click on the picture or wording to be taken to where I purchased
it. Affiliate links are used on some products. This means that if you make a
purchase after clicking on my link, I receive a small commission with no extra
cost to you. I truly appreciate your support when using these links.
+ Muji Acrylic DVD boxes, Gorjuss tins and Studio 3 Solutions Color Cubbies - unable to link as they are currently unavailable, sorry.
I should also just mention that I do have a cupboard that is not in my craft room. This holds my larger Xyron machines, older punches, my back up supply of PTI white cardstock and some ink refills. I hope you enjoyed having a look at my craft room today. Do you like craft storage as much as me? Thanks so much for visiting me today, have a great day!


