Showing posts with label Craft Room. Show all posts

1 January 2022

VIDEO | Craft Room Tour 2022

Hello there, today I have a craft room tour to share with you and I thought what better time than to share it on the 1st January 2022! Up until a few years ago (2019 to be exact), I used to share craft room tours annually. The last few years got a bit chaotic but I am finally back sharing one today. 

PLEASE NOTE: This post contains affiliate links. Please see below for my full disclosure.


So to start off with, I need to mention that not everything craft-wise is in here that I own and use. Although I love the space and am very grateful for it, I cannot fit everything in here. In my bedroom I have extra cardstock (the boxes fit underneath my wardrobe so out of sight!), as well as my Cricut Maker and Easy Press. I also have a cupboard in my hallway that holds seasonal stamps and dies, photo props, the cards that I make, Copic refills and various older bits and bobs. Having said that, I still have managed to fit a lot in my room. 

VIDEO:

Here is the video showing the tour: 


If you are viewing this blog post via email subscription, you can watch the video HERE on YouTube. 

CRAFT ROOM DETAILS:

My room is about 2.7 meters x just under 2 meters. On one side of the room are my desks. These are large deep desks that I purchased from Storage4Crafts.co.uk (no longer sold). One is for my main crafting desk and the other is my computer desk. 


On the wall beside my computer desk are Ikea MOSLANDA Picture Ledges. On the top shelf are pens that I like stored vertically and also my Zig Clean Color Real Brush Pens (I think the company advises you to store them horizontally but I have not had a problem so far). On the other two shelves are my liquid watercolours and Distress Reinkers. 


Underneath the shelves is an Ikea SVENSAS Memo Board and on there I write my craft assignments (with a whiteboard marker) and tick them off as I go. I find this very helpful to keep track of my DT work. On the desk, I have some acrylic drawers and in these I hold pens, stickers for my planner and washi tape. Next to my computer is my Blue Yeti Microphone for voiceovers and my Ikea FORSA Lamp that I use as extra light when filming (you can see the accessories that I use for filming here). 

Underneath the desk are Ikea HELMER drawers. These hold so much stuff! Stationery, pens, storage accessories, colouring mediums, colouring pencils, paints, paper - so much!


Above my main crafting desk are two shelves with decorative items on, as well as my paint brushes. Above these on the wall is my Manfrotto Adjustable Arm camera mount. My camcorder fits on the end and that is how I film my videos from above. 


On my main crafting desk is a shelf that I have attached Ikea CAPITA Legs to. This is so that I have just that little bit of extra space on the desk. On the shelf are my Copic Markers, more acrylic drawers with pens and my most used ink pads in. Underneath are little bowls that I use for various different things - I have my absorber cloths in one and hold die cuts and things in another. 

To the right of the shelf is a spinning carousel that holds loads of tools. It holds adhesives, scissors, cutting tools, rulers, brayers, palette knives, erasers, extra nibs for markers - so much! 


Underneath the desk are two Ikea ALEX Drawer Units. The one on the left holds acrylic blocks and stamping tools, ink blending tools, alcohol inks and foil. The one on the right holds essential tools that I use daily like my embossing bag, memo and Post-It tape. It also holds adhesives, Distress Inks (mini ones) and more blending tools, cards and envelopes and mixed media supplies. 


Next up is my Ikea RASKOG and RASHULT Carts. The RASULT is a new addition last year and is a work in progress cart. It holds product that I need to use for upcoming assignments (DT work) and also cards that I have made and still need to write blog posts for. The bottom shelf usually holds products that I have used and still need to put away. 

The RASKOG holds my MISTIs (in cases that Ruth's Reusables kindly made for me) on the top shelf along with my swatch binders. Underneath the Ikea HOGSMA Chopping Board (top) are extra backgrounds, more MISTI's, punch board and gel press. The next shelf holds colour pencils and Arteza markers. The bottom shelf holds my Gemini Junior (with a cover over) and Cricut Joy. Underneath the HOGSMA are Cricut items. 


Above the carts on the wall is my Ikea SKADIS Pegboard. On it I have shelves with more product. On these shelves I store embossing paste, Tonic Nuvo Drops, Distress Paint, Tonic Nuvo Glacier Paste and Mousse. 


On the other wall opposite my desks is my Hemnes Bookcase with Doors (no longer sold, sadly). On top the top of the unit are Ikea KVARNVIK Boxes. The round ones hold wood mounted stamps, the other two hold older Clearly Besotted stamps and Hero Arts Bold Prints (background stamps). 

All of the dividers in my room are made by cutting down Lawn Fawn Mermaid Cardstock, rounding the corners with a We R Memory Keepers Corner Chomper and then laminating them. I use 125 micron laminating pouches (sorry the ones I have are no longer sold). Once laminated I round the corners again, this time with scissors and then label them with my label maker


In the cupboard are all of my stamps. The larger sets are in more Ikea boxes. The 'normal' sized stamps are in acrylic boxes. Big thanks to Sharon for finding a replacement for my old discontinued Muji ones! I also have background stamps and embossing folders in InterDesign containers. I then have my cardstock in magazine files, dies in Crafter's Companion Binder Boxes, and paper in more InterDesign containers. I also store my manual die cutting machines and plates in here. 


Next to that are two Best Craft Organizer Cart Cabinets (without the castors). These hold my ink pads, embossing powders, ribbon, twine, stickers and embellishments. Above that are binders with my stencils in and my little pin flag, as well as 12" x 12" cardstock. 

After filming this video, I received some questions on YouTube so I have filmed an extra one addressing the questions:


You can watch this video on YouTube here

And that's it! If you think I have missed anything or need to know any more information on anything, please just ask in the comments. 

SUPPLIES:


Here are the links to what I have shared in the video. Affiliate links are used on some products. This means that if you make a purchase after clicking on my link, I receive a small commission with no extra cost to you. I truly appreciate your support when using these links. Please click on the logo below the product to shop at your favourite store. All products were personally purchased except those from Clearly Besotted, Hero Arts or those marked with an asterisk (*) which were kindly sent to me to use. You can read my full disclosure here.


I definitely love organisation. I have to be honest and say that I haven't kept up with it as much over the last two years but I am hoping to get back in to it in 2022 (I have lost of swatches to catch up on!). Thank you so much for stopping by today. I really do appreciate it. Have a wonderful day! 

18 March 2020

Craft Room Labelling with the Cricut Joy

Hello here, today I have something a little different to share with you, I thought I would share how I have labelled some storage boxes in my craft room using the Cricut Joy. If you haven't seen my video on using the Cricut Joy for cardmaking, you may want to check that out here.


The Cricut Joy can be used with new smart labels but I do not have any of those just yet. I thought instead I would create labels from removable vinyl and simply stick them to the boxes. These boxes I use for assignments and for putting new products in when they arrive. So let's get into how to make them …
 
 
The first to do is grab the products that you want to use - The Cricut Joy, the mat (if using one), the material being cut - Cricut Black Removable Vinyl and the storage boxes.
 
 
The next thing is to create the labels in Cricut Design Space. I simply typed them using the font tool and changed the size. I then clicked on attach, so that the labels/words would cut out on the mat one below the other. This is helpful when cutting the pieces out later on.
 
 
I then clicked on Make It and picked whether I was using a mat or no mat (the Cricut Joy can cut mat-less using smart materials). In this instance I was using a mat as I wanted to use a full-size roll of removable vinyl.
 
 
I removed the clear protective sheet from the mat and stuck down the vinyl. Top tip - add a sticker to the front of the protective sheet so that you know which way to put it back on to try and avoid dirt and dust getting on the mat.
 
 
I then picked the material from the list. Removable vinyl is not listed, so I just picked the Premium Vinyl setting. I then pressed to feed the mat into the Cricut Joy and then it started cutting.
 
 
These did take some time to cut as they are very intricate but it was great just to leave them cutting while I got on with something else.
 
 
Once cut, you need to remove the vinyl from the mat. Because vinyl has quite a tough backing, you could probably just remove the vinyl from the front of the mat, but it is good to get into a habit of removing the mat from the material, rather than the other way around. This helps to prevent warping and bending.
 
 
I then grabbed my Cricut BrightPad. Not only is this light pad perfect for lots of different things around the craft room, it is great for using with weeding. As you can see, the light shines through the cut lines so it is easy to see where you are weeding (removing the excess vinyl). In this case, the letters are fairly straight forward but it helps massively with more intricate designs.
 
 
Using the weeding tool from the Cricut Joy Basic Tool Set, I removed the inside pieces from the letters. The words/labels were then cut in to strips.
 
 
Next you need to add the letters/words on to Cricut Transfer Tape. This is so that you can pick up the transfer tape (which is clear) and place the vinyl on to whatever you are adding it to, and you can clearly see where to place it down.
 
 
The only thing left to do is to place the labels on to the boxes. I did eye-ball these, if you wanted them to be more precise, you can definitely measure them. I placed the vinyl (attached to the transfer tape) on to the front of the box and then using the scraper tool (from the Cricut Joy Basic Tool Set), I burnished the vinyl on to the box and then peeled away the transfer tape.

 
This is the before - some of the boxes had labels made with a label maker but I had not got round to adding labels to them all. There is absolutely nothing wrong with how these look but I do really like how the new labels turned out:
 
 
SUPPLIES:

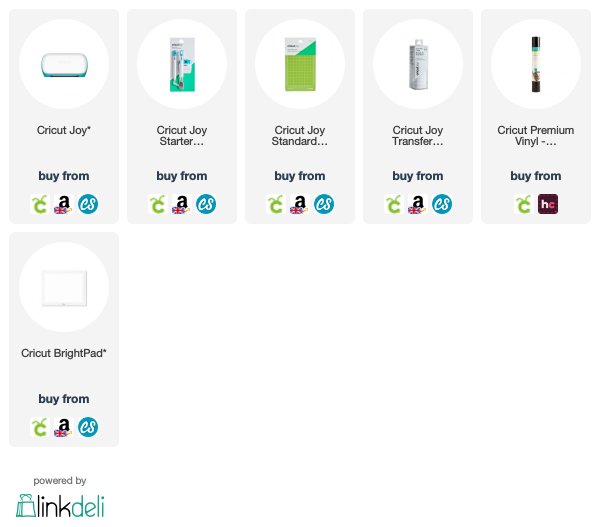
Here are the links to what I have used for this project. Affiliate links are used on some products. This means that if you make a purchase after clicking on my link, I receive a small commission with no extra cost to you. I truly appreciate your support when using these links. Please click on the logo below the product to shop at your favourite store. All products were personally purchased except those from Clearly Besotted, Hero Arts or those marked with an asterisk (*) which were kindly sent to me to use. You can read my full disclosure here.
 
 
As mentioned, they are not perfect and I may have to adjust one or two but overall, I really like how they look and they were really easy to make using the Cricut Joy. Thanks so much for stopping by to see me today, I really do appreciate it. I hope you have a great day and stay safe!

22 October 2019

VIDEO | Craft Room Tour 2019

Hello there, today I have my craft room tour of 2019 to share with you. I tend to do these every year. Not a huge amount has changed since my last one (which is good as it means that my organisational systems ae working for me) but I have moved a few things around and changed a few storage options.
 
 
My craft room is fairly small (although I love it!), it definitely looks bigger on camera than it is in real-life. I recently had a friend come to visit and she mentioned that too, but I try and have the furniture out so that I make the most of the space that I have. I also have two windows in the room, so that helps to keep it fairly bright (depending on the English weather!).

Here is the video showing the tour:


If you are viewing this post via email subscription, you can watch the video on YouTube here.


CRAFT ROOM DETAILS:


I have two large desks that that take up the length of one side of the room. I use one for crafting and one for office work/blogging. Underneath the desks I have Ikea Helmer Drawer Units, as well as one Ikea Alex Unit. The ones on the office side hold stationery and colouring mediums, the ones under my craft desk hold crafting tools, envelopes, Distress Inks and mediums. This is my painting supplies drawer:


I have my watercolour tubes in Tim Holtz Mini Distress Ink Tins, water cups, palettes, reusable cloth, as well as some paints that still need swatching!

 
This is my essentials drawer in the top of my Alex unit. This drawer holds things that I grab for all the time - mini guillotine, mask paper, painters tape, most used embossing powders, coffee filters, embossing bag (in a little Really Useful Box) and my ink blending tools in InterDesign containers.


On my main crafting desk, I have a shelf from Ikea that I added legs to. This helps to raise the things off my desk and gives me a little space underneath to add some bowls (these hold my absorber cloth and things that I might be using whilst making a card). I also have a magnetic one that holds my most used dies in. On top of the shelf I have my Copic Markers (they are in Color Cubbies but sadly the company is no longer in business, you can get something similar at OrganizeMore).
 
A new addition is a Muji Acrylic 5 Drawer unit. This now holds my fine-liners and various other pens. I recently read that Copic Multiliners should be stored horizontally, so moved them to this and I love it! Next to that is my tool carousel. This holds tons of tools and my go-to adhesives as well.


Above my craft desk, I have shelves on the wall. These hold mainly decorative items but I do have washi tape in Ikea Skurar Pots, as well as paint brushes in jars. Above the shelves is my camera mount for filming. You can see more about my filming set up here.


I often get asked about my ink blending tool storage. I keep them in nail polish holders, a tip that I stole from Ardyth. I label the tops of the tools using printed out labels from the Ranger website. I print them on to removable label paper, punch out and stick on. I also have the labels added to pieces of white cardstock and laminated, so that I can put them inside the holder.


Next up is my Raskog. I love this thing! I recently bought a Hogsma Cutting Board to go on the top so that I can have my die cutting machine on top. On the shelves I have more colouring mediums, as well as my Copic Refills. I have a pegboard above that that holds my MISTI tools, as well as stamp cleaner, water spray bottles and some different mediums - Distress Reinkers, Nuvo Glimmer Paste etc.

 
On the other side of the room is my Ikea Hemnes Cabinet. Unfortunately this may not be being sold in the UK currently but I believe that it will come back soon. This holds all my stamps and dies, as well as cardstock, die cutting machines plus much more.

 
My stamps are stored in Ikea Kvarnvik boxes in Avery Elle Stamp & Die Pockets. I do have some acrylic containers that I hold stamps in too, sadly these have been discontinued by Muji. My standalone dies are stored in Crafter's Companion Binders. These do get quite heavy but I find that they do not take up much room, which I like. My cardstock is stored in Grip Seal/Zip Lock Bags that I cut the top off of. These are then stored in magazine files. My manual die cutting machines, as well as patterned paper are stored at the bottom of the cabinet.
 
 
Next to that are The Best Organizer units. These have a wooden exterior and then plastic shelves. You can get different sizes of shelves which is great because you can mix and match and move them around as much as you need to. On the top is my 12"x12" cardstock and paper, as well as my swatch and stencil binders. The drawers hold ink pads as well as felt, foil and embellishments.


Here is one of my ink pad drawers with my Distress Oxides and Hero Arts Reactive Inks in. I store a lot of my dye inks on their sides (I have had no problem storing them this way) but I do store pigment or hybrid inks flat.


This my foiling drawer. I have foils for different things - Deco Foil for using with a laminator or alcohol inks, Gemini FoilPress foil (the machine is stored in my bedroom) and the WRMK Foil Quill to use with my Cricut (which is also stored in my bedroom!).


Last but not least is my computer desk. This is where I write my blog posts and edit photos and videos. Above my desk to the right are Ikea Mosslanda Picture Ledges. These hold my liquid watercolours, as well as some decorative items on the top shelf.
 
As well as my Cricut machines and Gemini FoiPress, I also have some extra items not in the room as well. I have extra adhesives, the cards that I have made, extra cardstock and my Christmas supplies in a cabinet in my hallway.
 

SUPPLIES:

Here are the links to what I have shared in the video and the blog post. Affiliate links are used on some products. This means that if you make a purchase after clicking on my link, I receive a small commission with no extra cost to you. I truly appreciate your support when using these links. Please click on the logo below the product to shop at your favourite store. All products were personally purchased except those from Clearly Besotted, Hero Arts or those marked with an asterisk (*) which were kindly sent to me to use. You can read my full disclosure here.
 
 
If you have made it this far, you deserve a medal! Thank you so much for sticking with me until the end. I love craft room storage and I am always looking for new ways to store things. I hope you have enjoyed taking a look in my happy space today. Thank you so much for visiting. Have a great day!

5 July 2019

VIDEO | Behind The Scenes: Filming Set Up

Hello there, today I have something a little different to share with you - my filming set up. I have shown bits of this in my craft room tours, but I have never shown my set up with my lights out so I thought I would do that today.


My set up is not fancy, I am in no way saying that this is the professional way to do it or this is what you should do (if you make videos/want to get into making videos) but just a behind the scenes look at how I do it. I have to use artificial lighting when making videos. In an ideal world, I wouldn't but even on really sunny days, I just do not get good enough lighting without having artificial lights.


The only problem with this, is that I have to get them in and out each time I want to make a video. This is not a huge problem but I am not going to lie, it would be easier if I didn't have to and I would likely make more videos if I didn't have to set up my room each time, but that is ok!
 
 
I have two Neewer 14" Ring Lights that are usually behind me while I am sitting at my desk. This helps to prevent glare on my media mat. I have two sets of lights - Soft Umbrella Lights and ring lights (which are shown here). I use both sets at different times. The ring lights are great as they do not take up a lot of space but obviously you have to have the space to have them out on the stands. Although, I am sure they could be attached to the ceiling if you wanted.

I also have an Ikea Forsa Lamp that sits on my desk and I use that along with my lights too. I have a piece of tracing paper over the light bulb to help reduce the glare. It is not pretty but it works!

 
My camera attaches to a Manfrotto Variable Friction Arm that attaches to the wall with a Baby Wall Plate. You can now get the system as a whole, with the wall plate attached but at the time of me using this set up, it did not exist. There is a quick release plate at the end so that I can add and remove my camcorder easily. I use a Sony Camcorder to film, along with a Sony Remote Commander. I film from above on to the Tim Holtz Media Mat.
 
 
While I am filming, I like to try and keep my desk clear so that I have as much space as possible. I do keep a small tray on my desk that I keep the supplies on that I will be using in the video. For the most part, my room is set up so that most things are easy to grab whilst I am sitting at my desk.
 
VIDEO:

Here is the video showing my set up:


If you are viewing this blog post via email subscription, you can watch the video HERE on YouTube.
 
SUPPLIES:

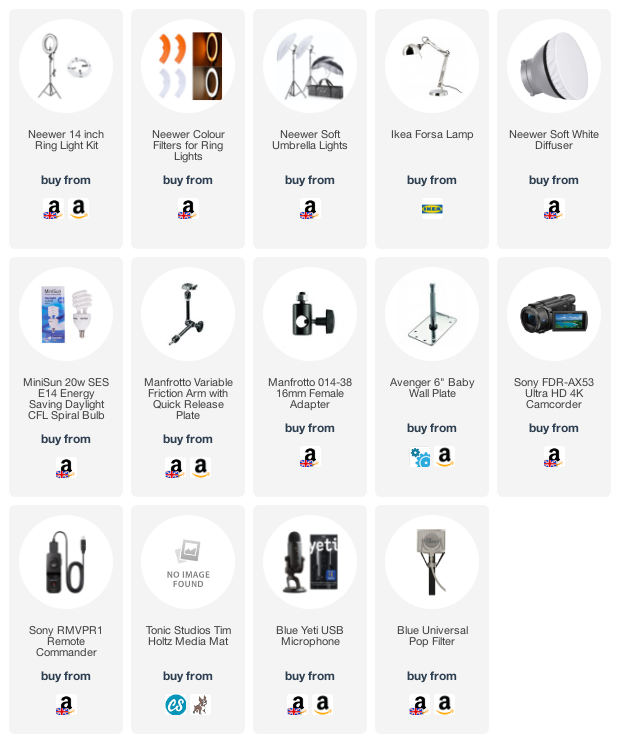
Here are the links to what I shared in the video. Affiliate links are used on some products. This means that if you make a purchase after clicking on my link, I receive a small commission with no extra cost to you. I truly appreciate your support when using these links. Please click on the logo below the product to shop at your favourite store. All products were personally purchased except those from Clearly Besotted, Hero Arts or those marked with an asterisk (*) which were kindly sent to me to use. You can read my full disclosure here.
 
 
I hope you have enjoyed taking a little peek behind the scenes with me on how I film my videos. I hope you have a great day and a wonderful weekend!

3 April 2019

VIDEO | Raskog Cart Organisation 2019

Hello there, if you have been following me for a little while, you will know that I love my Raskog cart. It holds so much stuff and when you have a small craft room like mine, you need all the storage space you can get! I recently picked up the Hogsma Cutting Board to put on the top of it to create a die cutting station for myself.
 
 
The Hogsma Cutting Board has indentations at the side so that it sits perfectly on the top of the Raskog. Up until now, I have been getting my die cutting machine out of my cupboard each time I want to use it and put it back in afterwards. To be honest with you, this has become hard work and so I wanted to see if I could keep it out all of the time. I was not keen to have it on my desk (I like to keep my desk fairly clutter free, where possible) but as soon as I saw the Hogsma Chopping Board, I knew it would be perfect to use for die cutting.
 
 
I do also use a Spellbinders Platinum 6 for die cutting but I can easily grab that and put it on my desk to use it, if needed, as it has a handle. The Gemini Junior doesn't, so that's why I opted to put the Gemini Junior on there as it is harder to move. There is enough space on the top to run my cutting plates through and I have a plug socket next to my Raskog so I can plug my Gemini Junior in when I am using it. I added a 3M hook to the back so that I can hang up the cord to keep it out of the way.
 
 
The great thing with the board is that the cups still fit underneath which is really helpful for me. I have the older Bygel cups but the newer Sunnersta fit as well. Underneath the board there is still room to put things. At the moment, I just have a Cricut Trimmer and pens in it but I will likely add more as time goes on. I am thinking that when I am using my Cricut Maker, I can move my die cutting machine and place the Maker on top, so it will have two uses :)
 
 
The next tier of my cart holds a lot of my pens and pencils. I have them in the Skurar cups from Ikea. The small ones are labelled as candle holders and these hold my multi-liners, water brushes, gel pens, sparkle pens etc. the bigger version are labelled as plant pots and in these I have my Zig Clean Color Real Brush Pens, Arteza Real Brush Pens, Prismacolor pencils and Derwent Coloursoft pencils. I have a basket at the front which holds paper towels. Sadly, this has been discontinued but the OMAR Clip On Basket looks very similar.
 
 
The bottom tier holds more cups. these ones hold mini misters and dropper bottles, Aletenew Artist Markers and Tonic Nuvo Aqua Flow pens. I have my Distress Markers in the Tim Holtz Tin and next to that my Copic Refills in a Really Useful Box, as well as my Copic Airbrush attachments and some gloves.
 
 
To the side of the cart are my heat tools (and an art brush), these are clipped on with 3M hooks.
 
VIDEO:
 
Here is the video showing my updated organisation:


If you are viewing this blog post via email subscription, you can watch the video here on YouTube.
 
SUPPLIES:

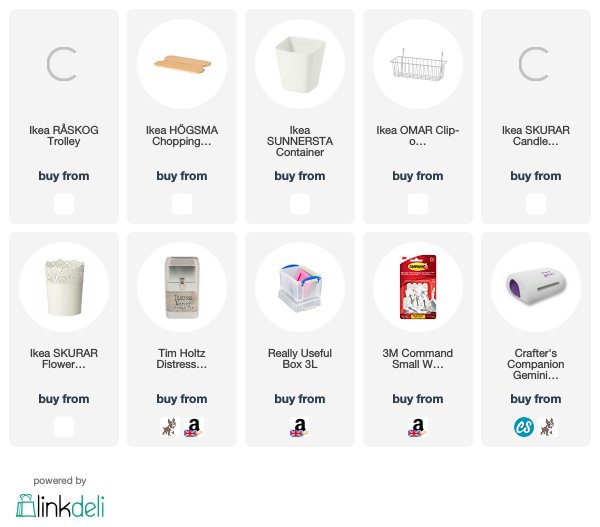
Here are the links to what I shared in the video. Affiliate links are used on some products. This means that if you make a purchase after clicking on my link, I receive a small commission with no extra cost to you. I truly appreciate your support when using these links. Please click on the logo below the product to shop at your favourite store. All products were personally purchased except those from Clearly Besotted, Hero Arts or those marked with an asterisk (*) which were kindly sent to me to use. You can read my full disclosure here.
 
 
I really like how this is working for me. I am finding it so much easier to die cut now. Thank you so much for stopping by today, I really do appreciate it. I hope you have a great rest of the day!
End of code