Showing posts with label Hero Arts. Show all posts

6 September 2025

Simon Says Stamp + Hero Arts STAMPtember 2025 Collaboration

Hello there,  today I have a card to share using the Simon Says Stamp + Hero Arts STAMPtember 2025 collaboration set. It is called Snowy & Bright and features mountains, trees, a snowman, a little dog, two skaters and sentiments. I loved the design of the mountains, so used those as my focal point today. 

This set is exclusive to Simon Says Stamp and once it sells out that's it! So if you like it, grab it while you can! 

PLEASE NOTE: This post contains affiliate links. Please see below for my full disclosure.


I started off by stamping the bottom of the mountains from the Simon Says Stamp + Hero Arts STAMPtember 2025 Stamp Set onto white cardstock using Hero Arts Orchid Core Ink. For the snow at the top, I wanted a light layer of ink, so I grabbed a Hero Arts Small Ink Blending Brush and just dabbed Hero Arts Passion Flower Core Ink at the top of the stamp before stamping them above the bottom part of the mountains. 

There are two mountains in the set, so I stamped one of them twice. I then stamped the dog from the set onto white cardstock using Hero Arts Intens-ified Black Ink. I added a teeny tiny bit of Copic Marker colouring using V15 & V12 for the scarf and C1 for the shading on the dog. I then cut the dog out using the coordinating dies. I cut the dog die another two times from white cardstock and adhered them behind the stamped one. 

Since the mountains are cut in two pieces with the dies, I decided to fussy cut these out using scissors instead. I took a US A2 sized white card base and stamped the sentiment on top using Hero Arts Intensified Black Ink. I also stamped the snow flurries from the set too. The mountains were adhered on top with thin foam tape, followed by the dog.  

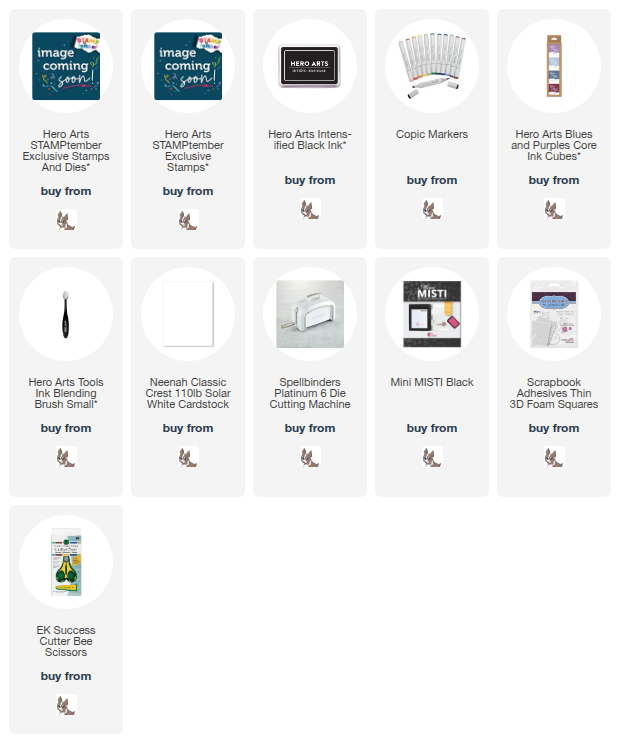
SUPPLIES:


Here are the links to what I have used on the project. Affiliate links are used on some products. This means that if you make a purchase after clicking on my link, I receive a small commission with no extra cost to you. I truly appreciate your support when using these links. Please click on the logo below the product to shop at your favourite store. All products were personally purchased except marked with an asterisk (*) which were kindly sent to me to use. You can read my full disclosure here.


This is such a cute set, very whimsical in feel! Thank you so much for stopping by today, I really do appreciate it. I hope you have a great day! 

1 September 2025

Hero Arts | Hero Studio September 2025 Release Blog Hop + Giveaway

Hello there, I am delighted to be joining Hero Arts today for a fun blog hop to celebrate the Hero Studio September 2025 release. The theme this month is all about autumn and fall. 

The Card Kit of the Month, Stamp & Cut of the Month, Dies of the Month, Layering Stencils of the Month, and Cling of the Month are all releasing today. You can also purchase the Whole Studio which includes all of the kits and a free gift. Today, I am focussing on the Card Kit and the Stamp & Cut of the Month. 

PLEASE NOTE: This post contains affiliate links. Please see below for my full disclosure.

HERO STUDIO CARD KIT OF THE MONTH

The Hero Arts Hero Studio September Card Kit of the Month is so cute! There are lots of squirrels, pumpkins, leaves, mushrooms and all things woodland in the stamp set. There is also a die set in the kit that cuts a tree and you can have the squirrels popping out from it - so cute! 

For my card, I started off by stamping one of the squirrels, the tree stump, two pumpkins, mushrooms and leaves onto Hero Arts Deluxe Smooth White Cardstock using Hero Arts Intens-ified Black Ink. I then coloured the images using Copic Markers (the colours that I used are listed below the supplies for reference). 

I took a panel of Hero Arts Sand Cardstock and stamped the 'hello' from the stamp set on top with Hero Arts Clear Embossing & Watermark Ink. I applied Hero Arts Detail White Embossing Powder and heat set. The panel was then adhered to an A2 sized white card base. The images were adhered on top using a combination of liquid glue and thin foam tape. To finish, I added white gel pen dots. 

WHAT’S IN THE KIT?

The Hero Arts September 2025 Card Kit of the Month includes:

        • Fall is my Favorite 6" x 8" Stamp Set
        • Fall is my Favorite Coordinating Dies
        • Treehouse Die Set
        • Sunset Enamel Dots
        • Brown Twine, 1 yard
        • 10 Sheets of Cardstock- 1 of each color, 5.5" x 8.5" (Truffle, Merlot, Cinnamon, Terra Cotta, Carrot, Coral, Bellini, Beeswax, Saffron, Tuscan)

HERO STUDIO STAMP & CUT OF THE MONTH


For my second card today, I am using the Hero Arts Hero Studio September 2025 Stamp & Cut of the Month called Pick of the Patch. I started off by stamping three of the pumpkins from the stamp set onto Deluxe Smooth White Cardstock using Hero Arts Paradise Core Ink. I then stamped two more using Hero Arts Papaya Core Ink


For the second layer of the images, I used Hero Arts Intens-ified Black Ink. I also stamped the leaves using Hero Arts Green Hills and Butter Bar Core Inks, followed by the second layer in Intens-ified Black. They were then cut out. I have a confession here - I would have used the dies to cut them out but I accidently stamped the second layer of the stamp slightly in the wrong place, this meant that the dies did not line up properly, so I ended up fussy cutting them out with scissors instead. I should have die cut then stamped!


I took a panel of white cardstock and adhered it onto an A2 sized card base made from Hero Arts Sand Cardstock. The pumpkins and leaves were then adhered on top using thin foam tape. I stamped the sentiment in the set onto more white cardstock and die cut it out using the coordinating die. I cut the die another two times and layered them up one on top of each other and then onto the card. To finish, I added dots using an Altenew Fine Liner Pen

BLOG HOP:


For the hop, you should have arrived here from Michelle. Next on the hop is Mindy. If you get lost along the way or want to start the hop from the beginning, please head over to the Hero Arts Blog

GIVEAWAY:

Hero Arts will give away a $50 gift card, drawn from the comments left across the hop. Enter by Friday, September 5th at 11:59pm PT, and the winner will be announced on the Hero Arts blog the following week. Leave a comment on all stops for more chances to win!

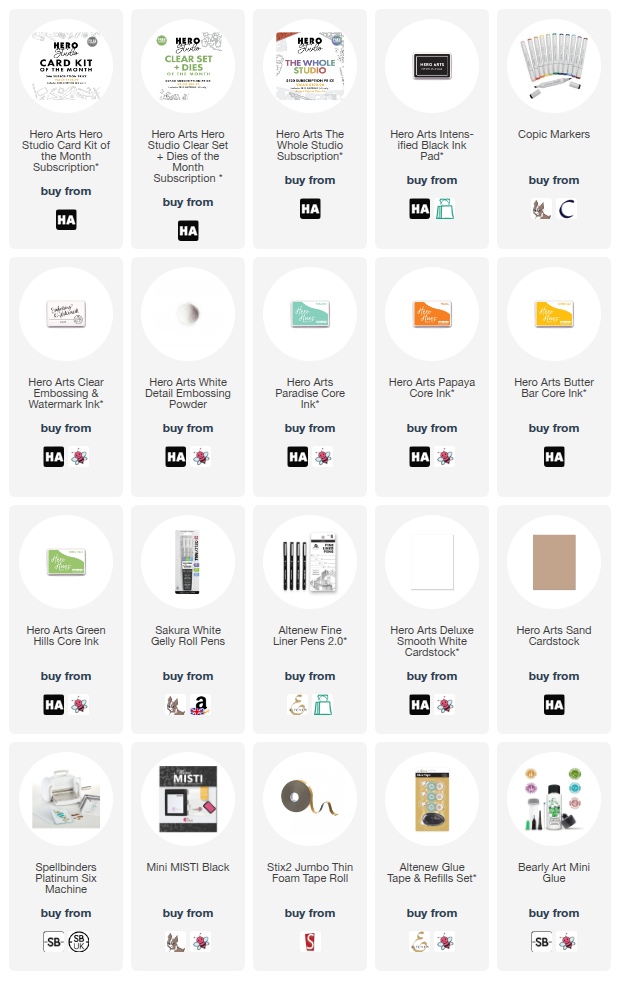
SUPPLIES:


Here are the links to what I have used on the projects. Affiliate links are used on some products. This means that if you make a purchase after clicking on my link, I receive a small commission with no extra cost to you. I truly appreciate your support when using these links. Please click on the logo below the product to shop at your favourite store. All products were personally purchased except marked with an asterisk (*) which were kindly sent to me to use. You can read my full disclosure here.


COPIC MARKERS: Squirrel - E09, E08, E11. Tree stump - E59, E57, E55, E53. Pumpkins - YR18, YR14, YR12/YG99, YG93. Mushrooms - R89, R39, R37, R35/C1/E43, E41. Leaves - YR27, Y17, Y15/RV99, RV69, RV95/G28, YG17, YG23, YG01. 

Thank you so much for stopping by today, I really do appreciate it. I hope you have a wonderful day! 

28 August 2025

Hero Arts | Festive Trees

Hello there, I hope you are well! I am over on the Hero Arts blog today sharing a card using the Festive Tree Dies, adding patterns to the trees for some added interest and sparkle! 

PLEASE NOTE: This post contains affiliate links. Please see below for my full disclosure.


There are two dies in the Hero Arts Festive Tree Etched Dies set. I cut the larger one from a panel of white cardstock to create an aperture. I added Spellbinders ColorWheel Cardstock behind in a diagonal pattern. For the smaller tree, I die cut it from Waterfall Cardstock and then placed the Hero Arts Snowflake Pattern Stencil on top. 

I first added Hero Arts Bermuda Core Ink and then a layer of Hero Glitter Paste for some added sparkle! The sentiment on the card is from the Hero Arts Modern Holiday Greetings Stamp & Cut. I finished off the card with Spellbinders Crystal Mix Color Essentials Gems

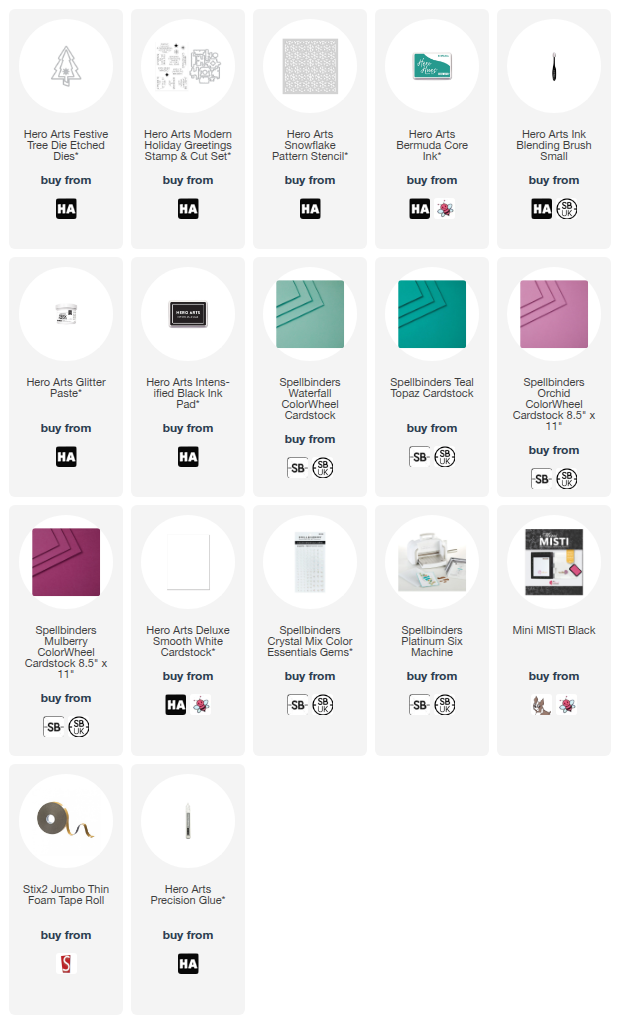
SUPPLIES:


Here are the links to what I have used on the project. Affiliate links are used on some products. This means that if you make a purchase after clicking on my link, I receive a small commission with no extra cost to you. I truly appreciate your support when using these links. Please click on the logo below the product to shop at your favourite store. All products were personally purchased except marked with an asterisk (*) which were kindly sent to me to use. You can read my full disclosure here.


For more information on how I made the card, please head over to the Hero Arts Blog. Thank you so much for stopping by today, I hope you have a great day! 

15 August 2025

Hero Arts | Hocus Pocus

Hello there, today I have a card to share using the Hero Studio August 2025 Die Set of the Month which is called Haunted Gallery. The set consists of lots of different frames and icons that can go inside the frames. For today's card, I just used the icons. 

PLEASE NOTE: This post contains affiliate links. Please see below for my full disclosure.


I started off by die cutting the icons from the Hero Arts Hero Studio August 2025 Die Set of the Month. I cut the cat, hat, bats and base layer of the skull from Hero Arts Pitch Black Cardstock. I cut the moon and top layer of the skull from Spellbinders Classic White ColorWheel Cardstock, and the pumpkin from Spellbinders Carrot ColorWheel Cardstock for the base layer and Hero Arts Papaya Cardstock for the top layer. 


The layers were adhered together using liquid glue. I then added a little Spellbinders Rainforest ColorWheel Cardstock behind the cat to show though for his eyes. I took the sentiment from the Hero Arts Hero Studio August 2025 Card Kit of the Month and stamped it onto Hero Arts Pitch Black Cardstock using Hero Arts Clear Embossing & Watermark Ink. I applied Detail White Embossing Powder and heat set. It was die cut out using the coordinating dies. 


I die cut the die another two times from the same black cardstock and adhered them one on top of another for added dimension. I then took a 4.25" x 5.5" panel of Spellbinders Lilac ColorWheel Cardstock and added ink blending around the edges. I used Hero Arts Amethyst Core Ink, followed by Hero Arts Purple Galaxy Reactive Ink and lastly, Hero Arts Pitch Black Core Ink


I then splattered on new Hero Arts Black Acrylic Speckle Ink around the edges and set it aside to dry. Once dry, It was adhered to a white A2 sized white card base. I adhered the icons on top with a combination of liquid glue and thin foam tape. The sentiment was adhered with liquid glue. To finish, I added Spellbinders Onyx Color Essentials Gems to the centres of the bats. 

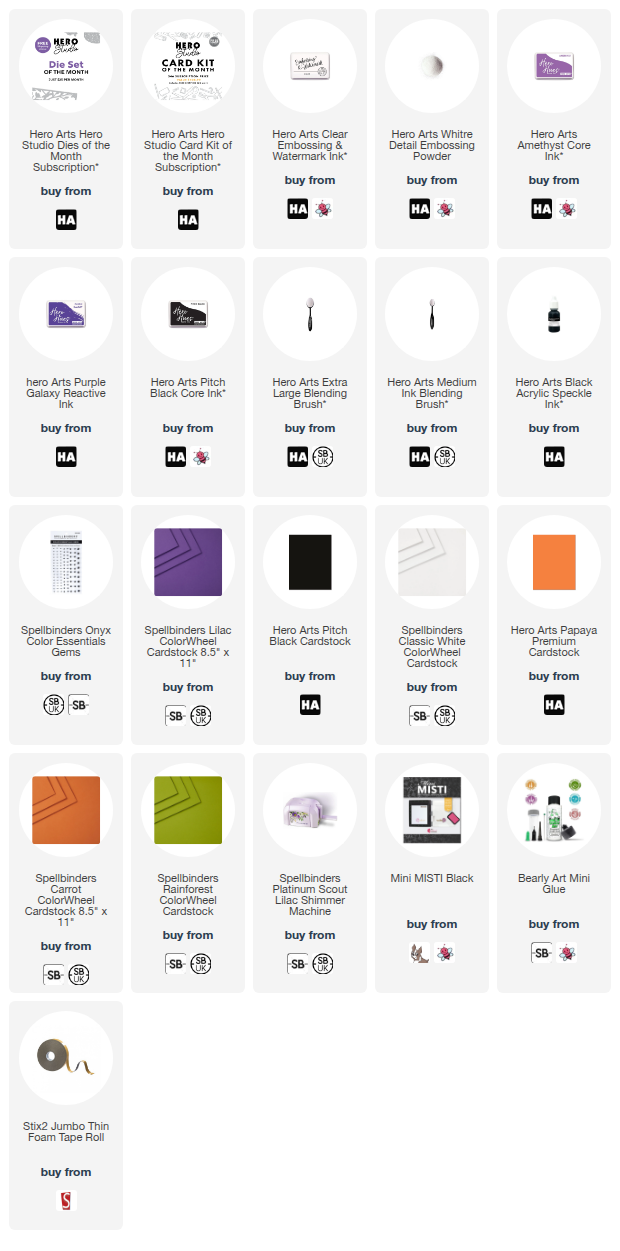
SUPPLIES:


Here are the links to what I have used on the project. Affiliate links are used on some products. This means that if you make a purchase after clicking on my link, I receive a small commission with no extra cost to you. I truly appreciate your support when using these links. Please click on the logo below the product to shop at your favourite store. All products were personally purchased except marked with an asterisk (*) which were kindly sent to me to use. You can read my full disclosure here.


Please check out the Hero Arts website for more examples using this set, including ones using the frames. Thank you so much for stopping by today, I really do appreciate it. I hope you have a wonderful day! 

1 August 2025

Hero Arts | Hero Studio August 2025 Release Blog Hop + Giveaway

Hello there, I am delighted to be joining Hero Arts today for a fun blog hop to celebrate the Hero Studio August 2025 release. The theme this month is Ichabod's Study. The Card Kit of the Month, Stamp & Cut of the Month, Dies of the Month, Layering Stencils of the Month, and Cling of the Month are all releasing today. You can also purchase the Whole Studio which includes all of the kits and a free gift. Today, I am focussing on the Card Kit and the Layering Stencils of the Month. 

PLEASE NOTE: This post contains affiliate links. Please see below for my full disclosure.

HERO STUDIO CARD KIT OF THE MONTH

The Card Kit this month is a fun one! There are lights and special film in the kit so that you can add pictures into the frame. You cannot see them when you add the film on top but then if you light them up, the image appears which is super cool! I went in a different direction with the card I am showing you, but I did want to mention that that is the main idea for this kit. 

I started off my card by stamping the cobweb image from the Hero Studio August 2025 Card Kit of the Month stamp set onto a panel of Spellbinders Lilac ColorWheel Cardstock using Hero Arts Clear Embossing & Watermark Ink. I applied Hero Arts White Detail Embossing Powder and heat set. 

I then added ink blending around the edges of the panel using Hero Arts Amethyst Core Ink, followed by Hero Arts Purple Galaxy Reactive Ink and finally, a little Hero Arts Pitch Black Core Ink. I splattered on Hero Arts Pitch Black Core Inker and then mixed a little Hero Arts Black Hero Wax with water and splattered that on too, before setting aside to dry. 

I die cut four frames from the Hero Studio August 2025 Card Kit of the Month die set from Hero Arts Pitch Black Cardstock. I layered them up so that I had two frames, each two layers of die cuts high. I then die cut three bats from Spellbinders Onyx Metallic Glitter Treasured Cardstock. They were adhered to the card using liquid glue. 

I stamped a sentiment from the kit stamp set onto Hero Arts Pitch Black Cardstock using Hero Arts Clear Embossing & Watermark Ink. I applied Hero Arts Detail White Embossing Powder and heat set. It was die cut out using the coordinating die and adhered to the card. To finish, I embellished with Hero Arts Black Enamel Dots

WHAT’S IN THE KIT?


The Hero Arts August 2025 Card Kit of the Month includes:

Abraham and Katrina 6x8 Stamp Set
Abraham and Katrina Coordinating Dies
Stamping Guide for stamp set
Victorian Frame Die Set
Pear Blosson Press-One Light 2 Pack
10 Sheets of Cardstock- 1 of each color, 5.5" x 8.5" (Cinnamon, Terra Cotta, Carrot, Coral, Bellini, Tuscan, Mint, Waterfall, Blue Spruce, Raven)
Holographic Rainbow Film, 1 sheet - 5.5" x 8.5"
Acetate, 1 sheet - 5.5" x 8.5"

HERO STUDIO LAYERING STENCILS OF THE MONTH

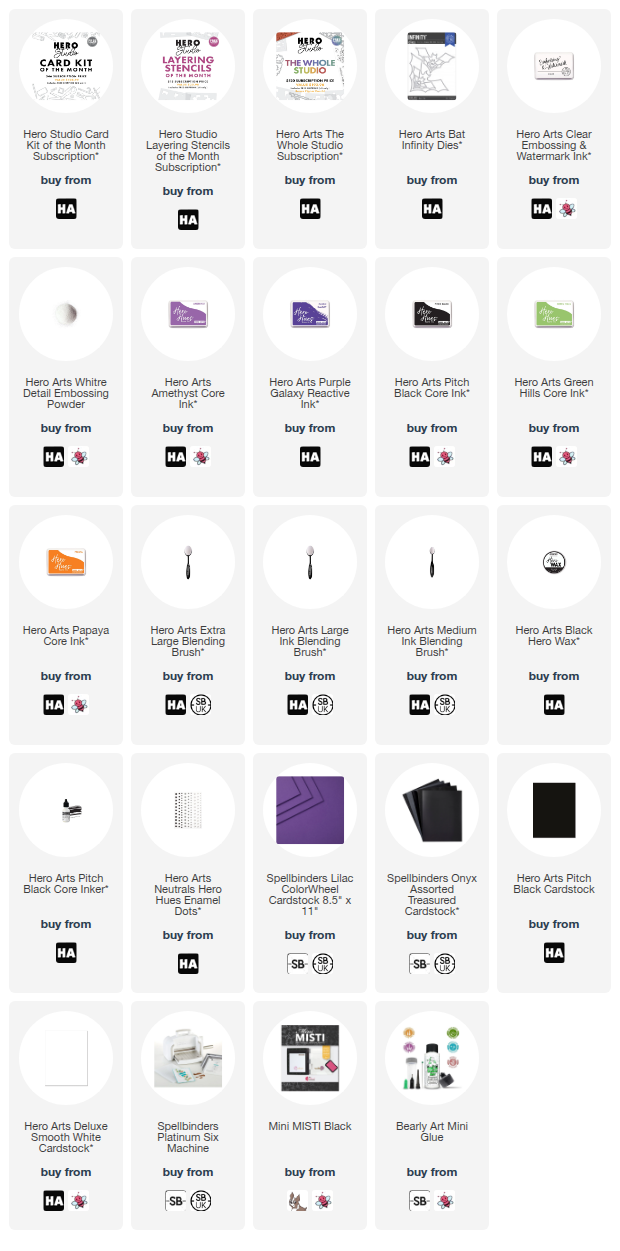
For my stencil card, I started off by taking the Hero Studio August 2025 Layering Stencils of the Month and placed the first one onto a panel of white cardstock. Using an Ink Blending Brush, I blended on Hero Arts Purple Galaxy Reactive Ink. I removed the stencil and placed the next one down, for this layer I used Hero Arts Pitch Black Core Ink

The third layer uses Hero Arts Green Hills Core Ink and the final layer uses Hero Arts Papaya Core Ink. I cut the panel down to 3.5" x 5.75" and then die cut it using the Hero Arts Bat Infinity Dies. I bent the wings up slightly and then adhered them in the same place that I cut them from the stencilled panel, onto a black card base. 

I stamped a sentiment from the Hero Studio August 2025 Card Kit of the Month stamp set onto Hero Arts Pitch Black Cardstock using Hero Arts Clear Embossing & Watermark Ink. I applied Hero Arts White Detail Embossing Powder and heat set. It was die cut out using the coordinating die. I cut the die another three times from black cardstock and layered them up one on top of another before adhering to the card. To finish, I embellished with Hero Arts Black Enamel Dots

WHAT’S IN THE KIT?

The Hero Arts Layering Stencils of the Month called Sunnyside Manor includes four mylar stencils that layer up to create a pattern. 

BLOG HOP:

For the hop, you should have arrived here from Mindy Eggen. Next on the hop is Michelle Lupton. If you get lost along the way or want to start the hop from the beginning, please head over to the Hero Arts Blog

GIVEAWAY:

Hero Arts will give away a $50 gift card, drawn from the comments left across the hop. Enter by Tuesday, August 5th at 11:59pm PT, and the winner will be announced on the Hero Arts blog the following week. Leave a comment on all stops for more chances to win!

SUPPLIES:


Here are the links to what I have used on the projects. Affiliate links are used on some products. This means that if you make a purchase after clicking on my link, I receive a small commission with no extra cost to you. I truly appreciate your support when using these links. Please click on the logo below the product to shop at your favourite store. All products were personally purchased except marked with an asterisk (*) which were kindly sent to me to use. You can read my full disclosure here.


Thank you so much for stopping by today, I really do appreciate it. I hope you have a wonderful time on the rest of the hop and a great day! 

28 July 2025

VIDEO | Layered Hydrangeas

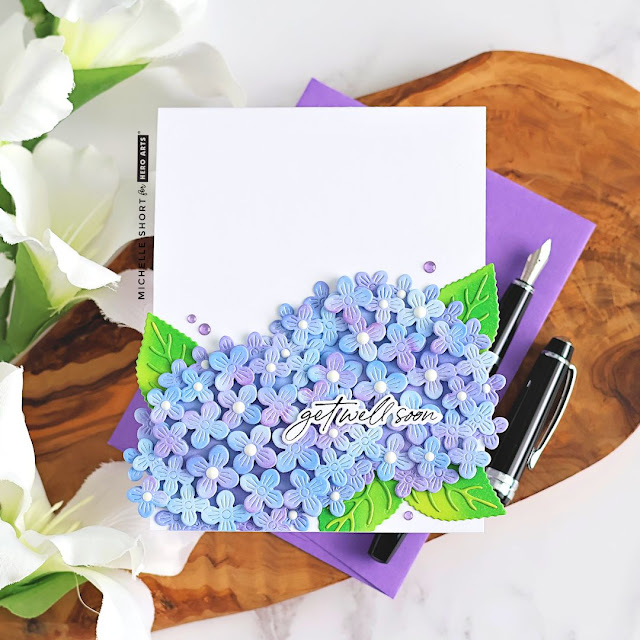
Hello there, today I have a card (and video) to share using the Hero Arts Layered Hydrangeas Etched Dies from the new Seaside Blooms Collection which released last week. This set is so pretty! There are different layers to the hydrangeas and you can customise them as much or as little as you like! 

PLEASE NOTE: This post contains affiliate links. Please see below for my full disclosure.


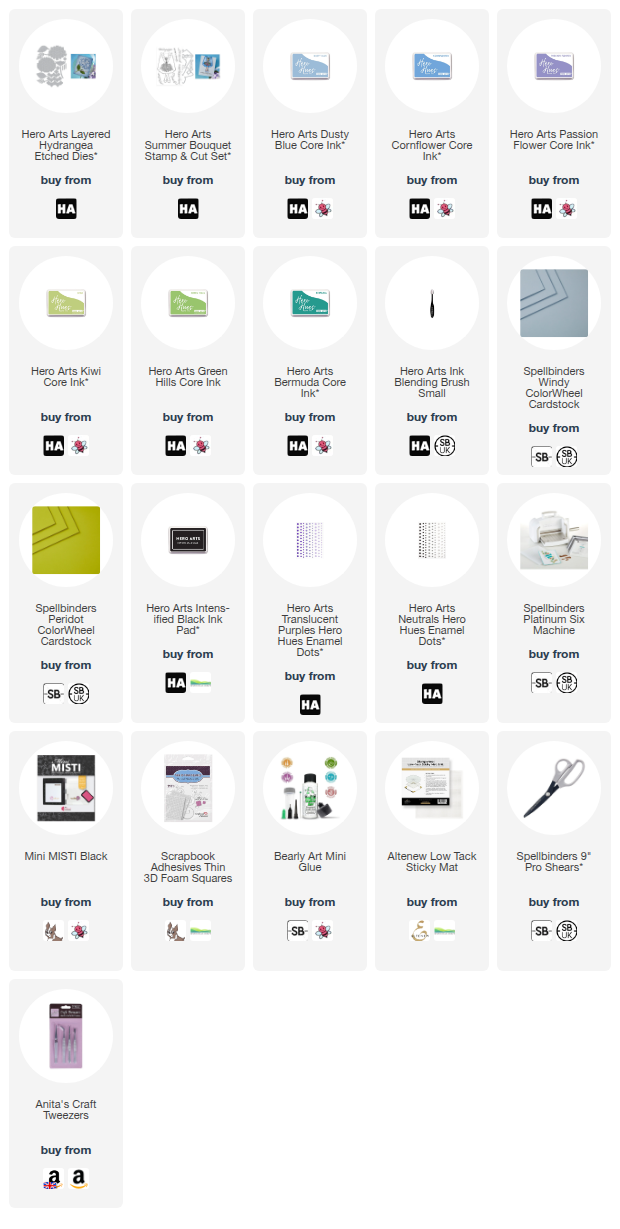
I started off my card by die cutting the Hero Arts Layered Hydrangea Etched Dies from Spellbinders Windy ColorWheel Cardstock for the flowers themselves. I used this colour for all three layers. The leaves were cut from Spellbinders Peridot ColorWheel Cardstock


I added ink blending to the flowers using a Small Blending Brush and Hero Arts Core Inks in Dusty Blue, Cornflower and Passion Flower. For the leaves, I used Hero Arts Kiwi, Green Hills and Bermuda Core Inks. I adhered the leaves first onto a US A2 sized white card base with liquid glue. I then adhered the base layer of the hydrangeas on top, cutting off the excess from the bottom of the card with scissors. 


I adhered the second layer of the hydrangeas with thin foam squares, followed by the third layer. Whilst you can do, I did not add the third layer to all the flowers, so that I had varying heights throughout the bloom. I stamped a sentiment from the Hero Arts Summer Bouquet Stamp & Cut onto white cardstock using Hero Arts Intens-ified Black Ink


It was die cut out using the coordinating die and then I die cut another of the die and adhered it behind the stamped one for added dimension. It was adhered onto the card using liquid glue. I added Hero Hues Translucent Purples Enamel Dots around the flowers and then finished off by adding Hero Arts Neutrals (white) Enamel Dots to the centres of some of the flowers. 

VIDEO:

Here is the video showing how I made the card:


If you are viewing this blog post via email subscription, you can watch the video HERE on YouTube. 

SUPPLIES:


Here are the links to what I have used on the project. Affiliate links are used on some products. This means that if you make a purchase after clicking on my link, I receive a small commission with no extra cost to you. I truly appreciate your support when using these links. Please click on the logo below the product to shop at your favourite store. All products were personally purchased except marked with an asterisk (*) which were kindly sent to me to use. You can read my full disclosure here.


I really love those hydrangeas! And I love that you can use them in different ways! Thank you so much for stopping by today, I really do appreciate it. I hope you have a wonderful day! 

21 July 2025

Hero Arts | Summer Bouquet

Hello there, I am delighted to be joining Hero Arts today to celebrate the release of the July 2025 collections with a fun and inspirational Instagram Hop. My card today uses the Summer Bouquet set from the Seaside Blooms collection. 

PLEASE NOTE: This post contains affiliate links. Please see below for my full disclosure.


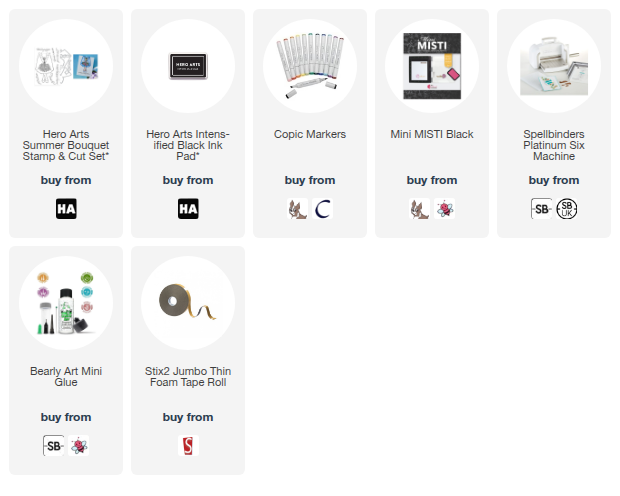
I started off by stamping the main image from the Hero Arts Summer Bouquet Stamp Set onto white cardstock using Hero Arts Intensified Black Ink twice. I stamped it twice so that I could cut out the arms and bouquet to layer them on top of the body, but you do not have to do this as there is a die that cuts it out as one layer too. 


I coloured the images using Copic Markers (the colours that I used are listed below the supplies area for reference) and then I die cut one out as a whole and the other with just the arms and bouquet. I cut this die from white cardstock another two times as well. The bottom layer was adhered to a US A2 sized white card base with thin foam tape. 


I then adhered the white die cuts for the arms and bouquet behind the stamped one and then adhered it on top of the first layer. I then stamped the 'thanks a bunch' sentiment from the set onto white cardstock using Hero Arts Intens-ified Black Ink. It was die cut out and adhered to the card with another two die cut layers behind. 

SUPPLIES:


Here are the links to what I have used on the project. Affiliate links are used on some products. This means that if you make a purchase after clicking on my link, I receive a small commission with no extra cost to you. I truly appreciate your support when using these links. Please click on the logo below the product to shop at your favourite store. All products were personally purchased except marked with an asterisk (*) which were kindly sent to me to use. You can read my full disclosure here.


COPIC MARKERS: Skin - E13, E11, E00, E000. Dress - V09, V17, V15, V12, V01. Shoes - C8, C6, C5, C3. Greenery - G28, YG17, YG23, YG01. Flowers: BV17, BV01/Y11, Y000, Y17/RV 66, RV55, RV52. 

In terms of hopping along to see the inspiration, that's happening over on Instagram. You can visit my Instagram here and Hero Arts here. Thanks so much for stopping by today, I really do appreciate it. I hope you have a great day! 

19 July 2025

Hero Arts | Mix Tape

Hello there, today I have a card to share using the Hero Arts Hero Studio July 2025 Die Set of the Month. The set is called Mix Tape and is so fun! You can create a cassette tape and although I didn't use it today, there is a die that spells out hello using the audio tape/film. So fun! 

PLEASE NOTE: This post contains affiliate links. Please see below for my full disclosure.


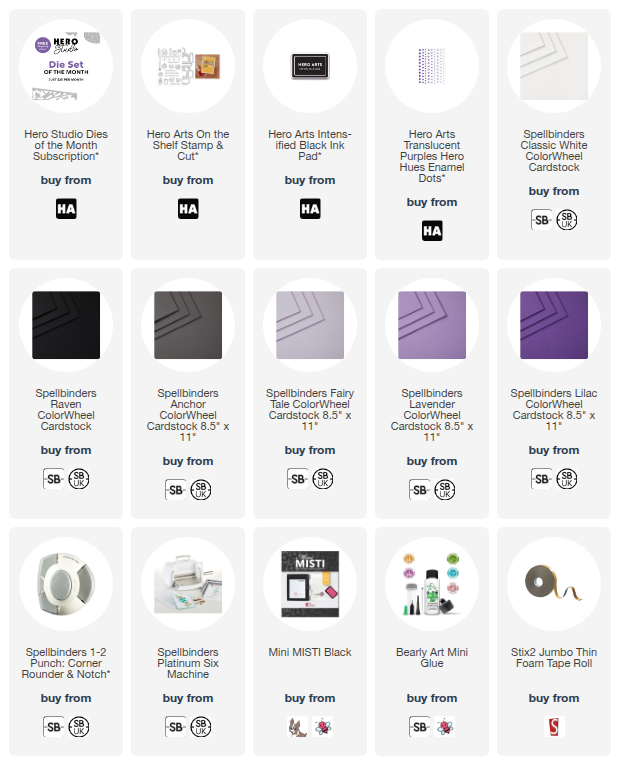
I started off my card by die cutting the Hero Studio July 2025 Die Set of the Month cassette tape using Spellbinders ColorWheel Cardstock. I used Raven for the main part of the tape, cutting the bits that you wind up (in our household with a pencil!) in the middle from Anchor, as well as the pieces in either corner. 


For the label I used Classic White, Fairy Tale, Lavender and Lilac. I adhered the parts together using liquid glue. I took a white US A2 sized card base and rounded the corners using the Spellbinders 1-2 Punch: Corner Rounder & Notch. The tape was then adhered on top using thin foam tape. 


I stamped the sentiment from the Hero Arts On The Shelf Stamp Set onto white cardstock using Hero Arts Intens-ified Black Ink. It was cut into a strip and adhered to the card using foam tape. To finish, I embellished with Hero Arts Hero Hues Purples Enamel Dots

SUPPLIES:


Here are the links to what I have used on the project. Affiliate links are used on some products. This means that if you make a purchase after clicking on my link, I receive a small commission with no extra cost to you. I truly appreciate your support when using these links. Please click on the logo below the product to shop at your favourite store. All products were personally purchased except marked with an asterisk (*) which were kindly sent to me to use. You can read my full disclosure here.


I thought that sentiment worked well with the tape, not that I think anyone that anyone in the era of tapes (myself included there!) is either old or retro, but I thought it was fun! Although, even CDs are clased as old now! Haha! Thank you so much for stopping by today, I really appreciate it. I hope you have a great weekend! 

1 July 2025

Hero Arts | Hero Studio July 2025 Release Blog Hop + Giveaway

Hello there, I am delighted to be joining Hero Arts today for a fun blog hop to celebrate the Hero Studio July 2025 release called Road Trip. The Card Kit of the Month, Stamp & Cut of the Month, Dies of the Month, Layering Stencils of the Month, and Cling of the Month are all releasing today. You can also purchase the Whole Studio which includes all of the kits and a free gift. Today, I am focussing on the Card Kit and the Stamp & Cut of the Month. 

PLEASE NOTE: This post contains affiliate links. Please see below for my full disclosure.

HERO STUDIO CARD KIT OF THE MONTH

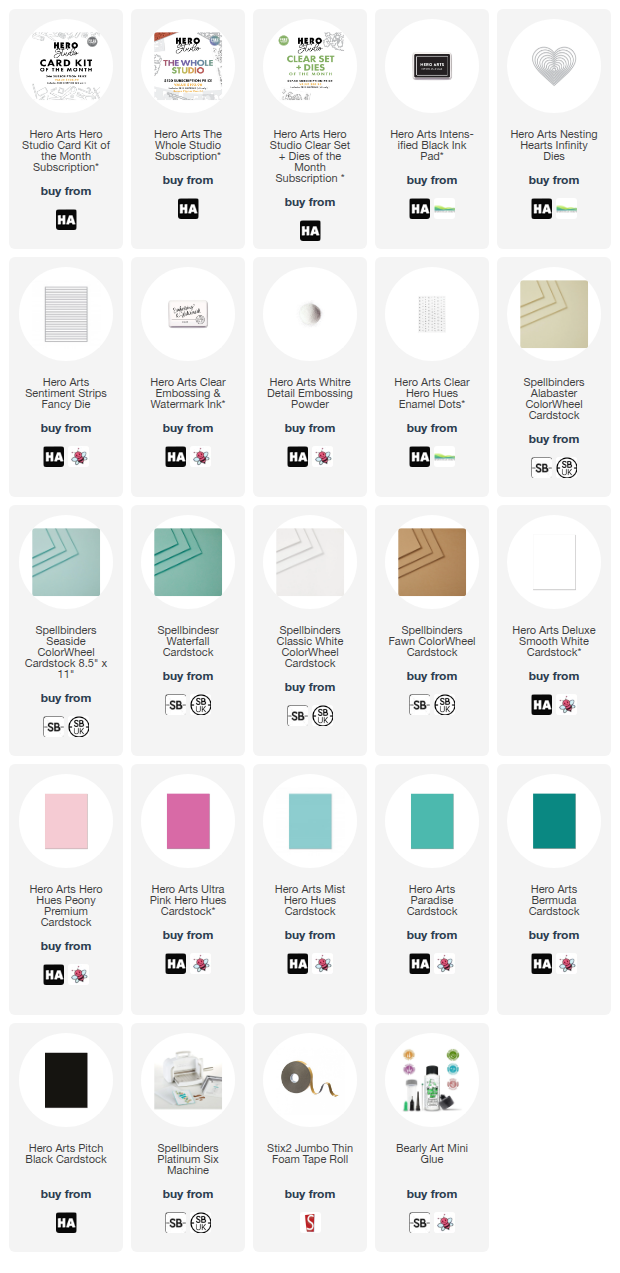
I started off my card by taking the dies from the Hero Studio July 2025 Card Kit of the Month and die cutting the arm and coffee cup. I cut the arm itself from Spellbinders Alabaster ColorWheel Cardstock and the sleeve and cuff from Spellbinders Seaside and Waterfall ColorWheel Cardstock respectively. For the coffee cup, I used Classic White and Fawn Spellbinders ColorWheel Cardstock. 

I assembled the pieces and adhered them using Bearly Art Glue. I then attached the hand to to coffee cup, so that it looks like it is holding it and added thin foam tape on the back. It was adhered to a 4.25" x 5.25" panel of white cardstock. I then stamped the sentiment from the kit stamp set onto more white cardstock using Intens-ified Black Ink

It was die cut out using the coordinating die and then the die cut another two times from white cardstock. I adhered them one on top of another with the stamped one on top (for added dimension) and then adhered onto the panel. The panel was then adhered to a US A2 sized card base made from Waterfall cardstock with foam tape. To finish, I die cut the smallest Hero Arts Nesting Hearts Infinity Dies from Seaside cardstock and adhered it to the coffee cup. 

WHAT’S IN THE KIT?

The Hero Studio July Card Kit of the Month includes:

On the Road HeroScape 6x8 Stamp Set
On the Road HeroScape Coordinating Dies
Let's Go Die Set
Pine Core Ink Cube
10 Sheets of Cardstock- 1 of each colour, 5.5" x 8.5" (Sicily, Coral, Bellini, Waterfall, Teal Topaz, Blue Spruce, Peridot, Beeswax, Saffron, Carrot)
Mirror Paper, 1 sheet - 5.5" x 8.5"

HERO STUDIO STAMP & CUT OF THE MONTH

I started off my card by stamping the 'friend' word from the Hero Studio July 2025 Stamp & Cut of the Month onto white cardstock using Intens-ified Black Ink. There are two parts to the word - the outline and the shadow, so that you can stamp them in different colours if you want to. I just opted to keep mine black and white. It was then die cut out using the coordinating die. I cut the die another four times from white cardstock and stacked and adhered them behind the stamped one. 

I then die cut two hearts from the Hero Arts Nesting Hearts Infinity Dies from white cardstock. On one, I cut a little off the bottom so that it could stand up better and also scored a line at the top to create a hinge. I added adhesive to the hinge and adhered to the back of the other one to create a heart shaped card base. I die cut strips of cardstock using the Hero Arts Sentiment Strips Fancy Dies and adhered them on to the card base, cutting the excess off the sides with scissors. 

I adhered the friend word on top. I then stamped the accompanying sentiment from the kit onto Hero Arts Pitch Black Cardstock with Hero Arts Clear Embossing & Watermark Ink. I applied Hero Arts White Detail Embossing Powder and heat set. It was cut into a strip and adhered to the card with thin foam tape. To finish, I embellished with Hero Hues Clear Enamel Dots

WHAT’S IN THE KIT?

The Hero Studio July 2025 Stamp & Cut of the Month is called Sending Big Hugs. It is a 4" x 6" stamp set with coordinating dies. 

BLOG HOP:

For the hop, you should have arrived here from Michelle Lupton. Next on the hop is Mindy Eggen. Please head over to the Hero Arts Blog for the full list of participants. 

GIVEAWAY:

Hero Arts will give away a $50 gift card, drawn from the comments left across the hop. Enter by 6th July 2025 at 11:59pm PST, and the winner will be announced on the Hero Arts blog the following week. Leave a comment on all stops for more chances to win!


SUPPLIES:


Here are the links to what I have used on the project. Affiliate links are used on some products. This means that if you make a purchase after clicking on my link, I receive a small commission with no extra cost to you. I truly appreciate your support when using these links. Please click on the logo below the product to shop at your favourite store. All products were personally purchased except marked with an asterisk (*) which were kindly sent to me to use. You can read my full disclosure here.


Thank you so much for stopping by today, I really do appreciate it. I hope you have a wonderful rest of the day! 

End of code