Hello there, if you happen to have been visiting my blog for a little while you will know how much I love organisation and craft room storage. I am constantly changing my room around and seeing what works best for me. My last craft room tour was in
November 2012 so I wanted to share a new one with you as a few things have changed. Just to pre-warn you this post is likely to be a long one so if you want to see the video only please scroll down below! :0)
So back in 2012, my room felt quite cramped. It is only a small room anyway but I felt like I had crammed too much stuff in it. There was also a fair amount in there that I did not use and I was struggling for more space. I went back to University this year so I also need some space, non-craft related, to work. My craft room was initially always meant to be a study/office so I wanted to bring back some of that space. The major thing in my room that has changed is this. I now have a dedicated space for my PC/work-study and also for crafting.
I had been searching for white desks to fit the length of my room for years (literally!) but with no luck. Towards the end of last year I managed to find some that fitted - yay! I now have two white rectangular desks; one for my PC and one for craft (links to all products that I can link to are at the end of the post).
As you can see the desk on the left is for my PC, printer etc. and the one on the right is my crafting desk. As much as I can, I like to keep them clean and clutter free. I try not to have too much stuff out as I feel I work better with it being more minimal. I know this is not going to be to everyone's taste though!
Here is a better view of my craft desk:
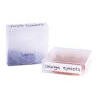
Above my desk are two shelves. The one to the left has a box of washi tape and my embossing folder tin (separate blog post/video
here). The other one has my un-mounted (now EZ Mounted) stamps on (separate blog post/video
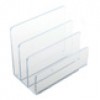
here). I keep them all in DVD cases. On the top of my desk I have a acrylic letter sorter that I keep a notebook in (the Gorjuss one) that I write products that I have used on cards, a Martha Stewart notebook that I keep video ideas/request etc. in, my Martha Stewart Mini Score Board and my Copic Colour Chart.
Next along is my Copic Markers. I keep them in the Color Cubbies from Studio 3 Solutions (separate blog post/video
here). It costs me a small fortune to have them shipped over from the US but I really love them. I think they look nice on my desk. I have a mixture of the Sketch and Ciao but I prefer the Sketch. I also keep some refills in there, as well as my Spica pens and Wink of Stella pens. The WOS brush pens are supposed to be store vertically but to be honest with you, I have had mine quite a while now and they seem fine.
Next is a dispenser for Scotch tape, I use this when adding twine or ribbon to cards, I stick it to the back of the panel with this tape. Last but not least is my tool carousel (separate blog post/video
here). This is from the Great Little Trading Company and I love it. I can fit so many tools in it including pens, glue, craft knives, rulers, scissors, corner chompers etc.
To the right of my desk is my window. On the window sill I have two baskets that I got from eBay. One has my DT stuff in and the other has my new products in. I do have to move these off if there is a lot of sun streaming through the window as I am always worried that it will damage the products.

Under my desks I have the Helmer drawer units from Ikea. I love these! They are pretty narrow in width but they are large depth wise. You can fit a lot in them. The ones under my PC desk hold stationery mainly. The set to the left under my craft desk hold cardstock and ink swatches, black ink pads, my handmade stamps, acrylic blocks and baby wipes to clean stamps, cutting plates for my Cuttlebug, stencils, tools and punches. The one to the right holds adhesives, envelopes, poly bags and wood mounted stamps. Above it there is a little gap which is where I keep my SU Grid Paper. To the side of it is where I keep my guillotine and behind it are some larger cutting boards and my large MS Score Board.

On the other wall of my room I have a shelving unit from Ikea (now sadly discontinued) and my The Best Organiser Stackables Units. The top shelf of my shelving unit holds my A4/11x8.5" cardstock (separate blog post/video
here) and some books/catalogues/magazines along with my EZ Mount foam and felt sheets.
The next shelf holds my clear stamps in Muji DVD boxes (separate blog post/video
here). The next one holds more clear stamps, this time in DVD boxes from Rymans. The one on the left is PTI stamps (in Tim Holtz stamp sleeves), the one in the middle holds more PTI stamps as well as my larger other clear stamps that are in their original packaging - large MFT sets and Waltzingmouse stamps. The one to the right has my longer CBS sets in.
The next shelf holds by thin metal dies in boxes by Crafters Companion (separate blog post/video
here), a QuicKutz die folder and my 6x6" paper pads in photo boxes by Cropper Hopper (separate blog post/video
here).
The drawer at the bottom holds ink pads (separate blog post/video
here), stamp cleaners, ink refills, embossing paste and watercolour markers. Under the drawer is a little gap where I have my ribbon boxes (separate blog post/video
here).
Next up is my Stackables units. On top of them (although you cannot see in the photo) is my Cuttlebug. The top unit has all my 12x12" cardstock and paper (separate blog post/video
here) and the bottom holds all my embellishments (separate blog post/video
here) including glitter, brads, flowers, sequins, buttons, more ribbon, cardstock stickers, twine etc.
Here is the video:
I also have a cupboard that is in my hallway landing where I hold overflow items like more envelopes, cardstock etc. and also flowers, my larger Xyron machines, the cards I have already made and art materials.
PRODUCTS MENTIONED:
WOW! that was long! Well done if you have read all the way to here! I hope you have enjoyed looking around my room. I have enjoyed sharing with you and hope that it may have given you some ideas on how to organise your supplies. Thanks you so much for visiting me today. Happy Mother's Day to all the UK Mum's out there :0)


