27 July 2023

Hero Arts | Soft Floral Stencilling

Hello there, Hero Arts have a lot of coordinating stencils to go with their floral stamp sets, but did you know that a lot of the stencils can work on their own to give a soft no-line look? 

PLEASE NOTE: This post contains affiliate links. Please see below for my full disclosure.


I am over on the Hero Arts blog today sharing a card using the Color Layering Wild Columbine Stencils. I have already made a card using them, which you can see HERE but for that card, I used the stamp set with the stencils. This time, I am using the stencils on their own for a softer look. 


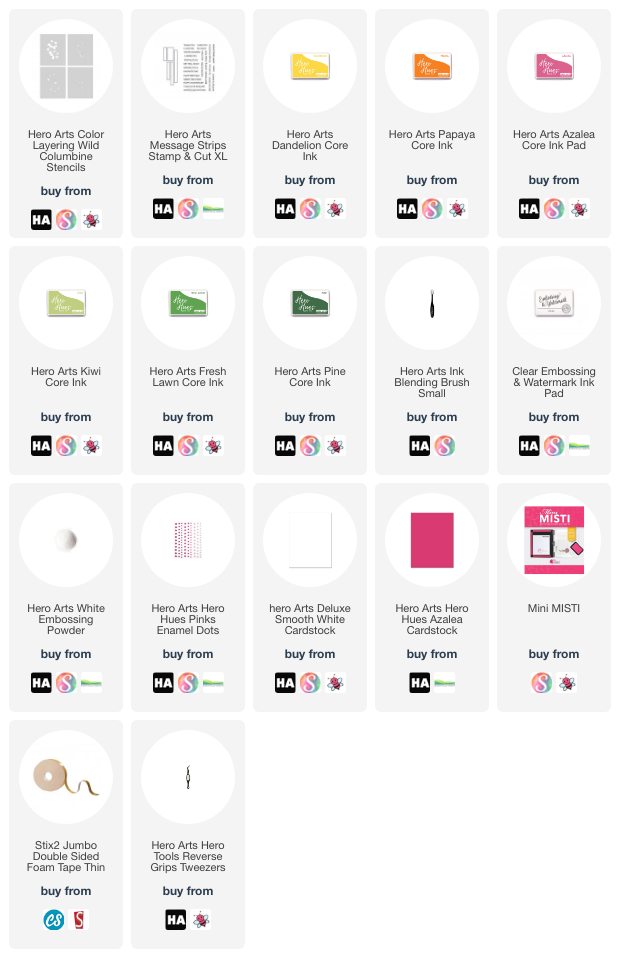
I used Dandelion, Papaya and Azalea Core Inks to blend colour onto the flowers themselves, and Kiwi, Fresh Lawn and Pine Core Inks for the leaves. The sentiment, from the Message Strips Stamp & Cut XL set, is heat embossed onto Azalea Cardstock

SUPPLIES:


Here are the links to what I have used on the project. Affiliate links are used on some products. This means that if you make a purchase after clicking on my link, I receive a small commission with no extra cost to you. I truly appreciate your support when using these links. Please click on the logo below the product to shop at your favourite store. All products were personally purchased except those from Clearly Besotted, Hero Arts or those marked with an asterisk (*) which were kindly sent to me to use. You can read my full disclosure here.


For more information on how I made the card, please head over to the Hero Arts blog. Thank you so much for stopping by today, I really do appreciate it. I hope you have a wonderful day! 

Simon Says Stamp | Golden Fern

Hello there, today I have a card to share using the new Simon Says Stamp Golden Fern Embossing Folder from the Just a Note release, which is out today. Simon Says Stamp kindly sent me this folder and it was a perfect match for me as I love ferns! 

PLEASE NOTE: This post contains affiliate links. Please see below for my full disclosure.


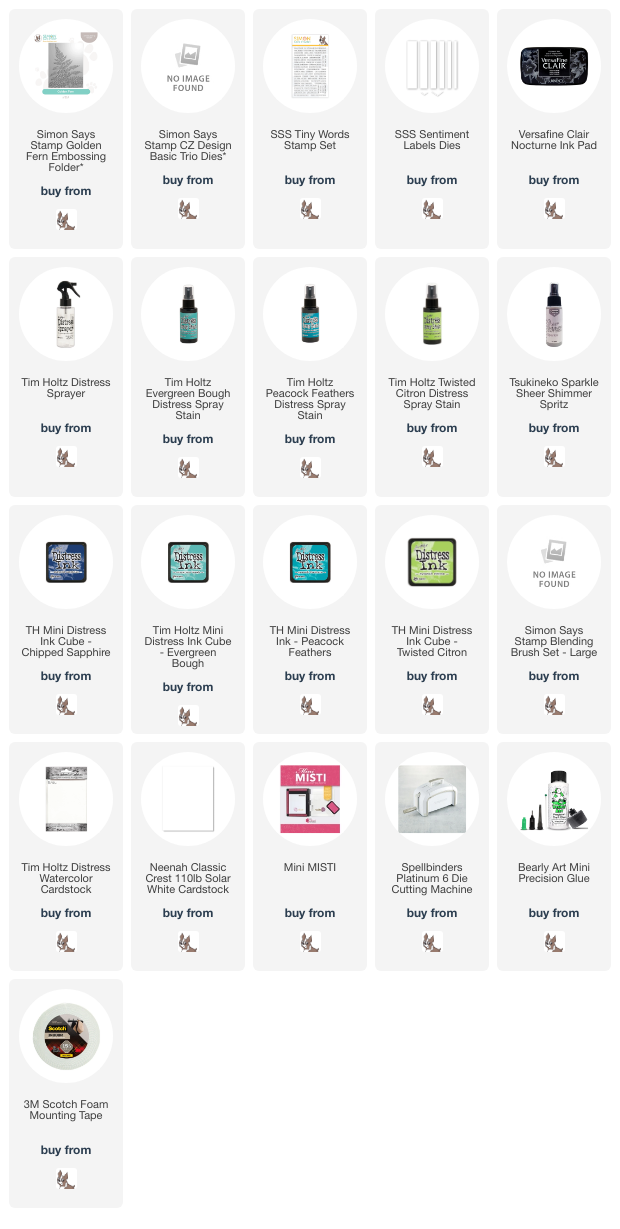
I started off by taking a sheet of Tim Holtz Watercolor Paper and adding a few spritzes of water to it. I then sprayed on Tim Holtz Distress Spray Stains in Evergreen Bough, Peacock Feathers and Twisted Citron. I added a little more water and then sprayed on Tseukineko Sparkle Sheer Shimmer Spritz before setting aside to dry. 


Once almost dry, I placed the panel inside the Simon Says Stamp Golden Fern Embossing Folder and ran it through my die cutting machine. Using Blending Brushes, I blended on Tim Holtz Distress Inks in Chipped SapphireEvergreen Bough, Peacock Feathers and Twisted Citron. Focussing the colour on the fern to darken it. 


The panel was cut down slightly and adhered to a US A2 sized white card base with foam tape. I die cut the 'hello' from the CZ Design Basic Trip Dies set three times from white cardstock and adhered them one on top of another using liquid glue, before adhering to the card. I then stamped a sentiment from the Simon Says Stamp Tiny Words Stamp Set on to white cardstock using Versafine Clair Nocturne Ink. It was cut into a strip and adhered below the 'hello'. 

SUPPLIES:


Here are the links to what I have used on the project. Affiliate links are used on some products. This means that if you make a purchase after clicking on my link, I receive a small commission with no extra cost to you. I truly appreciate your support when using these links. Please click on the logo below the product to shop at your favourite store. All products were personally purchased except those from Clearly Besotted, Hero Arts or those marked with an asterisk (*) which were kindly sent to me to use. You can read my full disclosure here.


I really wanted to let the fern be the focus, so I didn't add much else to it but I do think it would be nice as more of a background for some flowers or foliage too. Thank you so much for stopping by, I really appreciate it. I will be back later with another card. In the mean time, I hope you have a wonderful day! 

26 July 2023

Spellbinders | Poinsettia Bloom

Hello there, okay, so I have an obsession with blue flowers! There is just something about them that I think looks elegant. I do love red poinsettias but for this card, I decided to go blue! I am using the Spellbinders Poinsettia Bloom Etched Dies from Yana's new De-Light-Ful Christmas Collection over at Spellbinders. 

PLEASE NOTE: This post contains affiliate links. Please see below for my full disclosure.


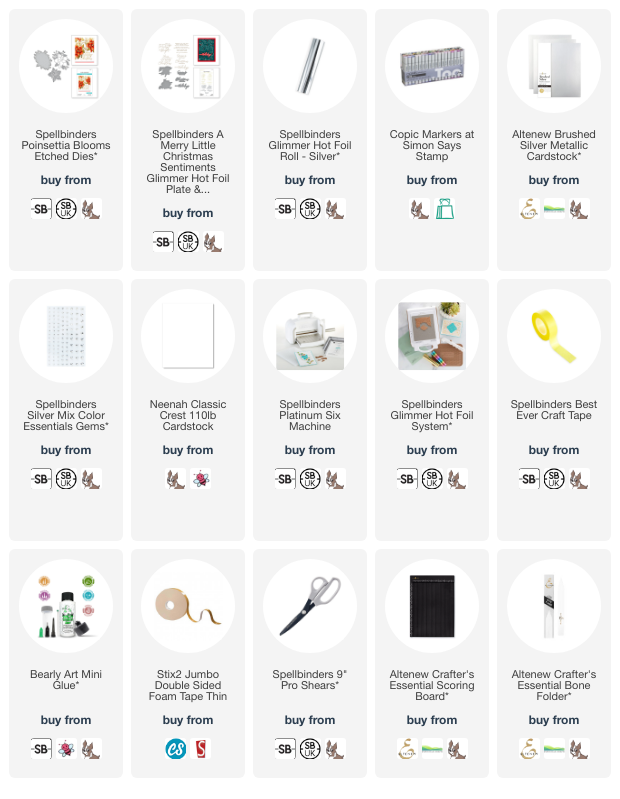
I started off by die cutting the Spellbinders Poinsettia Blooms Etched Dies (just the inside layer, not the frame piece) from white cardstock, twice. Using Copic Markers, I coloured the poinsettia in blue shades - B39, B18, B06 & B04 on one of the layers. I then die cut the same die from Altenew Brushed Silver Metallic Cardstock, popped out the inside pieces and adhered it over the one I coloured. 


I then adhered this to the second white layer, for some added dimension. I added scoring lines to a 3.5" x 4.75" panel of white cardstock (difficult to see in the photos but does add something in real-life!) and adhered it to a US A2 sized white card base with thin foam tape. The poinsettia was adhered on top using Bearly Art Glue. I cut off the excess off the sides using Spellbinders Shears (these are super sharp!). 


I took the sentiment from the Spellbinders A Little Merry Christmas Sentiments Glimmer Hot Foil Plate & Die Set and foiled it on to white cardstock using Spellbinders Silver Foil. It was die cut out and then adhered on to another die cut piece (for added dimension) before adhering to the card. To finish, I embellished with a few Spellbinders Silver Mix Color Essentials Gems

SUPPLIES:


Here are the links to what I have used on the project. Affiliate links are used on some products. This means that if you make a purchase after clicking on my link, I receive a small commission with no extra cost to you. I truly appreciate your support when using these links. Please click on the logo below the product to shop at your favourite store. All products were personally purchased except those from Clearly Besotted, Hero Arts or those marked with an asterisk (*) which were kindly sent to me to use. You can read my full disclosure here.


I almost used gold for the poinsettia. I think it does work well with blue but I am definitely team silver and I think it gave more of a frostier look to the card too! Thank you so much for stopping by today. I apologise for sharing another Christmas card in July, but my next one will be a "normal" one! Have a great day! 

25 July 2023

Spellbinders | Christmas Florals Stencil

Hello there, I was over on the Spellbinders blog a few days ago, sharing a step-by-step photo tutorial on how to use the Christmas Florals Stencil. This is a set of stencils that layer up to create a floral image. There is also a bundle you can purchase with a coordinating die too. 

PLEASE NOTE: This post contains affiliate links. Please see below for my full disclosure.


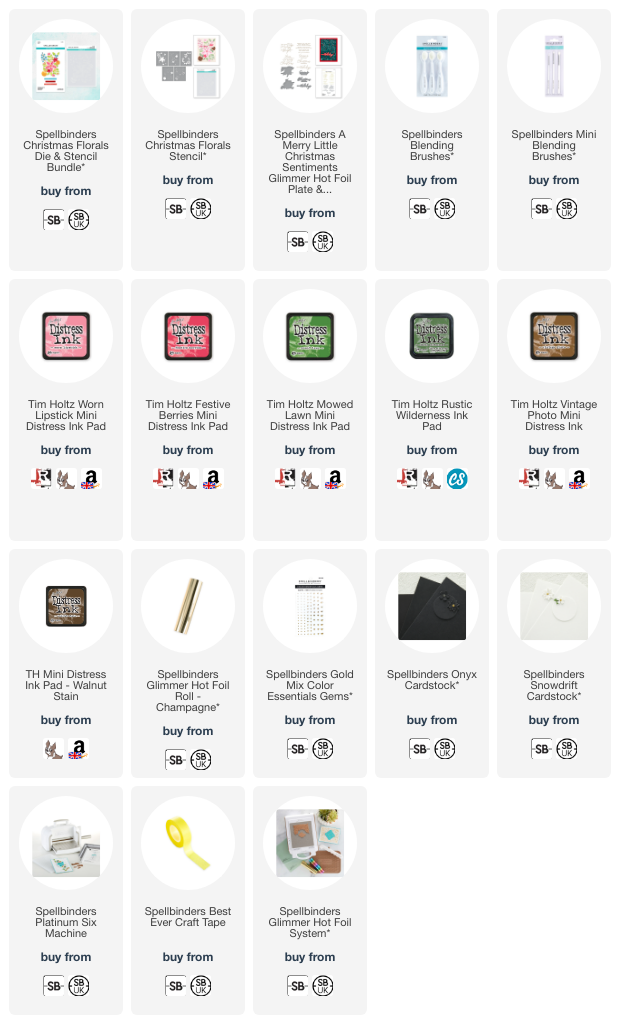
I stencilled the Spellbinders Christmas Florals Stencil on to white cardstock using various shades of Distress Ink (two reds, two greens and two browns). I kept the colours fairly traditional for the image but then popped it up on a black card base for some added contrast. The sentiment from A Merry Little Christmas Sentiments Hot Foil Plate & Die Set was foiled in Champagne Foil and adhered on top. To finish off, I added a few Spellbinders Gold Mix Color Essentials Gems

SUPPLIES:


Here are the links to what I have used on the project. Affiliate links are used on some products. This means that if you make a purchase after clicking on my link, I receive a small commission with no extra cost to you. I truly appreciate your support when using these links. Please click on the logo below the product to shop at your favourite store. All products were personally purchased except those from Clearly Besotted, Hero Arts or those marked with an asterisk (*) which were kindly sent to me to use. You can read my full disclosure here.


For a step-by-step photo tutorial on how I made the card, including all the stencil layers, please head over to the Spellbinders blog. Thank you so much for stopping by today, I hope you have a wonderful day! 

24 July 2023

VIDEO | Soft Watercolour Flowers

Hello there, I hope you are well. Today I have a card and video to share using the Altenew Craft-A-Flower: Fragrant Peony Layering Die Set. My go-to for colouring these flowers is to use ink blending, but I wanted a soft watercolour look, so I grabbed my dual tip pens and had fun watercolouring! 

PLEASE NOTE: This post contains affiliate links. Please see below for my full disclosure.


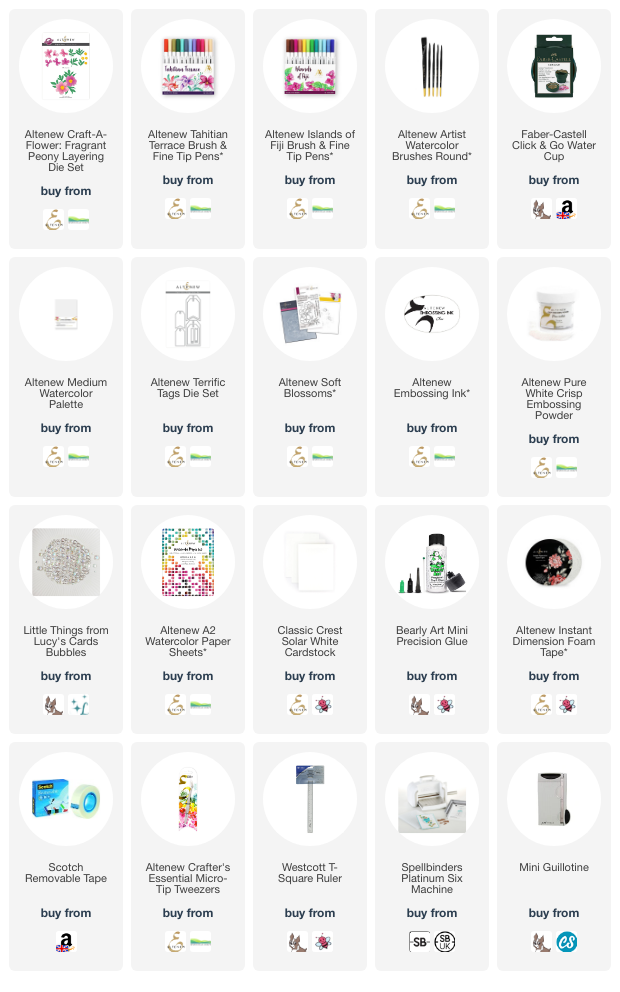
I started off by die cutting the Altenew Craft-A-Flower: Fragrant Peony Layering Die Set from Altenew Watercolor Paper. I then added colour to the flowers using Altenew Dual Tip Pens and an Altenew Round Size 4 Watercolor Brush


I used Eastern Sky and Hydrangea for the blue/purple flowers and Pink Pearl and Coral Berry for the pink flowers. These colours are from the Altenew Tahitian Terrace Dual Tip Pens set. For the leaves, I used Bamboo and Grass Field from the Altenew Islands of Fiji Dual Pens set. I set them aside to dry and then assembled and adhered using liquid glue. 


I took an Altenew Terrific Tags die and partially die cut it (just the bottom part) from a panel of white cardstock. I wanted a fishtail banner piece to add to my card to add the flowers on to. By partially die cutting it, I could cut the rest off the top with a mini guillotine and create a banner, rather than a tag. It was then adhered to a US A2 sized white card base using Altenew Instant Dimension Foam Tape


I adhered the flowers and leaves on top using liquid glue. I stamped a sentiment from the Altenew Soft Blossoms Stamp Set on to black cardstock using Altenew Embossing Ink. I applied Altenew Pure White Crisp Embossing Powder and heat set. It was cut into a strip and adhered to the card with more foam tape. To finish off, I added a few Iridescent Bubbles embellishments. 

VIDEO:

Here is the video showing how I made the card:


If you are viewing this blog post via email subscription, you can watch the video HERE on YouTube. 


It was really nice to use a different colouring medium/method for the flowers and I must do it more often. The colour combination was inspired by this photo I took of the hydrangeas in my garden. 


Whilst the hydrangeas are definitely brighter, I really love the different tones - blue, purple and pink on one bloom! Instead of doing that for my card, I thought I would have a pink flower and a blue/purple one. The photo was taken as part of the Altenew July 2023 Inspiration Challenge. If you are inspired by the photo, I would love to see what you make! You have until 31st July 2023 to enter. 

SUPPLIES:


Here are the links to what I have used on the project. Affiliate links are used on some products. This means that if you make a purchase after clicking on my link, I receive a small commission with no extra cost to you. I truly appreciate your support when using these links. Please click on the logo below the product to shop at your favourite store. All products were personally purchased except those from Clearly Besotted, Hero Arts or those marked with an asterisk (*) which were kindly sent to me to use. You can read my full disclosure here.


Thank you so much for stopping by my blog today. Whether you stop by often or occasionally, or if this is the first time visiting. I really appreciate you taking the time to do so. Wishing you a wonderful day! 

21 July 2023

Spellbinders | July 2023 Clubs Inspiration Blog Hop

Hello there, I am delighted to be joining Spellbinders today for a fun blog hop to share more inspiration using the July 2023 Clubs. I already shared one card using the July 2023 Large Die of the Month Club Kit, which you can see here, today I am sharing another. Please note, if you want to receive the clubs being shared today and you are not currently a subscriber, you will need to subscribe by 27th July 2023. 

PLEASE NOTE: This post contains affiliate links. Please see below for my full disclosure.


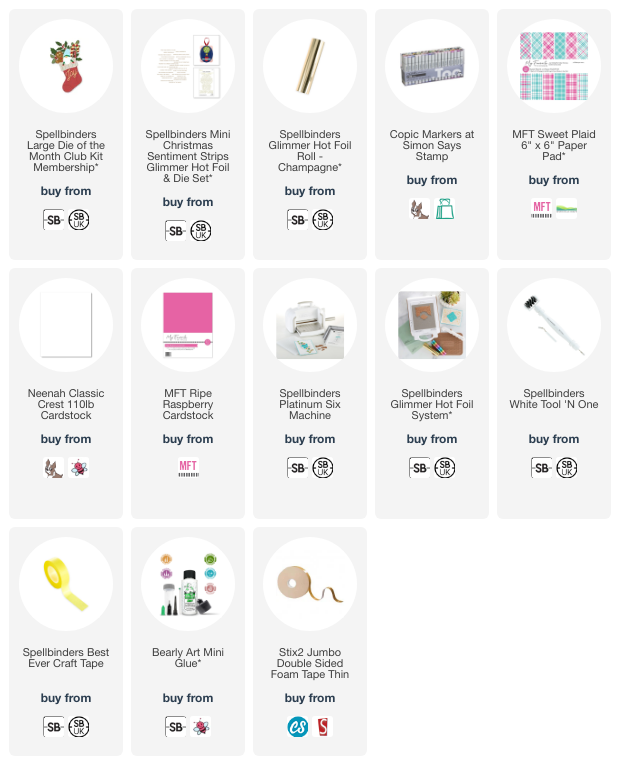
I started off my card by die cutting the stocking in the Spellbinders July 2023 Large Die of the Month Club Kit from MFT Sweet Plaid Paper Pad (I am so sorry but I have just found out this is now discontinued) and Ripe Raspberry cardstock. I did also cut the base layer from white cardstock. I added the plaid layer to the white cardstock (for added stability) and then added shading to the pink parts using Copic Markers. 


I die cut the candy canes and mistletoe from white cardstock and coloured them using Copic Markers (the colours that I have used are listed below the supplies area). I cut the berries and stripes for the candy canes from white cardstock and adhered them on top using Bearly Art Glue. The stocking was adhered first, using thin foam tape, to a US A2 sized white card base. 


I then popped the mistletoe and candy canes behind, so it looks like they are popping out of the stocking. I foiled a sentiment from the Spellbinders Mini Christmas Sentiment Strips Glimmer Hot Foil Plate & Die Set on to white cardstock using Spellbinders Champagne Foil. It was cut into two strips and adhered to the card using foam tape. 

BLOG HOP:


As mentioned, this post is part of a fun, inspirational blog hop with prizes. For the hop, you should have arrived here from the incredibly talented Heejung Hunsberger. Next on the hop is amazing Allison Frazier. If you get lost along the way, or want to start the hop from the beginning, please head over to the Spellbinders blog

GIVEAWAY:

Spellbinders is giving away a $25 gift certificate to 3 lucky blog hop readers, chosen from the comments left on the Spellbinders blog. Giveaway closes on 23rd July at 11.59pm MST. The winners will be announced on the Spellbinders blog the following Wednesday. The winner will be responsible for any shipping costs, duties and taxes. Store credit/gift cards cannot be applied to club subscriptions.

SUPPLIES:


Here are the links to what I have used on the project. Affiliate links are used on some products. This means that if you make a purchase after clicking on my link, I receive a small commission with no extra cost to you. I truly appreciate your support when using these links. Please click on the logo below the product to shop at your favourite store. All products were personally purchased except those from Clearly Besotted, Hero Arts or those marked with an asterisk (*) which were kindly sent to me to use. You can read my full disclosure here.


COPIC MARKERS: Pink stocking parts - RV66, RV55, RV52. Mistletoe - BG49, BG15, BG13, BG11. Candy canes - R39, R37, R35. 

Thank you so much for stopping by to see me today, I really do appreciate it. I hope you have a wonderful time on the rest of the hop and have a great rest of the day too! Take care! 

20 July 2023

VIDEO | Cotton Candy Critters

Hello there, I am delighted to be over on the My Favorite Things YouTube Channel today, sharing a circle card using Cotton Candy Critters, from the July 2023 release. I really enjoy making circle cards and I thought these images worked well for the shape. 

PLEASE NOTE: This post contains affiliate links. Please see below for my full disclosure.


Here in the UK, cotton candy is called candy floss! So I will call it that in my post, but do be assured that I am referring to cotton candy, if that is what it is called where you are! :)


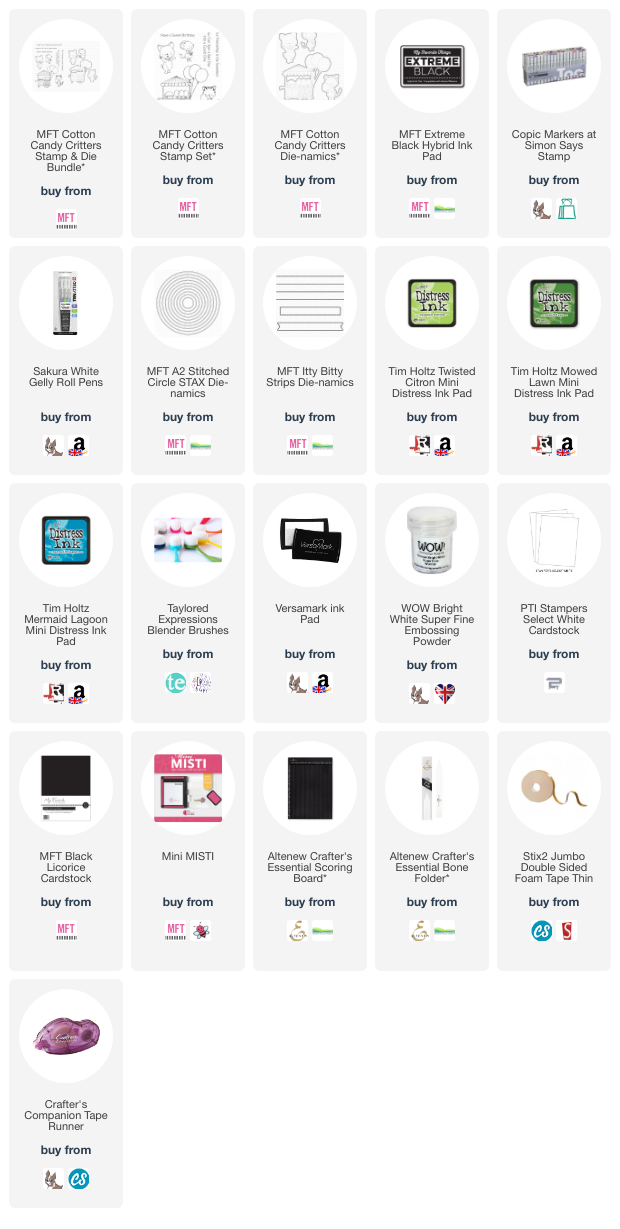
I started off by stamping the candy floss cart and cat from the MFT Cotton Candy Critters Stamp Set on to white cardstock using MFT Extreme Black Ink. I then coloured them using Copic Markers. The colours that I used are listed below the supplies area. They were die cut out using the MFT Cotton Candy Critters Die-namics


I die cut a a circle using the MFT A2 Stitched Circle STAX Die-namics set and added ink blending on top using Distress Inks. I used Twisted Citron and Mowed Lawn for the grass and Mermaid Lagoon for the sky. I then stamped a sentiment from the set on to black cardstock using Versamark Ink. I applied white embossing powder and heat set. It was cut into a strip using the MFT Itty Bitty Strips Die-namics


I die cut another two circles from white cardstock, slightly bigger than the ink blended one. I cut a little off the bottom on one (so that it stands up nicely) and then scored a line at the top to create a hinge. I added adhesive to the hinge and adhered it to the other circle to create a card base. I adhered the images and sentiment to the ink blended panel using thin foam tape and then adhered it to the card base with thin foam tape also. 

VIDEO:

Here is the video showing how I made the card:


If you are viewing this blog post via email subscription, you can watch the video HERE on YouTube.

SUPPLIES:


Here are the links to what I have used on the project. Affiliate links are used on some products. This means that if you make a purchase after clicking on my link, I receive a small commission with no extra cost to you. I truly appreciate your support when using these links. Please click on the logo below the product to shop at your favourite store. All products were personally purchased except those from Clearly Besotted, Hero Arts or those marked with an asterisk (*) which were kindly sent to me to use. You can read my full disclosure here.


COPIC MARKERS: Cat - C7, C5, C3, C1, C00, R52. Candy floss - RV55, RV52, RV00. Cone - Y00. Candy floss machine - B00, B0000, C3, C1, C00. Cart - RV19, RV66, RV55, RV52, BV11, BV00, BV0000. Balloons - BV11, BV00, BV0000 + RV55, RV52, RV00. 

Thank you so much for stopping by today, I really do appreciate it. I hope you have a wonderful day! 

19 July 2023

VIDEO | Add Interest to Florals in a Clean & Simple Way

Hello there, today I have a tag to share with you adding interest to florals in a clean and simple way. These Altenew Dreamy Daylilies are so pretty and I wanted to use them again. You can see my first project using them HERE

PLEASE NOTE: This post contains affiliate links. Please see below for my full disclosure.


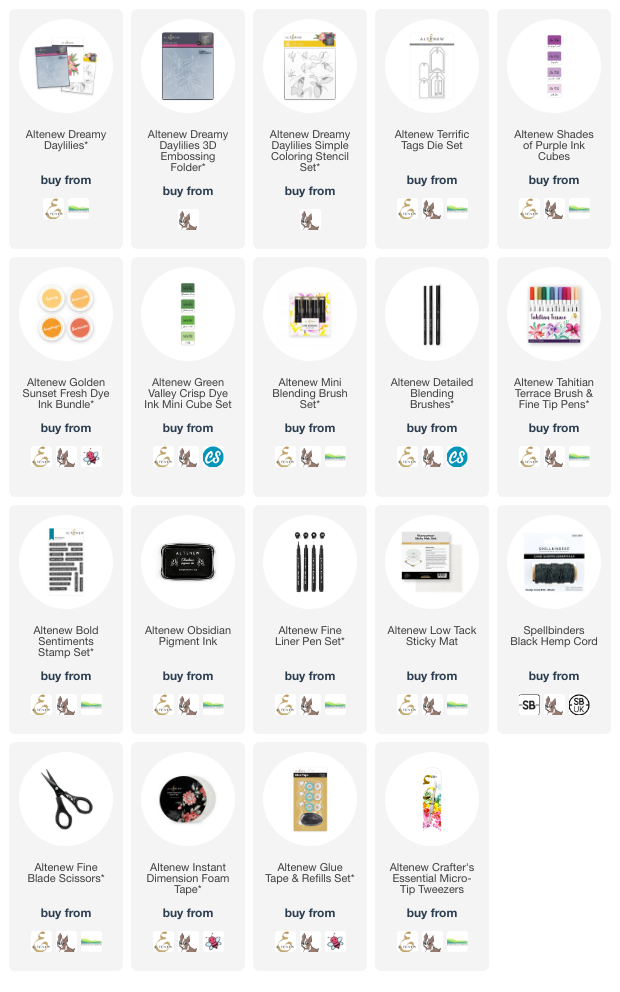
I started off by die cutting an Altenew Terrific Tag Die from white cardstock. I placed it inside of the Altenew Dreamy Daylilies 3D Embossing Folder (the first way to add interest) and ran it through my die cutting machine. I then placed the Altenew Dreamy Daylilies Simple Coloring Stencils on top (one by one) to colour the flowers using ink and blending brushes. 

I added Altenew Shades of Purple Crisp Dye Ink (Deep Iris & Midnight Violet) around the tips of the petals using an Altenew Mini Ink Blending Brush. I then added Altenew Golden Sunset Fresh Dye Inks (Sunray & Chamomile) to the centres using an Altenew Detailed Blending Brush. This is the second way to add interest, I love how the petals look adding two different colours to them!

I used Altenew Green Valley Crisp Dye Inks for the leaves. I then wanted to add a little more interest, so I took the Chamomile pen from the Altenew Tahitian Terrace Dual Tip Pens Set and using the fine point end, added dots to the centres of the petals. Although subtle, as I did it tone-on-tone with the ink, I do think it added a little extra to the flowers. 

I cut another tag from white cardstock and adhered it to the back. I stamped a sentiment from the Altenew Bold Sentiments Stamp Set on to white cardstock using Altenew Obsidian Pigment Ink. It was cut into a strip and then to remove the white core of the cardstock, I went around it with an Altenew Fine Liner (brush) Pen. It was adhered to the tag using Altenew Instant Dimension Foam Tape. To finish off, I added black twine through the top of the tag and tied it in a bow. 

VIDEO:

Here is the video showing how I made the tag:

If you are viewing this post via email subscription, you can watch the video HERE on YouTube. 

SUPPLIES:


Here are the links to what I have used on the project. Affiliate links are used on some products. This means that if you make a purchase after clicking on my link, I receive a small commission with no extra cost to you. I truly appreciate your support when using these links. Please click on the logo below the product to shop at your favourite store. All products were personally purchased except those from Clearly Besotted, Hero Arts or those marked with an asterisk (*) which were kindly sent to me to use. You can read my full disclosure here.


There are definitely a lot more ways to add interest to florals but I really like how these lilies turned out! Thank you so much for stopping by today, I very much appreciate it. Have a wonderful day!

18 July 2023

Altenew | July 2023 Marvelous Monthly Series Release Blog Hop + Giveaway

Hello there, I am delighted to be joining Altenew today to celebrate the release of the July 2023 Marvelous Monthly Series sets. There are lots of sets releasing today - Craft-A-Flower, Build-A-Flower, Mini Delight, Dynamic Duo, plus lots more!

PLEASE NOTE: This post contains affiliate links. Please see below for my full disclosure.

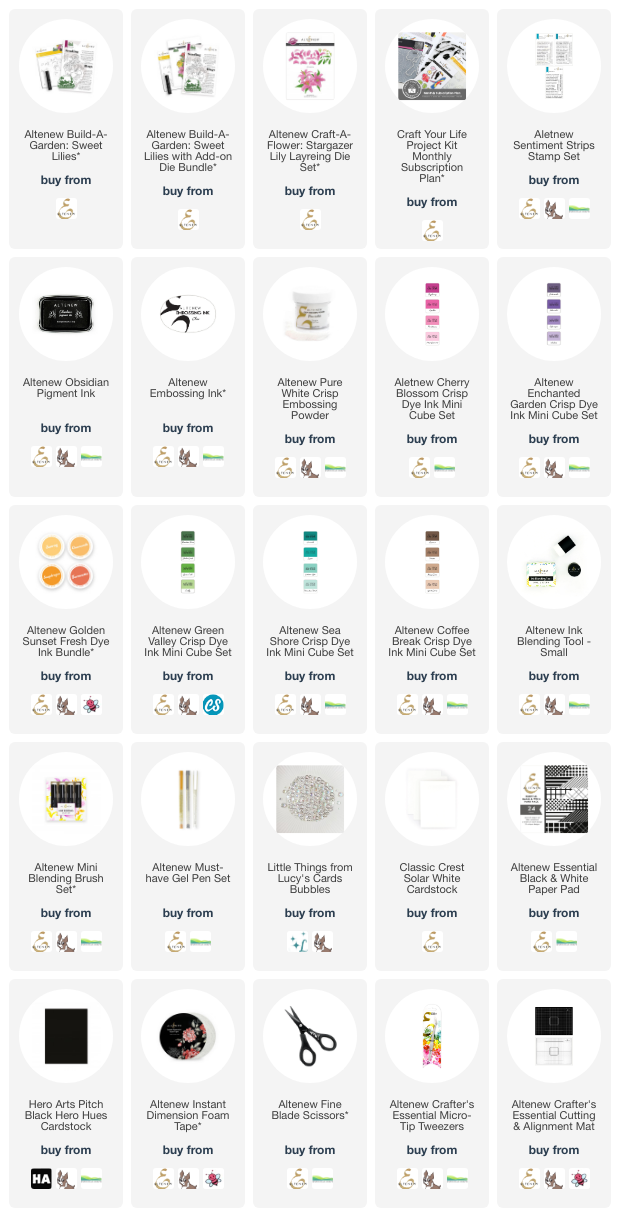
Today I am using the July 2023 Build-A-Garden and Craft-A-Flower set, plus the August 2023 Craft Your Life Project Kit. 

BUILD-A-GARDEN: SWEET LILIES

My first card today uses the beautiful Altenew Build-A-Garden: Sweet Lilies. The set consists of a stamp set, coloring stencils and a mini blending brush. There is also a coordinating die you can purchase separately or as part of the bundle. I started off by stamping the large image from the stamp set on to white cardstock using Altenew Obsidian Pigment Ink

Using the stencils and Altenew Mini Blending Brushes, I blended on inks to colour the images. I used Altenew Cherry Blossom and Golden Sunset inks for the lilies, Altenew Enchanted Garden inks for the purple flowers and Altenew Green Valley inks for the leaves. It was then die cut out using the coordinating die. 

I adhered it to a US A2 sized white card base using Altenew Instant Dimension Foam Tape, cutting of the excess using scissors. I stamped the 'sending' sentiment from the set on to white cardstock using Altenew Obsidian Pigment Ink. It was die cut using the coordinating die. I then stamped 'birthday wishes' from the Altenew Sentiment Strips Stamp Set and cut it into a strip. Both were then adhered to the card. To finish off, I added a few Bubbles embellishments. 

CRAFT-A-FLOWER: STARGAZER LILY

I started off my card by die cutting the Altenew Craft-A-Flower: Stargazer Lily Layering Die Set from white cardstock. I then added ink blending on top using Altenew Mini Blending Brushes. I used Altenew Cherry Blossom inks for the petals, Golden Sunset inks for the stamens and Green Valley inks for the leaves. 

I adhered the leaves first, to a panel of white cardstock and then the flowers on top using foam tape. I added a panel of paper from the Altenew Essential Black & White Paper Pad on to the front of a US A2 sized white card base and then added the panel on top with Altenew Instant Dimension Foam Tape

I stamped a sentiment from the Altenew Sentiment Strips Stamp Set on to black cardstock using Altenew Embossing Ink. I applied Altenew Pure White Crisp Embossing Powder and heat set. It was cut into a strip and adhered to the card with more foam tape. To finish off, I added white gel pen dots to the flowers and embellished with a few Bubbles. 

CRAFT YOUR LIFE PROJECT KIT: TROPICAL VIBES

My last card today uses the Altenew August 2023 Craft Your Life Project Kit: Tropical Vibes. This kit consists of a stamp set, coordinating dies, embossing folder and stencils. This kit is now only available via subscription. To receive this kit, you will need to subscribe by August 3rd 2023. Subscribers can cancel or pause their subscription at any time.

I started off by stamping the toucan from the stamp set on to white cardstock using Altenew Obsidian Pigment, Sunray and Marigold inks. I then stamped the branch using Mocha ink. They were die cut out using the coordinating dies. 

I ran a panel of cardstock through my die cutting machine using the 3D embossing folder in the kit and then one by one placed the stencils on top to colour the leaves. I used Altenew Green Valley and Sea Shore inks. The panel was adhered to a US A2 sized card base using Altenew Instant Dimension Foam Tape and the bird and branch adhered on top. I stamped a sentiment from the stamp set and fussy cut it out using scissors. It was adhered to the card with more foam tape. 

BLOG HOP:

This blog post is part of a fun blog hop with prizes. Please click the links below for the other participants in the hop. 

You are invited to the Inlinkz link party!

Click here to enter

GIVEAWAY:

$300 in total prizes! To celebrate this release, Altenew is giving away a $100 gift certificate to 1 lucky winner and a $40 gift certificate to 5 winners! Please leave a comment on the Altenew Card Blog and/or each designer’s blog post on the blog hop list below by 24th July 2023 for a chance to win. Altenew will draw 6 random winners from the comments left on each stop of this blog hop and announce the winners on the Altenew Winners Page on 26th July 2023*The winner of the $100 gift certificate will be chosen from comments left on the Altenew blog. 

SUPPLIES:


Here are the links to what I have used on the projects. Affiliate links are used on some products. This means that if you make a purchase after clicking on my link, I receive a small commission with no extra cost to you. I truly appreciate your support when using these links. Please click on the logo below the product to shop at your favourite store. All products were personally purchased except those from Clearly Besotted, Hero Arts or those marked with an asterisk (*) which were kindly sent to me to use. You can read my full disclosure here.


Thank you so much for stopping by to see me today. I really do appreciate it. I hope you enjoy the rest of the hop and have a wonderful day! 

15 July 2023

VIDEO | Changing the Look of Die-Cuts

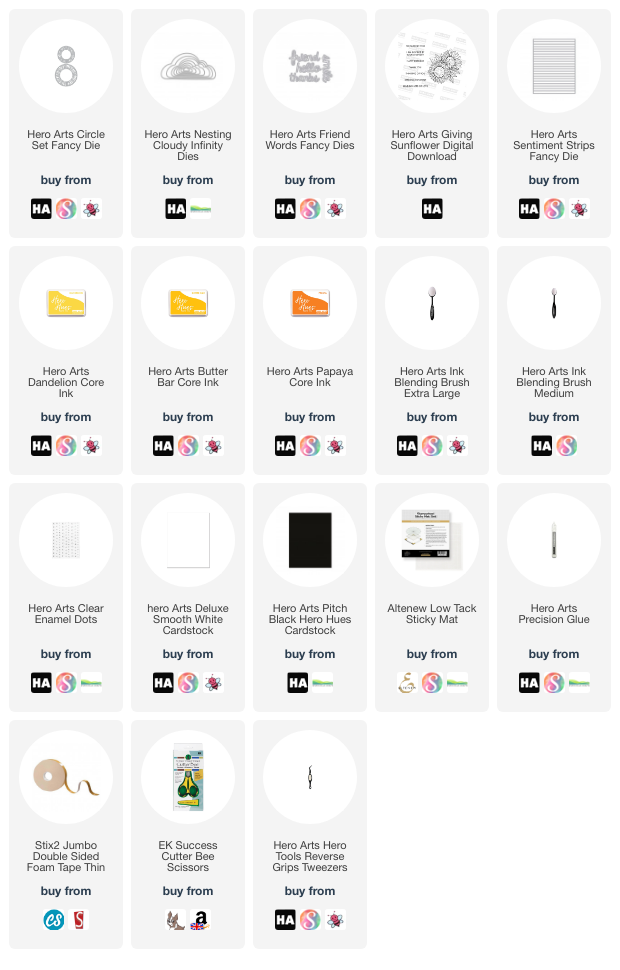
Hello there, today I have a video and card sharing how to change the look of die-cuts to suit your needs. The Hero Arts Circle Set Fancy Die is a really great die set. It has two circle dies in it that you can do lots with as is, but for my card today, I thought it would be fun to cut the edge off and have the circle be a sun.

PLEASE NOTE: This post contains affiliate links. Please see below for my full disclosure.


I started off by die cutting the largest Hero Arts Circle Set Fancy Die from Hero Arts Deluxe Smooth White Cardstock. I then cut around the outside edge with scissors to create a sun. I added ink blending to it using Hero Arts Core Inks in Dandelion, Butter Bar and Papaya. I then cut another two layers of the die from white cardstock and adhered them to the back, cutting off the edge pieces as I went. I found it easier to cut one layer at a time. This just gives more dimension and stability to the sun. 


Whilst die cutting, I die cut two of the smaller clouds from the Hero Arts Nesting Cloudy Infinity Dies set (each one twice) from white cardstock. I also cut the friend word from the Hero Arts Friends Words Fancy Dies set three times from Hero Arts Pitch Black Cardstock. They were layered up (adhering with Precision Glue) so that the clouds are two layers high and the word three layers high. 


I printed the Hero Arts Giving Sunflower Digital Download from my PC on to a sheet of Hero Arts Deluxe Smooth White Cardstock but when I was printing, I changed the size to (UK) A5, so that the sentiment would print out smaller in size. I then cut the 'sending sunshine' sentiment into a strip using the Hero Arts Sentiments Strip Fancy Die


I adhered the sun first on to a US A2 sized white card base with Precision Glue, followed by the clouds. I added a little foam tape to the bottom of the 'd' on the friend word and adhered that on top. The sentiment strip was adhered below with thin foam tape. To finish off, I added a few Hero Arts Clear Hero Hues Enamel Dots

VIDEO:

Here is the video showing how I made the card:


If you are viewing this blog post via email subscription, you can watch the video HERE on YouTube. 

SUPPLIES:


Here are the links to what I have used on the project. Affiliate links are used on some products. This means that if you make a purchase after clicking on my link, I receive a small commission with no extra cost to you. I truly appreciate your support when using these links. Please click on the logo below the product to shop at your favourite store. All products were personally purchased except those from Clearly Besotted, Hero Arts or those marked with an asterisk (*) which were kindly sent to me to use. You can read my full disclosure here.


Thank you so much for stopping by today, I really do appreciate it. I hope you have a wonderful weekend! 
End of code