31 October 2021

Clearly Besotted Teasers | Tangled in Tinsel

Hello there and welcome to day four of the Clearly Besotted November 2021 Teasers. Release day is tomorrow but I still have two more teasers to share with you. Today I am using the adorable Tangled In Tinsel set. This is a really fun set with lots of critters and a beautiful Christmas tree image. 

PLEASE NOTE: This post contains affiliate links. Please see below for my full disclosure.


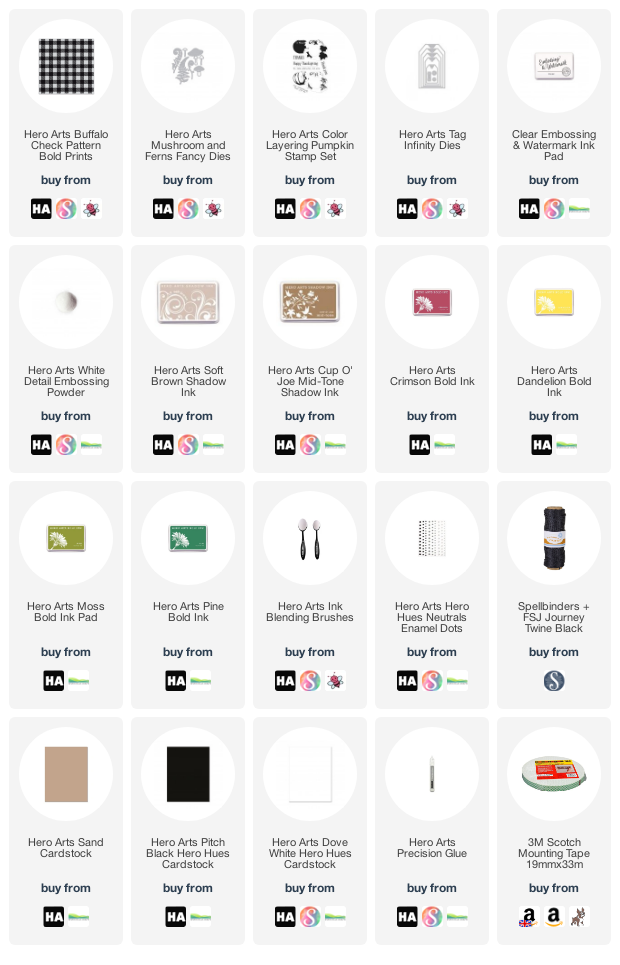
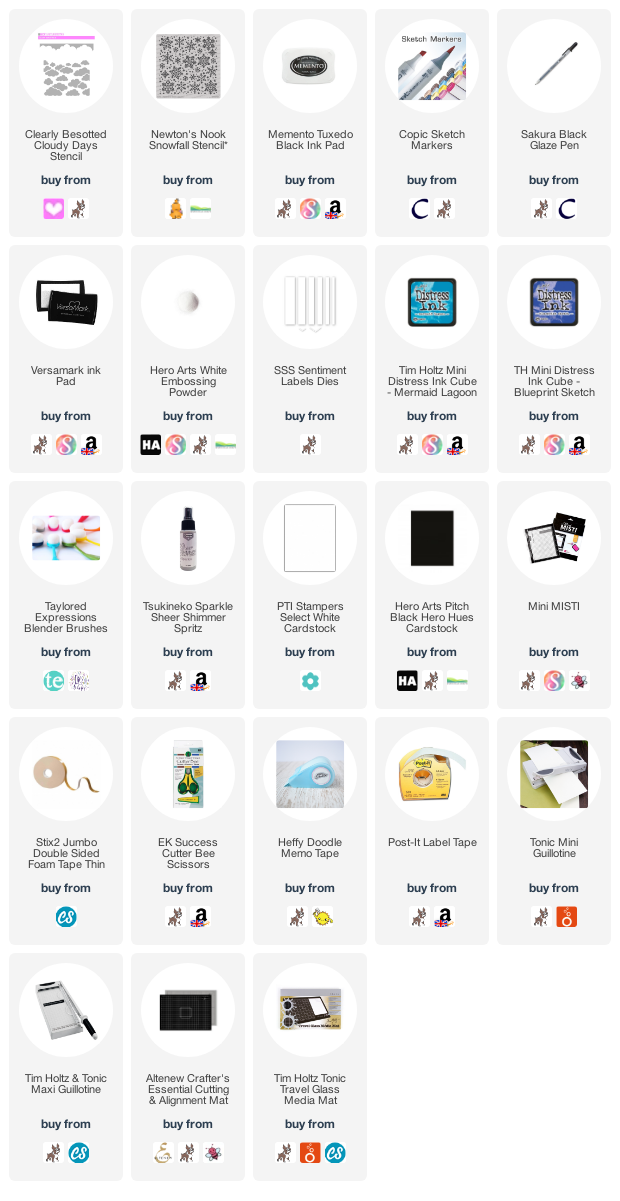
I started off my tag by stamping the bunny and tree images from the Clearly Besotted Tangled In Tinsel Stamp Set on to white cardstock with Memento Tuxedo Black Ink. I coloured them with Copic Markers (the colours that I used are listed below the supplies area) and fussy cut them out with scissors. 

I die cut a Clearly Besotted Tag Along Die from white cardstock and blended Distress Inks on top. I used Seedless Preserves, Picked Raspberry and Kitsch Flamingo. I spritzed on Picket Fence Distress Spray Stain, followed by Sparkle Sheer Shimmer Spritz. It was then set aside to dry. 

Once dry, I stamped the sentiment, from the Clearly Besotted A Little Sentimental Stamp Set, on the bottom of the tag with black ink. The tree image was added on top with tape runner and the bunny with foam tape. To finish off, I added twine through the top of the tag and Tonic Nuvo Crystal Glaze to the candy cane and star. 

SUPPLIES:


Here are the links to what I have used on the project. Affiliate links are used on some products. This means that if you make a purchase after clicking on my link, I receive a small commission with no extra cost to you. I truly appreciate your support when using these links. Please click on the logo below the product to shop at your favourite store. All products were personally purchased except those from Clearly Besotted, Hero Arts or those marked with an asterisk (*) which were kindly sent to me to use. You can read my full disclosure here.


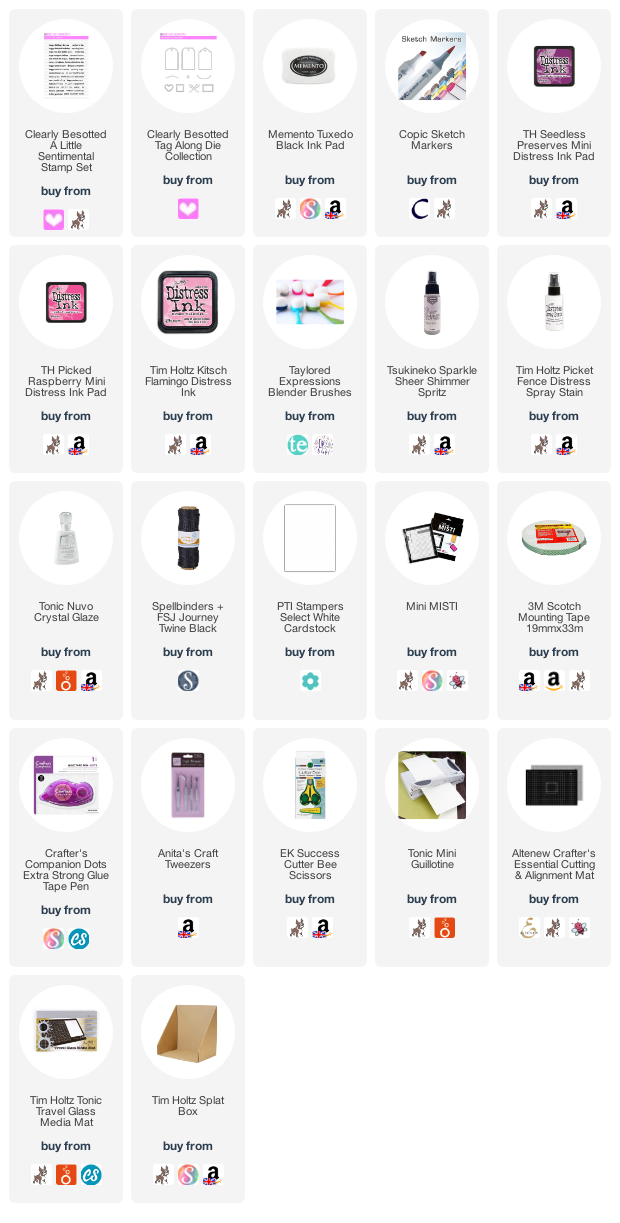
COPIC MARKERS: Bunny - W5, W3, W2, W1, W0, R12, R00. Tree - G29, YG17, YG23, YG03, YG01, E59, E57, E55. Star - YR24, YR23, Y08, Y04. Presents - R89, R39, R37, R35, R32/V06, V05, V04, V01/RV66, RV55, RV52. 

A lot of the critters in the set are holding ornaments to decorate the tree so you could create some really fun scenes with it. For more inspiration using the new sets, please head over to the Clearly Besotted Blog, Keren and Lisa plus our wonderful guests this month AlbertoFrancine and Mona. Thanks so much for stopping by, I hope you are well and staying safe. Have a wonderful day!

30 October 2021

Clearly Besotted Teasers | Sulking Santa

Hello there and welcome to day day three of the Clearly Besotted November 2021 Teasers. Not long to wait now until release day on the 1st November. Today I am using the new Sulking Santa set. Each year Clearly Besotted comes out with more baa humbug type sets and they are all so funny! 

PLEASE NOTE: This post contains affiliate links. Please see below for my full disclosure.


I started off by creating my background. I took a panel of white cardstock and stamped the background image from the Clearly Besotted Dachshund Through Stamp Set on top with Versamark Ink. I applied white embossing powder and heat set. I made a mask for the ground and then blended Distress Inks in Peacock Feathers and Blueprint Sketch above. I then splattered on Dr. Ph. Martin's Bleed Proof White paint and set it aside to dry.

Once dry, the mask was removed and the panel cut down using a Sunny Studio Slimline Pennants Die. It was adhered to an A2 white card base with thin foam tape. I took one of the bears from the new Clearly Besotted Sulking Santa Stamp Set and stamped it on to white cardstock with Memento Tuxedo Black Ink. He was coloured with Copic Markers and fussy cut out with scissors.

I took the sentiment from the set and heat embossed it on to black cardstock. It was cut in to a strip and added to the card with more thin foam tape. The bear was then added on top. To finish off, I added black glaze pen to his nose. 

SUPPLIES:


Here are the links to what I have used on the project. Affiliate links are used on some products. This means that if you make a purchase after clicking on my link, I receive a small commission with no extra cost to you. I truly appreciate your support when using these links. Please click on the logo below the product to shop at your favourite store. All products were personally purchased except those from Clearly Besotted, Hero Arts or those marked with an asterisk (*) which were kindly sent to me to use. You can read my full disclosure here.


COPIC MARKERS: Bear - E59, E57, E55, E53, E51, E50. Hat & Santa sack - R89, R39, R37, R35. 

Although these sets aren't for everyone, his grumpy expression does make me laugh! For more inspiration using the new sets, please head over to the Clearly Besotted Blog, Keren and Lisa plus our wonderful guests this month AlbertoFrancine and Mona. Thanks so much for stopping by, I really do appreciate it. I hope you have a wonderful day!

29 October 2021

Tonic Stamp Club | Snowmies Release Blog Hop + Giveaway

Hello there, I am delighted to be joining Maria Willis and Tonic Studios today for the release of this month's Stamp Club which is Snowmies! The Stamp & Die Set (exclusive to Tonic Studios and retires after three months) contains lots of lovely snowmen/snowwomen that can be stamped or die cut. For my cards today, I have done one of each and I have also used the new Slimline Envelope Creator Die Set, which is an add-on to the set, for my mini slimline envelopes. 

PLEASE NOTE: This post contains affiliate links. Please see below for my full disclosure.


I created two mini slimline cards today (3.25" x 6.25") so that I could create envelopes using the new Tonic Studios Slimline Envelope Creator Die Set. Please note, this die only fits in larger format die cutting machines, not standard sized ones. I don't have one but the lovely Maria kindly cut some for me to decorate (thank you, Maria!). This set also contains plates to add detail to the envelopes but I did use one on my card. It also contains tags and different bits and bobs to decorate cards and envelopes too. 


For my first card, I started off by die cutting the background. I took a panel of white cardstock and cut it using one of the patterns from the Tonic Studios Slimline Envelope Creator Die Set. This doesn't cut a panel but just indents the little holes for the pattern - so pretty! Using Ink Blending Brushes, I blended on Distress Inks in Wilted Violet, Blueprint Sketch and Mermaid Lagoon. I then spritzed on Picket Fence Distress Spray Stain and Sparkle Sheer Shimmer Spritz (impossible to see in the photos but oh so pretty and sparkly in real-life!).


The images, from the Tonic Studios Stamp Club Snowmies Stamp & Die Set, were stamped on to white cardstock with black ink. I coloured them with Copic Markers and die cut them out. The sentiment from the set was stamped on to the panel and then the panel added to a mini slimline card base with thin foam tape. The trees were added with tape runner and the snowpeople with more foam tape. To finish off, I added Tonic Nuvo White Blizzard Nuvo Drops to their hats. 


The envelope was die cut from white cardstock. I then added ink blending on top with the same Distress Ink colours but this time in the Oxide formula. I placed the Stencil (that you get with the bundle as a free gift) on top and blended Hero Arts Unicorn Pigment Ink through the snowfakes to create a subtle pattern. I die cut a tag from the Tonic Studios Slimline Envelope Creator Die Set from vellum and added a hole reinforcer on top. The snowflake was cut from Tonic Sugar Crystal Glitter Cardstock and adhered on top. I added thread through the top and adhered with a tiny bit of vellum adhesive. 


My next card uses the dies from the set. There are lots of different elements to create a snowman including the body, head, hat, arms, face, scarf, there is even a mug/cup that they can hold or a present. I started off by die cutting all of the different elements and adhering them together with Deluxe Glue. There is a smile that you can cut but I drew mine in with a pen. For the holly berries, I coloured tiny gems with a red Copic Marker and added them to the hat, along with Tonic Nuvo White Blizzard Nuvo Drops.


For the background, I blended Distress Inks in Seedlees Preserves, Picked Raspberry and Kitsch Flamingo. I then spritzed on Picket Fence Distress Spray Stain and Sparkle Sheer Shimmer Spritz. It was adhered to a mini slimline card base with thin foam tape and the snowman added on top. I took the sentiment from the set and white heat embossed it on to black cardstock. The snowflakes (from the die set) were cut from Tonic Sugar Crystal Glitter Cardstock and adhered around the sentiment. I finished off with Bubbles added to to their centres. 


For the envelope, I kept it very simple and used one cut from white cardstock with the other pattern die in the Tonic Studios Slimline Envelope Creator Die Set. I blended Distress Oxide Inks on top and then embellished with a tag made like the first envelope. I think the tags add a little extra handmade element to the envelopes. 

SUPPLIES:


Here are the links to what I have used on the project. Affiliate links are used on some products. This means that if you make a purchase after clicking on my link, I receive a small commission with no extra cost to you. I truly appreciate your support when using these links. Please click on the logo below the product to shop at your favourite store. All products were personally purchased except those from Clearly Besotted, Hero Arts or those marked with an asterisk (*) which were kindly sent to me to use. You can read my full disclosure here.


BLOG HOP:


This post is part of a fun, inspiration filled blog hop (with prizes!). For the hop, you should have arrived here from the fantastic Emily Midgett. Next on the hop is the wonderful Marie Heiderscheit. If you get lost along the way or want to start the hop from the beginning, please head over to the amazing Maria Willis

GIVEAWAY:

Tonic Studios are giving away a Snowmies Bundle plus a £50/$50 gift card to one lucky blog hop winner. To enter, comment on every blog in the hop by 3rd November 2021 at 11.59pm PST/07.59 GMT. The winner will be announced on 5th November on Tonic Studios social media accounts. Good luck!

Thank you so much for stopping by to see me today. I apologise for all the blog posts but I hope you have enjoyed all the inspiration! Wishing you a wonderful rest of the day. Take care! 

Hero Arts | November 2021 My Monthly Hero Countdown

Hello there and welcome as we countdown to the release of the Hero Arts November 2021 My Monthly Hero Release (My Monthly Hero Kit and add-ons). Release day is Monday 1st November but all weekend long (including today!), we will be sharing projects with you using the new kit. 

PLEASE NOTE: This post contains affiliate links. Please see below for my full disclosure.


This month is all about tags! But wait! You don't just have to make tags, you can make anything you want! Since I love tags, that is what I have focused on but I will be sharing a card on Monday too. The kit contains four adorable characters that you can build up with die cutting. See that little tab at the top? This is so they can be used as tags but you can easily cut that off to have the characters without the tag feature. 


For the elf, I started off by die cutting the different elements. The hat comes as one die but I cut it twice - once from red and once from green so that I could cut the red bit off and add it on to the green piece. The same with the bell from the Holiday Sparkle Glitter Paper set. I had so much fun making these adorable characters! 


In the kit, you also get a stamp set with greetings/sentiments plus two patterns. These can be used to add detail on to the characters. It is a little difficult to see in the photos (I apologise!) but I have stamped the dot pattern on to the elf's collar and red portion on the hat using Crimson Ink. For the eyes, that were cut from Pitch Black Cardstock, I added Crystal Clear Lacquer Pen to make them shine. The twine is from the kit also. 


For the snowman, I used black glitter cardstock (from the Basics Glitter Paper pack) for the hat and cut the holly leaves from Kiwi Cardstock. The berries are from the Pinks Enamel Dots set. The scarf (cut from cardstock from the last kit) was stamped with the lines pattern from the stamp set with Grape Juice Ink


I die cut a Tag Infinity Die from Dove White Cardstock and stamped the sentiment from the stamp set in the bottom left hand corner with Intens-ified Black Ink. The snowman was then added on top, lining up the hole in the hat with the hole in the tag, with foam tape. I then tied black twine through the top and tied in a bow. 

SUPPLIES:


Here are the links to what I have used on the project. Affiliate links are used on some products. This means that if you make a purchase after clicking on my link, I receive a small commission with no extra cost to you. I truly appreciate your support when using these links. Please click on the logo below the product to shop at your favourite store. All products were personally purchased except those from Clearly Besotted, Hero Arts or those marked with an asterisk (*) which were kindly sent to me to use. You can read my full disclosure here.


Although I kept my characters pretty simple by just die cutting them from colours of cardstock, you could definitely add ink blending or colouring to these too. Please head over to the Hero Arts Blog to see more inspiration from my teamies and be sure to leave a comment over there for a chance to win a kit too! Thanks so much for stopping by today, see you later for another post (I am so sorry for three posts in one day today!). 

Clearly Besotted Teasers | Winter Woodland

Hello there and welcome to day two of the Clearly Besotted November 2021 Teasers. As you may have gathered from the first day of teasers, this is another winter/Christmas/holidays release. Today I am using the super cute Winter Woodland set which features adorable critters skating on an ice rink!

PLEASE NOTE: This post contains affiliate links. Please see below for my full disclosure.

For my card, I started off by stamping the background image from the Clearly Besotted Winter Woodland Stamp Set on to a panel of white cardstock with Memento Tuxedo Black Ink. I made a mask for the snow, ice rink and trees from masking paper and placed it over the top. 

Using ink blending brushes, I blended Distress Inks in Shaded Lilac and Wilted Violet above for the sky. The mask was removed and the scene coloured with Copic Markers (the colours that I used are listed below the supplies area). I then stamped the fox and squirrel from the set on to separate cardstock, coloured them and fussy cut them out. 

The panel was adhered to an A2 white card base and the the critters added on top with foam tape. The sentiment from the Clearly Besotted A Little Sentimental Stamp Set was stamped on to black cardstock with Versamark Ink. I applied white embossing powder and heat set. It was cut in to a strip and added to the card with more foam tape. To finish off, I added white gel pen snow. 

SUPPLIES:


Here are the links to what I have used on the project. Affiliate links are used on some products. This means that if you make a purchase after clicking on my link, I receive a small commission with no extra cost to you. I truly appreciate your support when using these links. Please click on the logo below the product to shop at your favourite store. All products were personally purchased except those from Clearly Besotted, Hero Arts or those marked with an asterisk (*) which were kindly sent to me to use. You can read my full disclosure here.


COPIC MARKERS: Trees - W3, W1, W0. Snow - B00, B000, B0000, BV01, BV00, BV0000. Ice - BG13, BG11, BG10. Fox - E09, E19, E07, E13, E11, W2, W1, E50. Squirrel - W7, W5, W3, W2, W1. Hat & scarf - V17, V15, V12, V01. Skates - C3, C1. 

There are lots more critters in the set, so you could create a really big scene with them, but of course, I kept mine simple today! For more inspiration using the new sets, please head over to the Clearly Besotted Blog, Keren and Lisa plus our wonderful guests this month AlbertoFrancine and Mona. Thanks so much for stopping by, I will be back later with another post but for now, I hope you have a wonderful day!

28 October 2021

Hero Arts | Buffalo Check Fall Tag

Hello there, I am over on the Hero Arts Blog today sharing a tag that works perfectly for this month's Stay Crafty with Hero Challenge which is to use fall colours. When I think of autumn colours, I think deep reds, rusty oranges, yellows, browns and mossy greens. I thought that I would try and combine as many as possible on to my little tag! 

PLEASE NOTE: This post contains affiliate links. Please see below for my full disclosure.


I first took a Tag Infinity Die and cut it from Sand Cardstock. I then stamped the Buffalo Check Patterns Bold Prints on top. Such a great background that can be used all year round! I cut the Mushrooms & Ferns Fancy Dies from Dove White Cardstock and then using Ink Blending Brushes, blended inks on top using the fall colours. 


They were adhered to the tag with Precision Glue. The sentiment, from the Color Layering Pumpkin stamp set, was stamped and heat embossed on to Pitch Black Cardstock. They were cut in to a strips and added to the tag with foam tape. I finished off with a few Neutrals Enamel Dots

SUPPLIES:


Here are the links to what I have used on the project. Affiliate links are used on some products. This means that if you make a purchase after clicking on my link, I receive a small commission with no extra cost to you. I truly appreciate your support when using these links. Please click on the logo below the product to shop at your favourite store. All products were personally purchased except those from Clearly Besotted, Hero Arts or those marked with an asterisk (*) which were kindly sent to me to use. You can read my full disclosure here.


For more information on how I made the tag, please head over to the Hero Arts Blog. Thanks so much for stopping by today. Wishing you a wonderful day! 

Clearly Besotted Teasers | Bee Merry

Hello there, today kicks off the start of the Clearly Besotted November 2021 release teasers. Release day is 1st November 2021 at 8pm GMT. From now until then, we will be sharing teasers with you using the new release. For my card today, I am using the new Bee Merry set. Such a cute set filled with festive bees! 

PLEASE NOTE: This post contains affiliate links. Please see below for my full disclosure.


I started off by creating my background. I took a panel of white cardstock and placed the Clearly Besotted Cloudy Day Stencil on top. I then blended above using Blueprint Sketch Distress Ink and an ink blending brush. With the stencil still in place, I then placed over the Newton's Nook Snowfall Stencil to add in some snowflakes. I just added random ones in to the sky. As I moved down the panel I lightened the colour and brought in Mermaid Lagoon Distress Ink


The panel was splattered with Sparkle Sheer Shimmer Spritz and set aside to dry. I took the bees from the Clearly Besotted Bee Merry Stamp Set and stamped them on to white cardstock with Memento Tuxedo Black Ink. They were coloured with Copic Markers (the colours that I used are listed below the supplies area) and then fussy cut out with scissors. 


I adhered the background panel to an A2 white card base with thin foam tape, followed by the bees. I took the sentiment from the set and stamped it on to black cardstock with Versamark Ink. I applied white embossing powder and heat set. It was cut in to a strip and added to the card with more thin foam tape. To finish off, I added black glaze pen to the bee's eyes. 

SUPPLIES:


Here are the links to what I have used on the project. Affiliate links are used on some products. This means that if you make a purchase after clicking on my link, I receive a small commission with no extra cost to you. I truly appreciate your support when using these links. Please click on the logo below the product to shop at your favourite store. All products were personally purchased except those from Clearly Besotted, Hero Arts or those marked with an asterisk (*) which were kindly sent to me to use. You can read my full disclosure here.


COPIC MARKERS: Bees - Y17, Y15, Y13, Y11, C10, C7, C6, C5, B00, B000, B0000. Hat & candy cane - R89, R39, R37, R35, R32, C3, C1, C0. 

Aren't those bees adorable? For more inspiration using the new sets, please head over to the Clearly Besotted Blog, Keren and Lisa plus our wonderful guests this month Alberto, Francine and Mona. Thanks so much for stopping by, I will be back later with another post. Until then, have a great day! 

25 October 2021

Reverse Confetti | You're So Very Kind

Hello there, today I have a card to share with you using the Reverse Confetti Floral Chain Cover Plate that was part of their August Mini Release. I thought I would pair it with the beautiful Hummingbird set. These florals could be used in so many different ways but you know me, I kept it simple and did white on white. 

PLEASE NOTE: This post contains affiliate links. Please see below for my full disclosure.


I started off by die cutting the Reverse Confetti Floral Chain Cover Panel Confetti Cuts from white cardstock. I cut the frame, the flowers and the flower centres. In order to have enough of the small flowers, you do need to cut them four times. I took a panel of white cardstock and blended on Tim Holtz Peacock Feathers Distress Ink. 


I focused most of the colour in the bottom right hand corner and then adhered it to an A2 white card base. I added the frame on top with Bearly Art Glue and then the flowers with foam tape. The centres were added flat with more glue. I took the Reverse Confetti Hummingbird Stamp Set and stamped one of the hummingbirds on to white cardstock with Memento Tuxedo Black Ink. 


It was coloured with Copic Markers (the colours that I used are listed below the supplies area) and then cut out with the Reverse Confetti Hummingbird Confetti Cuts. It was added to the card with a combination of foam tape and tape runner adhesive. The sentiment, from the Reverse Confetti Word Up Stamp Set, was stamped on to black cardstock with Versamark Ink. I applied white embossing powder and heat set. It was cut in to a strip and added to the card. To finish off, I added a few Lucy's Bubbles. 

SUPPLIES:


Here are the links to what I have used on the project. Affiliate links are used on some products. This means that if you make a purchase after clicking on my link, I receive a small commission with no extra cost to you. I truly appreciate your support when using these links. Please click on the logo below the product to shop at your favourite store. All products were personally purchased except those from Clearly Besotted, Hero Arts or those marked with an asterisk (*) which were kindly sent to me to use. You can read my full disclosure here.


COPIC MARKERS: V17, V15, V12, V01, V000, BG49, BG15, BG13, BG11, BG10, T3, T1. 

I love that you can have the die which ever way up you want. I think it works well with the hummingbird too! Thanks so much for stopping by today, I really do appreciate it. I hope you have a wonderful week ahead! 

23 October 2021

VIDEO | Layering Pigment Inks to Enhance Embossing

Hello there, today I have two tags and video to share with you where I am layering pigment inks to enhance embossing with embossing folders. 

PLEASE NOTE: This post contains affiliate links. Please see below for my full disclosure.


For the tags, I started off by die cutting the Altenew Terrific Tags Die Set four times from white cardstock - two for the front of the tags and two for the backs of the tags. On two, I am adding ink blending with an Altenew Large Ink Blending Tool


For the blue tag, I am using Altenew Glacier Caves Pigment Ink Bundle. I used Persian Blue at the top and Sapphire at the bottom. It was then run through my die cutting machine with the Altenew Decorative Florals 3D Embossing Folder. I then added Arctic on top to enhance the embossing. This did make quite a bit of difference to the darker base. I then spritzed it with Altenew Iridescent Shimmer Ink Spray


For the sentiment, I used the Altenew Build-A-Flower Iris Stamp & Die Set and stamped the sentiment on to black cardstock with Altenew Embossing Ink. I applied Altenew Pure White Crisp Embossing Powder and heat set. It was cut in to a strip and added to the tag with Altenew Instant Dimension Foam Tape


For the yellow tag, I added a base to the tag with the Altenew Summer Afternoon Pigment Ink Bundle. I used Warm Sunshine at the top and Caramel Toffee at the bottom. I then embossed it using the Altenew Cheerful Bloom 3D Embossing Folder. To enhance the embossing, I added Buttercream Pigment ink on top. 


It was also spritzed with Altenew Iridescent Shimmer Ink Spray and set aside to dry. I stamped the sentiment from the Altenew Statement Flowers Stamp Set on to black cardstock with Altenew Embossing Ink and applied Altenew Pure White Crisp Embossing Powder. It was heat set and then cut in to a strip and added to the tag with Altenew Instant Dimension Foam Tape

For both tags, I embellished with Altenew Essential Black & White Enamel Dots and tied twine through the top of the tags, after adding the clean white tags to the back. 

VIDEO:


If you are viewing this blog post via email subscription, you can watch the video HERE on YouTube. 

SUPPLIES:


Here are the links to what I have used on the project. Affiliate links are used on some products. This means that if you make a purchase after clicking on my link, I receive a small commission with no extra cost to you. I truly appreciate your support when using these links. Please click on the logo below the product to shop at your favourite store. All products were personally purchased except those from Clearly Besotted, Hero Arts or those marked with an asterisk (*) which were kindly sent to me to use. You can read my full disclosure here.


As mentioned in the video, I often do this with white pigment ink but I think it looks lovely with different colours as well. You could even add a completely different colour on top like green or pink! Thanks so much for stopping by to see me today. I really do appreciate it. I hope you have a wonderful weekend!

22 October 2021

Altenew | Paint-A-Flower Rosa Floribunda Stamp Set Release Blog Hop + Giveaway

Hello there and welcome as we celebrate the release of the new Altenew Paint-A-Flower Rosa Floribunda Outline Stamp Set. What a beautiful set! It can be purchased on it's own or as a bundle with watercolours. For the release, we are celebrating with a fun, inspiration filled blog hop with prizes. For more details, please see below. 

PLEASE NOTE: This post contains affiliate links. Please see below for my full disclosure.


For my card, I started off by stamping the Altenew Paint-A-Flower Rosa Floribunda Outline Stamp Set on to a panel of white cardstock with Altenew Permanent Black Ink. I then coloured the roses, leaves and stems with Copic Markers. I took the panel and cut the right side off, fussing cutting around the roses. 

I took an A2 white card base and added a piece of Altenew Essential Black & White Paper Pad on the right hand side. The roses panel was then adhered on top with Altenew Instant Dimension Foam Tape. The sentiment, from the Altenew Sentiment Strips 2 Stamp Set was stamped on to black cardstock with Altenew Embossing Ink

I applied Altenew Pure White Crisp Embossing Powder and heat set. It was cut in to a strip and added to the card with more foam tape. To finish off, I added a few Iridescent Jewels. 

SUPPLIES:


Here are the links to what I have used on the project. Affiliate links are used on some products. This means that if you make a purchase after clicking on my link, I receive a small commission with no extra cost to you. I truly appreciate your support when using these links. Please click on the logo below the product to shop at your favourite store. All products were personally purchased except those from Clearly Besotted, Hero Arts or those marked with an asterisk (*) which were kindly sent to me to use. You can read my full disclosure here.


BLOG HOP:

As mentioned, this blog post is part on a fun, inspiration filled blog hop. For the hop, you should have arrived here from the wonderful Joy Baldwin. Next on the hop is the fabulous Bridget Casey. If you get lost along the way, or want to start the hop from the beginning, please head over to the Altenew Blog

GIVEAWAY:

$200 in total prizes! To celebrate this release, Altenew is giving away a $50 gift certificate to 2 lucky winners and a $20 gift certificate to 5 winners! Please leave a comment on the AltenewCard Blog and/or each designer’s blog post on the blog hop list below by 28th October 2021 for a chance to win. Altenew will draw 7 random winners from the comments left on each stop of this blog hop and announce the winners on the Altenew Winners Page on 30th October 2021.

You can also purchase the set as part of the Altenew Paint-A-Flower Subscription. Thank you so much for stopping by to see me today, I really do appreciate it. I hope you have a great time on the rest of the hop and a wonderful rest of the day too! Take care!

19 October 2021

Altenew | Mighty Kind Stand Alone Dies Collection Release Blog Hop + Giveaway

Hello there and welcome as we celebrate the new Altenew Mighty Kind Stand Alone Dies Collection. This is such a wonderful release and I have two cards to share with you using three new sets. We are celebrating the release with a fun, inspiration filled blog hop with prizes too. More on that below. 

PLEASE NOTE: This post contains affiliate links. Please see below for my full disclosure.


My first card uses the new Altenew Lovely Envelope Die Set. This is such a wonderful set as you can create an envelope and then have lots of loveliness popping out from it - flowers, hearts, foliage. I started off by die cutting the envelope from Altenew Sea Shore Gradient Cardstock. I cut the leaves and stems from Altenew Green Meadows Gradient Cardstock and the flower heads from New Purple Gradient Cardstock


I also cut two of the hearts from purple too. I took a 4" x 5.5" white card base and scored lines in to the front using the Altenew Crafter's Essential Bone Folder and score board (sorry they are difficult to see in the photos but do add something in real-life!). I adhered the envelope on top with Altenew Instant Dimension Foam Tape. I added the leaves and stems inside, followed by the flower heads. The top of the envelope was then added on top (it comes in two parts). 


The hearts were added and then I took the sentiment from the Altenew Sentiment Strips Stamp Set and stamped it on to black cardstock with Altenew Embossing Ink. I applied Altenew Pure White Crisp Embossing Powder and heat set. It was cut in to a strip and added to the card with more foam tape. To finish off, I added white dots from the Altenew Essential Black & White Enamel Dots pack to the flower centres. 


For my second card, I started off by die cutting the Altenew Flowing Foliage Die Set from white cardstock with Altenew Double-Sided Adhesive Sheet on the back. I cut each leaf multiple times so that I could stack two high. They were added to an A2 white card base. I then took an Altenew Small Ink Blending Tool and blended Altenew Sweet Dreams Crisp Dye Inks on to the top of the card base. 


I focused most of the darker colour at the top, fading to white at the bottom. This gave a slight halo effect around the leaves. I then took the Altenew Mighty Alphabet Die Set and die cut the letters for 'hello' five times from white cardstock, again with adhesive sheet on the back. 


I cut some of the letters down where it overhangs the foliage pieces, so that the letters would end up flush on the card base. I took the sentiment from the Altenew Sentiment Strips 2 Stamp Set and stamped it on to black cardstock with Altenew Embossing Ink. I applied Altenew Pure White Crisp Embossing Powder and heat set. It was cut in to a strip and added to the card with Altenew Instant Dimension Foam Tape

SUPPLIES:


Here are the links to what I have used on the project. Affiliate links are used on some products. This means that if you make a purchase after clicking on my link, I receive a small commission with no extra cost to you. I truly appreciate your support when using these links. Please click on the logo below the product to shop at your favourite store. All products were personally purchased except those from Clearly Besotted, Hero Arts or those marked with an asterisk (*) which were kindly sent to me to use. You can read my full disclosure here.


BLOG HOP:


As mentioned, this post is part of a fun, inspiration filed blog hop. For the hop, you should have arrived here from the fantastic LauraJane. Next on the hop is the wonderful Natasha Davies. If you get lost along the way, or want to start the hop from the beginning, please head over to the Altenew Blog

GIVEAWAY:

$300 in total prizes! To celebrate this release, Altenew is giving away a $50 gift certificate to 2 lucky winners and a $25 gift certificate to 8 winners! Please leave a comment on the Altenew Card Blog and/or each designer’s blog post on the blog hop list below by 25th October 2021 for a chance to win. Altenew will draw 10 random winners from the comments left on each stop of this blog hop and announce the winners on the Altenew Winners Page on 27th October 2021.


Thanks so much for stopping by today. I hope you enjoy the rest of the hop and have a wonderful day! 
End of code