Showing posts with label Cricut. Show all posts

17 March 2025

Football Boots

Hello there, today I have a card to share that I made for my nephew for his birthday last year. I don't tend to share the cards that I make for my family because quite often I don't write down what products I used or I simply cannot link to the products that I used because I used my Cricut. I know many of you have electronic die cutting machines though, so I am going to try and share them here more in the future. 

PLEASE NOTE: This post contains affiliate links. Please see below for my full disclosure.


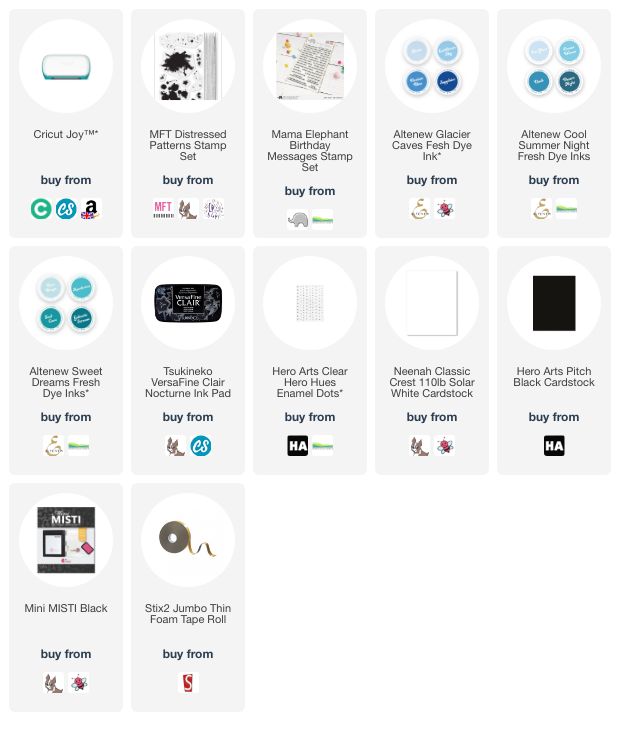
I started off by cutting the Soccer Cleats by Victor Losev from Cricut Design Space on my Cricut Joy. I cut them from Hero Arts Pitch Black Cardstock and then once cut, I added small pieces of white cardstock behind, for the stripes. I took the MFT Distressed Patterns Stamp Set and using the boots as a guide, stamped the patterns onto the front of a US A2 sized card base using blue inks. 


I will be honest with you, I cannot remember all of the colours of inks that I used but I believe I used Sapphire, Persian Blue & Caribbean Sky from the Altenew Glacier Caves Fresh Dye Ink Collection, Dusk from the Altenew Cool Summer Night Collection, and Aqualicious from the Altenew Sweet Dreams Fresh Dye Ink Collection


The football boots where then adhered on top using thin foam tape. I stamped a sentiment from the Mama Elephant Birthday Messages Stamp Set onto white cardstock using Versafine Clair Nocturn Ink. It was cut into a strip and adhered to the card using more thin foam tape. To finish, I embellished with Hero Arts Clear Enamel Dots

SUPPLIES:


Here are the links to what I have used on the project. Affiliate links are used on some products. This means that if you make a purchase after clicking on my link, I receive a small commission with no extra cost to you. I truly appreciate your support when using these links. Please click on the logo below the product to shop at your favourite store. All products were personally purchased except those marked with an asterisk (*) which were kindly sent to me to use. You can read my full disclosure here.


If you don't have an electronic die cutting machine, I hope that I can still inspire you with this card. This design could easily be replicated with a different focal point. Thank you so much for stopping by today, I really do appreciate it. I hope you have a wonderful day! 

18 March 2020

Craft Room Labelling with the Cricut Joy

Hello here, today I have something a little different to share with you, I thought I would share how I have labelled some storage boxes in my craft room using the Cricut Joy. If you haven't seen my video on using the Cricut Joy for cardmaking, you may want to check that out here.


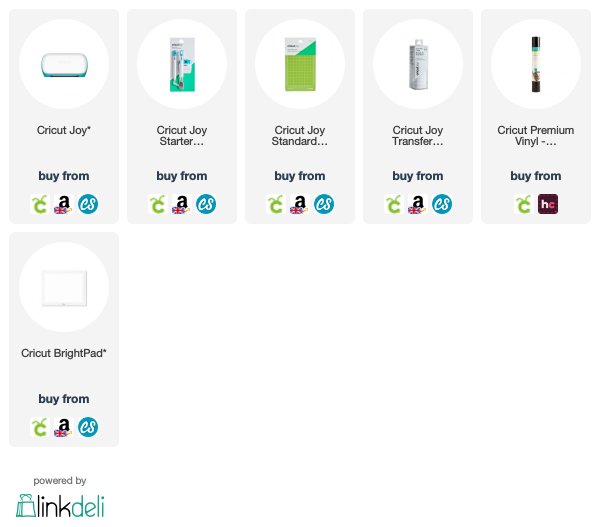
The Cricut Joy can be used with new smart labels but I do not have any of those just yet. I thought instead I would create labels from removable vinyl and simply stick them to the boxes. These boxes I use for assignments and for putting new products in when they arrive. So let's get into how to make them …
 
 
The first to do is grab the products that you want to use - The Cricut Joy, the mat (if using one), the material being cut - Cricut Black Removable Vinyl and the storage boxes.
 
 
The next thing is to create the labels in Cricut Design Space. I simply typed them using the font tool and changed the size. I then clicked on attach, so that the labels/words would cut out on the mat one below the other. This is helpful when cutting the pieces out later on.
 
 
I then clicked on Make It and picked whether I was using a mat or no mat (the Cricut Joy can cut mat-less using smart materials). In this instance I was using a mat as I wanted to use a full-size roll of removable vinyl.
 
 
I removed the clear protective sheet from the mat and stuck down the vinyl. Top tip - add a sticker to the front of the protective sheet so that you know which way to put it back on to try and avoid dirt and dust getting on the mat.
 
 
I then picked the material from the list. Removable vinyl is not listed, so I just picked the Premium Vinyl setting. I then pressed to feed the mat into the Cricut Joy and then it started cutting.
 
 
These did take some time to cut as they are very intricate but it was great just to leave them cutting while I got on with something else.
 
 
Once cut, you need to remove the vinyl from the mat. Because vinyl has quite a tough backing, you could probably just remove the vinyl from the front of the mat, but it is good to get into a habit of removing the mat from the material, rather than the other way around. This helps to prevent warping and bending.
 
 
I then grabbed my Cricut BrightPad. Not only is this light pad perfect for lots of different things around the craft room, it is great for using with weeding. As you can see, the light shines through the cut lines so it is easy to see where you are weeding (removing the excess vinyl). In this case, the letters are fairly straight forward but it helps massively with more intricate designs.
 
 
Using the weeding tool from the Cricut Joy Basic Tool Set, I removed the inside pieces from the letters. The words/labels were then cut in to strips.
 
 
Next you need to add the letters/words on to Cricut Transfer Tape. This is so that you can pick up the transfer tape (which is clear) and place the vinyl on to whatever you are adding it to, and you can clearly see where to place it down.
 
 
The only thing left to do is to place the labels on to the boxes. I did eye-ball these, if you wanted them to be more precise, you can definitely measure them. I placed the vinyl (attached to the transfer tape) on to the front of the box and then using the scraper tool (from the Cricut Joy Basic Tool Set), I burnished the vinyl on to the box and then peeled away the transfer tape.

 
This is the before - some of the boxes had labels made with a label maker but I had not got round to adding labels to them all. There is absolutely nothing wrong with how these look but I do really like how the new labels turned out:
 
 
SUPPLIES:

Here are the links to what I have used for this project. Affiliate links are used on some products. This means that if you make a purchase after clicking on my link, I receive a small commission with no extra cost to you. I truly appreciate your support when using these links. Please click on the logo below the product to shop at your favourite store. All products were personally purchased except those from Clearly Besotted, Hero Arts or those marked with an asterisk (*) which were kindly sent to me to use. You can read my full disclosure here.
 
 
As mentioned, they are not perfect and I may have to adjust one or two but overall, I really like how they look and they were really easy to make using the Cricut Joy. Thanks so much for stopping by to see me today, I really do appreciate it. I hope you have a great day and stay safe!

1 March 2020

VIDEO | Cricut Joy - An Introduction

Hello there, today I am delighted to sharing the new Cricut Joy with you that is out today. I was kindly contacted by Cricut to ask if I wanted to have a play with the machine and of course, I said yes!
 
 
The Cricut Joy is a compact and portable electronic die cutting machine with a cut size of 4.5" wide. Using the new Cricut Joy Smart Materials (I will get on to that a little later), you can cut up to 20ft long. The machine works via Bluetooth so can be used on a desktop, tablet or mobile phone. There are no buttons on the Cricut Joy, it is controlled exclusively via Cricut Design Space.
 

It has been designed so that you can quickly and easily create projects within 15 minutes of getting it out of the box and let me tell you, they are right! It is really easy to set up and you will be creating your first cut in minutes!
 
 
So what's different with this machine compared to the Cricut Maker and Cricut Explore? The first thing is obviously the size. This machine is substantially smaller. This does mean that the area of cutting is smaller (except for length) but it also means that it is really portable. You can carry this anywhere! I think it will be perfect for those who attend craft groups. I also think it is perfect to use with children.

 
The second thing that you will notice is that there is only one clamp. Currently there is also only blade that works in the Cricut Joy (which cuts up to 50 different materials). This clamp also holds the new Cricut Joy Pens.
 
 
The Cricut Joy Pens that can write messages, draw images … all sorts! These pens are smaller in size to the pens that you would use in the larger machines, since they are made specifically for the smaller size of the Cricut Joy. There are lots of different types - glitter, gel, metallic, fine point, extra fine point etc. and come in lots of different colours.
 
 
(photo from cricut.com)
 
There are also new Smart Materials that can be used with the Cricut Joy. These can work without using the mat to cut on. The vinyl, for example, has a stronger backing to it so it does not require that mat. This can be used to your advantage to be able to cut up to 20ft in length (for a repeated pattern) which you cannot do in The Maker or Explore.
 
 
(photo from cricut.com)
 
There is also the new Cricut Joy Card Mat and Card Inserts. These allow you to make a card in minutes. These may not necessarily be the type of cards that us card makers will create, but they are great when you are in a rush, or if a loved one wants to create a card for you but doesn't have the same skill as you. These are perfect! There are also ways to customise these ready made cards or completely design you own card using the technology.


CONGRATS CARD WITH THE CARD MAT
 
 
The Cricut Joy Card Mat allows you to cut directly on to the front of a card base but leaves the rest of the card intact. This is so cool and will be perfect to create window cards, shaker cards … the sky is the limit! For my first project, I am creating one of the ready-made designs in Cricut Design Space.
 
 
This card uses a blue card base from the Cricut Joy Insert Cards Fingerprint Sampler as well as the silver holographic insert from the Cricut Joy Gray/Silver Matte Holographic pack. This card came together in five minutes and you can see how I made it in the video below.


THANKS CARD WITH CUTTING & DRAWING
 
 
For my next project, I wanted to create a card that was a little bit more like the style I usually make. I first cut the 'thanks' from white cardstock, as well as Tonic Sugar Crystal Glitter Cardstock and stacked these up. I then cut a heart from vellum (using a premade shape in Design Space) and then drew the accompanying sentiment on to white cardstock with the Cricut Joy Extra Fine Point Pen.
 
 
On to a panel of white cardstock, I blended Distress Inks in Picked Raspberry, Wilted Violet and Blueprint Sketch. This was added to an A2 card base with foam tape. I then added the thanks sentiment on to the vellum heart with tape runner, followed by the written sentiment which was cut in to a strip. I added that with foam tape and then added the heart to the card with liquid glue (adding the glue behind the die cuts on the front). To finish off, I added a few jewels.
 
I love how I could combine my traditional style with the electronic die cutting! With the Cricut Joy being so portable, it was easy just to have on my desk while crafting.


CREATING DECALS WITH SMART VINYL
 
 
My last project is a little different, I thought it would be fun to add a decal on to the front of my mini dustbin/trash can. I purchased the CrazyCraftyLadyCo Craftiness is Happiness SVG on Etsy and uploaded it to Cricut Design Space. I then cut it using the new Cricut Joy Smart Vinyl. I used the black vinyl from the Cricut Joy Smart Vinyl Removable Elegance Sampler.
 
 
Once cut, I weeded the design (removed the excess vinyl from inside the letters) and then added the vinyl to Cricut Joy Transfer Tape. Using the Transfer Tape, I then placed the design on to the dustbin and using the Cricut Joy Starter Tool Set, I removed the Transfer Tape to reveal the decal. I think it looks really nice sitting on my desk!
 

VIDEO:

Here is a look at how I created the cards with the Cricut Joy:


If you are viewing this post via email subscription, you can watch the video HERE on YouTube.
 
I loved creating with the Cricut Joy for these projects! If you already have the Cricut Maker do you need the Cricut Joy too? That depends on what you like to cut. If you want to ability to cut longer then the answer would be yes. If you want to use the new Card Mat, then the answer will be yes. If you need more portability and be able to create anywhere, then the answer will be yes! But it all depends on what you cut.
 
Personally, I do not have a huge amount of desk space, so using the Cricut Joy vs the Maker is so much easier. You really do not need a lot of space with the Cricut Joy which I think is perfect for cardmakers. If you do not already have an electronic die cutting machine then I think this is a perfect machine to get started in the world of electronic die cutting!


SUPPLIES:

Here are the links to what I have used on the cards and in the video. Affiliate links are used on some products. This means that if you make a purchase after clicking on my link, I receive a small commission with no extra cost to you. I truly appreciate your support when using these links. Please click on the logo below the product to shop at your favourite store. All products were personally purchased except those from Clearly Besotted, Hero Arts or those marked with an asterisk (*) which were kindly sent to me to use. You can read my full disclosure here.
 
 
Do you have an electronic die cutting machine? Do you use it for cardmaking? I would love to hear. Thanks so much for stopping by. I will be back later with my Clearly Besotted post.

8 July 2019

Fantastic Dad

Hello there, today I have a bit of a different card to share with you. This is the card that I made for my dad for Father's Day. He is a fan of comedy so I thought it would be good to make him a punny card. I didn't have an image or sentiment in stamps so I turned to my Cricut Maker to help me make the card.
 
 
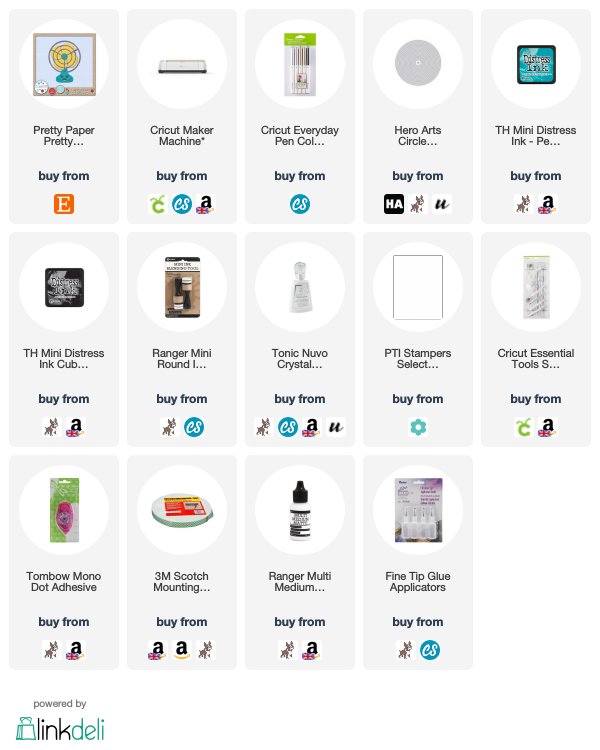
I started off by cutting the fan. I found a fan cutting file from Etsy and cut this from Doodlebug Cardstock (sadly now discontinued) and cut this using the Cricut Maker. I didn't cut all the layers of the fan, just the main body in black, the top part in white and the little inside piece in aqua. I assembled the pieces using liquid glue and set them aside.
 
 
I took another piece of the aqua cardstock and cut this using a Hero Arts Nesting Circle Infinity Die. To add some dimension to it, I blended ink around the edges. I first used Peacock Feathers Distress Ink and then added a very small amount of Black Soot Distress Ink around the very outer edges. This was added to a white 4" x 5.5" white card base so that it was hanging off the edge.
 
 
I then added the fan on top with liquid glue. I created the sentiment in Cricut Design Space using the font Algebra. This was then made using a Cricut 0.4 Black Pen in the Cricut Maker. I cut the sentiments out and adhered them to the card with foam tape. To finish off, I added Nuvo Crystal Glaze to the aqua centre piece on the fan.
 
 
SUPPLIES:

Here are the links to what I have used on the card. Affiliate links are used on some products. This means that if you make a purchase after clicking on my link, I receive a small commission with no extra cost to you. I truly appreciate your support when using these links. Please click on the logo below the product to shop at your favourite store. All products were personally purchased except those from Clearly Besotted, Hero Arts or those marked with an asterisk (*) which were kindly sent to me to use. You can read my full disclosure here.


A very CAS card but my dad did like it, thank goodness! Thank you so much for popping by to see me today. I hope you have a great day and a wonderful week!

10 April 2019

Easter Egg Treat Boxes

This is a sponsored conversation written by me on behalf of Cricut. The opinions and text are all mine.

Hello there, following on from my posts reviewing the Cricut Maker and the Cricut EasyPress 2, I am back to share my final post of the series with you. Since I made quite a few projects when reviewing the EasyPress 2 (you can see that post here), I thought I would focus today on the Maker. If you haven't already seen it, you can see my review of that here). I thought it would be fun to create some Easter treat boxes as I like to make some every year.

 
I first looked in Design Space to see if there were any ready-made projects that I could make. There was lots of different ideas on there but I decided to create something myself using the image files. First of all, I found the Chocolate Box (#M97AA7) from the Fancy Boxes collection.
 
 
The box cuts an opening in the front to add a contrasting colour of cardstock behind, but I thought it would be fun to replace that with acetate and add a greeting to the acetate with vinyl. I took a piece of purple cardstock and placed this in the Maker to cut and score the box. I used the Scoring Wheel for the scoring and it worked wonderfully! I love that Design Space tells you to add the Scoring Wheel in first, it does what it needs to do and then it prompts you to add in the Premium Fine Point Blade to do the cutting.
 
 
Once the boxes were cut I added a piece of acetate behind the opening. You can get the Maker to cut this for you but I decided to just adhere a piece behind the window. I then worked on the sentiment for the window. I found a sentiment in Design Space images called Hippity Hoppity Happy Easter (#M9FFC85C) from the Shake Your Bunny Tail collection.
 

I didn't want the whole phrase so I edited it to remove the hearts and the 'hippity hoppity' part. This was cut on to white vinyl. I weeded the sentiment and then using Transfer Tape, I added the vinyl wording to the acetate. I found that the scraper tool from the Essential Tools Set helped with this.
 

I then constructed the boxes (they assemble very easily) and added mini chocolate eggs inside. To finish off, I added ribbon through the top holes to tie them together.
 
 
I did make the boxes a little bigger than they originally are in Design Space to accommodate my eggs but that is the great thing with using the Maker to make things like this, you can make them any size you need to.
 
I have had a lot of fun working with the Cricut Maker and EasyPress 2 over the last couple of months. It has been really nice to do something different. I hope you have enjoyed the series and I hope to share other things that I make with the machines soon. Thank you so much for stopping by today, I really do appreciate it.

27 March 2019

Review | Cricut EasyPress 2

This is a sponsored conversation written by me on behalf of Cricut. The opinions and text are all mine.

Hello there, following on from my review of the Cricut Maker, today I have a review of the Cricut EasyPress2 to share with you. This was kindly sent to me to review from Cricut but as always, all opinions are my own.


The Cricut EasyPress 2  is used to adhere a material to another material using heat. Most people use it to adhere heat transfer/iron-on vinyl to fabric to decorate t-shirts, cushion covers, bags etc. but it can be used for a lot more. If you did not have a gadget like the EasyPress 2, you would either use a heat press, which is bulky, expensive and not portable; or an iron, which is difficult to control the temperature with.


Cricut designed the EasyPress to work with the speed of a heat press with the convenience of an iron. The EasyPress 2 is a second addition to the original EasyPress. The EasyPress 2 comes in three sizes - 6" x 7", 9" x 9" and 12" x 10" (I have the 9" x 9" to review). The EasyPress 2 heats up to a precise maximum temperature of 205 degrees Celsius (400F). It heats up very quickly and has a countdown timer and comfortable handle. It has a ceramic coated heat plate and safety base, as well as auto shut-off. The 9" x 9" size retails in the UK for around £170 and comes in the raspberry colour only (the original EasyPress is a blue colour)


WHAT’S IN THE BOX?


In the box you get the Cricut EasyPress 2, the safety base, a welcome book, materials for practice project, safety instructions and warranty.


WHAT CAN IT DO?


You can adhere a number of different materials with the EasyPress 2. You can adhere iron-on/heat transfer vinyl, foil and fusible fabric easily. You can adhere these on to a number of surfaces including fabric, canvas, cardstock (including notebooks), leather, wood, corkboard and chipboard.


The EasyPress Interactive Guide on the Cricut website tells you what temperature to set the EasyPress at, as well as how long you need to press the material for. It also gives you step-by-step instructions of what to do.


PROJECT: CUSHION COVER STEP-BY-STEP


So now I have explained what the EasyPress 2 can do, I would like to show you what I made! I did make the practice project first but then kicked off by creating a cushion cover. I went to the Cricut Design Space to find a design that I liked.


I saw the Mandala Cushion Cover project in the iron-on section and thought it was a lovely pattern. I customised the size to fit my cushion cover and then proceeded to cut it on the Maker using Grey Iron-On Vinyl. The Cricut Design Space explains that you need to mirror your design and place the vinyl shiny side down when cutting.


Once it was cut, I took the vinyl off the mat and peeled back the back layer of the vinyl to reveal the pattern.


You then need to remove any inside bits from the vinyl that you do not want. This is called weeding and I find it helpful to use the Cricut Weeding Tool for this.


Once my vinyl was ready to go, I visited the EasyPress Interactive Guide on the Cricut website. This shows what I need to set the temperature at and gives instuctions on using the EasyPress. I told the guide that I was using Everyday Iron-on Vinyl, that I was adhering it to 100% cotton and I was using the Cricut EasyPress Mat. This is used to protect your work surface but you can use a towel instead.


It told me the settings for the temperature and told me to pre-heat the material for 5 seconds. I then applied my vinyl on top of my cushion cover and placed the EasyPress 2 on top. I started the timer and applied gentle pressure for 30 seconds. I did have to do this a few times to cover the whole image, as it is quite large. I then flipped the material and applied heat from the back too.


I started to peel the vinyl sheet off and it did not feel like it was coming off easily, so I applied more heat and tried again.


The second time it removed perfectly and left a lovely design on the cushion cover. I placed the cushion inside the cover and now I have a lovely cushion for my sofa!


PROJECT: ELEPHANT VEST TOP


For my next project, I thought I would add a design on to the front of a vest top. I scrolled through the images on Design Space and came across an adorable elephant image that I thought would look really cute on the front of the vest. I followed the same steps as above and used Everyday Iron-on in Black. I love how it came out!


PROJECT: CRICUT PEN CASE


For my last project, I decorated a pencil case that I will use to keep my Cricut pens in. I made a design in Design Space using the Cricut DonJuan font. I cut it with the Maker and then used the same steps as above to add the design to the front of the pencil case. I used Glitter Iron-on for this in white. Sadly the glitter does not show up in the photos but in real-life, it is really pretty!


SO, WHAT DO I THINK?


I want to put this out there, I am a complete heat transfer vinyl newbie. I have never used any other heat press or even an iron for anything like this. Having said that, the Cricut EasyPress 2 is very easy to use, I love that the EasyPress Interactive Guide tells you exactly what to do to use it. Although I have never used an iron for applying heat transfer vinyl, I am assuming that it is difficult to know how long to apply the heat for and the temperature is not regulated. The EasyPress 2 takes the guess work out of that for you. In terms of size, I think the 9" x 9" one is a great size and perfect for lots of different applications, but as a newbie, I may have gone for the smaller one. If you were frequently making projects where you needed to apply heat, I think the EasyPress 2 is a great investment and would definitely improve your workflow. I am looking forward to creating more items for both myself and gifts for my family.
 
I hope that you have found this review helpful in seeing what the EasyPress 2 can do but do bear in mind, there are lots of other things that it can do. Thank you so much for stopping by today, I really do appreciate it. Have a great day!
End of code