Showing posts with label Taylored Expressions. Show all posts

15 October 2020

Birthday Cupcakes

Hello there, if you have followed me for a while, you will know that I make a lot of cards for design/guest design work. For this, I mainly need to stick to that companies products (makes sense!) but when I make cards for myself, I love combining products from different companies. Especially ones where I can personalise the card for the recipient. My niece turned 12 last month and this is the card that I made for her.

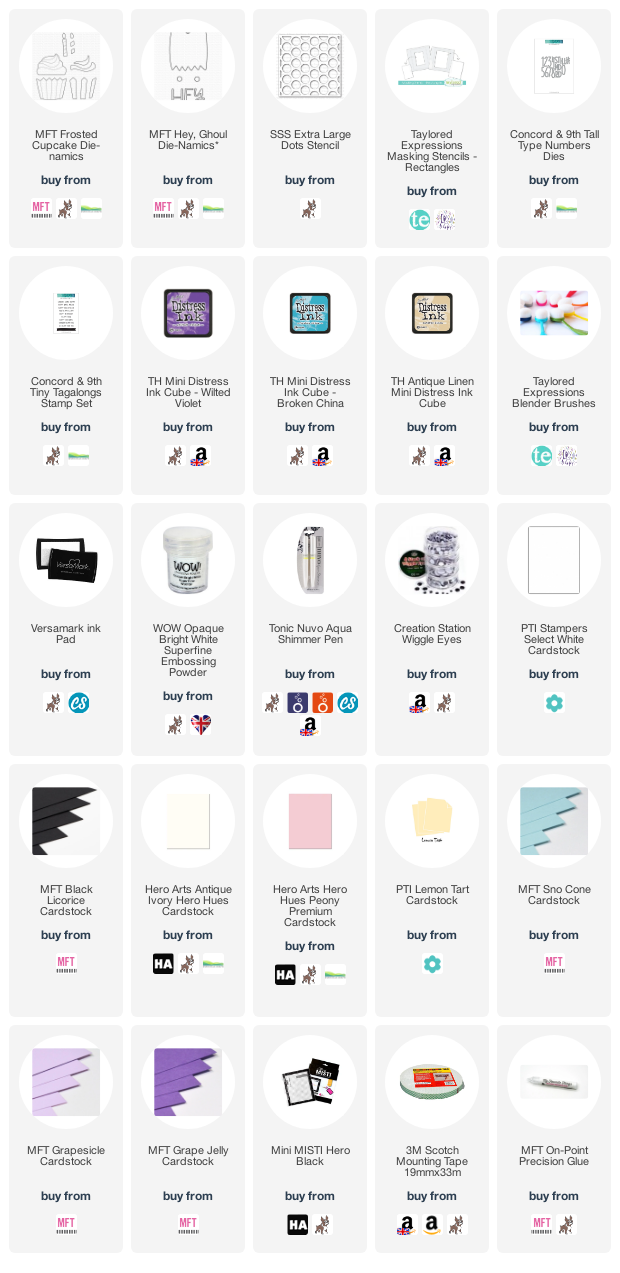
I started off by die cutting the MFT Frosted Cupcakes Die-namics. I cut the wrapper from cream cardstock and blended the bottom part with Tim Holtz Antique Linen Distress Ink. For the frosting, I used MFT Sno Cone and Berrylicious (sadly now discontinued) cardstock for one and MFT Grapescicle and Grape Jelly Cardstock for the other. The candles were cut with the same colours but I used a lemon cardstock for the flame and went over it with Copic Markers (Y17, Y11) for some added dimension. I also coloured the wick black. 

For the cupcake faces, I used the smile and cheeks from the MFT Hey Ghoul Die-namics and cut them from pink and black cardstocks. Once the cupcakes were assembled (using liquid glue), I then added googly eyes for some added fun. They were then set aside while I worked on the background. I first placed the Taylored Expressions Rectangle Masking Stencil on to the front of an A2 white card base. On top of that, I placed the Simon Says Stamp Extra Large Dots Stencil. Using blended brushes, I then blended on Tim Holtz Wilted Violet and Broken China Distress Inks. The stencils were then removed. 

I took the numbers from the Concord & 9th Tall Type Numbers Dies and die cut the 1, 2 and 'th' three times each from MFT Grape Jelly Cardstock. They were layered up one on top of another and added to the card with liquid glue. I then took the sentiments from the Concord & 9th Tiny Tagalongs Stamp Set and stamped the happy and birthday on to MFT Black Licorice Cardstock with Versamark Ink. I applied white embossing powder and heat set. They were cut in to strips and added to the card with foam tape. The cupcakes were then also added with foam tape below. To finish off, I added Tonic Nuvo Aqua Shimmer Pen to the 12th and the darker frosting on the cupcakes. 

SUPPLIES:

Here are the links to what I have used on the card. Affiliate links are used on some products. This means that if you make a purchase after clicking on my link, I receive a small commission with no extra cost to you. I truly appreciate your support when using these links. Please click on the logo below the product to shop at your favourite store. All products were personally purchased except those from Clearly Besotted, Hero Arts or those marked with an asterisk (*) which were kindly sent to me to use. You can read my full disclosure here.


How about you? When making a card do you stick to one company or do you love to combine different ones depending on the products? I would love to hear your thoughts. Thank you so much for stopping by to see me today. I really do appreciate it. I hope that you are well and staying safe. Take care! 

18 June 2020

Spellbinders | Wedding Season

Hello there, today I have a card to share with you using the Spellbinders Wedding Season collection by Nichol Spohr. I am using the fabulous wedding dress and tux dies, as well as the Glimmer Wedding Wishes hot foil sentiments.
 

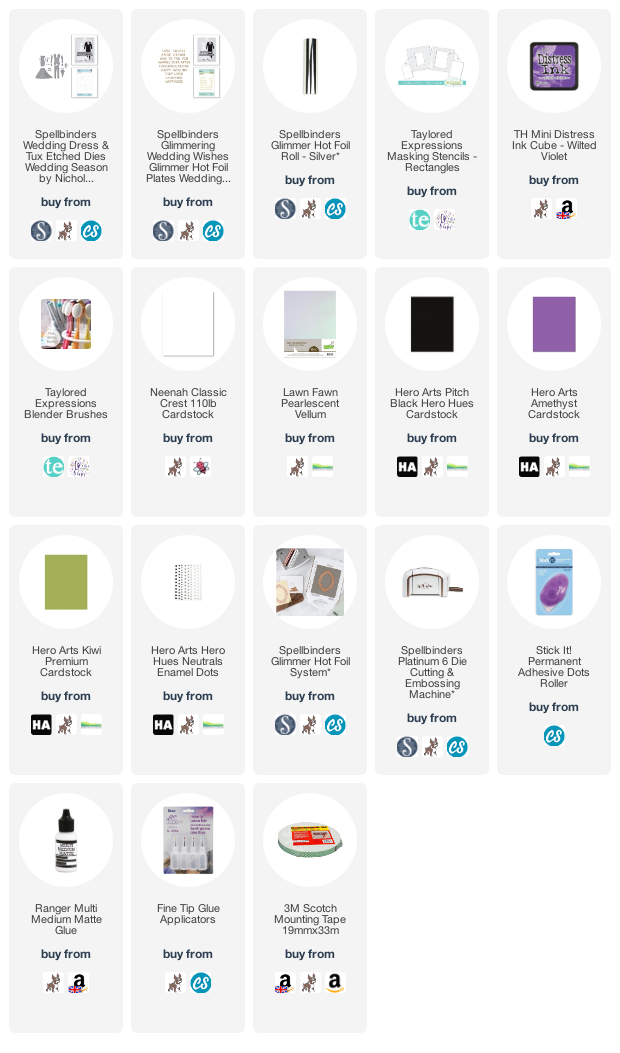
I started off my card by die cutting the Spellbinders Wedding Dress & Tux Etched Dies from various shades of cardstock. I cut the main parts of the dress from white cardstock and then cut the bottom part from pearlescent vellum. The pieces were adhered together with liquid glue. I adhered the top of the vellum but let the bottom be loose to give the effect of layers on the dress. For the tux, I used white and black cardstock. I then cut the bow tie from purple, as well as the flowers and the leaves from green.
 
 
I took a white A2 card base and placed the largest of the Taylored Expressions Rectangle Masking Stencils on top, securing with memo tape. Using a blending brush, I blended on Tim Holtz Wilted Violet Distress Ink, concentrating most of the colour towards the bottom and fading up to white at the top. The mask was then removed.
 
 
The dress and tux were then adhered on top with tape runner. I took the sentiment from the Spellbinders Glimmer Wedding Wishes Glimmer Hot Foil Dies set and foiled it using Spellbinders Silver Foil Roll on to purple cardstock. It was cut out and added to the card with foam tape. To finish off, I added black enamel dots to the centres of the flowers.
 
SUPPLIES:

Here are the links to what I have used on the card. Affiliate links are used on some products. This means that if you make a purchase after clicking on my link, I receive a small commission with no extra cost to you. I truly appreciate your support when using these links. Please click on the logo below the product to shop at your favourite store. All products were personally purchased except those from Clearly Besotted, Hero Arts or those marked with an asterisk (*) which were kindly sent to me to use. You can read my full disclosure here.
 
 
I hope you will check out the rest of the Wedding Season dies, it is a wonderful collection! Thank you so much for stopping by today, I really do appreciate it. I hope you have a wonderful day!

20 May 2020

Purple Onion Designs | Treat Yourself!

Hello there, today I have another card to share using the new Sunshine Lake collection from Purple Onion Designs. Today I am using the super cute Marigold and Juliet, who are enjoying their ice creams!
 

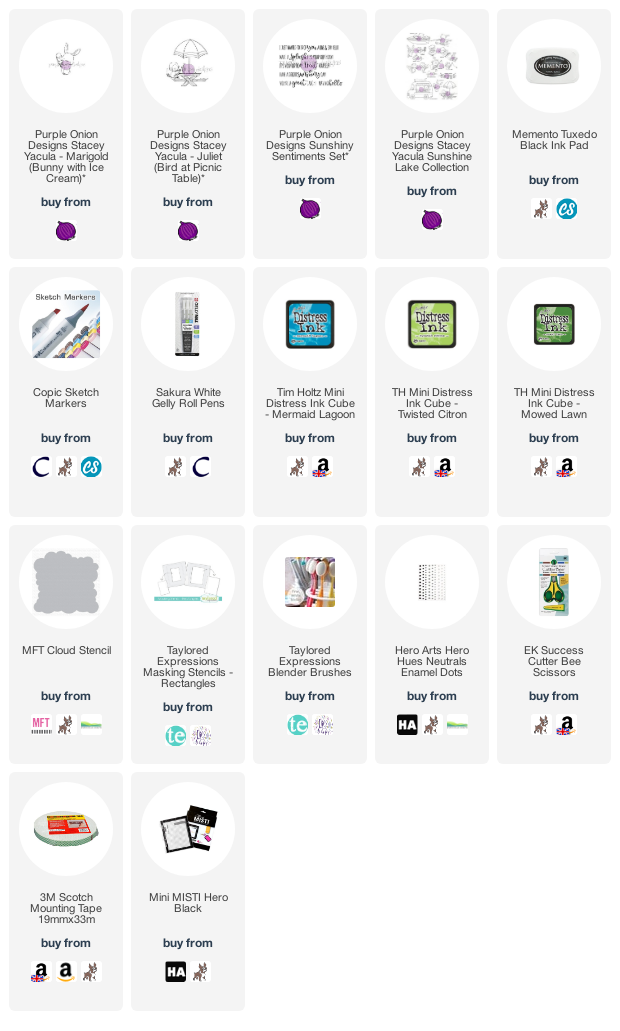
I started off by stamping Juliet (Bird at Picnic Table) and Marigold (Bunny with Ice Cream) on to white cardstock with Memento Tuxedo Black Ink. I then coloured them using Copic Markers (the colours that I used are listed below the supplies area). I then fussy cut them out using scissors.
 
 
I took an A2 white card base and placed the Taylored Expressions Rectangle Masking Stencil over the top. I then blended green ink at the bottom for grass. I used Twisted Citron and Mowed Lawn Distress Inks. I then took the MFT Cloud Stencil and placed this towards the top. Using Mermaid Lagoon Distress Ink, I blended on clouds, moving the stencil down as I went.
 
 
The stencils were removed and the sentiment from the Sunshiny Sentiments Set stamped in the top right hand corner. I then added the images on top with foam tape. To finish off, I added a few Hero Hues Enamel Dots and white gel pen highlights to the images.
 
SUPPLIES:

Here are the links to what I have used on the card. Affiliate links are used on some products. This means that if you make a purchase after clicking on my link, I receive a small commission with no extra cost to you. I truly appreciate your support when using these links. Please click on the logo below the product to shop at your favourite store. All products were personally purchased except those from Clearly Besotted, Hero Arts or those marked with an asterisk (*) which were kindly sent to me to use. You can read my full disclosure here.
 
 
COPIC MARKERS: Bird - N5, N3, N1, N00, Y26. Picnic Table - E59, E57, E55, E53. Umbrella - C5, C3, C1, BV09, V17, V15, V12, V01. Bunny - W5, W3, W1, W0, R12, R00. Ice creams - E51, E50, BG11, BG10, R83, R81.
 
You can buy the new stamps from the Sunshine Lake release separately, or as a bundle of 27 image stamps and 6 sentiments for a 30% discount. This offer is valid until 31st May 2020.
 
Thanks so much for stopping by today, I really do appreciate it. I hope you have a wonderful day!
End of code