28 April 2017

MMH May Kit Countdown

Hello there, today I am over on the Hero Arts blog sharing the first look at the new My Monthly Hero Kit. Let me tell you, it is gorgeous! The mermaids in the kit are beautiful and I love the coordinating sentiments and little images too. There are also some stunning papers in the kit, two of which I have used on my card today.
 
 
Do remember to go over to the blog and leave comments on the post, as well as the other posts this weekend to be in with a chance of winning one of the kits. You can see my post here. Thanks so much for popping by today. I hope you have a great rest of the day and a fabulous weekend!

27 April 2017

Birthday Candles

Hello there, today I have a card to share using the Hero Arts Candle stamp. I often forget to use little, individual stamps like these. I thought it would be great to use for another male themed card and it was incredibly quick to put together too!
 

I started off by cutting a piece of white cardstock using the second largest of the Nesting Postage Stamp Infinity dies. I then stamped the Handwritten Happy Birthday stamp on to this using Intense Black ink. The candles were stamped above. I used a stamp positioner for perfect placement since the stamps are wood mounted.
 
 
I simply coloured the candles with Copic Markers, using three shades of marker for each colour. The panel was adhered to an A2 card base made from SSS Island Blue cardstock, using foam tape.
 
SUPPLIES:
Here are the links to what I have used on the card. Please click on the picture or wording to be taken to where I purchased it. Affiliate links are used on some products. This means that if you make a purchase after clicking on my link, I receive a small commission with no extra cost to you. I truly appreciate your support when using these links. Please click on the letters below the product to shop at your favourite store - Simon Says Stamp (SSS), Hero Arts (HA), Seven Hills Crafts (SHC) Amazon (AZ) etc.


COPIC MARKERS: Candle flames - Y17, Y13, Y11. Purple candle - V05, V01, V00. Blue candle - B04, BG01, B00. Green candle - YG23, YG03, YG01.
 
Such a simple card but sometimes it is nice to make some quick ones to have on hand. Thanks so much for visiting me today, I hope you have a great day!

25 April 2017

Birthday Octopus

Hello there, today I have a card to share using the Hero Arts Birthday Animals Silhouettes stamp set. It is so much fun! I think is especially good for male cards.
 

I started off with a piece of white cardstock and cut this using one of the Rectangle Infinity Dies. I then stamped the octopus using Pool to Navy Ombre Ink. I stamped the balloons using Butter Bar to Orange Ombre and Mint Julip to Emerald Green Ombre Inks. I masked off the smaller balloon and stamped the bigger one so that it is behind it. The strings were stamped with Soft Granite Ink.
 
 
The sentiment, from the same set, was stamped below using Intense Black Ink. The image panel was added to an A2 Fog card base with foam tape. To finish off, I added a coating of Glossy Accents to the balloons.
 
SUPPLIES:
Here are the links to what I have used on the card. Please click on the picture or wording to be taken to where I purchased it. Affiliate links are used on some products. This means that if you make a purchase after clicking on my link, I receive a small commission with no extra cost to you. I truly appreciate your support when using these links. Please click on the letters below the product to shop at your favourite store - Simon Says Stamp (SSS), Hero Arts (HA), Seven Hills Crafts (SHC) Amazon (AZ) etc.

I was tempted to add a balloon to each of his arms (or are they legs?!) but decided against it in the end. That would be fun though! Thank you so much for popping by today. I hope you are all doing well and have a great day!

21 April 2017

VIDEO | Craft Room Progress

Hello there, I made a quick vlog style video to share on my You Tube channel about how my craft room is progressing. I thought I would share it here too. Although things are going a lot slower than I originally expected (and hoped!), there is progress! Yay!
 
 
I have all the walls painted. Although, I loved the blue I had, I wanted a lighter colour to brighten things up. I love the colour I chose which is an exact match for MFT's Sno Cone colour. I got a new carpet and finally my windows got installed. I am still waiting to get some blinds fitted and then once they are done, I will be back in properly. In the mean time, I have made two new pieces of furniture - a small Alex unit and a Hemnes cabinet (both from Ikea). You can see how I am getting on in the video:


As you can see, I have my stamps in my new unit (I still need to label everything though) and I am slowly getting my cardstock in. Although I really want to get back in as quickly as possible, I do actually like the process of organising! I hope you will bear with me a bit longer with my sporadic blog posts and lack of videos. Thanks for popping by today, see you soon!

18 April 2017

My Monthly Hero International Shipping

Hello there, today I have an exciting announcement to share. Hero Arts have reduced their international shipping for My Monthly Hero Kit subscribers.


If you subscribe to the kit, shipping internationally will now be $9.99 for my UK peeps, that is approx. £7.95 (depending on exchange rate) which I think is an exceptional shipping cost :)
 
The even better news? you can add your add-ons in to that same parcel for the same shipping cost. If you love the kits but have been put off subscribing due to the postage, I hope you will now think again about it.
 
The new rate applies to the May kit,  you need to sign up by April 19th to receive the May kit. Nothing has changed for US subscribers, shipping is still free!
 
You can learn more about the subscription service HERE and subscribe HERE. Thanks for popping by today. I hope you have a great day!

16 April 2017

Happy Easter

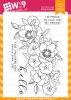
Hello there and happy Easter to you! Today I have a card to share using the adorable Hoppy Easter Bunny Wobble stamp from Stamping Bella. I thought the image would be really cute for an Easter card to my mum.


I started off by stamping the image on to a piece of white cardstock, using Memento Tuxedo Black Ink. The individual egg and grass are separate stamps, so I masked these off as I went to create a little trail of eggs. The sentiment in the set reads 'hoppy Easter' which is cute but I wanted a 'happy' one so I took the sentiment from the Easter Bunny Chick set instead.


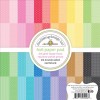
The image was coloured using Copic Markers. I then added clear Wink of Stella to the eggs and then for the chocolate ones, I added on white dots with a gel pen. I took a white 5.25" square card base and added a piece of Doodlebug patterned Paper on to the front panel. The image piece was then added on top with foam sheet.


SUPPLIES:

Here are the links to what I have used on the card. Please click on the picture or wording to be taken to where I purchased it. Affiliate links are used on some products. This means that if you make a purchase after clicking on my link, I receive a small commission with no extra cost to you. I truly appreciate your support when using these links.


COPIC MARKERS - Bunny: C5, C3, C1, C0, R00, R000. Daffodils: Y35, Y18, Y13, Y11. YG17, YG23, YG03. Bag: BG57, BG53. Easter Eggs: R85, R83, R81. E25, E23, E51. Grass: YG17, YG23, YG03, YG01. Sky: B00, B000, B0000, 0.

I am sure I have said this many times but I love Stamping Bella images! They are so lovey to colour! Thanks so much for popping by today. I hope you enjoy the rest of the Easter weekend.

13 April 2017

Mother's Day Flowers

Hello there, today I have the card to share that I made for my mum for Mother's Day (we celebrated it here in the UK about two weeks ago). My mum loves flowers so I decided to use the WPlus9 Kind Soul stamp set for her card. I just love WPlus9's florals!
 

I started off by taking a piece of white cardstock and stamped the flowers on to it using Memento Tuxedo Black Ink. I then stamped the sentiment from the Clearly Besotted All Occasion Sentiments Stamp Set below. The image was then coloured using Copic Markers. I also added a soft blue halo around the image to help it pop.
 
 
The image panel was simply added to a white A2 card base with ATG. To finish off, I added PPP Sparkling Clear sequins and a little clear Wink of Stella to the centres of the purple flowers.
 
SUPPLIES:
Here are the links to what I have used on the card. Please click on the picture or wording to be taken to where I purchased it. Affiliate links are used on some products. This means that if you make a purchase after clicking on my link, I receive a small commission with no extra cost to you. I truly appreciate your support when using these links.


COPIC MARKERS: Purple flowers - V09, V06, V05, V04, V01, Y13. Pink flowers - R85, R83, R81. Leaves - YG67, YG17, YG23, YG03. Shadow/halo - B00, B000, B0000, 0.
 
A bit of a simple card but my mum liked it so that's what matters! :) Thanks so much for visiting me today. I  hope you have a great week!
End of code