30 April 2021

Concord & 9th | Eclectic Garden + Lace Borders

Hello there, it is my last week of guest designing with Concord & 9th and let me tell you, it has been wonderful! What a great release this month! For my projects today, we are featuring the Eclectic Garden bundle (stamps and dies) and the Lace Border Dies. 

My first card uses the Eclectic Garden Bundle. This such a wonderful set with flowers, hummingbirds, background stamps and sentiments! I started off by taking an A2 white card base and stamping the lined circle background stamp from the Concord & 9th Eclectic Garden Stamp Set on to it using Versamark Ink. I applied Hero Arts Sparkle Embossing Powder and heat set. I wanted this to be subtle, it is nearly impossible to see in the photos (I think you can just about see it in the close up photo below) but in real-life it just adds a subtle sparkle to the card. 

I then die cut the flower and leaf die from the Concord & 9th Eclectic Garden Dies, once from white cardstock and once from Sprout cardstock. The green layer was adhered on top of the white layer and then adhered on to the card base with liquid glue. I then die cut the flower heads from Ballet Slippers and Honeysuckle cardstock. They were adhered on top and then I added an enamel dot to the centre of the flowers. 

I die cut the base layer of the hummingbird from Black cardstock and the layers were cut from White, Aqua Sky and Eggplant cardstock. All of these cardstocks are from the Concord & 9th Assorted Color Cardstock Pack. For the tails on the hummingbirds, I pounced on Versamark Ink and applied the same sparkle embossing powder that I used on the background, and heat set. This gives them just a little added shimmer as well. To finish off, I stamped the sentiment from the stamp set with Versamark Ink, applied white embossing powder, heat set and cut it in to a strip using the die in the set. It was added to the card with foam tape. 

My next projects use the Lace Border Dies. These are so pretty and you can use them in different ways - separately or they layer together too. For the card I started off by taking a panel of white cardstock and die cutting the larger of the Concord & 9th Lace Border Dies at the bottom. I then cut the strip border die from Oceanside cardstock and adhered it on top of the panel (as you can see, it lines up perfectly with both borders). 

I then took the sentiment from the Concord & 9th Eclectic Garden Garden Stamp Set and stamped it above the border using Versafine Clair Nocturne Ink. I took an A2 white card base and adhered a panel of Aqua Sky cardstock to it. The white panel was then added on top so that you can see the Aqua Sky cardstock through the border die. To finish off, I die cut a hummingbird from the Concord & 9th Eclectic Garden Dies three times from Black cardstock and layered them up. 

For my last project, I created a little gift box. I die cut the Concord & 9th Mini Gift Box Die from Aqua Sky cardstock and assembled it. I then die cut the larger of the Concord & 9th Lace Border Dies from Oceanside cardstock (for these borders, I added adhesive sheet to the back before die cutting). I cut the middle size from white and the thinner border from Peacock. I lined them up and adhered them to the box. 

I then stamped and heat embossed another sentiment from the Concord & 9th Eclectic Garden Stamp Set and die cut it out with the sentiment strip die. It was added to the box with foam tape. To finish off, I die cut the mini heart from the Concord & 9th Big On You Dies three times from white cardstock, stacked them up and added them to the box as well. 
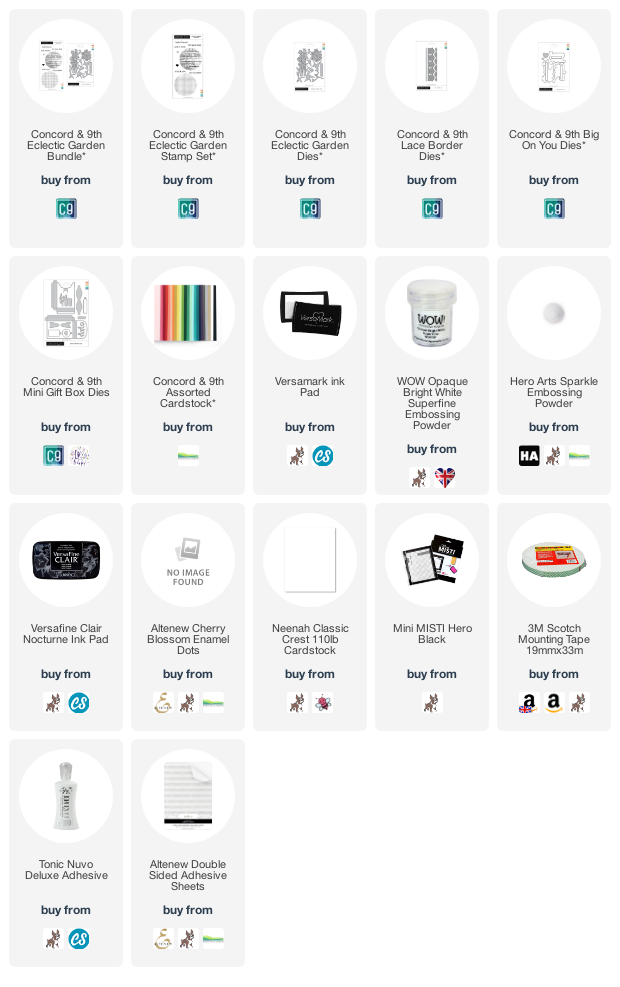
SUPPLIES:

Here are the links to what I have used on the project. Affiliate links are used on some products. This means that if you make a purchase after clicking on my link, I receive a small commission with no extra cost to you. I truly appreciate your support when using these links. Please click on the logo below the product to shop at your favourite store. All products were personally purchased except those from Clearly Besotted, Hero Arts or those marked with an asterisk (*) which were kindly sent to me to use. You can read my full disclosure here.


For more inspiration using the sets, as well as what my guest teamies have been up to, please head over to the Concord & 9th Blog. A big thank you goes to Concord & 9th for having me guest with them this month, it has been an absolute pleasure! Thank you so much for stopping by today. I hope you have a great day and weekend! 

Hero Arts | May 2021 My Monthly Hero Countdown

Hello there and welcome as we countdown to the release of the Hero Arts May 2021 My Monthly Hero Kit. The kit releases on Monday 3rd May and from now until then, we will be sharing inspiration using the new kit. This month has a beautiful ocean/underwater theme to it. I love sea creatures, so this kit is perfect for me! In the kit, you get a mini Contour Ink and so I am using that on my card today. 


I started off my card by taking a panel of Copic friendly white cardstock and stamping the jellyfish and bubbles from the main kit stamp set on to it using the Contour Ink. If you haven't heard of this ink before, it is a very pale grey colour that is perfect for no-line colouring. 


I then stamped the sentiment using Intens-ified Black Ink. I coloured the jellyfish and bubbles using Copic Markers (the colours that I used are listed below) and then added some dot detailing with the Copics on the jellyfish for some added interest. 


I made an A2 card base from Lavender Cardstock and then using an Ink Blending Brush, blended Grape Slush Reactive Ink at the bottom, blending up lighter towards the top of the card. I then sprayed it with White Iridescent Shimmer Mist. Once the card base was dry, the image panel was adhered to it using foam tape. 

SUPPLIES:


Here are the links to what I have used on the project. Affiliate links are used on some products. This means that if you make a purchase after clicking on my link, I receive a small commission with no extra cost to you. I truly appreciate your support when using these links. Please click on the logo below the product to shop at your favourite store. All products were personally purchased except those from Clearly Besotted, Hero Arts or those marked with an asterisk (*) which were kindly sent to me to use. You can read my full disclosure here.


COPIC MARKERS: Jellyfish - V17, V15, V12, V01, V00, BG49, BG13, BG11, BG10. Bubbles - RV02, RV01, RV000, V15, V12, V00, B02, B01, B00, B000, BG13, BG11, BG10. 

Please head over to the Hero Arts Blog to see more inspiration using the kit and remember to leave a comment over there for a chance to win a kit! Thank so much for much for stopping by today. I will be back later with another post but in the mean-time, I hope you have a lovely day! 

29 April 2021

Altenew | Wildflower Paper Crafting Collection Release Blog Hop + Giveaway

Hello there, I am delighted to be joining Altenew today for the the release of the new Wildflower Paper Crafting Collection. The release includes, a 12x12 paper pad, a 6x6 paper pad and two ephemera packs. Quite often these collections feel like they are more suited to scrapbooking, rather than card making but as you will see on the hop, they can be used beautifully on cards too. For my projects today though, I decided to create tags. 

For the release, we are celebrating with a fun, inspiration filled blog hop. More details on that below :)


As I mentioned, I decided to use the 6x6 paper pad and ephemera packs to create some tags today. When I send gifts to friends and family, I like to decorate the parcels with tags that I usually make with either stickers or ephemera, so this new Wildflower collection is perfect for these! 


I started off by die cutting two tags using the Altenew Terrific Tags Dies from the Altenew Wildflower Paper Crafting Collection 6x6 Paper Pad. Usually with tags, I would add a cardstock piece behind but since I will not be writing on the back of these, I left them as is. The paper is very thick so they didn't need the extra support either. 


For my first tag, I took the black and white floral ephemera piece from the Altenew Wildflower Paper Crafting Collection Bitty Bits Ephemera and added it simply as it was to the tag with Altenew Instant Dimension Foam Tape. The sentiment, from the Altenew Flower Vine Stamp Set was stamped on to black cardstock with Versamark Ink. I applied Altenew Pure White Crisp Embossing Powder and heat set. It was cut in to a strip and added to the tag with foam tape. 


For the second tag, I took the larger floral piece Altenew Wildflower Paper Crafting Collection Bitty Bits Ephemera and adhered it to the tag with Altenew Instant Dimension Foam Tape. I then adhered the smaller flowers from the Altenew Wildflower Paper Crafting Collection Pink Posy Ephemera with glue. 


I took the sentiment from the Altenew Sentiment Strips 2 Stamp Set and stamped and embossed it on to black cardstock, cut it out and added it to the tag with more foam tape. I then finished off both tags with Altenew Cherry Blossom Enamel Dots and twine bows at the top. 

SUPPLIES:


Here are the links to what I have used on the projects. Affiliate links are used on some products. This means that if you make a purchase after clicking on my link, I receive a small commission with no extra cost to you. I truly appreciate your support when using these links. Please click on the logo below the product to shop at your favourite store. All products were personally purchased except those from Clearly Besotted, Hero Arts or those marked with an asterisk (*) which were kindly sent to me to use. You can read my full disclosure here.


BLOG HOP:


As mentioned, this post is part of a fun blog hop featuring the new collection. For the hop, you should have arrived here from Virginia Lu. Next on the hop is Tenia Nelson. If you get lost along the way, please visit the Altenew Blog Post

GIVEAWAY:

$200 in total prizes! To celebrate this release, Altenew is giving away a $50 gift certificate to 2 lucky winners and a $20 gift certificate to 5 winners! Please leave a comment on the Altenew Card Blog and/or each designer’s blog post on the blog hop list below by 5th May 2021 for a chance to win. Altenew will draw 7 random winners from the comments left on each stop of this blog hop and announce the winners on the Altenew Winners Page on 7th May 2021.

Thank you so much for stopping by today, I really do appreciate it. I hope you enjoy the rest of the hop and have a wonderful rest of the day! 

Hero Arts | Creating a Background with Smalll Images

Hello there, I am over on the Hero Arts Blog today, sharing a card using the Life Is Beautiful set. This set contains lots of little bundles of flowers that can be used in different ways. I really like using these smaller images for backgrounds. I stamped and heat embossed them repeatedly over the top half of an A2 white card base. 


I then added ink blending with Reactive Inks, followed by splatters of White Iridescent Spray. For the sentiment I used the die from the Thinking of You Stamp & Cut

SUPPLIES:


Here are the links to what I have used on the project. Affiliate links are used on some products. This means that if you make a purchase after clicking on my link, I receive a small commission with no extra cost to you. I truly appreciate your support when using these links. Please click on the logo below the product to shop at your favourite store. All products were personally purchased except those from Clearly Besotted, Hero Arts or those marked with an asterisk (*) which were kindly sent to me to use. You can read my full disclosure here.


For more details on how I made the card, please head over to the Hero Arts Blog post here. Thanks so much for stopping by, I will be back later with another blog post!

28 April 2021

Reverse Confetti | Hi, Friend

Hello there, today I have a card to share using the Reverse Confetti Orange Blossoms set. This is such a pretty set that screams spring and summer to me! 


I started off my card by stamping the large image from the Reverse Confetti Orange Blossoms Stamp Set on to white cardstock with Memento Tuxedo Black Ink. I then coloured it using Copic Markers (the colours that I used are listed below the supplies area) and die cut it out using the Reverse Confetti Orange Blossoms Confetti Cuts


I took an A2 white card base and placed the MFT Rectangle Extraordinaire Stencil on top. Using blending brushes, I then blended Tim Holtz Distress Inks inside the rectangle. I used Dried Marigold, Spiced Marmalade and Carved Pumpkin. With the mask still in place, I then splattered on black Arteza Gouache Paint. I removed the mask and let it sit to dry. 


Once dry, the orange blossoms image was adhered on top with foam tape. I then took the sentiment from the set and stamped it on to black cardstock with Versamark Ink. I applied white embossing powder and heat set. It was cut in to a strip and added to the card with tape runner and foam tape. To finish off, I added a few black Hero Arts Neutrals Enamel Dots

SUPPLIES:


Here are the links to what I have used on the project. Affiliate links are used on some products. This means that if you make a purchase after clicking on my link, I receive a small commission with no extra cost to you. I truly appreciate your support when using these links. Please click on the logo below the product to shop at your favourite store. All products were personally purchased except those from Clearly Besotted, Hero Arts or those marked with an asterisk (*) which were kindly sent to me to use. You can read my full disclosure here.


COPIC MARKERS: Oranges - YR27, YR18, YR15, YR12. Leaves - G28, YG17, YG23, YG01. Blossoms - YR31, YR30. 

I hope everyone is doing well. Spring is definitely my favourite season, so I am enjoying things brightening up and flowers popping up. Thank you so much for stopping by today, I really do appreciate it. I hope you have a lovely day and take care. 

26 April 2021

VIDEO | Popped Up Die-Cut Inlay

Hello there, today I have a card to share with you using the Hero Arts Birthday Message Cover Plate that I shared over on the Hero Arts Blog a couple of weeks ago. It uses the popped up die cut inlay technique which I really love doing. I think the recipient always wonders how the look was achieved! 


I started off by taking a panel of Hero Hues Dove White Cardstock and using blending brushes, blended on Hero Arts Reactive Inks. I used Key Lime Fizz, Pool Party, Splash, Blue Hawaii and Purple Galaxy. I then took the star stencil from the Hero Arts Sky Stencil Pair and placed it over the panel. Using an ink blending tool, I pounced Hero Arts Unicorn Pigment Ink through the star openings. 


I heat set the ink and then die cut the panel with the Hero Arts Birthday Message Cover Plate. I also cut the die three times from white cardstock as well. I took an A2 white card base and adhered the negative panel of the die cut on to the front using Hero Arts Precision Glue. I then inlaid the white letters, stacking them three high. 


The inked letters were then adhered on top to complete the star pattern. I took the sentiment from the Hero Arts Birthday Messages Stamp Set and stamped it on to Hero Hues Pitch Black Cardstock with Hero Arts Clear Embossing & Watermark Ink. I applied Hero Arts White Detail Embossing Powder and heat set. It was then cut in to a banner using the die from the Hero Arts Bouquet Accessories Dies and adhered to the card with tape runner adhesive. 

VIDEO:

Here is the video showing how I made the card:


If you are viewing this blog post via email subscription, you can watch the video HERE on YouTube. 

SUPPLIES:


Here are the links to what I have used on the project. Affiliate links are used on some products. This means that if you make a purchase after clicking on my link, I receive a small commission with no extra cost to you. I truly appreciate your support when using these links. Please click on the logo below the product to shop at your favourite store. All products were personally purchased except those from Clearly Besotted, Hero Arts or those marked with an asterisk (*) which were kindly sent to me to use. You can read my full disclosure here.


I do know that it is a little tricky to see the letters/words in the photos but in real-life I think they can be seen/read quite easily. Thanks so much for stopping by today, I really do appreciate it. I hope you have a lovely day and a great week! 

23 April 2021

Concord & 9th | Banner Builder + Thinking of You

Hello there, I am back today to share my next two cards as part of guest designing with Concord & 9th this month. Today we are showcasing the Banner Builder Bundle (a great set to create sentiment banners with), as well as the Thinking of You Bundle (such a pretty floral set with a gorgeous thinking of you theme). 


My first card uses the Banner Builder Stamps and Dies. I started off my card by die cutting the smaller of the two banners from the Concord & 9th Banner Builder Dies set from white cardstock. I think these would look great in multiple colours but you know that I am all about the CAS, so went with simply white today. I then took the sentiment from the Concord & 9th Banner Builder Stamp Set and stamped the 'happy birthday friend' on to white cardstock with Versafine Clair Nocturne Ink. 


I die cut the sentiments using the coordinating dies. Because I used the banner with two sentiment strips, I didn't use the word 'friend' but it is available there if you use the larger banner die. I took an A2 white card base and adhered the banner piece first with thin foam tape. I then added the sentiment pieces with more thin foam tape on top, so that it has some added dimension. 


I took the flowers from the Concord & 9th Eclectic Garden Dies and die cut them from Concord & 9th Ballet Slipper and Ocean Sky Cardstock. I also die cut the leaves (from a larger die) from Sprout cardstock, I cut these off the larger die and popped them behind the flowers. I added enamel dots to the centres of the flowers and then adhered the flowers around the banner. I also die cut a hummingbird from the die set from White, Black, Midnight and Oceanside cardstock. It was layered up and added to the card with more thin foam tape. 


My next card uses the beautiful Thinking of You stamp set and dies. The die set has a gorgeous floral frame in it that I was tempted to use but I wanted to use the set in a different way today. I started off by ink blending a panel of white cardstock with Concord & 9th Inks and a blending brush. I used Buttercup, Grapefruit, Sorbet and Cranberry. 


I then took the Concord & 9th Thinking of You Stamp Set and stamped the floral image on to it multiple times, rotating it as I went, with Versafine Clair Nocturne Ink. I took the thinking of you word die from the Concord & 9th Thinking of You Perfect Pairings Die Set and die cut it from the panel. I then die cut it another four times from white cardstock. 


I adhered a piece of printer paper behind the panel and then adhered the white thinking of you die cut back in to create an inlay. I stacked the white pieces four high and then added the inked one back on top to complete the stamped pattern. I then spritzed it heavily with Sparkle Sheer Shimmer Spritz. Once dry, it was adhered to an A2 white card base with tape runner. 

SUPPLIES:


Here are the links to what I have used on the projects. Affiliate links are used on some products. This means that if you make a purchase after clicking on my link, I receive a small commission with no extra cost to you. I truly appreciate your support when using these links. Please click on the logo below the product to shop at your favourite store. All products were personally purchased except those from Clearly Besotted, Hero Arts or those marked with an asterisk (*) which were kindly sent to me to use. You can read my full disclosure here.


For more inspiration using the sets, please head over to the Concord & 9th Blog to see what my guest teamies have been up to. Thanks so much for stopping by today, I really do appreciate it. I hope you have a great rest of the day and a wonderful weekend! 

22 April 2021

Altenew | Paint-A-Flower: Chamomile Outline Stamp Set Release Blog Hop + Giveaway

Hello there, I am delighted to be joining Altenew today to celebrate the release of the Paint-A-Flower Chamomile Outline Stamp Set. This is such a pretty set and perfect for lots of different occasions. It is great for colouring but I think that you can use it in different ways too. We are celebrating the release with a fun blog hop, more information on the blog hop below :)


I started off my card by stamping the flowers in the vase/jug from the Altenew Paint-A-Flower Chamomile Outline Stamp Set on to white cardstock with Memento Tuxedo Black Ink. I then coloured the images with Copic Markers before fussy cutting out with scissors. I took an A2 white card base and masked off the edges on the front panel. Using an Altenew Ink Blending Tool, I then blended on Chamomile and Sunray inks from the Altenew Golden Sunset Crisp Dye Ink Mini Cube Set


I adhered the image on top with Altenew Instant Dimension Foam Tape. I took the sentiment from the set and stamped it on to black cardstock with Versamark Ink. I applied Altenew Pure White Crisp Embossing Powder, heat set and cut it in to a strip. It was added to the card with thin foam tape. To finish off, I added a few Altenew Sea Shore and Pocket Full Of Sunshine Enamel Dots. I also added white gel pen to highlights to the image. 

SUPPLIES:


Here are the links to what I have used on the project. Affiliate links are used on some products. This means that if you make a purchase after clicking on my link, I receive a small commission with no extra cost to you. I truly appreciate your support when using these links. Please click on the logo below the product to shop at your favourite store. All products were personally purchased except those from Clearly Besotted, Hero Arts or those marked with an asterisk (*) which were kindly sent to me to use. You can read my full disclosure here.


BLOG HOP:


As mentioned this post is part of a fun, inspiration filled blog hop. For the hop, you should have arrived here from the wonderful LauraJane. Next on the hop is the amazing Emily Midgett. If you get lost along the way, please head over to the Altenew blog post

GIVEAWAY:

$200 in total prizes! To celebrate this release, Altenew is giving away a $50 gift certificate to 2 lucky winners and a $20 gift certificate to 5 winners! Please leave a comment on the AltenewCard Blog and/or each designer’s blog post on the blog hop list below by 27th April 2021 for a chance to win. Altenew will draw 7 random winners from the comments left on each stop of this blog hop and announce the winners on the Altenew Winners Page on 30th April 2021. 


Thank you so much for stopping by today, I really do appreciate it. I hope you have a great rest of the day! 

20 April 2021

Heffy Doodle and Clearly Besotted Collaboration Blog Hop + Giveaway

Hello there, today I am taking part in a fun blog hop to celebrate a collaboration between Clearly Besotted and Heffy Doodle. Both Design Teams have got together to share inspiration using both companies products. More information on the hop below :)

For my projects today, I thought I would create ATCs (Artist Trading Cards). This isn't something that I usually do but I do like the smaller format and I thought the size worked well with the products I was using. I will pop one of these into parcels that I send to friends. 


I started off by stamping my images from the Clearly Besotted Balloon Bunch Buddies Stamp Set. The images were stamped on to white cardstock using Memento Tuxedo Black Ink. I then coloured them with Copic Markers and fussy cut out with scissors. I took the Heffy Doodle Mini Essentials Dies and die cut the rectangle from the set, along with the square inside from white cardstock to create what look like polaroid photos.


I then cut two solid rectangle pieces (for the backs). I adhered the front piece to the back piece, saving the inside square pieces to ink blend on. For these I wanted to create a day sky and a night sky. I used Tim Holtz Mermaid Lagoon and Seedless Preserves Distress Inks for the day sky and Chipped SapphireSeedless Preserves and Black Soot for the night sky. They were then splattered with Sparkle Sheer Shimmer Spritz


I die cut the Heffy Doodle Sun, Moon & Stars Dies from white cardstock, as well as the Heffy Doodle Swirly Cloud Dies. They were coloured using Copic Markers and added to the squares, cutting off the bits overhanging with scissors. I stamped the sentiments on to the white frame pieces from the Clearly Besotted Balloon Bunch Buddies Stamp Set and then adhered the scene pieces like an inlay. 


The images were added to the ATCs with foam tape and then to finish off, I added Crystal Glaze to the balloons and white gel pen highlights to the critters. Along with black glaze pen to their eyes.

SUPPLIES:


Here are the links to what I have used on the project. Affiliate links are used on some products. This means that if you make a purchase after clicking on my link, I receive a small commission with no extra cost to you. I truly appreciate your support when using these links. Please click on the logo below the product to shop at your favourite store. All products were personally purchased except those from Clearly Besotted, Hero Arts or those marked with an asterisk (*) which were kindly sent to me to use. You can read my full disclosure here.


BLOG HOP:


As mentioned, this post is part of a fun, inspiration filled blog hop with prizes too. Here is the full list of participants taking part today:

GIVEAWAY:

To be entered to win the giveaway, all you need to do is comment at each stop along the Blog Hop! Clearly Besotted will be giving away a £25 gift certificate and Heffy Doodle will be giving away a £25 gift certificate to their respective stores. Be sure to comment before 11:59pm on 24th April 2021 to be entered to win! Both companies will post the winners of the prizes on 25th April 2021. Be sure to check the Clearly Besotted Blog and Heffy Doodle Blog to see if you are a winner.

It was a lot of fun combining the two different companies products together. As you can see, I used Clearly Besotted stamps and Heffy Doodle dies but I do think both companies stamps would work well together too! Thank you so much for stopping by today, next on the hop is the fabulous Ali. Have a great day!

19 April 2021

Altenew | Suddenly Spring Stand-alone Dies Release Blog Hop + Giveaway

Hello there, I am delighted to be joining Altenew today to celebrate the release of their Suddenly Spring Die Collection, as well as their new Instant Dimension Foam Tape. It is such a wonderful release and I really enjoyed creating my projects today. We are celebrating the release with a fun, inspiration filled blog hop (with prizes!), more on that below :)


For my first card, I am using the new Mini Flower Cluster Layering Die Set. This is such a beautiful set that is one of Altenew's classic layering die sets but in a mini version! I started off by die cutting the layers of the Altenew Mini Flower Clustrer Layering Die Set from Altenew Sea Shore and Summer Afternoon Gradient Cardstock. For the larger pieces, they were layered up with Altenew 2 in 1 Precision Glue and for the smaller pieces, I adhered Altenew Double Sided Adhesive Sheet to the back of the cardstock before die cutting. The leaves were cut from Altenew Green Meadows Gradient Cardstock


I then adhered these to a panel of white cardstock with the glue pen. I took the Altenew Fancy Thanks Die and die cut it twice from normal black cardstock and once from black alcohol ink cardstock (this has a lovely matte, almost suede feel to it) and layered them up so that the alcohol cardstock piece was on the top. 


I then stamped the sentiment from the Altenew Sentiment Strips Stamp Set on to white cardstock with Altenew Obsidian Black Ink. It was cut in to a strip and adhered to the panel using Altenew Instant Dimension Foam Tape. I then adhered the whole panel on to an A2 white card base with thin foam tape. To finish off, I added Altenew Sea Shore, Cool Summer Nights and Pocketful of Sunshine Enamel Dots. 


Before I share my next two cards with you, I wanted to share a look at the new Altenew Instant Dimension Foam Tape. This is by far the prettiest of foam tape you will have ever seen! Not only is the packaging for the tape beautiful, the actual backing on the foam tape is too! 


It is printed with beautiful Altenew flowers on it. The foam tape roll is huge! 33m in length and 1.5mm thick and has great adhesion. This foam tape will last you ages!


For my next two cards, I am using the new Decorative Swirls Die Set. This new set features two beautiful swirl dies, along with two beautiful leaves. I have used the leaves on my cards today. I started off by taking a sheet of Yupo paper and adding drops of Altenew Alcohol Inks on to it. I used Sea Glass, Ocean Waves, Frayed Leaf and Forest Glades. I left them to dry slightly and then pressed Silver Deco Foil on to the paper and where the inks were still slightly wet, the foil adhered to it. 


I then die cut the alcohol inked background using the two leaves from the Altenew Decorative Swirls Die Set. I also die cut each leaf another four times from white cardstock. The leaves were layered up one on top of another and the alcohol inked ones adhered on top. 


I took A2 white card bases and ran them through my die cutting machine, embossing the Altenew Fine Frames Rectangle Die in the centre. I love the added interest this adds to the simple cards! 


I took the sentiment from the Altenew Sentiment Strips Stamp Set, stamped it on to black cardstock twice with Versamark Ink. I applied Altenew Pure White Crisp Embossing Powder, heat set and cut them in to strips. They were added to the card with Altenew Instant Dimension Foam Tape. To finish off, I added a few Raindrops. 

SUPPLIES:


Here are the links to what I have used on the project. Affiliate links are used on some products. This means that if you make a purchase after clicking on my link, I receive a small commission with no extra cost to you. I truly appreciate your support when using these links. Please click on the logo below the product to shop at your favourite store. All products were personally purchased except those from Clearly Besotted, Hero Arts or those marked with an asterisk (*) which were kindly sent to me to use. You can read my full disclosure here.


BLOG HOP:


As mentioned, this post is part of a fun, inspiration filled hop. For the hop, you should have arrived here from Amber Rain Davis. Next on the hop is Therese Calvird. If you get lost along the way, please head over to the Altenew Blog

FREE GIFTS:

Here are two ways to get a FREEBIE to kickstart your creativity! Free gift will be added to cart automatically. 


- Get a FREE brand-new Suddenly Spring Stand-alone Dies Release Inspiration Guide (worth $5.99) with every order of Suddenly Spring Stand-alone Die Release Bundle. 

- Get a FREE brand-new Suddenly Spring Stand-alone Dies Release Mini Inspiration Guide with every order from 19th April 2021 through 21st April 2021. 


GIVEAWAY:

$300 in total prizes! To celebrate this release, Altenew is giving away a $50 gift certificate to 2 lucky winners and a $20 gift certificate to 10 winners! Please leave a comment on the Altenew Card Blog and/or each designer’s blog post on the blog hop list below by 25th April 2021 for a chance to win. Altenew will draw 12 random winners from the comments left on each stop of this blog hop and announce the winners on the Altenew Winners Page on 27th April 2021. 


Thanks so much for stopping by today, I really do appreciate it. I hope you have a lovely time on the rest of the hop and a great day! 

End of code