30 August 2017

Scrumptious Birthday

Hello there, today I have a card to share using the gorgeous Just For you set from Clearly Besotted. I love the large ranunculus image in the set and thought it would work well for water colouring. I have combined it with the Scrumptious Script set to make a birthday card.
 

I started off by stamping the ranunculus image on to watercolour paper using Versamark Ink. I applied white embossing powder and heat set. I coloured the image using Zig Clean Color Real Brush pens (colours used listed below the supplies section) along with water and a paint brush. The image was then fussy cut out with scissors.
 
 
I took a white A2 card base and added a strip of paper from the MFT Black & White Basics Paper Pad on to the left hand side. I then added a panel of white cardstock to the right. On to this panel, I stamped the sentiment from the Scrumptious Script set, in Memento Tuxedo Black Ink. I then added the flowers on top with foam tape. To finish off, I added a few Lucy's sequins and jewels with Multi Medium Matte.
 
SUPPLIES:
Here are the links to what I have used on the card. Affiliate links are used on some products. This means that if you make a purchase after clicking on my link, I receive a small commission with no extra cost to you. I truly appreciate your support when using these links. Please click on the logo below the product to shop at your favourite store. Products marked with an asterisk (*) were kindly sent to me to use.
 
 
ZIG CLEAN COLOR REAL BRUSH PENS - Flowers: 025 Pink, 081 Light Violet. Big leaves: 045 Pale Green, 041 Light Green. Small flowers: 042 Turquoise Green.
 
This is a really great image to colour if you don't like spending too much time colouring. The ranunculus are so easy to colour and I think they will look great however you do it! Thanks so much for visiting me today. I hope you have a great day!

28 August 2017

VIDEO | Alcohol Ink Background with Honey Bee Stamps

Hello there, today I am delighted to be guest designing with Honey Bee Stamps. I am using the super cute Swimming By stamp set along with alcohol inks to create a fun sea background.
 

To start my card, I took a piece of Yupo paper (a synthetic paper that works really well with alcohol inks) and added on some Alcohol Ink Blending Solution on to it. This helps the alcohol inks to move. I then applied three shades of alcohol ink. I used Mermaid, Pool and Aqua. Since I blended the colours together so much, I probably could have just used one or two but that's ok! Once I had the colour on the paper, I picked it up and moved it so that the alcohol inks ran on the paper. I then spritzed air on to it using the TH Spritzer Tool. I set this piece aside to dry while I worked on my stamping.
 
 
I took the mermaid and turtle from the Swimming By stamp set and stamped these on to white cardstock using Memento Tuxedo Black Ink. I then coloured them using Copic Markers and cut them out with the coordinating dies.
 
 
I cut my alcohol inked piece down to size and stamped the bubbles from the set on to it. I used Versamark ink to stamp and then applied white embossing powder and heat set. The heat did warp the paper slightly but since I was sticking it down to the card base I wasn't too concerned. After applying the piece to an A2 white card base, I added two strips of white cardstock on top with foam tape. The 'happy birthday' sentiment was stamped on to the top piece with Memento Tuxedo Black Ink.
 
 
I then added the turtle on to the card with foam tape and the mermaid was added with a combination of foam tape and tape runner. Using Copic At You Spica glitter pens, I added little dots to the mermaid's hair, top and tail. I also added a little on to the shell of the turtle too. To finish off, I added Shimmering Pool Jewels, along with Peacock sequins.
 
VIDEO:

Here is a look at how I made the card:


SUPPLIES:

Here are the links to what I have used on the card. Affiliate links are used on some products. This means that if you make a purchase after clicking on my link, I receive a small commission with no extra cost to you. I truly appreciate your support when using these links. Please click on the logo below the product to shop at your favourite store.
 
 
COPIC MARKERS: Mermaid skin - E13, E11, E00, E000, E0000, E11. Mermaid hair - V09, V06, V05, V01, Spica 01 Lavender, Spica 13 Lilac. Mermaid Top and tail - BG49, BG34, BG13, BG11, BG10, BG000, Spica 08 Turquoise. Turtle - YG17, YG23, YG03, YG01, Spica 17 Mint.
 
For more inspiration using this set, along with the other sets from Honey Bee Stamps, please head over to their blog. Thanks so much for visiting me today. I hope you have a great day!

26 August 2017

Baby Penguin

Hello there, today I am back with another card using some of the new products from the Hero Arts Wintertime Fun release. I just couldn't resist this Baby Penguin, I mean, adorable, right?! :)
 

I started off by stamping the penguin on to white cardstock. I used the ink colours from the Ink & Emboss Penguin set. The colours are Soft Granite, Charcoal and Black. To help layer them up, I used a stamp positioner. I cut him out using the coordinating Frame Cut. To create a background for him, I took a circle die and cut this with Bristol cardstock. I then blended on various shades of Distress Ink to create a sky look. I spritzed this with a solution of Perfect Pearls and water and set aside to dry.
 
 
Once dry, I took the piece and ran it through my Cuttlebug using the Snowflake Confetti die. The piece was adhered flat to a card base made from the new Decorative Woodgrain Cardstock. I then took the sentiment from the set, stamped this with Versamark Ink on to a piece of black cardstock, applied white embossing powder and then heat set. I added the penguin to the card with foam tape as well as the sentiment piece. To finish off, I added a few Frost Sequins with Multi Medium Matte.
 
SUPPLIES:
Here are the links to what I have used on the card. Affiliate links are used on some products. This means that if you make a purchase after clicking on my link, I receive a small commission with no extra cost to you. I truly appreciate your support when using these links. Please click on the logo below the product to shop at your favourite store. Products marked with an asterisk (*) were kindly sent to me to use.
 
 
I know that woodgrain has nothing to do with Winter but I thought it was too beautiful not to use! :) Thanks so much for popping by to see me today. I hope you have a great rest of the day and a fabulous weekend!  

24 August 2017

VIDEO | Card Making Haul - August 2017

Hello there, I am popping in today to share my latest haul with you. I know a lot of you like watching them, so I hope you do not mind me sharing! I was actually rather good this month, I think. Although I have developed an obsession ...
 
 
Alcohol Inks! I am loving using them at the moment so I decided I NEEDED a few more! ;) I got some warm tones this time as the ones I currently have are mainly blues. Here is a look at what I got:


SUPPLIES:

Here are the links to what I have shared in the video. Affiliate links are used on some products. This means that if you make a purchase after clicking on my link, I receive a small commission with no extra cost to you. I truly appreciate your support when using these links. Please click on the logo below the product to shop at your favourite store.
 
 
I hope you enjoyed watching. I am hoping to play with the new inks and paints soon! Thanks so much for visiting me today. I hope you have a great day!

23 August 2017

Hero Arts Wintertime Fun Blog Hop + Giveaway

Hello there, today we are celebrating the launch of the new Wintertime Fun catalogue from Hero Arts. It is filled with wonderful new winter and Christmas products but lots of them can be used all year round too, as you will see in one of my cards below. The new products are available to purchase from the Hero Arts Shop now.
 

If you are following along with the hop, you should have arrived here from my amazing teamie Amy. If you get lost along the way, I have the full list of participants below. For my cards today, I wanted to create a Christmas card and a non-seasonal card.
 
My first card uses lots of new products from the catalogue. I started off by taking a piece of Bristol paper and cutting this using one of the Rectangle Infinity Dies. I took various shades of Distress Ink (colours listed below) and blended these over the piece. I then took the tree images from the new Winter Silhouettes set and stamped these on top with Intense Black ink. I then splattered over some Copic Opaque White.
 

On a separate piece of cardstock, I took the reindeer from the Jingle All The Way Stamp & Cut and stamped this with Intsense Black Ink, coloured it with Copic Markers and then used the matching die to cut him out. He was added to the background piece with foam tape. I took one of the sentiments from the new Off-Beat Holiday Messages set and stamped this on to a piece of black cardstock with Versamark ink. I applied white embossing powder, heat set and then cut in to a strip. This was also added to the panel with foam tape.
 
 
I took the Snowflake Confetti die and embossed this on to the front of an A2 white card base. I then added the image panel on top with foam tape. To finish off, I added two sequins from the new Frosty Sequin Mix plus a few gems. I also added Tonic Nuvo Crystal Glaze to the bells on the reindeer's collar.
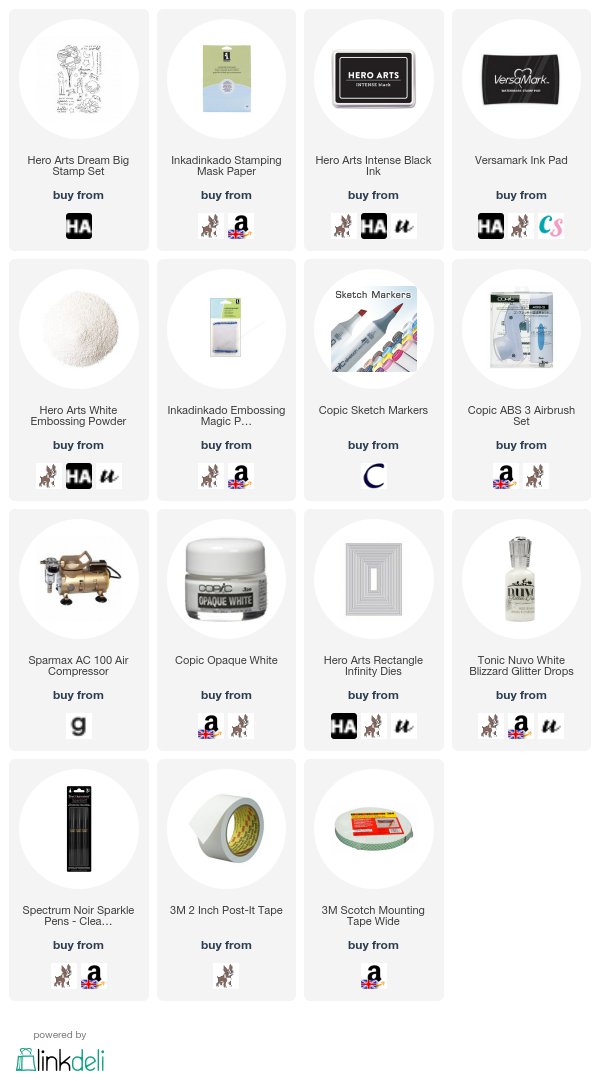

SUPPLIES:

Here are the links to what I have used on the card. Affiliate links are used on some products. This means that if you make a purchase after clicking on my link, I receive a small commission with no extra cost to you. I truly appreciate your support when using these links. Please click on the logo below the product to shop at your favourite store. Products marked with an asterisk (*) were kindly sent to me to use.


COPIC MARKERS: E59, E57, E55, E53, R00, R89, R37, R29, R27, R14.

My next card uses the new Seal Family wood mounted stamp. There are lots of animal family stamps in this catalogue and I thought it would be fun to use the seal one for a baby card.
 

I started off by taking a piece of Yupo paper and applying TH Alcohol Inks to it. I wanted an ombre look so I used Sailboat Blue at the bottom, followed by Turquoise in the middle and Aqua at the top. I loved how it came out! I added this piece to a white A2 card base and then added white cardstock strips to the sides with foam tape.
 

I took the Seal Family stamp and inked this up with Intense Black Ink and stamped it on to a piece of white cardstock. I coloured the seals with Copic Markers and then fussy cut them out with scissors. Once cut out, I added black pen to the edges to neaten them up. They were added to the card with foam tape and tape runner. I took the 'new baby' sentiment from the Congrats Stamp & Cut and stamped this on to a piece of black cardstock with Versamark Ink. I applied white embossing powder, heat set and cut this in to a strip. This was also added to the card with foam tape. To finish off, I added dots of Tonic Nuvo Jewel Drops.
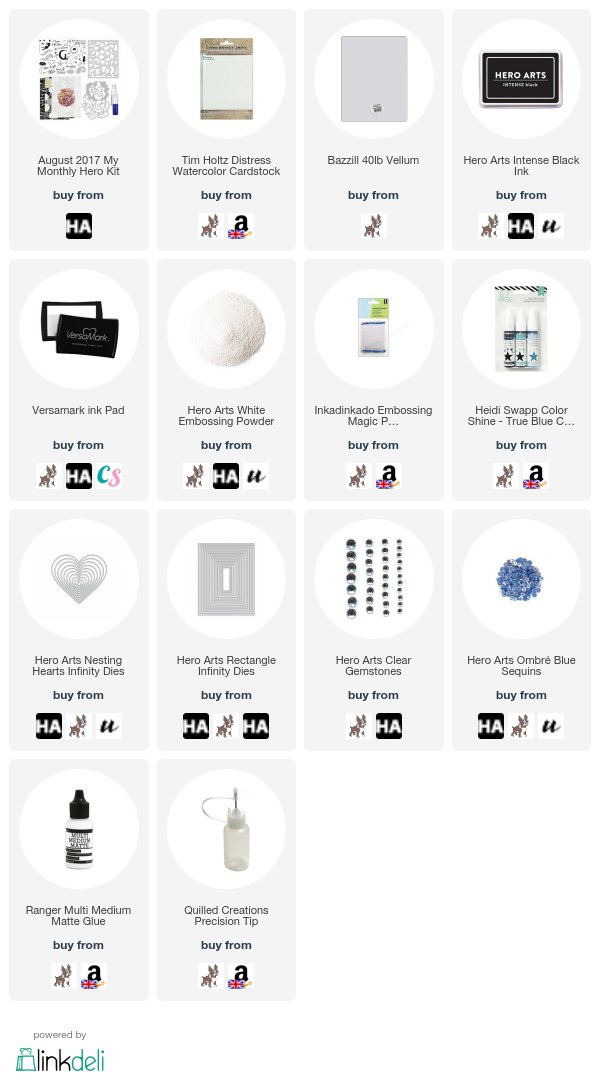

SUPPLIES:

Here are the links to what I have used on the card. Affiliate links are used on some products. This means that if you make a purchase after clicking on my link, I receive a small commission with no extra cost to you. I truly appreciate your support when using these links. Please click on the logo below the product to shop at your favourite store. Products marked with an asterisk (*) were kindly sent to me to use.


COPIC MARKERS: W7, W4, W2, W0, R000.


BLOG HOP:

Michelle Short - you are here!


GIVEAWAY:

Hero Arts are giving away three $25 shopping sprees to three lucky winners. The winners will be drawn from comments left across all of the blogs in the hop. Please leave a comment by Wednesday 30th August at 23.59 (PT). Hero Arts will announce the winners over on the Hero blog the following week.
 
As you can see the next in the hop is the amazing May. Thanks so much for visiting me today. I hope you have a great day!

21 August 2017

VIDEO | Tone-on-Tone Zodiac Birthday Background

Hello there, today I am over on the Hero Arts Blog sharing a card made with the Zodiac Birthday stamp set that was released as an add-on for this month's My Monthly Hero kit. Since I wasn't making the card for anyone in particular, I decided to use all of the star signs on my card but if you knew the person you were making it for, you could use just their sign, or use them all like I have done and make a focal point of their sign.
 
SUPPLIES:
Here are the links to what I have used on the card. Affiliate links are used on some products. This means that if you make a purchase after clicking on my link, I receive a small commission with no extra cost to you. I truly appreciate your support when using these links. Please click on the logo below the product to shop at your favourite store.
 
 
The star sign images are little difficult to see in the photos but they definitely show up nicely in person. They also show up a little better in the video too. You can see that directly on You Tube HERE. For more information on how I made the card, please head over to the Hero Arts Blog.
 
Thanks so much for popping by today. I hope you have a great week!

20 August 2017

Krumspring Stamps 1 Year Anniversary Blog Hop + Giveaway

Hello there, today I am taking part in a fun blog hop to celebrate Krumspring Stamps 1st year anniversary. Including the blog hop, Krumspring are also releasing 8 new stamp sets today which the hop designers are using.
 
 
If you are following along on the hop, you should have arrived here from the fabulous Vera, but if you get lost along the way, I have the full list of participants below.
 

My first card uses the new Coffee is Love set, along with the new Diagonal Stripes set. Now I have to be honest, I am not a coffee or a tea drinker but I do like the occasional hot chocolate! The set is so cute though and will be fabulous to send some cards to my tea and coffee loving friends! I started off by stamping the to-go cup in Memento Tuxedo Black ink. I then added on the wrapper part. The image was coloured with Copic Markers, cut out with scissors and then I ran a black Memento Marker around the edges to neaten them up.
 
 
On a piece of white cardstock, I stamped the Diagonal Stripes stamp, using Versafine Onyx Black ink and set it aside to dry. On to a separate piece of white cardstock, I lightly blended over some Peacook Feathers Distress Ink. I lightly splattered on some water, dabbed this off with a paper towel and set this aside to dry also. Once dry, I added the panels on to a white A2 card base with foam tape, adding the ink blended piece on top of the striped piece. I added the to-go cup with tape runner and then worked on the sentiment.
 
 
I stamped the 'thanks a latte' sentiment on to black cardstock with Versamark Ink. I applied white embossing powder and heat set. I then cut this piece in to a strip and created a banner end on one side. To finish off, I added Tonic Nuvo Crystal Glaze to the heart on the cup and then added three dots of Nuvo Ebony Black Crystal Drops.
 
SUPPLIES:

Here are the links to what I have used on the card. Affiliate links are used on some products. This means that if you make a purchase after clicking on my link, I receive a small commission with no extra cost to you. I truly appreciate your support when using these links. Please click on the logo below the product to shop at your favourite store.
 
 
COPIC MARKERS: Cup - C1, C0, 0. Lid - C5, C3, C1, C0. Wrapper - C9, C8, C7, C6, BG49, BG57, BG53, BG01.
 
My next card uses the super cute For My Koala Bear set. Oh my goodness! It is such a cute set! I also combined it with a sentiment from the new Elefantastic set.
 

I started off by stamping the koala on to white cardstock using Memento Tuxedo Black Ink. I then coloured him using Copic Markers (colours used listed below the supplies section). He was cut out with scissors and I added black Memento Marker around the edges to neaten them up. I then took a piece of watercolour paper and stamped the leaf branches in the set on to it using Versamark Ink. I applied white embossing powder and heat set. 
 
 
The piece was then coloured with Zig Clean Color Real Brush Markers and set aside to dry. Once the watercolour piece was dry, I used the Hero Arts Luggage Tag Dies to cut the letters to spell 'hello'. I also die cut two MFT Stitched Circle Scallop Frames from white cardstock. On to a panel of white cardstock, I added the circle frames with glue and then adhered the letters with foam tape.
 
 
I took the 'friend' sentiment from the Elefantastic set and stamped this on to a strip of black cardstock and white heat embossed it. This was added to the card with more foam tape. The koala was then added with foam tape also so that he is sitting on top of the letters. To finish off, I added Nuvo Crystal Glaze to the koala's nose and Ebony Black Crystal Drops to his eyes.
 
SUPPLIES:

Here are the links to what I have used on the card. Affiliate links are used on some products. This means that if you make a purchase after clicking on my link, I receive a small commission with no extra cost to you. I truly appreciate your support when using these links. Please click on the logo below the product to shop at your favourite store.
 
 
COPIC MARKERS: W8, W7, W6, E5, W4, W1, W00, R0000. ZIG CLEAN COLOR REAL BRUSH PENS - 036 Light Blue, 041 Light Green, 045 Pale Green.
 
BLOG HOP:
Michelle Short - you are here!
 
GIVEAWAY:

Krumspring Stamps have a $10 gift certificate to give away to spend in their shop. All you have to do is leave a comment on each of the stops in the shop today for 16 chances to win! Or you may even win the grand prize of a prize package containing lots of Krumspring stamps! The giveaway closes on August 23rd at 12 noon CET/11am BST. The winners will be announced that evening over on the Krumspring Blog. Good luck!
 
You next stop on the hop is the fabulous Amy. Thanks so much for visiting me today. I hope you have a great rest of the time on the hop and a great rest of the day! Oh and I hope you will check out the rest of the new stamps from Krumspring too!

18 August 2017

Birthday Cake

Hello there, I am back today to share a card using one of the alcohol ink background pieces I made when I made my brother's birthday card last week. This card looks extremely simple but it did take longer to put together than it looks!
 
 
I created my background by adding various shades of blue and turquoise alcohol inks on to a non-stick craft mat. I then added over some blending solution. I took a piece of Yupo paper and dripped this in to it face down. I then set this piece aside to dry.
 
 
I took the largest SSS Stitched Rectangle die and cut the panel out. I then ran this through again cutting the MFT Happy Birthday Centrepieces die with it. Using the negative piece of the die cut (the individual letters being the positive), I added foam tape to the back of the piece (this look ages!) and adhered it to a white A2 card base.
 
SUPPLIES:
Here are the links to what I have used on the card. Affiliate links are used on some products. This means that if you make a purchase after clicking on my link, I receive a small commission with no extra cost to you. I truly appreciate your support when using these links. Please click on the logo below the product to shop at your favourite store.
 
 
The great thing with this die is that I can get another card out of it, using the positive letter pieces. Thanks so much for popping by to see me today. I hope you have a great weekend!

16 August 2017

Hello, Friend

Hello there, today I have a card to share using the adorable Stand Tall set from Clearly Besotted. The giraffes are so very cute and I love the little turtles too!
 

I started off by stamping the giraffe and turtle using Memento Tuxedo Black. I coloured them using Copic Markers and then fussy cut them out with scissors leaving a small white border. I then took a piece of white cardstock and cut this using one of the circles from the SSS Stitched Circles die collection. I lightly blended over Tumbled Glass Distress Ink for the sky and Mowed Lawn and Twisted Citron for the grass. I flicked over a little water (difficult to see in the photo) and set this aside to dry.
 
 
I took a piece of paper from the MFT Itsy Bitsy Polka Dot paper pad and cut this with a SSS Stitched Rectangle die. This was adhered to a card base made from Hero Arts Decorative Woodgrain cardstock, with tape runner. I then adhered the circle piece with thin foam squares. I added the giraffe and turtle on top, also with thin foam squares. I stamped the sentiment from the Tiny Type set on to white cardstock, heat embossed in white and cut into strips. Again these were added with foam tape to the card. I added Tonic Nuvo Glaze to the giraffe's spots and the turtle's shell. I also added white gel pen to their eyes. To finish off, I added a few Enchanting sequins from Lucy's Cards.
 

SUPPLIES:

Here are the links to what I have used on the card. Affiliate links are used on some products. This means that if you make a purchase after clicking on my link, I receive a small commission with no extra cost to you. I truly appreciate your support when using these links. Please click on the logo below the product to shop at your favourite store.
 
 
COPIC MARKERS: Giraffe - YR27, YR24, YR23, Y19, E19, E08, E13. Turtle - YG67, YG17, YG23, YG07, YG05, YG03, YG01.
 
Thank you so much for popping by to see me today. I really do appreciate it. I hope you have a great day and rest of the week!

14 August 2017

Happy Birthday To You

Hello there, today I have a card to share that I made for my brother for his birthday. I wanted to combine alcohol ink somewhere on it so I went to town creating lots of backgrounds with various shades of alcohol ink. I ended up with quite a few different backgrounds which I am hoping to make into cards in the next few weeks. I ended up using one of the more dotty design pieces on this card and loved how it looked after die cutting it.
 

I started off creating my alcohol ink piece. I first took a piece of Yupo paper and added various shades of blue and turquoise/aqua colours to it. I also added in some dots with the blending solution too. Once completed, I set this aside to dry. I then ran it through my Cuttlebug with the MFT Happy Birthday To You die. I also die cut the same die using white cardstock twice.
 
 
I took a white A2 card base and embossed the front using the SSS Chevron Pattern Die (sadly this has been discontinued so I have linked a very similar MFT die instead). I then stacked up the die cut letters and added them to the card, using the negative piece as a guide to line them up. I had planned on using the negative piece on a separate card but I didn't like how it came out so I decided to use the pieces and cut some stars from it. I used three sizes of the Lil' Inker Designs Stitched Stars dies. These were added to the card with foam tape. To finish off, I added three PPP Clear Droplets with Multi Medium Matte.  
 
SUPPLIES:
Here are the links to what I have used on the card. Affiliate links are used on some products. This means that if you make a purchase after clicking on my link, I receive a small commission with no extra cost to you. I truly appreciate your support when using these links. Please click on the logo below the product to shop at your favourite store.
 
 
SSS Chevron Pattern Die - discontinued
 
I am looking forward to using some of the other backgrounds I made with alcohol inks. I love that you can use the same colours and the background comes out differently every time! Thanks so much for visiting me today. I hope you have a great week!

11 August 2017

Country Road

Hello there, today I have another card to share using the super cute stamps from Purple Onion Designs which currently have a fabulous sale on. More details of that below :)
 
 
For my card, I started off by stamping Free Spirits (Fox and Frog on Bicycle) on to a white card panel. I stamped the image again on to masking paper, cut out and added this on top of the first image. I then stamped the Country Road Background on to the panel. I removed the mask and then coloured the image with Copic Markers. I first coloured the background using shades of green for the grass and trees and then shades of brown for the path. I tried to create some texture on it using dots. The fox, bicycle and frog were then coloured. I added black glaze pen to the fox's eyes.
 
 
I took the 'waving hello' sentiment from the Journey Sentiments Set and stamped this on to a strip of white cardstock. I then created a ribbon end on one side. The image panel was added to a white A2 card base with ATG and then the sentiment banner was added with foam tape. To finish off, I added a few sparkly gumdrops around the sentiment banner.
 
SUPPLIES:
Here are the links to what I have used on the card. Affiliate links are used on some products. This means that if you make a purchase after clicking on my link, I receive a small commission with no extra cost to you. I truly appreciate your support when using these links. Please click on the shop logo below the product to shop at your favourite store.
 
 
COPIC MARKERS - Grass: G46, G43, G40. Trees: G85, G82, YG17, YG23, YG03, YG01. Path: E44, E43, E42, E41, E40. Sky: B45, B41, B32, B21, B14, B12, B00, B000. Bike: V28, V25, V22, C3, C1, C0. Fox: W7, W6, W5, W3, W2, W2, W1, W0. Frog: YG07, YG05, YG01.
 
Like I mentioned above, Purple Onion Designs currently have a sale on ...


That's right! All stamps are currently 25% off so if you have been putting off making an order, now is the time to do it! For more inspiration using these stamps, please head over to the Purple Onion Designs blog. Thanks so much for visiting me today. I hope you have a great day!

9 August 2017

Dream Big

Hello there, I am over on the Hero Arts Blog today, along with my teamie Amy. We are sharing ideas using some of the fabulous add-on products that were release with the August My Monthly Hero kit on Monday. My card uses the Dream Big stamp set. I used the girl from the set, I added the planet balloons so that she was holding them and then created a background using Copic Markers with the airbrush system.
 
 
SUPPLIES:
Here are the links to what I have used on the card. Affiliate links are used on some products. This means that if you make a purchase after clicking on my link, I receive a small commission with no extra cost to you. I truly appreciate your support when using these links. Please click on the logo below the product to shop at your favourite store.
 
 
COPIC MARKERS: Galaxy background - 110, C9, RV17, Y08, B79, B04, V05, YG07. Girl - Skin: E13, E11, E00, E000, R11. Hair: E47, E25, E23. Outfit: B04, B02, B00, B000. Planets: Y35, Y32, E30 / E44, E43, E42, E41 / B95, B93, B91, G43, G40 / B16, B14, B12 / B69, B66, B63 / R89, R37, R32 / V28, V25, V22, V20 / E30, Y13, Y11, Y00 / E33, E31, E30 / W4, W1, W0. Ground - W5, W3, W2, W1, W0.
 
For more details on how I made the card, please head over to the blog post here. I love how the galaxy background turned out and I will have to remember to use my airbrush for that again! Thanks so much for visiting me today. I hope you have a great day!

7 August 2017

Hero Arts August 2017 My Monthly Hero Blog Hop + Giveaway

Hello there, today we are celebrating the release of the My Monthly Hero August 2017 kit from Hero Arts. The kit has a wonderful night sky/celestial feel to it. You get one large stamp set in the kit, along with coordinating dies and some fabulous metallic sprays (plus lots more!).
 
For the hop, you should have arrived here from the fabulous Amy but if you get lost along the way, I have the full list of participants below.
 
 
I started off by creating the background for my card. I wanted to use the wonderful sprays in the kit as they have a lovely metallic shine to them. I thought they would make a nice night sky background. I took a piece of watercolour paper and first sprayed on some Heidi Swapp Color Shine in Teal and Ocean (I wanted some lighter shades for the base). I then spritzed on the Metallic Blueberry Mist from the kit and let all the colours meld together. Once this was half dry, I took the Gold Shimmer Mist from the kit and added some splatters. I then set the piece aside to dry.
 
 
I took the girl flying that is in the stamp set and stamped her on to some white cardstock with Intense Black Ink. I then cut her out using the coordinating die. I also die cut a pice of vellum using one of the Nesting Hearts dies. I prepped the vellum with anti-static powder and then stamped the sentiment on to it using Versamark Ink. I applied white embossing powder and then heat set. Once the background was dry, I cut it down using one of the Rectangle Infinity dies.
 
 
I wrapped the heart vellum piece around the background and then adhered this on to a white A2 card base with tape runner. I added a little tape runner on to the vellum piece to adhere it to the card and then added the girl on top (so that you can't see the adhesive) with foam tape. To finish off, I added Ombre Blue sequins along with gemstones.


SUPPLIES:

Here are the links to what I have used on the card. Affiliate links are used on some products. This means that if you make a purchase after clicking on my link, I receive a small commission with no extra cost to you. I truly appreciate your support when using these links. Please click on the logo below the product to shop at your favourite store.

THE KIT:
 
 
6" x 8" Clear Stamp Set
11 Coordinating Frame Cuts
1 Fancy Window Die
1.5 oz Celestial Sequins
1 Metallic Blueberry Mist
1 Gold Shimmer Mist
1 Stencil (5.25" x 6.5")
3 5" x 7" Assorted Patterned Celestial Papers
 
That is an amazing $77 worth of products for only $34.99 (approx. £28.00). Remember that the kits are limited edition and often sell out quickly. There is a subscription service so that you never miss a kit. If you are an international subscriber, you get money off shipping too!
 
As always, there are some fabulous add-on products this month too. These are not limited edition and can be purchased from your favourite Hero Arts retailer, as well as the Hero Store. Here is a look at them:


BLOG HOP:

Here is a the full list of participants in the hop:
 
Michelle Short
GIVEAWAY:

Hero Arts are giving away one kit as a prize to one lucky blog reader. The winner is selected from the comments across all of the blogs in the hop. The more comments you leave, the more chance you have to win! If the winner has already bought the kit, they will be reimbursed for it. Giveaway closes Sunday, 13th August at 11.59pm.
 
Nest on the hop is the fabulous Libby. Thanks so much for joining me today. I hope you enjoy the last stop on the hop and have a great rest of the day!
End of code