31 May 2023

Clearly Besotted Teasers | Let's Celebrate

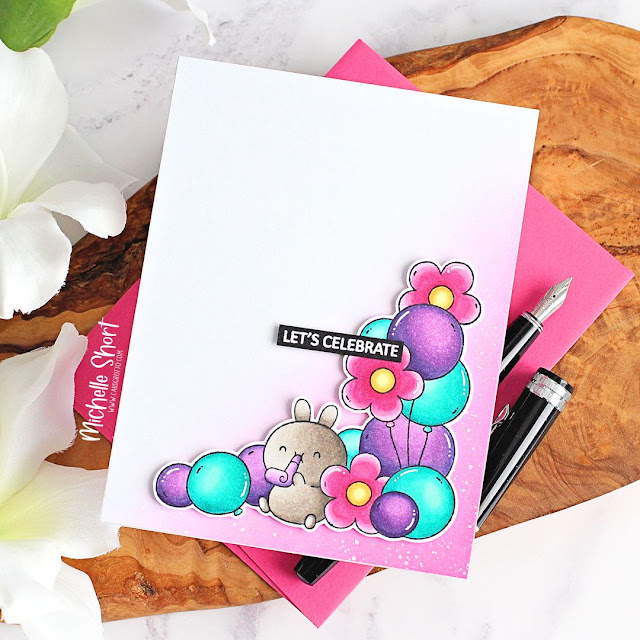
Hello there and welcome to day four of the Clearly Besotted Clearly Besotted June 2023 teasers. Release day is tomorrow, 1st June 2023. Today I am using the Balloon Bunch Corners set which is a really fun set perfect for all celebrations - birthdays, congratulations and lots more!

PLEASE NOTE: This post contains affiliate links. Please see below for my full disclosure.


I started off by stamping the image from the Clearly Besotted Balloon Bunch Corners Stamp Set on to white cardstock using Memento Tuxedo Black Ink. I coloured it using Copic Markers (the colours that I used are listed below the supplies area for reference) and then fussy cut it out using scissors. 


I took a panel of white cardstock and added ink blending to the bottom right hand corner using Tim Holtz Picked Raspberry Distress Ink and an ink blending brush. I splattered on Dr. Ph. Martin's Bleed Proof White Paint and set it aside to dry. Once dry, it was adhered to a US A2 sized white card base with tape runner adhesive. 


I stamped a sentiment from the Clearly Besotted Tiny Type Stamp Set on to black cardstock using Versamark Ink. I applied white embossing powder and heat set. It was cut into a strip and adhered to the card, along with the image, using thin foam tape. To finish, I added a white gel pen highlights to the balloons. 

SUPPLIES:


Here are the links to what I have used on the project. Affiliate links are used on some products. This means that if you make a purchase after clicking on my link, I receive a small commission with no extra cost to you. I truly appreciate your support when using these links. Please click on the logo below the product to shop at your favourite store. All products were personally purchased except those from Clearly Besotted, Hero Arts or those marked with an asterisk (*) which were kindly sent to me to use. You can read my full disclosure here.


COPIC MARKERS: Bunny - W6, W4, W3, W1. Balloons - V09, V17, V15, V12/BG49, BG15, BG13, BG11/RV19, RV66, RV55, RV52, Y17, Y15, Y11. 

I wanted to keep the sentiment generic, so that I can use it for a few different occasions. For more inspiration using the release, please head over to the Clearly Besotted Blog, Keren, Kitty, Francine and Alberto. Thank you so much for stopping by today, see you tomorrow for release day! Have a lovely day! 

30 May 2023

Spellbinders | Glimmer Cardfront Sentiments

Hello there, I am delighted to be over on the Spellbinders blog today, sharing three projects using the Spellbinders Glimmer Cardfront Sentiments Collection. These sentiments are great because they are fairly large, so fill a card front really easily (as the name suggests!). They also work for non-card projects too! 

PLEASE NOTE: This post contains affiliate links. Please see below for my full disclosure.


Project 1 (left) shows how you can use these sentiments for non-card projects as well. I die cut the Gift Bag Etched Dies twice from white cardstock and on one piece, foiled the Best Wishes on Your Birthday Glimmer Hot Foil Plate on top using Lavender Petal Foil. The bag was assembled and decorated with Petite Floral Potpourri flowers and Delicious Decorations leaves. 

Project 2 (top right) uses the Hello Blooms Die and Stencil Bundle. I first die cut the Hello Blooms die from white cardstock and then placed the stencil on top. Using ink blending brushes, I blended on inks for the flowers and leaves to create the image. The sentiment was cut from cardstock and layered up. 

Project 3 (bottom left) uses the This Card is Full of Hugs Glimmer Hot Foil Plate foiled on to white cardstock with Moondust Foil. The card was embellished with Be Bold Blooms flowers and leaves. 

SUPPLIES:


Here are the links to what I have used on the projects. Affiliate links are used on some products. This means that if you make a purchase after clicking on my link, I receive a small commission with no extra cost to you. I truly appreciate your support when using these links. Please click on the logo below the product to shop at your favourite store. All products were personally purchased except those from Clearly Besotted, Hero Arts or those marked with an asterisk (*) which were kindly sent to me to use. You can read my full disclosure here.


For more detailed instructions and photos, please head over to the Spellbinders Blog. Thank you so much for stopping by today, I really do appreciate it. I hope you have a wonderful day! 

Clearly Besotted Teasers | Hello Friend

Hello there and welcome to day three of the Clearly Besotted June 2023 Teasers. The new sets release on 1st June 2023, so not too long to wait now! My card today uses the new Sunny Day Play set. This set has lots of hippos having fun at the beach. As much as I love the hippos, I fell in love with the seagulls and wanted to make a feature of them! 

PLEASE NOTE: This post contains affiliate links. Please see below for my full disclosure.


I started off by stamping the seagulls from the Clearly Besotted Sunny Day Play Stamp Set on to white cardstock using Memento Tuxedo Black Ink. I coloured them using Copic Markers (the colours that I used are listed below the supplies list) before fussy cutting them out with scissors. 


I die cut a few Hero Arts Hexagon Infinity Dies from white cardstock - two for the card base and another two for the waves. Using a wave die (I used a retired set from MFT) I cut three layers of waves and then blended Tim Holtz Peacock Feathers Distress Ink on top. On another of the panels, I placed the Clearly Besotted Cloudy Days Stencil on top and blended Tim Holtz Mermaid Lagoon Distress Ink on top to create the sky. 


I scored the other hexagon piece at the top to make a hinge. I added adhesive to it and adhered it to the cloud one to make a card base. The waves were adhered to the card with tape runner adhesive, making sure to leave a gap at the top to add the seagulls under the waves. The seagulls were adhered with thin foam tape. 


I stamped the sentiment from the Clearly Besotted Tiny Type Stamp Set on to black cardstock using Versamark Ink. I applied white embossing powder and heat set. They were cut into strips and adhered to the card with more thin foam tape. To finish off, I added Copic Marker and white gel pen dots to the water. 

SUPPLIES:


Here are the links to what I have used on the project. Affiliate links are used on some products. This means that if you make a purchase after clicking on my link, I receive a small commission with no extra cost to you. I truly appreciate your support when using these links. Please click on the logo below the product to shop at your favourite store. All products were personally purchased except those from Clearly Besotted, Hero Arts or those marked with an asterisk (*) which were kindly sent to me to use. You can read my full disclosure here.


COPIC MARKERS: Seagulls - C6, C5, C3, C1, C0/YR18, Y17, Y15. Water dots - GB45. 

Although I already had the design for the card in my head, it end up being similar to a few cards I saw online using an MFT set - Anna Lorenzetto, Amy Yang and Angelica Conrad. Aren't they amazing! For more inspiration using the Clearly Besotted June 2023 release, please head over to the Clearly Besotted Blog, my amazing teamie Keren and our wonderful guests Kitty, Francine and Alberto. Thank you so much for visiting me today, I very much appreciate it. I hope you have a great day!

29 May 2023

Clearly Besotted Teasers | Bee Well

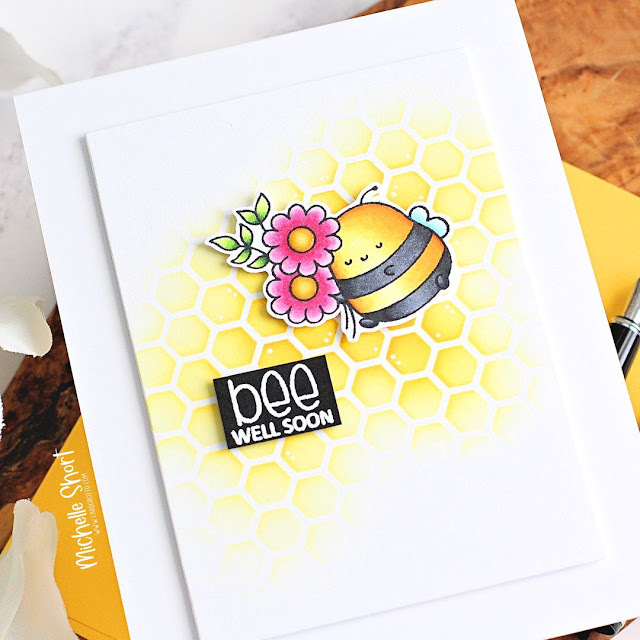
Hello there and welcome to day two of the Clearly Besotted June 2023 Teasers. Release day is 1st June 2023. Today I have a card to share using the new Bee Well set. This set features lots of adorable bees and fun sentiments. 

PLEASE NOTE: This post contains affiliate links. Please see below for my full disclosure.


I started off by stamping one of the bees from the Clearly Besotted Bee Well Stamp Set on to white cardstock using Memento Tuxedo Black Ink. I coloured him using Copic Markers (the colours that I used are listed below the supplies list for reference) and then fussy cut him out with scissors. 


I placed the Clearly Besotted Honeycomb Crunch Stencil on to a panel of white cardstock and using a blending brush, blended Tim Holtz Distress Inks on top. I used Squeezed Lemonade, Mustard Seed and Fossilized Amber. The stencil was removed and the panel die cut using a Hero Arts Rectangle Infinity Die before adhering to a US A2 sized white card base with thin foam tape. 


The bee was adhered on top with more thin foam tape. I took the sentiment from the Clearly Besotted Bee Well Stamp Set and stamped it on to black cardstock using Versamark Ink. I applied white embossing powder and heat set. It was cut into a strip and adhered to the card with more thin foam tape. To finish off, I added a few white gel pen dots and added Tonic Nuvo Crystal Glaze to the centres of the flowers. 

SUPPLIES:


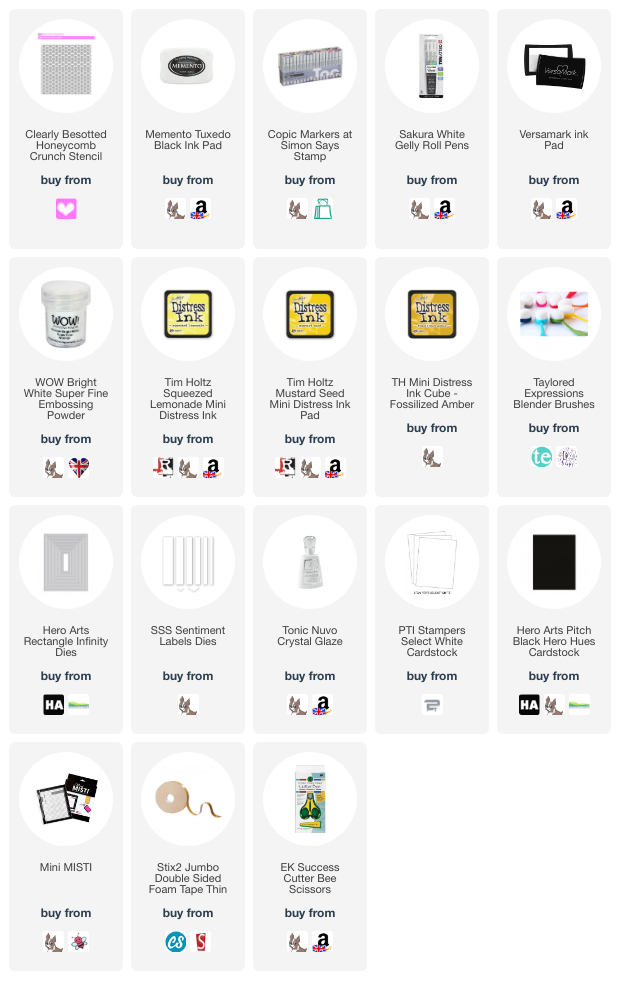
Here are the links to what I have used on the project. Affiliate links are used on some products. This means that if you make a purchase after clicking on my link, I receive a small commission with no extra cost to you. I truly appreciate your support when using these links. Please click on the logo below the product to shop at your favourite store. All products were personally purchased except those from Clearly Besotted, Hero Arts or those marked with an asterisk (*) which were kindly sent to me to use. You can read my full disclosure here.


COPIC MARKERS: Bee - YR27, Y17, Y15, Y13, Y11/C10, C8, C6, C5/B02, B00, B000. Flowers - RV19, RV66, RV55, RV52/YR27, Y17, Y15, Y13/G29, YG17, YG23, YG01. 

These bees are sure to put a smile on anyone's face! For more inspiration using the new sets, please head over to Clearly Besotted, Keren, Kitty, Francine and Alberto. Thanks so much for stopping by today, I really appreciate it. I hope you have a wonderful day! 

28 May 2023

Clearly Besotted Teasers | Magical Corners

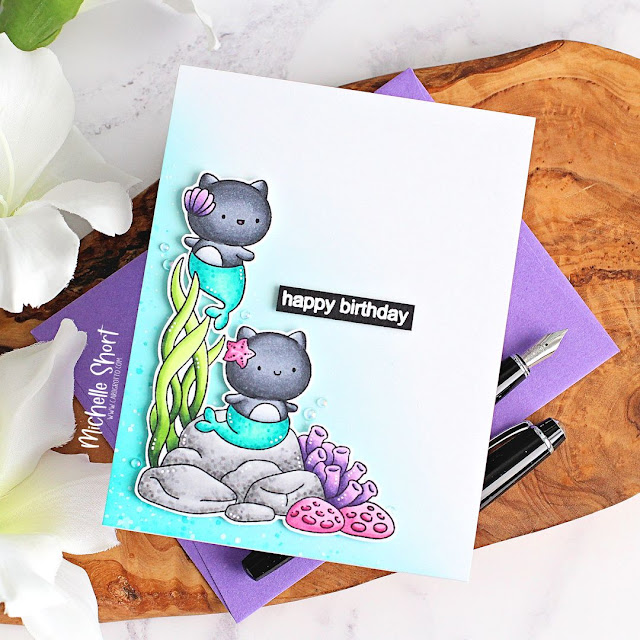
Hello there and welcome to day one of the Clearly Besotted June 2023 Teasers. Release day is Thursday, 1st June 2023. From now until then, we will be sharing teasers with you using the sets. Today I am using the super cute Magical Corners set. There are two corner images in the set, as well as separate images and lots of sentiments. 

PLEASE NOTE: This post contains affiliate links. Please see below for my full disclosure.


I started off my card by stamping the mercat image from the Clearly Besotted Magical Corners Stamp Set on to white cardstock using Memento Tuxedo Black Ink. I coloured it using Copic Markers (the colours that I used are listed below the supplies list for reference) and then fussy cut it out with scissors. 


On to another panel of white cardstock, I blended Tim Holtz Peacock Feathers Distress Ink in the bottom left hand corner, using a blending brush. I splattered on Peacock Feathers Reinker and then Dr. Ph. Martin's Bleed Proof White Paint before setting aside to dry. 


I stamped a sentiment from the Clearly Besotted A Little Sentimental Stamp Set on to black cardstock using Versamark Ink. I applied white embossing powder, heat set and cut into a strip. I adhered the ink blended panel on to a US A2 sized white card base with tape runner adhesive, followed by the image and sentiment with thin foam tape. To finish off, I embellished with a few Little Things from Lucy's Cards Bubbles and white gel pen dots. 

SUPPLIES:


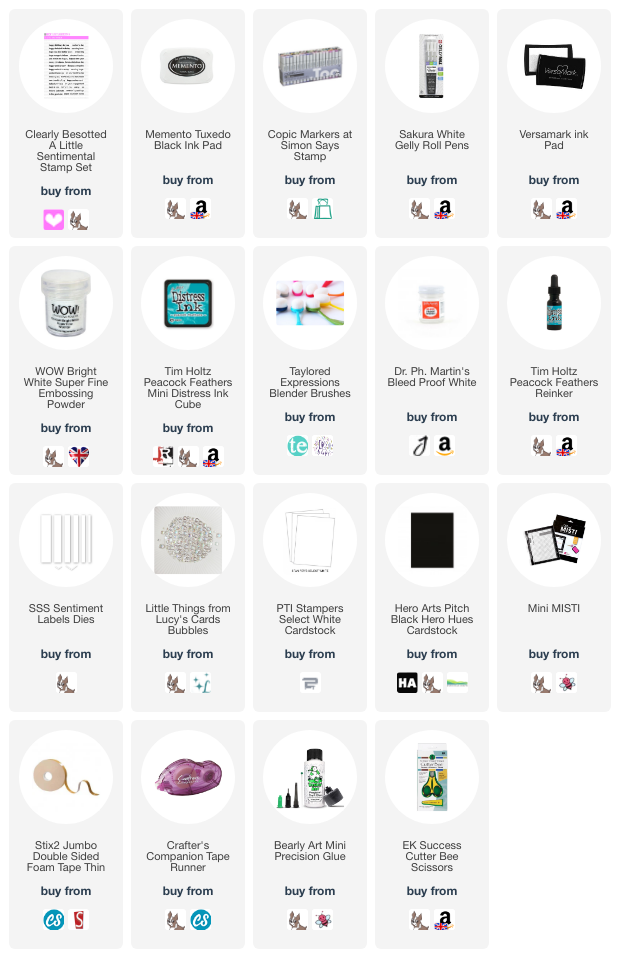
Here are the links to what I have used on the project. Affiliate links are used on some products. This means that if you make a purchase after clicking on my link, I receive a small commission with no extra cost to you. I truly appreciate your support when using these links. Please click on the logo below the product to shop at your favourite store. All products were personally purchased except those from Clearly Besotted, Hero Arts or those marked with an asterisk (*) which were kindly sent to me to use. You can read my full disclosure here.


COPIC MARKERS: Cats - C8, C6, C4, C3, C1, C00/BG49, BG15, BG13, BG11. Shell and coral - V09, V17, V15, V12. Starfish and coral - RV66, RV55, RV52. Seaweed - G29, YG17, YG23, YG01. Stones - N5, N3, N2, N1. 

I used mercats last month and thought they were so cute, I had to use them again but this time in corner form! For more inspiration using the new sets, please head over to Clearly Besotted and my amazing teamie Keren. We also have our resident guest designers with us this month too - Kitty, Francine and Alberto, so I hope you will check out what they have been up to as well! Thanks so much for stopping by today, I hope you have a wonderful day! 

24 May 2023

VIDEO | Controlling Splatter & Altenew Stampwheel Tips

Hello there, today I have two tags to share with you. I am taking a look at adding to splatter to projects, without actually splattering! I like the look of splatter but I am not always fond of not being able to control it. In the video, I also share tips for using the Altenew Stampwheel. 

PLEASE NOTE: This post contains affiliate links. Please see below for my full disclosure.


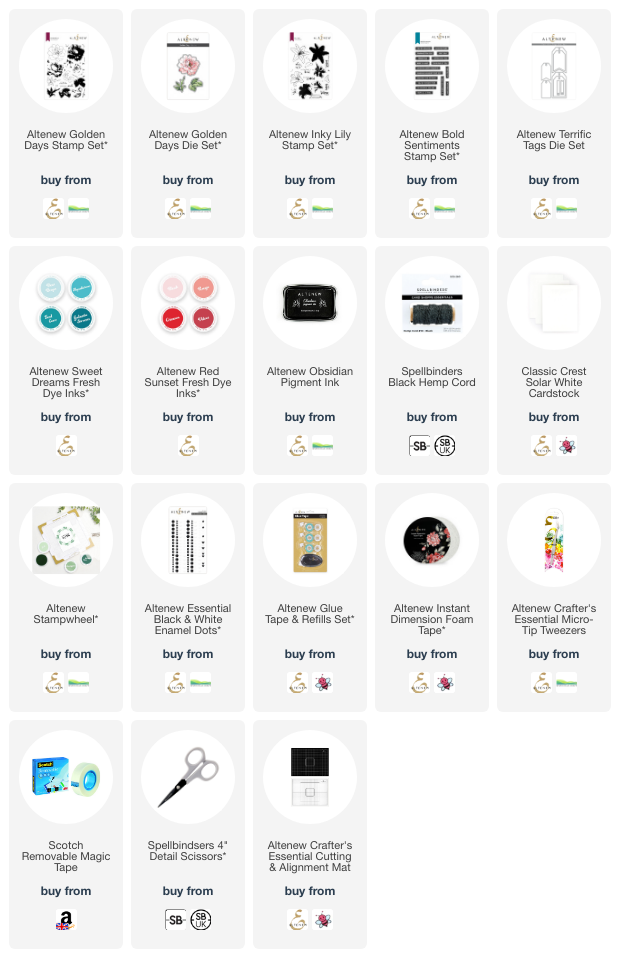
I started off my tags by stamping the flower from the Altenew Golden Days Stamp Set on to white cardstock using the Altenew Stampwheel. I used Altenew Obsidian Pigment Ink for the outline layer and then new Fresh Dye Ink colours for the other layers. I used Altenew Sweet Dreams Fresh Dye Inks for the aqua/teal one and Altenew Red Sunset Fresh Dye Inks for the coral one. 


I stamped the leaves from the set but decided to just stamp them in black and make them one layer. The leaves and flowers were die cut using the Altenew Golden Days Die Set and set aside. I die cut four tags from white cardstock using the Altenew Terrific Tags Die Set


On two, I stamped the splatter images from the Altenew Inky Lily Stamp Set using Altenew Obsidian Pigment Ink. This is such a fun way to add splatter as I am not even splattering and therefore can control where they go! I then adhered the other tags to the backs for added stability and to have a nice clean area to write a message. 


I adhered the leaves to the tags first, using Altenew Glue Tape. I then added the flowers on top using Altenew Instant Dimension Foam Tape. I took the sentiment from the Altenew Bold Sentiments Stamp Set and stamped it on to white cardstock twice, using Altenew Obsidian Pigment Ink


They were cut into strips and added to the tags with more foam tape. To finish off, I added twine through the top of the tags and tied in a bow. 

VIDEO:

Here is the video showing how I made the tags:


If you are viewing this blog post via email subscription, you can watch the video HERE on YouTube. 

SUPPLIES:


Here are the links to what I have used on the projects and in the video. Affiliate links are used on some products. This means that if you make a purchase after clicking on my link, I receive a small commission with no extra cost to you. I truly appreciate your support when using these links. Please click on the logo below the product to shop at your favourite store. All products were personally purchased except those from Clearly Besotted, Hero Arts or those marked with an asterisk (*) which were kindly sent to me to use. You can read my full disclosure here.


I really like how these tags turned out! I like the black and white with the pop of colour. Thank you so much for stopping by today, I very much appreciate it. I hope you have a wonderful day! 

23 May 2023

VIDEO | Perfectly Peaceful Day

Hello there, I was over on the My Favorite Things YouTube channel yesterday sharing a peaceful scene card using the Stacey Yacula Peaceful Birds set. This is such a beautiful set! I love the birds as well as all of the foliage and birdhouse. 

PLEASE NOTE: This post contains affiliate links. Please see below for my full disclosure.


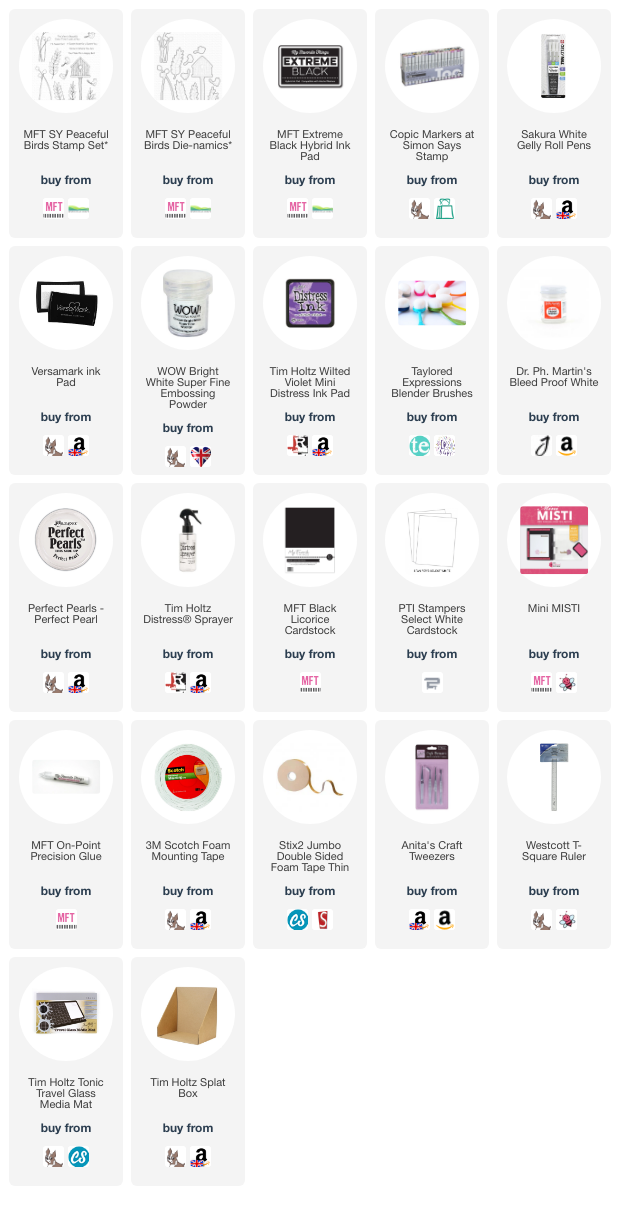
I started off my card by stamping the images from the MFT Peaceful Birds Stamp Set on to white cardstock using MFT Extreme Black Ink. I then coloured them using Copic Markers (the colours that I used are listed below the supplies area) before die cutting out using the MFT Peaceful Birds Die-namics


While die-cutting, I also cut the images again from white cardstock and adhered them behind the stamped images using MFT On-Point Precision Glue, for added dimension. I took a 3.5" x 4.75" panel of white cardstock and added ink blending to the bottom using Tim Holtz Wilted Violet Distress Ink and an ink blending brush. 


I mixed a little water with Dr. Ph. Martin's Bleed Proof White Paint and splattered it on to the panel. I also mixed Perfect Pearls powder with water and splattered that on too, before setting aside to dry. Once dry, the images were adhered on top, using more liquid glue. I cut the pieces overhanging the bottom and then adhered the panel to a US A2 sized white card base with thin foam tape. 


I stamped a sentiment from the MFT Peaceful Birds Stamp Set on to MFT Black Licorice Cardstock using Versamark Ink. I applied white embossing powder and heat set. It was cut into a strip and adhered to the card with a combination of foam tape and liquid glue. To finish off, I added white gel pen dots to the flowers. 

VIDEO:

Here is the video showing how I made the card:


If you are viewing this blog post via email subscription, you can watch the video HERE on YouTube. 

SUPPLIES:


Here are the links to what I have used on the project and in the video. Affiliate links are used on some products. This means that if you make a purchase after clicking on my link, I receive a small commission with no extra cost to you. I truly appreciate your support when using these links. Please click on the logo below the product to shop at your favourite store. All products were personally purchased except those from Clearly Besotted, Hero Arts or those marked with an asterisk (*) which were kindly sent to me to use. You can read my full disclosure here.


COPIC MARKERS: Birdhouse - E49, E59, E57, E55. Birds - B97, B95, B93, B91/C5, C3, C1, C00/YR24. Flowers - V17, V15, V12, V01, V0000/YG17, YG23. 

I think this card would be quite good for a new home card too, but I really like that sentiment. I think it could be used for lots of different occasions. Thank you so much for stopping by today, I really do appreciate it. 

22 May 2023

Hero Arts | Summer 2023 Release Blog Hop + Giveaway

Hello there and welcome as we celebrate the Hero Arts Summer 2023 release, which is out now. This is a wonderful release full of stamps, dies, stencils, hot foil plates, transfers, ink pads and sprays. The release as a whole has a more mixed media feel to it, I think, but a lot of the products can be used in so many different ways. 

PLEASE NOTE: This post contains affiliate links. Please see below for my full disclosure.


I have actually gone done the route of a more mixed media look. Technically mixed media is combining more than one medium on a project, but I do always think of mixed media as more of a design style! I have created a card and a tile/art panel and combined lots of the new products. 


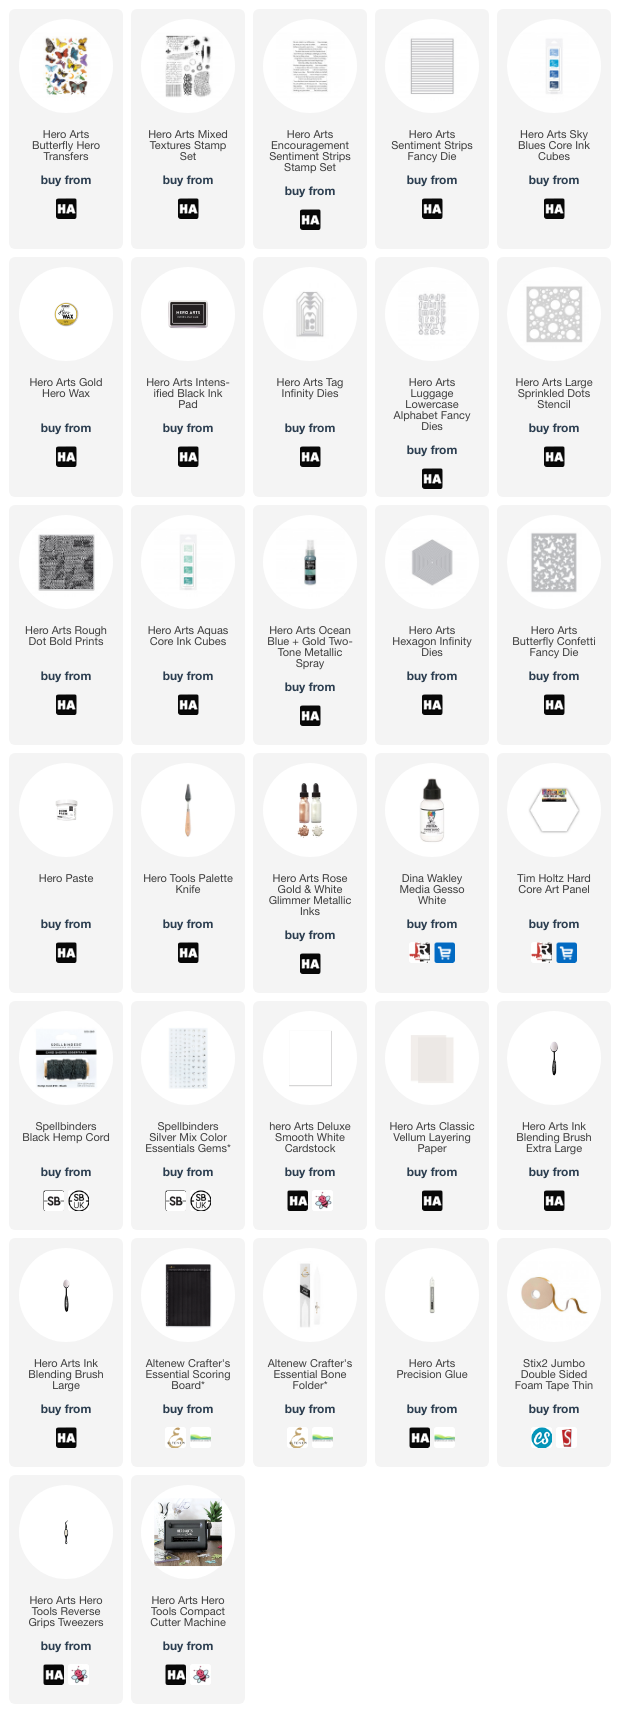
I started off the card by die cutting a Tag Infinity Die from white cardstock. I cut the bottom off to create a shorter tag. I then blended inks on top from the new Sky Blues Core Ink Cubes set. I used Cornflower and Nautical. I took one of the stamps from the new Mixed Textures Stamp Set and stamped it in the top left and bottom right corners using Nautical Core Ink. 


I splattered on some Gold Hero Wax (I mixed a little with water before splattering with a paintbrush) and then set it aside to dry. I took a butterfly from the Butterfly Hero Transfers set and applied it to Vellum Translucent Paper and fussy cut out with scissors. It was adhered to the tag using a small dab of Precision Glue just behind the body only. 


I stamped the sentiments from the new Encouragement Sentiment Strips Stamp Set on to white cardstock using Intens-ified Black Ink. They were die cut using the Sentiment Strips Fancy Die and then further cut down at the sides before adhering to the tag with thin foam tape. 


I added twine through the top of the tag and adhered it to a US A2 sized white card base, that has horizontal scoring lines on it, using more thin foam tape. 


For my next project, I thought I would do something a little different and create a tile/art piece. I started off by die cutting a Hexagon Infinity Die from white cardstock. I then added a layer of gesso (I actually do not think I needed to do this but I didn't want the layers to dry on the cardstock straight away). I placed the new Large Sprinkled Dots Stencil on top and using the Hero Tools Palette Knife, applied Hero Paste through it in three areas. 


Once the paste had dried, I blended on Core Inks from the new Aquas Core Ink Cubes set (Arctic, Paradise and Bermuda) as well as Indigo from the Sky Blues set. I sprayed on the new Ocean Blue + Gold Two-Tone Metallic Spray, followed by White Metallic Glimmer Ink and then set it aside to dry. 


Once dry, I stamped the new Rough Dot Bold Prints stamp on top in a few places using the taco method that I learnt from mixed media guru Maria (you ink up the stamp in a small area and then fold the stamp like a taco, so that you can just stamp the area you want on to the project). You cannot see it a lot but it does add a little bit more texture and interest to the piece. 


I adhered the hexagon panel on to a Tim Holtz Hard Core Art Panel. I then die cut the new Luggage Lowercase Alphabet Fancy Dies from white cardstock three times and adhered them one on top of each other before adhering on to the tile. To finish off, I die cut three butterflies from vellum using the Butterfly Confetti Fancy Die and adhered them on top, with a silver gem in the centres. 

I think the base of this tile would work great for an underwater/ocean theme too. I think the circles kind of look like bubbles!

SUPPLIES:


Here are the links to what I have used on the projects. Affiliate links are used on some products. This means that if you make a purchase after clicking on my link, I receive a small commission with no extra cost to you. I truly appreciate your support when using these links. Please click on the logo below the product to shop at your favourite store. All products were personally purchased except those from Clearly Besotted, Hero Arts or those marked with an asterisk (*) which were kindly sent to me to use. You can read my full disclosure here.


BLOG HOP:


This post is part of a fun, inspirational blog hop (with prizes!). For the hop, you should have arrived here from the fabulous Lydia. Next on the hop is the wonderful Mindy. If you get lost along the way, or want to start the hop from the beginning, please head over to the Hero Arts Blog

GIVEAWAY:

To celebrate the release, Hero Arts are giving away two $50 gift cards drawn from the comments left along the hop. Comment on all the blogs for more chances to win! You have until Sunday, 28th May 2023 at 11.59pm to enter. The winners will be announced on the Hero Arts Blog. 

I think that hexagon tile used more products on one project than I have all month combined! ;) Thank you so much for stopping by today, I really do appreciate it. I hope you have a wonderful rest of the day! 

19 May 2023

Simon Says Stamp | Dear Friend

Hello there, I hope you are well and having a good week! Today I have two cards to share with you using the new Caring Thoughts stamp set from Simon Says Stamp, which is out today as part of their Dear Friend release. It is such a cute set!

PLEASE NOTE: This post contains affiliate links. Please see below for my full disclosure.


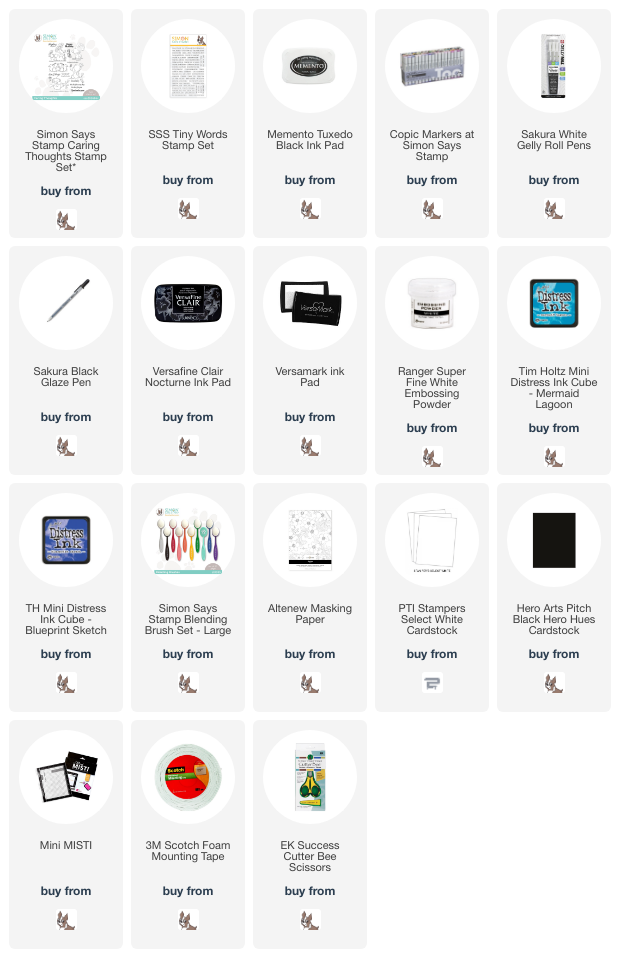
For my first card, I started off by stamping the panda from the Simon Says Stamp Caring Thoughts Stamp Set on to white cardstock using Memento Tuxedo Black Ink. I then stamped the image again but this time on to Altenew Masking Paper. I fussy cut around the image with scissors and placed it over the image on the panel. 


Using blending brushes, I blended on Tim Holtz Distress Inks in Mermaid Lagoon and Blueprint Sketch. I removed the mask and coloured the image using Copic Markers (the colours that I used are listed below the supplies area for reference). I stamped the sentiment below, using Versafine Clair Nocturne Ink


The panel was adhered to a US A2 sized white card base with foam tape. I then added a few white gel pen dots around the image, followed by black glaze pen on his eyes. 


For my next card, I stamped the dragon and caterpillar image on to a panel of white cardstock using Memento Tuxedo Black Ink. This time, I coloured the whole image with Copic Markers, blending blues in the centre to create a sky/background. 


The panel was adhered to a US A2 sized white card base with foam tape. I took the sentiment from the Simon Says Stamp Tiny Words Stamp Set and stamped it on to black cardstock using Versamark Ink. I applied Ranger Super Fine White Embossing Powder and heat set. 


It was cut into a strip and added to the card with more foam tape. To finish off, I added white gel pen dots to the image. 

SUPPLIES:


Here are the links to what I have used on the projects. Affiliate links are used on some products. This means that if you make a purchase after clicking on my link, I receive a small commission with no extra cost to you. I truly appreciate your support when using these links. Please click on the logo below the product to shop at your favourite store. All products were personally purchased except those from Clearly Besotted, Hero Arts or those marked with an asterisk (*) which were kindly sent to me to use. You can read my full disclosure here.


COPIC MARKERS: Panda - N10, N8, N6, N5, N3, N1, N0, 0/RV55, RV52. Branch - E59, E57, E55, E53. Leaves - G29, YG17, YG23, YG01. Dragon - V09, V17, V15, V12, V01/BG49, BG13, BG11. Flowers - YR27, Y17, Y15, Y13/V01, V000/G29, YG17, YG23, YG01. Caterpillar - BG49, BG13, BG11. Background/sky - B02, B01, B00, B000, B0000, 0. 

I have to say, it was lovely to just sit and colour these images! Thank you so much for stopping by today, I really appreciate it. I hope you have a great day and a wonderful weekend! 

17 May 2023

Birthday Stripes

Hello there, I don't know about you, but I tend to struggle a bit with masculine cards. I think it is ok of they are into a certain hobby but if you just want a generic one, I do find it a little more difficult. I find with masculine cards, simple is best and these are very simple indeed!

PLEASE NOTE: This post contains affiliate links. Please see below for my full disclosure.


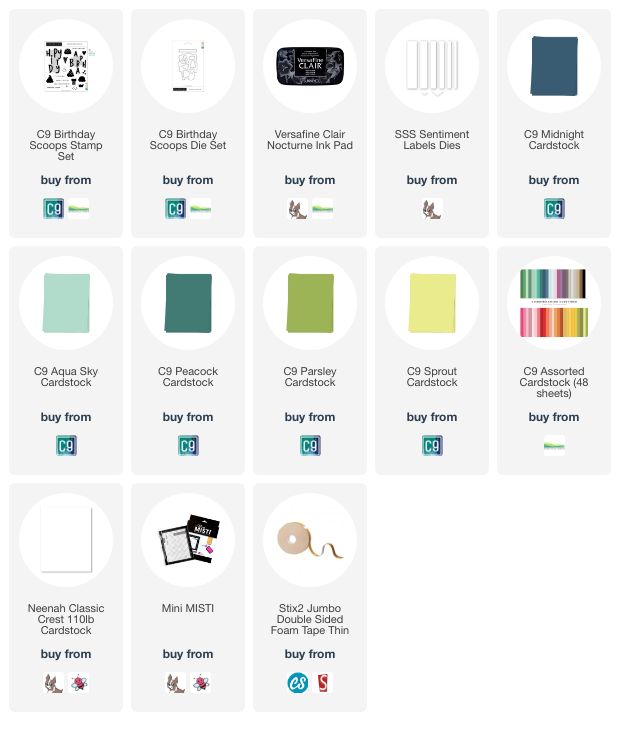
I started off by stamping the happy birthday sentiment from the Concord & 9th Birthday Scoops Stamp Set on to white cardstock using Versafine Clair Nocturne Ink. This stamp is in two parts so that you can combine different colours for the letters but I went with all black for today. They were then die cut out using the Concord & 9th Birthday Scoops Die Set


I took five colours of Concord & 9th Cardstock in Midnight, Peacock, Aqua Sky, Sprout and Parsley and die cut the sheets using the Simon Says Stamp Sentiment Labels Die. I took panels of white cardstock and adhered the strips on top, at a diagonal. 


The panels were adhered to US A2 sized white card bases with thin foam tape and the sentiments adhered on top with more thin foam tape. I thought about adding some embellishments but actually, I liked them as is, even if they are very plain! 

SUPPLIES:


Here are the links to what I have used on the projects. Affiliate links are used on some products. This means that if you make a purchase after clicking on my link, I receive a small commission with no extra cost to you. I truly appreciate your support when using these links. Please click on the logo below the product to shop at your favourite store. All products were personally purchased except those from Clearly Besotted, Hero Arts or those marked with an asterisk (*) which were kindly sent to me to use. You can read my full disclosure here.


These cards would be a good one to mass produce as I still have lots of strips left to make more! Thank you so much for stopping by my blog today, I really do appreciate it. I hope you have a great day! 
End of code