Showing posts with label Tonic. Show all posts

15 April 2023

Spellbinders | Bibi's Hummingbirds

Hello there and happy Saturday! Today I have a card to share with you using Bibi's Butterflies Collection from Spellbinders. This is such a wonderful collection featuring dies, stamps and stencils. I don't know what it is about hummingbirds but I find them quite elegant and very beautiful!

PLEASE NOTE: This post contains affiliate links. Please see below for my full disclosure.


I started off by die cutting the Spellbinders Hummingbird & Lily Etched Dies from white cardstock. I then blended Tim Holtz Distress Ink to the layers/parts with blending brushes. I used Peacock Feathers, Mermaid Lagoon, Prize Ribbon and Villainous Potion for the hummingbird. I used Picked Raspberry for the flower/lily petals and Mustard Seed and Dried Marigold for the stamens. For the leaves, I used Twisted Citron and Mowed Lawn inks. I then added Arteza TwiMarker and white gel pen dots to the lily petals. 


The elements were adhered together using Bearly Art Glue. I die cut a panel of cardstock using the largest of the new Spellbinders Everlasting Circles Etched Dies. I also made a card base with this die too. I placed the Spellbinders Hummingbird Textures Stencil on to the panel and using a spatula, applied Tonic Nuvo Moonstone Glimmer Paste


Once dry, the panel was adhered flat to the card base. The flower was adhered using thin foam tape and the leaves popped underneath. The hummingbird was then adhered with thin foam tape also. I added a Spellbinders Onyx Color Essentials Gem for his eye. The sentiment from Spellbinders Hello, Friend Sentiments Glimmer Hot Foil Plate set was foiled on to black cardstock using Spellbinders White Foil. It was cut into a strip and added to the card with more thin foam tape. 

SUPPLIES:


Here are the links to what I have used on the project. Affiliate links are used on some products. This means that if you make a purchase after clicking on my link, I receive a small commission with no extra cost to you. I truly appreciate your support when using these links. Please click on the logo below the product to shop at your favourite store. All products were personally purchased except those from Clearly Besotted, Hero Arts or those marked with an asterisk (*) which were kindly sent to me to use. You can read my full disclosure here.


The Glimmer Paste is a little difficult to see in the photos but in real-life, it adds that little touch of sparkle. Kind of like adding embellishments to the card. Thank you so much for stopping by today, I really do appreciate it. I hope you have a wonderful weekend! Take care!

29 October 2021

Tonic Stamp Club | Snowmies Release Blog Hop + Giveaway

Hello there, I am delighted to be joining Maria Willis and Tonic Studios today for the release of this month's Stamp Club which is Snowmies! The Stamp & Die Set (exclusive to Tonic Studios and retires after three months) contains lots of lovely snowmen/snowwomen that can be stamped or die cut. For my cards today, I have done one of each and I have also used the new Slimline Envelope Creator Die Set, which is an add-on to the set, for my mini slimline envelopes. 

PLEASE NOTE: This post contains affiliate links. Please see below for my full disclosure.


I created two mini slimline cards today (3.25" x 6.25") so that I could create envelopes using the new Tonic Studios Slimline Envelope Creator Die Set. Please note, this die only fits in larger format die cutting machines, not standard sized ones. I don't have one but the lovely Maria kindly cut some for me to decorate (thank you, Maria!). This set also contains plates to add detail to the envelopes but I did use one on my card. It also contains tags and different bits and bobs to decorate cards and envelopes too. 


For my first card, I started off by die cutting the background. I took a panel of white cardstock and cut it using one of the patterns from the Tonic Studios Slimline Envelope Creator Die Set. This doesn't cut a panel but just indents the little holes for the pattern - so pretty! Using Ink Blending Brushes, I blended on Distress Inks in Wilted Violet, Blueprint Sketch and Mermaid Lagoon. I then spritzed on Picket Fence Distress Spray Stain and Sparkle Sheer Shimmer Spritz (impossible to see in the photos but oh so pretty and sparkly in real-life!).


The images, from the Tonic Studios Stamp Club Snowmies Stamp & Die Set, were stamped on to white cardstock with black ink. I coloured them with Copic Markers and die cut them out. The sentiment from the set was stamped on to the panel and then the panel added to a mini slimline card base with thin foam tape. The trees were added with tape runner and the snowpeople with more foam tape. To finish off, I added Tonic Nuvo White Blizzard Nuvo Drops to their hats. 


The envelope was die cut from white cardstock. I then added ink blending on top with the same Distress Ink colours but this time in the Oxide formula. I placed the Stencil (that you get with the bundle as a free gift) on top and blended Hero Arts Unicorn Pigment Ink through the snowfakes to create a subtle pattern. I die cut a tag from the Tonic Studios Slimline Envelope Creator Die Set from vellum and added a hole reinforcer on top. The snowflake was cut from Tonic Sugar Crystal Glitter Cardstock and adhered on top. I added thread through the top and adhered with a tiny bit of vellum adhesive. 


My next card uses the dies from the set. There are lots of different elements to create a snowman including the body, head, hat, arms, face, scarf, there is even a mug/cup that they can hold or a present. I started off by die cutting all of the different elements and adhering them together with Deluxe Glue. There is a smile that you can cut but I drew mine in with a pen. For the holly berries, I coloured tiny gems with a red Copic Marker and added them to the hat, along with Tonic Nuvo White Blizzard Nuvo Drops.


For the background, I blended Distress Inks in Seedlees Preserves, Picked Raspberry and Kitsch Flamingo. I then spritzed on Picket Fence Distress Spray Stain and Sparkle Sheer Shimmer Spritz. It was adhered to a mini slimline card base with thin foam tape and the snowman added on top. I took the sentiment from the set and white heat embossed it on to black cardstock. The snowflakes (from the die set) were cut from Tonic Sugar Crystal Glitter Cardstock and adhered around the sentiment. I finished off with Bubbles added to to their centres. 


For the envelope, I kept it very simple and used one cut from white cardstock with the other pattern die in the Tonic Studios Slimline Envelope Creator Die Set. I blended Distress Oxide Inks on top and then embellished with a tag made like the first envelope. I think the tags add a little extra handmade element to the envelopes. 

SUPPLIES:


Here are the links to what I have used on the project. Affiliate links are used on some products. This means that if you make a purchase after clicking on my link, I receive a small commission with no extra cost to you. I truly appreciate your support when using these links. Please click on the logo below the product to shop at your favourite store. All products were personally purchased except those from Clearly Besotted, Hero Arts or those marked with an asterisk (*) which were kindly sent to me to use. You can read my full disclosure here.


BLOG HOP:


This post is part of a fun, inspiration filled blog hop (with prizes!). For the hop, you should have arrived here from the fantastic Emily Midgett. Next on the hop is the wonderful Marie Heiderscheit. If you get lost along the way or want to start the hop from the beginning, please head over to the amazing Maria Willis

GIVEAWAY:

Tonic Studios are giving away a Snowmies Bundle plus a £50/$50 gift card to one lucky blog hop winner. To enter, comment on every blog in the hop by 3rd November 2021 at 11.59pm PST/07.59 GMT. The winner will be announced on 5th November on Tonic Studios social media accounts. Good luck!

Thank you so much for stopping by to see me today. I apologise for all the blog posts but I hope you have enjoyed all the inspiration! Wishing you a wonderful rest of the day. Take care! 

22 September 2021

STAMPtember | Magical Christmas

Hello there and happy 22nd day of STAMPtember 2021! As part of the STAMPtember collaborations, Simon Says Stamp have paired with Clearly Besotted to bring you the super cute Magical Christmas set. This set can be purchased on it's own or with dies. Both are exclusive to Simon Says Stamp and will not be restocked. I am guessing it will go quickly, so if you like it, grab it while you can! 

PLEASE NOTE: This post contains affiliate links. Please see below for my full disclosure.


For my card, I thought I would create a little circle card. I love making shaped cards and do not do it enough! I started off by stamping the background element from the Simon Says Stamp + Clearly Besotted Magical Christmas Stamp Set on to white cardstock with Memento Tuxedo Black Ink. I then stamped one of the unicorns from the set on to a separate piece of cardstock with the same ink.


They were both coloured with Copic Markers (the colours that I used are listed below the supplies area) and the unicorn fussy cut out with scissors. I die cut the circle element with a Hero Arts Nesting Circle Infinity Die and then cut a further two circles (a slightly larger size) from blue cardstock. On one, I cut a slither off the bottom and then scored towards the top. I adhered it to the other circle to create a card base (that stands up!). 


The background piece was then added on top with foam tape, followed by the unicorn with more foam tape. I took the sentiment from the set and stamped it on to black cardstock with Versamark Ink. I applied white embossing powder and heat set. It was cut in to a strip using a Simon Says Stamp Sentiment Label Die and then added to the card with more foam tape. To finish off, I added white gel pen sparkles and stars to the sky, black glaze pen to the unicorn's eyes and Tonic White Blizzard Nuvo Drops to the ornaments on the tree. 

SUPPLIES:


Here are the links to what I have used on the project. Affiliate links are used on some products. This means that if you make a purchase after clicking on my link, I receive a small commission with no extra cost to you. I truly appreciate your support when using these links. Please click on the logo below the product to shop at your favourite store. All products were personally purchased except those from Clearly Besotted, Hero Arts or those marked with an asterisk (*) which were kindly sent to me to use. You can read my full disclosure here.


COPIC MARKERS: Unicorn - E53, E51, E50, R30, R00, R000, R000. Antlers - E59, E57, E55. Tree - G29, YG17, YG23, YG03, YG01. Rainbow and ornaments - R85, R83, R81, YR18, YR15, YR12, Y17, Y15, Y11, YG17, YG23, YG01, B01, B00, B000. Clouds - BG11, BG10, BG000. Mountain - BG73, BG72, BG70. Sky - B99, B97, B95, B93. 

There are lots of other adorable unicorns in the set but I loved this one dressed up as a reindeer! For more inspiration using the set, please head over to the Simon Says Stamp Blog. Thanks so much for stopping by today, I really do appreciate it. I will be back later with a blog hop. Have a great day!  

28 May 2021

Tonic Stamp Club | Shoot for the Stars Blog Hop + Giveaway

Hello there, I am delighted to be joining Tonic Studios today to celebrate the release of this month's Stamp Club bundle - Shoot for the Stars. If you haven't heard of Stamp Club, this is not a subscription but a monthly bundle release of a stamp set and dies that is exclusive to Tonic Studios and inspired by Maria Willis


As mentioned, the bundle this month is called Shoot for the Stars. If you have been following along with Stamp Club, you will know that they released a bundle called Shoot for the Moon previously. This set works perfectly with that set and great news! That set is coming back with this release, so if you missed it before, you have another chance to get it! You can see my cards using that bundle here. As you will see though, you can combine this set with other bundles too, even if you wouldn't necessarily think that they would go together! 


For my first card, I did something a bit odd and combined this month's Stamp Club with last month's. I started off by creating the background. I took a panel of white cardstock and blended on Tim Holtz Distress Inks in Picked Raspberry, Mermaid Lagoon, Blueprint Sketch, Chipped Sapphire, Seedless Preserves and Black Soot using blending brushes. I let the panel dry completely. 


I took the sparkle like star stamps from the Tonic Studios Stamp Club Shoot for the Stars Stamp & Die Bundle stamp set and stamped them repeatedly across the top half of the panel using Versamark ink. I applied Hero Arts Stain Pearl Embossing Powder and heat set. I then spritzed the panel with Sparkle Sheer Shimmer Spritz and set it aside to dry again. 


I took the whale from the Tonic Studios Stamp Club A Whaley Great Set Stamp & Die Bundle and stamped it on to white cardstock with Memento Tuxedo Black Ink. I coloured it with Copic Markers and splattered on a little more of the shimmer spray.  The sentiment from the set was stamped on to black cardstock with Versamark Ink. I applied White Embossing Powder, heat set it and cut it in to a strip. The panel was adhered to an A2 white card base and the whale and sentiment added on top with foam tape. 


My next card uses the dies from the bundle for a full shaker card. I started off by creating the background. I took a panel of white cardstock and blended on Tim Holtz Distress Inks in Picked Raspberry, Wilted Violet, Peacock Feathers, Mustard Seed, Chipped Sapphire and Black Soot. I then spritzed it with Sparkle Sheer Shimmer Spritz and then splattered on Dr. Ph. Martin's Bleed Proof White Paint for the stars. 


Whilst the panel was drying, I die cut a few of the stars from the Tonic Studios Stamp Club Shoot for the Stars Stamp & Die Bundle from black cardstock to use as my shaker elements. I then die cut the wish word three times - twice from white cardstock and once from Tonic Studios Sugar Crystal Glitter Cardstock with Tonic Studios Double Sided Adhesive Sheet on the back. They were adhered together one on top of another. I then stamped the sentiment (piecing different sentiments together) on to black cardstock with Versamark Ink. I applied White Embossing Powder and heat set. It was cut in to a strip. 


I took one of the new Tonic Studios Shaker Pockets and placed the stars on what would be the inside. I then placed the panel inked side down and folded the sides of the pocket around to the back and adhered down (they have adhesive already on them). These pockets are great because they are an easy way to create a full shaker card! The shaker panel was then adhered flat to an A2 black card base with tape runner. I die cut the mountain die from more black cardstock and adhered that on top of the shaker. The sentiment was adhered down and then the sentiment strip added below with thin foam tape. 

SUPPLIES:


Here are the links to what I have used on the project. Affiliate links are used on some products. This means that if you make a purchase after clicking on my link, I receive a small commission with no extra cost to you. I truly appreciate your support when using these links. Please click on the logo below the product to shop at your favourite store. All products were personally purchased except those from Clearly Besotted, Hero Arts or those marked with an asterisk (*) which were kindly sent to me to use. You can read my full disclosure here.


BLOG HOP:


Here is the full list of participants in the hop today:

Michelle Short - you are here!

GIVEAWAY:

Tonic Studios are giving away the Shoot for the Stars Bundle plus a £50/$50 gift certificate to the Tonic Studios Store (either UK or USA) to one lucky winner. To enter, leave a comment on every blog in the hop by 2nd June 2021 at 11.59pm PST/07.59am BST. The winner will announced by tonic on the 4th June 2021. Good luck!

For the whale card, I debated whether to put it on a galaxy background or not. If you Google 'whale in galaxy' some stunning images show up. I thought though, that with the card I made, it could either be interpreted as a whale in the sky or in the sea (with the stars being sparkles/reflections in the water). The ocean is not usually pink but I'm sure it could be with a little imagination! Thank you so much for stopping by today. Next on the hop is the amazing Jessica! Have a great rest of the day! 

26 December 2020

Tonic Studios Stamp Club - Shoot For The Moon Blog Hop

Hello there and welcome to the Tonic Studios Stamp Club Shoot For The Moon Blog Hop! The amazing Maria Willis has collaborated with Tonic Studios to bring us new releases every month called Stamp Club. These stamp and die sets are exclusive to Tonic Studios and limited edition so make sure to grab the sets while you can! 

This month, the bundle is called Shoot For The Moon and as you may have guessed, it is all about the moon! More details on the hop below. 

For my first card, I wanted to keep it (almost) one layer and use just the stamps from the set. I started off by taking a panel of white cardstock and placing the Taylored Expressions Rectangle Masking Stencil over the top. This masked off the edges of the panel. I then stamped the moon from the Tonic Studios Shoot For The Moon Stamp & Die Bundle using Altenew Morning Frost Ink. I made a mask for it and then blended the background with Distress Inks. 

I used Wilted Violet, Dusty Concord and Black Soot. I removed the moon mask and then stamped the trees from the set below using Versafine Clair Nocturne Ink. I removed the stencil and then set the piece aside to dry. Once dry, it was adhered flat to an A2 white card base with tape runner. 

I took the sentiment from the Tonic Studios Stamp Club Happy Mail Envelope Stamp Set and stamped it on to black cardstock with Tonic Nuvo Clear Mark Ink and applied white embossing powder. It was heat set and cut out using one of the banners from the Tonic Studios Stamp Club Banners & Strips Die Set. It was then added to the card with foam tape. 

My next card uses mainly dies from the bundle. I started off by taking a panel of white cardstock and Blending Distress Inks on to it using Tonic Nuvo Prescision Blending Brushes. I used Blueprint Sketch, Peacock Feathers, Wilted Violet and Picked Raspberry. I then spritzed on Tseukineko Sparkle Sheer Shimmer Spritz and Tim Holtz Picket Fence Distress Spray Stain and set it aside to dry. 

I took the tree dies from the Tonic Studios Shoot For The Moon Stamp & Die Bundle and die cut them from black cardstock. I cut the moon from white cardstock. This die has an embossing piece that you can add in too. It gives some lovely embossing to the moon, sadly, it is a little bit difficult to see in the photos but looks good in real life! I took a piece of white cardstock and blended on a little Tim Holtz Squeezed Lemonade Distress Ink and then cut the stars from it. 

Once the panel was dry, it was adhered flat to an A2 white card base with tape runner. I then added the trees with Tonic Nuvo Deluxe Adhesive and cut off the edges. I added a little ink blending to the moon (with the same sky colours) and adhered that with glue also, followed by the stars. I took the sentiment from the set and stamped and embossed it on to black cardstock. It was cut in to a strip and added to the card with foam tape. 

SUPPLIES:

Here are the links to what I have used on the card. Affiliate links are used on some products. This means that if you make a purchase after clicking on my link, I receive a small commission with no extra cost to you. I truly appreciate your support when using these links. Please click on the logo below the product to shop at your favourite store. All products were personally purchased except those from Clearly Besotted, Hero Arts or those marked with an asterisk (*) which were kindly sent to me to use. You can read my full disclosure here.


BLOG HOP:

Here is the full list of participants in the hop today:

GIVEAWAY:

Tonic Studios are giving away a £50/$50 gift card to the Tonic Studios store to one lucky blog hop winner, as well as the Shoot For The Moon Bundle. All you need to do to enter is to leave a comment on every stop on the hop by 11.59pm PST on 3rd January 2021. The winner will be announced on 5th January 2021. 

Next on the hop is the wonderful Mindy. Thank you so much for stopping by today. If you celebrate, I hope you are all having a lovely Christmas! Take care :) 

30 October 2020

Tonic Studios Stamp Club Party Animals Blog Hop

Hello there and welcome to the Tonic Studios Stamp Club Party Animals Blog Hop! The amazing Maria Willis has collaborated with Tonic Studios to bring you new releases every month called Stamp Club. The Stamp Club release this month features the super cute Party Animals Stamp & Die Bundle, along with the Banners & Strips Die Set that works well with the sentiments in the set, as well as lots of other sentiments that you might have. 

This is not a subscription but more like a kit and exclusive to Tonic Studios. You can purchase a stamp and die bundle along with add-on products on the last Friday of every month. The bundle is limited edition so once it is sold out, it is sold out for good, so grab it while you can! More details on the hop below :)

For my first card, I am using the adorable elephants from the Tonic Studios Party Animals Stamp & Die Bundle. I started off by stamping the two elephants and the birthday cake on to white cardstock with black ink. I then coloured them using a combination of Tonic Nuvo Alcohol Markers and Copic Markers. They were cut out using the coordinating dies (what is great about these dies is that they are not connected together, so no annoying metal to cut between them!). 

I then took a panel of white cardstock and masked off the edges. Using a blending brush, I blended Tonic Studios Nuvo Laguna Bay Hybrid Ink from the top down. I then splattered on some of the ink, followed by Arteza Titanium White Gouache. While the panel was drying, I took a piece of vellum and die cut it using the grass die in the set. I then blended on Tim Holtz Twisted Citron and Mowed Lawn Distress Inks. 

The grass was adhered to the panel using vellum adhesive and the baby elephant popped behind with tape runner. The bigger elephant and cake were adhered on top with foam tape. I took the sentiments from the set and stamped them on to black cardstock with Tonic Studios Nuvo Clear Mark Embossing Pad. I applied white embossing powder and heat set. They were cut in to strips using the Tonic Studios Banners & Strips Die Set and added to the card with foam tape. 

My next card uses the wonderful hippo from the set. I started off by stamping the hippo, balloon and hat from the Tonic Studios Party Animals Stamp & Die Bundle on to white cardstock with black ink. I coloured them using markers and then die cut them out with the coordinating dies. I took a Hero Arts Nesting Tag Infinity Die and cut it from MFT Summertime Polka Dots Paper Pad. It was added to a white card base with tape runner. 

I then took the sentiment from the set and stamped it on to black cardstock with Tonic Studios Nuvo Clear Mark Embossing Pad before applying white embossing powder. It was die-cut using one of the stitched dies from the Tonic Studios Banners & Strips Die Set and added to the card with foam tape. The hippo, balloon and tag were then added with foam tape also. To finish off, I added Tonic Studios Nuvo Crystal Glaze to the balloon. 

My final card for today uses the adorable turtle from the set. I started off my stamping the turtle, cake, hat and candle from the Tonic Studios Party Animals Stamp & Die Bundle on to white cardstock with black ink. They were coloured using markers and die cut out using the coordinating dies. They were then set aside while I worked on the background scene. I took an A2 white card base and masked of the edges. I die cut the cloud die from the set with Mylar sheet to create a stencil.

I did the same with the grass die as well. I first took the cloud stencil and placed this on to the panel. Using an ink blending brush, I blended on Tonic Studios Polar Ice Hybrid Ink, moving the stencil down as I went. For the grass, I used the negative piece of the stencil, placed this above and blended ink below. I used Tim Holtz Twisted Citron and Mowed Lawn Distress Inks. The masks were removed and the sentiment from the set stamped at the top. I then adhered the turtle, hat, cake and candle with foam tape. To finish off, I added Tonic Studios Nuvo Crystal Glaze to the turtle's shell. 
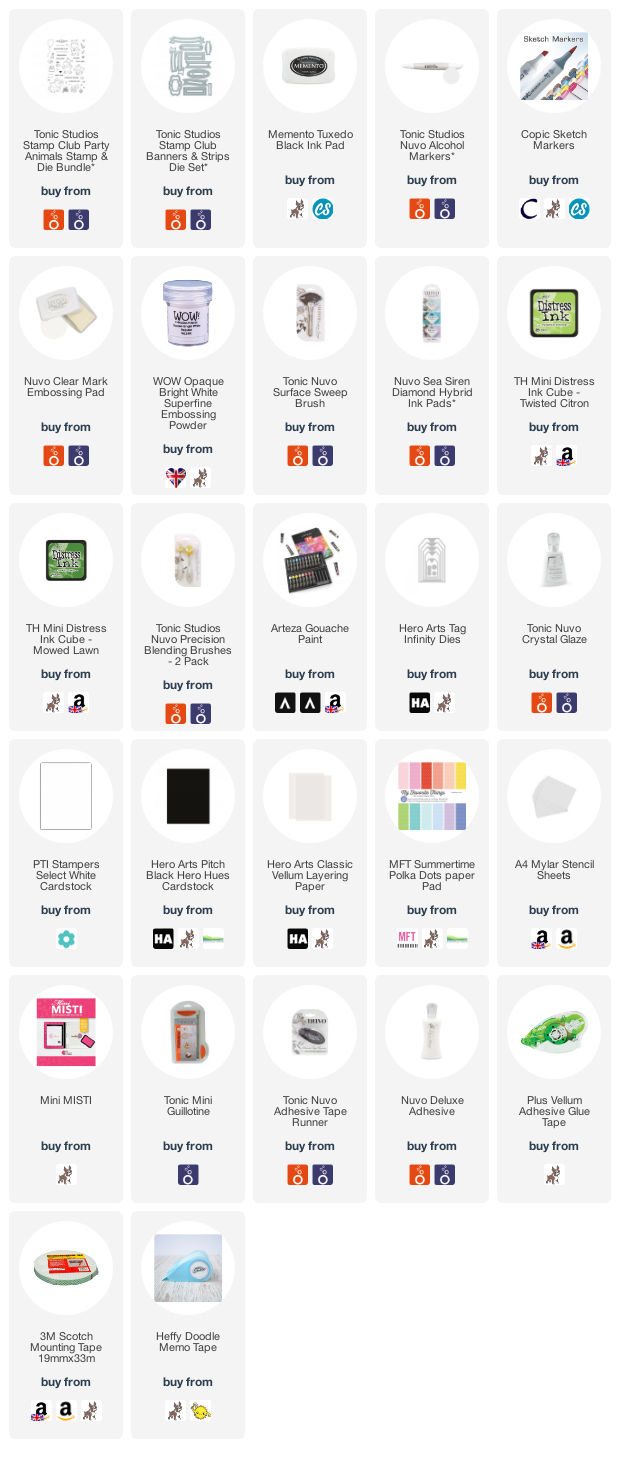
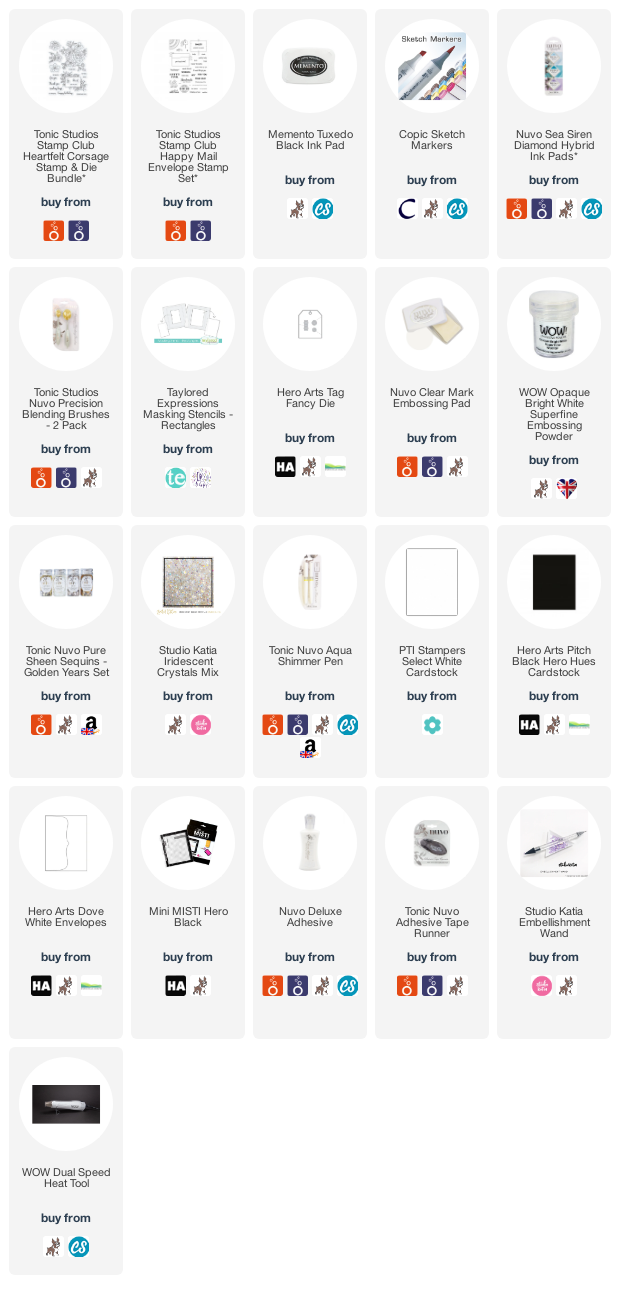

SUPPLIES:

Here are the links to what I have used on the card. Affiliate links are used on some products. This means that if you make a purchase after clicking on my link, I receive a small commission with no extra cost to you. I truly appreciate your support when using these links. Please click on the logo below the product to shop at your favourite store. All products were personally purchased except those from Clearly Besotted, Hero Arts or those marked with an asterisk (*) which were kindly sent to me to use. You can read my full disclosure here.


BLOG HOP:

Here is the full list of participants taking part in the hop today:

GIVEAWAY:

Tonic Studios are giving away one £100/$100 gift card to the Tonic Studios Store (either UK or USA) to one lucky blog hop reader. All you need to do to enter is to leave a comment on every stop in the hop by 4th November 2020 at 11.59pm PST/5th November 2020 at 7am GMT. Tonic will announce the winner shortly afterwards. 

Next on the hop is the fabulous Mindy. Thank you so much for stopping by today,  I hope you will check out the bundle, it is so cute and packed full of images and dies! I hope you have a wonderful rest of the day! 

25 September 2020

Tonic Studios Stamp Club Heartfelt Corsage Blog Hop

Hello there, today I am delighted to be taking part in the Tonic Studios Stamp Club Heartfelt Corsage Blog Hop. The amazing Maria Willis has collaborated with Tonic Studios to bring you new releases every month called Stamp Club. This is not a subscription but more like a kit and exclusive to Tonic Studios. You can purchase a stamp and die bundle along with add-on products on the last Friday of every month. The bundle is limited edition so once it is sold out, it is sold out for good, so grab it while you can! More details on the hop below :)


This month, the bundle is called Heartfelt Corsage and it is so beautiful! These florals are just gorgeous! For my card, I started off by stamping the largest of the floral images from the Tonic Studios Heartfelt Corsage Stamp & Die Bundle with Memento Tuxedo Black Ink. I then coloured it using Copic Markers (the colours that I used are listed below the supplies area). It was then die cut out using the coordinating die and set aside. 


I took an A2 white card base and placed the Taylored Expressions Rectangle Masking Stencil on top. I then blended inks from the Tonic Studios Nuvo Sea Siren Diamond Hybrid Ink Set on top. I used Polar Ice at the bottom and Spring Heather at the top. The mask was was removed and the image added on top with foam tape. 


The sentiment, from the same set was stamped on to black cardstock using Tonic Studios Nuvo Clear Mark Embossing Pad. I applied white embossing powder and heat set. It was then cut in to a strip and added to the card with foam tape. To finish off, I added Diamond Sequins from the Tonic Studios Nuvo Golden Years Pure Sheen Sequin Set along with some clear gems. 


I thought it would be nice to create an envelope to match so I first stamped the little snail image from the Tonic Studios Stamp Club Happy Mail Envelope Stamp Set (which is an add-on to the bundle this month) in to the bottom right hand corner of an A2 white envelope. I then made a mask for him before blending the same Tonic Studios Sea Siren Inks on top. The mask was removed and the snail coloured with Copic Markers. 


For my final project today, I thought I would complete the set with a little tag. I started off by stamping one of the smaller floral images from the Tonic Studios Stamp Club Heartfelt Corsage Stamp & Die Bundle on to white cardstock with black ink. It was coloured with the same Copic Markers and die cut out. 


I die cut the Hero Arts Fancy Tag Die from the white cardstock and blended the same Sea Siren inks on top. The image was added on top with foam tape and the sentiment, from the Tonic Studios Stamp Club Happy Mail Envelope Stamp Set was stamped and heat embossed on black cardstock, cut out and added to the tag with more foam tape. To finish off, I added twine through the top of the tag, as well as adding the same sequins and gems. 

SUPPLIES:

Here are the links to what I have used on the projects. Affiliate links are used on some products. This means that if you make a purchase after clicking on my link, I receive a small commission with no extra cost to you. I truly appreciate your support when using these links. Please click on the logo below the product to shop at your favourite store. All products were personally purchased except those from Clearly Besotted, Hero Arts or those marked with an asterisk (*) which were kindly sent to me to use. You can read my full disclosure here.

COPIC MARKERS: Purple flowers - V09, V17, V15, V12. Blue flowers - B18, B16, B12. Leaves and stems - G29, YG17, YG25, YG03, YG01. Flower centres - YR24, YR21. 

BLOG HOP:


As mentioned, this post is part of a blog hop to celebrate the launch of Stamp Club. If you are following along in the hop, you should have arrived here from the amazing Maria. Next on the hop is the fantastic Marie. If you get lost along the hop, you can start at the beginning with the Tonic Studios Blog

GIVEAWAY:

One lucky blog hop reader will win a £100/$100 gift card to the Tonic Studios Store (either the UK store or US store). To enter the giveaway, you need to comment on every stop in the hop. Giveaway closes 30th September 2020 at 11.59pm PST. The winner will be announced by Tonic on the 2nd October 2020. Good luck!

Thank you so much for stopping by today, I really do appreciate it. I hope you have a lovely time on the rest of the hop and a great rest of the day too! Take care! 
End of code