Showing posts with label Lawn Fawn. Show all posts

20 January 2020

Little Piggy

Hello there, I am back with my final card to share that I made last year but didn't post (well, I think it is my last!). This one was for my niece for her birthday, she happens to like pigs, like her aunt, so I thought the MFT Little Piggy would be perfect for her card!


I started off by cutting various shades of cardstock using the MFT Little Piggy Die-namics. I used Hero Arts Peony Cardstock for the main part of the pig, Hero Arts Antique Ivory Cardstock for the tummy, feet, inside of the ears and hands and Simon Says Stamp Smoke Cardstock for the eyes. I blended on a little Picked Raspberry Distress Ink on to the pieces, for some added dimension. The pig was then assembled using liquid glue but I did not add the head on at this point, as I wanted to pop it up.


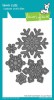
I then created the background. I took a white A2 card base, placed the MFT Cloud Stencil on top and blended on Mermaid Lagoon Distress Ink. I cut two grass pieces using the MFT Grassy Fields Die-namics from Hero Arts Kiwi Cardstock and then blended on a little Mowed Lawn Distress Ink for some added texture. The pieces were adhered to the bottom of the card with tape runner.

 
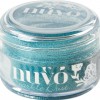
I took the Lawn Fawn Party Balloons Die Set and die cut the balloon part from Simon Says Stamp Lavender Cardstock and the string from white. I then blended on Shaded Lilac and Wilted Violet Distress Inks on to the balloon, followed by a layer of Tonic Nuvo Crystal Glaze for some added shine. The pig's body was added flat to the card with tape runner and then I added the head on top with foam tape.


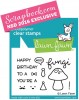
The balloon was added with tape runner and liquid glue (for the string). I took the sentiment from the MFT Birdie Brown Greetings Galore Stamp Set and stamped it on to black cardstock using Versamark Ink. I applied white embossing powder and heat set. It was cut in to strips and added to the card with foam tape. To finish off, I added more Crystal Glaze to the pig's eyes and nose.


SUPPLIES:

Here are the links to what I have used on the card. Affiliate links are used on some products. This means that if you make a purchase after clicking on my link, I receive a small commission with no extra cost to you. I truly appreciate your support when using these links. Please click on the logo below the product to shop at your favourite store. All products were personally purchased except those from Clearly Besotted, Hero Arts or those marked with an asterisk (*) which were kindly sent to me to use. You can read my full disclosure here.


Isn't that pig just adorable? I love him! One of my favourite dies from 2019. Thank you so much for stopping by today, I very much appreciate it. I hope you have a great day and a wonderful week ahead!

30 September 2019

Hero Arts + Lawn Fawn Big Thanks Simple Scene Building

Hello there, I am over on the Hero Arts Blog and YouTube Channel today, creating a card using the new Hero Arts Big Thanks set in partnership with Lawn Fawn. It is such a cute set and perfect for scene building.


SUPPLIES:

Here are the links to what I have used on the card. Affiliate links are used on some products. This means that if you make a purchase after clicking on my link, I receive a small commission with no extra cost to you. I truly appreciate your support when using these links. Please click on the logo below the product to shop at your favourite store. All products were personally purchased except those from Clearly Besotted, Hero Arts or those marked with an asterisk (*) which were kindly sent to me to use. You can read my full disclosure here.
 
 
COPIC MARKERS: Rhinos - W5, W4, W3, W2, W1, W0, R00, R000, E53, E50. Birds - Y17, Y15, Y13, Y11, YR15. Flowers - V17, V15, V12, Y11. Butterfly - V17, V15, V12. Clouds - BG11, BG10, 0.

Over on the blog, I talk about using the rule of thirds for clean and simple cards. This makes for a smaller scene but I still think it is super cute! Please visit the blog post here or watch the video directly on YouTube here. Thanks so much for stopping by today, have a great day!

24 September 2019

Hero Arts & Lawn Fawn Partnership Blog Hop + Giveaway

Hello there, as part of the ongoing celebrations for Hero Arts celebrating their 45th Birthday, this month Hero Arts have teamed up with Lawn fawn to bring you the fantastic Big Thanks set. It is such a cute set with rhinos and birds and lots of lovely thank you sentiments. To celebrate the release of the set, we are having a fun blog hop filled with lots of inspiration and prizes (more on that below).
 

For my card today, I started off by stamping one of the rhinos and two birds, as well as the little clouds from the Big Thanks Stamp Set on to white cardstock with Hero Arts Intens-ified Black Ink. I then coloured them using Copic Markers (the colours that I used are listed below the supplies area) and die cut them out using the Big Thanks Dies.
 
 
I took another piece of white cardstock and die cut it using one of the circles from the Hero Arts Nesting Circles Infinity Dies. I also cut another from Hero Hues Meadow Cardstock. I took the white piece and blended Hero Arts Splash Reactive Ink on to it using a blending brush. I took the green one and cut this down further using the grass die from the Hero Arts Thorn Tree & Grasses Fancy Die Set. I then blended Hero Arts Key Lime Fizz and Green Apple Reactive Inks on to it for some more dimension.
 
 
I took a white card base and using the next largest size of the nesting dies, embossed a larger circle on to the front of the card base. The sky cardstock piece was added on top with Hero Arts Precision Glue, followed by the grass piece. I then added the clouds flat, followed by the rhino and birds with foam tape. I took the sentiment from the set and stamped this on to Hero Hues Pitch Black Cardstock with Hero Arts Clear Embossing & Watermark Ink. I applied White Detail Embossing Powder and heat set. This was cut in to a strip and added to the card with more foam tape.
 
SUPPLIES:

Here are the links to what I have used on the card. Affiliate links are used on some products. This means that if you make a purchase after clicking on my link, I receive a small commission with no extra cost to you. I truly appreciate your support when using these links. Please click on the logo below the product to shop at your favourite store. All products were personally purchased except those from Clearly Besotted, Hero Arts or those marked with an asterisk (*) which were kindly sent to me to use. You can read my full disclosure here.
 
 
COPIC MARKERS: Rhino - W5, W3, W2, W1, W0, R00, R000, E53, E50. Birds - B04, B02, B01, Y13. Clouds - BG11, BG000.
 
BLOG HOP:
 
 
For the blog hop, you should have arrived here from the wonderful blog of Melissa Stinson. Next on the hop is the fantastic blog of Nichol Spohr. If you get lost along the way, the full list of participants is on the Hero Arts Blog.
 
GIVEAWAY:

There are three prizes to be won in today's hop:
 
- one winner will receive the Big Thanks stamp set and dies
- one winner will receive a $25 shopping spree at Lawn Fawn
- one winner will receive a $25 shopping spree at Hero Arts
 
The winners will be drawn from all of the comments left across all of the stops in the hop. The giveaway closes on Sunday 29th September and the winners will be announced on the Hero Arts Blog the following week.
 
I had so much fun creating with this set! Thank you so much for stopping by today, I hope you have a great rest of the hop and a lovely rest of the day!

1 September 2017

Hippo Birthday

Hello there, today I have a card to share using the super cute Happy Hippos set from MFT. I have been eager to ink up this set since I got it, those hippos are adorable!

I started off my card by creating the background. I took a piece of white cardstock and cut it using the largest of the SSS Stitched Rectangle Dies. I took the MFT Cloud stencil and used this to create clouds with my Copic Markers. I first outlined the cloud shape with the stencil and then filled in above it with shading, to create the effect I was looking for. I stamped the hippo and bow-tie using Memento Tuxedo Black ink. They were coloured with Copic Markers (colours used listed below the supplies section) and then fussy cut out. I added the bow-tie to the hippo with a little liquid glue.

 
I added the cloud background on to a white A2 card base with ATG. I die cut one of the balloons from the Lawn Fawn Party Balloons die collection and then coloured this with Copic Markers also. I wrapped some silver thread through the bottom and then tied it on to the hippos hand. The pieces were then added to the card with foam tape.
 
 
I took the 'hippo' portion of one of the sentiments from the Happy Hippos set and the 'birthday' portion of a sentiment from the MFT Beary Special Birthday set and stamped these on to black cardstock with Versamark Ink. I applied white embossing powder and heat set. These were then cut in to strips and added to the card with more foam tape. I added Tonic Nuvo Crystal Glaze to the balloon and then to finish off, I added a few Clear Iridescent Jewels.
 
SUPPLIES:
Here are the links to what I have used on the card. Affiliate links are used on some products. This means that if you make a purchase after clicking on my link, I receive a small commission with no extra cost to you. I truly appreciate your support when using these links. Please click on the logo below the product to shop at your favourite store. Products marked with an asterisk (*) were kindly sent to me to use.
 
 
COPIC MARKERS: Hippo - W7, W4, W2, W0. Bow-tie - B16, B14, B12. Balloon - RV55, RV52, RV06, YV04, RV02. Cloud - B00, B000, B0000, 0.
 
Thanks so much for visiting me today. I really do appreciate it. I hope you have a great rest of the day and a fabulous weekend!

7 April 2017

To A Fungi

Hello there, today I have a fun card to share that I made for my Dad for his birthday. My friend Kari kindly sent me this Lawn Fawn stamp set last year and I have been eager to use it ever since. I thought my dad might appreciate the pun!
 

I started off with a panel of white cardstock and stamped the middle mushroom/toadstool first. I then created a mask for him and added this on top. I then stamped a mushroom to either side of him and removed the mask. The sentiment was then stamped below.
 
 
Since I wanted the middle mushroom to be the fun guy, I coloured him like a toadstool with colour and kept the other two muted with greys, like normal mushrooms. The card panel was simply added to a red A2 card base with foam sheet. I then added a coating of Glossy Accents to the toadstool (not shown in the photograph as I was short of time to get the card posted in the mail!).
 
SUPPLIES:
Here are the links to what I have used on the card. Please click on the picture or wording to be taken to where I purchased it. Affiliate links are used on some products. This means that if you make a purchase after clicking on my link, I receive a small commission with no extra cost to you. I truly appreciate your support when using these links.


COPIC MARKERS: Mushrooms - W7, W5, W3, W2, W1, W0. Toadstool - E59, E57, E55, R89, R37, R29, R27, R24.
 
Unfortunately, the set was a Scrapbook.com exclusive and has now been discontinued. I try my best not to use discontinued products on my blog but I hope you will be ok with me sharing the card. Thanks so much for visiting me today. I hope you have a great day and wonderful weekend!

19 November 2016

VIDEO | Sparkly Snowflakes

Hello there, today I have a trio of cards that I made using the new Tonic Nuvo Sparkle Dust. Tonic Studios kindly sent me some of these to use and I have to say, I love them! They are really super fine glitter, hence why they are called a dust and not a glitter. They do not feel gritty like glitter but soft and silky like.


I started off by adding some Stick It adhesive sheet to some scraps of white cardstock. I removed the top film off of the Stick It and then applied the Sparkle Dust on top. Once it was adhered, I ran my finger over it to push the dust into the adhesive and then ran my bone folder over it. It's really difficult to capture the sparkle in photos or on camera but let me tell you, this stuff is gorgeous!
 
 
I used three shades of Sparkle Dust for my cards today - Paradise Blue, Cosmo Berry and Raspberry Bliss. The pieces were run through my Cuttlebug using one of the dies from the Lawn Fawn Stitched Snowflake die collection. Since the Sparkle Dust is so fine, you can still see the stitching detail on the die cuts which I love.


Whilst die cutting, I also embossed a SSS Stitched Frame die on to A2 white card bases. If you are not sure how to emboss with dies. You see my video about it here.
 
 
The sentiment, from the SSS Arctic Christmas stamp set, was stamped on to each of the card bases using my Mini MISTI. The snowflakes were then adhered to the card with thin strips of clear foam tape.
 
VIDEO:
 I apologise that the lighting isn't great in the video, but here is a look at how I made the cards:


SUPPLIES:
Here are the links to what I have used on the card. Please click on the picture or wording to be taken to where I purchased it. Affiliate links are used on some products. This means that if you make a purchase after clicking on my link, I receive a small commission with no extra cost to you. I truly appreciate your support when using these links. Products marked with an asterisk (*) were sent to me, all other products were purchased by myself.

I love how these came out. Clean and simple but I like the added shimmer that the Sparkle Dust gives. You could make them in lots of different colours too! Sadly the photos haven't done the glitter any justice but honestly, it is really sparkly in real life! Thank you so much for visiting me today. I hope you have a great weekend.

19 September 2016

Fairy Birthday

Hello there, today I have a card to share that I made for my niece for her birthday. She is a girly girl so I wanted to go with something pink and purple and glittery. The front of the card was inspired by Nichol Spohr but I also wanted to do decorate the inside, so I went with a pop up design.


For the front, I started off by cutting a rectangle of cardstock and then blending over distress inks to make a sky. Using the LF Puffy Cloud dies, I cut some clouds from white cardstock, along with a piece from vellum. These were adhered to the front of the distress inked panel. The sentiment, from the LF Scripty Sayings set was stamped on the bottom cloud.


The fairies from the LF Fairy Friends set were stamped on to white cardstock, along with the wands. These were coloured with Copics Markers and cut out with the matching dies. These were adhered to the front of the card with foam tape. I then added a sprinkling of confetti from Little Things from Lucy's Cards. I adhered them with Multi Medium Matte.
 

For the inside, I first took a piece of white cardstock and blended Broken China Distress Ink on to it, to follow on the sky from the front. This was adhered to the top part of the inside. I then added another cloud cut from white cardstock. I took a piece of green paper from the LF Let's Polka paper pad and cut this using the ME Grassy Border Trio dies. I then cut two pop up pieces in to using the ME Pop Up dies. This was then adhered to the bottom piece of the inside.
 

I took a white piece of cardstock and stamped the sentiment from the Fairy Friends set on to it. I then cut the top of the panel using the SSS A2 Card Curved Edge die. This was adhered below the grass piece. I then stamped the flowers, along with another fairy, coloured them in and die cut out. I already had the house stamped and coloured from the 30 day colouring challenge. The fairy and the house were adhered on to the pop up pieces and then the flowers behind. To finish off, I added a liberal coating of Wink of Stella to the flowers, the house and all the fairy's wings.
 

SUPPLIES:

Here are the links to what I have used on the card. Please click on the picture or wording to be taken to where I purchased it. Affiliate links are used on some products. This means that if you make a purchase after clicking on my link, I receive a small commission with no extra cost to you. I truly appreciate your support when using these links. Products marked with an asterisk (*) were sent to me, all other products were purchased by myself.


COPICS: Left Fairy - Skin: E11, E00, E000, R20. Hair: YR31, E43, E44. Dress: R85, R83, R81. Wings: R81, R0000. Right Fairy - Skin: E11, E00, E000, R20. Hair: E27, E25, E23. Dress: Vo6, V05, V04, V01. Wings: V01, V0000. Inside Fairy - Skin: E11, E00, E000, R20. Hair: E57, E55, E53. Dress: R85, R83, R81. Wings: Y11, Y0000. Flowers - YG17, YG23, YG03, YG01, R85, R83, R81. House - Y11, Y000, Y0000, B000, V09, V06, V05, V04, V01., YG23, YG01.
 
I used so many supplies on this card! My desk was a mess afterwards but I think it was worth the extra effort in doing the inside as well. I am hoping that my niece likes it! Thanks so much for visiting me today. I hope you have a great week!
End of code