PLEASE
NOTE: This post contains affiliate links. Please see below for my full
disclosure.
SWEET BIRTHDAY WISHES
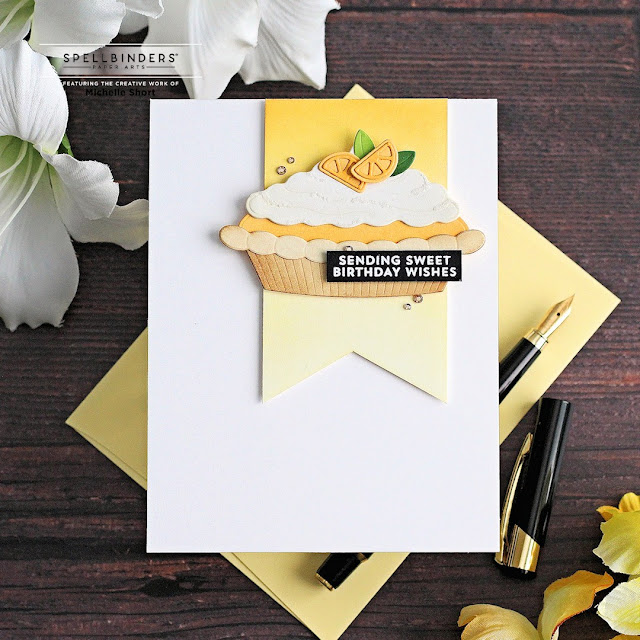
I added ink blending to it (Wild Honey Distress Ink) and then adhered it to an A2
white card base with foam tape. The pie was added on top with thin foam tape.
The sentiment, from Perfect
Pie Sentiments & Fillings Clear Stamp Set, was heat embossed on to Onyx Cardstock and added to the card. To finish off, I added Gold Mix Color Essential Gems and a little Sparkle Dust
Glitter to the meringue for the caramelised sugar look.
FOR YOU PIE BOX
This card features the cutest little box that you can add pies in to. Perfect for a little treat for a friend! I die cut The Bakers Box Etched Dies from Snowdrift Cardstock. It is really easy to assemble, I just adhered with a little double-sided tape and added acetate in the opening.
The Sky View Pies Etched Die Set was cut from Alabaster Cardstock. I added ink blending with Gathered Twigs Distress Ink before adding Diamond Dust to resemble sugar. It was then popped in the box and the box tied with Licorice Twist Twine, adding on a sentiment banner with the Perfect Pie Sentiments & Fillings Clear Stamp Set. The box was embellished with an apple slice and leaves die cut using the Delicious Decorations set.
I die cut a Nestabilities Essential Square from Rainforest Cardstock and then ran it through the Platinum 6 with the Picnic Checkerboard Stencil to emboss it. I added ink blending to the sides with Rustic Wilderness Distress Ink and then adhered it to a 4 ¼” x 4 ¼” white card base. The pie box was adhered on top. To finish off, I added Glaze n’ Glue to the pips in the apple slice.
BERRY SWEET
I couldn’t resist making a cherry pie for my last card today. I die cut the elements from Serve a Slice Etched Dies from Alabaster, Wild Berry, Snowdrift, Portobello and Fern Cardstock. I added ink blending with Gathered Twigs, Antique Linen and Seedless Preserves Distress Inks before adhering together with Bearly Art Glue.
The plate was adhered above the sentiment, followed by the pie with thin foam tape. The fork was added on next and then the hearts, which were layered up three die cuts high. To finish off, I added Glaze n’ Glue to the hearts and cherry for some added shine.
SUPPLIES:
Here are the links to what I have used on the projects. Affiliate links are used on some products. This means that if you make a purchase after clicking on my link, I receive a small commission with no extra cost to you. I truly appreciate your support when using these links. Please click on the logo below the product to shop at your favourite store. All products were personally purchased except those from Clearly Besotted, Hero Arts or those marked with an asterisk (*) which were kindly sent to me to use. You can read my full disclosure here.
Sorry if I have made you hungry reading this post! It is such a fun collection though! For more inspiration, please head over to the Spellbinders Blog. Thanks so much for stopping by today, I really do appreciate it. I hope you have a wonderful rest of the day!


You succeeded in four things with this post, three amazing cards, detailed & fun & not looking like a picture menu from a cafe & making me really craving something sweet. Off to find mixed berry our now x
ReplyDeleteThese are amazing Michelle, you have created three beautiful cards with this collection! My favourite pie is lemon meringue, closely followed by apple and I also love cherry, so your order was right up my street. The bakers box die is brilliant, so cute that you can see through the acetate to what is below. As always you bring your cards to life with fantastic extra details and thought through colours. I must look up Diamond Dust, I think I need that in my life! Xxx
ReplyDeletebeautiful cards
ReplyDelete