I have had a few questions about Copics again recently so I thought I would just add my little bit on here in the hope that it helps a few of you. As you can see from the photo below I have a mixture of Copic Ciaos, Sketches and Originals. I like all three really but it was just what was available to me at the time, I like the Ciaos as they are a little cheaper than the other two but they do come in less colours. I started off with the Ciaos and built up the colour families with the sketches and then got a few of the originals as I was unable to get the colours in the sketch type at that time.

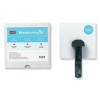
I store mine in these acrylic desk tidies, if you buy the sets these are what they come in. I myself just buy the pens seperately so bought these for them to be stored in. I got mine from All That Scraps in Canada and Cult Pens here in the UK which is where I buy the majority of my Copic pens too. I try and store them in their colour families so it easier for me to find when colouring an image.

In terms of colouring I use a thick cardstock - mostly the Softies range from Craftwork Cards. As this is so thick it will dry my pens out quicker than using thinner cardstock but persoanlly I like this cardstock and it works well for me. I would love to know what card you like working with using Copics? I always stamp with Memento Tuxedo Black as this has never run for me. I used to use Airondack Pitch Black but I did find that it did run on certain cardstocks. I definately wouldn't recomment Stazon though for Copics, that defiantely does run.
So for choosing the shades that I want? Well I tend to pick one colour and then pick the shade below and above. So for example here I have chosen R83 so I have also chosen R81 for the lighter shades and R85 for the darker shades.

I personally add the darker shades first and then add the next darker shade over this and run a bit further over and then the lighter shade. I used to do it the other way around but have been doing this recently and feel it works better for me. I am happy to do a mini picture tutorial of how I colour but there is so many about I don't think it would be worth it for any of you!! A tip I would say is that some shades of colours you can go over again and it will become darker and you may not need to use a darker marker but this does not work with all the colours. Although the more layers you add the darker it will become. I use greys if I want to colour black as the black pen is so dark you cannot shade with this. I use the blender pen for correcting mistakes and also for shading around the image for sky/grass.
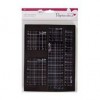
I pick the colour I want to use from my Copic Colour chart. I have a blank one which I have added the colours that I have beside. I find this great for trying to match the colour to my cardstock/patterned paper that I want to use in the card I am making. Please feel free to e-mail me for one if you don't have one.

Well, I hope this may have helped some of you. Please feel free to ask any questions you may have and if I can help I will, however I am far from an expert using these pens!


 I then dip my paperstump into the Sansodor. A paperstump is just a rolled up bit of paper that has a blunt end is great for using with mineral spirit to blend the colours in. I have used a paint brush before which also works well but I like using the paperstump better. With the paperstump dipped into the Sansodor I use the end to blend the colour into the centre of the image. I find that circluar motions work best for me! As you can see in the first picture I have just coloured half of the ducks tummy in.

 I would say to use farly thick card or watercolour paper as the mineral spirit do seep through a bit on to the back of the card, it does dry qucikly though. So that is it! again, I hope that it has helped a few of you! Happy colouring!


