
Hello there, today I have three cards to share with you using the new Spellbinders Birthday Celebrations Collection. This collection is releasing today to celebrate Spellbinders 20th Birthday. It is jam packed full with lots of new products for all kinds of celebrating.
PLEASE
NOTE: This post contains affiliate links. Please see below for my full
disclosure.
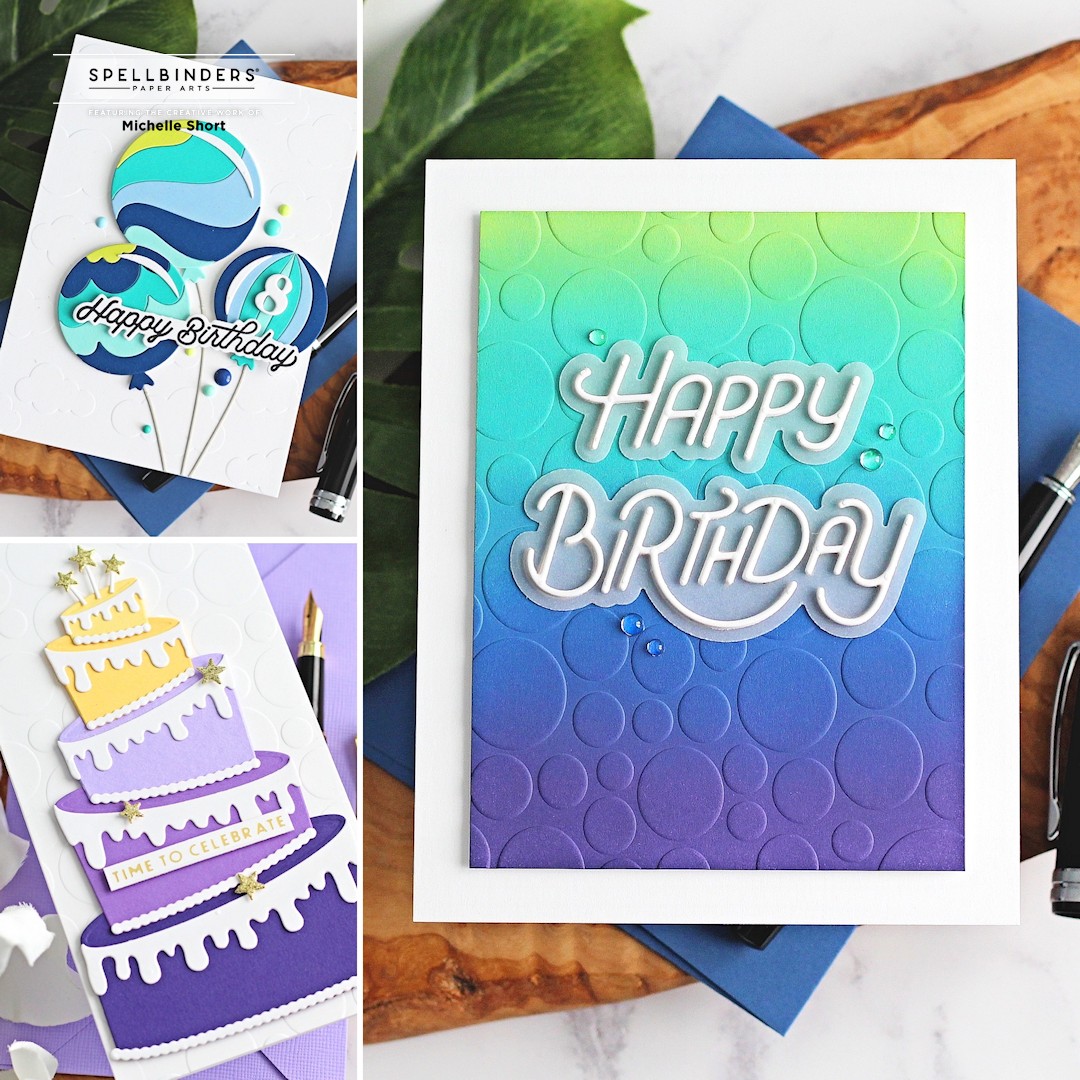
As mentioned, I am sharing three cards today using six products from the collection - three die sets, one embossing folder and two sentiment sets. I love that all of these products mix and match so easily! My first card uses the new Spellbinders Color Block Balloons Etched Dies. These can be used a few different ways - you can colour block them as the name suggests, but there is also a solid version, so you can just use that or add bits of the colour blocking on top too - so fun!

I die cut the pieces for the three balloons in Spellbinders Peridot, Waterfall, Teal Topaz, Raindrop and Cosmic Sky Cardstock. I did also cut the solid shape from white so that I could easily adhere the layers on top. All of the layers were adhered with Bearly Art Glue. I cut the strings from Spellbinders Silver Fox Cardstock and they were adhered to the back of the balloons with tape.

I took a panel of white cardstock and ran it through my di cutting machine with the Spellbinders Head in the Clouds Embossing Folder. It was then adhered to a white 4" x 5.5" card base with tape runner adhesive. The balloons were adhered on top with thin foam tape and more Bearly Art Glue for the strings. I took the sentiment from the Spellbinders Birthday Unboxing Sentiments Clear Stamp Set and stamped it on to white cardstock with Versafine Clair Nocturne Ink.

I die cut it out using the coordinating die for the Spellbinders Birthday Unboxing Glimmer Hot Foil Plate & Die Set. This does not completely line up (since it is made for the foil plate) but it almost does, I just had to cut a little bit off at the 'y' and 'd'. It was added to the card with more thin foam tape. Since this card is for my nephew, I wanted to personalise it with his age. I die cut the 8 from the Spellbinders Be Bold Lowercase Alphabet & Numbers Etched Dies set three times and stacked them up on to the smaller balloon. To finish off, I embellished with enamel dots.

My next card uses the new Spellbinders Topsy Turvy Cake Etched Dies which were cut from Spellbinders Purple Mist, Lilac Blossom, Royal Amethyst and Chamomile Cardstock. The second to top layer was cut from PTI Harvest Gold Cardstock. I cut the icing from Spellbinders Snowdrift Cardstock and then adhered and assembled the layers with Bearly Art Glue.

I took a 6.25" x 3.25" panel of white cardstock and ran it through my die cutting machine with the new Spellbinders Party Spots Embossing Folder. It was then adhered to a mini slimline card base with tape runner adhesive. The cake was adhered on top with thin foam tape.

I foiled the sentiment from the Spellbinders Birthday Unboxing Glimmer Hot Foil Plate & Die Set on to white cardstock with Spellbinders Matte Gold Glimmer Hot Foil Roll. It was die cut out with the coordinating die and added to the card with more thin foam tape. I die cut the stars in the Topsy Turvy Cake set from gold glitter cardstock and added them with thin foam tape to finish.

My final card for today uses the new Spellbinders Stylized Happy Birthday Etched Dies which were cut from white cardstock four times with Altenew Double-Sided Adhesive Sheet on the back. I then die cut the shadow pieces from vellum. I stacked up three of the words on to the shadow and then one on the back (with the adhesive on both sides) so that I could adhere it to the card easily.
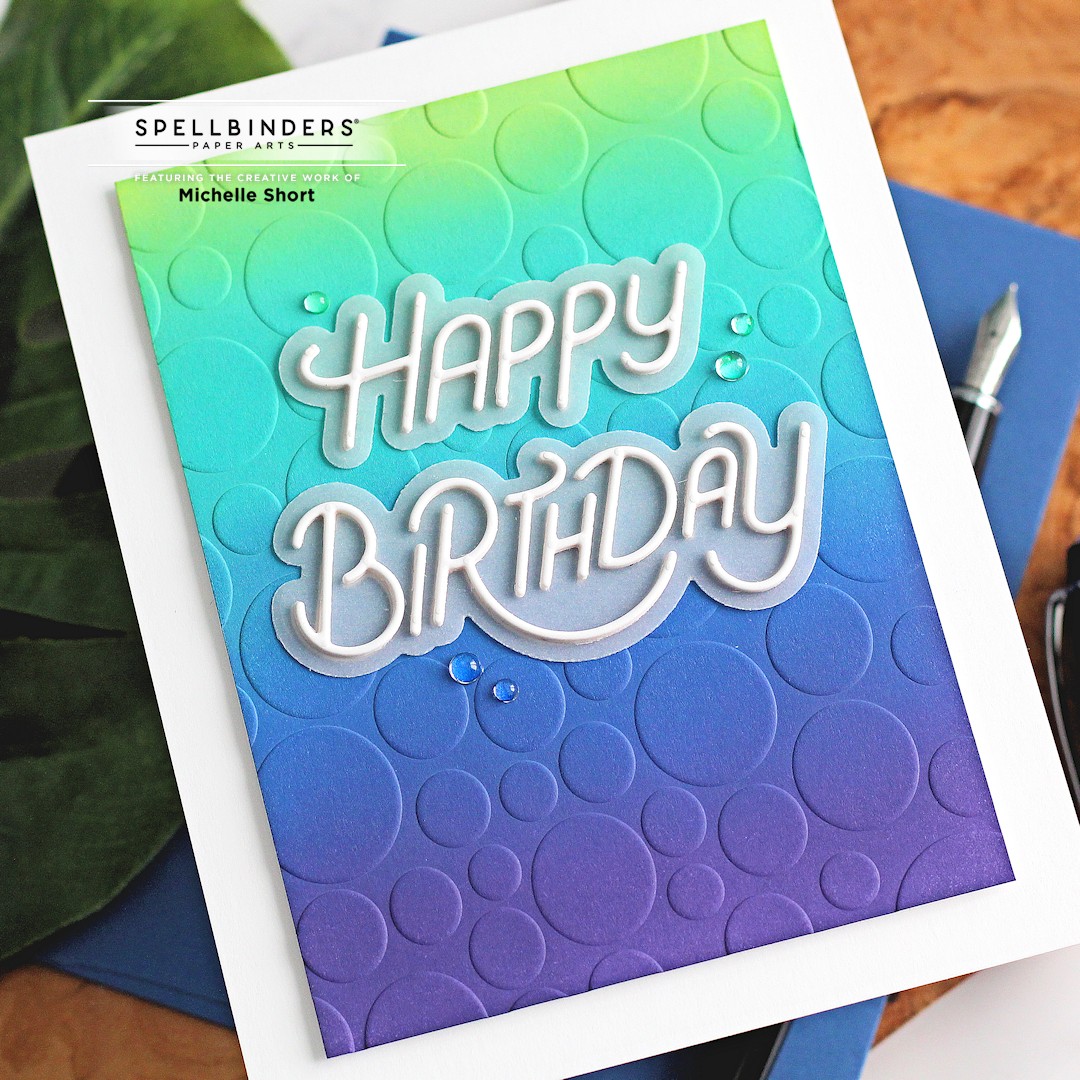
I took a panel of white cardstock and added ink blending to it with Tim Holtz Distress Oxide Inks. I used Twisted Citron, Peacock Feathers, Prize Ribbon and Villainous Potion. I then ran it through my die cutting machine with the Spellbinders Party Spots Embossing Folder.

I adhered it to an A2 white card base with thin foam tape and then added the happy birthday on top. To finish off, I added a few Lucy's Little Things Raindrops.
SUPPLIES:
Here are the links to
what I have used on the projects. Affiliate
links are used on some products. This means that if you make a purchase after
clicking on my link, I receive a small commission with no extra cost to you. I
truly appreciate your support when using these links. Please click on the logo below
the product to shop at your favourite store. All products were personally
purchased except those from Clearly Besotted, Hero Arts or those marked with an
asterisk (*) which were kindly sent to me to use. You can read my full
disclosure here.
I hope I have inspired you with this new collection. I absolutely love it! Perfect for so many occasions. I am always on the look out for sets that work well for masculine cards and this collection definitely fits the bill for me! Thank you so much for stopping by today, I really do appreciate it. Have a great day!
I am not sure what I love most! All three cards are of course fabulous! I love the color block balloons, it looks like such a versatile set. Your colours are gorgeous and perfect for an 8 year old and they go so well with the cloud embossing folder. Really good fun card! The topsy turvy cake is just wonderful, I love all the different pretty layers and piping/accents accents on each, again another really versatile set that would go for so many occasions, not just birthdays. The third card with the beautifully blended embossed panel looks stunning with that gorgeous happy birthday die cut. Amazing cards, you rocked the release! xx
ReplyDeleteso fun and cute
ReplyDelete