13 March 2025

Spellbinders | Gorgeous You Florals

Hello there, I am delighted to be over on the Spellbinders Blog today, sharing three cards using the Gorgeous You Collection. This collection is a beautiful one - makeup, perfume and florals. 

PLEASE NOTE: This post contains affiliate links. Please see below for my full disclosure.


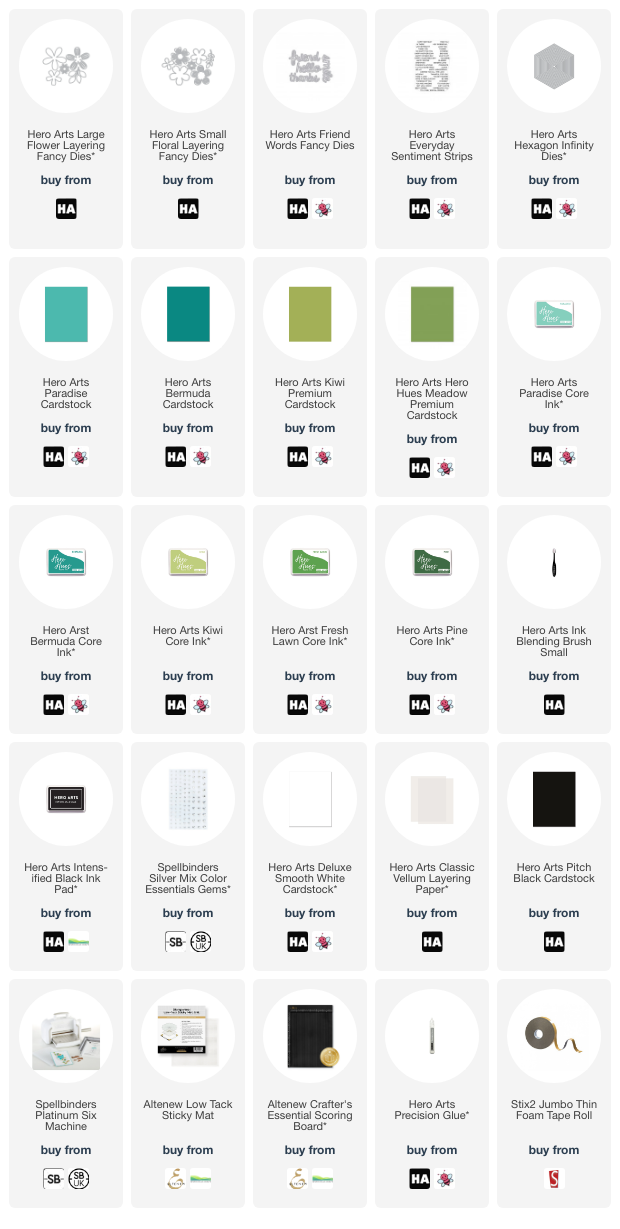
The peek below uses the Spellbinders Gorgeous You Florals Etched Dies that I cut from Spellbinders and Hero Arts Cardstock and adhered together using Bearly Art Glue. I placed a panel of Pitch Black Cardstock inside the Spellbinders Cross My Heart 3D Embossing Folder and ran it through my die cutting machine. 


I adhered it to an A2 sized black card base and adhered the flowers on top using Bearly Art Glue and thin foam tape. I hot foiled the Spellbinders Flawless Sentiments Press Plate & Die Set using Spellbinders White Foil on more black cardstock, die cut it out and adhered it to the card. To finish, I embellished with Spellbinders Berry Color Essentials Gems

SUPPLIES:


Here are the links to what I have used on the project. Affiliate links are used on some products. This means that if you make a purchase after clicking on my link, I receive a small commission with no extra cost to you. I truly appreciate your support when using these links. Please click on the logo below the product to shop at your favourite store. All products were personally purchased except marked with an asterisk (*) which were kindly sent to me to use. You can read my full disclosure here.


For more details on how I made the card, as well as the other two, please head over to the Spellbinders Blog HERE. Thank you so much for stopping by today, I hope you have a wonderful day! 

11 March 2025

VIDEO | Faux Velvet 3D Embossing

Hello there, today I am giving 3D embossing a faux velvet look. I am a huge fan of embossing folders and I am always trying to find new ways to give them a different look. This is a variation of a technique that I use often - highlighting the raised areas with white pigment ink but it adds an extra step that gives a soft velvety look. 

PLEASE NOTE: This post contains affiliate links. Please see below for my full disclosure.


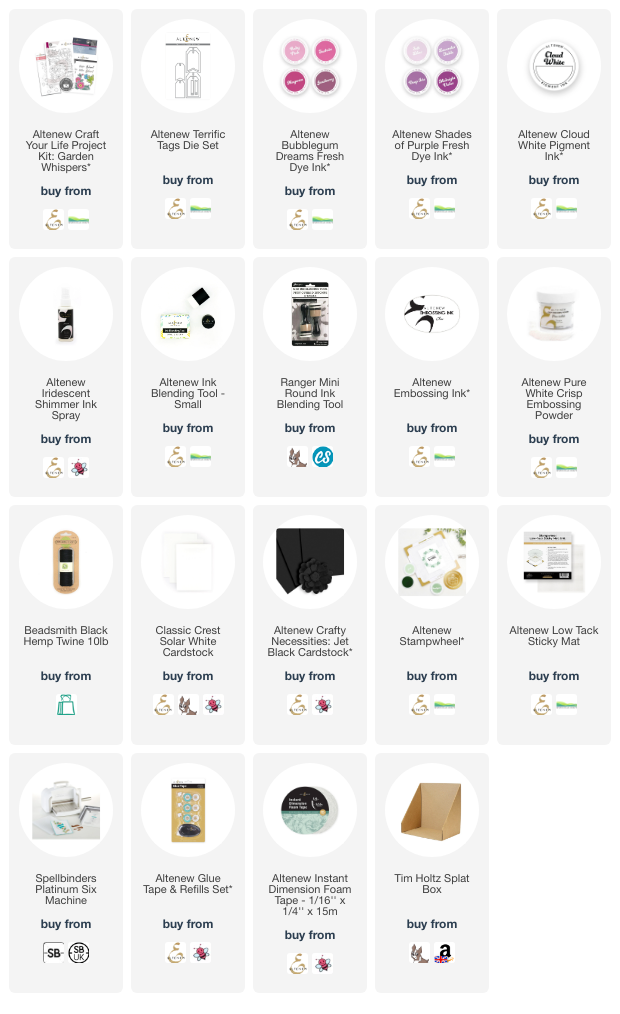
I started off by die cutting one the larger tags from the Altenew Terrific Tags Die Set from white cardstock. I then added ink blending on top using Altenew Bubblegum Dreams Fresh Dye Inks (the three lightest shades) using an Altenew Small Blending Brush


I blended Midnight Violet, from the Altenew Shades of Purple Fresh Dye Ink Collection, on top to give some extra darkness to the tag. I placed it inside the Altenew Garden Whispers 3D Embossing Folder and ran it through my die cutting machine. 


I smooshed Altenew Cloud White Pigment Ink onto the mat and picked it up using a Blending Tool (with a sponge applicator). I then pounced the tool onto the raised areas in layers. The white intensifies the more layers you add. I wanted to pounce/dab the tool onto the embossing, rather than swiping, to transfer the texture of the sponge and give a mottled look. I then placed the tag into my Splat Box and misted it with Altenew Iridescent Shimmer Ink Spray


This really brings out the white ink on the tag and gives a lovely soft velvety texture/look. I heat set the ink and then set the tag aside to dry while I stamped my sentiment, from the Altenew Garden Whispers Craft Your Life Project Kit, onto Altenew Crafty Necessities: Jet Black Cardstock using Altenew Embossing Ink. I applied Altenew Pure White Crisp Embossing Powder and heat set. It was die cut out using the coordinating die. 


I cut another tag from white cardstock and adhered it behind the embossed one. I threaded twine through the top of the tag and tied in a bow. I added Altenew Instant Dimension Foam Tape 1/4" onto the back of the sentiment and adhered it onto the tag to finish. 

VIDEO:

Here is the video showing how I made the tag:


If you are viewing this blog post via email subscription, you can watch the video HERE on YouTube. 

SUPPLIES:


Here are the links to what I have used on the project. Affiliate links are used on some products. This means that if you make a purchase after clicking on my link, I receive a small commission with no extra cost to you. I truly appreciate your support when using these links. Please click on the logo below the product to shop at your favourite store. All products were personally purchased except those marked with an asterisk (*) which were kindly sent to me to use. You can read my full disclosure here.


I am definitely going to try this technique again, it really gives a softness to the project. Thank you so much for stopping by today, I really do appreciate it. I hope you have a wonderful day! 

10 March 2025

Spellbinders | Gorgeous You 16

Hello there, today I have a card to share using some fun makeup themed products from the new Gorgeous You Collection from Spellbinders. I thought it would be fun to have the makeup hanging out the top of the make up bag. This card was for my niece for her 16th birthday and she loves makeup, so this collection is perfect for her!  

PLEASE NOTE: This post contains affiliate links. Please see below for my full disclosure.


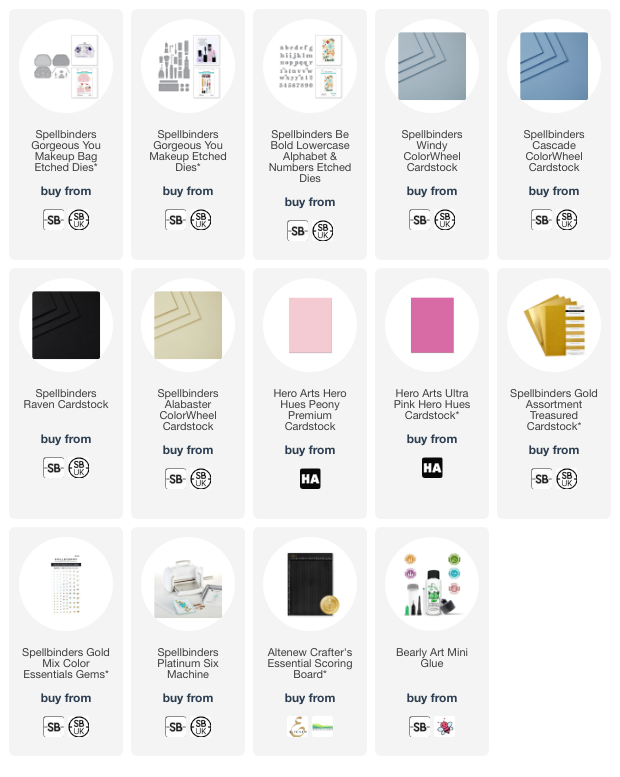
I started off my card by die cutting the Spellbinders Gorgeous You Makeup Bag Etched Dies from Spellbinders Cardstock. I actually made this card quite some time ago and so I used the older (now discontinued cardstock). I cut the base layer of the bag from Raindrop Cardstock (this is very similar to the new Cascade Cardstock) and the top, detailed layer, from Glacier Cardstock (this is very similar to the new Windy Cardstock). 

I cut the top trim and pull from Spellbinders Matte Gold Treasured Cardstock. I adhered the pieces together using Bearly Art Glue. I then die cut the Spellbinders Gorgeous You Makeup Etched Dies. The gold parts are the same cardstock as above, the pinks are the older Pink Sand and Fruit Punch (but Hero Arts Peony and Ultra Pink would work too), the top of the brush is cut from Spellbinders Alabaster Cardstock and the makeup palette uses grey (old Spellbinders Graphite). I also used black cardstock (now Raven). 

Since I knew that you would be able to see the makeup pieces from the back, I cut more layers to add to the back of them (back to back). This works for symmetrical images but doesn't for non-symmetrical images. Thankfully most of these are symmetrical! I then cut another base layer of the bag to use as the back of the card.

In the set, there is a hinge piece, so that you can easily make a card base from the bag, but I wanted the card to be top folding (so that it hid the bottom of the makeup), so I scored a line at the top of the piece and added adhesive to it, before adhering to the back of the front panel. 

Since it was my niece's 16th birthday, I die cut the 1 and 6 from the Spellbinders Be Bold Lower Alphabet & Numbers Etched Dies from more gold cardstock and adhered them to the bag. To finish, I added a Spellbinders Gold Mix Color Essentials Gem to the bag pull. 

SUPPLIES:


Here are the links to what I have used on the project. Affiliate links are used on some products. This means that if you make a purchase after clicking on my link, I receive a small commission with no extra cost to you. I truly appreciate your support when using these links. Please click on the logo below the product to shop at your favourite store. All products were personally purchased except those marked with an asterisk (*) which were kindly sent to me to use. You can read my full disclosure here.


I will be sharing more from this collection later in the week, until then, if you are a fan of makeup, I hope you will check out the collection, as well as the others releasing today. Thank you so much for stopping by, I really do appreciate it. I hope you have a wonderful day! 

8 March 2025

Spellbinders | Daisy

Hello there, today I have something different to share with you again. This time, a framed piece. If you have been here with me for a while, you will know that I love pigs, so as soon as I saw "Daisy", I knew I wanted to ink her up but that I probably wouldn't want to send her out. So I decided to frame the image, rather than adding her to a card!

PLEASE NOTE: This post contains affiliate links. Please see below for my full disclosure.


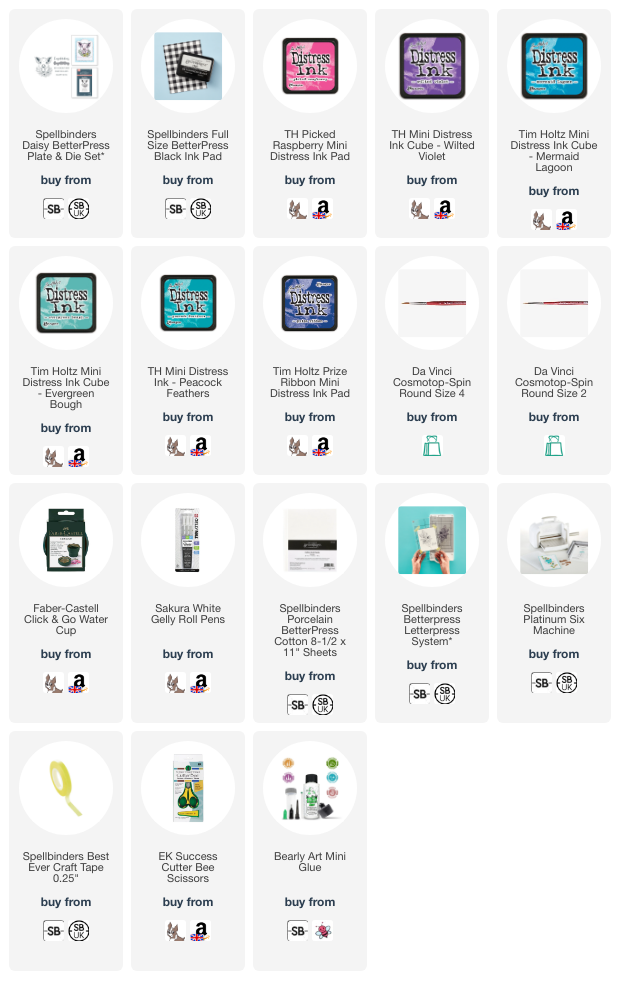
I started off by taking a panel of Spellbinders Porcelain BetterPress Cotton Card and cut it to 5 7/8" wide (the same width as my frame but also the widest you can cut it to fit through the machine). I left the length longer to give me some wiggle room. I placed Spellbinders Daisy BetterPress Plate onto the Chase in the Spellbinders BetterPress Letterpress System as centred as possible. 


I inked up the plate with Spellbinders BetterPress Black Ink and then placed the cardstock on the back of the Platen, securing in place with Best Ever Craft Tape. I placed the Platen on the platform and then ran it through the Platinum Six. I removed the image and then cut the length of the panel down to 5 7/8". 


I painted the image with Tim Holtz Distress Inks. I smooshed them onto an acrylic block and then picked them up with wet paintbrush. I used Picked Raspberry, Wilted Violet & Mermaid Lagoon for the pig, Evergreen Bough and Peacock Feathers for the leaves, and Peacock Feathers and Prize Ribbon for the flowers. For some added interest, I pressed the image again, painted the flowers, fussy cut them out and adhered them on top of the panel. To finish, I added a white gel pen dots before placing in the frame. 

SUPPLIES:


Here are the links to what I have used on the project. Affiliate links are used on some products. This means that if you make a purchase after clicking on my link, I receive a small commission with no extra cost to you. I truly appreciate your support when using these links. Please click on the logo below the product to shop at your favourite store. All products were personally purchased except those marked with an asterisk (*) which were kindly sent to me to use. You can read my full disclosure here.


The pig did turn out a lot more purple than I had planned but I still like how it turned out! Thank you so much for stopping by today, I hope you have a great weekend! 

7 March 2025

Spellbinders | ColorWheel Cardstock + Swatches

Hello there, if you have been following my posts here on my blog, I have mentioned a few times that Spellbinders were releasing new cardstock (and discontinuing their old). I finally got my hands on some and wanted to share all about it, along with swatches I made using the ColorWheel Swatch Party Collection products. 

PLEASE NOTE: This post contains affiliate links. Please see below for my full disclosure.


The new Spellbinders ColorWheel Cardstock is available in 48 colours. You can purchase it in assortments packs, or packs of 10 individual colours. It is available in 8.5" x 11", 12" x 12" and A4 sizes. The cardstock is smoother in texture compared to the old Color Essentials Cardstock. 


(Image from spellbinders.com)

If like me, you have a lot of the older Spellbinders cardstock, I wanted to compare colours (new vs. old) since a few of the new ones have the same name as the old cardstock line. 

The colours that are (in my opinion) exactly the same as before are: 

Poppy - this is the same as old Poppy Field
Pomegranate - same as old Pomegranate
Dahlia - same as old Dahlia
Wild Berry - same as old Wild Berry
Beeswax - same as old Beeswax
Rainforest - same as old Rainforest
Cosmic Sky - same as old Cosmic Sky
Indigo - same as old Indigo
Alabaster - same as old Alabaster
Teal Topaz - same as old Teal Topaz
Blue Spruce - same as old Lagoon (please note the new Blue Spruce is a lot lighter than the old Blue Spruce)

Colours that are almost the same as the old ones:

Saffron - the new colour is slightly darker than the old one
Peridot - the new colour has slightly more of a lime hue than the old one
Fern - the new colour is slightly lighter than the old
Waterfall - the new colour has more of a green hue than the old one
Windy - almost the same as old Glacier
Cascade - almost the same as old Raindrop
Lilac - almost the same as the old Lilac Blossom but just slightly darker
Fog - the new Fog is more warm toned than the older Fog
Raven - the new colour is slightly lighter in shade than the old Onyx
Classic White - the new shade is slightly more whiter (cool) than the old Snowdrift

Brand new colours:

Cranberry
Blush
Tutu
Merlot
Chiffon
Bellini
Coral
Sicily
Carrot
Terra Cotta
Cinnamon
Tuscan
Mint
Seaside
Breeze
Malibu
Oceanside
Windy
Fairy Tale
Lavender
Orchid
Mulberry
Violet
Fawn
Acorn
Truffle
Anchor

COLOR SWATCH PETAL

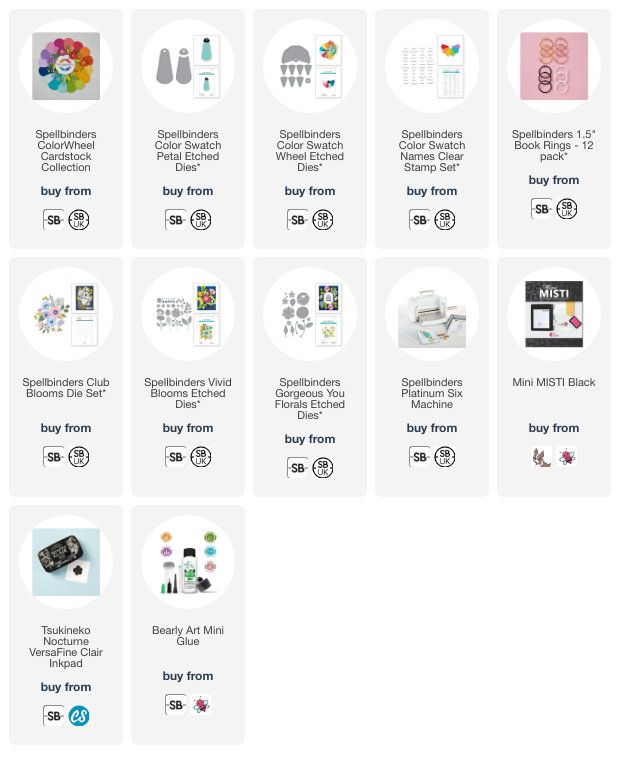
For my swatches, I started off with the Spellbinders Color Swatch Petal Etched Dies base layer and topper and cut them 48 times from white cardstock. I then took the Spellbinders Color Swatch Names Clear Stamp Set and stamped the names of the cardstock at the bottom of the petal pieces.


I am not going to lie, this did take me some time. I placed the petal piece in my Mini MISTI and then placed a piece of clear acetate over the top. I stamped the name onto the acetate first, to see if I got it in the right place, if it wasn't, I adjusted the swatch. I removed the acetate and then stamped it again onto the actual petal piece using Versafine Clair Nocturne Ink


I then repeated the process another 47 times! I knew that it would bother me if the names were just slightly off on the swatches, so that's why I took the time to stamp on the acetate first. This wouldn't be needed if either you were more confident in stamping than me, or if you didn't mind the placement as much! A few of the names are slightly off (slightly more to the left side) but unfortunately, I think I am just going to have to live with that! 


I then took the top swatch piece and cut it from all of the colours of Spellbinders ColorWheel Cardstock. I adhered the swatch piece onto the base piece using Bearly Art Glue and then adhered the topper piece at the top. To secure the swatches together, I am using one of the new Spellbinders 1.5" Book Rings. These come as a pack of 12 with four colours included - gold, rose gold, black and white. I am using the white ones. For these swatches, you definitely need a book ring this big or larger! 

COLOR SWATCH WHEEL


There is also another swatch set - the Spellbinders Color Swatch Wheel Etched Dies. These cut a base layer of half a wheel and then you can add six colour swatches on top. These can be used for swatching colour families - for example all the blues, all the purples etc. or you could use them like I am doing and create swatches of favourite colour combinations. 


I cut the base layer from white cardstock and stamped the names of the colours on each part of the wheel. I cut the swatch die from the different colours of cardstock and adhered them on top, followed by the topper piece. I will definitely make more of these when I find new colour combos I like with this cardstock! I think it will be a great reference for me. 

SUPPLIES:


Here are the links to what I have used on the projects. Affiliate links are used on some products. This means that if you make a purchase after clicking on my link, I receive a small commission with no extra cost to you. I truly appreciate your support when using these links. Please click on the logo below the product to shop at your favourite store. All products were personally purchased except those marked with an asterisk (*) which were kindly sent to me to use. You can read my full disclosure here.


I really love the new colours of cardstock. There are a few that I am going to miss - I really liked the old purples, I also really liked Bearly Peach. The closest match is Chiffon in the new line, but it is definitely different. I already have favourites from the new colours though - Orchid, Mulberry and Violet (that I swatched above with the aquas) are absolutely beautiful! 

Thank you so much for stopping by today, I really do appreciate it. I hope you have a wonderful day! 

4 March 2025

Spellbinders | Through the Meadow

Hello there, I am delighted to be over on the Spellbinders Blog today, sharing three cards using the Through the Meadow Collection by Susan Tierney-Cockburn. These flowers are made to look realistic, so I got my shaping tools out and had fun creating the cards!

PLEASE NOTE: This post contains affiliate links. Please see below for my full disclosure.


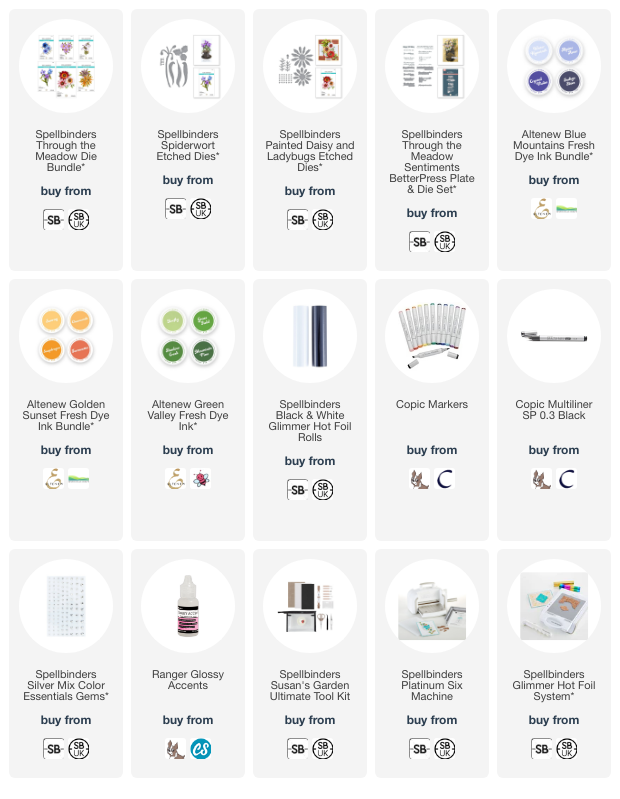
The peek below uses the Spellbinders Spiderwort Etched Dies. I did have to Google these flowers as I had never heard of them but they are really pretty! They seem to be mainly blue-purple in colour and their leaves hang down, rather than up, which I thought was interesting. The flowers and leaves were die cut from white cardstock and I added ink blending to them with Altenew Fresh Dye Inks


The sentiment, from the Spellbinders Through the Meadow Sentiments BetterPress Plate & Die Set was hot foiled onto white cardstock using Opaque Black Foil. To finish, I die cut the ladybug/ladybird from the Spellbinders Painted Daisy and Ladybugs Etched Dies from white cardstock and coloured it using a red Copic Marker and black fine liner pen. I added Glossy Accents on top for some shine. 

SUPPLIES:


Here are the links to what I have used on the project. Affiliate links are used on some products. This means that if you make a purchase after clicking on my link, I receive a small commission with no extra cost to you. I truly appreciate your support when using these links. Please click on the logo below the product to shop at your favourite store. All products were personally purchased except those from Clearly Besotted and those marked with an asterisk (*) which were kindly sent to me to use. You can read my full disclosure here.


Please head over to the Spellbinders Blog for more information on how I made this card, as well as the others that I made. Thank you so much for stopping by today, I really do appreciate it. I hope you have a wonderful day! 
1 March 2025

Hero Arts | Hero Studio March 2025 Release Blog Hop + Giveaway

Hello there, I am delighted to be joining Hero Arts today for a fun blog hop to celebrate the Hero Studio March 2025 release. Out today is the Card Kit of the Month, Clear Set & Dies of the Month, Fancy Dies of the Month, Layering Stencils of the Month, and Cling of the Month. You can also purchase the Whole Studio which includes all of the kits and a free gift. Today, I am focussing on the Card Kit and Cling of the Month.  

PLEASE NOTE: This post contains affiliate links. Please see below for my full disclosure.

HERO STUDIO CARD KIT OF THE MONTH

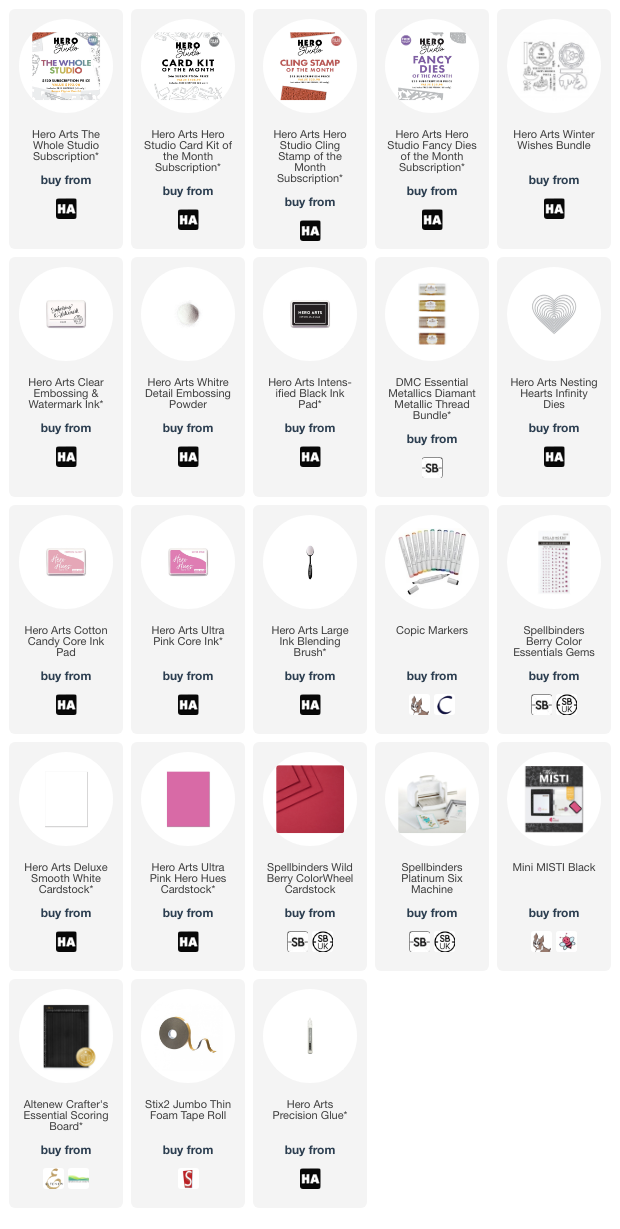
I started off my card by die cutting the Bellini and Tutu cardstock that comes in the Hero Studio March 2025 Card Kit of the Month into strips. I then adhered them to a panel of Deluxe Smooth White Cardstock to create a gift/present. 


I stamped the bow from the Bow Tag Clear Stamp Set in the kit onto Wild Berry Cardstock using Hero Arts Clear Embossing & Watermark Ink. I applied Hero Arts Detail White Embossing Powder and heat set. It was die cut out using the coordinating die. This die cuts the bow into a tag, so I simply just cut the top piece with the hole off using scissors. 


I cut a strip of Wild Berry cardstock and adhered it to the gift/present using Hero Arts Precision Glue, to look like ribbon wrapped it. I then stamped the 'for you' sentiment onto Hero Arts Deluxe Smooth White Cardstock using Hero Arts Intens-ified Black Ink. It was cut onto a strip using the banner die in the Hero Arts Winter Wishes set. 


I punched a hole in the top and cut the top to look like a tag shape. I threaded DMC Metallic Thread through it and adhered it to the top of the gift/present. The bow was then adhered on top using thin foam tape. To finish, I adhered a square card base to the back of the panel to make it into a card. I think this would make a great design for a gift card holder!

WHAT’S IN THE KIT?


    • Bows & Messages Clear Stamp Set, 6” x 8”
    • Bow Tag Clear Stamp Set, 4" x 6"
    • 10 Bows & Messages Coordinating Dies
    • 4 Bow Tag Coordinating Dies
    • Ribbons Cover Plate Die
    • Thin Stripes Stencil, 6" x 6"
    • 2 Bows Rub-On Transfer Sheets
    • 6 Sheets of Cardstock, 5.5" x 8.5" (Bellini, Tutu, Beeswax, Mint, Cascade, Orchid)
    • Pastel Pearl Embellishments

HERO STUDIO CLING OF THE MONTH


It was cut into a heart using the Hero Arts Heart Infinity Dies. Using Large Ink Blending Brushes, I blended Hero Arts Core Inks in Cotton Candy and Ultra Pink on top. I removed any excess ink from the embossing powder with a cloth. I then added little dots to the panel with Copic Markers. 


I adhered a strip of Hero Arts Ultra Pink Cardstock onto the panel with Hero Arts Precision Glue and then die cut the bow from the Hero Studio March 2025 Fancy Dies of the Month from the same cardstock. I added Copic Marker to the back piece of the bow to make it darker. The pieces were adhered together first and then adhered onto the card with thin foam tape. 


I die cut another heart from white cardstock and stamped the sentiment from the Bows & Messages Clear Stamp Set in the Hero Studio March 2025 Card Kit of the Month on top. I used Hero Arts Ultra Pink Core Ink for the 'happy' and Hero Arts Intensified Black Ink for the 'birthday to you'. I scored across the top of the heart to create a hinge and also cut a little off the bottom of the heart (to help the card stand up). I added adhesive to the hinge and then adhered it to the back of the front panel to create a heart shaped card. To finish, I added a Spellbinders Berry Color Essentials Gem to the bow. 

WHAT’S IN THE KIT?


The Hero Studio March 2025 Cling of the Month includes a 6" x 6" red rubber cling stamp with a bow design. 

BLOG HOP:


For the hop, you should have arrived here from the wonderful Michelle Lupton. Next on the hop is the fabulous Mindy Eggen. If you get lost along the way, or want to start the hop from the beginning, please head over to the Hero Arts Blog

GIVEAWAY:

Hero Arts will give away a $50 gift card, drawn from the comments left across the hop. Enter by Saturday, March 8 at 11:59pm PST, and the winner will be announced on the Hero Arts blog the following week. Leave a comment on all stops for more chances to win!

SUPPLIES:


Here are the links to what I have used on the projects. Affiliate links are used on some products. This means that if you make a purchase after clicking on my link, I receive a small commission with no extra cost to you. I truly appreciate your support when using these links. Please click on the logo below the product to shop at your favourite store. All products were personally purchased except those from Clearly Besotted and those marked with an asterisk (*) which were kindly sent to me to use. You can read my full disclosure here.


Thank you so much for stopping by today, I really do appreciate it. I hope you have a wonderful time on the rest of the hop and have a great rest of the weekend too! Take care! 

27 February 2025

Simon Says Stamp | Happy Easter Tags

Hello there, I am delighted to be joining Simon Says Stamp today for the Favorite Things release, which is out now. They kindly sent me the Blessings at Easter Stamp Set to play with and I have created three tags using the set. 

PLEASE NOTE: This post contains affiliate links. Please see below for my full disclosure.


Since the set is solid images (with the lovely pattern on them), I stamped the images using Concord & 9th Inks in lots of spring-like colours. The images are quite large, so I thought they would work nicely as a focal point on a tag. 


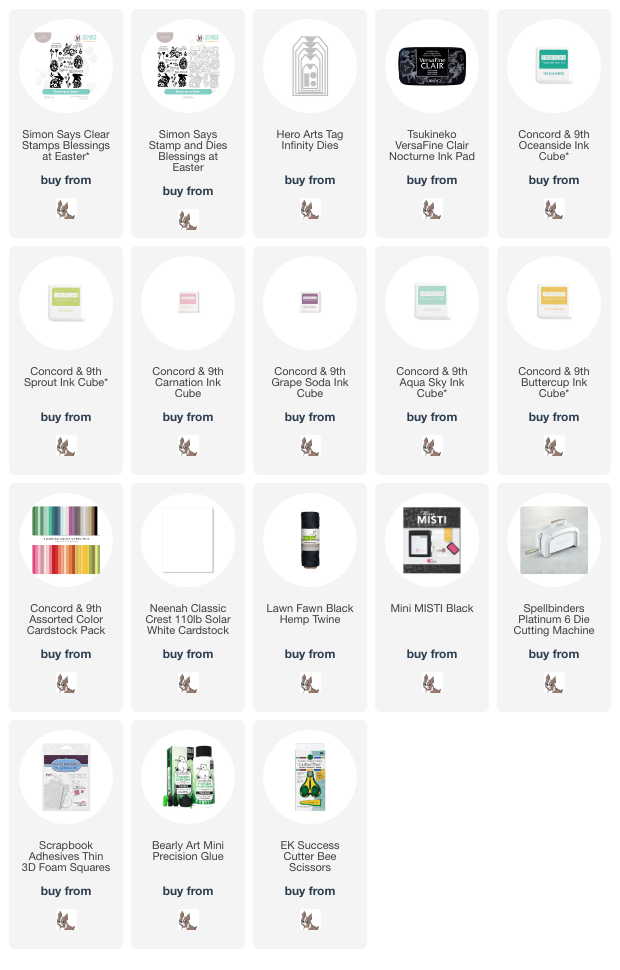
For the first tag, I stamped one of the bunnies, as well as the leaves from the Simon Says Stamp Blessing at Easter Stamp Set onto white cardstock using Concord & 9th Oceanside and Sprout Inks respectively. The images were then fussy cut out with scissors (but there are dies available). 


I then die cut a Hero Arts Tag Infinity Die from white cardstock and stamped the 'happy Easter' sentiment from the set on top using Versafine Clair Nocturne Ink. The leaves were adhered to the tag with Bearly Art Glue and the bunny adhered with thin foam tape. I die cut the eyelet from Concord & 9th Oceanside Cardstock and adhered it over the hole in the tag. 


For the second tag, I stamped the eggs from the Simon Says Stamp Blessing at Easter Stamp Set onto white cardstock using Concord & 9th Carnation and Grape Soda Inks. The leaves were stamped using Concord & 9th Aqua Sky Ink


The images were fussy cut out and adhered to another tag that was stamped with the same sentiment as the first, using Bearly Art Glue for the leaves, and thin foam tape for the eggs. I die cut the tag eyelet from Concord & 9th Carnation Cardstock.


For the last tag, I stamped the bunny from the Simon Says Stamp Blessing at Easter Stamp Set onto white cardstock using Concord & 9th Buttercup Ink. I stamped the egg using Concord & 9th Carnation Ink and the leaves using Concord & 9th Sprout Ink


The images were fussy cut out and adhered to another tag stamped with the same sentiment. I die cut the eyelet from Concord & 9th Buttercup Cardstock and adhered it over the hole in the tag. I threaded twine through all three tags (one at a time!) and tied in bows to finish. 

SUPPLIES:


Here are the links to what I have used on the projects. Affiliate links are used on some products. This means that if you make a purchase after clicking on my link, I receive a small commission with no extra cost to you. I truly appreciate your support when using these links. Please click on the logo below the product to shop at your favourite store. All products were personally purchased except those from Clearly Besotted and those marked with an asterisk (*) which were kindly sent to me to use. You can read my full disclosure here.


Thank you so much for stopping by today, I really do appreciate it. I hope you have a wonderful day! 

21 February 2025

Spellbinders | On the Farm

Hello there, I am delighted to be over on the Spellbinders Blog today sharing three cards using the new On the Farm collection. This is such a cute collection filled with farm animals and punny sentiments. There are also landscape and arches dies in the collection too. 

PLEASE NOTE: This post contains affiliate links. Please see below for my full disclosure.


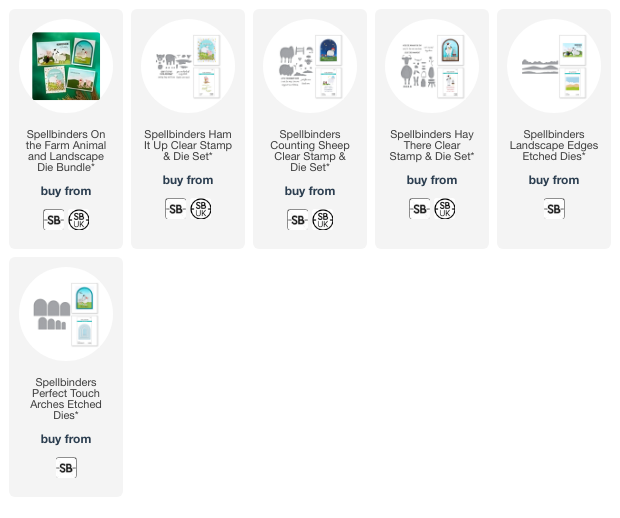
This is a peek of one of the cards I made using the Spellbinders Ham It Up Clear Stamp & Die Set. That pig is just too cute! I kept it simple and combined him with the grass/bushes, flowers and fence dies from the Spellbinders Counting Sheep Clear Stamp & Die Set. I simply stamped the sentiment from the pig set below. 

SUPPLIES:


Here are the links to the products I used from the collection for all three cards. Affiliate links are used on some products. This means that if you make a purchase after clicking on my link, I receive a small commission with no extra cost to you. I truly appreciate your support when using these links. Please click on the logo below the product to shop at your favourite store. Products marked with an asterisk (*) which were kindly sent to me to use. You can read my full disclosure here.


For more details on the card and to see the others that I made too, please head over to the Spellbinders Blog. Thank you so much for stopping by today, I really do appreciate it. I hope you have a wonderful day! 

20 February 2025

Hero Arts | Friendship Blooms

Hello there, I am delighted to be joining Hero Arts today to celebrate the release of the February collections. There are three new collections releasing today and my card focusses on the Friendship Blooms collection. 

PLEASE NOTE: This post contains affiliate links. Please see below for my full disclosure.


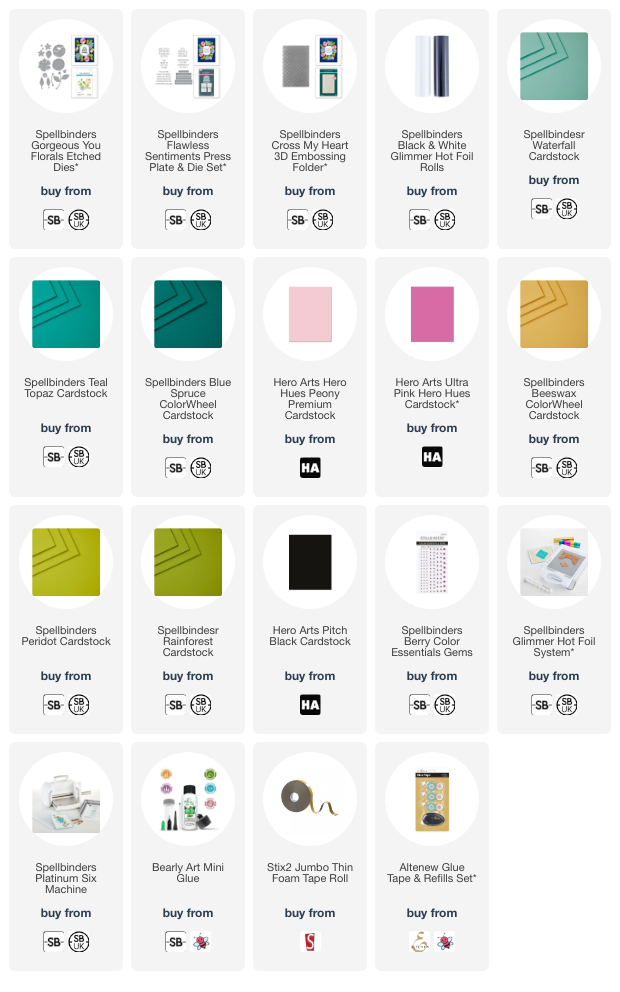
I started off my card by creating a hexagon shaped card base. I cut two Hero Arts Hexagon Infinity Dies from Hero Arts Deluxe Smooth White Cardstock and on one, made a score line towards to the top to create a hinge. I added adhesive to the hinge and adhered it to the back of the other hexagon to create the card base. 


I then took the new Hero Arts Large Flower Layering Fancy Dies, as well as the new Hero Arts Small Floral Layering Fancy Dies and cut one flower and leaf from each using Hero Arts Cardstock. I cut the large flower from Paradise Cardstock and added ink blending on top (in the centres) with Hero Arts Paradise and Bermuda Core Ink. I cut the smaller flower from Bermuda Cardstock and added Bermuda Core Ink on top. 


I cut the larger leaves from Hero Arts Kiwi Cardstock and added ink blending to them with Hero Arts Kiwi and Fresh Lawn Core Inks. I cut the smaller leaf frond from Hero Arts Meadow Cardstock and added ink blending with Hero Arts Fresh Lawn and Pine Core Inks. The flower centres were cut from white cardstock. I then added vellum to the backs of the flowers, so that you can see it through the holes. I adhered the leaves onto the card first, with Hero Arts Precision Glue, followed by the flowers with thin foam tape. 


I die cut the 'hello' from the Hero Arts Friends Words Fancy Dies three times from Hero Arts Pitch Black Cardstock. They were adhered one on top of another and then on to the card. I stamped a sentiment from Hero Arts Everyday Sentiment Strips Stamp Set onto white cardstock using Hero Arts Intens-ified Black Ink. It was cut into a strip and adhered to the card with foam tape. To finish, I embellished with Spellbinders Silver Mix Color Essentials Gems

SUPPLIES:


Here are the links to what I have used on the project. Affiliate links are used on some products. This means that if you make a purchase after clicking on my link, I receive a small commission with no extra cost to you. I truly appreciate your support when using these links. Please click on the logo below the product to shop at your favourite store. All products were personally purchased except those from Clearly Besotted and those marked with an asterisk (*) which were kindly sent to me to use. You can read my full disclosure here.


We are celebrating the release over on Instagram with a fun hop with prizes. You can visit my Instagram profile HERE. Thank you so much for stopping by today, I really do appreciate it. I hope you have a great rest of the day! 
End of code