12 March 2022

Hero Arts | Support Ukraine Blog Hop

Hello there, today I am taking part in a blog hop with Hero Arts. They have put together a Support Ukraine Collection. Hero Arts will donate 100% of net profits from the sale of these products to the Ukrainian Red Cross to help with the devastation and destruction of this awful war. Please see below for more details. 

PLEASE NOTE: This post contains affiliate links. Please see below for my full disclosure. Any commission that I receive from sales from Hero Arts until the end of the month will be donated to the British Red Cross, who are helping with the Ukrainian invasion. 


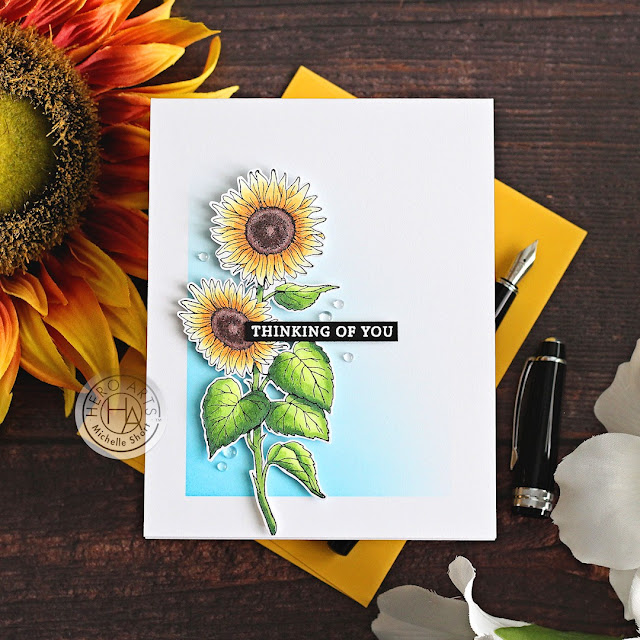
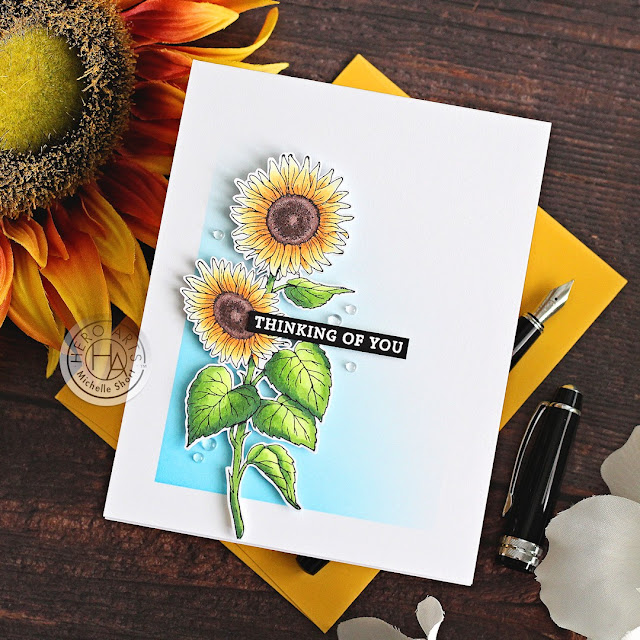
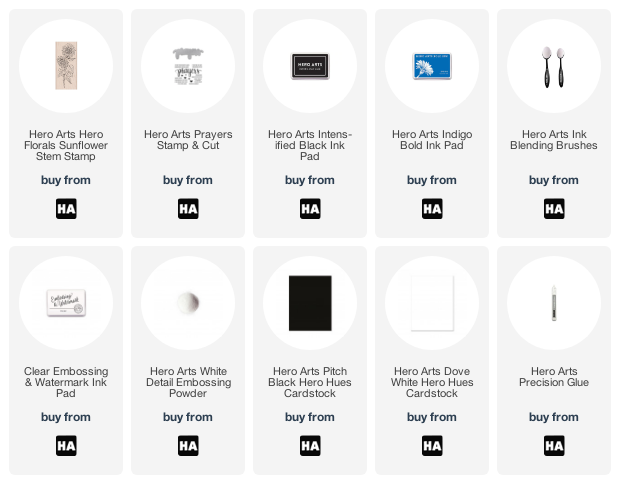
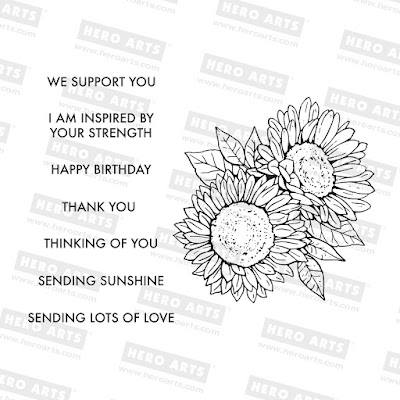
I started off my card by stamping the Hero Arts Hero Florals Sunflower Stem (part of the Hero Arts Support Ukraine Collection) on to white cardstock with Hero Arts Intens-ified Black Ink. I then coloured it with Copic Markers (the colours that I used are listed below the supplies area) and then fussy cut it out with scissors. 


On an A2 white card base, I masked off the edges and blended on Hero Arts Indigo Bold Ink Pad (part of the Hero Arts Support Ukraine Collection) using Hero Arts Ink Blending Brushes. I focused most of the colour in the bottom left hand corner, blending up to white. I  then adhered the sunflower on top using foam tape. 


I took the sentiment from the Hero Arts Prayers Stamp & Cut and stamped it on to Hero Arts Pitch Black Cardstock using Hero Arts Clear Embossing & Watermark Ink. I applied Hero Arts White Detail Embossing Powder and cut it in to a strip. It was added to the card with foam tape. To finish off, I added a few Raindrops from Little Things from Lucy's Cards. 

SUPPLIES:


Here are the links to what I have used on the project. Affiliate links are used on some products. This means that if you make a purchase after clicking on my link, I receive a small commission with no extra cost to you. I truly appreciate your support when using these links. Please click on the logo below the product to shop at your favourite store. All products were personally purchased except those from Clearly Besotted, Hero Arts or those marked with an asterisk (*) which were kindly sent to me to use. You can read my full disclosure here.


COPIC MARKERS: YR27, Y17, Y15, Y11, E49, E79, E77, E74, G29, YG17, YG23, YG01. 

I apologise for the reduced supply list but I do not wish to potentially gain any profit from this awful war. As mentioned, any sales/commission that I receive through Hero Arts from now until the end of the month will be donated to the British Red Cross, who are helping with the Ukrainian invasion (I have picked the British Red Cross purely because my currency (Great British Pounds) will go further that way.  

SUPPORT UKRAINE COLLECTION:


The blue and yellow of the Ukraine flag symbolize the beauty and calm of the skies above and the joy and prosperity of wheat fields throughout the country. The national flower, the sunflower, symbolizes motherhood. To honor Ukraine, and help counter the devastation and destruction, we are donating 100% of our net profits from sales of this Support Ukraine collection.  Funds will be donated to the Ukrainian Red Cross for immediate, on-the-ground help.  We will continue our fundraising efforts to also support the long-term rebuilding that will be required to restore schools, roads, homes, and the spirit of the Ukrainian people.


As well as physical products, there is also the
Giving Sunflower Digital Download. This beautiful image and sentiments can be purchased and printed off. Perfect to use with lots of different colouring mediums but would look beautiful as is too. 

BLOG HOP:


For the blog hop, you should have arrived here from the amazing Debi Adams. Next on the hop is the wonderful Emily Midgett. If you get lost along the way, or want to start the hop from the beginning, please head over to the Hero Arts Blog

Thanks so much for stopping by today, I really do appreciate it. As I said before, my heart is with Ukraine right now and anything we can do to help, even in a little way, is very much needed. I hope that you will take a look at the collection and a big thank you goes to Hero Arts for helping where they can. I am proud to work with a company that supports and cares about people. Take care!

10 March 2022

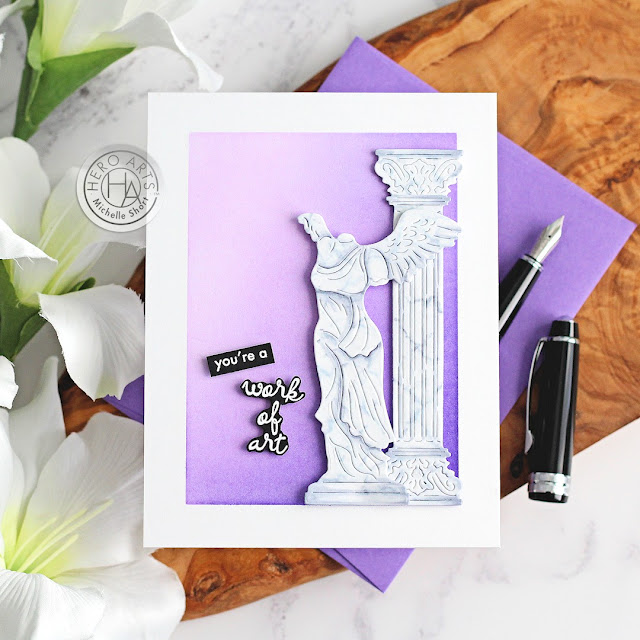
Hero Arts | You're a Work of Art!

Hello there, I am over on the Hero Arts Blog today, sharing a card using the new Museum Columns Fancy Dies. Although I think most columns/statues like this are made from stone, I thought it would be fun to try and colour them like they were marble! 

PLEASE NOTE: This post contains affiliate links. Please see below for my full disclosure.


I started off by die cutting the Hero Arts Museum Columns Fancy Dies from white cardstock and added shading and striations on to them using Copic Markers (C7, C5, C3, C2, C1, C00). I then created a background with ink blending using Hero Arts Thistle, Grape Slush and Purple Galaxy Reactive Inks. The sentiment is from the new Hero Arts Art Meowseum Stamp Set

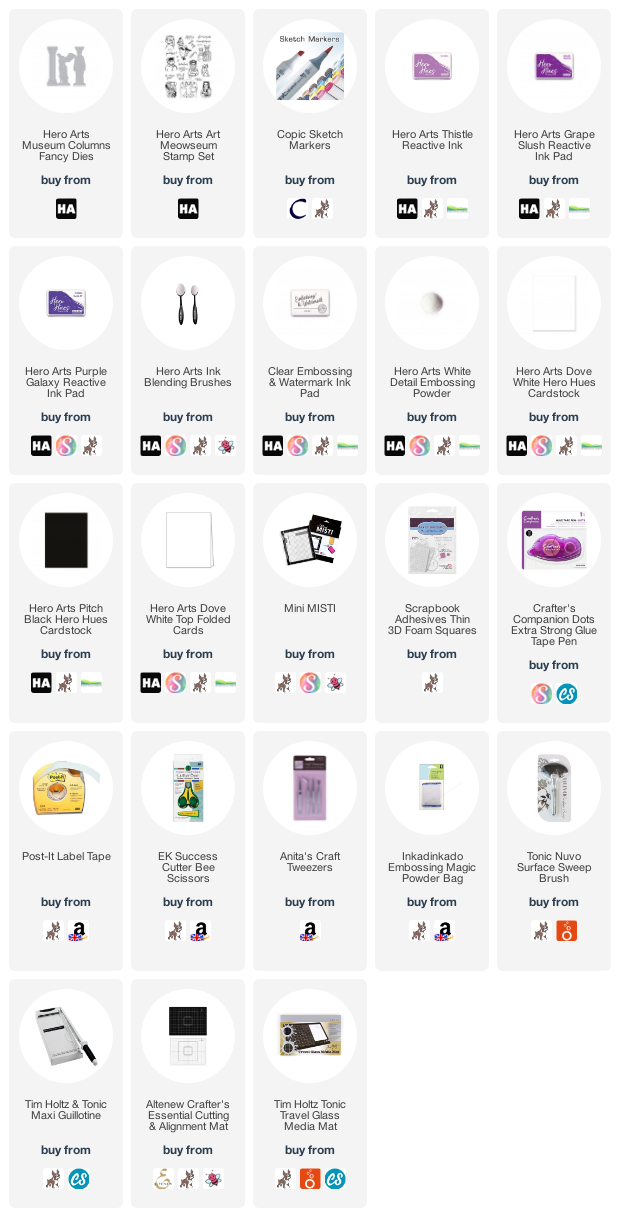
SUPPLIES:


Here are the links to what I have used on the project. Affiliate links are used on some products. This means that if you make a purchase after clicking on my link, I receive a small commission with no extra cost to you. I truly appreciate your support when using these links. Please click on the logo below the product to shop at your favourite store. All products were personally purchased except those from Clearly Besotted, Hero Arts or those marked with an asterisk (*) which were kindly sent to me to use. You can read my full disclosure here.


For more information on how I made the card, please head over to the Hero Arts Blog Post. Thanks so much for stopping by today, I really do appreciate it. Have a wonderful day! 

9 March 2022

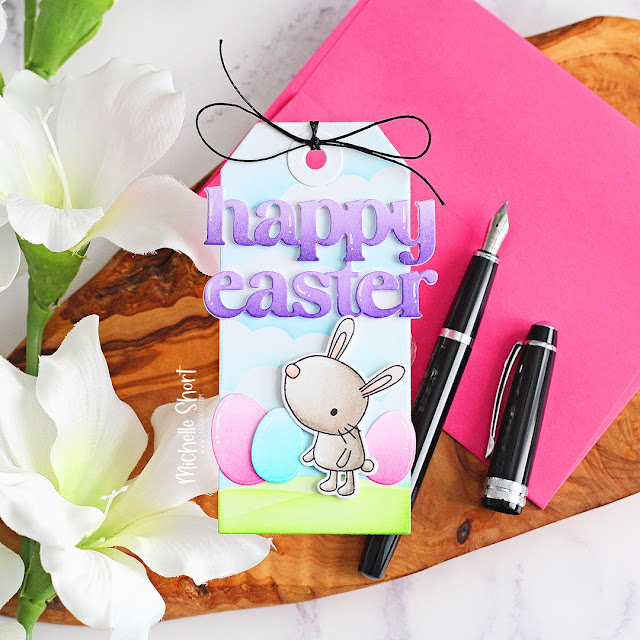
Reverse Confetti | Happy Easter Tag

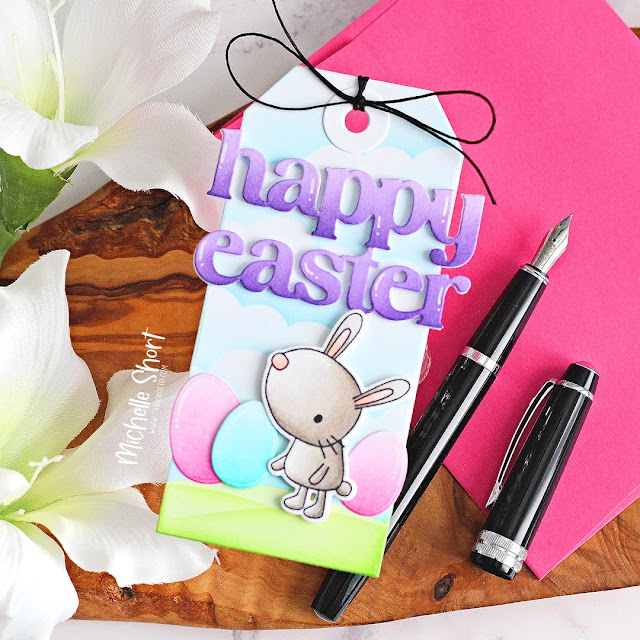
Hello there, following on from yesterday's post, I have another project to share with you using products from the Reverse Confetti March 2022 Release. Today I am using the Better with Friends set again and combining it with the Easter Cover Panel Confetti Cuts. This set is full of lovely smaller dies, as well as a shaped cover die. 

PLEASE NOTE: This post contains affiliate links. Please see below for my full disclosure.


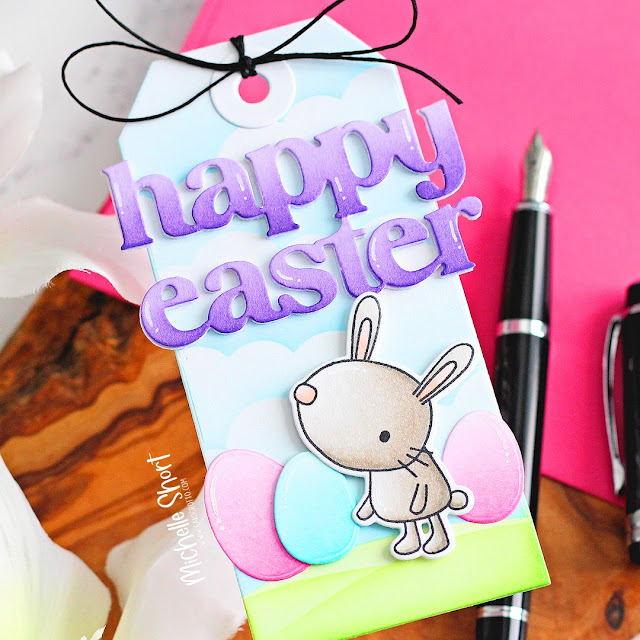
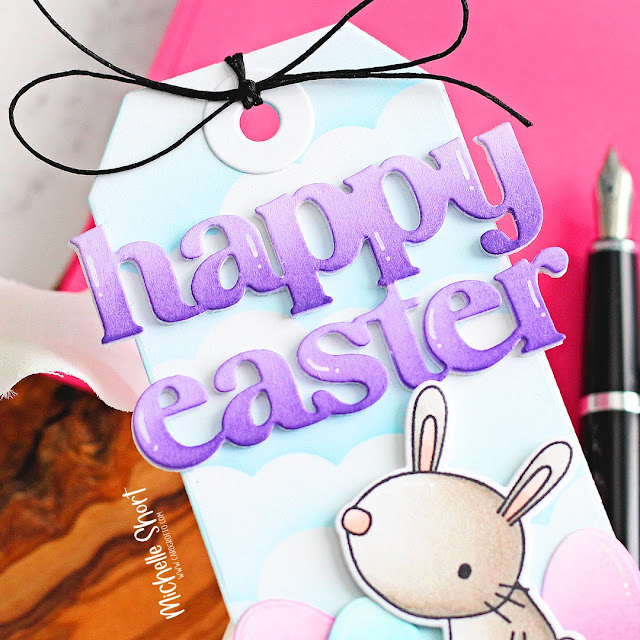
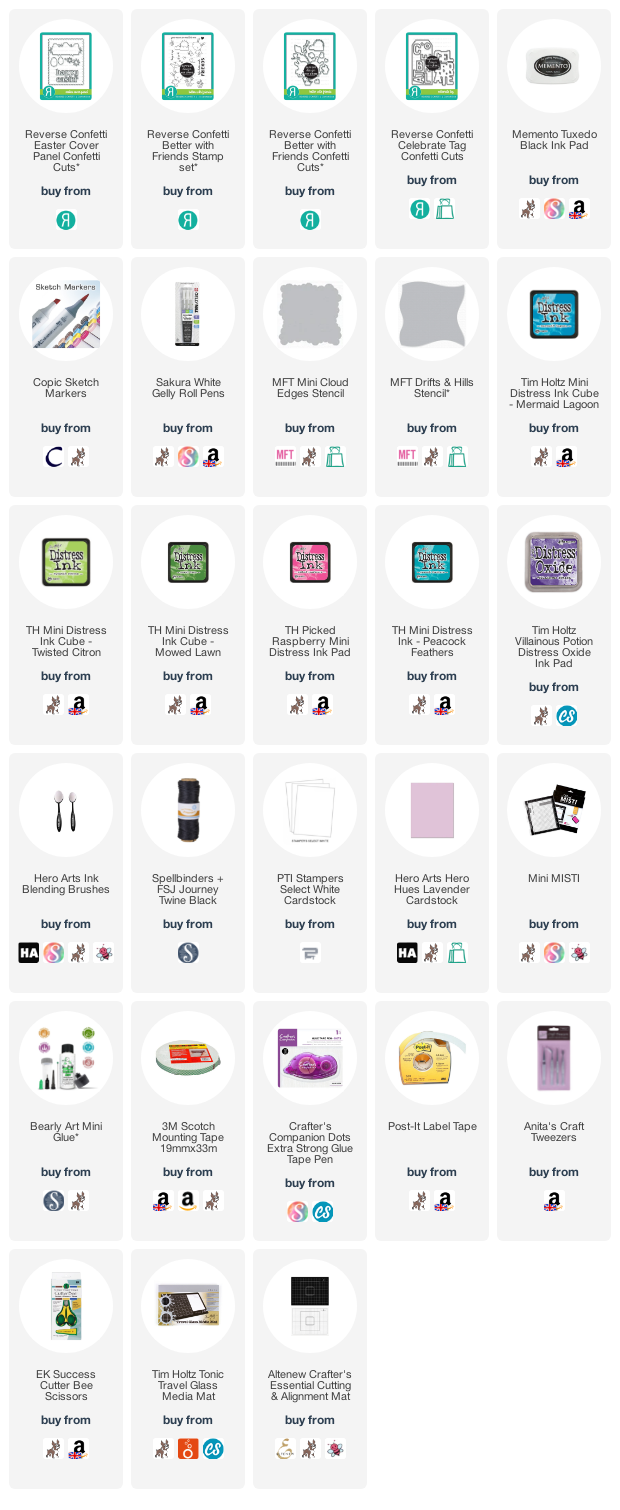
I started off by stamping the bunny from the Reverse Confetti Better with Friends Stamp Set on to white cardstock with Memento Tuxedo Black Ink. I coloured her with Copic Markers and cut her out using the Reverse Confetti Better with Friends Confetti Cuts. I then took the egg dies from the Reverse Confetti Easter Cover Panel Confetti Cuts and cut them from white cardstock. 


Using ink blending brushes, I blended on Tim Holtz Distress Inks in Picked Raspberry and Peacock Feathers. I took the Reverse Confetti Celebrate Tag Confetti Cuts and cut the tag from white cardstock. I placed the MFT Mini Cloud Edges Stencil on top and blended on Tim Holtz Mermaid Lagoon Distress Ink. I then used the MFT Drifts & Hills Stencil to create hills for the bunny to stand on. 


For those, I used Tim Holtz Distress Inks in Twisted Citron and Mowed Lawn. I die cut the happy easter word, from the Reverse Confetti Easter Cover Panel Confetti Cuts, four times - three times from white cardstock and once from Lavender cardstock. On the lavender one, I blended on Tim Holtz Villainous Potion Distress Oxide Ink


They were layered up on on top of another and then added to the tag with liquid glue. The eggs were then added, followed by the bunny, adhering with foam tape. I added another tag to the back (for stability and neatness) and then added the hole reinforcer cut from white. I tied twine through the top of the tag and then finished off by adding white gel pen highlights. 

SUPPLIES:


Here are the links to what I have used on the project. Affiliate links are used on some products. This means that if you make a purchase after clicking on my link, I receive a small commission with no extra cost to you. I truly appreciate your support when using these links. Please click on the logo below the product to shop at your favourite store. All products were personally purchased except those from Clearly Besotted, Hero Arts or those marked with an asterisk (*) which were kindly sent to me to use. You can read my full disclosure here.


COPIC MARKERS: W5, W3, W1, W0, R12, R01, R00. 

Thanks so much for stopping by today, I really do appreciate it. I hope you have a lovely day! 

8 March 2022

Reverse Confetti | March 2022 Release Blog Hop

Hello there, I am delighted to be joining Reverse Confetti today to celebrate the release of the March 2022 products with a fun blog hop. There are 5 new stamp sets and 10 new Confetti Cuts die sets releasing today. The sets are all spring themed, which happens to be my favourite season! More details on the hop below. 

PLEASE NOTE: This post contains affiliate links. Please see below for my full disclosure.


For my projects today, I am using the new Better with Friends and Picnic Pals sets. These sets are so cute and feature bunnies and their friends. I created a card and tag today. I also have a project up tomorrow using another of the bunnies! 


For the card, I started off by taking a panel of white cardstock and stamping the images from the Reverse Confetti Better with Friends Stamp Set on to it, using Memento Tuxedo Black Ink. I then coloured them with Copic Markers (the colours that I used are listed below the supplies area) and die cut them out using the Reverse Confetti Better with Friends Confetti Cuts


I took a panel of white cardstock and placed the MFT Rectangle Extraordinaire Stencil on top. Using ink blending brushes, I blended on Tim Holtz Distress Inks in Mermaid Lagoon and Blueprint Sketch for the sky and Twisted Citron, Mowed Lawn and Rustic Wilderness for the grass. It was then adhered to an A2 white card base with tape runner. 


I adhered the larger flowers and bee trail with tape runner, the smaller flowers and bee with thin foam tape and the bunny with regular foam tape. I took the sentiment, from the Reverse Confetti Picnic Pals Stamp Set, and stamped it on to black cardstock with Versamark Ink. I applied white embossing powder and heat set. It was cut in to a strip and added to the card with more foam tape. 


For my tag, I started off by die cutting the Reverse Confetti Grid Stitched Tag Confetti Cuts from white cardstock. I placed the MFT Mini Cloud Stencil on top and blended on Tim Holtz Mermaid Lagoon Distress Ink, moving the stencil down to cover the tag. I stamped the sun image from the Reverse Confetti Better with Friends Stamp Set followed by the branch (which is part of a larger tree image) and bird nest from the Reverse Confetti Picnic Pals Stamp Set on to white cardstock with more Memento Tuxedo Black Ink


They were coloured using Copic Markers and die cut out using the Reverse Confetti Better with Friends and Picnic Pals Confetti Cuts. The branch and sun were adhered to the tag with thin foam tape, cutting off the excess over hanging the tag. The bird and nest were adhered with regular foam tape. 


I took the sentiment from the Reverse Confetti Word Up Stamp Set and heat embossed it in white on to black cardstock. It was cut in to a strip and added to the tag using foam tape. To finish off, I added white gel pen highlights to the images, Little Things from Lucy's Cards Bubbles and then twine through the top of the tag. I thought it would make a cute pregnancy/new baby project. 

SUPPLIES:


Here are the links to what I have used on the projects. Affiliate links are used on some products. This means that if you make a purchase after clicking on my link, I receive a small commission with no extra cost to you. I truly appreciate your support when using these links. Please click on the logo below the product to shop at your favourite store. All products were personally purchased except those from Clearly Besotted, Hero Arts or those marked with an asterisk (*) which were kindly sent to me to use. You can read my full disclosure here.


COPIC MARKERS: Bunny - W5, W3, W1, W0, R12, R01, R00. Flowers - V17, V15, V12, Y17, Y15, Y11. Bee - Y17, Y15, Y11, C10, C7, C5, B00, B000. Sun - YR27, Y17, Y15, Y13, Y11. Branch - E59, E57, E55. Leaves - YG17, YG25, YG01. Nest - E44, E43, E41. Eggs - E53, E51, E50. Bird - B16, B12, B000, Y11. 

BLOG HOP:


As mentioned, this post is part of a fun, inspiration filled blog hop. For the hop, you should have arrived here from the amazing Amy Kolling. Next on the hop is the fabulous Joy Baldwin. I also have the full list of participants linked below:

Thank you so much for stopping by to see me today, I really do appreciate it. I hope you have a wonderful day! 

7 March 2022

Hero Arts | March 2022 My Monthly Hero Release Blog Hop + Giveaway

Hello there, today we are celebrating the release of the Hero Arts March 2022 My Monthly Hero Kit and add-ons. The theme this month is art museum and there are lots of different ways to use these products, so let your creativity run wild! I have already shared one card using the main kit, which you can see here. For that card, I focused on the stamp set but there is a fun die in the kit too, which I will be using today. 

This post is part of a fun, inspiration filled blog hop with prizes. Please see below for more details.

PLEASE NOTE: This post contains affiliate links. Please see below for my full disclosure.


For my first card, I am using the Hero Arts March 2022 My Monthly Hero Kit only. I started off by die cutting the Fancy Window Die from white cardstock. I then coloured the people, floor and bench with Copic Markers. There are lots of different ways to add colour to this die cut, you can also leave it completely colour free and that looks amazing too! 


On a separate piece of cardstock, I stamped the splatters from the stamp set. I used Hero Arts Orchid, Mulled Wine and Rose Madder Bold Inks. I actually had some blue ink left on my stamp from making my countdown card, so the Rose Madder ended up purple! I then stamped some splatters on top using Hero Arts Intens-ified Black Ink


I added the splatter piece to a 4.75" x 6" white card base. I then added the window frame on top with foam tape. I took the sentiment from the set and stamped it on to Hero Arts Pitch Black Cardstock with Hero Arts Clear Embossing & Watermark Ink. I applied Hero Arts White Detail Embossing Powder and heat set. It was cut in to two strips and added to the card with more foam tape. 

There are so many things you can do for the painting/window that they are looking at. You could create some really fun scenes. Libby has even made it in to an aquarium! So cool!


My next card uses the new Hero Arts Picasso Inspired Stencil, which is an add-on for the release. I started off by adding Pixie Spray to the back of it then placed it on to a panel of white cardstock. Using Ink Blending Brushes, I blended on tons of different Hero Arts Inks in shades of blue (they are all linked in the supplies list). Although a lot of Picasso's work was bold, primary colours, he did do some work in blues and greens, so I thought I would go with that for my card today. 


The panel was cut down to 3.75" x 5" and simply adhered to a white A2 card base with foam tape. I took the sentiment from the Hero Arts Creative Quotes Stamp Set and stamped it on to Hero Arts Pitch Black Cardstock with Hero Arts Clear Embossing & Watermark Ink. I applied Hero Arts White Detail Embossing Powder and heat set. It was cut in to a strip and added to the card with thin foam tape. 

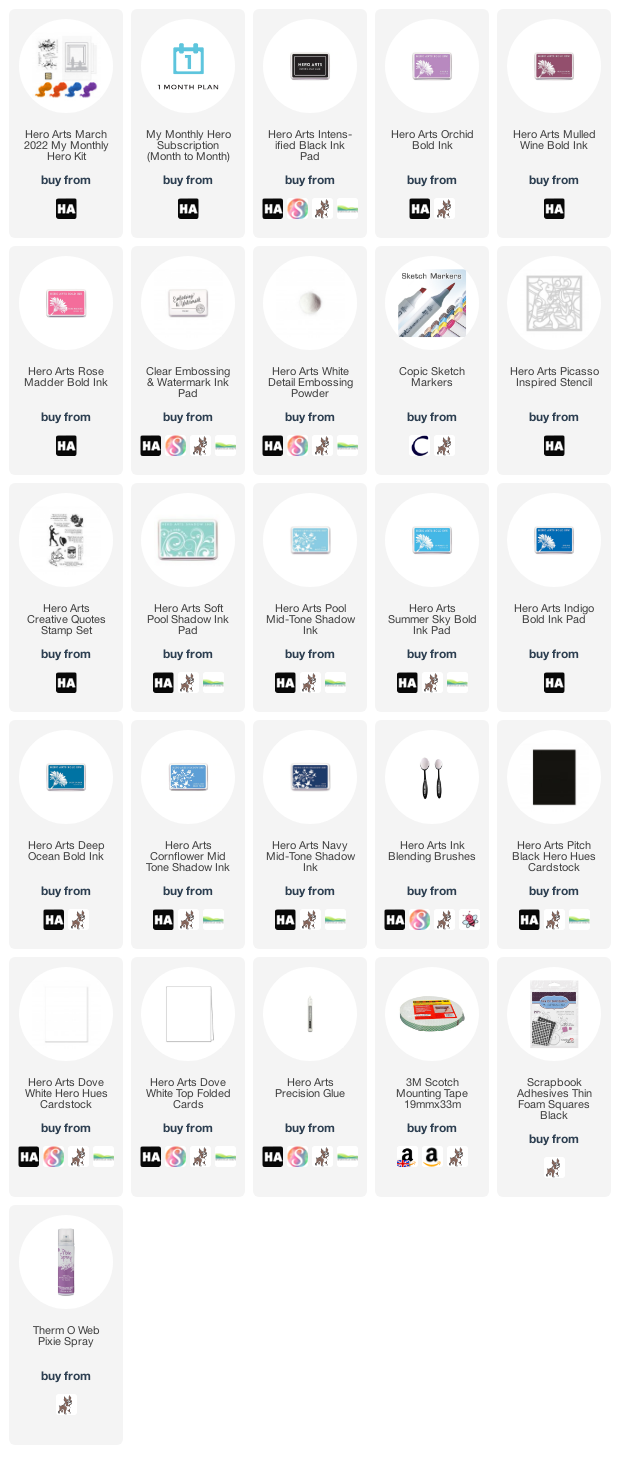
SUPPLIES:


Here are the links to what I have used on the projects. Affiliate links are used on some products. This means that if you make a purchase after clicking on my link, I receive a small commission with no extra cost to you. I truly appreciate your support when using these links. Please click on the logo below the product to shop at your favourite store. All products were personally purchased except those from Clearly Besotted, Hero Arts or those marked with an asterisk (*) which were kindly sent to me to use. You can read my full disclosure here.


MY MONTHLY HERO KIT:


Take a trip to the art museum with the March My Monthly Hero release. The main kit features Abstract Expressionist art in the form of paint splatters. Stamp them with your favorite inks, or to mimic the bold look of acrylic paint, emboss them with the four vibrant embossing powders included in this kit. We've also included paper with the feel of canvas for creating your masterpieces, and the kit is rounded out with a fantastic cover plate die of the art museum patrons gazing at your work of art. Just imagine all the things you can frame with this die!

KIT CONTENTS:

4" x 6" Clear Stamp Set
Fancy Window Die
4 Embossing Powders in Goldenrod, Orange, Blue & Purple
Clear Embossing & Watermark Ink Cube
2 Sheets Extra Thick Canvas Paper (4.25" x 5.5")
1 Sheet Canvas Textured Paper (5.5" x 8.5")

The Hero Arts March 2022 My Monthly Hero Kit is valued at $70 but you can get it for $34.99 (approximately £28 depending on exchange rate, not including VAT/customs charges). The kits are exclusive to the Hero Arts store and often sell out quickly, so you can subscribe here, so that you never miss a kit. Kits begin shipping Friday 11th March 2022. 

ADD-ONS:

There are lots of add-on products released each month. These work alongside the kit, or work on their own too. These can be purchased from Hero Arts when you order a kit, on their own or from your favourite Hero Arts retailer (these are not exclusive and are restocked if sold out). Here is a look at them:


BLOG HOP:

As mentioned, this post is part of a fun, inspiration filled blog hop with prizes. For the hop, you should have arrived here from the wonderful Maria Willis. Next on the hop is the fabulous Mindy Eggen. If you get lost along the way, or want to start the hop from the beginning, please head over to the Hero Arts Blog.

GIVEAWAY:

Hero Arts are giving away a $50 gift card drawn from the comments left across all of the stops in the hop. Enter by Sunday 13th March 2022 at 11.59pm PT. The winner will be announced the following week on the Hero Arts Blog.

Thanks so much for stopping by today, as always, I really do appreciate it. I hope you have a wonderful rest of the day (or evening as it is here in the UK!). Take care! 

4 March 2022

Altenew | Folktales & Stories Release Blog Hop + Giveaway

Hello there, today sees the release of the new Folktales & Stories release from Altenew. This is such a fun release with something for everyone, I think! Today I am using the new Endless Florescence set, which is a beautiful large floral image that would easily cover a 5" x 7" card but can also be used in sections (like I have done) for smaller projects. This post is part on a fun, inspirational blog hop with prizes. Please see below for more details. 

PLEASE NOTE: This post contains affiliate links. Please see below for my full disclosure.


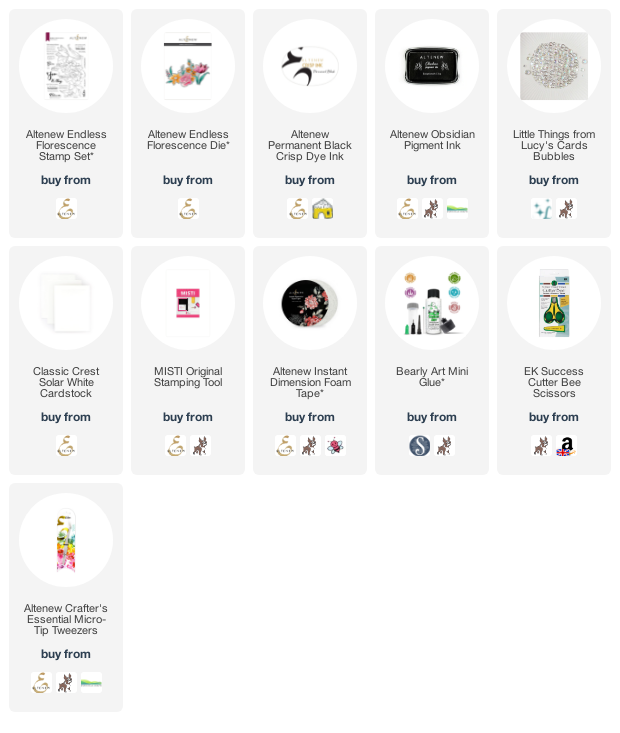
I started off by stamping the Altenew Endless Florescence Stamp Set on to white cardstock with Altenew Permanent Black Crisp Ink. I then coloured the flowers and leaves with markers. I apologise that I didn't male a note of the colurs that I used, I was just enjoying the process! 

The image was die cut out using the Altenew Endless Florescence Die. I took an A2 white card base and stamped the sentiment from the set in the top left hand corner using Altenew Obsidian Pigment Ink. The image was then added to the card with Altenew Instant Dimension Foam Tape, cutting off the excess with scissors. To finish off, I added a few Bubbles embellishments. 

SUPPLIES:


Here are the links to what I have used on the project. Affiliate links are used on some products. This means that if you make a purchase after clicking on my link, I receive a small commission with no extra cost to you. I truly appreciate your support when using these links. Please click on the logo below the product to shop at your favourite store. All products were personally purchased except those from Clearly Besotted, Hero Arts or those marked with an asterisk (*) which were kindly sent to me to use. You can read my full disclosure here.


BLOG HOP:

As mentioned, this post is part of  a fun, inspirational blog hop. For the hop, you should have arrived here from the amazing LauraJane. Next on the hop is the fantastic Cheryl Espie. If you get lost along the way, or want to start the hop from the beginning, please head over to the Altenew Blog

FREE GIFTS:

There are lots of ways to grab a freebie with this release:

GIVEAWAY:

$300 in total prizes! To celebrate this release, Altenew is giving away a $50 gift certificate to 2 lucky winners and a $25 gift certificate to 8 winners! Please leave a comment on the Altenew Card Blog and/or each designer’s blog post on the blog hop list below by 10th March 2022 for a chance to win. Altenew will draw 10 random winners from the comments left on each stop of this blog hop and announce the winners on the Altenew Winners Page on 12th March 2022.

Thanks so much for stopping by today, I really do appreciate it. I hope you have a lovely rest of the day!
Hero Arts | March 2022 My Monthly Hero Countdown to Creativity

Hello there and welcome to Hero Arts Countdown to Creativity weekend! I know that it is Friday but the celebrations always start on a Friday, so that we have three full days of inspiration before the My Monthly Hero Kit is released on Monday! The kit this month is called Art Museum and there are lots of fun add-ons to go with the kit, I'll be taking a look at those on Monday for the hop. Today, I am sharing a card using the kit itself. 

PLEASE NOTE: This post contains affiliate links. Please see below for my full disclosure.


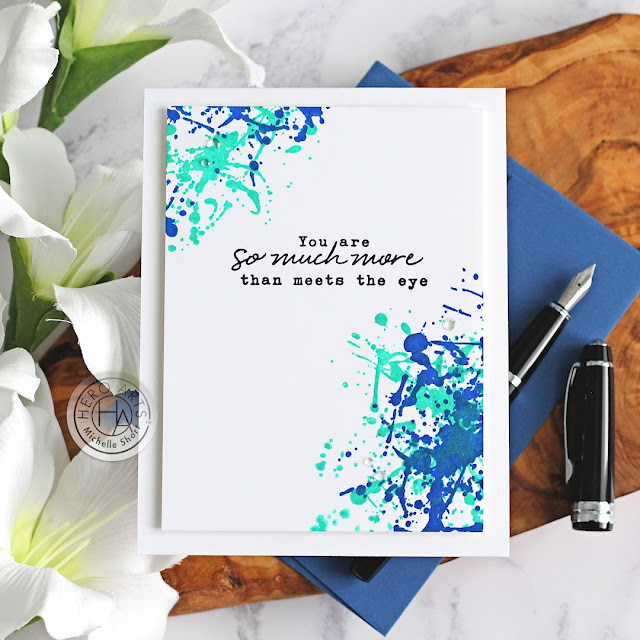
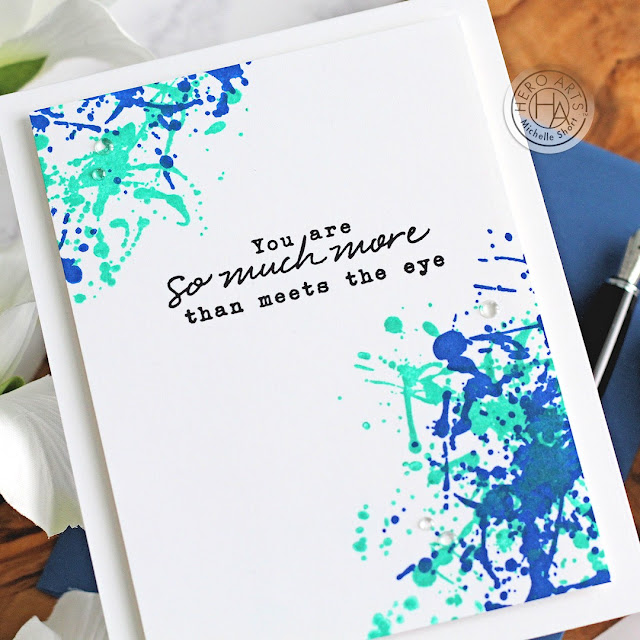
I started off my card by taking a panel of Hero Arts Dove White Cardstock and stamping the sentiment from the kit stamp set in the top middle using Hero Arts Intensified Black Ink. I then took the splatter stamps from the kit and stamped them in the top left of the panel and bottom right. 

There are two splatter stamps in the set. One I stamped with Hero Arts Aegean Bold Ink and the other with Hero Arts Aquatic Bold Ink. The top right hand corner, I just stamped both once, overlapping them. For the bottom corner, I stamped the Aegean layer twice and the Aquatic once. The panel was simply adhered to an A2 white card base with foam tape. To finish off, I added a few Hero Arts Clear Enamel Dots.

SUPPLIES:


Here are the links to what I have used on the project. Affiliate links are used on some products. This means that if you make a purchase after clicking on my link, I receive a small commission with no extra cost to you. I truly appreciate your support when using these links. Please click on the logo below the product to shop at your favourite store. All products were personally purchased except those from Clearly Besotted, Hero Arts or those marked with an asterisk (*) which were kindly sent to me to use. You can read my full disclosure here.


As mentioned, the kit releases on Monday 7th March. From now until then, we will be sharing inspiration using the kit. You can find more inspiration over on the Hero Arts Blog and be sure to leave a comment over there for a chance to win a kit! Thanks so much for stopping by, I will be back later with another post. In the mean-time, I hope you have a lovely day! 

3 March 2022

Spellbinders | Kaleidoscope Floral Slimline

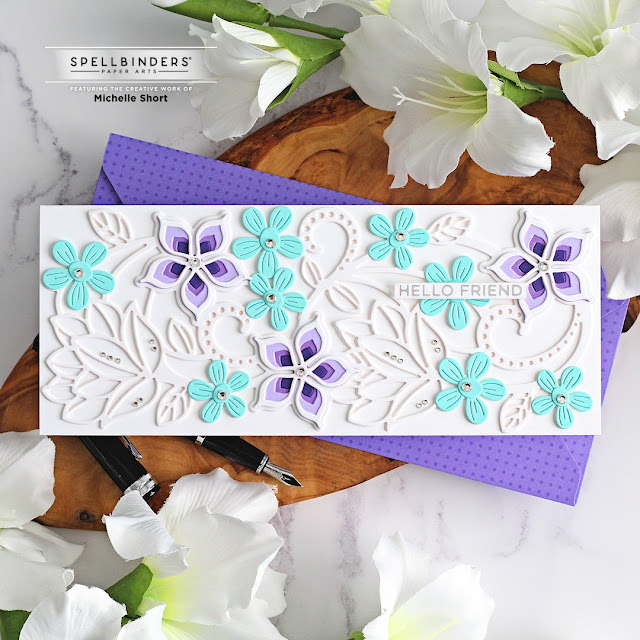
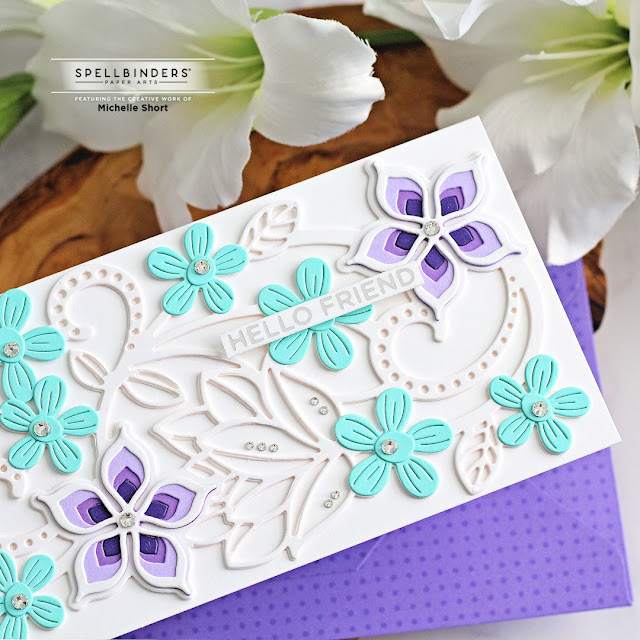
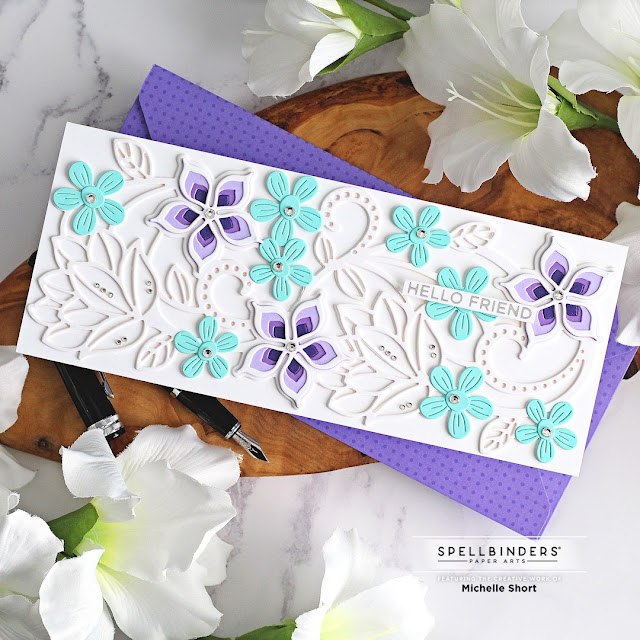
Hello there, today I have a card to share with you using the Spellbinders March 2022 Large Die of the Month Club Kit. This month is called Kaleidoscope Floral Slimline and as the name suggests, features a beautiful floral slimline die. There are different parts to the die - the main background shape piece, the larger floral dies which layer up and the smaller flowers. There are also some leaves too, so if you didn't want to use the slimline part, you can still use the flowers. 

PLEASE NOTE: This post contains affiliate links. Please see below for my full disclosure.


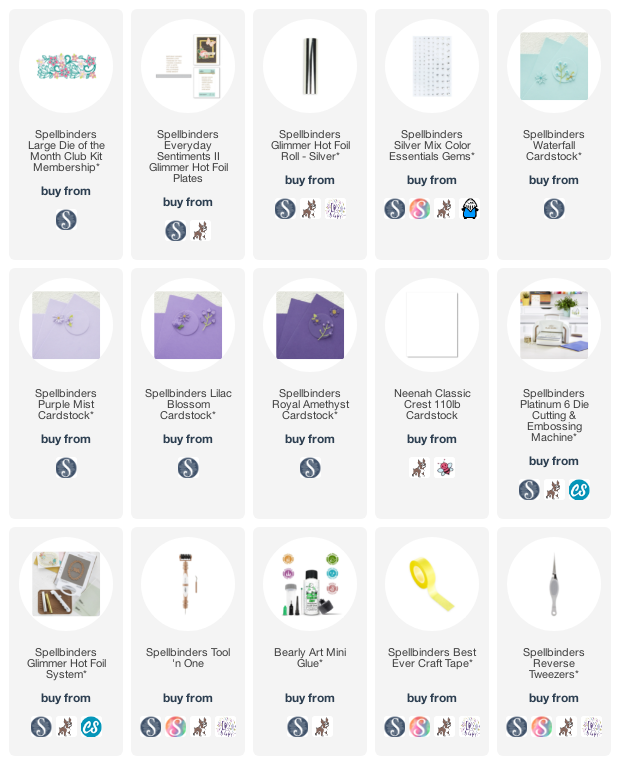
I started off by die cutting the main background floral piece from the Spellbinders Large Die of the Month Club Kit from white cardstock. I cut it twice and adhered them one on top of another. I then die cut the smaller flowers from Spellbinders Waterfall Cardstock. The larger flowers were cut from Spellbinders Purple Mist, Lilac Blossom and Royal Amethyst Cardstock. The outline was cut from white. 

The background piece was adhered to a slimline (3.5" x 8.5") white card base with Bearly Art Glue. I then added the smaller flowers on top. The larger flowers were layered up and then adhered to the card, also with Bearly Art Glue. 

I took the sentiment from the Spellbinders Everyday Sentiments II Hot Foil Plate and foiled it in Spellbinders Silver Glimmer Hot Foil Roll on white cardstock. It was cut in a strip and added to the card with foam tape. In hindsight, maybe I should have foiled it on black cardstock, so that it stands out more, but I was going for an airy feel to the card! To finish off, I added Spellbinders Silver Mix Color Essentials Gems

SUPPLIES:


Here are the links to what I have used on the project. Affiliate links are used on some products. This means that if you make a purchase after clicking on my link, I receive a small commission with no extra cost to you. I truly appreciate your support when using these links. Please click on the logo below the product to shop at your favourite store. All products were personally purchased except those from Clearly Besotted, Hero Arts or those marked with an asterisk (*) which were kindly sent to me to use. You can read my full disclosure here.


SPELLBINDERS CLUB KITS

I hope that you will check out the Spellbinders Club Kits. It is a wonderful monthly subscription where you receive the kit each month. Designers like myself share inspiration using the kit at the beginning of the month to show you lots of different ways that you can use it. 

There are also lots of other club kits too, like the Small Die of the Month and Stamp & Clear Die of the Month (plus lots more!), so there is something for everyone! If you do subscribe, you will get other benefits from Spellbinders too. Please see here for more information. You can also buy older kits here too. 

UK SUBSCRIBERS

GREAT NEWS! If you are in the UK, Spellbinders will now ship the kits directly from here in the UK for Club Kit Subscribers (Club Kits only). That means reduced shipping costs and no extra fees! If you have been putting off subscribing to the kits because of this, now is the time to do it! 

If you do want to get hold of this month's kit, you would need to subscribe by 24th March 2022 to receive it. Subscribers can cancel their membership at any time. 

Thank you so much for stopping by today, I really do appreciate it. Wishing you a wonderful day and a great rest of the week!

1 March 2022

Pinkfresh Studio | Songbirds on Branches

Hello there, I am delighted to be joining Pinkfresh Studio today for the February 2022 Release Instagram Hop. All of the fun, including giveaways, is happening over there, so please be sure to head over to my Instagram account and Pinkfresh Studio's as well. I wanted to post over here on my blog too though, so that I could share more information on my projects. 

PLEASE NOTE: This post contains affiliate links. Please see below for my full disclosure.


Today I am using the beautiful Songbirds on Branches collection. This collection features a cling stamp, hot foil plate, stencils and die. These can be purchased separately, so you can mix and match as you like. I love that the sets are a whole item - so for example, the die cuts out all of the images in one, so you only need to run it through your die cutting machine once. So cool! 


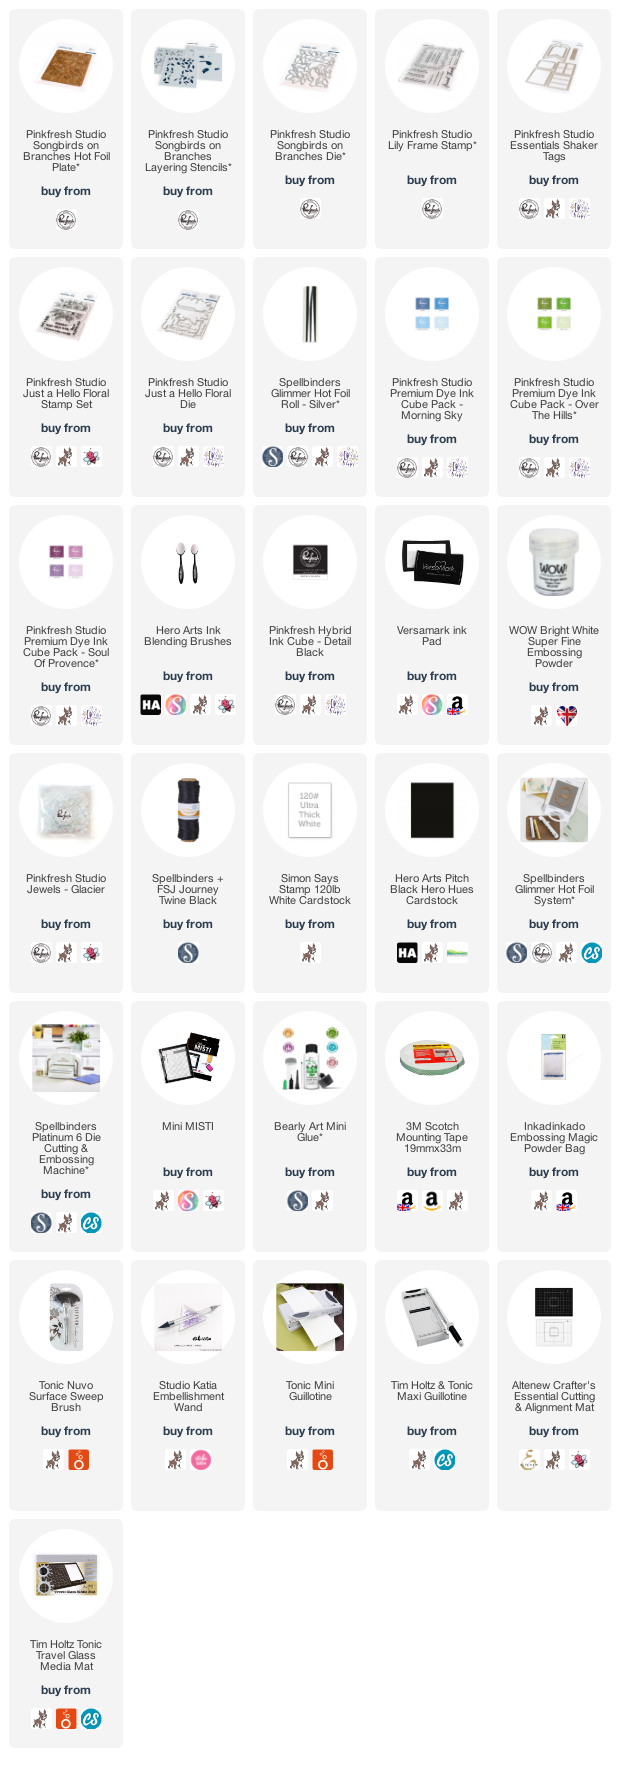
For the card, I started off by foiling the Pinkfresh Studio Songbirds on Branches Hot Foil Plate on to Simon Says Stamp 120lb White Cardstock with Spellbinders Silver Glimmer Hot Foil Roll. To add colour to the images, I placed the Pinkfresh Studio Songbirds on Branches Stencils on top. There are four stencils, enabling you to colour in all of the images with ink blending. I used Pinkfresh Studio Premium Dye Ink Cube Sets in Morning Sky for the birds and Over the Hills for the leaves. I also used Soul of Provence for the flowers, which are coming up a little later!


The images were then die cut out using the Pinkfresh Studio Songbirds on Branches Die. I cut it again another two times just as is, so that I could pop the images up (so that I didn't have to use foam tape!). I die cut the largest of the Pinkfresh Studio Essentials Shaker Tags Dies twice (doubled up again for dimension) and adhered the branches and birds on top, using Bearly Art Glue. 


The tag was adhered to an A2 white card base with tape runner adhesive. I then stamped the sentiment from the Pinkfresh Studio Just a Hello Floral Stamp Set on to white cardstock with black ink. It was die cut out using the Pinkfresh Studio Just a Hello Floral Die and again, I popped it up on more die cuts before adhering to the card. To finish off, I added Pinkfresh Studio Glacier Jewels


When creating the card, I had leftover pieces that would create a whole panel if you wanted to. I couldn't let these go to waste, so I had to create a little tag with them! I die cut the smaller of the tags from the Pinkfresh Studio Essentials Shaker Tags Dies from white cardstock. The floral branches were then adhered on top, again popping them up and cutting off the excess in places. 


I took the sentiment from the Pinkfresh Studio Lily Frame Stamp Set and stamped it on to black cardstock with Versamark Ink. I applied white embossing powder and heat set. It was cut in to a strip and added to the tag with tape runner adhesive. To finish off, I added twine through the top of the tag and more Pinkfresh Studio Glacier Jewels

INSTAGRAM HOP:


As mentioned, this is part of an fun Instagram Hop. There is lots of inspiration and giveaways happening over there. Please head over to my Instagram account here. You can also find a full list of participants in the hop over on the Pinkfresh Studio account here

SUPPLIES:


Here are the links to what I have used on the projects. Affiliate links are used on some products. This means that if you make a purchase after clicking on my link, I receive a small commission with no extra cost to you. I truly appreciate your support when using these links. Please click on the logo below the product to shop at your favourite store. All products were personally purchased except those from Clearly Besotted, Hero Arts or those marked with an asterisk (*) which were kindly sent to me to use. You can read my full disclosure here.


Thanks so much for stopping by today, I really do appreciate it. A huge thank you to Heather and the whole Pinkfresh Studio team for having me guest with them. I have loved it! Wishing you a great rest of the day! 
End of code