18 July 2016

New Heights

Hello there, today I have a little card to share using the Santoro Gorjuss New Heights stamp. This is part of their collectable range so the images are a lot smaller than the originals. They are so beautiful!
 

I started off by die cutting a panel of white cardstock using the largest of the SSS Stitched Square dies. I then stamped the Gojuss girl on to it using black ink. The sentiment, from the Clearly Besotted A Little Sentimental set, was stamped beside her.
 
 
The image was coloured using Copic Markers. The panel was then adhered to a 4.5 x 4.5" card base using foam sheet.
 
SUPPLIES:
Here are the links to what I have used on the card. Please click on the picture or wording to be taken to where I purchased it. Affiliate links are used on some products. This means that if you make a purchase after clicking on my link, I receive a small commission with no extra cost to you. I truly appreciate your support when using these links.


COPIC MARKERS - Skin: E11, E00, E000, R20. Hair: E29, E27, E25, E23. Dress: R39, R56, R85, R83, R81. Tights: E43, E42, E30. Books: E44, E43, E42. R39, R56, R83. Ground: W5, W3, W1, W00.
 
Such a simple card but I really loved colouring this little lady in. I thought it would make a nice card to send a friend a little note. Thanks so much for visiting me today. I hope you have a great week!

15 July 2016

VIDEO | Watercolour Hugs

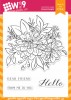
Hello there, today I have a card to share using the WPlus9 Beautiful Bouquets: Dahlias stamp set. I coloured this as part of The Daily Marker 30 Day Colouring Challenge. I did film a speed paint video of me colouring it, which you can see below.
 

I started off with a piece of TH Watercolor Cardstock and I stamped the image on to it using Versamark ink. I then applied Hero Arts white embossing powder and heat set. The image was coloured using Zig Clean Color Real Brush pens (please see below the supplies section for a list of colours used), a paint brush and some water.
 
 
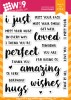
Once the panel was dry, I cut it down slightly and then stamped the sentiment from the WPlus9 That Is All stamp set, using Versafine Onyx Black ink. The panel was adhered flat to an A2 purple card base, with an added strip of black cardstock to the right hand side.
 
VIDEO:
Here is a look at how I coloured the image:


SUPPLIES:
Here are the links to what I have used on the card. Please click on the picture or wording to be taken to where I purchased it. Affiliate links are used on some products. This means that if you make a purchase after clicking on my link, I receive a small commission with no extra cost to you. I truly appreciate your support when using these links.


ZIG CLEAN COLOR REAL BRUSH PENS - 081 Light Violet, 083 Lilac, 042 Turquoise Green, 045 Pale Green, 070 Orange, 025 Pink, 036 Light Blue
 
Thank you so much for visiting me today. I hope you have a great Friday and also a great weekend!

13 July 2016

Beary Special Birthday

Hello there, today I am back to share a card made using the new super cute Beary Special Birthday stamp set from MFT. I shared the set in my recent haul video and I just couldn't wait to ink it up!
 

I started off by stamping the bear using black ink and colouring him with Copic Markers (colours listed below the supplies list). He was then cut out using the coordinating die. I added clear Wink of Stella to the present and balloon. I also added a coating of Glossy Accents tot he balloon. The sentiment, from the Ewe Are The Best stamp set, was stamped on more white cardstock and cut out.

 
I took a piece of white cardstock and cut this using a SSS Stitched Square Die, I then ran it through my die cutting machine again, this time with a SSS Stitched Circle die. I cut a piece of patterned paper from the MFT Calm & Cosy paper pad to fit behind the aperture frame I created and then adhered it to a 4.75 x 4.75" card base. The frame was then added on top with foam tape. The bear and the sentiment were also added with foam tape. To finish off, I added a few Doodlebug sprinkles around the sentiment.
 
SUPPLIES:
Here are the links to what I have used on the card. Please click on the picture or wording to be taken to where I purchased it. Affiliate links are used on some products. This means that if you make a purchase after clicking on my link, I receive a small commission with no extra cost to you. I truly appreciate your support when using these links.


COPIC MARKERS: Bear - E59, E57, E55, E53, E50. Balloon & present - YR02, YR01, YR00, YR000.
 
I apologise for having two MFT cards in a row, I am just loving using the latest release. I also need to apologise for the photos. The awful weather and lighting here are causing havoc with my photography. Anyway, I hope you are having a great week so far, thanks so much for visiting me today.

11 July 2016

VIDEO | Emboss Resist with Distress Inks

Hello there, today I have two cards to share using the emboss resist technique with Distress Inks. This is one of my favourite ways to make simple backgrounds and I think the cards I have made today make great simple male birthday cards.
 

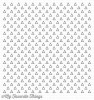
I started off with two piece of Bristol Smooth cardstock (this works really well with blending Distress Inks and it can take a bit of water without warping so I really loved using it). I stamped the MFT Transparent Triangle Background stamp on to it using Versmark ink. I then coated the cardstock with WOW! Clear Matte Dull Embossing Powder and heat set it.
 

I then applied the embossing powders using an ink blending tool. I used Twisted Citron, Cracked Pistachio and Peacock Feathers on the first panel and Twisted Citron, Peacock Feathers and Blueprint Sketch on the second. I love how when you add the ink over the embossing powder it resists it and you can see the great pattern. For some added interest (since the cards are so simple), I spritzed some water over it using the Distress Sprayer.
 

I then ran the pieces through my Cuttlebug using the largest of the SSS Stitched Rectangle dies. I then ran it through a second time with the MFT Happy Birthday To You die. I was careful to keep the insides of the letters so that I could pop them back in later. The panels were adhered to black A2 card bases using foam tape. I then added in the insides of the letters. I thought about adding enamel dots to the cards but I liked them clean and simple, so I left them as that! :)


VIDEO:

Here is the video showing how I made them:


SUPPLIES:

Here are the links to what I have used on the card. Please click on the picture or wording to be taken to where I purchased it. Affiliate links are used on some products. This means that if you make a purchase after clicking on my link, I receive a small commission with no extra cost to you. I truly appreciate your support when using these links.


I am really glad to have another couple of male birthday cards to add to my box. Thank you so much for visiting me today, I really appreciate it. I hope you have a great day!
End of code