21 February 2017

Thinking of You Butterfly

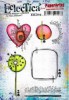
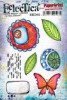
Hello there, today I am sharing my second project using the amazing new release by Kim Dellow for PaperArtsy. Today I am using the gorgeous butterfly from the EKD05 Stamp Set, as well as the PS048 Stencil Pack along with PaperArtsy Fresco Finish Paints.


I started my card by running a piece of white cardstock through my Cuttlebug and embossing the one of the stencils from the PS048 set. The stencil comes with the actual stencil portion as well as the masks and these emboss beautifully. I then took the butterfly from the EKD05 set and stamped this on to white cardstock using Black Soot Archival Ink using my Mini MISTI.

 
To colour the butterfly, I used Bubble Gum and Coral PaperArtsy Fresco Finish Paints. I tried to paint it to that the darker coral colour is on the bottom and fades to pink at the top. Once the paint was dry, I added the cardstock back in my MISTI and stamped it again. This meant that I has dark, crisp outlines to the image. It was then cut out using scissors. I mixed some of the coral paint with Pearl Glaze and splattered this on to the embossed cardstock piece for some added interest.

 
The embossed piece was added to an A2 size white card base with foam tape and then the butterfly added with tape runner to the centre and foam to the wings. The sentiment is from the PaperArtsy EM24 stamp set. This was stamped on to white cardstock and cut in a trip. It was added to the card with tape runner.
 

SUPPLIES:

Here are the links to what I have used on the card. Please click on the picture or wording to be taken to where I purchased it. Affiliate links are used on some products. This means that if you make a purchase after clicking on my link, I receive a small commission with no extra cost to you. I truly appreciate your support when using these links.


I have to say, I love how this card came out and it was fun getting messy with the paints too! For more info on this set and the whole release, please head over to the PaperArtsy Blog. Thanks so much for visiting me today. I hope you have a great day!

20 February 2017

Adding Layers In a Clean & Simple Way

Hello there, as mentioned in my post yesterday, throughout the next few days, I will be sharing my PaperArtsy cards using the fabulous new release from Kim Dellow. Today I am sharing the card I made using the new EKD04 Stamp set.
 

First, I took a 4x4" white card base and stamped the rectangle image from the set on to it using Memento Tuxedo Black Ink. I then stamped the heart image in the centre. I took a separate piece of white cardstock and stamped the same heart image on to it twice. The images were coloured using Copic Markers.
 
 
The blue heart was cut out in it's entirety and then for the red one, I just cut out the middle portion. These were added to the card base and popped up on foam tape. I added a coating of Glossy Accents to the red part.
 
SUPPLIES:
Here are the links to what I have used on the card. Please click on the picture or wording to be taken to where I purchased it. Affiliate links are used on some products. This means that if you make a purchase after clicking on my link, I receive a small commission with no extra cost to you. I truly appreciate your support when using these links.



 COPIC MARKERS: R22, R21, R00. B08, B06, B05.
 
Although the card in itself is very simple, I love the added depth you get with the layers. I thought it would make a nice little notecard to send to a loved one to let them know you love them and are thinking of them. You can see more about the stamp set and the release over on the Paperartsy Blog. Thanks so much for visiting me today. I hope you have a great day!

19 February 2017

PaperArtsy Ecclectica Kim Dellow February 2017 Release

Hello there, have you heard the news? The amazing Kim Dellow has a new release of fabulous stamps and stencils out for PaperArtsy this month. Kim kindly asked me to be one of her Wingmen for the release and along with Anneke (the other Wingman), we are joining  Kim creating samples using the new products.
 

Kim is releasing three new stamps sets, along with three new stencils/masks with a floral theme. PaperArtsy definitely has a more artsy/mix media feel to their products but I wanted to show you that you can create clean and simple projects (if that is what you would like to do!) with them as well. I had great fun creating with the stamps, stencils and paints. Today I am sharing snippets of all the projects I made with the new release and then throughout the following days, I will go in depth with each project sharing all of the supplies I used.


My first card uses the new EKD04 stamp set. It's a wonderful set filled with different shaped images that work really well the other stamp sets being released, but can be used on it's own too. The rectangle image and heart image are two separate stamps that I layered up to create a little notecard. I love Kim's line work!


My second card uses the new EKD05 stamp set. How gorgeous is that butterfly?! The set also has some beautiful floral images in it as well as some great shape images. Can you see the embossing in the background? That was created with one of Kim's new stencils. PS048 has four gorgeous images in the set. Three flowers and one leaf image. These actually are masks, rather than stencils and are excellent quality. As you can see, it embossed really well using my die cutting machine.


My next card uses the amazing new EKD06 stamp set for the large flower and the EKD05 for the leaves. EKD06 has the same floral theme, filled with gorgeous flowers and leaves in Kim's unique line art style. I love it!


The last of my projects uses the graphic images from the EKD06 stamp set. They look like flowers to me but can be simple circle images too. I love the versatility of Kim's sets! The tag on the left also uses the new PS046 stencil, again I have embossed with it as I love the look. The tags also use the PaperArtsy Fresco Finish paints in Kim's colour palette - they are gorgeous!
 
You can find out all of the information on the release over on Kim's Blog as well as the PaperArtsy blog. Here is a video from PaperArtsy sharing all of the samples created for the release. As you can see, my cards are more on the clean and simple side but you can do amazing things with different media too! (My projects have been matted in the video so that all the samples work together across the PaperArtsy line).


Please do pop back throughout the next few days for the details on the projects I shared. Thank you so much for visiting me today. I hope you have a great rest of the day!

18 February 2017

Colour Pencils on Dark Cardstock

Hello there, today I have a card to share with you that I made back in November last year for my friend Kari's Birthday. After making the card I quickly took a photo so that I could sent the card off to her. Well, the photos turned out awful! I decided that I wasn't going to end up sharing the card because of that but three months later, I have changed my mind. I really like how the card turned out so please just forgive the poor photos!
 

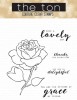
I started off by taking a piece of black cardstock and cutting it using a SSS Stitched Rectangle die. I then stamped the Graceful Rose image from The Ton on to it using white pigment ink. The image was coloured with colour pencils. I used a mixture of Polychromos and Coloursoft pencils, as well as the Caran d'Ache Luminance White.
 
 
The panel was adhered flat to a black A2 card base with tape runner. The sentiment, was printed out from my PC, cut in to a strip and added to the card using foam tape. To finish off, I added a few sequins from The Ton.
 
SUPPLIES:
Here are the links to what I have used on the card. Please click on the picture or wording to be taken to where I purchased it. Affiliate links are used on some products. This means that if you make a purchase after clicking on my link, I receive a small commission with no extra cost to you. I truly appreciate your support when using these links.

PENCILS: Flower - Polychromos 156, 153, 246, Coloursoft C380, Luminance 001. Leaves - Polychromos 171, 112, 163, 158, Luminance 001.
 
Again, I apologise for the photos but I love how the coloured pencils work against the black cardstock. The Graceful Rose image is just stunning too. Thanks so much for popping in today. I hope you have a great weekend!

17 February 2017

VIDEO | Sequin Storage

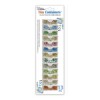
Hello there, I recently shared in my January haul video that I purchased some new containers to hold my sequins in. I thought I would share with you what they look like now I have all of my sequins in them and they are tucked away in my drawer.
 

Before I got the Elizabeth Ward containers, I was using Craft Mates containers. I have to say that I really like them. They hold a lot of sequins or any embellishment for that matter, and they are pretty compact and fit in a drawer really well.

 
So what made me change then? Well, I have seen these Elizabeth Ward containers popping up everywhere. A lot of crafter in the US store their sequins in them and they do look lovely in them. So for a long time I searched and searched for these containers in the UK. I found them to be incredibly expensive. Finally I found them in a bead shop called Stitch n Craft Beads for a reasonable price. Well of course I had to grab them! I purchased quite a few of the Tiny Containers, but I also got a pack of the Small and also Medium.
 
 
They fit in my drawer really well and take up less space than the Craft Mates ones did. It is also easier to just grab one mix out instead of having to take a whole row out (not a huge deal obviously but it is nice!). One major bonus - nothing leaks from them. Even the tiniest of tiny confetti does not come out. I love them! I keep them in colour order and as you can see, I have lots of room to grow in my drawer now. That is one of the things I find really important when setting up new storage/organisation systems. You need to still have room to grow!
 
 
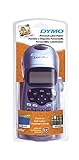
If the sequin mix is from Little Things from Lucy's Cards then I keep the original label since they come off of the bags easily and fit perfectly on these containers. If I have a mix from another company I just create a label on my Label Maker and pop that on the back too.
 
VIDEO:
Here is a look at them in the video:


SUPPLIES:
Here are the links to what I have used on the card. Please click on the picture or wording to be taken to where I purchased it. Affiliate links are used on some products. This means that if you make a purchase after clicking on my link, I receive a small commission with no extra cost to you. I truly appreciate your support when using these links.


 
The company that I got them from ship worldwide I believe but if you are in the US you can get them easily from Simon Says Stamp (affiliate link used) or Amazon. Thank you so much for visiting me today. I hope you have a great day!

15 February 2017

Hey, Petunia!

Hello there, I am back with another Wonderful Wednesday with Stamping Bella. Today I am using the adorable Nice To See You Petunia. If you have followed me for a while you will know that I love pigs but I absolutely adore the little Stamping Bella chicks too, so this image is perfect for me!
 

I started off by taking a piece of white cardstock and cutting the bottom edge using the scallop Femme Frames die from Mama Elephant. This is a great way to get a fancy edge on cardstock if you do not have border dies. Petunia and the chicks were then stamped on top using Memento Tuxedo Black ink. The sentiment is from the Budding Chick stamp set (I masked off the 'bud' portion of the sentiment using post it tape).
 
 
The image was coloured using Copic Markers. It is a little difficult to see in the photos, since it is such a light colour, but I added a little shadow around the centre of the image using BG11 and BG10 markers. This does look nice in real-life! I took an A2 card base and added a sheet of paper from the MFT Hearts & Stripes Paper Pad on to the front. The image panel was then added on top with foam tape.
 
SUPPLIES:
Here are the links to what I have used on the card. Please click on the picture or wording to be taken to where I purchased it. Affiliate links are used on some products. This means that if you make a purchase after clicking on my link, I receive a small commission with no extra cost to you. I truly appreciate your support when using these links.

 
COPIC MARKERS: Pig - R32, R21, R20, R12, R11, R00, R000. Chicks - Y19, Y17, Y15, Y13, Y11, YR04, YR12. Glasses - BG57, BG53, B000, B0000. Ground - W5, W3, W2, W1, W00. Shadow - BG11, BG10.
 
This image does come with a super cute sentiment but I wanted a hello type sentiment so went with that for my card today. For more inspiration using the set, please head over to the Stamping Bella Blog. Thank you so much for visiting me today. I hope you have a great day!
End of code