9 January 2025

Altenew | January 2025 Release Blog Hop + Giveaway

Hello there, I am delighted to be joining Altenew today to celebrate the January release with a fun blog hop. The main part of the release this month is sweet/candy themed, however, I fell in love with some of the subscription products this month, so focused on those.

PLEASE NOTE: This post contains affiliate links. Please see below for my full disclosure.

CREATIVE CUTS: HOUSEPLANTS

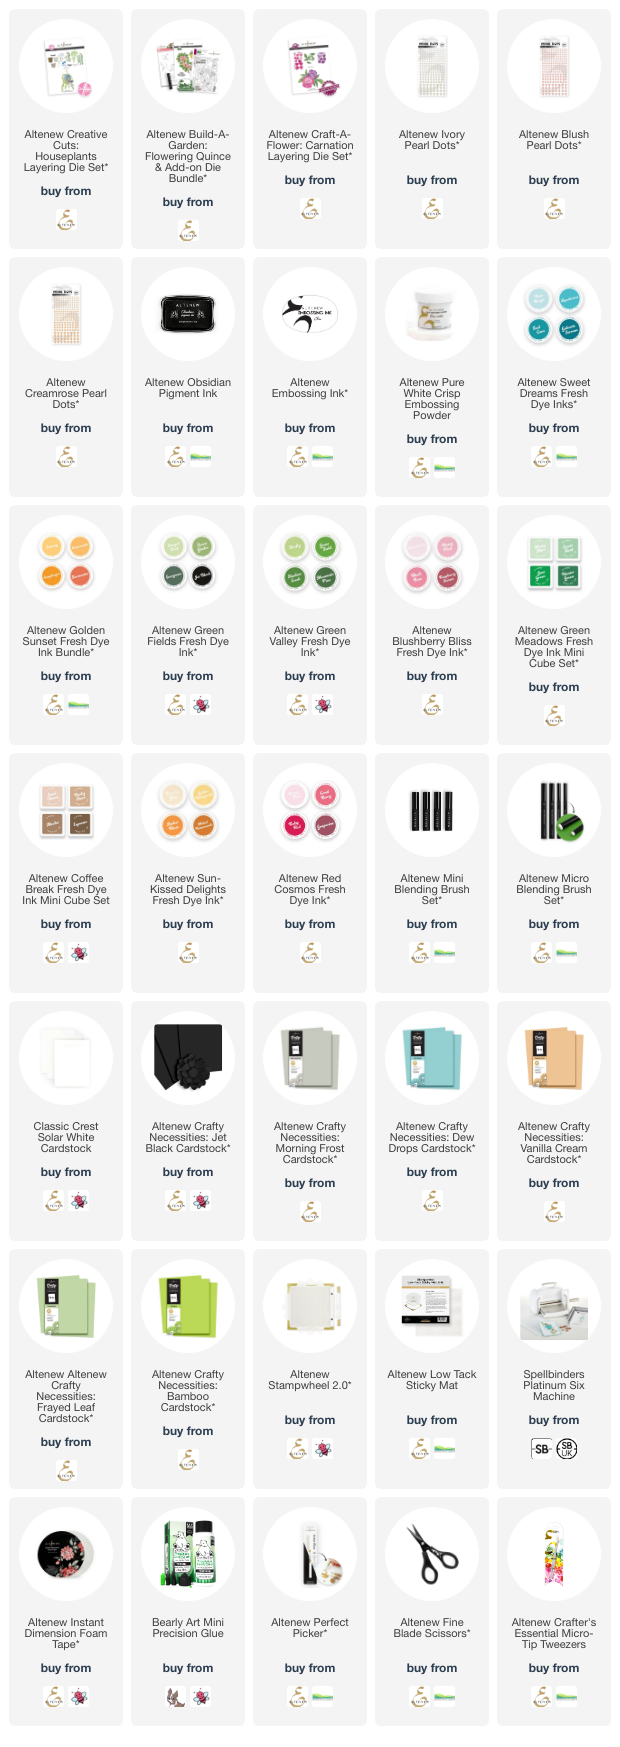
There is a fabulous new subscription launching this month - Creative Cuts. I love die cutting so absolutely could not resist this month's set! I started off by die cutting the elements from the Altenew Creative Cuts: Houseplants Layering Die Set from Altenew Crafty Necessities Cardstock. I used Morning Frost and Jet Black for the pot, Morning Frost for the hanging piece, Frayed Leaf and Bamboo for the leaves, Dew Drops for the flower petals, and Vanilla Cream for the flower centres. 

I placed the die cuts on my Sticky Mat and added ink blending on top with inks and brushes. I used Altenew Jet Black Fresh Dye Ink for the pot, Altenew Green Valley Fresh Dye Inks for the Bamboo Cardstock, Altenew Green Fields Fresh Dye Inks for the Frayed Leaf Cardstock, Altenew Dew Drops Fresh Dye Inks for the flower petals and Altenew Golden Sunset Fresh Dye Inks for the flower centres. 

I assembled the pot first and adhered it to to a white US A2 sized white card base, followed by the hanging piece. I then adhered the leaves on top, followed by the flowers. I stamped a sentiment from Altenew Build-A-Garden: Flowering Quince onto Altenew Crafty Necessities Jet Black Cardstock using Altenew Embossing Ink. I applied Altenew Pure White Crisp Embossing Powder and heat set. It was cut into a strip and adhered to the card with foam tape. To finish, I embellished with new Altenew Ivory Pearl Dots (love these!). 

BUILD-A-GARDEN: FLOWERING QUINCE

My second card uses the new Altenew Build-A-Garden: Flowering Quince & Add-on Die Bundle. I started off by stamping the larger floral image from the set onto white cardstock using Altenew Obsidian Pigment Ink and the Stampwheel 2.0. Once the ink was dry, I placed the coordinating stencils on top of the image, one by one, to colour it in using ink blending. 

I used Altenew Blushberry Bliss Fresh Dye Inks for the flower petals, Altenew Golden Sunset Fresh Dye Inks for the flower centres, Altenew Green Meadows Fresh Dye Inks for the leaves and Altenew Coffee Break Fresh Dye Inks for the stems. 

It was die cut out using the coordinating die and adhered onto a US A2 sized white card base with Altenew Instant Dimension Foam Tape. The excess was cut off the dies using scissors. I stamped a sentiment from the set and die cut it out using the coordinating die. I also cut another two layers of the die and adhered them behind the stamped one for added dimension. To finish, I embellished with new Altenew Blush Pearl Dots

CRAFT-A-FLOWER: CARNATION

My last card for today uses the new Altenew Craft-A-Flower: Carnation Layering Die Set. I die cut the flowers and leaves from white cardstock and placed them on my Sticky Mat to add ink bending to them using inks and Altenew Mini Blending Brushes

I used Altenew Sunkissed Delights Fresh Dye Inks for the petals, adding in a little Frosty Pink from the Altenew Red Cosmos Fresh Dye Ink Collection for some added pink tone. I used Altenew Green Valley Fresh Dye Inks for the leaves. I left them aside to dry for a little while and then adhered the layers of the flowers together using liquid glue.

I adhered the leaves to a US A2 sized white card base first with liquid glue, followed by the flowers with Altenew Instant Dimension Foam Tape. The sentiment, from Altenew Build-A-Garden: Flowering Quince & Add-on Die Bundle, was stamped using Altenew Obsidian Pigment Ink, die cut out and adhered to the card with more foam tape. To finish, I embellished with new Altenew Creamrose Pearl Dots

BLOG HOP:

As mentioned, this post is part of a fun, inspirational blog hop. Please click the links below for the other participants in the hop. 

You are invited to the Inlinkz link party!

Click here to enter

GIVEAWAY:

$300 in total prizes! To celebrate this release, Altenew is giving away a $100 gift certificate to 1 lucky winner and a $50 gift certificate to 4 winners! Please leave a comment on the Altenew Card Blog and/or each designer’s blog post on the blog hop list below by January 15th 2025 for a chance to win. Altenew will draw 5 random winners from the comments left on each stop of this blog hop and announce the winners on the Altenew Winners Page on January 17th 2025. The winner of the $100 gift certificate will be chosen from comments left on the Altenew blog. 

SUPPLIES:


Here are the links to what I have used on the projects. Affiliate links are used on some products. This means that if you make a purchase after clicking on my link, I receive a small commission with no extra cost to you. I truly appreciate your support when using these links. Please click on the logo below the product to shop at your favourite store. All products were personally purchased except those from Clearly Besotted, Hero Arts or those marked with an asterisk (*) which were kindly sent to me to use. You can read my full disclosure here.

Thank you so much for stopping by today, I really do appreciate it. I hope you have a wonderful time on the rest of the hop and a great rest of the day too! Take care! 

6 January 2025

Spellbinders | Jack of All Trades

Hello there and happy New Year to you! I hope this year is a wonderful one for you filled with lots of love, happiness, creativity and crafty fun! 

PLEASE NOTE: This post contains affiliate links. Please see below for my full disclosure.


I'm here today to share that I am delighted to be over on the Spellbinders Blog sharing three cards using the new Jack of All Trades Collection by Jaycee Gasper. This is such a fun collection based on playing cards and releases on the 10th January 2025. 


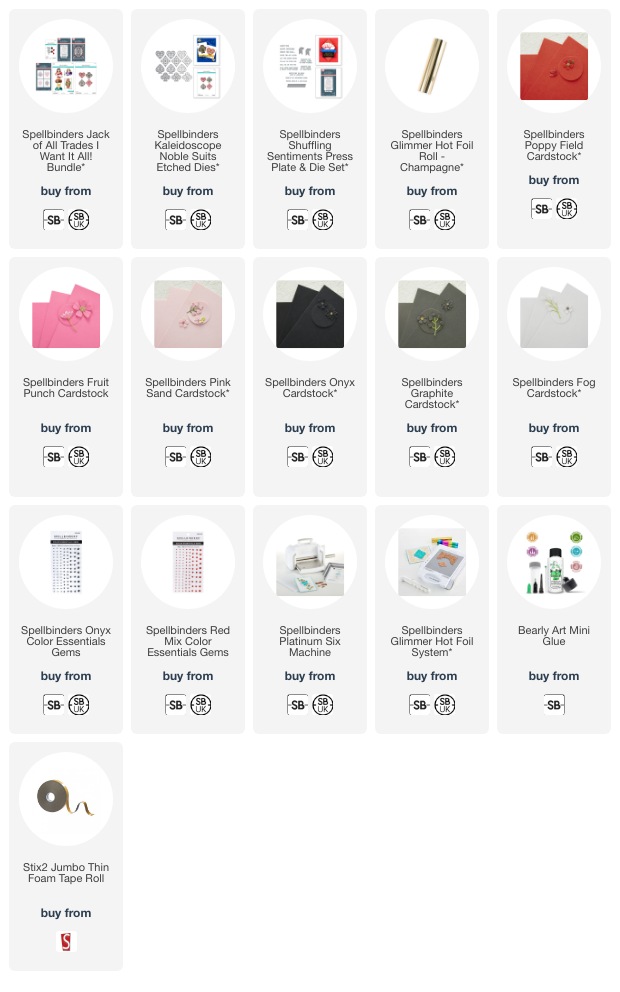
The peek above shows my card using the Spellbinders Kaleidoscope Nobel Suits Etched Dies. These are great as there are three layers for each suit that you can layer up to get a kaleidoscope look. I used red and pink cardstock for the club and heart, and black and grey for the spade and diamond. The sentiment is from the Spellbinders Shuffling Sentiments Press Plate & Die Set, which I hot foiled using Champagne Foil. 

SUPPLIES:


Here are the links to what I have used on the project. Affiliate links are used on some products. This means that if you make a purchase after clicking on my link, I receive a small commission with no extra cost to you. I truly appreciate your support when using these links. Please click on the logo below the product to shop at your favourite store. All products were personally purchased except those from Clearly Besotted, Hero Arts or those marked with an asterisk (*) which were kindly sent to me to use. You can read my full disclosure here.


For more details on how I made the card, as well as the others shared, please head over to the Spellbinders Blog HERE. Thank you so much for stopping by today, I really do appreciate it! I hope you have a great day!

25 December 2024

Spellbinders | Santa, Reindeer & Penguin

Hello there and Merry Christmas to you! Today I have one last Christmas card to share using the Spellbinders Cozy Toes October 2024 Large Die of the Month Club Kit. This was definitely a favourite of mine and you can see my other cards using it HERE and HERE. Today I am using it again but with all the characters, apart from the bunny. The bunny is super cute but I needed space for the sentiment!

PLEASE NOTE: This post contains affiliate links. Please see below for my full disclosure.


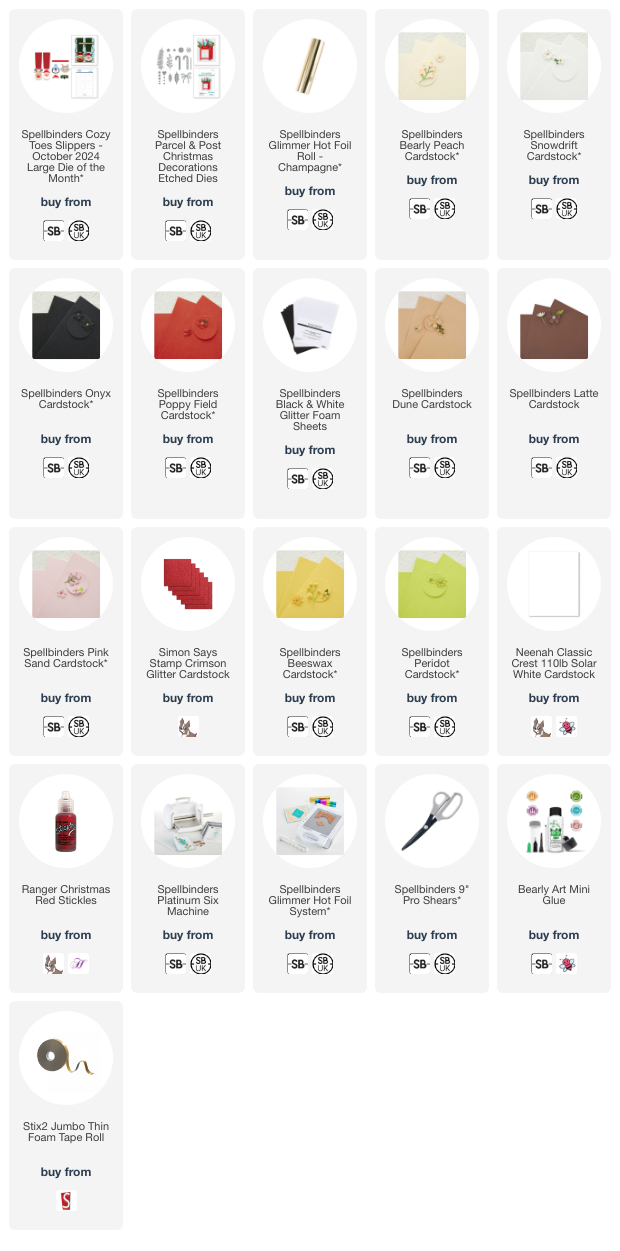
I started off my card by die cutting Santa from the Spellbinders Cozy Toes October 2024 Large Die of the Month Club Kit from Spellbinders Bearly Peach, Onyx, Snowdrift and Poppy Field Cardstock. I used Spellbinders White Glitter Foam Sheet for the furry bits on his hat. The pieces were adhered togther using Bearly Art Glue


For the reindeer, I used Spellbinders Dune, Latte, Pink Sand and Onyx Cardstock. For the nose, I used Simon Says Stamp Crimson Glitter Cardstock. For the Penguin, I used Spellbinders Onyx, Beeswax, Snowdrift and Poppy Field Cardstock. I cut the fluffy bits on the earmuffs from Spellbinders White Glitter Foam Sheet. They were also assembled and adhered using Bearly Art Glue. 


I then cut the holly (Spellbinders Peridot Cardstock) and berries (Spellbinders Poppy Field Cardstock)  from Spellbinders Parcel & Post Christmas Decorations Etched Dies, adhered them together and then adhered them to penguin and Santa. The characters were then adhered to a US A2 sized white card base with foam tape. 


I took the Happy Christmas sentiment from the Spellbinders Glitter Wishes Glimmer Hot Foil Plate & Die Set (sorry, this set is sadly now retired) and hot foiled it onto white cardstock using Spellbinders Champagne Foil and the Glimmer Hot Foil System. It was cut into two strips and adhered to the card using foam tape. To finish, I added Christmas Red Stickles to the holly berries. 

SUPPLIES:


Here are the links to what I have used on the project. Affiliate links are used on some products. This means that if you make a purchase after clicking on my link, I receive a small commission with no extra cost to you. I truly appreciate your support when using these links. Please click on the logo below the product to shop at your favourite store. All products were personally purchased except those from Clearly Besotted, Hero Arts or those marked with an asterisk (*) which were kindly sent to me to use. You can read my full disclosure here.


Whilst these characters were designed to be used as slippers, I love that you can use them on their own too! Thank you so much for stopping by, I really do appreciate it. Wishing you a very Merry Christmas, if you celebrate. If you don't, or if you celebrate another holiday, I hope you have a wonderful few days filled with lots of love. Take care! 

24 December 2024

Happy Christmas Poinsettia

Hello there, I still have two Christmas cards to share with you, so I hope you are not too bored of them yet! This one uses the Concord & 9th Festive Blooms Dies again. If you didn't see my previous cards using the set, you can see them HERE. I wanted to use the set again, but this time, without the base plate. 

PLEASE NOTE: This post contains affiliate links. Please see below for my full disclosure.


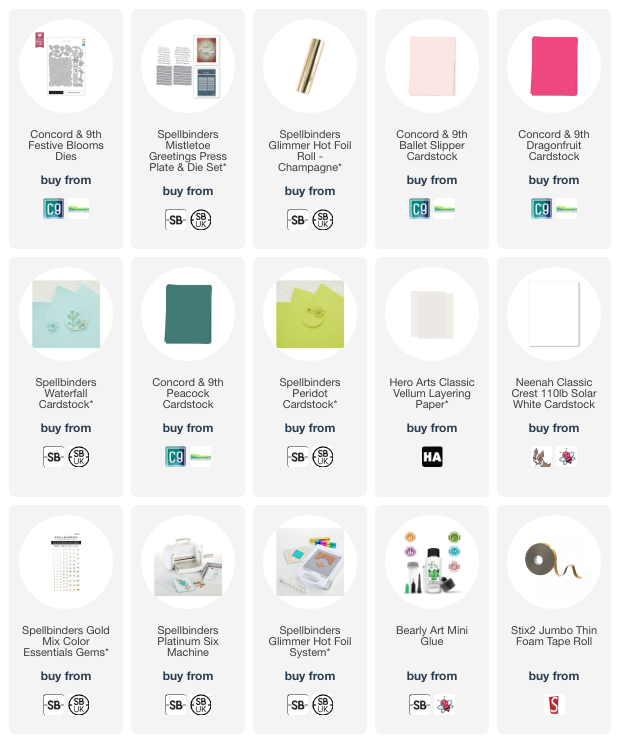
I started off by die cutting the flowers and foliage from the Concord & 9th Festive Blooms Die Set from cardstock. I cut the poinsettia from Concord & 9th Ballet Slipper Cardstock, the other flower from white cardstock, as well as Spellbinders Chamomile Cardstock (retired) for the flower centre.


I adhered the foliage first onto a US A2 sized white card base using liquid glue, the flower pieces were adhered together first and then adhered onto the card base using thin foam tape. 


I hot foiled the sentiment from the Spellbinders Mistletoe Greetings Press Plate & Die Set onto white cardstock using Spellbinders Champagne Foil and the Spellbinders Glimmer Hot Foil System. It was die cut out using the coordinating die and adhered to the card using more foam tape. To finish, I embellished with Spellbinders Gold Color Essentials Gems

SUPPLIES:


Here are the links to what I have used on the project. Affiliate links are used on some products. This means that if you make a purchase after clicking on my link, I receive a small commission with no extra cost to you. I truly appreciate your support when using these links. Please click on the logo below the product to shop at your favourite store. All products were personally purchased except those from Clearly Besotted, Hero Arts or those marked with an asterisk (*) which were kindly sent to me to use. You can read my full disclosure here.


Whilst not traditional, I really love the colour combo on this card! Apart from maybe the poinsettia, I do think you could use this set all year round. Thank you so much for stopping by today, I really do appreciate it. I hope you have a great day. I am off to wrap up some presents! 

23 December 2024

Spellbinders | Hydrangea

Hello there, today I have a card to share using the Spellbinders Hydrangea Dies from The Nature's Botanical Garden collection, which was released earlier this year. If you are not familiar with the dies by Susan Tierney-Cockburn, they are made to be realistic and she shares videos on how to shape the flowers to get that look. 

PLEASE NOTE: This post contains affiliate links. Please see below for my full disclosure.


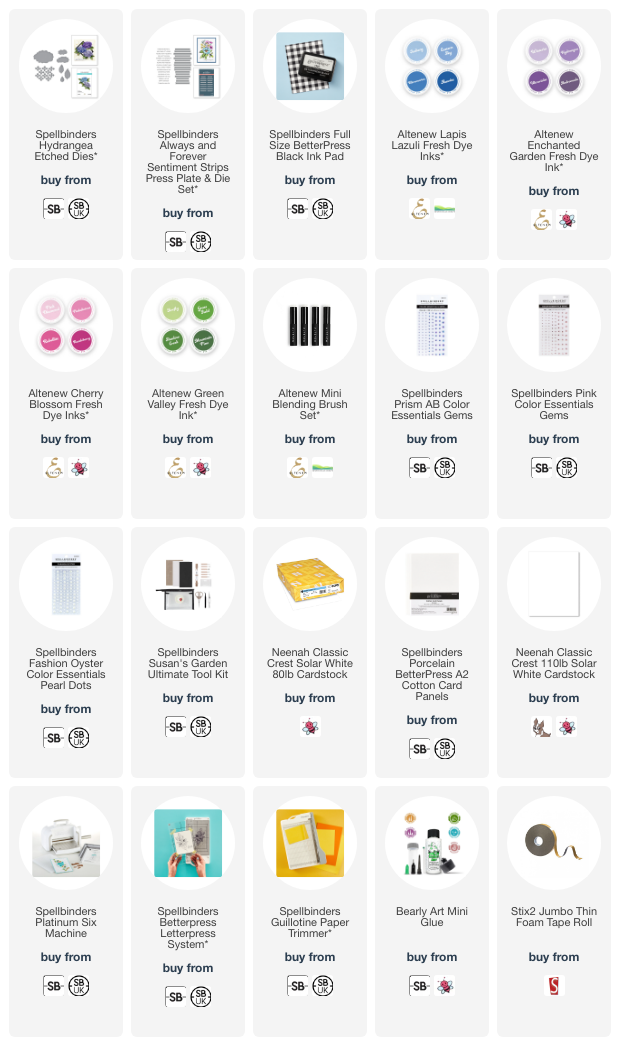
I started off my card by die cutting the Spellbinders Hydrangea Etched Dies from 80lb white cardstock (I usually always use 110lb cardstock for die cuts but with these, having a thinner cardstock is slightly easier with the shaping). I added ink blending on top using Altenew Fresh Dye Inks. I used Eastern Sky & Hydrangea inks for one set of petals and Pinkalicous & Razzleberry for the other set. I used Altenew Green Valley Fresh Dye Inks for the leaves and base layers. 


I then shaped the petals using Susan's Garden Ultimate Tool Kit, following her video for the process. I adhered the base layers and leaves of the hydrangeas to a US A2 sized card base first. I then added the hydrangea petals on top with Bearly Art Glue. I added a teeny gem to each of the flowers - Prism AB Gems for the blue/purple ones, and Pink Gems for the pink ones. 


I pressed a sentiment from the Spellbinders Always & Forever Sentiment Strips Press Plate & Die Set onto Spellbinders Porcelain BetterPress Cotton Card using Spellbinders BetterPress Black Ink and the Spellbinders Betterpress Letterpress System. It was cut into a strip and the edges cut down using a guillotine. It was adhered to the card with thin foam tape. To finish, I embellished with Spellbinders Fashion Oyster Color Essentials Pearls

SUPPLIES:


Here are the links to what I have used on the project. Affiliate links are used on some products. This means that if you make a purchase after clicking on my link, I receive a small commission with no extra cost to you. I truly appreciate your support when using these links. Please click on the logo below the product to shop at your favourite store. All products were personally purchased except those from Clearly Besotted, Hero Arts or those marked with an asterisk (*) which were kindly sent to me to use. You can read my full disclosure here.


I absolutely love how these flowers look and hydrangeas are one of my favourite flowers. The only downside to these dies is that they are very dimensional, so these are definitely had-deliver type cards! Thank you so much for stopping by today, I hope you have a wonderful Christmas Eve Eve! 

22 December 2024

Spellbinders | Penguin Love

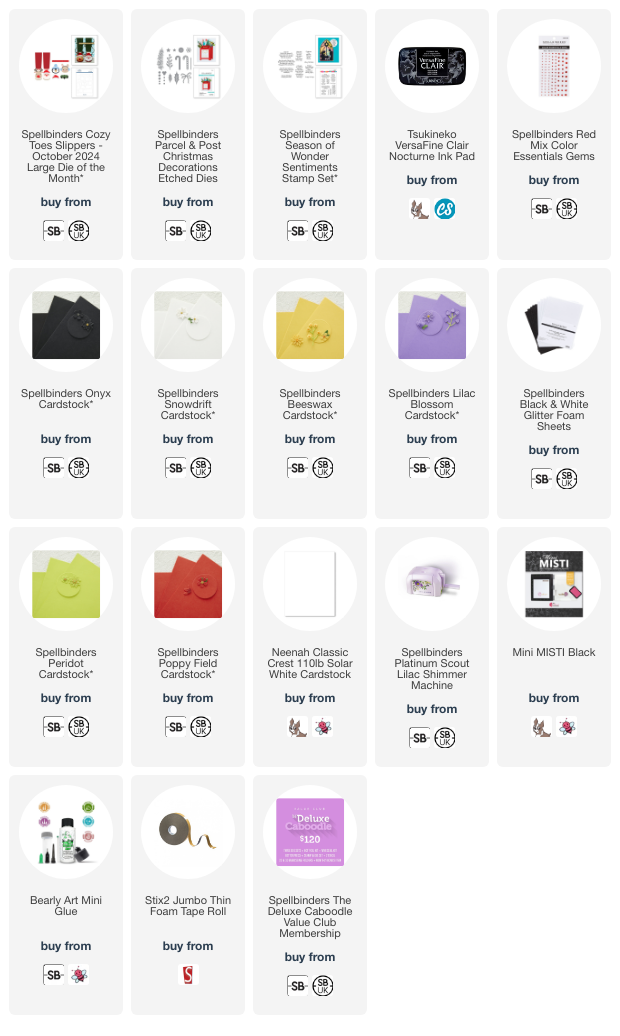
Hello there, today I have a card to share using the penguin from the Spellbinders Cozy Toes set, which was the October 2024 Large Die of the Month Club Kit, but can now be purchased without a subscription. You can see my first card using the set HERE but I only got to use the reindeer on that card. I thought not only is the penguin too cute not to use, but that my friend would love him (hopefully!) on her Christmas card! 

PLEASE NOTE: This post contains affiliate links. Please see below for my full disclosure.


I started off by die cutting the penguin from the Spellbinders Cozy Toes Etched Dies using Spellbinders Cardstock. I used Onyx for his head, Snowdrift for his face, Beeswax for his beak, Lilac Blossom for the main part of his hat, and White Glitter Foam for the fluffy parts of the hat. I assembled and adhered the penguin using Bearly Art Glue. 


I wanted to add some holly to his hat, so I die cut the holly and berries from the Spellbinders Parcel & Post Christmas Decorations Etched Dies. I cut the holly from Peridot Cardstock and the berries from Poppy Filed Cardstock and adhered them to his hat. 


I created a mini slimline card base (3.25" x 6") from white cardstock and then stamped the sentiment from the Spellbinders Season of Wonder Sentiments Stamp Set on top using Versafine Clair Nocturne Ink. The penguin was then adhered above with thin foam tape. To finish, I added Spellbinders Red Color Essentials Gems to the berries. 

FREE GIFT

Before I go, I wanted to mention that if you sign up for the Spellbinders Deluxe Caboodle Value Club Membership this month (that is all the clubs), you get a free bonus gift of a tote bag:


Spellbinders kindly sent me one of these and I wanted to say how fabulous it is! Not only do I love the purple flowers on the front (of course!), but the bag itself is great quality and you can fit a lot in it! I love using tote bags when I am out shopping. 

SUPPLIES:


Here are the links to what I have used on the project. Affiliate links are used on some products. This means that if you make a purchase after clicking on my link, I receive a small commission with no extra cost to you. I truly appreciate your support when using these links. Please click on the logo below the product to shop at your favourite store. All products were personally purchased except those from Clearly Besotted, Hero Arts or those marked with an asterisk (*) which were kindly sent to me to use. You can read my full disclosure here.


Thank you so much for stopping by today, I really do appreciate it. I hope you have a great rest of the weekend! Take care! 

21 December 2024

Mr Frostie

Hello there, if you have followed what I do here for a while, you will know that I am not keen on mass-producing cards. I think it is a great idea but it is just not something that I particularly like doing. Having said that, I do find it very helpful at Christmas time when I want to send a lot of cards out and don't have the time to make everyone an individual one (although I wish I did!). Here is the card that I made a few of this year:

PLEASE NOTE: This post contains affiliate links. Please see below for my full disclosure.


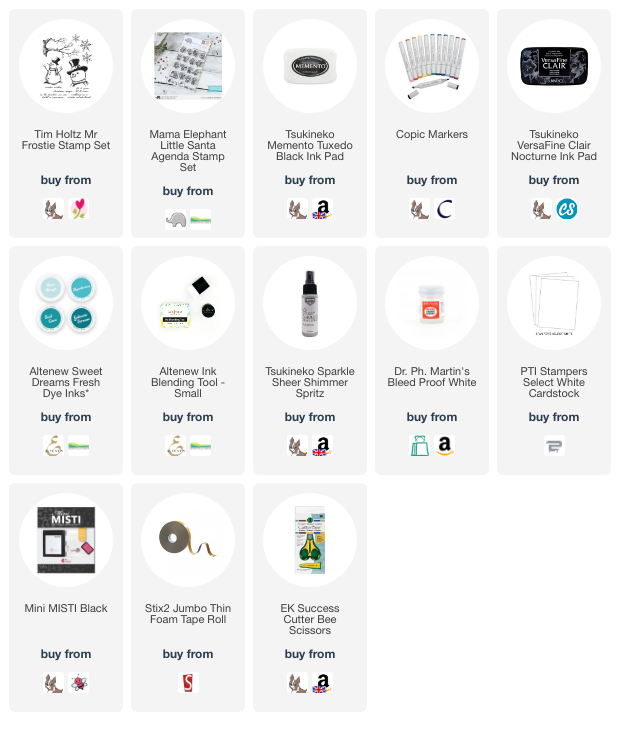
I started off my stamping the smaller of the two snowmen from the Tim Holtz Mr Frostie Stamp Set onto white cardstock using Memento Tuxedo Black Ink. They were coloured using Copic Markers and then fussy cut it out using scissors. 


I created mini 3.5" x 3.5" card bases from white cardstock and then stamped the sentiment from the Mama Elephant Little Santa Agenda Stamp Set on top. Once dry, I added ink blending on the right hand side using Altenew Sweet Dream Fresh Dye Inks (Dew Drops & Aqualicious). 


I splattered the cards using Dr. Ph. Martin's Bleed Proof White Paint (mixed with a little water), as well as Tsukineko Sparkle Sheer Shimmer Spritz and set them aside to dry. Once dry, the snowmen were adhered on top using thin foam tape. 

SUPPLIES:


Here are the links to what I have used on the project. Affiliate links are used on some products. This means that if you make a purchase after clicking on my link, I receive a small commission with no extra cost to you. I truly appreciate your support when using these links. Please click on the logo below the product to shop at your favourite store. All products were personally purchased except those from Clearly Besotted, Hero Arts or those marked with an asterisk (*) which were kindly sent to me to use. You can read my full disclosure here.


COPIC MARKERS: Snowman - BG13, BG11, BG10, 0. Nose - YR18, YR16, Y17. Hat - V09, V17, V15, V01/YR24, YR23, YR31. Scarf - V09, V17, V15, V01.

Sadly, you can't see the shimmer in the photos, but in real-life, it really does add something to the cards! Thank you so much for stopping by today, I hope you have a wonderful day and a great weekend! 

20 December 2024

Spellbinders | Floral Garden

Hello there, I hope you are well. Today I have a card to share using the Spellbinders Floral Garden stamp from the Stampendous Beautiful Collection which was released earlier in the year. I thought this stamp was a great opportunity to get my watercolour pens out and have a play!

PLEASE NOTE: This post contains affiliate links. Please see below for my full disclosure.


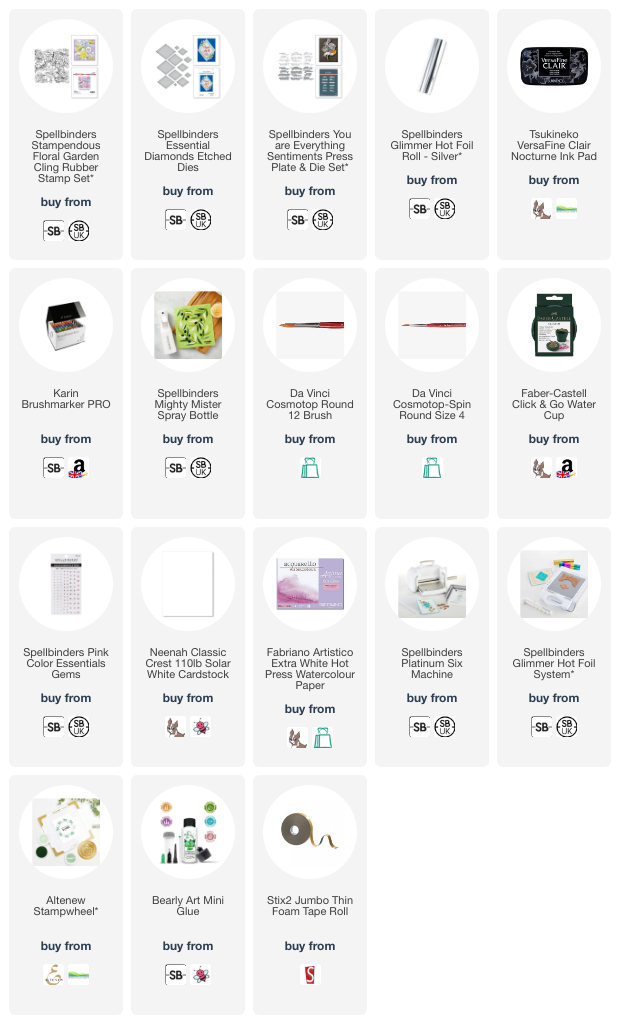
I started off by stamping the Spellbinders Stampendous Floral Garden Cling Rubber Stamp onto Fabriano Artistico Extra White Hot Press Watercolour Paper using Versafine Clair Nocturne Ink. I set it aside to dry before spritzing it with water using the Spellbinders Mighty Mister

I mixed Karin Brushmarker Pro pens with water and dabbed the colour onto the panel to get a light wash. Using the pens directly to the paper, I then added the colour where I wanted it to be the darkest and then blended it out with water and a brush. Since the image is a sketchy image, I kept my water colouring loose. I used four colours - Cerise, Pale Violet, Apple and Turquoise. 

Once the panel was dry, I die cut it using one of the Spellbinders Essentials Diamonds Etched Dies and adhered it to a US A2 sized white card base with thin foam tape. I hot foiled the Spellbinders You Are Everything Sentiments Press Plate & Die Set onto white cardstock using Spellbinders Silver Foil and the Glimmer Hot Foil System. It was die cut out and adhered to the card. To finish, I embellished with Spellbinders Pink Color Essentials Gems

SUPPLIES:


Here are the links to what I have used on the project. Affiliate links are used on some products. This means that if you make a purchase after clicking on my link, I receive a small commission with no extra cost to you. I truly appreciate your support when using these links. Please click on the logo below the product to shop at your favourite store. All products were personally purchased except those from Clearly Besotted, Hero Arts or those marked with an asterisk (*) which were kindly sent to me to use. You can read my full disclosure here.


It was nice to have a break from making Christmas cards! Every year I say that I am going to make them earlier and every year I fail, sadly, so I still have a few more to share here. Thank you so much for stopping by today, I really do appreciate it. I hope you have a wonderful day! 

19 December 2024

Clearly Besotted | Let's Prance

Hello there, I absolutely love the reindeer in the Clearly Besotted Let's Prance Stamp Set and thought they would be great for an easy Christmas card idea that could be mass produced. 

PLEASE NOTE: This post contains affiliate links. Please see below for my full disclosure.


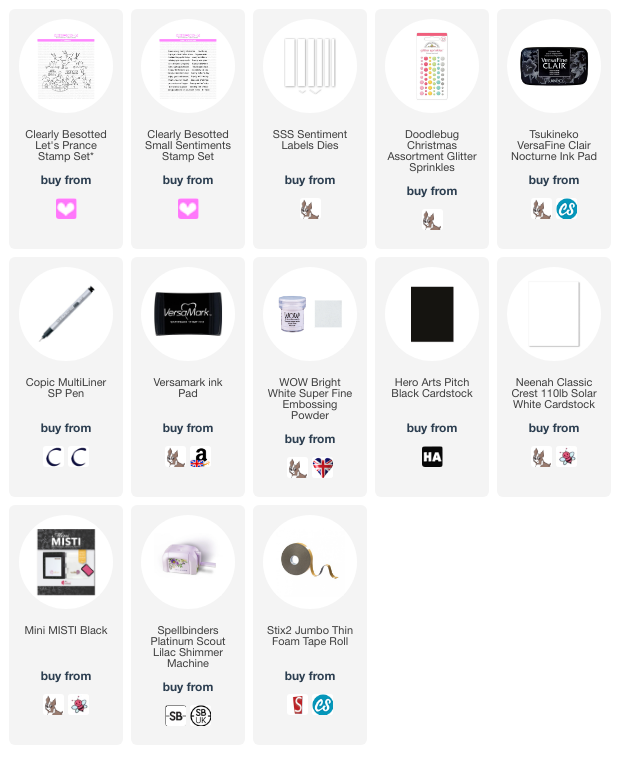
I started off my card by taking a panel of white cardstock and stamping the three reindeer from the Clearly Besotted Let's Prance Stamp Set on top using Versafine Clair Nocturne Ink. Whilst I love colouring these reindeer, I thought it would like look nice to keep them just black and white and modern looking. 


I grabbed a Copic Black Multiliner and coloured the hooves and scarves of the reindeer, plus the noses on two as well. I then cut the panel down a little (to 3.75" tall) and adhered it to a 4" x 5.5" black card base with thin foam tape. 


I stamped a sentiment from the now retired Clearly Besotted A Little Sentimental Stamp Set (but the newer Small Sentiments set has the same font) onto more black cardstock using Versamark Ink. I applied white embossing powder and heat set. It was cut into a strip and adhered to the card using more thin foam tape. To finish, I adhered a Doodlebug red glitter Sprinkle to the reindeer's nose in the middle.  

SUPPLIES:


Here are the links to what I have used on the project. Affiliate links are used on some products. This means that if you make a purchase after clicking on my link, I receive a small commission with no extra cost to you. I truly appreciate your support when using these links. Please click on the logo below the product to shop at your favourite store. All products were personally purchased except those from Clearly Besotted, Hero Arts or those marked with an asterisk (*) which were kindly sent to me to use. You can read my full disclosure here.


I did think about adding the panel onto a red card base to make it look a bit more Christmassy, but I love black card bases, so went with that instead! Thank you so much for stopping by today, I really do appreciate it. I hope you have a wonderful day! 

17 December 2024

Festive Blooms

Hello there, today I have a card to share using the Concord & 9th Festive Blooms die. I was so eager to get my hands on this die back when it was released, even stalking the Seven Hills Crafts website daily, but then once I got it, it just sat in my Rashult for months not being used! Is buying craft supplies and actually using them two completely different things? Haha! Thankfully, last weekend, I finally got a chance to play!

PLEASE NOTE: This post contains affiliate links. Please see below for my full disclosure.


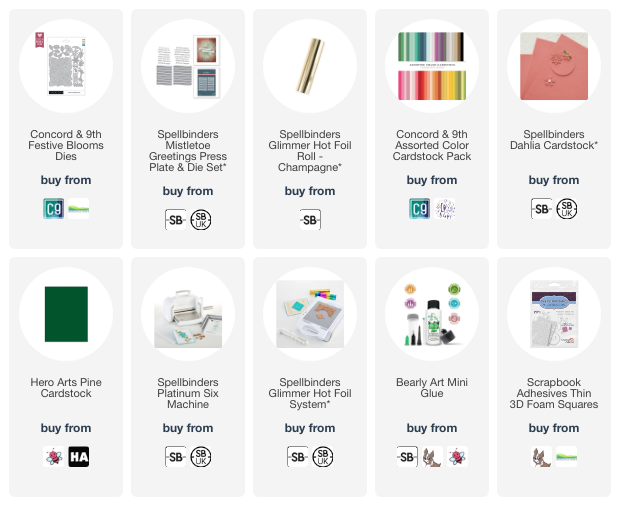
I started off by die cutting all of the flowers and foliage from the Concord & 9th Festive Blooms Die Set from various shades of Concord & 9th Cardstock, as well as the lighter shade on the poinsettias being Spellbinders Dahlia Cardstock and the flower centres being Spellbinders Chamomile Cardstock (sadly now discontinued). 

I assembled the flowers using Bearly Art Glue and set them aside while I worked on the card base. I folded a panel of Hero Arts Pine Cardstock in half and then placed the large base layer die on top, overlapping the die slightly with the folded edge of the card base to keep it intact. It was then run through my die cutting machine. 

To hide the folded edge, I die cut another of the base layer die from the same Pine Cardstock and adhered it on top. I then adhered the foliage first, followed by the berries and then the flowers. I adhered almost everything with Bearly Art Glue. The poinsettias were adhered with thin foam squares. 

I hot foiled the Spellbinders Mistletoe Greetings Press Plate onto white cardstock using Spellbinders Champagne Foil and the Spellbinders Glimmer Hot Foil System. It was cut out using the coordinating die and adhered to the card with more thin foam tape. 

SUPPLIES:


Here are the links to what I have used on the project. Affiliate links are used on some products. This means that if you make a purchase after clicking on my link, I receive a small commission with no extra cost to you. I truly appreciate your support when using these links. Please click on the logo below the product to shop at your favourite store. All products were personally purchased except those from Clearly Besotted, Hero Arts or those marked with an asterisk (*) which were kindly sent to me to use. You can read my full disclosure here.


I really wanted to add gems to the centres of the poinsettias but I needed to mail/post these cards out and so wanted to keep them as flat as possible! Thank you so much for stopping by today, I really do appreciate it. I hope you have a wonderful day! 
End of code