6 November 2023

Altenew | November 2023 Release Blog Hop + Giveaway

Hello there, I am delighted to be joining Altenew today to celebrate the November 2023 release, which is out now! There are lots of stamps, dies, embossing folders, Press Plates and organisational labels. 

I have a lot to share today, so I hope you will grab a drink and a snack and enjoy the inspiration! 

PLEASE NOTE: This post contains affiliate links. Please see below for my full disclosure.


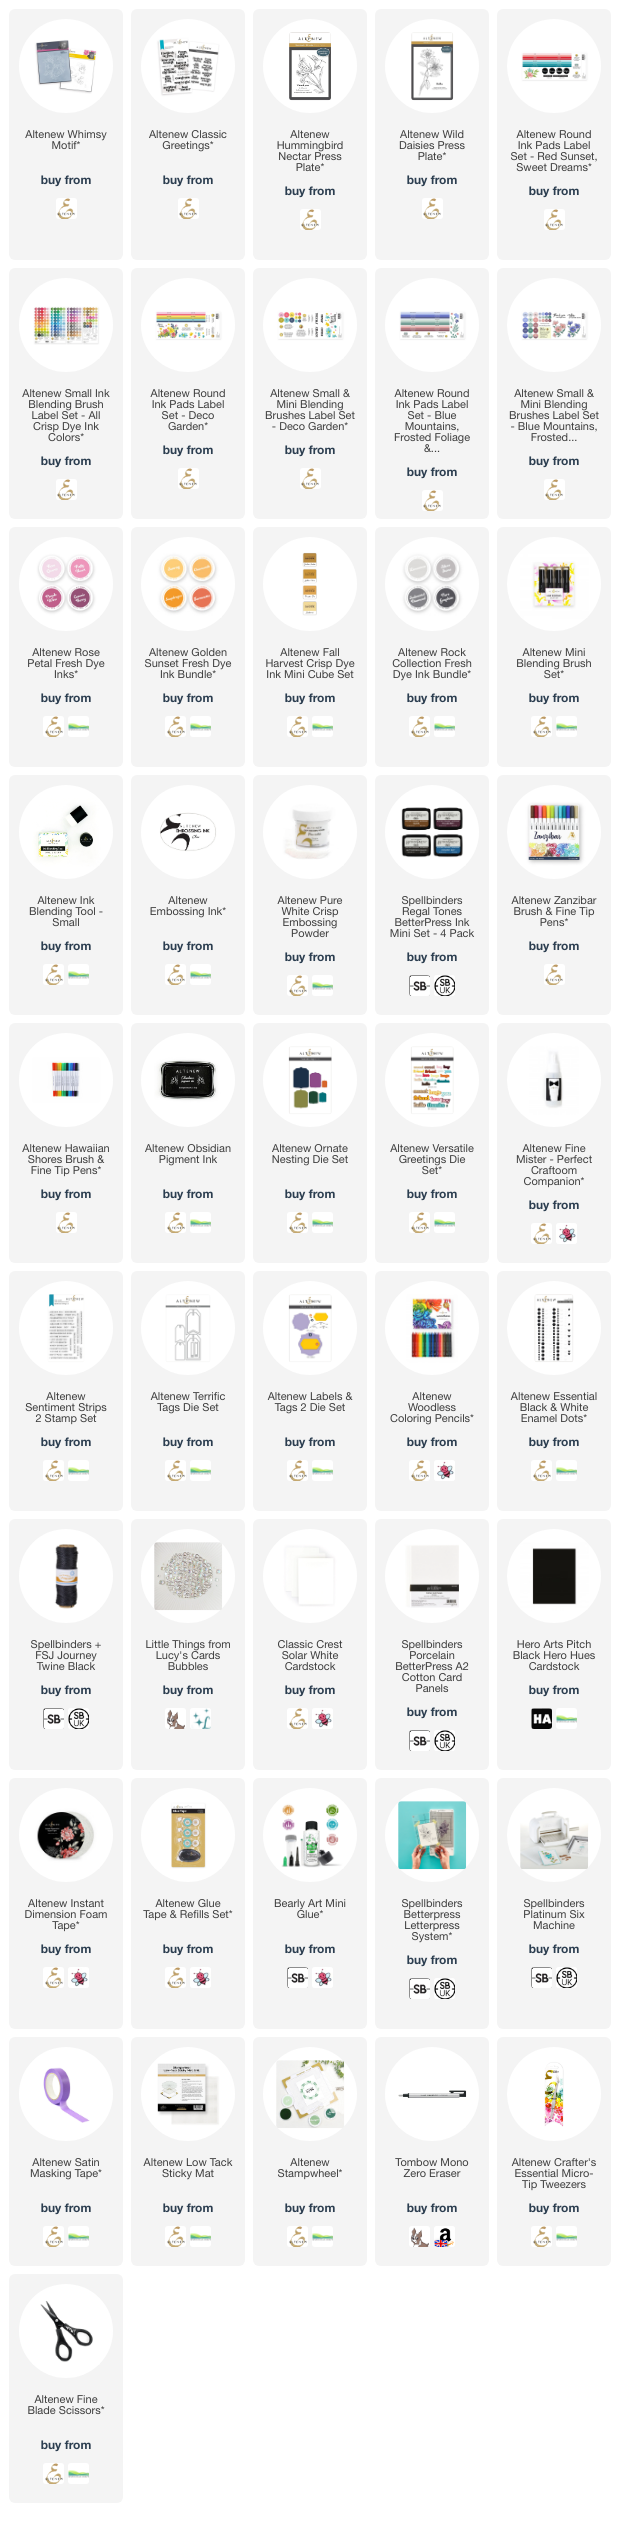
I started off my first card by taking a panel of white cardstock and placing it inside the Altenew Whimsy Motif 3D Embossing Folder and running it through my die cutting machine. I placed it on my Sticky Mat and then placed the Altenew Whimsy Motif Simple Coloring Stencil Set on top (one by one).


I added ink blending with Altenew Mini Ink Blending Tools to colour the flowers and leaves. I used Altenew Rose Petal Fresh Dye Inks for the flowers, Sunray (Altenew Golden Sunset Fresh Dye Inks) and Pumpkin (Altenew Fall Harvest Crisp Dye Inks) for the stamens and Altenew Rock Collection Fresh Dye Inks (Limestone and Silver Stone) for the leaves. 


The panel was adhered to a US A2 sized white card base with foam tape. I then stamped a sentiment from the Altenew Classic Greetings Stamp Set onto black cardstock using Altenew Embossing Ink. I applied Altenew Pure White Crisp Embossing Powder and heat set. It was cut into a strip and adhered to the card with more foam tape. To finish off, I added a few Bubbles embellishments.


My next few projects use new Press Plates that work with the Spellbinders Betterpress Letterpress System. For my first card, I pressed the Altenew Hummingbird Nectar Press Plate using the cardstock and ink that come with the Betterpress System.


Using Altenew Hawaiian Shores and Zanzibar Brush & Fine Tips Pens, I watercoloured the hummingbird and flowers. I used Teal Cave, Ocean Waves, Ultramarine and Nimbus for the hummingbird and Ultraviolet, Ultramarine, Maple Yellow, Firefly and Teal Cave for the flowers and leaves.


I fussy cut the images out using Altenew Fine Blade Scissors and adhered them onto a US A2 sized white card base with Altenew Instant Dimension Foam Tape. I stamped a sentiment from the Altenew Classic Greetings Stamp Set onto white cardstock using Altenew Obsidian Pigment Ink. I die cut it out using the Altenew Classic Greetings Die Set. It was adhered to the card and to finish, I added a few Bubbles embellishments.


For my next card, I pressed the Altenew Wild Daisies Press Plate using the same cardstock and ink. I die cut the panel using an Altenew Ornate Nesting Die and then added ink blending to the panel with Altenew Golden Sunset Fresh Dye Inks and an Altenew Small Ink Blending Tool.


I splattered on some water and once dry, adhered it to a US A2 sized white card base with Altenew Instant Dimension Foam Tape. I die cut the 'hugs' word from the Altenew Versatile Greetings Die Set three times from black cardstock. I adhered them together one on top of another and then onto the card. To finish off, I added a few Bubbles embellishments.  


I have also since made another project using the Altenew Wild Daisies Press Plate (shown on the Altenew blog on Saturday), so thought I would share that here too. I pressed the plate using the same cardstock and ink that comes with the Spellbinders Betterpress Letterpress System. 


I then die cut the panel using an Altenew Terrific Tags Die. I coloured the image using Altenew Woodless Coloring Pencils. I used Midnight Violet, Rubellite and Sapphire for the petals, Maple Yellow, Ochre and Fresh Lemon for the centres and Grass Field, Limeade and Shadow Creek for the leaves and stems. 


I cut the hole reinforcer piece from the Altenew Labels & Tags 2 Die Set from black cardstock and adhered it to the tag. I die cut another tag and adhered that to the back (for added stability and also to have somewhere clean to write a personal message). I stamped a sentiment from the Altenew Sentiment Strips 2 Stamp Set onto black cardstock using Altenew Embossing Ink. 


I applied Altenew Pure White Crisp Embossing Powder and heat set. It was cut into a strip and adhered to the card tag using Altenew Instant Dimension Foam Tape. To finish off, I added a few Essential Black & White Enamel Dots (just the black ones), followed by twine through the top of the tag and tied in bow. 

VIDEO:

Here is the video showing how I made the tag:


If you are viewing this post via email subscription, you can watch the video HERE on YouTube. 

Before I go, I have some organisational products to share with you. You may or may not know that I am a huge fan of organising craft supplies. So when I saw that Altenew was releasing new ink pad and blending tool labels, I was super excited! 


There are labels for the new round ink pads - Red Sunset & Sweet Dreams, as well as Small Ink Blending Tool Label Set (all Crisp Dye Ink colors). 


These labels are vinyl so hard wearing. They also remove easily, so if you change your mind or need to move the label for perfect placement, it is easy to do! 


There are also new round ink pad labels, as well as mini and small blending tool labels for the Deco Garden Collection.


As well as round ink pad labels and mini & small blending brush labels for Blue Mountains, Frosted Foliage & Woodland Escape Collections.

Plus lots more including mini ink cubes labels, mini blending brush labels, labels for the Amy Tangerine colours (round and mini cubes) and alcohol marker labels too! 

BLOG HOP:


This post is part of  a fun, inspirational blog hop with prizes. Please click the links/pictures below for all the participants in the hop.

You are invited to the Inlinkz link party!

Click here to enter

GIVEAWAY:

$300 in total prizes! To celebrate this release, Altenew is giving away a $100 gift certificate to 1 lucky winner and a $50 gift certificate to 4 winners! Please leave a comment on the Altenew Card Blog and/or each designer’s blog post on the blog hop list below by 12th November 2023 for a chance to win. Altenew will draw 5 random winners from the comments left on each stop of this blog hop and announce the winners on the Altenew Winners Page on 14th November 2023. *The winners of the $100 gift certificate will be chosen from comments left on the Altenew blog. 


SUPPLIES:


Here are the links to what I have used on the projects. Affiliate links are used on some products. This means that if you make a purchase after clicking on my link, I receive a small commission with no extra cost to you. I truly appreciate your support when using these links. Please click on the logo below the product to shop at your favourite store. All products were personally purchased except those from Clearly Besotted, Hero Arts or those marked with an asterisk (*) which were kindly sent to me to use. You can read my full disclosure here.


If you have made it this far, thank you so much for sticking with me, I really appreciate it. I hope you have a wonderful time on the rest of the hop. I will be back later with another post but in the mean-time, I hope you have a great day! 

5 November 2023

Hero Arts | November 2023 My Monthly Hero Countdown to Creativity

Hello there and welcome as we countdown to the release of the Hero Arts November 2023 My Monthly Hero Kit (and add-on products). We are here all weekend long sharing inspiration using both the Classic and Premium Kits before the release tomorrow, 6th November 2023. This month the release is all about holiday mail art.

PLEASE NOTE: This post contains affiliate links. Please see below for my full disclosure.


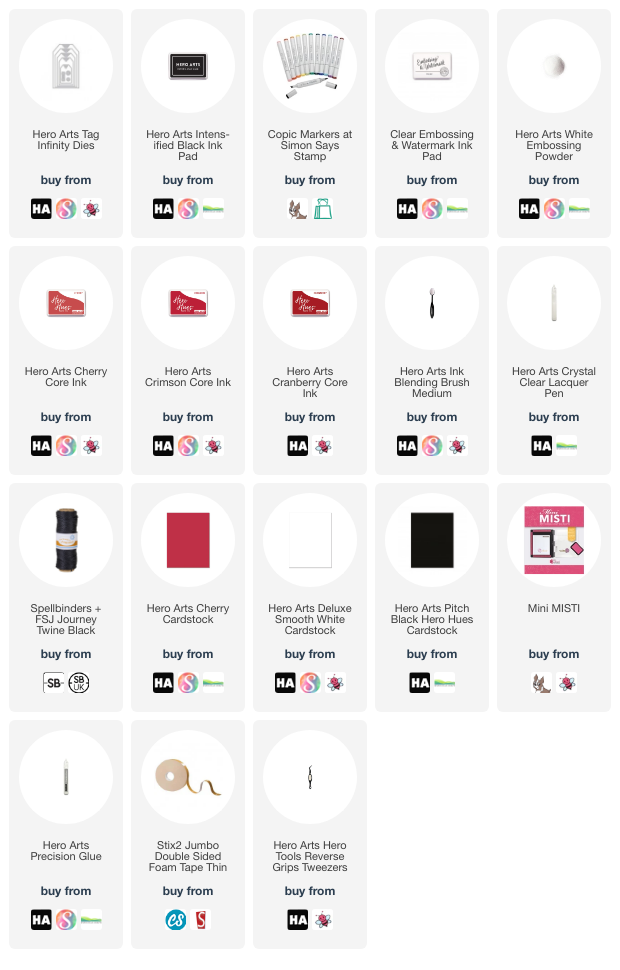
My tags today use the Hero Arts November 2023 My Monthly Hero Premium Kit. I started off by stamping the images from the Peeking Critters Clear Stamp Set onto Hero Arts Deluxe Smooth White Cardstock using Hero Arts Intens-ified Black Ink. I then coloured them using Copic Markers and fussy cut them out with scissors, leaving a small white border. 


I then took the sentiments from the set and stamped them onto Hero Arts Pitch Black Cardstock using Hero Arts Clear Embossing & Watermark Ink. I applied Hero Arts White Embossing Powder and heat set. They were cut into strips and set aside. 


I die-cut the middle size Hero Arts Tag Infinity Die from Hero Arts Cherry Cardstock three times. I then moved the die upwards and re-cut it so that the tags would be shorter in length. I added ink blending around the edges with Hero Arts Cherry, Crimson and Cranberry Core Inks. 


I die cut the hole reinforcer piece from white cardstock and adhered them on top using Hero Arts Precision Glue. I adhered the images and sentiments with thin foam tape. 


I added twine through the top of the tags and tied in a bow. To finish off, I added Hero Arts Clear Lacquer Pen to the the animals noses/beak. 

SUPPLIES:


Here are the links to what I have used on the projects. Affiliate links are used on some products. This means that if you make a purchase after clicking on my link, I receive a small commission with no extra cost to you. I truly appreciate your support when using these links. Please click on the logo below the product to shop at your favourite store. All products were personally purchased except those from Clearly Besotted, Hero Arts or those marked with an asterisk (*) which were kindly sent to me to use. You can read my full disclosure here.


Although the kits are geared towards mail art, you can use them in so many different ways - cards, tags, envelopes, décor pieces ... skies the limit! 

Make sure to head over to the Hero Arts Blog for more inspiration and to leave a comment to be entered to win a kit. Thank you so much for stopping by today, I really do appreciate it. I hope you have a great rest of the weekend! 

4 November 2023

VIDEO | MFT Wishing You Joy

Hello there, I am delighted to be over on the My Favorite Things YouTube Channel today sharing a card using new products from the October 2023 release. 

PLEASE NOTE: This post contains affiliate links. Please see below for my full disclosure.


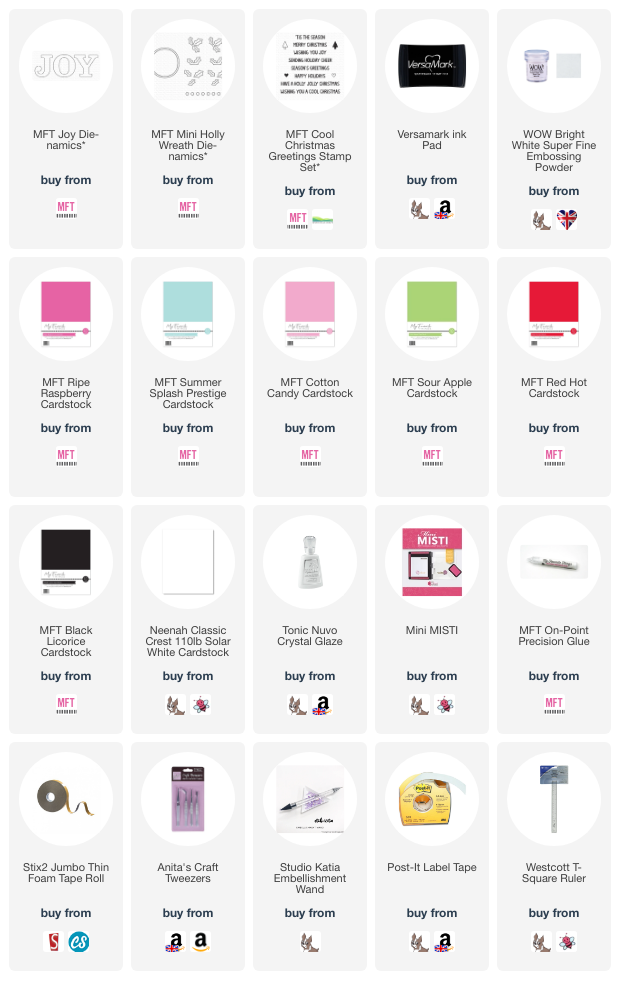
I started off my card by die cutting the MFT Joy Die-namics from MFT Ripe Raspberry, Summer Splash and Cotton Candy Cardstock twice. I adhered the letters together using On-Point Precision Glue before adhering them to a 3.5" x 5.5" panel of white cardstock. 


The panel was adhered to a US A2 sized white card base with thin foam tape. I then die cut the holly leaves from the MFT Mini Holly Wreath Die-namics from MFT Sour Apple Cardstock and the berries from MFT Red Hot Cardstock. 


I adhered the holly leaves to the letters using On-Point Precision Glue, followed by the berries. I stamped a sentiment from the MFT Cool Christmas Greetings Stamp Set onto MFT Black Licorice Cardstock using Versamark Ink. I applied white embossing powder and heat set. It was cut into a strip and adhered to the card with foam tape. To finish off, I applied Crystal Glaze to the berries. 

VIDEO:

Here is the video showing how I made the card:


If you are viewing this post via email subscription, you can watch the video HERE on YouTube. 

SUPPLIES:


Here are the links to what I have used on the project. Affiliate links are used on some products. This means that if you make a purchase after clicking on my link, I receive a small commission with no extra cost to you. I truly appreciate your support when using these links. Please click on the logo below the product to shop at your favourite store. All products were personally purchased except those from Clearly Besotted, Hero Arts or those marked with an asterisk (*) which were kindly sent to me to use. You can read my full disclosure here.


I said in the video that I had originally planned to make the 'O' in the Joy a wreath and I still think I will do that! Thank you so much for stopping by today, I really do appreciate it. I hope you have a wonderful weekend! 

31 October 2023

Spellbinders | Game Day

Hello there, you may or may not know this (since I do not share them here that often) but when I make cards for family, I try my best to customise them to the recipient. This often means making cards on my Cricut or using supplies in a more unconventional way. So when I saw the Game Day Collection from Spellbinders, I thought it would be perfect for a card for my nephew. 

PLEASE NOTE: This post contains affiliate links. Please see below for my full disclosure.


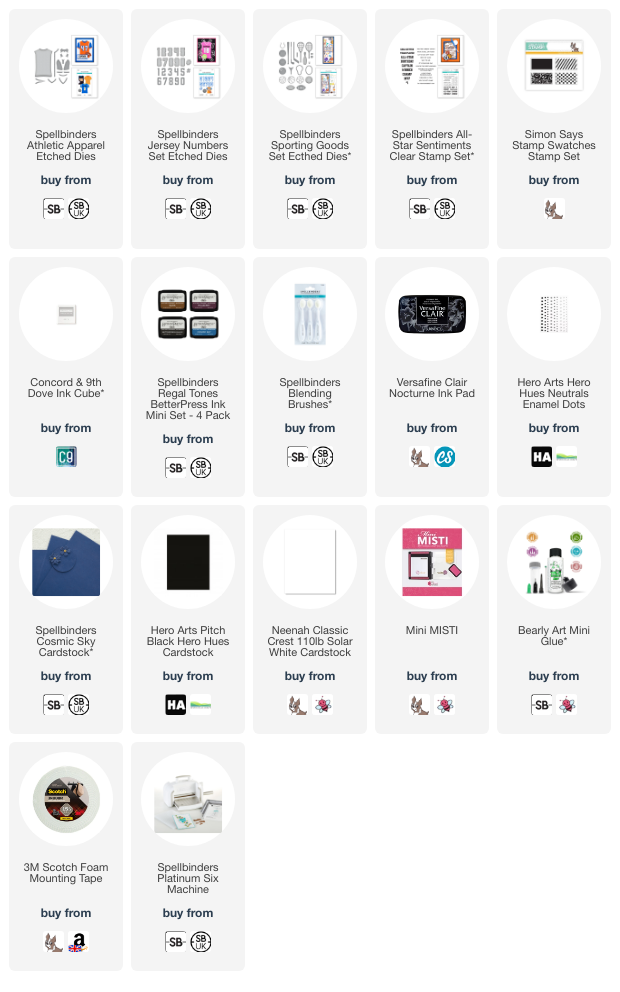
I started off my card by die cutting the Spellbinders Athletic Apparel Etched Dies from white cardstock and Spellbinders Cosmic Sky Cardstock for the trim. These dies are meant to create the front of a shirt, but since in UK football the numbers are on the back of the shirts, I created the back and it still worked well I think. 


My family support Tottenham Hotspur FC and their kit this season has patterns on it, so I hunted through my stamps to see if I had something that would work. I found a Simon Says Stamp Swatch Stamp Set, as well as some retired Clearly Besotted Sets and stamped them onto the shift (with a bit of masking or cutting the stamps down) using Concord & 9th Dove Ink Cube. 


I then assembled the shirt, adhering with Bearly Art Glue. I die cut the Spellbinders Jersey Numbers Set Etched Dies from Spellbinders Cosmic Sky Cardstock for his age and adhered them to the shirt. I also die cut the footballs from the Spellbinders Sporting Goods Set from white and black cardstock and adhered them together. 


I took a Cosmic Sky US A2 sized card base and masked off the top (back panel). I then blended Spellbinders Cosmic Sky and Betterpress Black Betterpress Inks around the edges for some added interest. The shirt and footballs were adhered with a combination of foam tape and Bearly Art Glue. I embellished with a few white enamel dots. 


Since there wasn't much room on the front for a sentiment, I opted to put it in the inside of the card. I stamped the sentiments from the Spellbinders All-Star Sentiments Clear Stamp Set onto a panel of white cardstock using Versafine Clair Nocturne Ink. I adhered the panel to the inside of the card to finish. 

SUPPLIES:


Here are the links to what I have used on the project. Affiliate links are used on some products. This means that if you make a purchase after clicking on my link, I receive a small commission with no extra cost to you. I truly appreciate your support when using these links. Please click on the logo below the product to shop at your favourite store. All products were personally purchased except those from Clearly Besotted, Hero Arts or those marked with an asterisk (*) which were kindly sent to me to use. You can read my full disclosure here.


The hardest part of the design was stamping the patterns on the shirt! Trying to find the right kind of stamps was difficult but I am glad I did it. It makes the card more personalised I think! Thank you so much for stopping by today, I really do appreciate it. I hope you have a great day! 

27 October 2023

Spellbinders | Simon's Snow Globe

Hello there, today I have a card to share using Simon's Snow Globes Collection from Spellbinders, designed by Simon Hurley. I am using the main snow globe die today but there are other sets that make different scenes in the snow globe, or can be used on their own too. 

PLEASE NOTE: This post contains affiliate links. Please see below for my full disclosure.


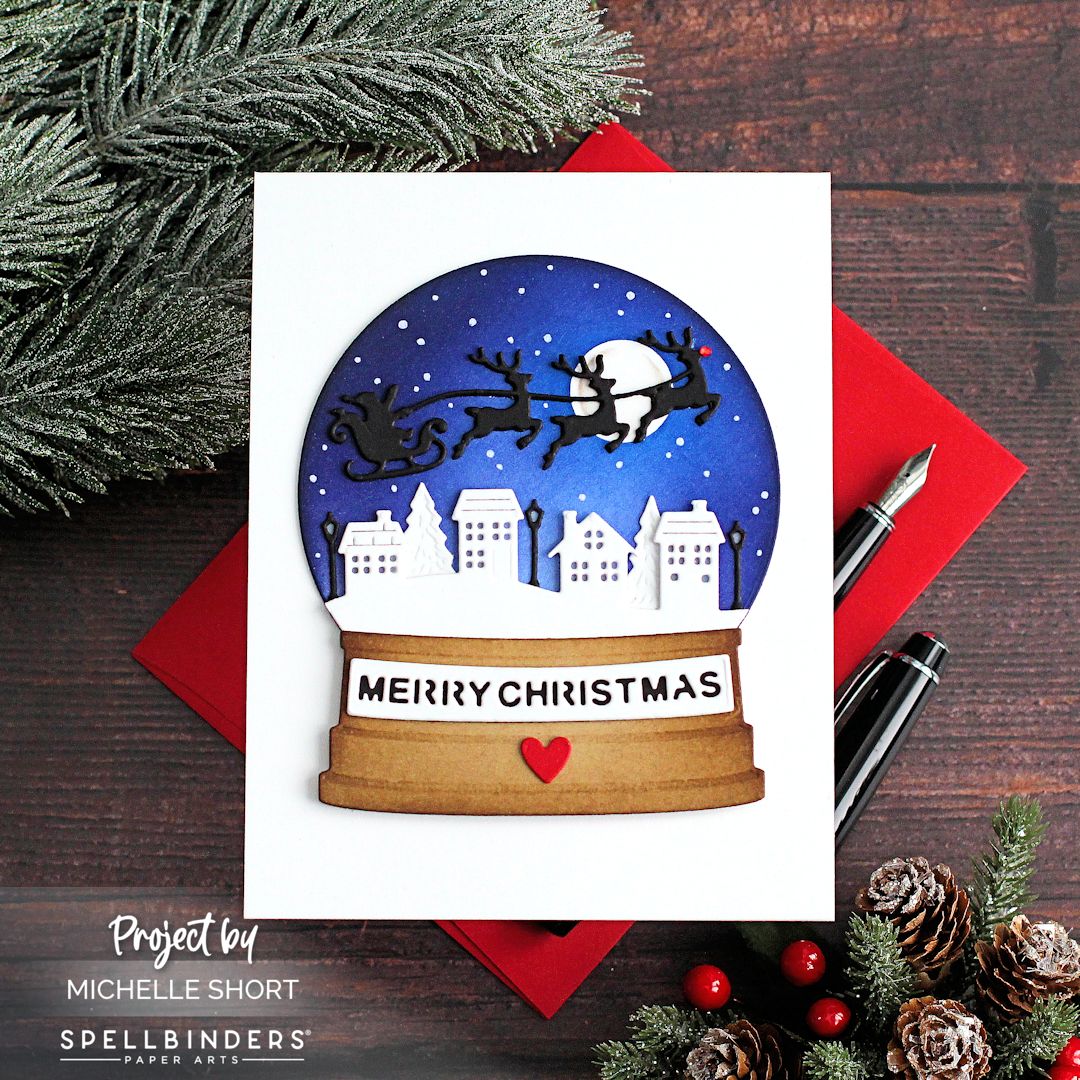
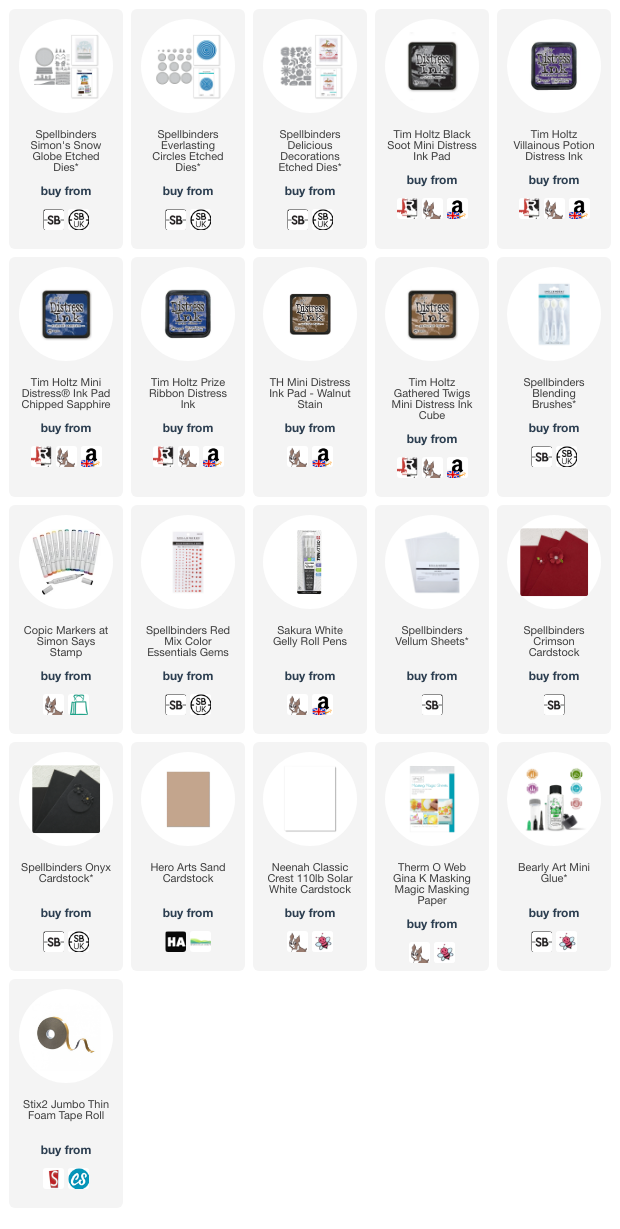
I started off my card by die cutting Simon's Snow Globe Etched Dies (the main circle piece, trees and the houses) from white cardstock. I then cut a mask for the moon using Spellbinders Everlasting Circles Etched Dies and masking paper. I placed it on top of the circle background piece and then added ink blending on top with Distress Inks. 


I used Prize Ribbon, Chipped Sapphire, Villainous Potion and Black Soot. The mask was removed and the moon coloured using W2, W0 & 0 Copic Markers. I adhered small bits of vellum behind the house windows and then adhered the piece to the circle panel using thin foam tape. I die cut Santa and the reindeer from black cardstock twice, layered them up one on top of another and then onto the background. 


I die cut the street lamps from black cardstock, added small pieces of vellum behind where the light would be and adhered them beside the houses. I also adhered two trees as well. I die cut the snow globe base from Sand cardstock and added ink blending on top with Gathered Twigs and Walnut Stain Distress Inks. I die cut the word piece from white cardstock and the base piece from black cardstock. I adhered them together and then onto the snow globe base. 


I adhered the top of the snow globe base to the circle piece and then adhered the whole snow globe onto a US A2 sized white card base (liquid glue at the top and foam tape at the bottom). I die cut a heart from the Spellbinders Delicious Decorations Etched Dies and adhered that to the snow globe. I added a Spellbinders Red Mix Color Essentials Gem to the first reindeer and then finished off by adding white gel pen dots for snow in the sky. 

SUPPLIES:


Here are the links to what I have used on the project. Affiliate links are used on some products. This means that if you make a purchase after clicking on my link, I receive a small commission with no extra cost to you. I truly appreciate your support when using these links. Please click on the logo below the product to shop at your favourite store. All products were personally purchased except those from Clearly Besotted, Hero Arts or those marked with an asterisk (*) which were kindly sent to me to use. You can read my full disclosure here.


These snow globes would work perfectly for a shaker card or to add lights to but I kept mine simple for today! Thank you so much for stopping by to see me today, I very much appreciate it. I hope you have a wonderful day and a great weekend too! 

25 October 2023

Spellbinders | Beautiful Wreaths

Hello there, today I have two projects to share using the new Beautiful Wreaths collection by Suzanne Hue for Spellbinders. There is one main wreath set and then lots of add-on sets that work well for different seasons. 

PLEASE NOTE: This post contains affiliate links. Please see below for my full disclosure.


The wreaths are great for cards but also for tags too. I thought on this occasion though, that I would make an ornament/home decor piece, but it would work as a tag too!


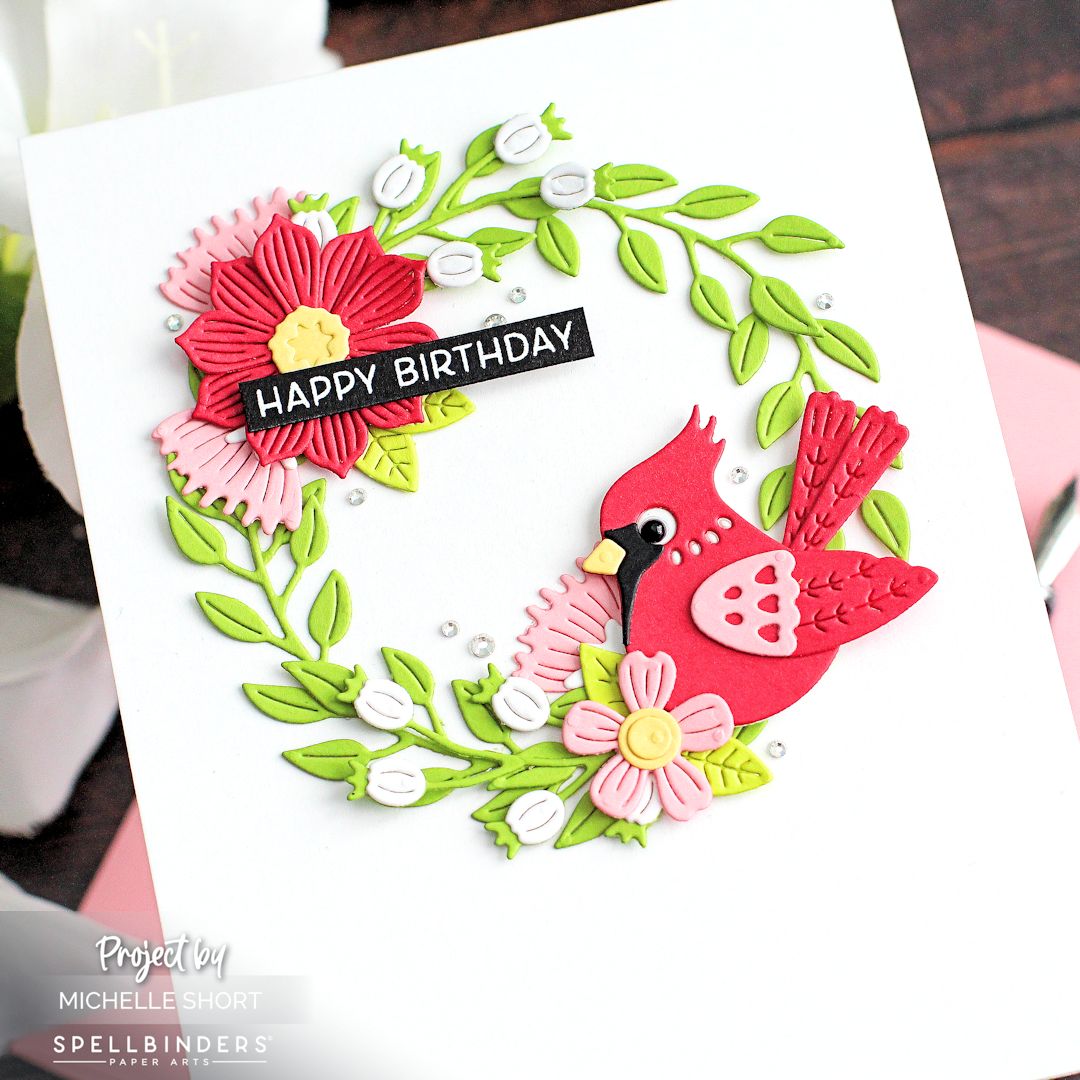
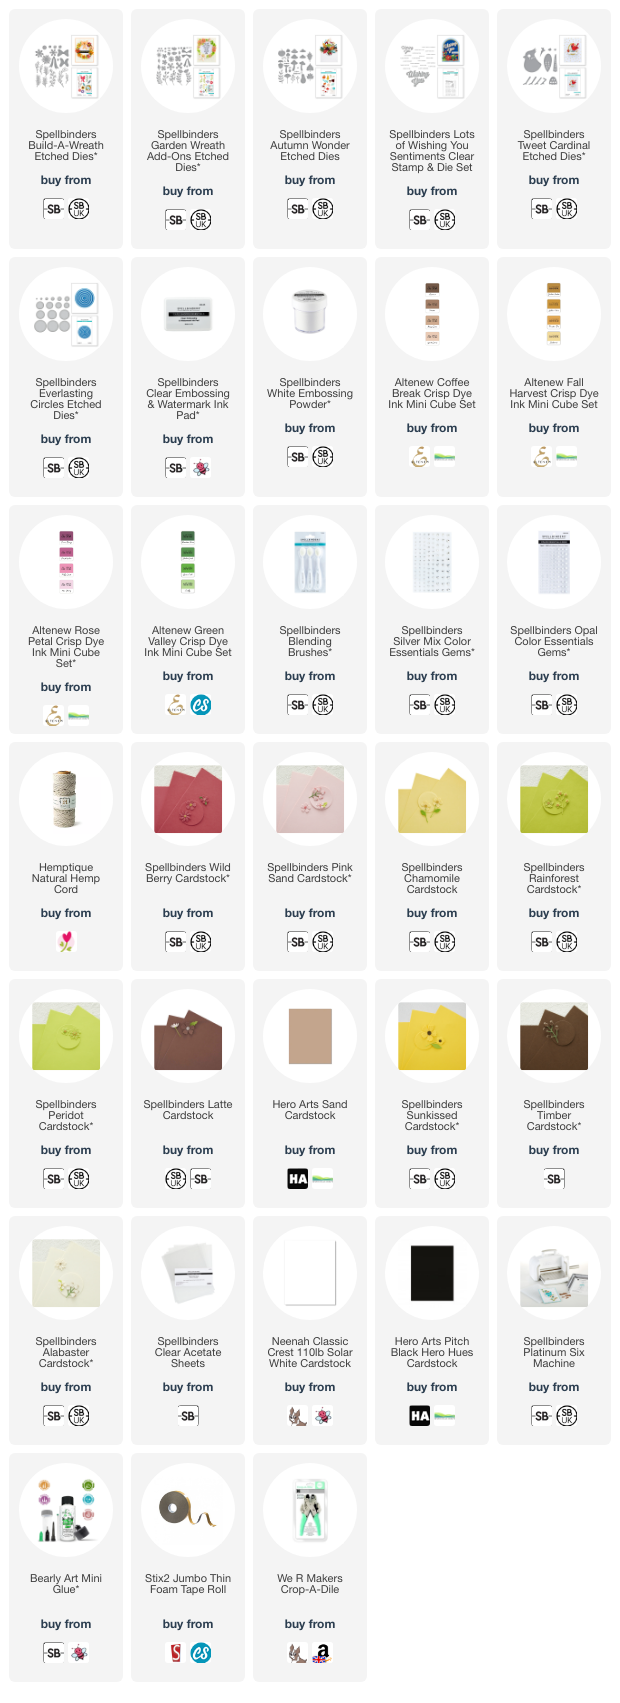
I started off the card using the Spellbinders Garden Wreath Add-Ons Etched Dies. I die cut the leaf branches from Spellbinders Rainforest Cardstock, as well as the flower branches. I cut the flowers for the branch pieces from white cardstock. I then cut the large flower from Spellbinders Wild Berry Cardstock, the flower centre pieces from Spellbinders Chamomile Cardstock and the smaller flowers from Spellbinders Pink Sand Cardstock. 


I die cut the Spellbinders Tweet Cardinal Etched Dies with the same colours. I took a Spellbinders Everlasting Circles Etched Die and placed it on top of a US A2 sized white card base. Using a pencil, I drew around the inside lightly to create a guide as to where to place the wreath branches. I adhered the leaf layers with Bearly Art Glue, followed by the flower ones (only adhered at the bottom to add some movement/dimension to the wreath). 


The large flower and bird were adhered using thin foam tape, the smaller flowers with Bearly Art Glue. I stamped the sentiment from the Spellbinders Lots of Wishing You Sentiments Stamp Set onto black cardstock using Spellbinders Clear Embossing & Watermark Ink. I applied Spellbinders White Embossing Powder and heat set before cutting into a strip. It was adhered to the card with thin foam tape. To finish off, I added a few Spellbinders Silver Mix Color Essentials Gems. 


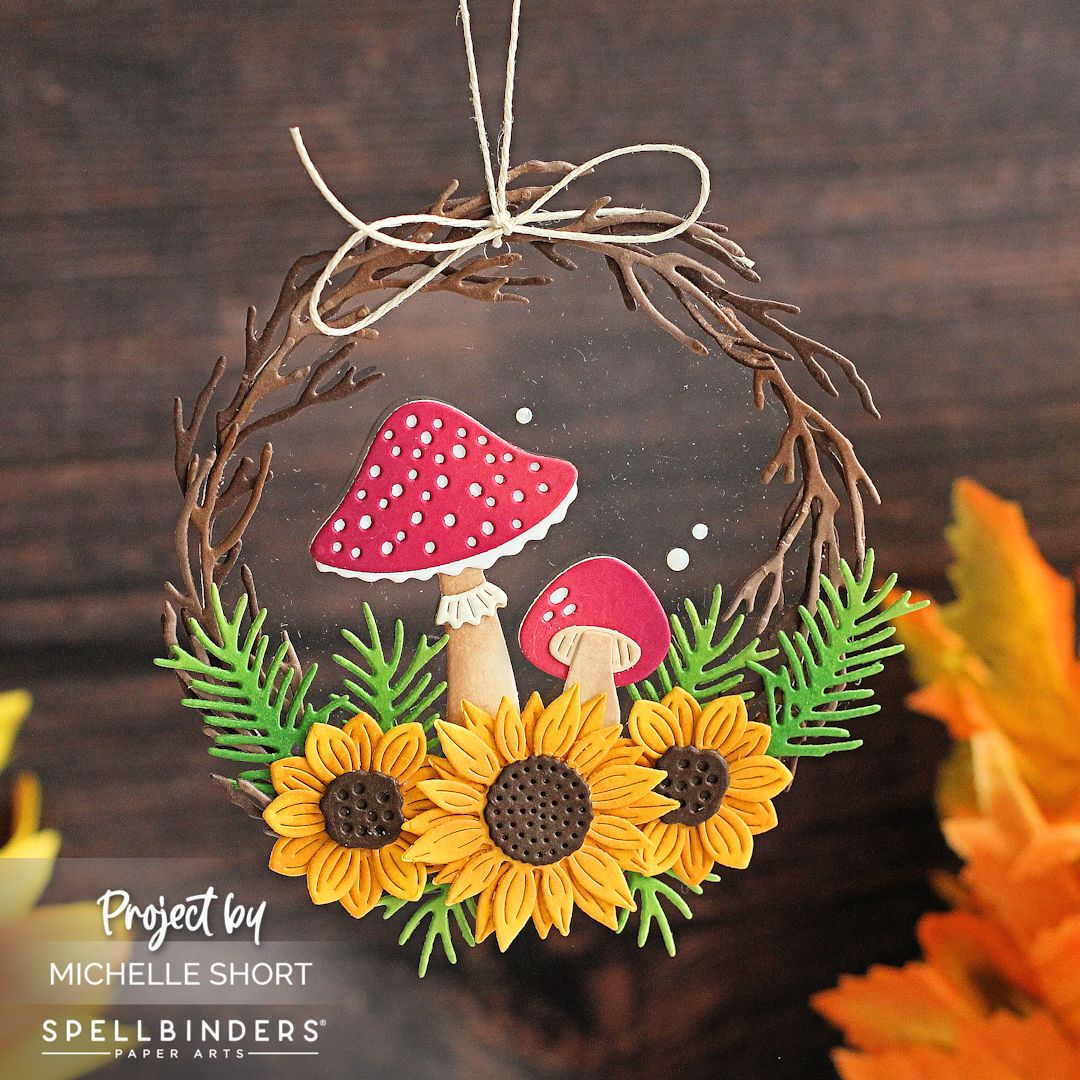
For the ornament, I first die cut the branches from the Spellbinders Build-A-Wreath Etched Dies from Hero Arts Sand Cardstock and Spellbinders Latte Cardstock. I added ink blending to the lighter branches with Altenew Coffee Break Crisp Dye Inks and then adhered them into a circle shape. I die cut a Spellbinders Everlasting Circles Etched Die from acetate and adhered the wreath on top. 


I die cut the flower petals from Spellbinders Sunkissed Cardstock and added ink blending to them using Altenew Fall Harvest Crisp Dye Ink. I adhered them together and die cut the centres from Spellbinders Timber Cardstock and adhered them on top. I die cut the branches from Spellbinders Rainforest Cardstock and added ink blending to those too, with Altenew Green Valley Crisp Dye Inks. 


I die cut the mushrooms from Spellbinders Autumn Wonder Etched Dies from Spellbinders Wild Berry and Alabaster Cardstock. I added ink blending to those as well (Altenew Coffee Break and Rose Petal Crisp Dye Inks) and assembled the pieces with Bearly Art Glue. The elements were adhered to the acetate piece with a combination of Bearly Art Glue and thin foam tape. To finish off, I added Spellbinders Opal Mix Color Essentials Gems. I punched a hole in top of the piece and tied twine through it. 

SUPPLIES:


Here are the links to what I have used on the projects. Affiliate links are used on some products. This means that if you make a purchase after clicking on my link, I receive a small commission with no extra cost to you. I truly appreciate your support when using these links. Please click on the logo below the product to shop at your favourite store. All products were personally purchased except those from Clearly Besotted, Hero Arts or those marked with an asterisk (*) which were kindly sent to me to use. You can read my full disclosure here.


I love that these sets have so many possibilities and work with lots of other sets too. In the photos of the ornament, you can see paper dust on the acetate. You cannot see them in real-life but I will be wiping the back with a Swiffer cloth again before hanging it up! Thank you so much for stopping by today, I really appreciate it. I hope you Have a wonderful day! 

23 October 2023

VIDEO | Glitter Cardstock Accents

Hello there, today I have a card and video to share using a new Glitter Cardstock Set from Altenew. I love Altenew Glitter Cardstock as it comes in small packs. I do not use a huge amount of glitter in general, obviously it is not good for the environment but also for me, it can be a little overbearing, so smaller sheets work well for me!

PLEASE NOTE: This post contains affiliate links. Please see below for my full disclosure.


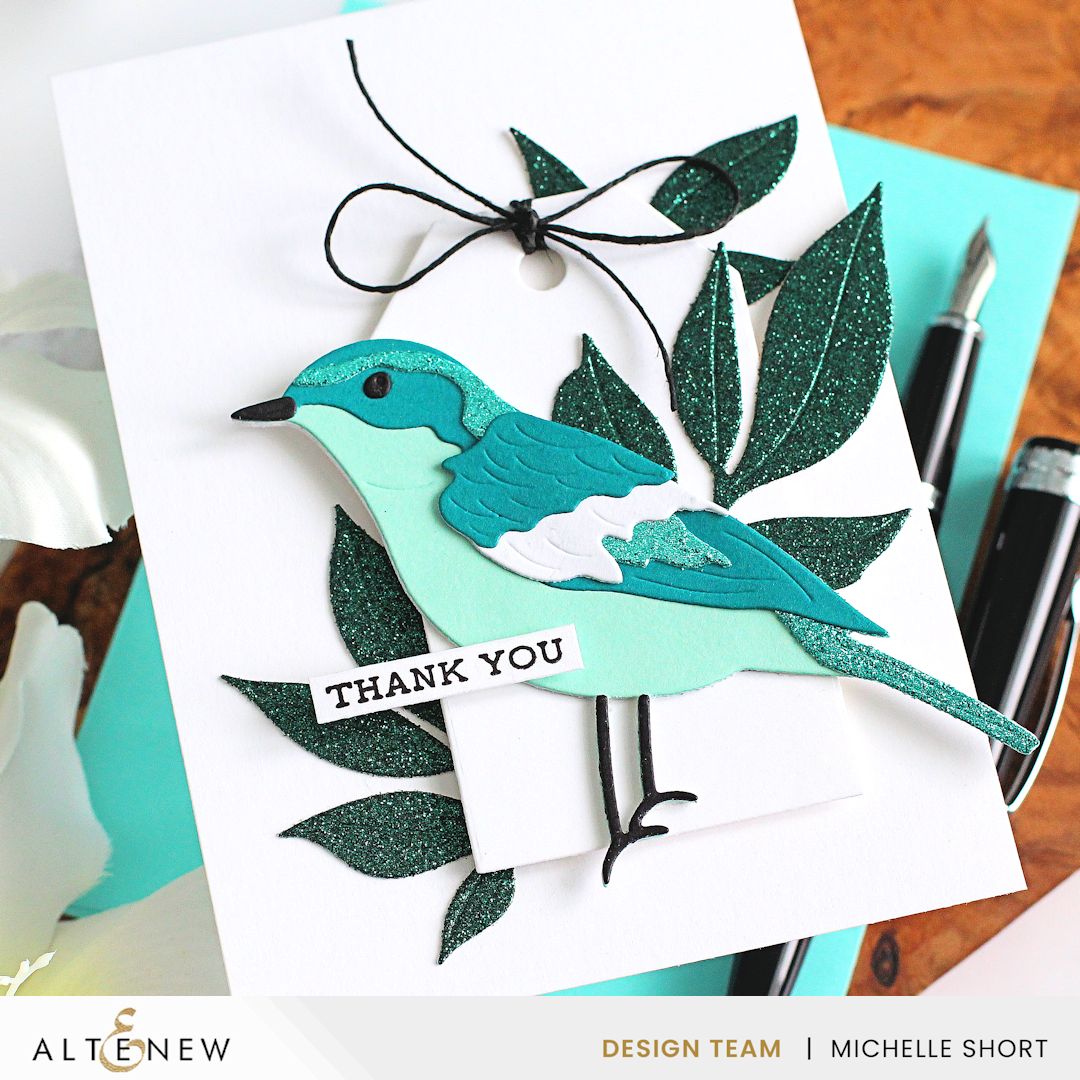
I started off my card by die cutting the Altenew Bird of the Mountain Die Set. I cut some layers from Altenew Sea Shore Gradient Cardstock, Altenew Shimmering Shore Glitter Cardstock Set and white cardstock. I also cut the beak, legs and eye from black cardstock. I assembled and adhered the bird, using the instructions on the packaging, with liquid glue. 


I die cut leaves from the Altenew Craft-A-Flower: Open Peony Layering Die Set from the darkest shade in the Altenew Shimmering Shore Glitter Cardstock Set. I also cut an Altenew Terrific Tag Die from white cardstock. I took a 4" x 5.5" white card base and adhered two sets of leaves on top with liquid glue. I then adhered the other set to the tag. I threaded twine through the top of the tag and tied in a bow and then adhered it to the card with Altenew Instant Dimension Foam Tape.


I die cut another two of the bird's body from white cardstock and adhered them behind the bird for added dimension and stability. It was adhered to the card, perching on the bottom of the tag. I stamped a sentiment from the Altenew Sentiment Strips 2 Stamp Set onto white cardstock using Altenew Obsidian Pigment Ink. It was cut into a strip and adhered to the card with more foam tape. 

VIDEO:

Here is the video showing how I made the card:


If you are viewing this blog post via email subscription, you can watch the video HERE on YouTube. 

SUPPLIES:


Here are the links to what I have used on the project. Affiliate links are used on some products. This means that if you make a purchase after clicking on my link, I receive a small commission with no extra cost to you. I truly appreciate your support when using these links. Please click on the logo below the product to shop at your favourite store. All products were personally purchased except those from Clearly Besotted, Hero Arts or those marked with an asterisk (*) which were kindly sent to me to use. You can read my full disclosure here.


I mentioned in the video that I ended up adding more glitter cardstock to the card than I had planned but I do think those leaves look pretty! Thank you so much for stopping by today, I really do appreciate it. I hope you have a wonderful day and a great week ahead! 

21 October 2023

Spellbinders | Betterpress Christmas

Hello there, today I have three cards to share using the Spellbinders Betterpress Christmas and More Betterpress Christmas collections. I used one with actual Betterpress and the other two were hot foiled. I love that you can use press plates for foiling too, it gives them a lot of versatility. 

PLEASE NOTE: This post contains affiliate links. Please see below for my full disclosure.


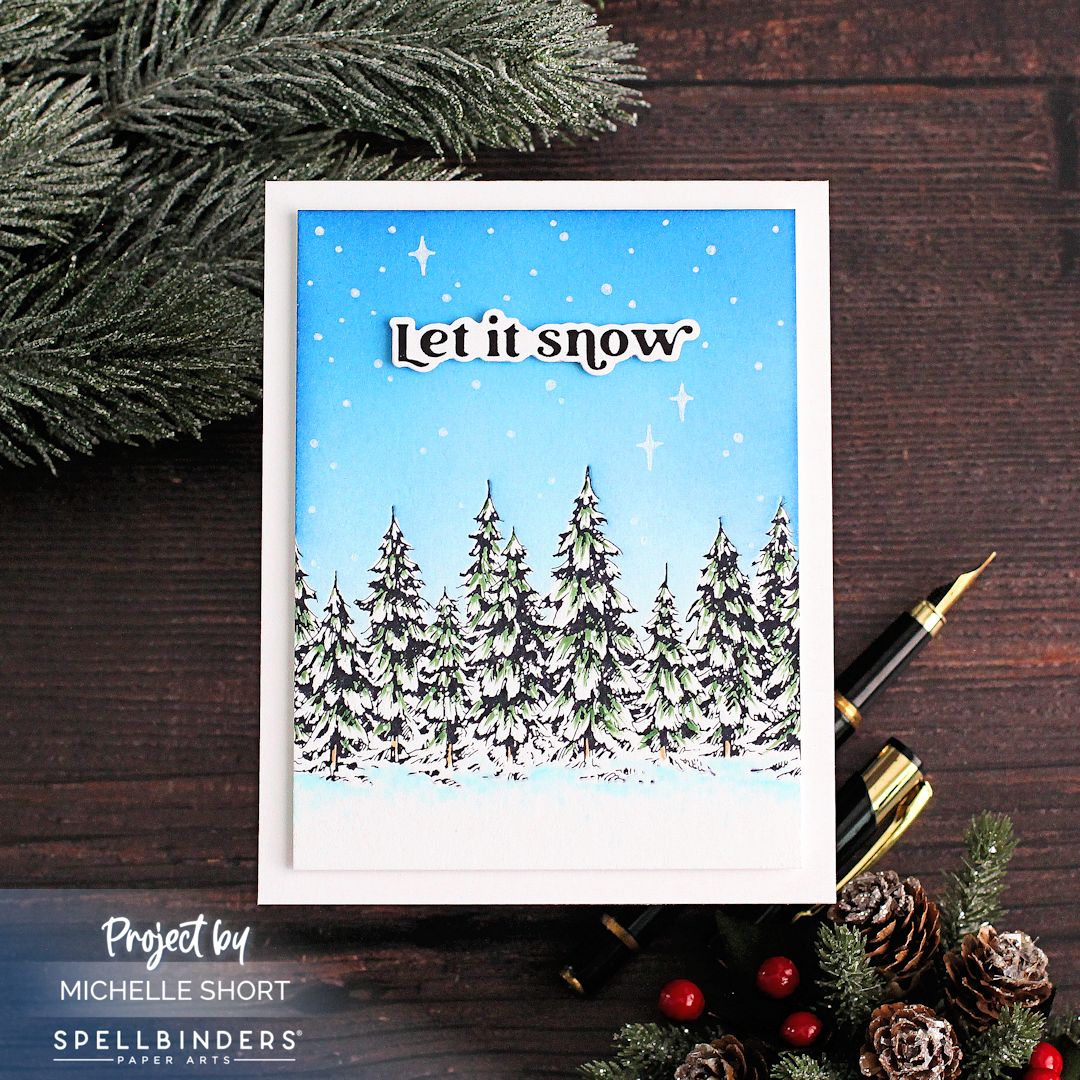
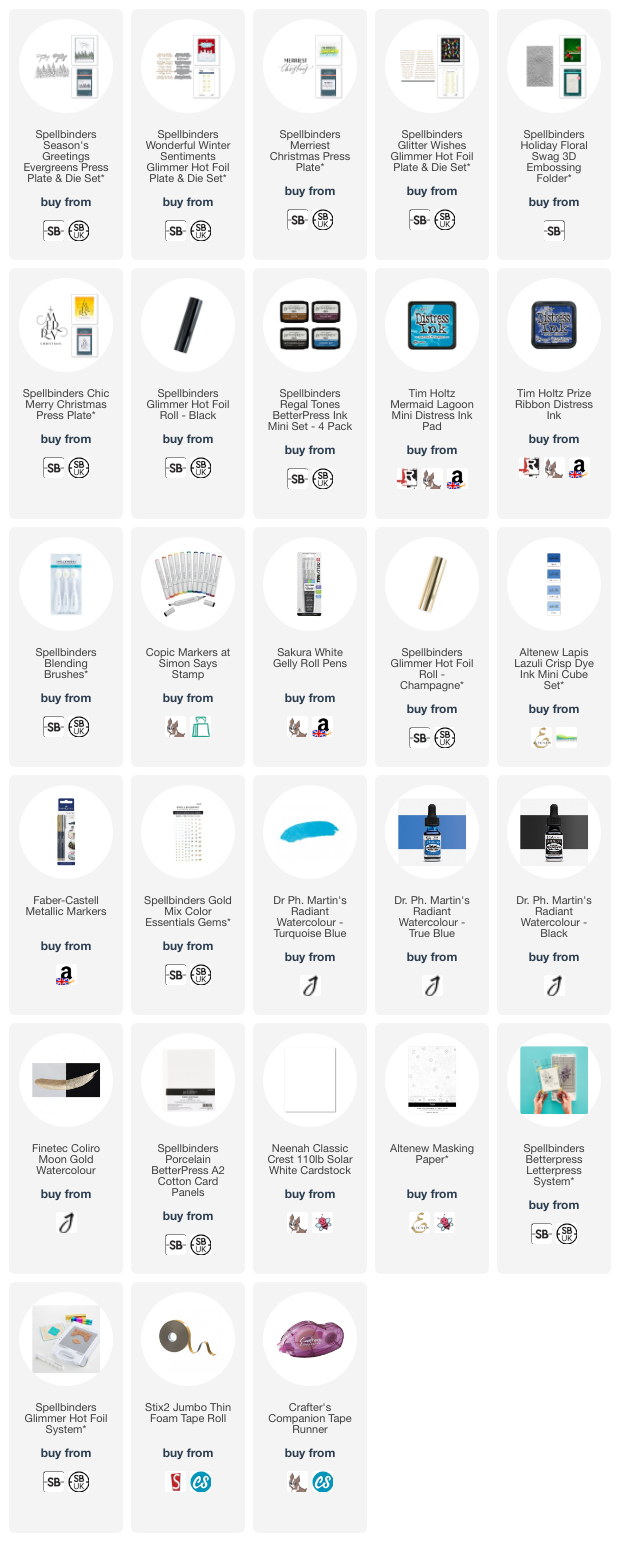
My first card uses the Spellbinders Season's Greetings Evergreens Press Plate & Die Set. I pressed it onto Spellbinders Betterpress Porcelain Card with Spellbinders Betterpress Black Ink and the Spellbinders Betterpress Letterpress System. I also pressed the plate onto masking paper. I fussy cut the mask out with scissors and then placed it on top of the image. 


Using blending brushes, I blended Tim Holtz Distress Inks in Mermaid Lagoon and Prize Ribbon at the top of the panel for the sky. I removed the mask and added a little colour to the trees with a G46 Copic Marker, followed by the ground/snow using B000, B0000 and 0 Copic Markers. The panel was cut down a little and adhered onto a US A2 sized white card base with thin foam tape. 


I took the Spellbinders Wonderful Winter Sentiments Glimmer Hot Foil Plate & Die Set and foiled it onto white cardstock using Spellbinders Black Foil. It was die cut out using the coordinating die and adhered to the card using thin foam tape. To finish off, I added white gel pen snow and stars to the sky and trees. 


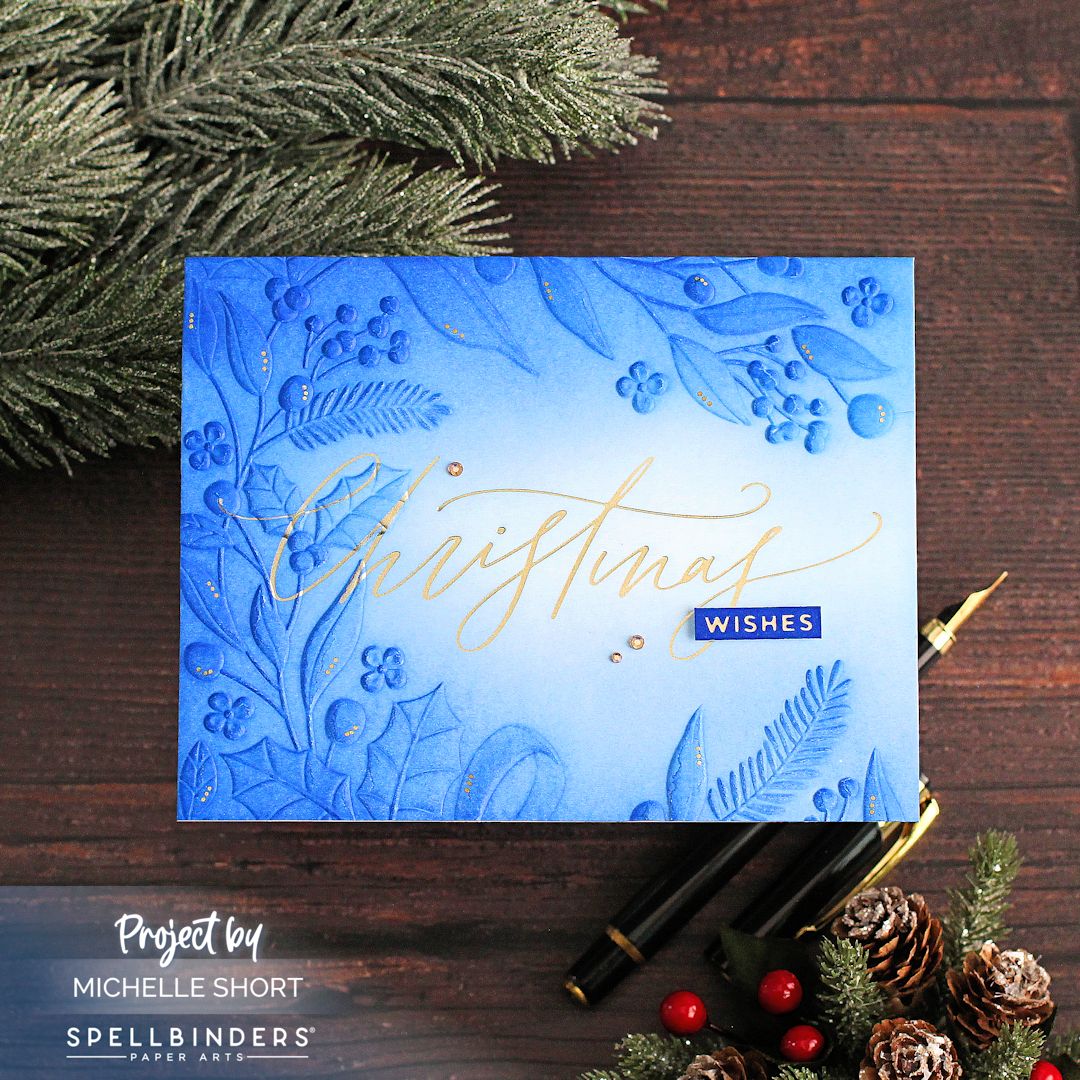
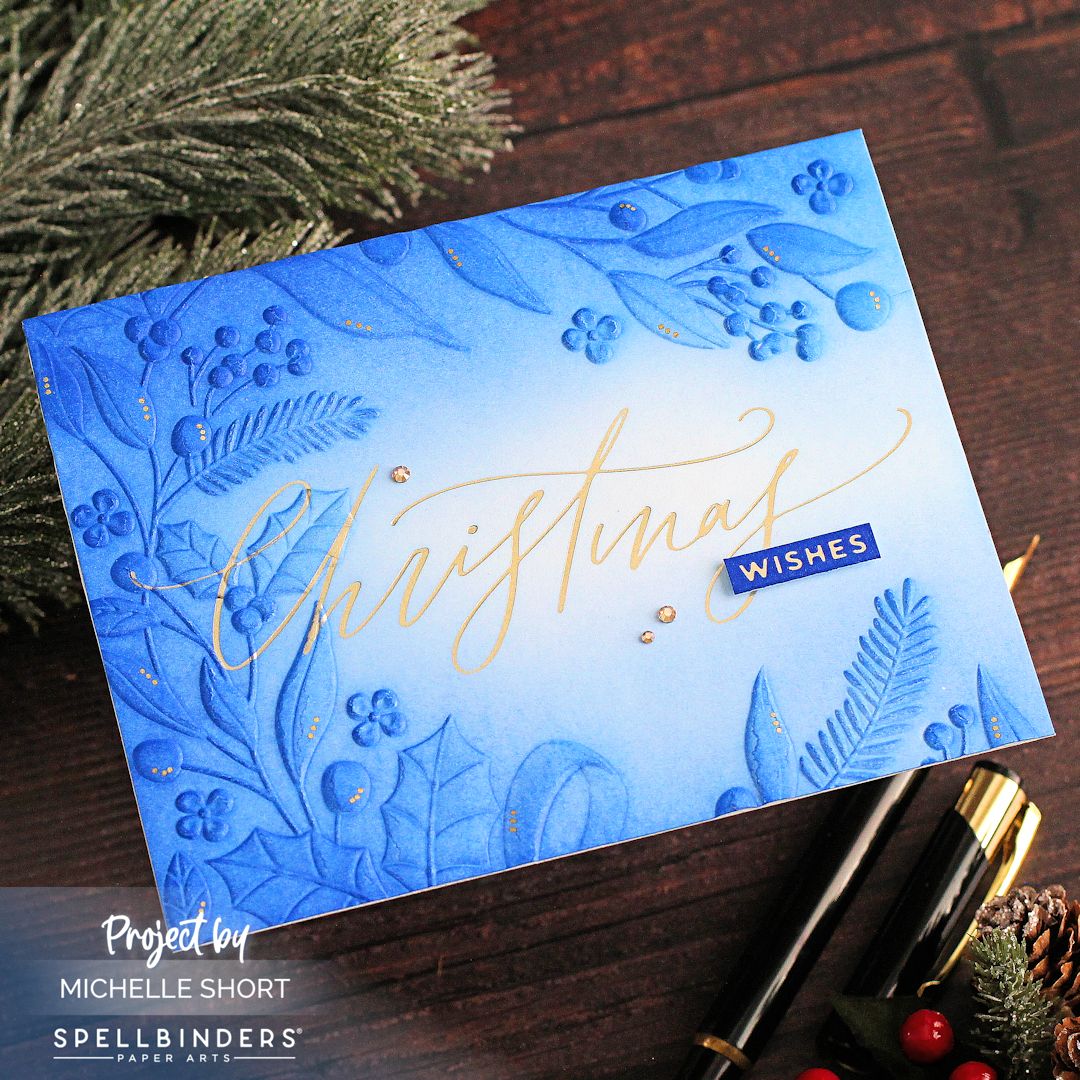
My next card uses the Spellbinders Merriest Christmas Press Plate. I started off by foiling the 'Christmas' part of the sentiment onto white cardstock with Spellbinders Champagne Foil and the Spellbinders Glimmer Hot Foil System. I then foiled 'wishes' from the Spellbinders Glitter Wishes Hot Foil Plate & Die Set. This was part of a longer sentiment but I just wanted the wishes word. 


I ran the foiled panel through my die cutting machine inside the Spellbinders Holiday Floral Swag 3D Embossing Folder. The embossing did overlap the foiling a little but it didn't seem to cause any harm to it, although it does obscure the letters a little. I blended Altenew Lapis Lazuli Crisp Dye Inks on top and then adhered it to a US A2 sized white card base with tape runner adhesive. 


I added ink to the foiled 'wishes' cardstock piece and cut it into a strip. It was adhered to the card with thin foam tape. To finish off, I added gold dots to the embossed areas, as well as a few Spellbinders Gold Mix Color Essentials Gems. 


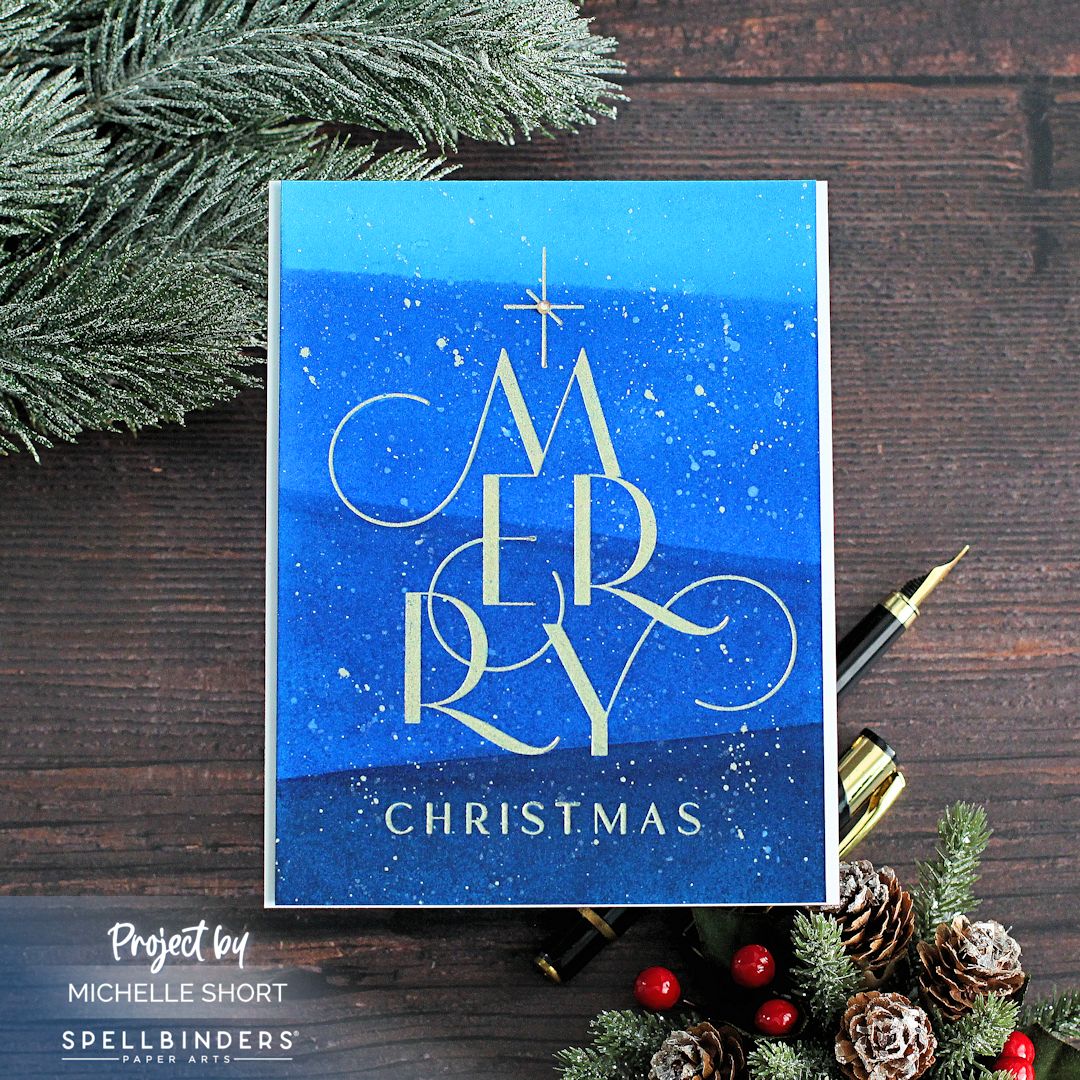
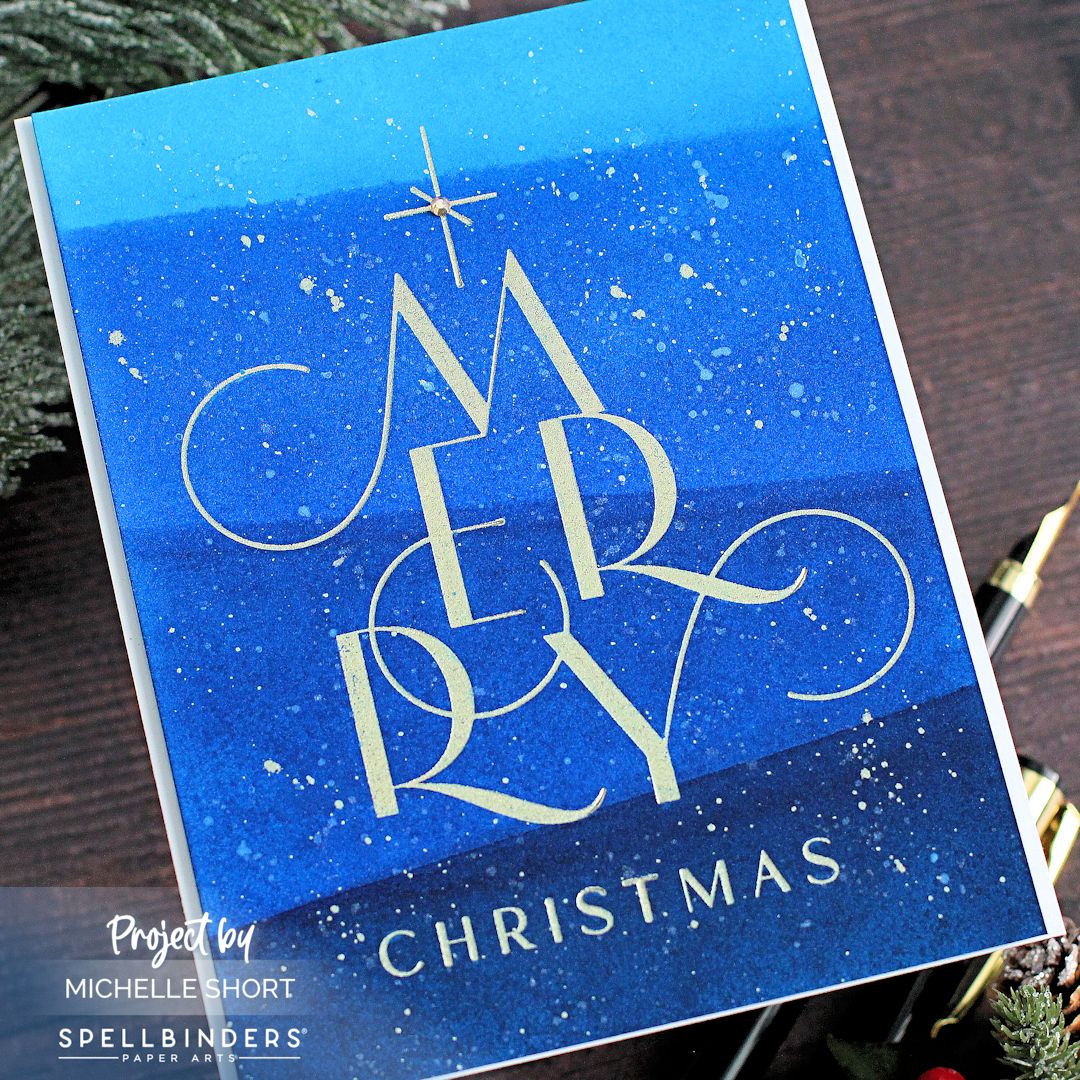
My last card today uses the Spellbinders Chic Merry Christmas Press Plate. I again foiled it using Spellbinders Champagne Foil but this time onto Spellbinders Betterpress Porcelain Card. I then painted on stripes using Dr. Ph. Martin's Radiant Watercolours (mixing the colours to get gradients of colour). 


I splattered Finetec Coliro Moon Gold Watercolour on top and set aside to dry. Once dry, the panel was cut down slightly and adhered onto a US A2 sized white card base with thin foam tape. To finish off, I added a Spellbinders Gold Mix Color Essentials Gem to the centre of the star. 

SUPPLIES:


Here are the links to what I have used on the projects. Affiliate links are used on some products. This means that if you make a purchase after clicking on my link, I receive a small commission with no extra cost to you. I truly appreciate your support when using these links. Please click on the logo below the product to shop at your favourite store. All products were personally purchased except those from Clearly Besotted, Hero Arts or those marked with an asterisk (*) which were kindly sent to me to use. You can read my full disclosure here.


Have you tried Bettrpress yet? Do you like it? I have to admit to not liking the clean up of the plates afterwards, but I do really like the letterpress look and as I said above, I really like that you can foil with the plates too! Thank you so much for stopping by today, I really do appreciate it. I hope you have a wonderful weekend! 

20 October 2023

Spellbinders | Ho Ho Ho

Hello there, I am hope you are well. I am here today to share another Christmas card and also another card using red. Funnily enough, red is not a colour that I would usually gravitate towards but I do like it for Christmas cards. I am using the Spellbinders Peppermint Stripes Embossing Folder again and so had to use red and white! 

PLEASE NOTE: This post contains affiliate links. Please see below for my full disclosure.


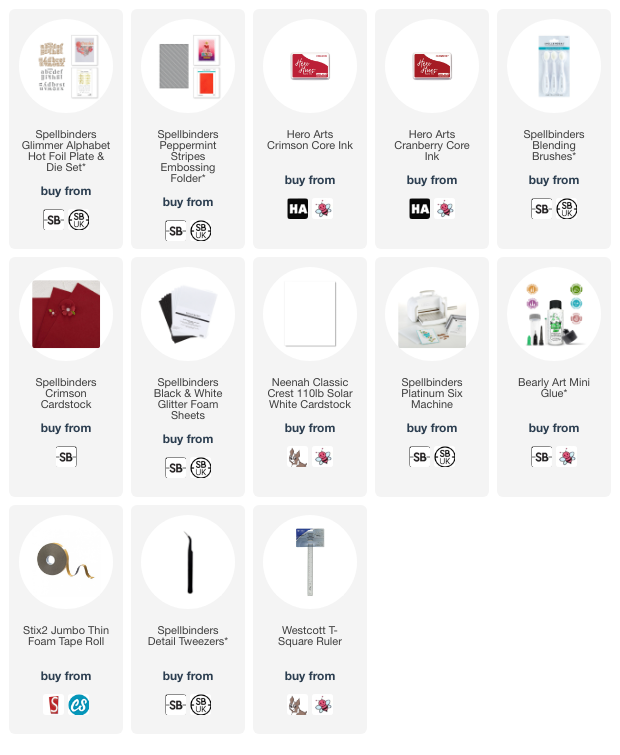
I started off by taking a 3.5" x 4.75" panel of Spellbinders Crimson Cardstock and ran it through my die cutting machine inside the Spellbinders Peppermint Stripes Embossing Folder. I then blended Hero Arts Core Inks in Crimson and Cranberry around the edges for some interest. 


The panel was adhered to a US A2 white card base with thin foam tape. I die cut the 'ho ho ho' from the Spellbinders Glimmer Alphabet Hot Foil Plate & Die Set using Spellbinders White Pop-Up Die Cutting Glitter Foam Sheets. The letters were adhered to the card using tweezers and a T-square ruler to help with placement. 

SUPPLIES:


Here are the links to what I have used on the project. Affiliate links are used on some products. This means that if you make a purchase after clicking on my link, I receive a small commission with no extra cost to you. I truly appreciate your support when using these links. Please click on the logo below the product to shop at your favourite store. All products were personally purchased except those from Clearly Besotted, Hero Arts or those marked with an asterisk (*) which were kindly sent to me to use. You can read my full disclosure here.

This is such a simple card but I really like the contrast between the red and white! Thank you so much for visiting me today, as always it is most appreciated. Wishing you a great day and weekend! 
End of code