22 May 2020

Purple Onion Designs | Make A Splash!

Hello there, I am back to share my last card using the new Sunshine Lake collection from Purple Onion Designs. This is such a fun collection and I have really enjoyed using the images. Today I have a pool scene to share with you using Cosmo, Peony and Daphne. I have to admit, it didn't quite come out as I had planned, but I guess you win some and you lose some, sadly!
 

I started off by stamping Cosmo (Bear with Float), Peony (Mouse Floating) and Daphne (Beaver Swimming) on to white cardstock with Memento Tuxedo Black Ink. I then coloured them with Copic Markers (the colours that I used are listed below the supplies area) and cut them out with scissors. Once cut out, I ran a black pen around the edges to neaten them up.
 
 
I set the images aside while I worked on my background using Copic Markers. I wanted to have them in/by a swimming pool so I first drew a pool in the bottom left hand corner and then drew a line above it where the tiling would end and the grass started. I used the lightest colours of Copics to map out the drawing and then coloured in using the darker shades. I added lines to the area around the pool to create tiles.
 
I had originally planned to stamp the images directly on the background piece and draw the scene around them but forgot and only realised half way through! Hence why they are stamped on to separate pieces. I think it would have worked better stamping and masking but never mind!
 
 
I stamped the sentiment in the top left hand corner from the Sunshiny Sentiments Set and then adhered the background piece to an A2 white card base with foam tape. I then added Peony with tape runner in the pool, Daphne jumping in to the pool with foam tape and Cosmo standing at the side with thin foam tape. To finish off, I added a few white gel pen highlights.
 
SUPPLIES:
 
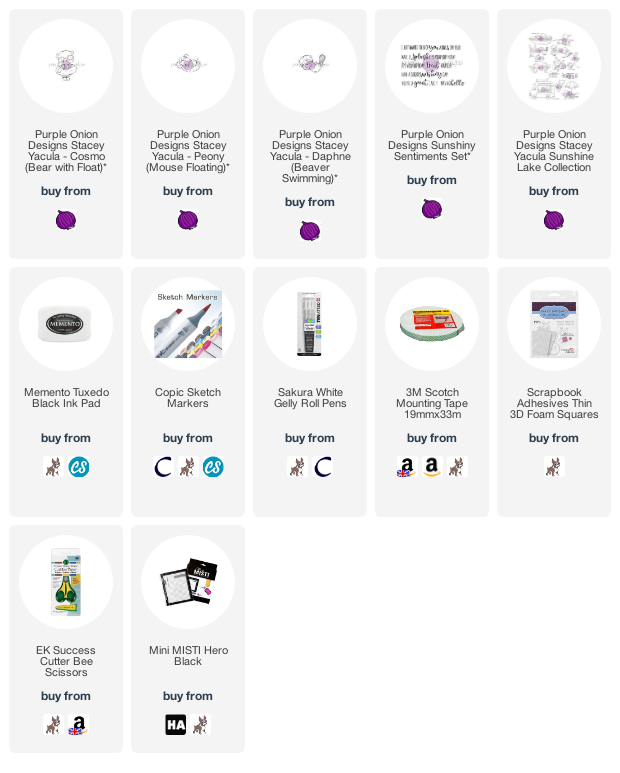
Here are the links to what I have used on the card. Affiliate links are used on some products. This means that if you make a purchase after clicking on my link, I receive a small commission with no extra cost to you. I truly appreciate your support when using these links. Please click on the logo below the product to shop at your favourite store. All products were personally purchased except those from Clearly Besotted, Hero Arts or those marked with an asterisk (*) which were kindly sent to me to use. You can read my full disclosure here.
 
 
COPIC MARKERS: Mouse - W5, W3, W1, W0, R12, R00. Costume - R85, R83, R81. Rubber rings/floats - V17, V15, V12, Y17, Y15, Y13, Y11. Goggles - V15, B00, B000. Beaver - E49, E29, E27, E25, E23, E21. Outfit - V17, V15, V12, Y17, V15, V13, Y11. Bear - E59, E57, E55, E53, E51, R12, R00. Costume - BG49, BG15, BG13.
 
You can buy the new stamps from the Sunshine Lake release separately, or as a bundle of 27 image stamps and 6 sentiments for a 30% discount. This offer is valid until 31st May 2020.
 
If I get a chance, I would like to remake this card and try and get it to more like I was thinking it would look in my head. I sadly ran out of time though! Thanks so much for stopping by today, I do very much appreciate it. I hope you are doing well and have a lovely day and weekend. Take care.

20 May 2020

Purple Onion Designs | Treat Yourself!

Hello there, today I have another card to share using the new Sunshine Lake collection from Purple Onion Designs. Today I am using the super cute Marigold and Juliet, who are enjoying their ice creams!
 

I started off by stamping Juliet (Bird at Picnic Table) and Marigold (Bunny with Ice Cream) on to white cardstock with Memento Tuxedo Black Ink. I then coloured them using Copic Markers (the colours that I used are listed below the supplies area). I then fussy cut them out using scissors.
 
 
I took an A2 white card base and placed the Taylored Expressions Rectangle Masking Stencil over the top. I then blended green ink at the bottom for grass. I used Twisted Citron and Mowed Lawn Distress Inks. I then took the MFT Cloud Stencil and placed this towards the top. Using Mermaid Lagoon Distress Ink, I blended on clouds, moving the stencil down as I went.
 
 
The stencils were removed and the sentiment from the Sunshiny Sentiments Set stamped in the top right hand corner. I then added the images on top with foam tape. To finish off, I added a few Hero Hues Enamel Dots and white gel pen highlights to the images.
 
SUPPLIES:

Here are the links to what I have used on the card. Affiliate links are used on some products. This means that if you make a purchase after clicking on my link, I receive a small commission with no extra cost to you. I truly appreciate your support when using these links. Please click on the logo below the product to shop at your favourite store. All products were personally purchased except those from Clearly Besotted, Hero Arts or those marked with an asterisk (*) which were kindly sent to me to use. You can read my full disclosure here.
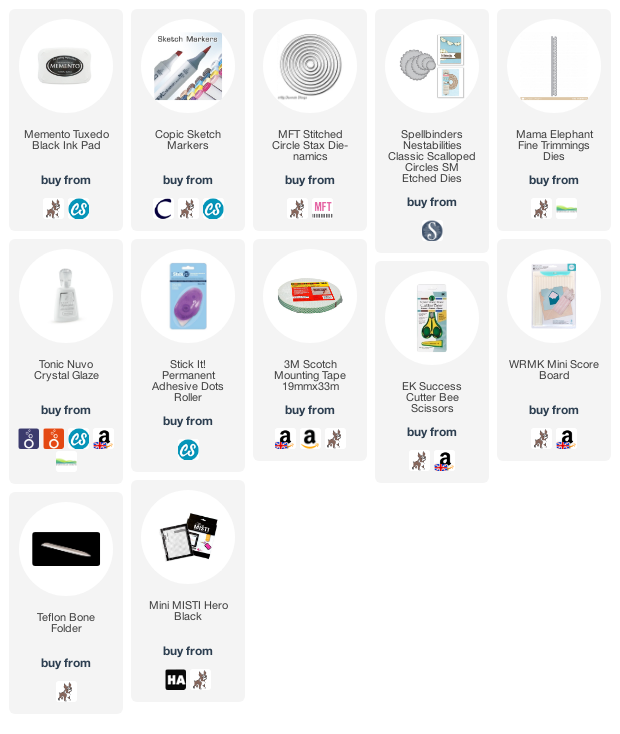
 
 
COPIC MARKERS: Bird - N5, N3, N1, N00, Y26. Picnic Table - E59, E57, E55, E53. Umbrella - C5, C3, C1, BV09, V17, V15, V12, V01. Bunny - W5, W3, W1, W0, R12, R00. Ice creams - E51, E50, BG11, BG10, R83, R81.
 
You can buy the new stamps from the Sunshine Lake release separately, or as a bundle of 27 image stamps and 6 sentiments for a 30% discount. This offer is valid until 31st May 2020.
 
Thanks so much for stopping by today, I really do appreciate it. I hope you have a wonderful day!

18 May 2020

VIDEO | Creating a Night Sky with Ink Blending and Die Cutting

Hello there, today I am over on the Hero Arts Blog and YouTube channel sharing a night sky scene using the Cloudy Sky Scene Dies. When I initially saw them, I thought of nice bright sunny scenes but I wanted to do something a bit different so I decided to create a night sky using the circle die as a moon.
 
 
I created a night sky using ink blending and then splattered on some White Iridescent Shimmer Spray for stars. I cut down panels of white cardstock using the cloud edges in the Cloudy Sky Scene Dies and layered these up on top of the sky, along with a vellum layer. I cut the moon from white cardstock and added a little Copic colour for some added interest.
 
 
I then cut the Airplane Fancy Die from white also and added a little Copic Marker to this too. It was added to the card with foam tape. To finish off, I white heat embossed the sentiment from the Astronomical Stamp Set and then added  a few Lucy's Sequins.
 

VIDEO:
 
Here is the video showing how I made the card:


If you are viewing this blog post via email subscription, you can watch the video HERE on YouTube.
 
SUPPLIES:

Here are the links to what I have used on the card. Affiliate links are used on some products. This means that if you make a purchase after clicking on my link, I receive a small commission with no extra cost to you. I truly appreciate your support when using these links. Please click on the logo below the product to shop at your favourite store. All products were personally purchased except those from Clearly Besotted, Hero Arts or those marked with an asterisk (*) which were kindly sent to me to use. You can read my full disclosure here.
 
 
For more information on how I made the card, please head over to the Hero Arts blog post here. Thanks so much for visiting me today. I hope you are well and have a lovely week!

15 May 2020

Purple Onion Designs | Waving Hello

Hello there, I am delighted to share the new Stacey Yacula release from Purple Onion Designs with you! The new Sunshine Lake release is on sale today and for my first card I am using the super cute Maverick, Miki and Gladys who are having fun on the water!
 

I started off by taking a panel of white cardstock. I first stamped the Dock using Memento Tuxedo Black Ink and then made a mask for it using mask paper and added it on top. I then stamped the Grassy Shore on either side. I then took Maverick & Miki and stamped them towards the left of the panel. Made a mask for them and then stamped Gladys to the right. The masks were then all removed.
 
 
The panel was coloured using Copic Markers (the colours that I used are listed below the supplies area). I first drew in a big rock/land to the left. I started colouring this with cool grey markers, then changed to warm grey markers. In the end, I added in brown shades, so the colour does look a bit odd! I then coloured the sky followed by the boat and critters, the sea and then the grass and dock. I added sparkles, dots and highlights to the sea using a white gel pen.
 
 
I adhered the panel to a 8 7/8" x 3 7/8" card base with foam tape. I took the sentiment from the Sunshiny Sentiments Set and stamped it on to black cardstock with Versamark Ink. I applied white embossing powder and heat set. It was cut in to a strip with a banner end and then added to the right bottom corner with more foam tape.
 
SUPPLIES:

Here are the links to what I have used on the card. Affiliate links are used on some products. This means that if you make a purchase after clicking on my link, I receive a small commission with no extra cost to you. I truly appreciate your support when using these links. Please click on the logo below the product to shop at your favourite store. All products were personally purchased except those from Clearly Besotted, Hero Arts or those marked with an asterisk (*) which were kindly sent to me to use. You can read my full disclosure here.
 
 
COPIC MARKERS: Sky - B02, B01, B00, B000, B000. Rock/island - C5, C3, C1, W5, W3, W1, E44, E43, E41. Dock - E57, E55, E53. Grass - G46, YG25, YG03. Sea - BG49, BG15, BG13, BG11, BG000. Life jackets - Y17, Y15, Y13, Y11. Boat - C10, C8, C7, C6, C5, C3, C1, C0, B000, V17, V15, V12. Raccoon - W8, W7, W6, W5, W3, W2, W1, R12, R000. Mouse - E37, E35, E34, E31, R12, R000. Fox - E18, E19, E09, E07, E15, E13, E31, E30, E50. Skis - V17, V15, V12.
 
You can buy the new stamps from the Sunshine Lake release separately, or as a bundle of 27 image stamps and 6 sentiments for a 30% discount. This offer is valid until 31st May 2020.

I haven't made a slimline card for a while. I used to make them all the time when I first started crafting. I am glad that they have become popular again! For more inspiration using the new release, please head over to the Purple Onion Designs Blog. Thanks so much for stopping by today, I do very much appreciate it. I hope you have a wonderful day and a great weekend. Take care!

14 May 2020

Spellbinders Small Die Of The Month | Stacked Decorative Edges

Hello there, today I have two tags to share with you using the Spellbinders Small Die of the Month Club Kit. This month it is all about decorative edges. There are 8 dies in the kit that you can use to create decorative edges for your projects. You can stack them up or you can use them separately like I have done to create a decorative accent.
 

I started off by die cutting two tags using the FSJ Tag Steel Rule Die Set from white cardstock. I then added one of the decorative edges dies on to the tag and die cut this further. I used a different edge on each tag. I then created a background to show through using alcohol inks on Yupo Paper. I used pinks and oranges. I left the pieces to dry and then die cut them with the same tag die and adhered them behind the tag with tape runner. I also die cut two more white ones to put on the back to give them a neat finish.
 
 
For the front of the tags, I foiled elements from Yana's Foliage Border set, as well as Yana's Organic Foliage set. I foiled them on to white cardstock with Silver Foil. The sets do come with coordinating cutting dies, but unfortunately, I did not leave enough gap between the foiling so I fussy cut them out with scissors instead. I then foiled sentiments from the Everyday Sentiments II set and cut them in to strips.
 
 
I coloured the flowers with Copic Markers (R22, R20, YR31) and then adhered everything to the front of the tags with either foam squares or tape runner. I then embellished with FSJ Silver Fashion Embellishments and added twine through the top of the tags to finish.
 
SUPPLIES:
 
Here are the links to what I have used on the card. Affiliate links are used on some products. This means that if you make a purchase after clicking on my link, I receive a small commission with no extra cost to you. I truly appreciate your support when using these links. Please click on the logo below the product to shop at your favourite store. All products were personally purchased except those from Clearly Besotted, Hero Arts or those marked with an asterisk (*) which were kindly sent to me to use. You can read my full disclosure here.
 
 
I hope you will check out the Spellbinders Small Die of the Month Kit. It is a monthly subscription where you receive the kit each month. If you do become a member, you will also receive other Spellbinder benefits too. For more information, please see here. You can also purchase previous kits separately but the price is increased for those. You can see them here. Thanks so much for stopping by today, it is much appreciated. I hope you are keeping well. Take care :)

13 May 2020

You Brighten My Day!

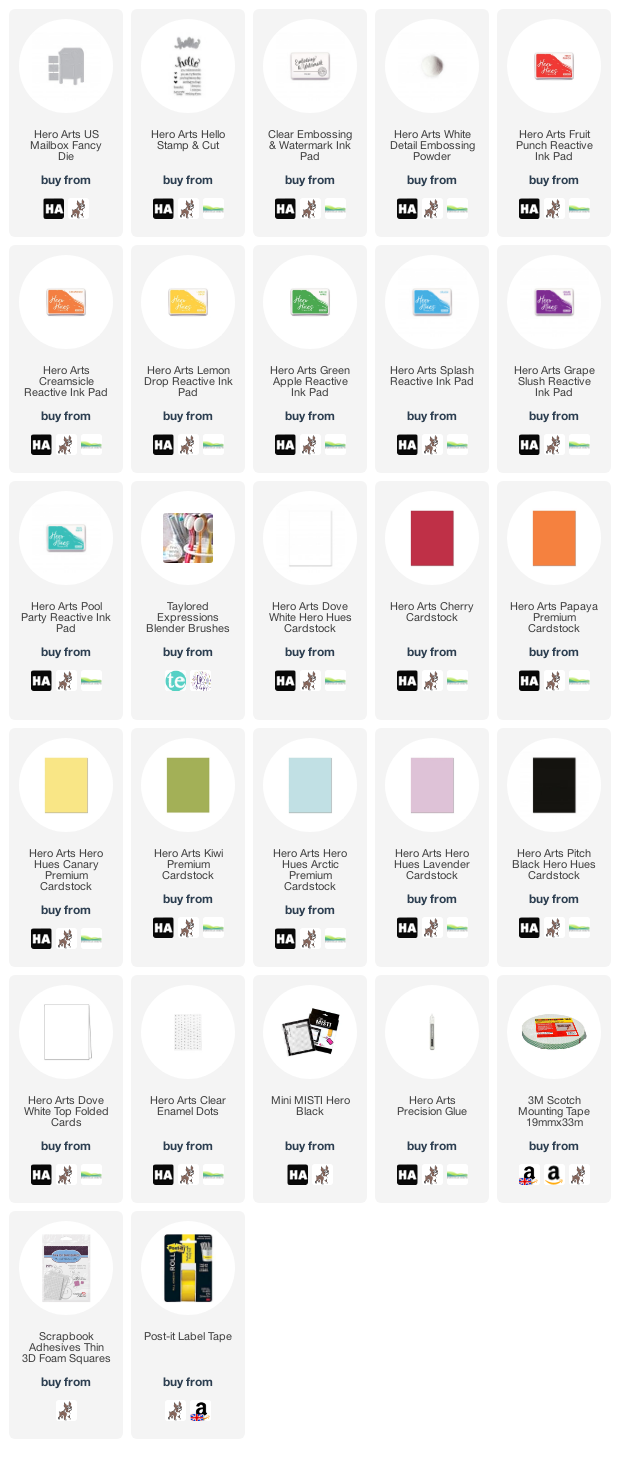
Hello there, apologies for being a day late but I was over on the Hero Arts Blog yesterday sharing a card using the US Mailbox Fancy Die. Being in the UK, I wasn't sure what colour US mailboxes usually are (ours are red), but I thought it would be fun to keep the mailbox white and have all the mail/post be colourful instead!
 
 
I took a white card base and masked off the edges, I then ink blended Pool Party Reactive Ink on to the panel, removed the tape and adhered the main mailbox on top with foam tape. I then cut the envelopes from various shades of Hero Hues Premium Cardstock. I did add a little ink blending to the envelopes to help with dimension and then placed some in the mailbox and two falling from the mailbox. The sentiment from the Hello Stamp & Cut was white heat embossed on black cardstock, cut in to strips and added to the card with foam tape. To finish off, I added a few clear enamel dots.
 
SUPPLIES:

Here are the links to what I have used on the card. Affiliate links are used on some products. This means that if you make a purchase after clicking on my link, I receive a small commission with no extra cost to you. I truly appreciate your support when using these links. Please click on the logo below the product to shop at your favourite store. All products were personally purchased except those from Clearly Besotted, Hero Arts or those marked with an asterisk (*) which were kindly sent to me to use. You can read my full disclosure here.
 
 
For more information on how I made the card, please head over to the blog post here. Thanks so much for popping by today. I really do appreciate it. I hope that you are all doing well. Sending hugs and take care :)

6 May 2020

Brighter Days Are Ahead

Hello there, today I have a card to share with you using the Reverse Confetti Perfect Timing Stamp Set, along with the beautiful Over The Rainbow Die. I think rainbows are perfect for what we are going through at the moment!
 

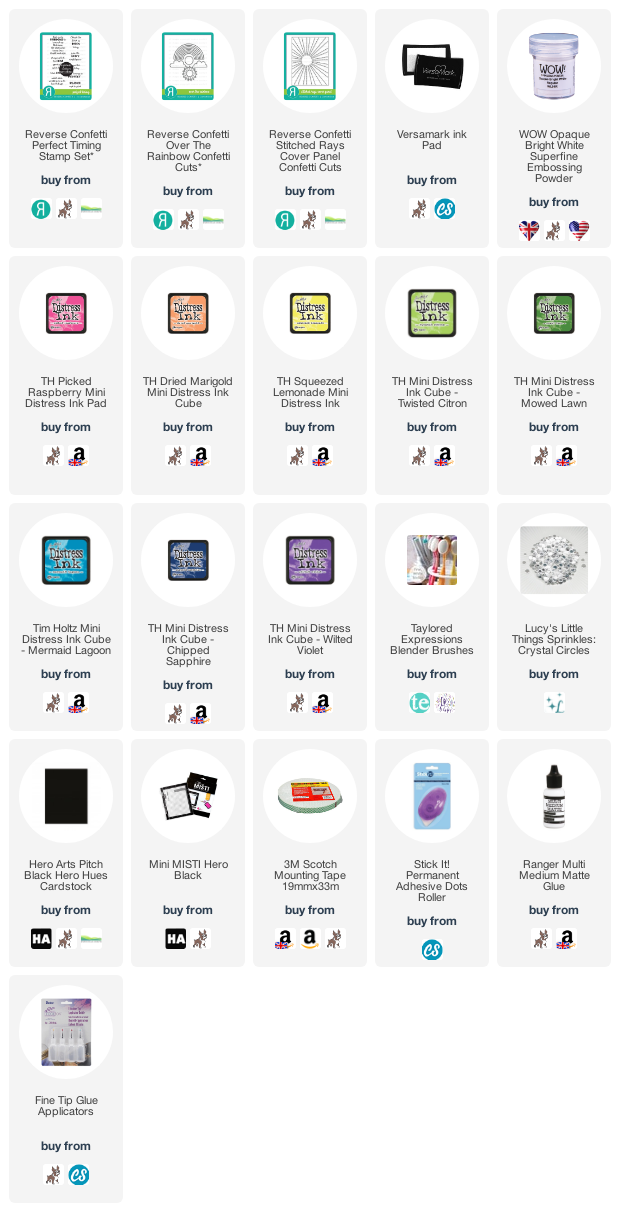
I started off my card by cutting a panel of white cardstock using the Reverse Confetti Stitched Rays Cover Panel Die and adhering it to the front of an A2 white card base with tape runner. I then die cut the rainbow and clouds from the Reverse Confetti Over The Rainbow Die Set from white cardstock also. Using an ink blending tool, I blended Distress Inks on the rainbow, trying to focus the darker colour at the bottom of each side.
 
 
The rainbow was then adhered to the card using Multi Medium Matte Glue and the clouds added at the bottom with tape runner. I then stamped the sentiment from the Reverse Confetti Perfect Timing Stamp Set on to black cardstock with Versamark Ink. I applied white embossing powder and heat set. It was then cut in to strips and added to the card with foam tape. To finish off, I added Lucy's Sprinkles: Crystal Circles around the sentiments strips.
 
SUPPLIES:

Here are the links to what I have used on the card. Affiliate links are used on some products. This means that if you make a purchase after clicking on my link, I receive a small commission with no extra cost to you. I truly appreciate your support when using these links. Please click on the logo below the product to shop at your favourite store. All products were personally purchased except those from Clearly Besotted, Hero Arts or those marked with an asterisk (*) which were kindly sent to me to use. You can read my full disclosure here.
 
 
Reverse Confetti are currently running a birthday sale where you can get 20% off orders using the code RCSEVEN until 8th May 2020. I hope you are all doing well, thank you so much for visiting me today, I really do appreciate it. I hope you have a lovely day! Take care :)

4 May 2020

VIDEO | Hero Arts May 2020 My Monthly Hero Kit Release + Giveaway

Hello there and welcome as we celebrate the release of the Hero Arts May 2020 My Monthly Hero Kit. This month has a wonderful happy mail feel to it - perfect for cards and for envelope art, too. If you are following along with the hop, you should have arrived here from the amazing Lydia, but if you get lost along the way, I will have the full list of participants listed below.
 
 
The first projects I am sharing with you today are the envelopes that I created for the Hero Arts Blog. I thought it would be fun to use the dies from the kit, as well as two add-on products to decorate the backs of the envelopes to help spread some cheer! For more details on how I made them, please head over to the blog post here.
 
 
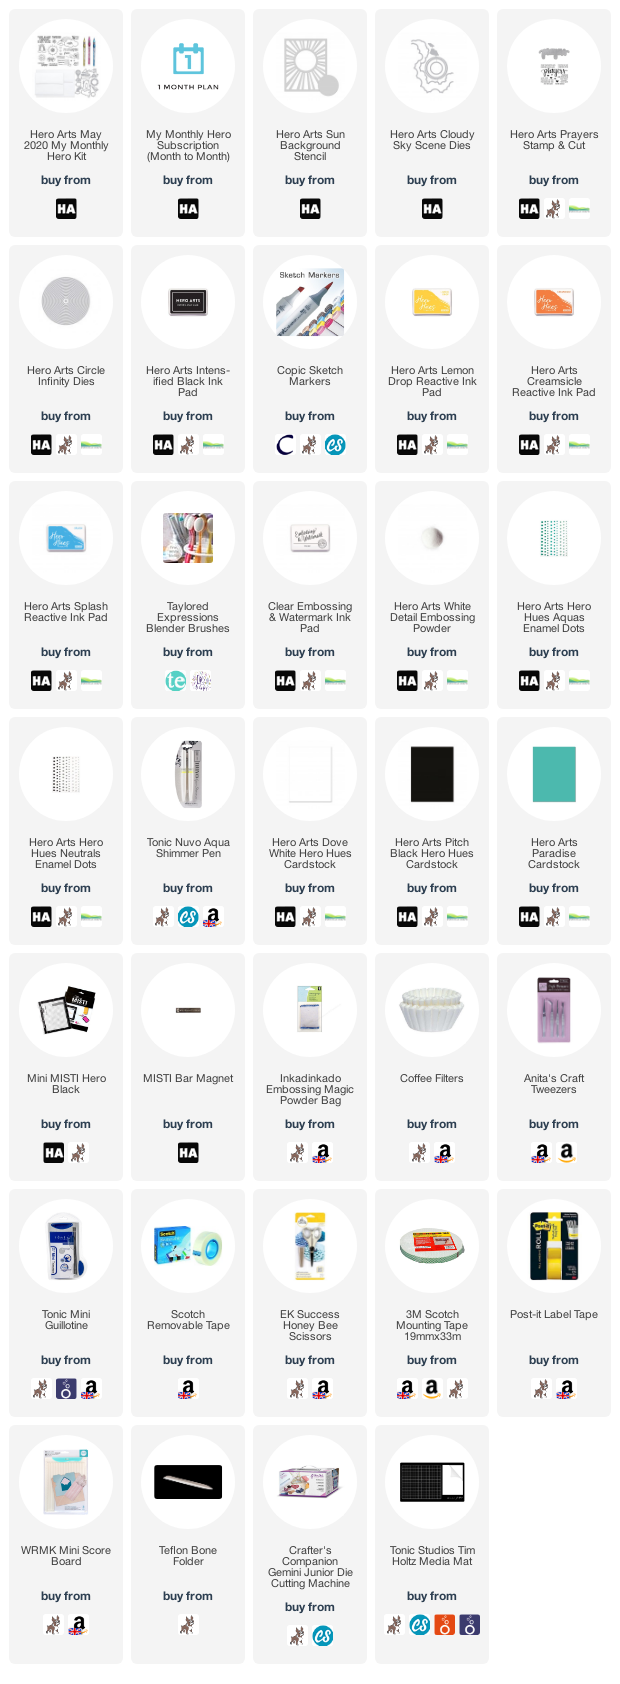
For my project today, I thought it would be fun to create a circle shaped card. I stamped the plane and the hearts from the main kit stamp set on to white cardstock with Hero Arts Intens-ified Black Ink. They were then coloured using Copic Markers (the colours that I used are listed below the supplies area for reference). I then cut them out using the coordinating die for the plane and fussy cut out the hearts using scissors.
 
 
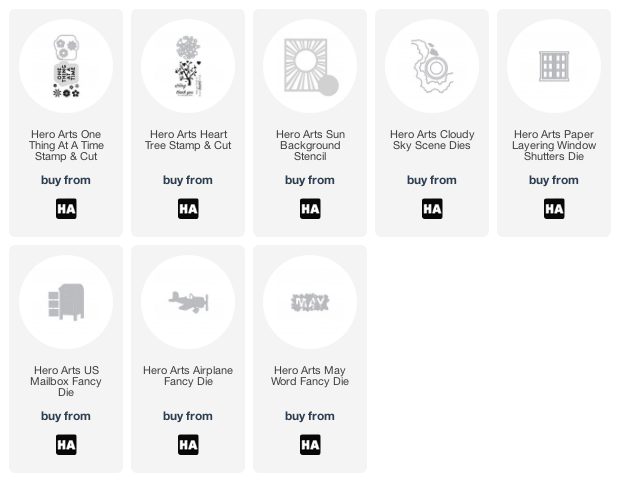
For the background, I die cut circles from white cardstock using the Hero Arts Nesting Circle Infinity Dies. On one of them, I placed the Hero Arts Sun Background Stencil (an add-on this month) on top and blended Hero Arts Lemon Drop and Creamsicle Reactive Inks for sun rays. The other circles were then further cut down using Hero Arts Cloudy Sky Scene Dies (another add-on) and then adhered on top of the sun rays piece with tape runner.
 
 
I took the sentiment from the Hero Arts Prayers Stamp & Cut and stamped it on to Hero Hues Pitch Black Cardstock with Hero Arts Clear Embossing & Watermark Ink. I applied Hero Arts White Detail Embossing Powder, heat set and cut in to a strip. This along with the plane and hearts were added to the panel with foam tape. The panel was then added to a circle shaped card made using Hero Hues Paradise Cardstock, with more foam tape. To finish off, I added Hero Hues Enamel Dots and Aqua Shimmer Pen to the hearts.
 

VIDEO:
 
Here is the video showing how I made the card:


If you are viewing this post via email subscription, you can watch the video HERE on YouTube.
 

THE KIT:
 
The Hero Arts May 2020 My Monthly Hero Kit contains a 6" x 8" clear stamp set, 7 Coordinating Frame Cuts, 7 Envelope Icon Fancy Dies, 3 Karin DecoBrush Metallic Markers (Pink, Gold & Blue), 5 A7 envelopes and 5 A2 envelopes. The kit values at $79.99 but you can get it for $34.99 (approximately £28 depending on exchange rate). The kits are limited edition and often sell out quickly. You can subscribe here so that you never miss a kit. International subscribers get a discount off shipping too.
 

A MESSAGE FROM HERO ARTS:
 
Hero Arts remains closed due to the shelter-in-place order. We have only limited capabilities at this time. Currently we estimate that shipping will begin on May 15, and continue until all boxes have shipped. We are so appreciative that so many have continued to order despite knowing we have long delays. Thank you for your patience, support, and kind wishes. It means the world to us, and we send love and appreciation your way.
 

ADD-ONS:
 
There are lots of fabulous add-on products available to purchase this month. These are not limited edition and can be purchased alongside your kit from Hero Arts or separately from you favourite Hero Arts retailer. Here is a look at them:
 
 
BLOG HOP:
 
Here is the full list of participants in the hop today:
 
Michelle Short - you are here!
 
 
GIVEAWAY:
 
Hero Arts are giving away one $50 gift card, drawn from the comments left across the hop. Enter by Sunday, May 10th at 11:59pm PDT, and the winner will be announced on the Hero Arts blog the following week.  
 
SUPPLIES:

Here are the links to what I have used on the card. Affiliate links are used on some products. This means that if you make a purchase after clicking on my link, I receive a small commission with no extra cost to you. I truly appreciate your support when using these links. Please click on the logo below the product to shop at your favourite store. All products were personally purchased except those from Clearly Besotted, Hero Arts or those marked with an asterisk (*) which were kindly sent to me to use. You can read my full disclosure here.
 
 
COPIC MARKERS: Plane - BG49, BG15, BG13, BG11, B00, B000, C7, C5, C3, C1. Hearts - BG49, BG15, BG13, BG11, R85, R83, R81.
 
Next on the hop is the wonderful Nichol. Thanks so much for stopping by today, I hope you enjoy the rest of the hop and have a wonderful rest of the day!

1 May 2020

VIDEO | Clearly Besotted May 2020 Release Preview

Hello there, I am back to take a look at the whole Clearly Besotted May 2020 release. As you have seen, the sets are super cute this month (as always!) and I think they not only work really well for spring, but for all year round too!
 
 
The sets will be available to purchase from the Clearly Besotted shop at 8pm BST tonight. You can also purchase them now over at Simon Says Stamp. Here is the video showing the sets up close and also a recap of the cards that I made:


If you are viewing this post via email subscription, you can watch the video HERE on YouTube.
 
SUPPLIES:

Here are the links to what I have shared in the video. Affiliate links are used on some products. This means that if you make a purchase after clicking on my link, I receive a small commission with no extra cost to you. I truly appreciate your support when using these links. Please click on the logo below the product to shop at your favourite store. All products were personally purchased except those from Clearly Besotted, Hero Arts or those marked with an asterisk (*) which were kindly sent to me to use. You can read my full disclosure here.
 
 
I would love to know what you think of the release, I had a lot of fun making my cards, so I hope you will like them too! For more information and inspiration, please head over to the Clearly Besotted Blog. Thanks so much for visiting me today, I very much appreciate it. I hope you have a wonderful day and a fabulous weekend!

Clearly Besotted Teasers | Happy Happy Birthday

Hello there and happy Clearly Besotted release day! The new products will be available to purchase in store later today but I have one last teaser to share with you this morning. I couldn't resist inking up the new Piggy Plushie Plans set! This set consists of lots of adorable pigs depicting different activities that you may do throughout the week.
 

I started off by stamping the pig from the Clearly Besotted Piggy Plushie Plans Stamp Set on to white cardstock with Memento Tuxedo Black Ink. I then made a mask for it from mask paper and placed it over the image. I took the balloon image from the Clearly Besotted Balloon Bunch Buddies Stamp Set and stamped it next to the pig so that it looks like he is holding that too.
 
 
The mask was removed and the image coloured using Copic Markers (the colours that I used are listed below the supplies area) and fussy cut out with scissors. I took a panel of white cardstock and masked off the bottom portion using memo tape. Using an ink blending brush, I blended Peacock Feathers Distress Ink at the top. I then splattered on some water droplets and let it sit to dry.
 
 
Once dry, I stamped the sentiment from the set on to the panel with more Memento Tuxedo Black Ink and then adhered the panel on to an A2 white card base with foam tape. The piggy was then added on top with thin foam tape. To finish off, I added Crystal Glaze to the pig's nose.
 
SUPPLIES:

Here are the links to what I have used on the card. Affiliate links are used on some products. This means that if you make a purchase after clicking on my link, I receive a small commission with no extra cost to you. I truly appreciate your support when using these links. Please click on the logo below the product to shop at your favourite store. All products were personally purchased except those from Clearly Besotted, Hero Arts or those marked with an asterisk (*) which were kindly sent to me to use. You can read my full disclosure here.
 
 
COPIC MARKERS: Pig - R22, R21, R00, R00, R000. Hat & balloon - V09, V17, V15, V12, V01. Cupcake - V17, V15, V12, R85, R83, R81.
 
These images work perfectly in planners but as you can see, on cards also. They are just adorable! For more inspiration using the new release, please head over to the Clearly Besotted Blog as well as Keren's Blog. Also check out our wonderful guest Keeway. Thanks so much for stopping by, I will be back in a few hours with my release video. See you then!

30 April 2020

Clearly Besotted Teasers | Spring Hugs

Hello there and welcome to day four of the Clearly Besotted May 2020 Teasers. The new sets release tomorrow but I still have a couple of teasers to share with you! Today I am using an adorable set called Spring Corners. The set has two corner images of adorable chicks with flowers but for my card today, I decided to use the smaller image in the set.
 

I started off by stamping the chick with daffodil image from the Clearly Besotted Spring Corners Stamp Set on to white cardstock with Memento Tuxedo Black Ink. I then coloured the chick and daffodil using Copic Markers (the colours that I used are listed below the supplies area) and fussy cut out with scissors.
 

I thought it would be fun to have the image on a circle card so I first cut two scalloped circles from white cardstock. I scored a line towards the top of one piece and adhered it to the back of the other piece. This makes a hinge so that the card can open and close easily. I then cut two circles from patterned paper (sadly the MFT paper has now been discontinued) and adhered the blue one on to the card with tape runner.
 
 
I cut the green circle down and using the stitched die from the Mama Elephant Fine Trimmings Die Set, added the stitching detail to the top of the piece. It was then added on top of the blue circle to be the grass. I took the sentiment from the Clearly Besotted Flower Plushies Stamp Set (that I used on day two of the teasers) and stamped this above the grass layer. The chick and daffodil image was then added on top with foam tape. To finish off, I added Crystal Glaze to the chicks beak.
 
SUPPLIES:

Here are the links to what I have used on the card. Affiliate links are used on some products. This means that if you make a purchase after clicking on my link, I receive a small commission with no extra cost to you. I truly appreciate your support when using these links. Please click on the logo below the product to shop at your favourite store. All products were personally purchased except those from Clearly Besotted, Hero Arts or those marked with an asterisk (*) which were kindly sent to me to use. You can read my full disclosure here.
 
 
COPIC MARKERS: Chick - Y17, Y15, Y13, Y11, YR16, YR12. Daffodil - YR31, YR30, Y00, G29, G46, G43, YG01.
 
I love creating little cards like this, just to send a little cheer through the mail! I am, however, looking forward to inking up and colouring the corner images in the set too! For more inspiration using the new release, please head over to the Clearly Besotted Blog, Keren and Keeway. Thanks so much for visiting me today. See you tomorrow for release day. Have a lovely day!

29 April 2020

Clearly Besotted Teasers | Hug In A Mug

Hello there and welcome to day three of the Clearly Besotted Teasers. Not long to go until the release. The sets release on Friday :) For my cards today, I am using the super cute Spilling Tea set. I know that coffee and tea sets are really popular in the crafting world, so I hope you like these adorable critters drinking their favourite beverages!
 

For both cards, I started off by taking A2 white card bases and scoring horizontal lines on the front using a scoring board and bone folder. I apologise that they are difficult to see in the photos, white texture is not easy to capture, but they do add an extra detail to clean and simple cards in real life! I then took the rounded tag die from the Clearly Besotted Tag Along Die Collection and die cut it twice from white cardstock.
 
 
Taking the Clearly Besotted Freshly Cut Grass Stencil, I placed the landscape side towards the bottom of the tag. I then blended Distress Inks on top. For the sloth, I used Peacock Feathers and Cracked Pistachio inks. For the penguin, I used Seedless Preserves and Wilted Violet inks. I then splattered on some water droplets and set aside to dry.
 
 
I took the sloth and penguin images from the Clearly Besotted Spilling Tea Stamp Set and stamped them on to white cardstock with Memento Tuxedo Black Ink. They were coloured using Copic Markers (the colours that I used are listed below the supplies area) and then fussy cut out with scissors. The sentiments were stamped on to the tags and then the images added on with foam tape. I tied twine through the top of the tags and then they were added to the cards with tape runner. To finish off, I added white gel pen details to the images.
 
SUPPLIES:

Here are the links to what I have used on the cards. Affiliate links are used on some products. This means that if you make a purchase after clicking on my link, I receive a small commission with no extra cost to you. I truly appreciate your support when using these links. Please click on the logo below the product to shop at your favourite store. All products were personally purchased except those from Clearly Besotted, Hero Arts or those marked with an asterisk (*) which were kindly sent to me to use. You can read my full disclosure here.
 
 
COPIC MARKERS: Penguin - BV29, BV25, BV23, C2, C1, YR14, YR12. Cup - C5, C3, C1, C00, V17, V15, V12, V01, B00, B000, B0000. Sloth - W8, W7, W6, W5, W4, W3, W2, W1, E50. Cup - BG49, BG15, BG13, BG11.
 
The set also includes other critters such as bears, bunnies and cats, as well as lots of fun sentiments. For more inspiration using the new release, please head over to the Clearly Besotted Blog, as well as Keren; plus our wonderful guest this month, Keeway. Thanks so much for stopping by, see you tomorrow for day four. Have a lovely day!
End of code