17 October 2016

Hello, Friend!

Hello there, today I have a trio of really simple cards to share with you. Although they are simple, I love how the backgrounds came out and I love the vibrancy of the colour against the black card bases.


I started off by taking pieces of Bristol Smooth cardstock and stamping the hello friend from the ME Hello Friend Wishes stamp set on to them using Versamark ink. I then applied Hero Arts white embossing powder and heat set. I then took various shades of Distress Ink and blended these over.
 
 
I used Picked Raspberry and Seedless Preserves for the first. I used Mustard Seed, Dried Marigold and Abandoned Coral for the second one. I then used Twisted Citron, Cracked Pistachio and Peacock Feathers for the third. After blending on the colours, I sprayed them with a Mini Mister filled with water and Perfect Pearls. This gives them a nice, subtle shimmer and as you can see on the pink one, it gave some nice textural interest to the background too.
 
 
I adhered the panels flat to A2 sized black card bases with ATG. I had planned on adding sequins to the cards, and I think that would have looked nice, but I decided to leave them as is. I do still like them without and I can always add some at a later date if I change my mind!
 

SUPPLIES:

Here are the links to what I have used on the card. Please click on the picture or wording to be taken to where I purchased it. Affiliate links are used on some products. This means that if you make a purchase after clicking on my link, I receive a small commission with no extra cost to you. I truly appreciate your support when using these links.


Thank you so much for visiting me today. I hope you are all doing well. I apologise for my absence again but hopefully a little crafty spend may have helped with the lack of mojo. I am really looking forward to some new goodies arriving soon. I will of course, share them with you when they get here. Thanks so much for visiting me today. I hope you have a great day and a great week!

11 October 2016

Owliver Loves To Celebrate

Hello there, it was my mum's birthday last week and as soon as I saw this Stamping Bella image, I thought it would be perfect for her card. Owliver is so cute!
 

I started off by taking a panel of white cardstock. I stamped Owliver on to it using Memento Tuxedo Black Ink. I then coloured him using Copic Markers. I created a background by flicking in some grass, making some clouds in the sky and then a ground for him to stand on. All of this was coloured with Copic Marker also.
 
 
The sentiment, from the Your Next Stamp Cool Tag Banner Sentiment set, was stamped in the top right corner using the same Memento ink. The panel was adhered to a 5" x 5" white card base with foam tape. I then added some clear Wink of Stella to his hat and then added Glossy Accents to his glasses.
 
SUPPLIES:
Here are the links to what I have used on the card. Please click on the picture or wording to be taken to where I purchased it. Affiliate links are used on some products. This means that if you make a purchase after clicking on my link, I receive a small commission with no extra cost to you. I truly appreciate your support when using these links.
 
COPIC MARKERS: Owliver - E29, E27, E25, E23, E21, E50, YR24, Y15, Y13, Y11. Glasses & Hat - V09, V06, V04, V01. Ground - E44, E43, E42, E41, E40. Grass - YG67, YG17, YG23, YG03, YG01. Sky - B00, B000, B0000. Clouds - C1, C0, C00.
 
A very simple background for Owliver to stand in but I did enjoy creating it. Thank you so much for visiting me today. I hope you have a great day!

8 October 2016

DESTASH

Hello there, I am so sorry I have MIA recently. I have to be honest with you and say I have had zero mojo. When I am mojo-less I tend to organise and tidy so I have had a good clear out of my stamps and a few dies and thought you may like to see what I am selling. I have added them all over on my For Sale page. Please do pop over and have a look to see if there is anything you are interested in. If you are, please send me an email - all the details are over on the page! Thanks :)

3 October 2016

40

Hello there, today I have something to share that doesn't happen very often ... a card with no stamping on! The card is entirely made up of die cutting and embossing. I did stamp a sentiment on the inside though! ;)
 

I started off by taking a piece of white cardstock and ran this through my Cuttlebug using the PTI Sunrise Impressions 1 Impression Plate. I then die cut the MFT High Rise numbers from Stampin' Up Silver Glimmer Paper. I cut these from foam sheet too. I took the Mama Elephant Confetti dies and cut these also with the glimmer paper.
 
 
I adhered the embossed piece on to an A2 white card base with ATG. I then layered up the glimmer 4 and 0 on to the foam ones (to give some dimension) with Multi Medium Matte. These were added to the sun part of the embossed background. To finish, I added the little sequin and star pieces.
 
SUPPLIES:
Here are the links to what I have used on the card. Please click on the picture or wording to be taken to where I purchased it. Affiliate links are used on some products. This means that if you make a purchase after clicking on my link, I receive a small commission with no extra cost to you. I truly appreciate your support when using these links.

Such a simple design but I think the glitter gives it that extra touch. My camera never enjoys the glitter though, so I apologise for the photos! Thank you for visiting me today. I hope you have a great week!

1 October 2016

Anniversary Hearts

Hello there, today I have a card to share that I made for my brother and sister-in-law's wedding anniversary. They have been married for 10 years this year and I have to admit, I am running out of ideas for their cards now! ;) I decided to use the negative painting technique with some hearts. 
 

I started off with a piece of Arches Cold Press watercolour paper. I then drew on some hearts with a watercolour pencil. The panel was spritzed with water and then I dropped in various shades of red, pink and purple watercolours (colours in supplies section). I focussed most of the colour outside of the hearts so that they showed up. Once dry, the panel was cut down.
 
 
I took the sentiment from the Clearly Besotted Round Roses set (this set is retired from CB but you can still get it at SSS while stocks last). This was stamped in black ink on to a piece of white cardstock and cut out. I took a piece of black cardstock and ran this through my Cuttlebug with the PTI Woodgrain Impression Plate. This was adhered to the front of an A2 black card base with ATG. I then added the watercolour panel on top with foam tape. The sentiment piece was also adhered with foam tape. To finish off, I added a few Hero Arts smooth gems (these are sadly discontinued but similar to the PPP droplets).
 
SUPPLIES:
Here are the links to what I have used on the card. Please click on the picture or wording to be taken to where I purchased it. Affiliate links are used on some products. This means that if you make a purchase after clicking on my link, I receive a small commission with no extra cost to you. I truly appreciate your support when using these links.
 
One thing I have noticed is that there are not many stamp companies that have anniversary sentiments in their sets. Do people not send many anniversary cards these days? Thanks so much for visiting me today. I hope you have a great weekend!

29 September 2016

VIDEO | 1 Stamp, 3 Ways Collab

Hello there, today I am taking part in a fun collaboration with Kim Dellow and Sharon Curtis. We thought it would be fun to use the same stamp set and see what we all create using it.


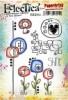
We are using the Eclectica 3 EKD03 stamp set by Kim Dellow for PaperArtsy. I guess the set is aimed more for the mixed media field, but I thought it would be fun to use in a clean and simple way.


I started off by stamping the image on to a piece of white cardstock using Memento Tuxedo Black ink. I then cut this out using the largest of the SSS Stitched Rectangle dies. The panel was then coloured using Copic Markers (the colours used are listed below the supplies section).


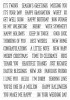
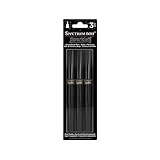
I took the sentiment from the Clearly Besotted Many Mini Messages set and stamped it on to more white cardstock with the same Memento Tuxedo Black ink. This was then cut out. I adhered the image panel to a white 5"x5" card base with foam tape. I then popped the sentiment piece up with foam tape also. To finish off, I added Spectrum Noir Sparkle Pen to the inside portions of the flowers and then coated them with Glossy Accents.


VIDEO:

Here is how I made the card and a closer look at the colouring:


SUPPLIES:

Here are the links to what I have used on the card. Please click on the picture or wording to be taken to where I purchased it. Affiliate links are used on some products. This means that if you make a purchase after clicking on my link, I receive a small commission with no extra cost to you. I truly appreciate your support when using these links.


 COPIC MARKERS - Background sky: B04, B02, B01, B00, B000, B0000. Stems & leaves: YG17, YG23, YG03, YG01. Yellow flowers: Y17, Y15, Y13, Y11, Y000. Purple flower: V06, V05, V04, V01, V000.

Please do go and see what Kim and Sharon have done with the stamp set, I am sure you will not be disappointed! Thanks so much for visiting me to day, I hope you have a great day!
End of code