
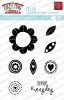
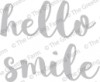
Hello there, today I have the pleasure of Guest Designing for The Greeting Farm. I am using the super cute Mini Fleurs stamp set, as well as the Hello & Smile die cutting set.

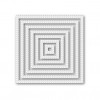
For my card, I started off with a piece of white cardstock which was cut using a SSS Stitched Square die. I then took the centre of the flower from the Mini Fleur set and stamped this on tot the panel using MFT Orange Fizz ink. The flower image was then stamped using MFT Razzle Berry ink. I also created a mask of this stamp and placed it over the image. The leaves were then stamped on top using MFT Sour Apple ink. The mask was then removed.

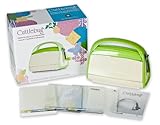
I then took the Hello die and placed this over the top of the panel in the middle of the flower. I ran this through my Cuttlebug and made sure to keep all of the little pieces from the letters safe to inlay afterwards. I die cut three of the hello die using white cardstock and stacked them together using Multi Medium Matte. These were inlaid in to the panel, as well as all of the little pieces from the letters. I then added the final layer of the hello (the one die cut from the panel) on top which then finished the pattern.

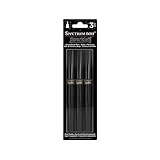
To finish off the card, I added the panel on to a 4"x4" Razzle Berry card base using foam sheet. I also added a coating of Spectrum Noir Clear Sparkle Pen on top of the hello die cut.
VIDEO:
SUPPLIES:
Here are the links to what I have used on the card and in the video. Please click on the picture or wording to be taken to where I purchased
it. Affiliate links are used on some products. This means that if you make a
purchase after clicking on my link, I receive a small commission with no extra
cost to you. I truly appreciate your support when using these links.


For more inspiration using The Greeting Farm products please take a look at their blog and You Tube channel. I will be back later in the month with another Guest Design post. Thank you so much for visiting me today. I hope you have a lovely day!
Congratulations on being guest designer Michelle and I love this style of card, ingenious!!
ReplyDeleteBig hugs
Roni :D xox
Lovely! Love the colours - they really pop - and the inlaid word, which is slightly hidden. Xx
ReplyDeleteI love this design Michelel. Definitely something I will try. Great card x
ReplyDeleteThis is such a sweet little card, Michelle! I liked your video, too.
ReplyDeleteLove the inlaid diecut word - fiddly, but worth it!
ReplyDeleteLovely dad Michelle and a great technique ..thank,you the tutorial ... Congratulations on your GD post
ReplyDeleteAnne
Simply perfection, certainly a Michelle Short card. Congrats on the GDT, you deserve it my friend. You are a true inspiration.
ReplyDeleteHugs xx
Beautiful Michelle, love your design its very effective :)
ReplyDeleteHugs, Kaz x
This is a sweet, pretty card Michelle! Also, thanks for the video - I have often wondered how this technique was done! I'm definitely going to give it a try now :-)
ReplyDeletePretty card...love your sweet design.
ReplyDelete