11 January 2024

Simon Says Stamp | Printmaking Hearts

Hello there, today I have two cards to share with you using the new Printmaking Hearts Stamp Set from the Simon Says Stamp Sweetheart Collection, which is out today. Whilst the set is more on the Valentine's theme, I decided to use non-traditional colours and make more generic cards that could be used for other occasions (especially the aqua one). 

PLEASE NOTE: This post contains affiliate links. Please see below for my full disclosure.


I started off my cards by stamping the Simon Says Stamp Printmaking Hearts stamp onto white cardstock. The image has three layers (all nine hearts on one layer), so that you can use different colours for the different layers if you want to. Whilst my hearts are not perfect, I did find the layers pretty easy to line up. 


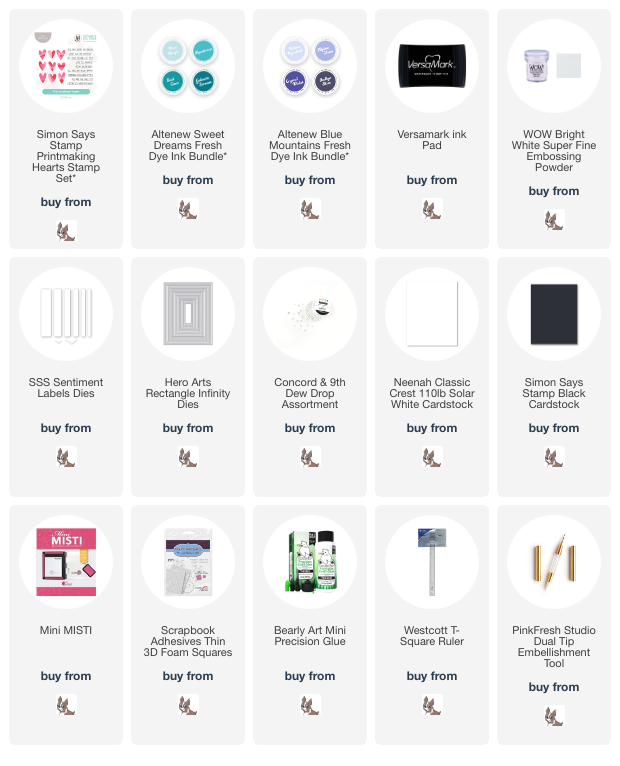
For the aqua card I used Altenew Sweet Dreams Fresh Dye Inks (Dew Drops, Aqualicious and Teal Cave). For the blue card, I used Altenew Blue Mountains Fresh Dye Inks (Water Hyacinth, Alpine Aster and Crystal Violet). The panels were then die cut out using a Hero Arts Rectangle Infinity Die and adhered to US A2 sized white card bases with thin foam tape. 


I stamped the sentiments from the Simon Says Stamp Printmaking Hearts Stamp Set onto black cardstock using Versamark Ink. I applied white embossing powder and heat set. They were cut into strips using the Simon Says Stamp Sentiment Labels Dies and adhered to the cards using more thin foam tape. 


To finish off, I adhered Concord & 9th Dew Drops to the hearts using Bearly Art Glue. I do love the non-traditional colours but I think I am going to make some in pinks and reds for anniversary cards too! 

SUPPLIES:


Here are the links to what I have used on the projects. Affiliate links are used on some products. This means that if you make a purchase after clicking on my link, I receive a small commission with no extra cost to you. I truly appreciate your support when using these links. Please click on the logo below the product to shop at your favourite store. All products were personally purchased except those from Clearly Besotted, Hero Arts or those marked with an asterisk (*) which were kindly sent to me to use. You can read my full disclosure here.


Thank you so much for stopping by today, I really do appreciate it. I will be back later with another post, but in the mean-time, I hope you have a wonderful day! 

10 January 2024

Altenew | January 2024 Release Blog Hop + Giveaway

Hello there, I am delighted to be joining Altenew today to celebrate the January 2024 release with a fun blog hop. I have lots to share today, so I hope you will grab a drink and a snack and enjoy the inspiration! 

PLEASE NOTE: This post contains affiliate links. Please see below for my full disclosure.


My first card today uses Altenew Build-A-Garden: Daisy Crown & Add On Die Bundle (it can be purchased without the die also). I started off by stamping the main image from the stamp set onto white cardstock using Altenew Obsidian Pigment Ink


Using the stencil in the kit, as well as Altenew Mini Blending Brushes, I blended ink on top to colour the image. I used Altenew Enchanted Garden Crisp Dye Inks for the petals, Altenew Golden Sunset Fresh Dye Inks for the centres and Altenew Green Valley Crisp Dye Inks for the leaves and stems. It was then die cut out using the coordinating die. I adhered it onto a US A2 sized white card base with Altenew Instant Dimension Foam Tape


I then stamped the 'thanks' sentiment from the set onto white cardstock using Obsidian Pigment Ink. It was die cut out using the coordinating die. For the accompanying sentiment, I used the sentiment from Altenew Paint-A-Flower: Iceland Poppies Stamp Set. It was stamped onto black cardstock using Altenew Embossing Ink. I applied Altenew Pure White Crisp Embossing Powder, heat set and cut into a strip. Both were adhered to the card with more foam tape. To finish off, I added a few Altenew Enchanted Garden Enamel Dots


My next card uses the beautiful Altenew Mega Blossom Stencil Set (4 in 1). One by one, I placed the stencils onto a panel of white cardstock and added ink blending with an Altenew Mini Blending Brush. I used Altenew Sweet Dreams Fresh Dye Ink for the petals and Altenew Green Valley Crisp Dye Ink for the stem and leaves. 


I adhered the panel to a US A2 sized white card base with tape runner adhesive. I then stamped the 'hello' from Altenew Build-A-Garden: Daisy Crown onto white cardstock using Altenew Obsidian Pigment Ink. It was die cut using the coordinating die. 


I took the sentiment from the Altenew Soft Blossoms Stamp Set and stamped it onto black cardstock and heat embossed. It was then cut into a strip. Both were adhered to the card with Altenew Instant Dimension Foam Tape. To finish off, I added a few iridescent bubble embellishments. 


My next card uses the new Altenew Zero-Waste: Field of Flowers Die. If you are not familiar with this concept, the idea is that you can use both the negative and positive of the die, so not to waste anything! I only used the negative on my card today but you can definitely use both! 


I started off by die cutting the die from white cardstock. I then used the Altenew Zero-Waste Layering Stencil Set to colour the pieces in. I used Altenew Enchanted Evening, Green Valley and Sweet Dreams Inks. I scored an A2 sized white card base with horizontal lines and then adhered the flowers and leaves on top. I adhered some flat and some with foam tape. 


I then die cut the 'hello' sentiment from the Altenew Timeless Sentiments Die Set from white cardstock. On the word itself, I added ink blending with Altenew Enchanted Garden Inks, stacked it up on another white die cut and then adhered it to the shadow piece. It was then adhered to the card with thin foam tape. To finish off, I added a few silver gems. 


My last card for today uses the new Altenew Enchanted Beginnings 3D Embossing Folder. I placed a panel of white cardstock inside it and ran it through my die cutting machine. Using the Altenew Enchanted Beginnings Simple Coloring Stencil, I added ink blending to the image to colour it in. 


I used Altenew Enchanted Garden Crisp Dye Inks for the dress and flowers, Altenew Jet Black Fresh Dye Ink for the suit and Altenew Green Valley Crisp Dye Inks for the leaves. It was adhered to an A2 white card base with tape runner adhesive. 


I stamped the 'congrats' from Altenew Build-A-Garden: Daisy Crown onto white cardstock using Altenew Obsidian Pigment Ink. It was die cut using the coordinating die. The accompanying sentiment is from the same set. It was heat embossed in white onto black cardstock. It was cut into a strip and both sentiments adhered to the card using Altenew Instant Dimension Foam Tape. To finish off, I added a few silver gems to the dress. 


Next up are more new pouches. These are great for organisation! The first one is the new Altenew Zip 'n' Stash pouch. The mesh zipper pouches are 13" x 9.5" and available in three colours - teal (pictured), yellow and blue. They hold a lot of stuff! perfect for storing items or using as project pouches. 


Next are the Altenew Zip 'n' Keep pouches. These 13" x 9.5" pouches are available in packs of three. There is a white back and a clear front. They are available in three colours - grey, white and blue (pictured). 


Also releasing today are Altenew Acrylic Markers 24 Set Vol. 1. These opaque, water based acrylic markers are acid free and have a medium tip. I love the colour selection! Releasing alongside them are Altenew Color-by-Number: Instant Artist - Blossoming Florals 12 Sheets. These sheets are a color by number concept where you can use the acrylic markers (or other mediums) to colour them in. There are six designs, each with a sheet with black outlines and one with a no-line look. 


Although I think the markers look great on the colouring sheets, I have to be honest and say that I couldn't get as neat as a result as I would have liked. So I tried using them on an envelope for some (very simple!) envelope art and loved the results! They will be perfect to colour and draw on lots of different mediums too! 

BLOG HOP:

This blog post is part of a fun, inspirational blog hop with prizes. Please click the links below for the other participants in the hop:

You are invited to the Inlinkz link party!

Click here to enter

GIVEAWAY:

$300 in total prizes! To celebrate this release, Altenew is giving away a $100 gift certificate to 1 lucky winner and a $50 gift certificate to 4 winners! Please leave a comment on the Altenew Card Blog and/or each designer’s blog post on the blog hop list below by 17th January 2024 for a chance to win. Altenew will draw 5 random winners from the comments left on each stop of this blog hop and announce the winners on the Altenew Winners Page on 19th January 2024*The winner of the $100 gift certificate will be chosen from comments left on the Altenew blog.

SUPPLIES:


Here are the links to what I have used on the projects. Affiliate links are used on some products. This means that if you make a purchase after clicking on my link, I receive a small commission with no extra cost to you. I truly appreciate your support when using these links. Please click on the logo below the product to shop at your favourite store. All products were personally purchased except those from Clearly Besotted, Hero Arts or those marked with an asterisk (*) which were kindly sent to me to use. You can read my full disclosure here.


Thank you so much for stopping by today, it really is very appreciated. I hope you have a great rest of the day! 

Spellbinders | Monster Birthday

Hello there and happy Spellbinders release day! I have two cards to share today using the new Monster Birthday Collection. These characters are made so that their legs can move (so cute!), but I decided for these cards, that I would just keep them static and I think they are still as cute! 

PLEASE NOTE: This post contains affiliate links. Please see below for my full disclosure.


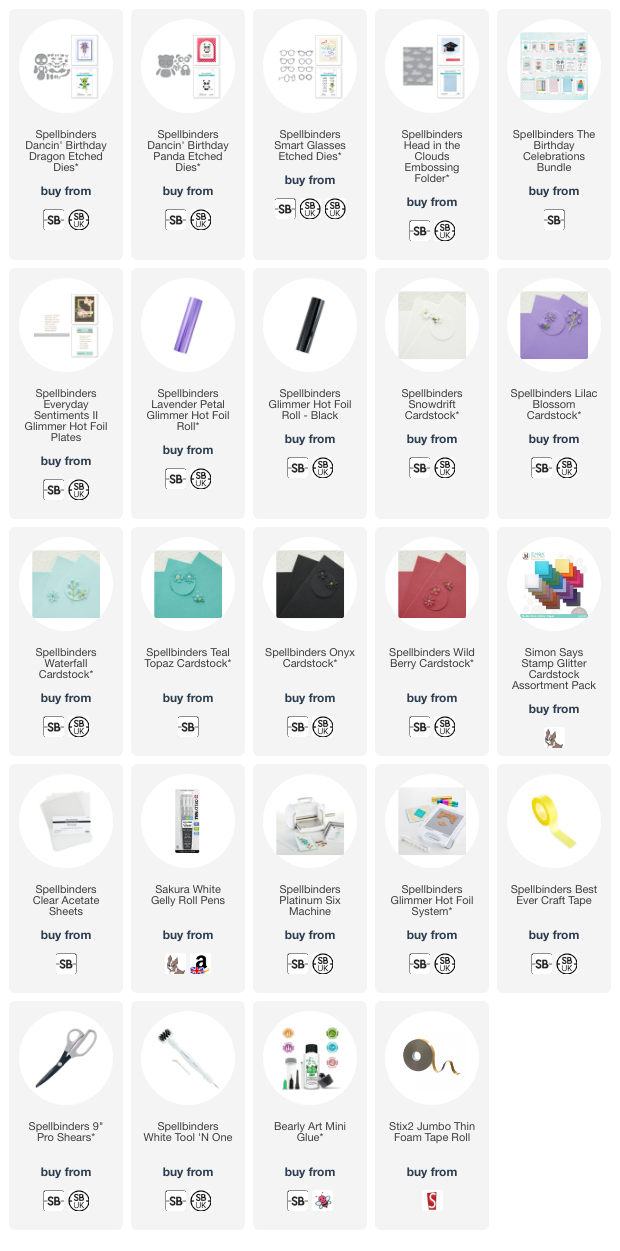
For my first card, I started off by die cutting the Spellbinders Dancin' Birthday Dragon Etched Dies from Spellbinders Cardstock. I used Spellbinders Lilac Blossom and Waterfall for the main parts of the body, tail and wings and Onyx for his eyes. I cut the present/gift from Spellbinders Teal Topaz Cardstock and the bow from Simon Says Stamp Glitter Cardstock. I also used the glitter cardstock for his crown and glasses. 


The glasses are from the Spellbinders Smart Glasses Etched Dies set and they are so fun! They are a great size and fit lots of different characters! I assembled the dragon and adhered with Bearly Art Glue. I then took a panel of white cardstock and ran it through my die cutting machine inside the Spellbinders Head in the Clouds Embossing Folder


It was adhered onto a US A2 sized white card base, followed by the dragon (both using thin foam tape). I hot foiled the sentiment from the Spellbinders Everyday Sentiments II Glimmer Hot Foil Plate using Spellbinders Lavender Petal Foil and the Glimmer Hot Foil Machine. It was cut into a strip and adhered to the card with thin foam tape. To finish off, I added a few white gel pen highlights. 


My next card uses Spellbinders Dancin' Birthday Panda Etched Dies. I die cut her from Spellbinders Onyx and Snowdrift Cardstock and added a little Spellbinders Wild Berry Cardstock behind the head piece for her mouth. The bow and glasses were cut from Simon Says Stamp Glitter Cardstock


For the glasses on this one, I added small pieces of acetate behind the openings to look like real glasses! I took a panel of white cardstock and ran it through my die cutting machine inside the Spellbinders Party Spots Embossing Folder. It was adhered to a US A2 sized white card base with thin foam tape. 


The panda was adhered on top, also with thin foam tape. I hot foiled the sentiment from the Spellbinders Everyday Sentiments II Glimmer Hot Foil Plate using Spellbinders Black Foil. It was cut into a strip and adhered to the card with more thin foam tape. To finish off, I added a few white gel pen highlights. 

SUPPLIES:


Here are the links to what I have used on the projects. Affiliate links are used on some products. This means that if you make a purchase after clicking on my link, I receive a small commission with no extra cost to you. I truly appreciate your support when using these links. Please click on the logo below the product to shop at your favourite store. All products were personally purchased except those from Clearly Besotted, Hero Arts or those marked with an asterisk (*) which were kindly sent to me to use. You can read my full disclosure here.


These characters are just absolutely adorable! The glasses just make them ever better! But they would still look cute without them as well. Thank you so much for stopping by today, I really do appreciate it. I will be back later with another project but in the mean-time, I hope you have a wonderful day! 

8 January 2024

Hero Arts | My Monthly Hero January 2024 Release Blog Hop + Giveaway

Hello there and welcome as we celebrate the release of the Hero Arts January 2024 My Monthly Hero Kits and add-on products. The release this month is all about love, flowers and friendship! 

PLEASE NOTE: This post contains affiliate links. Please see below for my full disclosure.


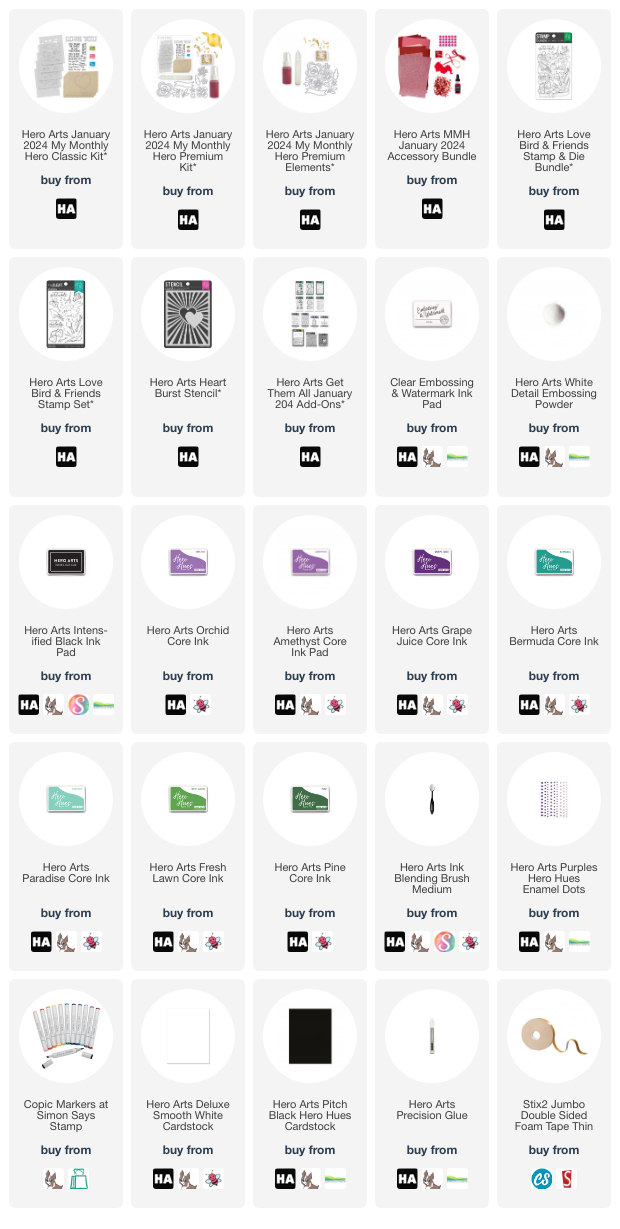
My first project today uses the Hero Arts January 2024 My Monthly Hero Premium Kit. I started off by die cutting the Floral Fancy Dies in the kit from Deluxe Smooth White Cardstock. I then added ink blending on top with Ink Blending Brushes


I used OrchidAmethyst and Grape Juice Core Inks for the purple flowers, Bermuda and Paradise Core Inks for the aqua/teal flowers and Fresh Lawn & Pine for the leaves. I adhered the leaves first to an A2 sized white card base with Precision Glue


The flowers were adhered using foam tape. I stamped the sentiment from the Love Messages Clear Stamp Set (in the kit) onto Pitch Black Cardstock using Clear Embossing & Watermark Ink. I applied White Embossing Powder and heat set. It was fussy cut out and adhered to the card with more foam tape. To finish off, I added a few Purple Enamel Dots


My second project for today uses two new add-on sets. I started off by stamping the bird and branch from the Love Bird & Friends Stamp Set onto white cardstock using Intens-ified Black Ink. They were coloured with Copic Markers and die cut out. Using a craft knife, I cut around the bottom of the bird's feet/claws so that I could pop the branch below them. 


I then stamped the sentiment from the set and die cut it out too. I took a panel of white cardstock and ran it through my die cutting machine with the Heart Burst Stencil to emboss/deboss it. The panel was adhered to an A2 sized white card base with tape runner adhesive. 


I then stamped the music notes on top with Intens-ified Black Ink. The bird, branch and sentiment were adhered with foam tape. 


MY MONTHLY HERO KITS:


• 5 Color Layering Floral Background Stencils, 5.25" x 6.5"
• Coordinating Heart Window Frame Cut
• Love You Fancy Dies
• Love Messages Clear Stamp Set, 4" x 6"
• 6 Sheets of Camel Watercolor Paper, 5" x 7"
• 3 Core Ink Cubes (Moss, Azalea, Summer Sky)

The kit is valued at $70 but you can get it for $36.99 ($34.99 if you are a monthly subscriber, $32.99 if you subscribe for 6 months). 


• 5 Color Layering Floral Background Stencils, 5.25" x 6.5"
• Coordinating Heart Window Frame Cut
• Love You Fancy Dies
• 10 Floral Fancy Dies
• Love Messages Clear Stamp Set, 4" x 6"
• 6 Sheets of Camel Watercolor Paper, 5" x 7"
• 3 Core Ink Cubes (Moss, Azalea, Summer Sky)
• Gold Leaf Flakes
• Sparkle Clear Lacquer Pen
• Pink Gold Metallic Spray, 1 oz

The kit is valued at $106 but you can get it for $49.99 ($47.99 if you are monthly subscriber, $45.99 if you subscribe for 6 months).


You can also now purchase the Premium Kit Elements separately. This includes just the extra elements in the Premium Kit. It does not include the Classic Kit elements. 


There is also an Accessory Bundle this month too. These products compliment the kit nicely and help to increase creativity!

ADD-ONS:

There are lots of add-on products released each month. These work alongside the kit, or work on their own too. These can be purchased from Hero Arts when you order a kit, on their own or from your favourite Hero Arts retailer (these are not exclusive (unlike the kit) and are restocked if sold out). Here is a look at them:

BLOG HOP:

This post is part of a fun, inspirational blog hop with prizes. For the hop, you should have arrived here from the amazing Charlene. Next on the hop is the fabulous Karen. If you get lost along the hop, or want to start it from the beginning, please head over to the Hero Arts Blog

GIVEAWAY:

Hero Arts are giving away a $50 gift card to the Hero Store, drawn from the comments left across all the stops in the hop. Enter by 14th January 2024 at 11.59pm PT. The winner will be announced on the Hero Arts Blog the following week. 

SUPPLIES:


Here are the links to what I have used on the projects. Affiliate links are used on some products. This means that if you make a purchase after clicking on my link, I receive a small commission with no extra cost to you. I truly appreciate your support when using these links. Please click on the logo below the product to shop at your favourite store. All products were personally purchased except those from Clearly Besotted, Hero Arts or those marked with an asterisk (*) which were kindly sent to me to use. You can read my full disclosure here.


Thank you so much for stopping by today, I really do appreciate it. I hope you have a wonderful time on the rest of the hop and a great rest of the day too! Take care! 

6 January 2024

Spellbinders | Honey Bee Jar

Hello there and Happy New Year to you! It's already the 6th of the month and this is my first post of the year. Here's hoping that 2024 is going to be a happy and healthy year for all!

I am here today to share a card that I have made using the Spellbinders January 2024 Large Die of the Month Club Kit, which is called Honey Bee Jar. The jar is made to be filled with honey (or maybe jam or even water to use as a vase!) but I decided not to fill it and just decorate the outside. 

PLEASE NOTE: This post contains affiliate links. Please see below for my full disclosure.


I started off by die cutting the main jar die from the Spellbinders January 2024 Large Die of the Month Club Kit from white cardstock twice. I made a score line towards the top of one piece and adhered it to the back of the other, to create a jar shaped card base. 


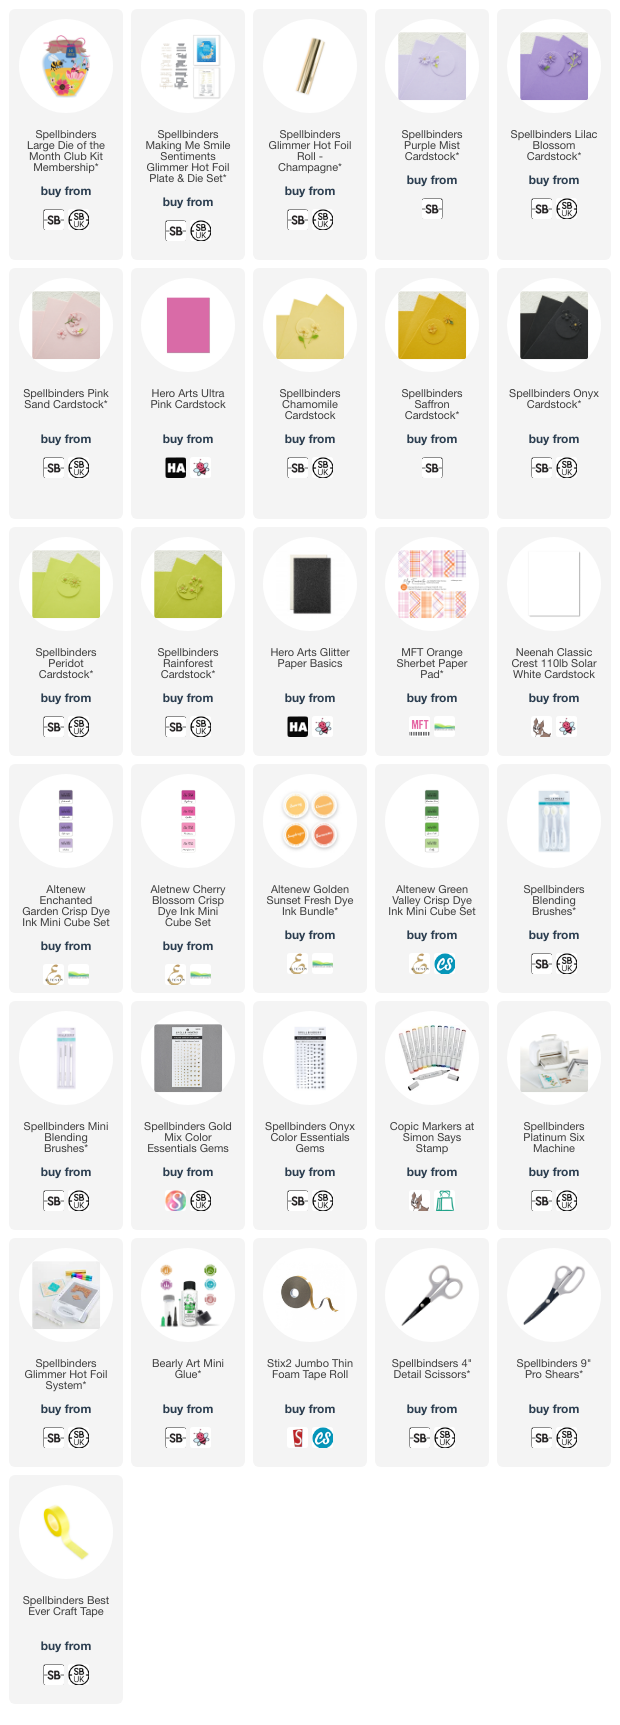
I then die cut the flowers from Spellbinders Cardstock in Purple Mist, Lilac Blossom and Pink Sand. For the darker pink, I used Hero Arts Ultra Pink. The flower centres were cut from Spellbinders Chamomile and Saffron Cardstock, and the leaves from Spellbinders Peridot and Rainforest Cardstock. The bee is cut from Spellbinders Chamomile and Onyx Cardstock for the body, and Hero Arts White Glitter Cardstock for the wings. 


I cut the cloth piece for the top of the jar from MFT Orange Sherbet Paper. I added ink blending to all the cardstock layers using Altenew Inks. I used Copic Marker shading for the cloth piece (purple shades). The cloth was adhered first, using Bearly Art Glue, followed by the twine and bow cut from Spellbinders Onyx Cardstock. I then adhered the leaves. The flowers and bee were adhered with thin foam tape. 


The sentiment from the Spellbinders Making Me Smile Sentiments Glimmer Hot Foil Plate & Die Set was hot foiled onto white cardstock with Spellbinders Champagne Foil. It was die cut out using the coordinating die and adhered to the card with thin foam tape. To finish off, I added a few Spellbinders Gold Mix Color Essentials Gems around the images and a Spellbinders Onyx Color Essential Gem in the centre of the bow. 

SPELLBINDERS CLUB KITS

I hope that you will check out the Spellbinders Club Kits. It is a wonderful monthly subscription where you receive the kit each month. Designers like myself share inspiration using the kit at the beginning of the month to show you lots of different ways that you can use it. 

There are also lots of other club kits too, like the Small Die of the Month, Clear Stamp & Die of the Month, Embossing Folder of the Month (plus lots more!), so there is something for everyone! If you do subscribe, you will get other benefits from Spellbinders too. Please see here for more information. You can also buy older kits here too. 

To buy the kit - if you are a current subscriber to the Large Die of the Month Club Kit (or any kit), you do not need to do anything. You will be charged as normal on the 5th of the month and your kit will be shipped to you. If you are a new subscriber, you can purchase the kit from the 6th - 27th January 2024. Members can cancel their membership at any time.


SUPPLIES:


Here are the links to what I have used on the project. Affiliate links are used on some products. This means that if you make a purchase after clicking on my link, I receive a small commission with no extra cost to you. I truly appreciate your support when using these links. Please click on the logo below the product to shop at your favourite store. All products were personally purchased except those from Clearly Besotted, Hero Arts or those marked with an asterisk (*) which were kindly sent to me to use. You can read my full disclosure here.


Thank you so much for stopping by today, I really do appreciate it. I hope you have a wonderful weekend! 

22 December 2023

VIDEO | Micest Friend

Hello there, I am delighted to be over on the My Favorite Things YouTube Channel today, sharing a card using the Micest Friend set from the December 2023 release. 

PLEASE NOTE: This post contains affiliate links. Please see below for my full disclosure.

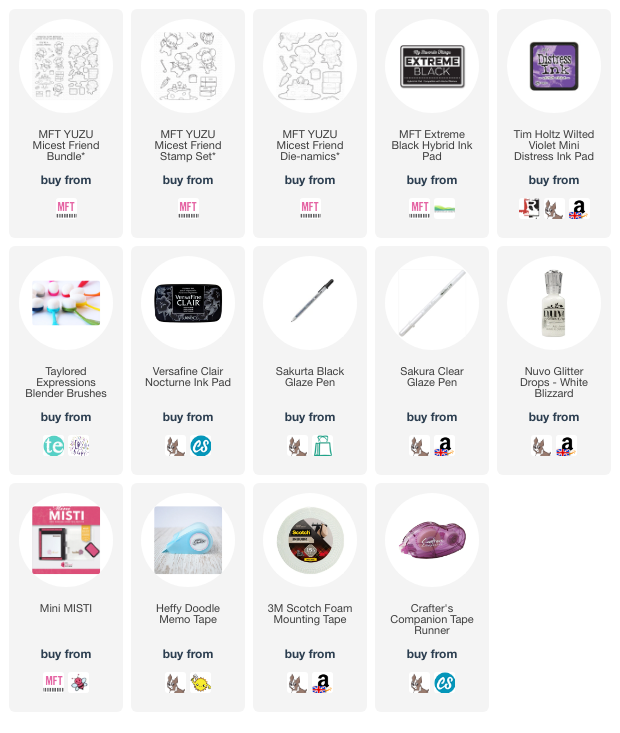
I started off my card by stamping the mouse and cake/cheese from the MFT YUZU Micest Friend Stamp Set onto white cardstock using black ink. I coloured them using Copic Markers (the colours that I used are listed below the supplies list) and then die cut them out using the MFT YUZU Micest Friend Die-namics

I took a panel of white cardstock and using the images as a guide for placement, stamped the sentiment from the set on top using Versafine Clair Nocturne Ink. I then added memo tape above the sentiment to mask off the 'ground'. 

I added ink blending above using Tim Holtz Wilted Violet Distress Ink. I removed the tape and adhered the panel to a US A2 sized white card base with tape runner adhesive. I then adhered the images with foam tape. To finish off, I added black glaze pen to the mouse's eyes and clear glaze pen to his nose. I also added Nuvo Glitter Drops in White Blizzard to the stars on the cake. 

VIDEO:

Here is the video showing how I made the card:

If you are viewing this blog post via email subscription, you can watch the video HERE on YouTube. 

SUPPLIES:


Here are the links to what I have used on the project. Affiliate links are used on some products. This means that if you make a purchase after clicking on my link, I receive a small commission with no extra cost to you. I truly appreciate your support when using these links. Please click on the logo below the product to shop at your favourite store. All products were personally purchased except those from Clearly Besotted, Hero Arts or those marked with an asterisk (*) which were kindly sent to me to use. You can read my full disclosure here.


COPIC MARKERS: Mouse - E49, E59, E57, E55/RV55, RV52, RV00. Chef's hat and jacket - C5, C3, C0. Neck tie - V17, V15, V12. Cake/cheese - YR27, Y17, Y15, Y13, Y11. Platter - C5, C3, C2, C1, C0. Stars - RV55, RV52/V17, V15, V12. 

This set is so cute! There are lots of mice in it, so you can create big scenes if you wanted to but I kept mine simple today. Thank you so much for stopping by, I really do appreciate it. I hope you have a wonderful day! 

20 December 2023

Christmas Filled With Joy

Hello there, today I have three cards to share with you, all with the same design but a different colourway. I am using the Simon Says Stamp Winter Village Die Set for my cards today, which is super cute! You can create lots of scenes with these dies but as usual, I kept mine pretty simple!

PLEASE NOTE: This post contains affiliate links. Please see below for my full disclosure.


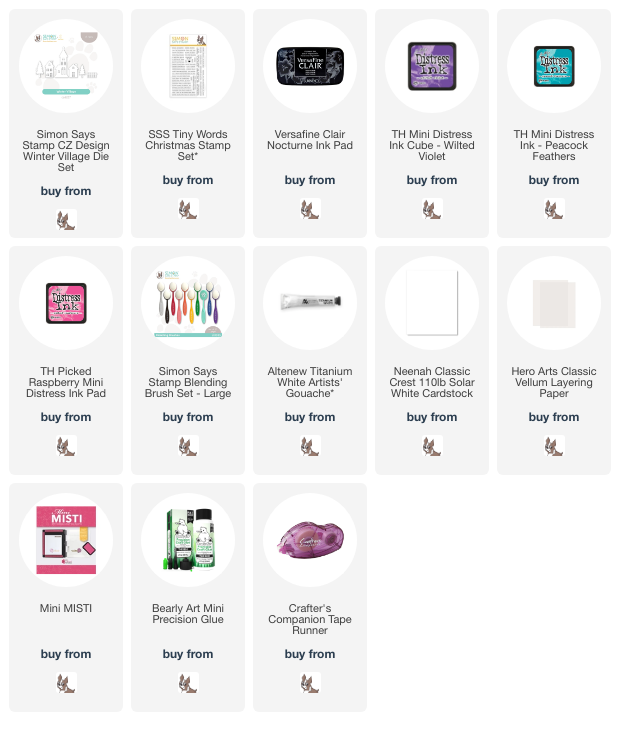
I started off by die cutting the Simon Says Stamp Winter Village Die Set from white cardstock. I then added vellum to the back of the houses to cover up the windows. Ordinarily, I would stack multiple layers up to add dimension, but since I knew that I wanted to post/mail these cards I kept them fairly flat. 

I did double up the house in the middle though, just for some variation. I then took white cardstock panels and blended Tim Holtz Distress Inks at the top, fading to white at the bottom. I used Wilted Violet for the purple card, Peacock Feathers for the aqua card and Picked Raspberry for the pink card. I then splattered Altenew Titanium White Gouache on top and set them aside to dry. 

Once dry, I stamped a sentiment on top from the Simon Says Stamp Tiny Words Christmas Stamp Set using Versafine Clair Nocturne Ink. The panel were adhered to US A2 sized white card bases with tape runner adhesive. I then adhered the houses and trees on top with Bearly Art Glue

SUPPLIES:


Here are the links to what I have used on the projects. Affiliate links are used on some products. This means that if you make a purchase after clicking on my link, I receive a small commission with no extra cost to you. I truly appreciate your support when using these links. Please click on the logo below the product to shop at your favourite store. All products were personally purchased except those from Clearly Besotted, Hero Arts or those marked with an asterisk (*) which were kindly sent to me to use. You can read my full disclosure here.


Simple cards but I really like how they turned out! They are my favourite colours, so I hope the recipients like them too! Thank you so much for stopping by today, I really do appreciate it. I hope you have a wonderful day. 

End of code