Showing posts with label My Minds Eye. Show all posts

3 January 2016

CB Teasers | Feeling Pawly

Hello there, welcome back to more Clearly Besotted teasers. My card today uses the new You're Purrfect stamp set. If you love cats, this is the set for you!
 

I started off by cutting a piece of white cardstock with the LF Stitched Journaling Card. I then stamped the kitty and pillow from the set (I stamped the kitty first, masked her off and then stamped the pillow). They were then coloured using Copic Markers. I stamped the sentiment below.
 
 
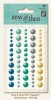
I then took a white 4"x5" card base and added a piece of paper from the MFT Fresh Squeezed Chevron paper pad on tot he front. I rounded the corners using the WRMK Corner Rounder Punch and then added the panel on to it using foam sheet. To finish off, I added clear Wink of Stella to the pillow and white gel pen to the kitty's cheeks. I also added a few MME Enamel Dots.
 
SUPPLIES:
Here are the links to what I have used on the card. Please click on the picture or wording to be taken to where I purchased it. Affiliate links are used on some products. This means that if you make a purchase after clicking on my link, I receive a small commission with no extra cost to you. I truly appreciate your support when using these links.


+ MME Collectable Memorable I'm With Enamel Dots - Discontinued
 
COPIC MARKERS: Kitty: N5, N4, N3, N2, N1. Pillow: BG13, BG11. Ground: W5, W3, W1.
 
As always, please pop over and see Stephanie for her amazing samples, as well as links to the other DT sharing today. thanks so much for visiting me today.

28 July 2015

Thanks

Hello there, I was kindly sent some products from docrafts to play with a few weeks ago. One of the products I was sent was the Papermania Folk Floral Ultimate Die-Cut and Paper Pack. I have to admit, I haven't used Papermania products for a long time (docrafts is where I first started crafting, so I used to use all their products) but I was pleasantly surprised by the quality of the pack.


I started off by taking a piece of white cardstock and running this through my Cuttlebug using the PTI Linen Impression Plate. I then added a strip of paper from the Folk Floral pack to the left side of this. I die cut a CB Scallop Tag from some vellum and added this on to the panel.


I took one of the die-cut pieces from the Folk Floral pack and adhered this on top of the tag, with thin foam tape. I then wrapped some Hemptique cord through the top of the tag and adhered the panel to a 4-bar notecard. I finished off by adding some MME enamel dots and a little clear Wink of Stella to the flowers on the die-cut piece.


SUPPLIES:

Here are the links to what I have used on the card. Please click on the picture or wording to be taken to where I purchased it. Affiliate links are used on some products. This means that if you make a purchase after clicking on my link, I receive a small commission with no extra cost to you. I truly appreciate your support when using these links. I was kindly sent the Folk Floral Die-cut & Paper Pad from Do Crafts. I have linked to an online shop that stocks Do Crafts products.


I was channelling my inner Debby Hughes when I made this. I just love her delicate and elegant cards. Thank you so much for visiting me today, I really do appreciate you stopping by. Have a great day!

19 February 2015

Thanks

Hello there, remember me? I am so sorry I haven't been around for over a week. There have been a few reasons as to why but I won't bore you with those! I am back today to share a card I have made using the Mod Arrow Border die from Simon Says Stamp. I thought it would be great as a male themed background for a thank you card.


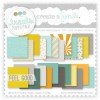
I first took the die and ran it through my Cuttlebug, cutting various sheets of paper from the Create A Smile Feel Good Paper Pad. I love these colours together. I then went to work adding them to a panel of white cardstock, using the original die as a placement guide.


I then took the thanks sentiment from the SSS Thanks set and stamped this with black ink on to banner die from the Clearly Besotted Tag Along die collection. This was adhered with foam tape to the panel, the panel was then adhered to an A2 card base with more foam. I finished off by adding a few enamel dots.
 
SUPPLIES:
 Here are the products that I used on the card. Please click on the picture to be taken to where I purchased it.


Thanks so much for visiting me today, I hope you have all been well in my absence. Have a lovely day!

11 February 2015

Create A Smile | Feel Better Soon

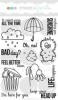
Hello there, I am back with a card and video for Create A Smile. Today I am using the super cute Bad Day stamp set and the new Feel Good paper pad.
 

I started off by stamping the chick image on to a piece of white cardstock, which was cut using one of the Lil' Inker Stitched Rectangle dies, in Memento Tuxedo Black ink. I then coloured this with Copics and added a little Glossy Accents to the beak. The sentiment was stamped on a sheet of paper from the Feel Good collection and cut into a banner. This was layered up with more paper banners using foam tape.

 
I cut another two papers from the pad using the same rectangle die and adhered these to a white A2 card base. The image panel was then adhered on top with foam tape. To finish off, I added some MME enamel dots.
 
VIDEO:


SUPPLIES:
Here are links to the products I have used in the video. Please click the pictures to be taken to where I purchased it.

COPIC MARKERS: Chick - YR27, YR24, Y19, Y18, Y17, Y08, Y06, B0000. Ground - W6, W4, W2.
 
Thanks so much for visiting me today. For more inspiration on using this set, please pop over to the Create A Smile Blog. You will also find peeks of the new products being released soon! :D Have a great day!

30 July 2014

Have A Great Day

Hello there, good morning! I am a little late to the party with this one but here is my card for lasts week's CASE Study #200 Challenge. I loved Shari Carroll's card so I had to take part (even being late!). 

I have first taken a white CS panel and added a circle die cut using the SSS Cake & Congrats Die Collection from AE Sorbet paper. I have then cut a little banner edge from the same paper using the CBS Tag Along Die Collection, this has been added to the top of the panel.
 

I have added the panel with foam tape on to a white card base. The sentiment from the CBS A Little Sentimental set has been stamped and cut in a strip and popped over the base. The flower has been stamped from the CBS Pretty Petals Plus stamp set using SSS Mint ink and then cut using the matching die set. A dash of WOS added on top followed by some Doodlebug sequins and MME enamel dots.
 
 
Thanks so much for visiting me today, I hope you are having a lovely week so far. Have a great day!

19 May 2014

Happy Birthday Chevrons

Hello there, so I did managed to use the stencil that I cut from my new Cricut Explore - yay! I cut the Chevron Rectangle from cardstock and used it as a stencil to create a background with various TH Distress Inks and sponge daubers.

 
The sentiment is from the Clearly Besotted A Little Sentimental set and it has been cut out using the Clearly Besotted You Said It dies. This has been popped up on the background with 3D foam and a few enamel dots added to finish.


SUPPLIES:

Hope you all had a lovely weekend. Thanks so much for visiting me today. Hope you have a good day!
End of code