30 August 2024

Altenew | September 2024 Release Blog Hop + Giveaway

Hello there, I am delighted to be joining Altenew today, to celebrate the September 2024 release, which is full of stamps, dies, stencils, press plates, inks, cardstock and embellishments! I have two cards to share with you today using a few of the new products. 

PLEASE NOTE: This post contains affiliate links. Please see below for my full disclosure.


CRAFT YOUR LIFE PROJECT KIT: MIXED BLOOMS

My first card today uses the Altenew Craft Your Life Project Kit: Mixed Blooms. The kit includes a stamp set, coordinating stencils, coordinating die and a coordinating embossing folder. 


You can use the stencils to colour in the images in the stamp set, but also the embossing folder, so I decided to go for a no-line look today and just use the embossing folder. I first cut a panel of white cardstock using the coordinating die. I then placed it inside the 3D Embossing Folder and secured it in place with a little low-tack tape before running it through my die cutting machine. 


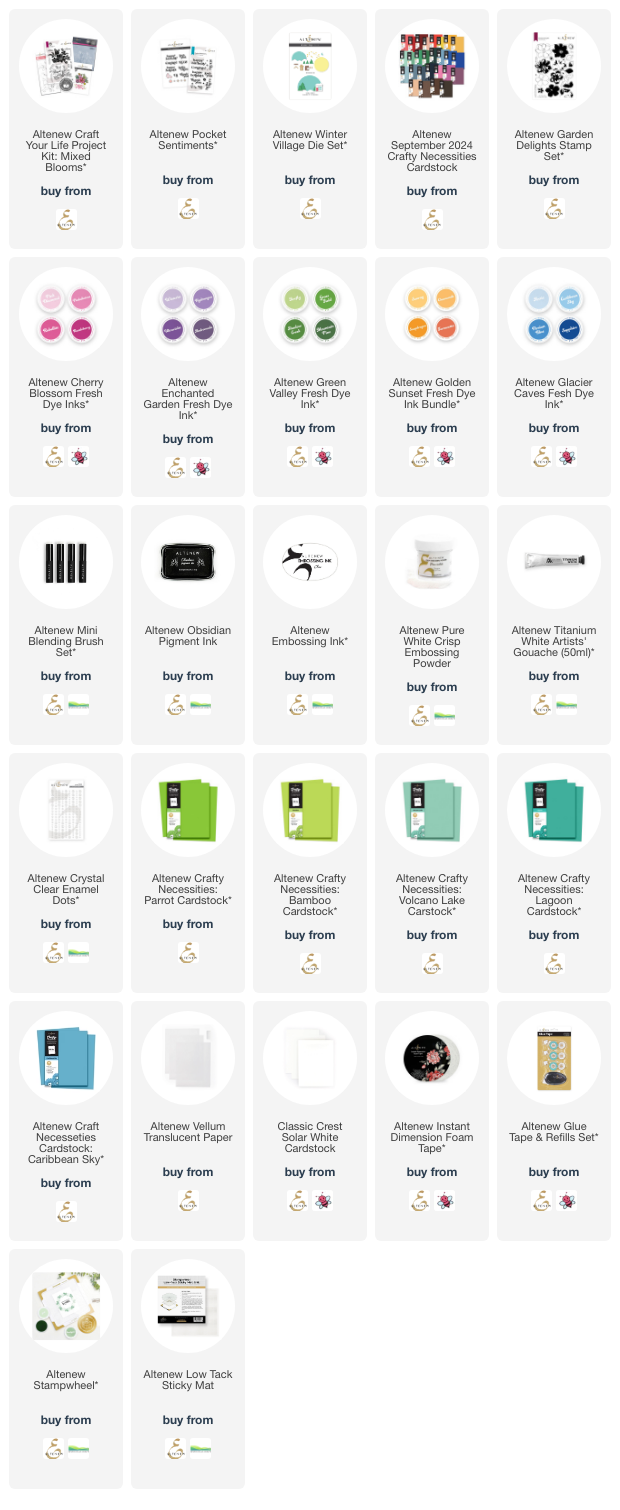
I placed it on my Sticky Mat and then using the stencils, added ink blending to the image. I used Altenew Cherry Blossom Fresh Dye Inks for the large flower, Altenew Golden Sunset Fresh Dye Inks for the flower centre, Altenew Enchanted Garden Fresh Dye Inks for the smaller flowers and Altenew Green Valley Fresh Dye Inks for the leaves; adding the ink with an Altenew Mini Blending Brush


I stamped the sentiment from the Altenew Pocket Sentiments Stamp Set onto white cardstock using Altenew Obsidian Pigment Ink. It was then cut out using the Altenew Pocket Sentiments Die Set. I adhered the image onto a US A2 sized white card base with Altenew Instant Dimension Foam Tape, followed by the sentiment. To finish off, I embellished with Altenew Crystal Clear Enamel Dots

CRAFTY NECESSITIES CARDSTOCK


Although I do not have them yet to share swatches with you, I wanted to share that there are now 27 more colours in the Crafty Necessities Cardstock line. This 8.5" x 11" cardstock is 80lb - 90lb in weight depending on the colour and can be purchased in packs of 10 sheets. 

WINTER VILLAGE

My last card today uses the new Altenew Winter Village Die Set. This is such a fun set as you can create little scenes or villages with the different dies - there are houses, trees, sky, stars, moon and a circle layer that can be used as the base. 


I started off by die cutting the sky piece from Altenew Caribbean Sky Crafty Necessities Cardstock. I then added ink blending on top using Altenew Persian Blue (from the Glacier Caves collection) and Ultraviolet (from the Enchanted Garden collection) Inks. I splattered Altenew Titanium White Artists' Gouache on top and set it aside to dry. 


I die cut the trees from Altenew Parrot and Bamboo Crafty Necessities Cardstock and the house from Altenew Volcano Lake and Lagoon Crafty Necessities Cardstock. I adhered the house pieces together, adding a little vellum on the back for the windows. 


I adhered the sky first to a US A2 sized white card base with Altenew Glue Tape. I then added the house and trees on top with Altenew Instant Dimension Foam Tape. The sentiment, from the Altenew Garden Delights Stamp Set, was stamped onto black cardstock using Altenew Embossing Ink. I applied Altenew Pure White Crips Embossing Powder and heat set. It was cut into a strip and adhered to the card to finish. 

BLOG HOP:

This post is part of a fun, inspirational blog hop with prizes. Please click on the other participants in the hop to visit their blogs. 

You are invited to the Inlinkz link party!

Click here to enter

GIVEAWAY:

$300 in total prizes! To celebrate this release, Altenew is giving away a $100 gift certificate to 1 lucky winner and a $50 gift certificate to 4 winners! Please leave a comment on the Altenew Card Blog and/or each designer’s blog post on the blog hop list below by September 5th 2024 for a chance to win. Altenew will draw 5 random winners from the comments left on each stop of this blog hop and announce the winners on the Altenew Winners Page on September 7th, 2024.


SUPPLIES:


Here are the links to what I have used on the projects. Affiliate links are used on some products. This means that if you make a purchase after clicking on my link, I receive a small commission with no extra cost to you. I truly appreciate your support when using these links. Please click on the logo below the product to shop at your favourite store. All products were personally purchased except those from Clearly Besotted, Hero Arts or those marked with an asterisk (*) which were kindly sent to me to use. You can read my full disclosure here.


Thank you so much for stopping by today, I really do appreciate it. I hope you have a wonderful rest of the day, take care! 

Hero Arts | Hero Studio September 2024 Countdown to Creativity

Hello there and welcome as we countdown to the Hero Arts September 2024 Hero Studio release. The release this month is all spooky/Halloween themed and is out on Tuesday 3rd September 2024. 

PLEASE NOTE: This post contains affiliate links. Please see below for my full disclosure.

For my card today, I am using the Hero Studio September 2024 Card Kit of the Month, specifically the Moon Fancy Die. 


I started off my card by die cutting the Moon Fancy Die from the kit from a 5.5" x 4.25" panel of Pitch Black Cardstock. I discarded the positive piece and used the negative only (but I am sure there are fun ways to use the positive piece too!). 


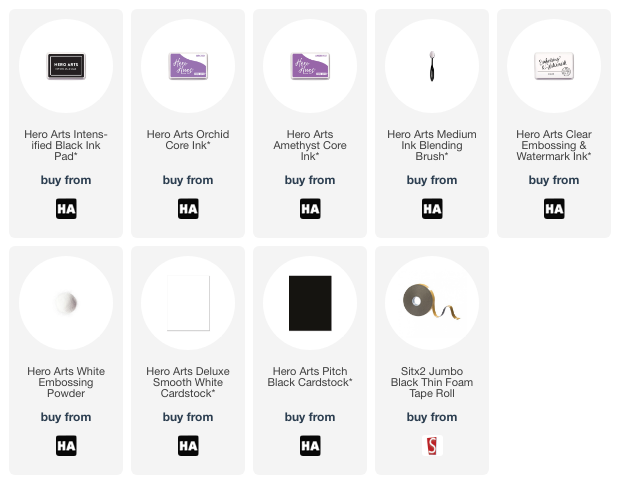
I took a panel of Deluxe Smooth White Cardstock and using the moon shape as a guide, blended Hero Arts Core Inks in Orchid and Amethyst around the edges, leaving the centre the white colour of the cardstock. I then stamped the bats from the clear stamp set in the Hero Studio September 2024 Card Kit of the Month on top using Intens-ified Black Ink


I adhered the die cut panel on top of the inked and stamped one using thin black foam tape. I then adhered the panels onto a US A2 sized card base made from Pitch Black Cardstock. I stamped the sentiment from the clear stamp set onto more black cardstock using Clear Embossing & Watermark Ink. I applied White Embossing Powder and heat set. It was die cut out using the coordinating dies in the kit and adhered to the card with more thin foam tape. 

SUPPLIES:


Here are the links to what I have used on the project. Affiliate links are used on some products. This means that if you make a purchase after clicking on my link, I receive a small commission with no extra cost to you. I truly appreciate your support when using these links. Please click on the logo below the product to shop at your favourite store. All products were personally purchased except those from Clearly Besotted, Hero Arts or those marked with an asterisk (*) which were kindly sent to me to use. You can read my full disclosure here.


For more inspiration using the Hero Studio September 2024 Card Kit of the Month (all the cards shown today show a different aspect of the kit), please head over to the Hero Arts Blog. Inspiration using the Monthly Minis and Extraordinary Extras will be shared over on the Hero Arts blog tomorrow. Make sure to leave a comment over there for a chance to win a kit! Thank you so much for stopping by, take care!

23 August 2024

Spellbinders | Happy Hour

Hello there, I was over on the Spellbinders Blog yesterday sharing three cards using the Happy Hour Collection. I cannot begin to tell you how much fun I had making these cards! In the collection there are cocktail glasses that you can dress up for different occasions - everyday/birthday, holidays/Christmas and Halloween, plus much more! 

PLEASE NOTE: This post contains affiliate links. Please see below for my full disclosure.


I made a birthday card, a Halloween card and a Christmas card. You can see them all over on the blog post here. Below is a peek of the Halloween one that I made.


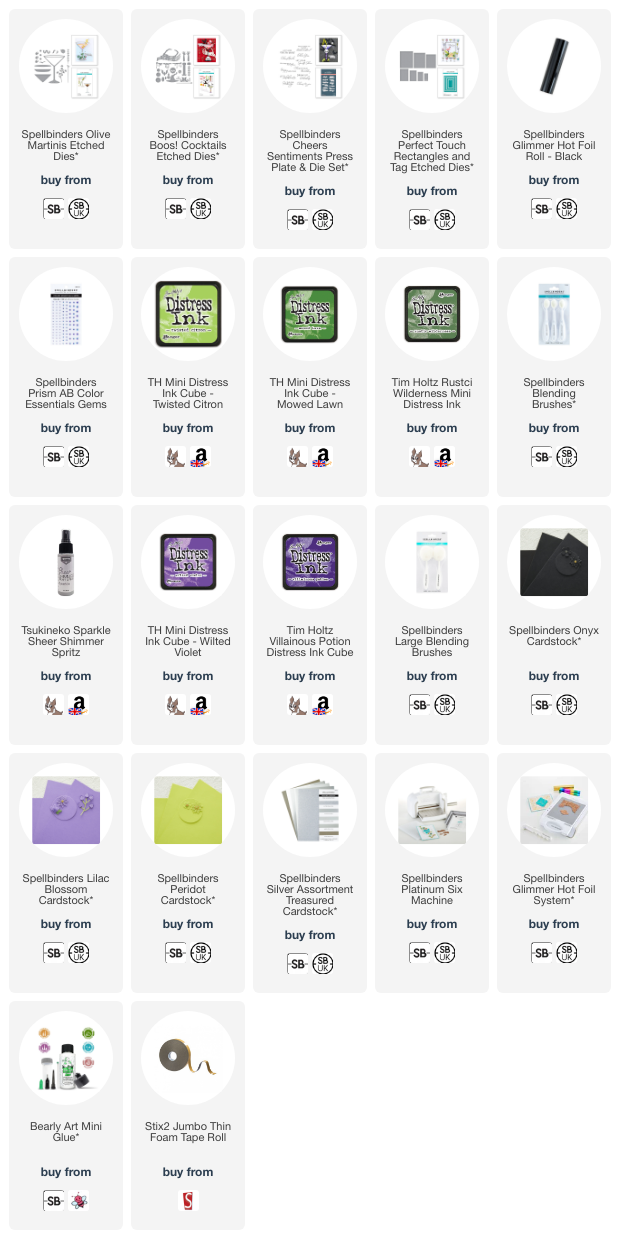
The Olive Martinis glass was cut from black cardstock and the drink part cut from white cardstock. I added ink blending to the drink part with Distress Inks and added a little Sheer Shimmer Spritz on top for some added sparkle. 

To embellish the glass I used the Boos! Cocktails Etched Dies and added legs and a bat to the glass itself, plus a skull picker with eye ball olives to the drink. I also added a witches hat to the side of the glass. The sentiment was hot foiled from the Cheers Sentiments Press Plate & Die Set. It was all popped on a base cut with the Perfect Touch Rectangles Etched Dies which I added a little ink blending on. 

I don't celebrate Halloween but this card was so fun to make! Please head over to the blog post for not only more info on this card but the others that I made too. 

SUPPLIES:


Here are the links to what I have used on the project. Affiliate links are used on some products. This means that if you make a purchase after clicking on my link, I receive a small commission with no extra cost to you. I truly appreciate your support when using these links. Please click on the logo below the product to shop at your favourite store. All products were personally purchased except those from Clearly Besotted, Hero Arts or those marked with an asterisk (*) which were kindly sent to me to use. You can read my full disclosure here.


Thank you so much for stopping by today, I really do appreciate it. I hope you have a wonderful day and a great weekend! 

22 August 2024

Hero Arts | Holiday 2024 Release Blog Hop + Giveaway

Hello there, I am delighted to be joining Hero Arts today to celebrate the Holiday 2024 Release with a fun blog hop! There are lots of lovely new products in this release - stamps, dies, stencils, press plates, inks and more! I am using a few of them on my projects today. 

PLEASE NOTE: This post contains affiliate links. Please see below for my full disclosure.


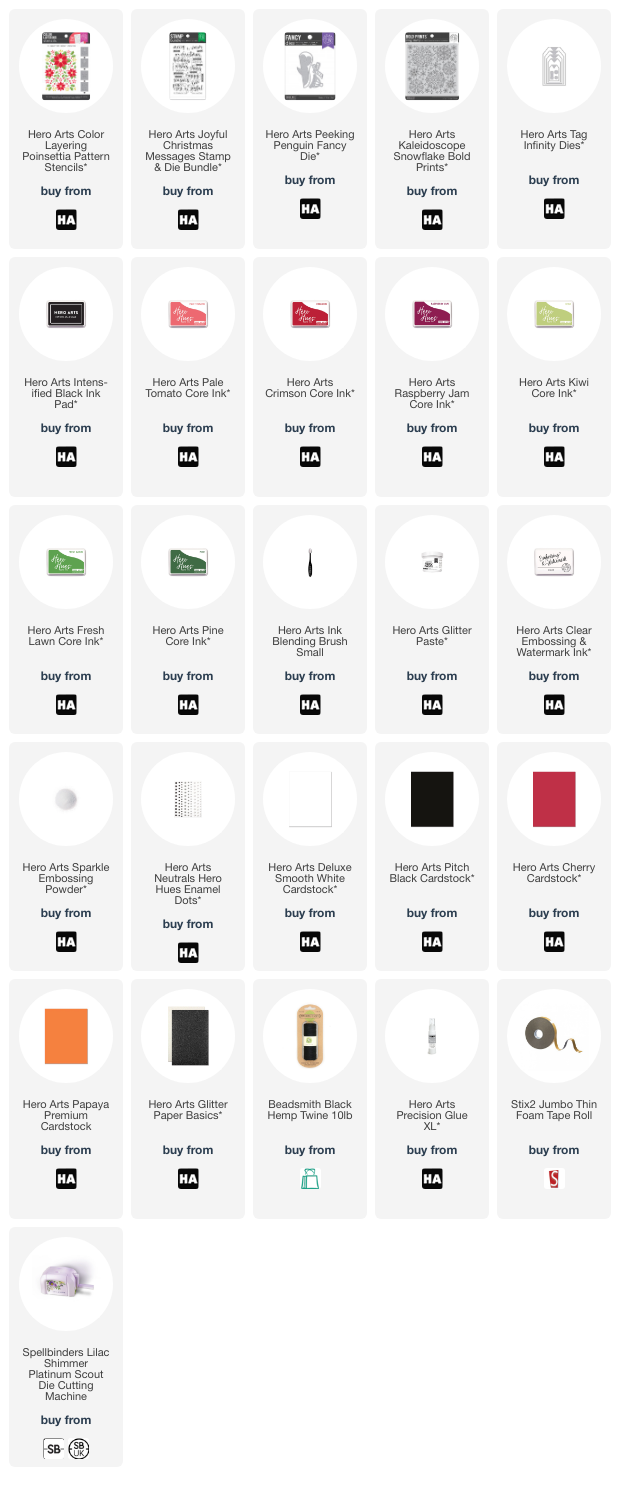
My first project uses the new Hero Arts Color Layering Poinsettia Pattern Stencils. These layering stencils work well with the coordinating stamps set, or can be used on their own like I have. I started off with the first layer of the stencil using Hero Arts Pale Tomato Core Ink, I then added a little Hero Arts Crimson Core Ink to the centres of the larger flower petals, although to be honest with you, I am not sure it made much a of a difference, so I could have skipped that step! 


For the second layer, I used Hero Arts Crimson and Raspberry Jam Core Inks for the top petals. The next layer is for the leaves and for these I used Hero Arts Kiwi and Fresh Lawn Core Inks. The last stencil is for the top layer of the leaves, which I used Hero Arts Fresh Lawn and Pine Core Inks, and this layer also has the flower centres and the flourishes, for these I used Hero Paste Glitter


The paste is quite subtle but I think it's really pretty! Once the paste was dry, the panel was cut down and adhered to a US A2 sized card base made from Hero Arts Cherry Cardstock. I stamped the sentiments from the Hero Arts Joyful Christmas Messages Bundle onto white cardstock using Hero Arts Intens-ified Black Ink. They were then die cut out using the coordinating dies. I cut the dies another two times and layered them up before adhering to the card. 


My second project uses the new (super cute) Hero Arts Peeking Penguin Fancy Die. I die cut the body three times rom Hero Arts Cardstock- once from Deluxe Smooth White, once from Pitch Black and once from Papaya. I cut around the black outside body piece and adhered it to the white cardstock layer. I then cut around the beak and adhered that on top too. 


I die cut the scarf and hat from Cherry Cardstock and the hat again from White Glitter Cardstock. I cut the pieces apart and layered them together before adhering onto the penguin. I stamped the new Hero Arts Kaleidoscope Snowflake Bold Prints onto white cardstock using Hero Arts Clear Embossing & Watermark Ink


I applied Hero Arts Sparkle Embossing Powder and heat set (unfortunately you cannot see it in the photos but in real-life, it is so pretty!). It was cut into a tag using the Hero Arts Tag Infinity Dies. I cut the topper from Pitch Black Cardstock and adhered that to the top and then tied twine through. I adhered the penguin using thin foam tape. The sentiments, from the Hero Arts Joyful Christmas Messages Bundle, were stamped and die cut out (I fussy cut the banner one) and then adhered to the card. To finish off, I added Hero Arts Black Enamel Dots for the penguin's eyes. 

BLOG HOP:


As mentioned, this post is part of a fun, inspiration blog hop with prizes (see below). For the hop, you should have arrived here from Karen. Next on the hop is Natasha. If you get lost along the way or want to start the hop from the beginning, please head over to the Hero Arts Blog

GIVEAWAY:

Hero Arts are giving away two $50 gift cards, drawn from comments left across the hop. Enter by Wednesday 28th August 2024 at 11.59 hours PT. The winners will be announced on the Hero Arts Blog the following week. 

SUPPLIES:


Here are the links to what I have used on the projects. Affiliate links are used on some products. This means that if you make a purchase after clicking on my link, I receive a small commission with no extra cost to you. I truly appreciate your support when using these links. Please click on the logo below the product to shop at your favourite store. All products were personally purchased except those from Clearly Besotted, Hero Arts or those marked with an asterisk (*) which were kindly sent to me to use. You can read my full disclosure here.


If you are in the holiday/Christmassy mood (although there are some autumnal products too!), I hope you will check out the release. Thank you so much for stopping by today, I hope you have a wonderful day! Take care! 

21 August 2024

Spellbinders | Sweet Friend + 2024 Crafty Advent Calendars

Hello there, I hope you are well. Today I have a card to share using the Spellbinders Out & About Collection. This collection was launched in June in the USA and July in the UK (I apologise that I am a bit behind with sharing!) to coincide with the launch of the Platinum Scout, which is a mini die cutting machine. All the dies in the collection fit easily in the Scout, but obviously, you can use any die cutting machine for them!

PLEASE NOTE: This post contains affiliate links. Please see below for my full disclosure.


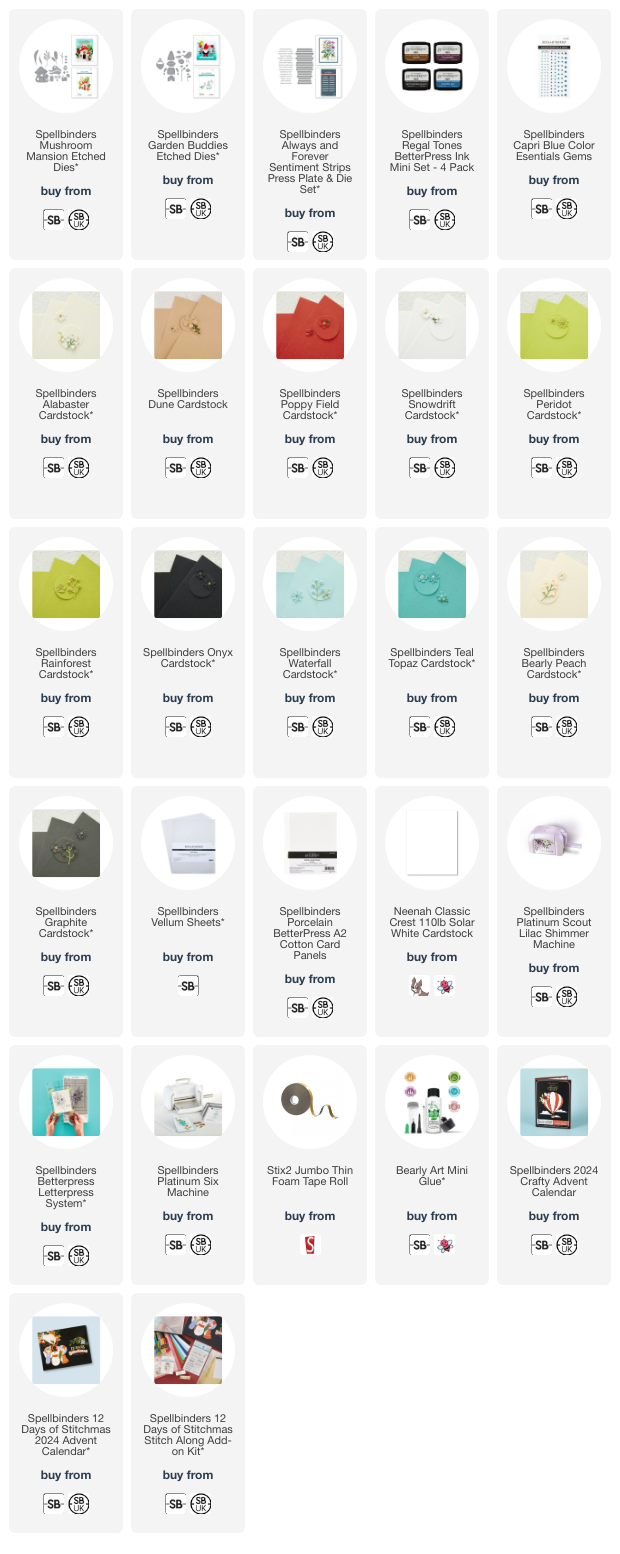
I started off my card by die cutting the Spellbinders Mushroom Mansion Etched Dies from Spellbinders Cardstock (Alabaster, Dune, Snowdrift, Poppy Field & Onyx). I assembled the pieces of the house and adhered using Bearly Art Glue. I added vellum on the back so that it showed through the windows. 


I then cut the foliage and flowers from Spellbinders Cardstock (Peridot, Rainforest, Waterfall & Teal Topaz). I took a US A2 sized white card base and adhered the foliage first using Bearly Art Glue. I then adhered the mushroom cottage on top with thin foam tape. The flowers were popped behind and adhered with a combination of liquid glue and foam tape (behind the petals). 


I had originally planned to just add the snail that comes in the set to the card but then I thought that the gnome from the Spellbinders Garden Buddies Etched Dies would look good, so I cut him from Spellbinders Cardstock (Bearly Peach, Snowdrift, Onyx, Waterfall, Teal Topaz and Graphite) and adhered him together with Bearly Art Glue. He was adhered to the card with more thin foam tape. 


For the sentiment, I pressed the Spellbinders Always and Forever Sentiment Strips Press Plate & Die Set (one of my favourites!) onto Spellbinders Porcelain BetterPress Cotton Card using BetterPress Black Ink and the Spellbinders Betterpress Letterpress System. It was die cut out and adhered onto the card with foam tape. To finish off, I added Spellbinders Capri Blue Color Essentials Gems to the centres of the flowers. 

PLATINUM SCOUT


(Image from the Spellbinders website)

Before we get onto the Advent Calendars, I just wanted to mention the Platinum Scout. I haven't had mine long (there was a delay in getting them here in the UK) but did use it to cut these dies and I love it! My mum kindly bought it for me as a birthday present and I think it's going to be my now go-to die cutting machine that I leave out on my desk. I will still need a larger one for foiling, pressing and larger dies but if the die will fit in the Scout, I will likely be using that one. I, of course, got the Lilac Shimmer version! :)

I have heard some comments regarding that it doesn't cut well or that it needs conditioning, but mine cut perfectly straight out of the box and has done since. 

2024 CRAFTY ADVENT CALENDARS

Yesterday saw the release of the Spellbinders 2024 Crafty Advent Calendars:


The 2024 Crafty Advent Calendar - which is a normal advent calendar that you would open on each day of December and receive a little crafty product/gift to play with! 

The 12 Days of Stitchmas 2024 Advent Calendarwhich works alongside the 12 Days of Stitchmas Stitch Along Add-On Kit - this advent calendar has been designed to be opened before Christmas so that you can create 12 projects that you would use at Christmas time - for example, you can make Christmas cards, gift tags, ornaments etc. The Stitch Along Kit has cardstock, thread, needles, embellishments and stamp set in that you can use with the calendar, but obviously you can use any of your own current crafty stash too! 

I will be sharing a video using the 12 Days of Stitchmas 2024 Advent Calendar soon. 

SUPPLIES:


Here are the links to what I have used on the project. Affiliate links are used on some products. This means that if you make a purchase after clicking on my link, I receive a small commission with no extra cost to you. I truly appreciate your support when using these links. Please click on the logo below the product to shop at your favourite store. All products were personally purchased except those from Clearly Besotted, Hero Arts or those marked with an asterisk (*) which were kindly sent to me to use. You can read my full disclosure here.


Thank you so much for stopping by today, I really do appreciate it. I hope you have a wonderful day! 

19 August 2024

Spellbinders | Colorful Expressions Blooms

Hello there, I hope you are well. Today I have a card to share using the Spellbinders August 2024 Large Die of the Month Club Kit called "Colorful Expressions Blooms". I apologise for the delay in sharing it this month but I haven't been well. The kit consists of flowers (some are layered, some are one layer) and foliage that you can mix and match to create a bouquet. 

PLEASE NOTE: This post contains affiliate links. Please see below for my full disclosure.


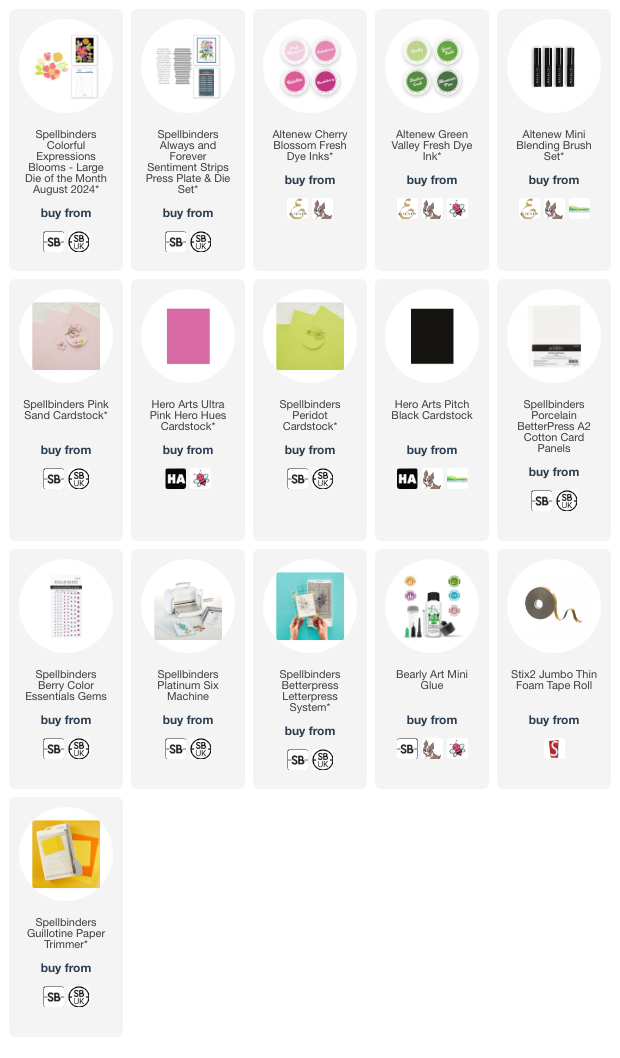
I started off my card by die cutting the flowers in the Spellbinders August Large Die of the Month Club Kit from Spellbinders Pink Sand and Hero Arts Ultra Pink Cardstock. I cut the leaves and stems from Spellbinders Peridot Cardstock


I added ink blending to the pieces with Altenew Inks - Cherry Blossom Inks for the flowers and Green Valley Inks for the leaves and stems. I assembled the flowers first using Bearly Art Glue. I then took a black US A2 sized card base and adhered the leaves on top using Bearly Art Glue. The flowers were adhered using thin foam tape. 


I pressed the Spellbinders Always and Forever Sentiments Strips Press Plate & Die Set onto Spellbinders Porcelain BetterPress Cotton Card using the Spellbinders BetterPress Letterpress System and BetterPress Black Ink. It was cut into a strip and adhered to the card with more thin foam tape. To finish off, I embellished with Spellbinders Berry Color Essentials Gems.  

SPELLBINDERS CLUB KITS

Spellbinders Club Kits are wonderful monthly subscription where you receive a kit each month. Designers like myself share inspiration using the kits at the beginning of the month to show you lots of different ways that you can use it. 

I am using the Large Die of the Month Club Kits but there are also lots of other club kits too, like the Small Die of the Month, Clear Stamp & Die of the Month, Embossing Folder of the Month (plus lots more!), so there is something for everyone! If you do subscribe, you will get other benefits from Spellbinders too. Please see here (UK) or here (USA) for more information. 

To buy the kit - if you are a current subscriber to the Large Die of the Month Club Kit (or any kit), you do not need to do anything. You will be charged as normal on the 5th of the month and your kit will be shipped to you. If you are a new subscriber, you can purchase the kit from the 6th - 27th August 2024. Members can cancel their membership at any time.


SUPPLIES:


Here are the links to what I have used on the project. Affiliate links are used on some products. This means that if you make a purchase after clicking on my link, I receive a small commission with no extra cost to you. I truly appreciate your support when using these links. Please click on the logo below the product to shop at your favourite store. All products were personally purchased except those from Clearly Besotted, Hero Arts or those marked with an asterisk (*) which were kindly sent to me to use. You can read my full disclosure here.


Thank you so much for stopping by today, I really do appreciate it. I hope you have a wonderful day and a great week ahead! 

15 August 2024

Spellbinders | Dancin' Christmas Friends

Hello there, I am delighted to be over on the Spellbinders Blog today sharing three cards using the Dancin' Christmas Friends Collection. This is such a cute collection! The legs on the characters can move from side to side, so it looks like they are dancing! 

PLEASE NOTE: This post contains affiliate links. Please see below for my full disclosure.

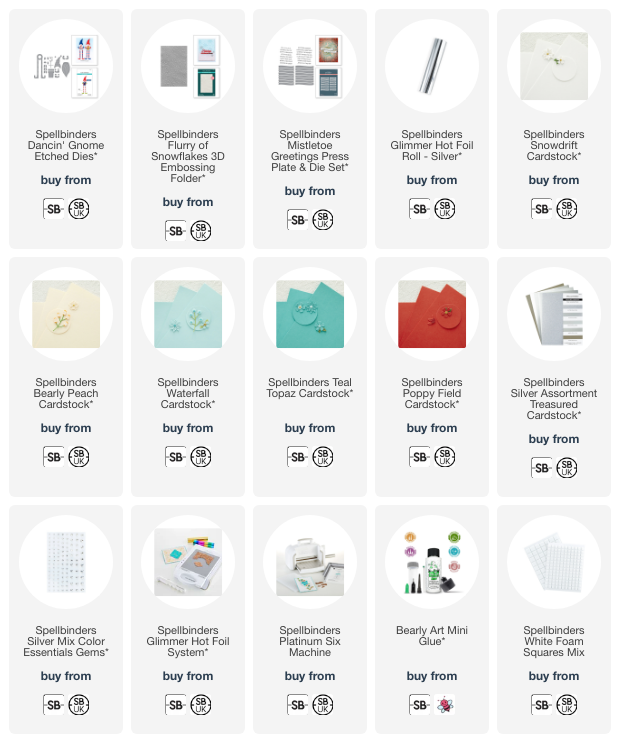
Here is a peek of one of the cards I made using this collection. I used the Spellbinders Dancin' Gnome Etched Dies. Since this gnome is just about 6 inches tall, I made a mini slimline card. For the background, I used the older Spellbinders Flurry of Snowflakes 3D Embossing Folder and hot foiled the sentiment from the Spellbinders Mistletoe Greetings Press Plate & Die Set

SUPPLIES:


Here are the links to what I have used on the project. Affiliate links are used on some products. This means that if you make a purchase after clicking on my link, I receive a small commission with no extra cost to you. I truly appreciate your support when using these links. Please click on the logo below the product to shop at your favourite store. All products were personally purchased except those from Clearly Besotted, Hero Arts or those marked with an asterisk (*) which were kindly sent to me to use. You can read my full disclosure here.


For more information on how I made the card, as well as the other two cards I made, please head over to the Spellbinders Blog. Thank you so much for stopping by today, I really do appreciate it. Take care! 

12 August 2024

Spellbinders | Yana's Poppies

Hello there, I am delighted to be over on the Spellbinders Blog today, sharing three cards using the stunning new Yana's Poppies Collection by Yana's Smakula. The collection is small - one die and one press plate (that you can purchased with or without the coordinating stencils) - but they are absolutely beautiful! 

PLEASE NOTE: This post contains affiliate links. Please see below for my full disclosure.


Below is a peek of one of the cards I made using the Spellbinders Poppy Background Press Plate & Stencil Bundle. I hot foiled the plate with the Spellbinders Glimmer Hot Foil System using Champagne Foil. I then coloured the poppies, stems and leaves using ink blending and the coordinating stencils. I love blue poppies, so all my cards feature blue poppies.


The sentiment, from the Hello, Friend Sentiments Glimmer Hot Foil Plate set, was foiled using Champagne Foil and die cut out using the Spellbinders Wonderful Script Sentiments Etched Dies. The accompanying 'friend' was foiled and cut into a strip. To finish off, I embellished with Spellbinders Gold Mix Color Essentials Gems

For more details on the card, and to see the others, please head over to the Spellbinders Blog

SUPPLIES:


Here are the links to what I have used on the project. Affiliate links are used on some products. This means that if you make a purchase after clicking on my link, I receive a small commission with no extra cost to you. I truly appreciate your support when using these links. Please click on the logo below the product to shop at your favourite store. All products were personally purchased except those from Clearly Besotted, Hero Arts or those marked with an asterisk (*) which were kindly sent to me to use. You can read my full disclosure here.


Thank you so much for stopping by today, I really appreciate it. I hope you have a great week ahead! 

9 August 2024

Altenew | August 2024 Release Blog Hop + Giveaway

Hello there, I am delighted to be joining Altenew today to celebrate the August 2024 release, which is out now! There are lots of new stamps, dies, stencils, embossing folders, press plates, inks, embellishments and cardstock releasing and my cards use a few of them today! 

PLEASE NOTE: This post contains affiliate links. Please see below for my full disclosure.

BUILD-A-GARDEN: LOVELY ROSE PEONY

My first card uses the Altenew Build-A-Garden: Lovely Rose Peony. This beautiful kit consists of a stamp set, coordinating stencil and mini blending brush. There is also an add-on die set that can be purchased on it's own or with the kit. 

I started off my card by stamping the flowers in the set onto white cardstock using Altenew Obsidian Pigment Ink. I then used the coordinating stencils to colour the image using ink blending. I used the new Altenew Cherry Blossom Fresh Dye Inks for the petals, Altenew Fall Harvest Fresh Dye Inks for the centres and Altenew Green Valley Fresh Dye Inks for the leaves. 

I don't have the die set, so I fussy cut the flowers using scissors. I took a US A2 sized white card base and stamped the spotty background image from the Altenew Craft Your Life Project Kit: Chocolate Flowers on top using Altenew Obsidian Pigment Ink. The flowers were then adhered on top using Altenew Instant Dimension Foam Tape

I stamped a sentiment from the Altenew Build-A-Garden: Lovely Rose Peony stamp set onto black cardstock using Altenew Embossing Ink. I applied Altenew Pure White Crisp Embossing Powder and set set. It was cut into a strip and adhered to the card using more foam tape. 

CRAFT YOUR LIFE PROJECT KIT: CHOCOLATE FLOWERS

My next couple of cards use the beautiful Altenew Craft Your Life Project Kit: Chocolate Flowers. This kit consist of a stamp set, zero-waste die set, coordinating stencils and an embossing folder. 

I started off my first card by die cutting the Zero-Waste Chocolate Flowers Die from white cardstock. I then added ink blending to the flowers using Altenew Fresh Dye Inks in Cherry Blossom, Enchanted Garden, Sweet Dreams, Golden Sunset and Green Valley

I placed a panel of white cardstock inside the Chocolate Flowers 3D Embossing Folder and ran it through my die cutting machine. It was adhered to a US A2 sized white card base with Altenew Instant Dimension Foam Tape. The flowers and leaves were then adhered on top. 

I stamped a sentiment from the Chocolate Flowers Stamp Set onto white cardstock using Altenew Obsidian Pigment Ink. It was cut into a strip and adhered to the card with more foam tape. To finish off, I embellished with Altenew Pocketful of Sunshine Enamel Dots, adding them to the centres of the flowers. 

For my second card using the set, I die cut the flowers and leaves again from white cardstock and added ink blending to the flower with the new Altenew Deep Blue Seas Fresh Dye Inks. I kept the flower centre and the leaves white. 

I die cut the new film strip die from the Altenew Picture Perfect Die Set three times from white cardstock and adhered them one on top of another for dimension. I added black cardstock behind the top and bottom and then adhered it onto a US A2 sized white card base. 

I adhered the leaves on top using liquid glue and the flower with foam tape. The sentiment, from Altenew Build-A-Garden: Lovely Rose Peony, was stamped and heat embossed on black cardstock. It was cut into a strip and adhered to the card with more foam tape. To finish off, I added an Altenew Crystal Clear Gem Sparkle to the centre of the flower. 

CRAFTY NECESSITIES CARDSTOCK

Before we get onto my last two cards, I wanted to share the great news that Altenew are releasing Crafty Necessities Cardstock in full 8.5" x 11" sheets in the same wonderful colours that match the colour families (inks, embellishments, markers etc). 

They are available in 10 sheet packs and the cardstock ranges from 80lb/216 gsm to 90lb/245 gsm in weight, depending on the colour. I don't have all the packs (I am missing the two darker grays and also the darkest green) but above are the swatches I have made. I like to label the cardstock tags on the back so they look pretty from the front! 

MUSHROOM COTTAGE

My last two cards use the super cute Mushroom Cottage Die Set, as well as some of the new cardstock. 

For the fist card, I die cut the Altenew Mushroom Cottage Die Set from Altenew Blush, Coffee Break and white cardstock for the houses/cottages. I cut the leaves from Altenew Volcano Lake Cardstock. I added ink blending to all the pieces with Altenew Red Cosmos, Sweet Dreams and Coffee Break Fresh Dye Inks. The houses/cottages were then assembled and adhered using liquid glue. 

I took a panel of Altenew Lagoon Cardstock and added ink blending to it using Altenew Sweet Dreams, Navy and Jet Black Inks. I splattered Altenew Titanium White White Gouache on top and set it aside to dry. Once dry, it was adhered to a US A2 sized white card base. 

I adhered the leaves on first with liquid glue, followed by the houses/cottages with Altenew Instant Dimension Foam Tape. I stamped the sentiment from the Altenew Bold Sentiments Stamp Set onto white cardstock using Altenew Obsidian Pigment Ink. I cut it into a strip and adhered it to the card with more foam tape. To finish off, I embellished with silver gems. 

For my last card, I wanted to show that you can use the mushrooms without the house part if you want to. This time, I die cut the mushrooms from the Altenew Mushroom Cottage Die Set from Altenew Morning Frost, Lagoon, Volcano Lake and white cardstock. The leaves were cut from Altenew Parrot and Bamboo cardstock. 

I added ink blending to the mushroom layers using Altenew Warm Gray and Sea Shore Inks. I used Altenew Lettuce Celebrate Fresh Dye Ink for the leaves. I die cut the film strip from the Altenew Picture Perfect Die Set twice and adhered them one on top of another using liquid glue, before adhering onto a US A2 sized white card base. 

The leaves were adhered next, followed by the mushrooms (using foam tape). I stamped a sentiment from the Altenew Craft Your Life Project Kit: Chocolate Flowers onto white cardstock using Altenew Obsidian Pigment Ink. It was cut into a strip and adhered to the card with more foam tape. To finish off, I embellished with Altenew Crystal Clear Enamel Dots

BLOG HOP:

This blog post is part of a fun, inspirational blog hop (with prizes). Please click on the other participants below to visit their blogs. 

You are invited to the Inlinkz link party!

Click here to enter

GIVEAWAY:

$300 in total prizes! To celebrate this release, Altenew is giving away a $100 gift certificate to 1 lucky winner and a $50 gift certificate to 4 winners! Please leave a comment on the Altenew Card Blog and/or each designer’s blog post on the blog hop list below by August 15th 2024 for a chance to win. Altenew will draw 5 random winners from the comments left on each stop of this blog hop and announce the winners on the Altenew Winners Page on August 17th, 2024. The winner of the $100 gift certificate will be chosen from comments left on the Altenew blog.

SUPPLIES:


Here are the links to what I have used on the projects. Affiliate links are used on some products. This means that if you make a purchase after clicking on my link, I receive a small commission with no extra cost to you. I truly appreciate your support when using these links. Please click on the logo below the product to shop at your favourite store. All products were personally purchased except those from Clearly Besotted, Hero Arts or those marked with an asterisk (*) which were kindly sent to me to use. You can read my full disclosure here.


I hope I have given you some inspiration using the new products. I had a lot of fun making my cards, especially the mushroom cottages! Thank you so much for stopping by today, I really appreciate it. Take care! 

End of code