28 February 2023

Clearly Besotted Teasers | For You

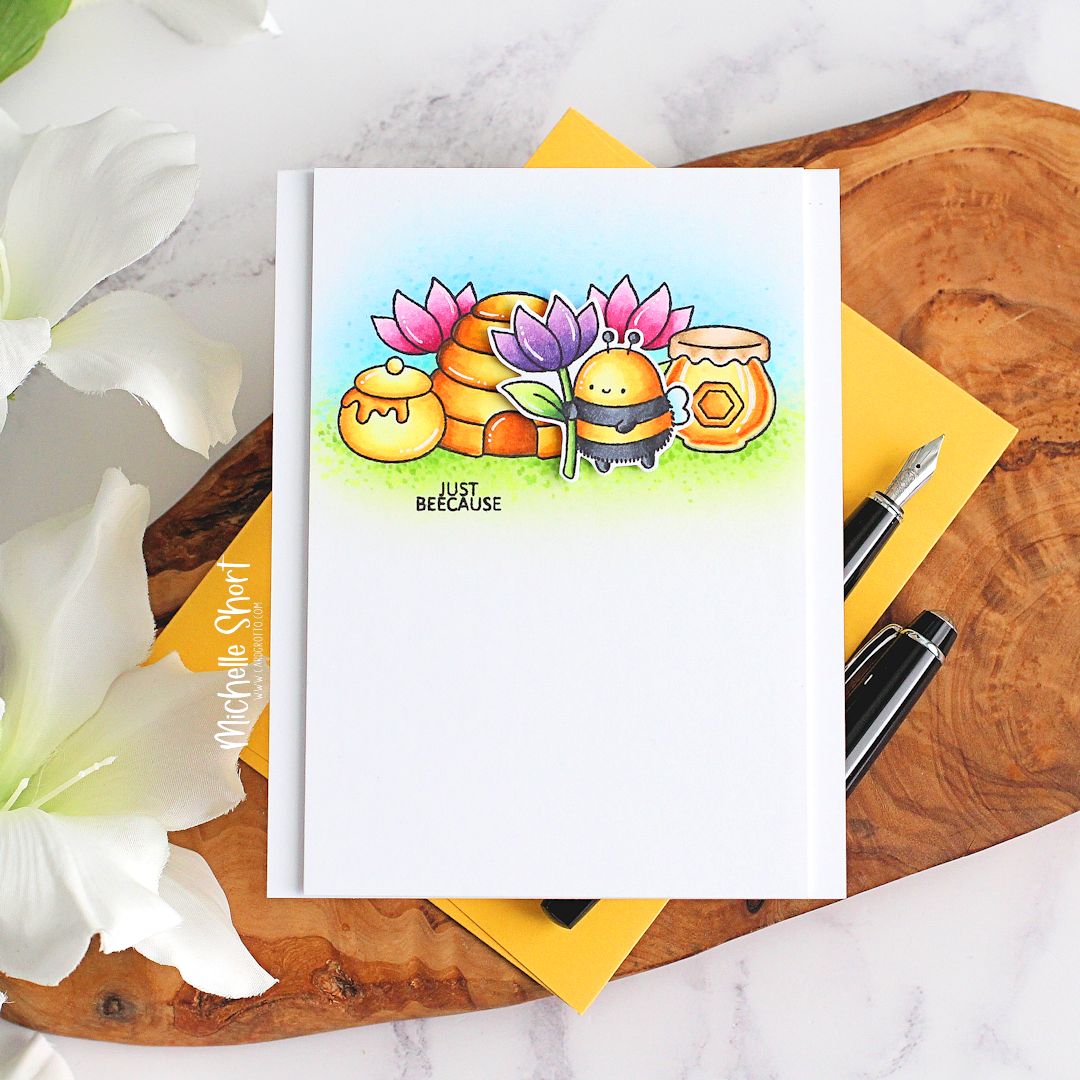
Hello there and welcome to day four of the Clearly Besotted March 2023 Teasers. Release day is tomorrow, so only one more sleep to go! Today I am using the super cute Blowing Balloons set. This set features critters holding balloon animals and flowers. Although I did not emphasise that the flowers are balloons on my card, you certainly could! 

PLEASE NOTE: This post contains affiliate links. Please see below for my full disclosure.


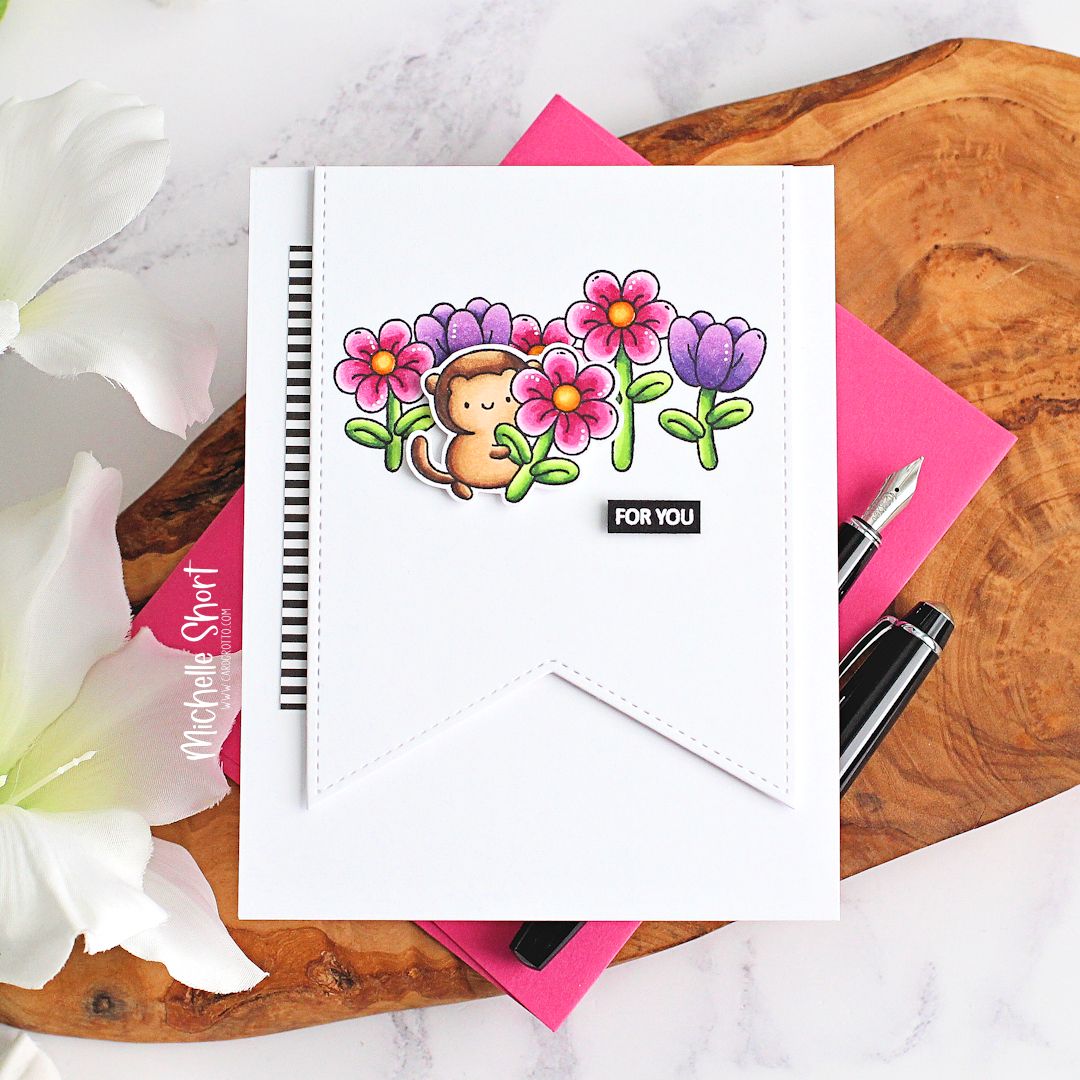
I started off my card by die cutting a Sunny Studio Slimline Pennants Die from white cardstock. I then stamped the flower balloon image from the Clearly Besotted Blowing Balloons Stamp Set on top with Memento Tuxedo Black Ink. I then stamped the monkey with the balloon flower on to a separate piece of cardstock. 


Both were coloured with Copic Markers (the colours that I used are listed below the supplies area) and then the monkey image fussy cut out with scissors. I stamped the sentiment from the set on to black cardstock using Versamark Ink. I applied white embossing powder and heat set. It was then cut into a strip. 


I added a strip of MFT Black & White Stripes Paper to a US A2 sized white card base and then adhered the banner piece of top with thin foam tape, followed by the monkey image and then the sentiment. To finish off, I added black glaze pen to the money's eyes and white gel pen dots to the flowers, followed by Crystal Glaze to the flower centres. 
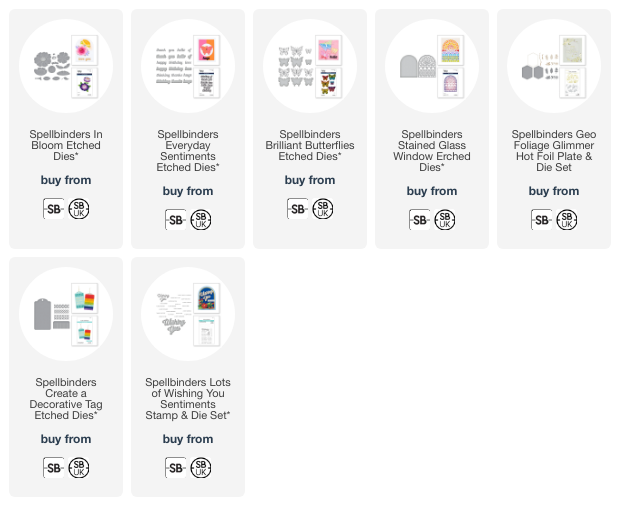
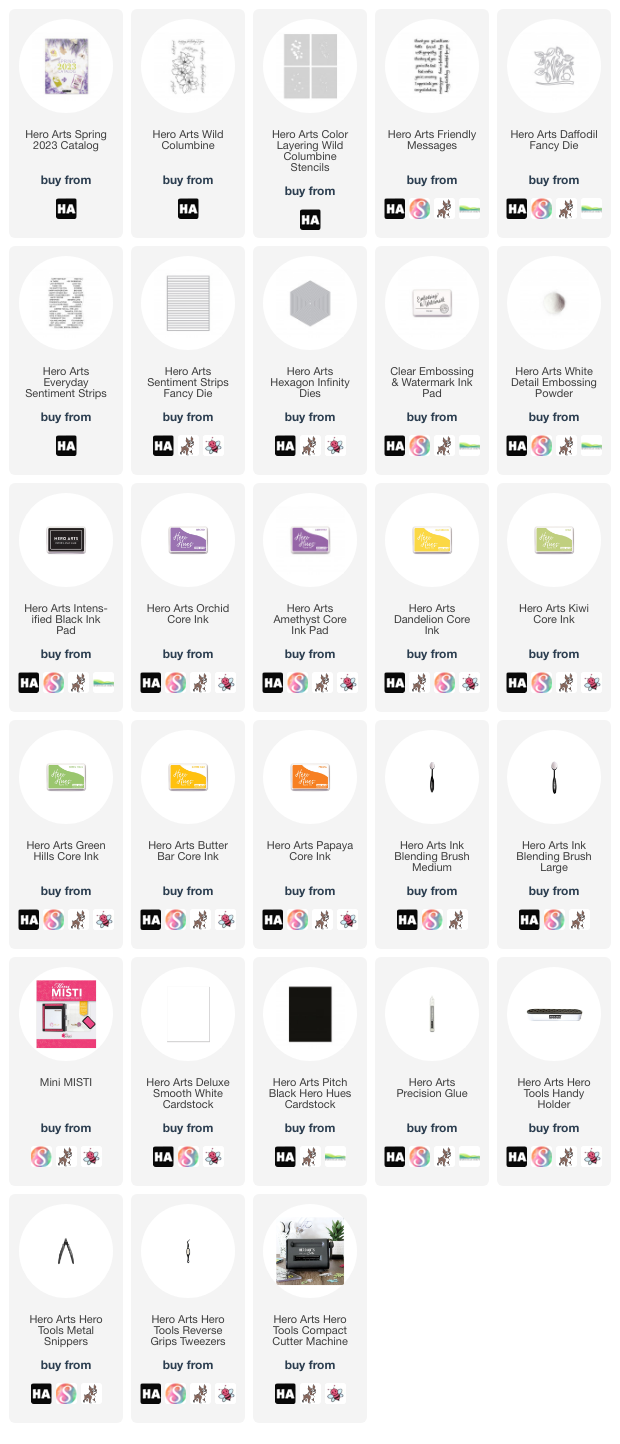
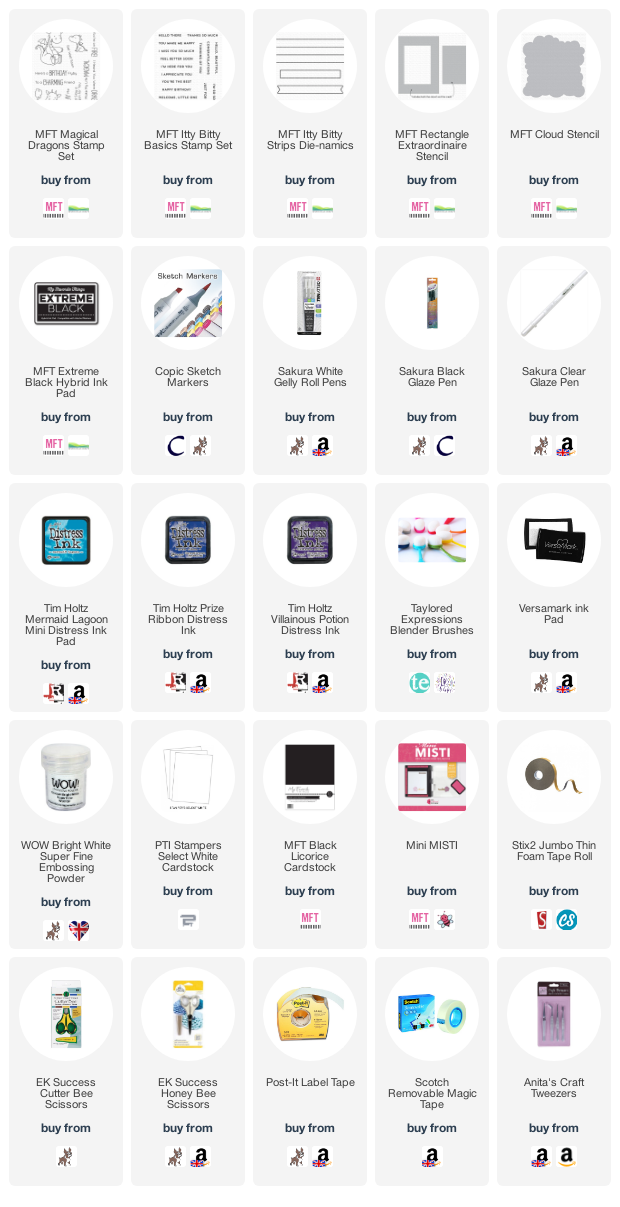
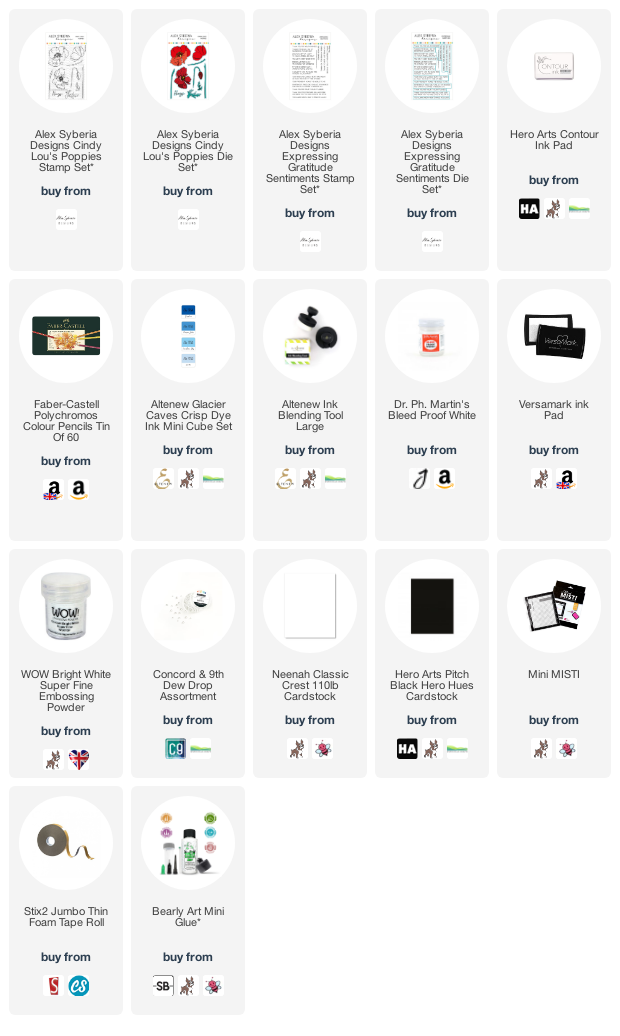
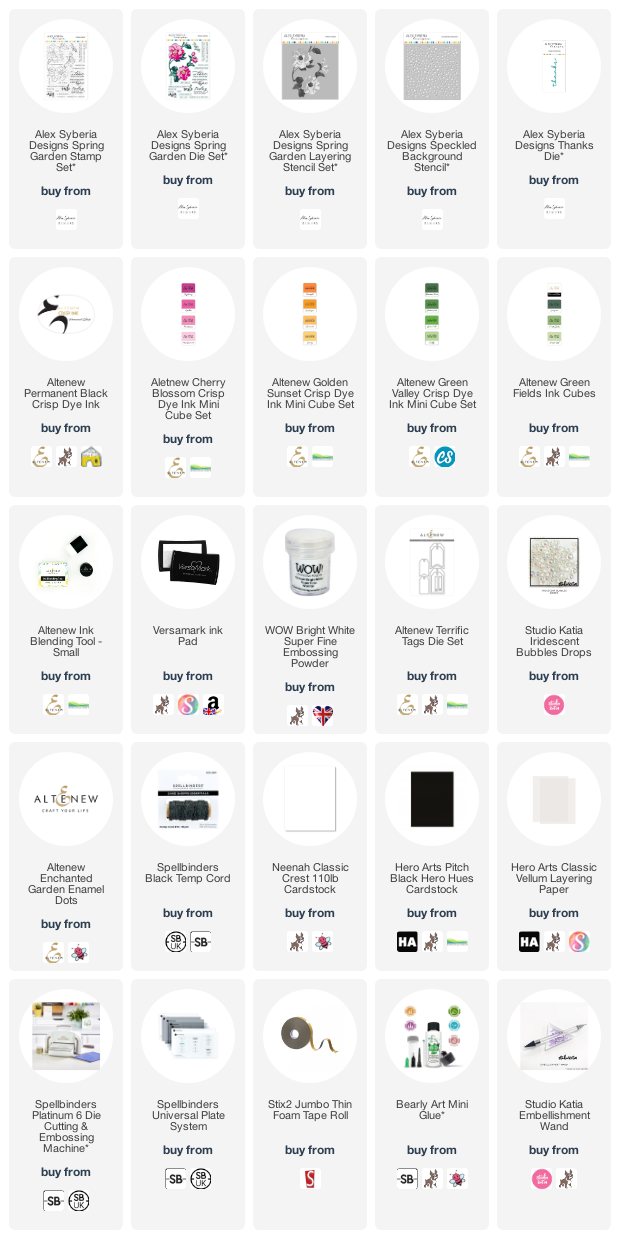
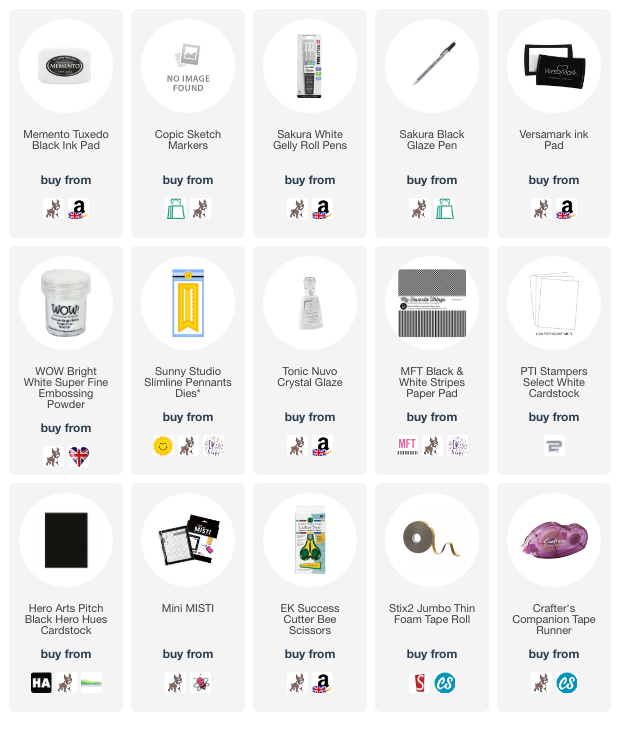
SUPPLIES:


Here are the links to what I have used on the project. Affiliate links are used on some products. This means that if you make a purchase after clicking on my link, I receive a small commission with no extra cost to you. I truly appreciate your support when using these links. Please click on the logo below the product to shop at your favourite store. All products were personally purchased except those from Clearly Besotted, Hero Arts or those marked with an asterisk (*) which were kindly sent to me to use. You can read my full disclosure here.


COPIC MARKERS: Monkey - E49, E59, E57, E55, E53. Pink flowers - RV99, RV66, RV55, RV52. Purple flowers - V09, V17, V15, V12. Stems/leaves - G29, YG17, YG23, YG01. 

I will take a look at the two other sets that I haven't used in my release video tomorrow (spoiler alert! They are super cute as well!). For more inspiration using the new release, please head over to the Clearly Besotted Blog, Keren, Francine, Kitty and Alberto. Thank you so much for stopping by, I really do appreciate it. I hope you have a great day! 

27 February 2023

Clearly Besotted Teasers | Just Beecause

Hello there and welcome to day three of the Clearly Besotted March 2023 Teasers. Not long to wait now, the release hits the shops of the 1st March. Today I am using the super cute Let's Bee Friends set. There are lots of bee and bear friends in this set, as well as a scene image. 

PLEASE NOTE: This post contains affiliate links. Please see below for my full disclosure.


I started off my card by stamping the scene image from the Clearly Besotted Let's Bee Friends Stamp Set on to a panel of white cardstock using Memento Tuxedo Black Ink. I then made a mask for it from masking paper, fussy cut out out and placed it over the image. Using ink blending brushes, I blended on Tim Holtz Distress inks Inks in Twisted Citron and Mowed Lawn for the grass and Mermaid Lagoon for the sky. 


The mask was removed and the image coloured using Copic Markers (the colours that I used are listed below the supplies area for reference), adding in some dots to the grass and sky. I also stamped the bee holding the flower from the set on to a separate piece of cardstock, coloured it with Copic Markers and fussy cut it out with scissors. 


I stamped the sentiment from the older Clearly Besotted Spelling Bee Stamp Set on to the panel before adhering to a US A2 sized white card base with thin foam tape. The bee was then adhered on top. To finish off, I added white gel pen highlights to the image. 

SUPPLIES:


Here are the links to what I have used on the project. Affiliate links are used on some products. This means that if you make a purchase after clicking on my link, I receive a small commission with no extra cost to you. I truly appreciate your support when using these links. Please click on the logo below the product to shop at your favourite store. All products were personally purchased except those from Clearly Besotted, Hero Arts or those marked with an asterisk (*) which were kindly sent to me to use. You can read my full disclosure here.


COPIC MARKERS: Bee - YR27, Y17, Y15, Y13, Y11/C10, C8, C6, B00, B000. Flowers - RV99, RV66, RV55, RV52/G29, YG17, YG23, YG01. Honey pot - YR27, Y17, Y15, Y13, Y11, Y00. Beehive - E87. YR27, YR14, Y17, Y15, Y13, Y11, Black Polychromos pencil. Honey jar - YR27, Y17, Y15, Y13, Y11/E57, E55, E53, E51. Grass - YG17, YG23, YG01. Sky - B02, B00, B000. 

There are so many fun scenes you can create with this set! For more inspiration using the new release, please head over to the Clearly Besotted Blog, Keren, Kitty, Francine and Alberto. Thank you so much for stopping by, I hope you have a wonderful day! 

26 February 2023

Clearly Besotted Teasers | Sundae Funday

Hello there and welcome to day two of the Clearly Besotted March 2023 Teasers. Release day is 1st March 2023. We are sharing teasers with you until then using the new sets. Today I am using the super cute Sundae Funday set. This set includes lots of cute critters with their yummy sundaes, as well as some fun sentiments. 

PLEASE NOTE: This post contains affiliate links. Please see below for my full disclosure.


I started off my card by stamping the dog with the sundae image from the Clearly Besotted Sundae Funday Stamp Set on to white cardstock using Memento Tuxedo Black Ink. I coloured it using Copic Markers (the colours that I used are listed below the supplies area for reference). It was then fussy cut out using scissors. 


I took a 3.5" x 4.75" panel of white cardstock and masked off the bottom part. Above it, I blended Tim Holtz Picked Raspberry Distress Ink using an ink blending brush. The masking tape was removed and the sentiment from the set stamped below using black ink, before adhering to a US A2 sized white card base with thin foam tape. 


The image was then adhered on top with more thin foam tape. I added white gel pen highlights to the image and then I added sparkles and dots to the background. I also added black glaze pen to the dog's eyes. 

SUPPLIES:


Here are the links to what I have used on the project. Affiliate links are used on some products. This means that if you make a purchase after clicking on my link, I receive a small commission with no extra cost to you. I truly appreciate your support when using these links. Please click on the logo below the product to shop at your favourite store. All products were personally purchased except those from Clearly Besotted, Hero Arts or those marked with an asterisk (*) which were kindly sent to me to use. You can read my full disclosure here.


COPIC MARKERS: Dog - E59, E57, E55. Spoon - C7, C5, C3. Glass - T5, T3, T1, Black Polychromos Pencil. Ice cream - R39, R56, R85, R83, R81. Cherries - R89, R39, R35. Chocolate sauce - E27, E25, E23. Cream - E53, E51, E50. Wafer - E59, E55, E53, E51. 

Although I am not a fan of strawberry ice cream (I am more of a mint choc chip kind of girl!), that sundae does look yummy! For more inspiration using the new release, please head over to the Clearly Besotted Blog, Keren, Kitty, Francine and Alberto. Thank you so much for stopping by today, I very much appreciate it. I hope you have a wonderful day! 

25 February 2023

Clearly Besotted Teasers | Beeutiful Corners

Hello there and welcome to the start of the Clearly Besotted March 2023 Teasers. Release day is 1st March 2023 and from now until then, we will be sharing teasers using the new sets. Today I am using the Beary Beeutiful Corners set. This set features bees and bears in corner images. 

PLEASE NOTE: This post contains affiliate links. Please see below for my full disclosure.

I started off my card by stamping one of the corner images from the Clearly Besotted Beary Beeutiful Corners Stamp Set on to white cardstock using Memento Tuxedo Black ink. I coloured it using Copic Markers (the colours that I used are listed below the supplies area for reference). It was then fussy cut out using scissors. 

I took a panel of white cardstock and added ink blending to the top left hand corner using ink blending brushes. I used Tim Holtz Distress Inks in Squeezed Lemonade, Mustard Seed and Wild Honey. I then splattered on Dr. Ph. Martin's Bleed Proof White Paint before setting it aside to dry. 

I took the sentiment from the older Clearly Besotted Spelling Bee Stamp Set and stamped it on to the panel using more black ink. The panel was adhered to a US A2 sized white card base with tape runner adhesive. The image was adhered on top with thin foam tape. I added white gel pen dots to the image and then embellished with Dew Drops to finish. 

SUPPLIES:


Here are the links to what I have used on the project. Affiliate links are used on some products. This means that if you make a purchase after clicking on my link, I receive a small commission with no extra cost to you. I truly appreciate your support when using these links. Please click on the logo below the product to shop at your favourite store. All products were personally purchased except those from Clearly Besotted, Hero Arts or those marked with an asterisk (*) which were kindly sent to me to use. You can read my full disclosure here.


COPIC MARKERS: Bee - YR27, Y17, Y15, Y13, Y11/C10, C8, C6/B00, B000. Honeycomb - E87, YR27, YR24, Y17, Y15, Y13. Flowers: YR27, Y17, Y15, Y11, Y00, Y000. 

Although I did not use any of the bears on my card today, they are super cute! For more inspiration using the new release, please head over to the Clearly Besotted Blog and my amazing teamie Keren. We also have our resident guests back this month - Alberto, Francine and Kitty, so please do check out what they have been up to as well. Thank you so much for stopping by today. As always, I really do appreciate it. I hope you have a great day! 

23 February 2023

Spellbinders | Metamorphosis Collection

Hello there, I am over on the Spellbinders Blog today sharing three projects using the Metamorphosis collection by Simon Hurley. This is such a wonderful collection of dies. There are butterflies, a stained glass window, sentiments and flowers. I am using all four of the sets on my projects today. 

PLEASE NOTE: This post contains affiliate links. Please see below for my full disclosure.


Project 1 (left) - This card uses the beautiful In Bloom Etched Dies for the flower and the sentiment is from the Everyday Sentiments Etched Dies Set. I love that there is a word and a shadow die for all of the sentiments in the set. 

Project 2 (top right) - I thought the Brilliant Butterflies Etched Dies would look lovely on an acetate tag. The sentiment is from Lots of Wishing You Sentiments. I love that the butterflies can be used many ways - with the shadow, without, shadow on it's own - so many possibilities! 

Project 3 (bottom right) - This card uses the wonderful Stained Glass Window Etched Dies to create a shaped card. I also used the Brilliant Butterflies Etched Dies and Everyday Sentiments Etched Dies Set

SUPPLIES:


Here are the links to what I have used on the projects. Affiliate links are used on some products. This means that if you make a purchase after clicking on my link, I receive a small commission with no extra cost to you. I truly appreciate your support when using these links. Please click on the logo below the product to shop at your favourite store. All products were personally purchased except those from Clearly Besotted, Hero Arts or those marked with an asterisk (*) which were kindly sent to me to use. You can read my full disclosure here.


For more information on how I made the projects, as well as up close photos, please head over to the Spellbinders Blog. Thank you so much for stopping by today, I very much appreciate it. I hope you have a great day! 

20 February 2023

Hero Arts | Spring Release Blog Hop + Giveaway

Hello there, today is an exciting day as the Hero Arts Spring Release is now available to purchase in the Hero Arts Store! We are celebrating with a fun and inspirational blog hop (with a giveaway too!). I have two cards to share with you today using two new sentiment stamp sets, a floral die set and a floral stamp set with coordinating stencils. 

PLEASE NOTE: This post contains affiliate links. Please see below for my full disclosure.


My first card uses the new Hero Arts Wild Columbine Set. I stamped the image on to white cardstock using Hero Arts Intens-ified Black Ink. I then took the Hero Arts Color Layering Wild Columbine Stencils and placed them on top, one at a time and added ink bending to colour in the image. I used Ink Blending Brushes and Hero Arts Orchid, Amethyst, Dandelion, Kiwi and Green Hills Core Inks. 


The image was die cut out using the coordinating Frame Cuts. I took a panel of white cardstock and masked off the edges. I added ink blending inside using Hero Arts Orchid Core Ink and then removed the masks. The panel was adhered to a US A2 sized white card base with tape runner adhesive. 


The flower image was adhered on top using thin foam tape. I stamped the 'happy birthday' sentiment from the new Hero Arts Friendly Messages Set on to white cardstock using Hero Arts Intens-ified Black Ink. It was die cut out using the coordinating Frame Cut and adhered to the card with more thin foam tape. To finish off, I added a few clear sequins. 


My next card uses the new Hero Arts Daffodil Fancy Dies. I die cut them from white cardstock twice. I then added ink blending on top using an Ink Blending Tool and Hero Arts Dandelion, Butter Bar and Papaya Core Ink. I used Hero Arts Kiwi and Green Hills Core Ink for the leaves. 


I die cut two Hero Arts Nesting Hexagon Infinity Dies and adhered them one on top of another (for dimension) before adhering to a US A2 sized white card base with Hero Arts Precision Glue. The leaves were then adhered on top with more liquid glue and the daffodil heads adhered with thin foam tape. 


I took the Hero Arts Everyday Sentiment Strips Stamp and stamped it on to Hero Arts Pitch Black Cardstock with Hero Arts Clear Embossing & Watermark Ink. I applied Hero Arts White Detail Embossing Powder and heat set. It was die cut out using the Hero Arts Sentiment Strips Fancy Die. The 'happy birthday' sentiment was then adhered to the card using thin foam tape. To finish off, I added a few dew drop embellishments. 

SUPPLIES:


Here are the links to what I have used on the projects. Affiliate links are used on some products. This means that if you make a purchase after clicking on my link, I receive a small commission with no extra cost to you. I truly appreciate your support when using these links. Please click on the logo below the product to shop at your favourite store. All products were personally purchased except those from Clearly Besotted, Hero Arts or those marked with an asterisk (*) which were kindly sent to me to use. You can read my full disclosure here.


BLOG HOP:


As mentioned, this post is part of  a fun, inspirational blog hop. For the hop, you should have arrived here from the fabulous Maria. Next on the hop is the marvellous Mindy. If you get lost along the way or want to start the hop from the beginning, please head over to the Hero Arts Blog

GIVEAWAY:

Hero Arts are giving away two $50 gift cards to the Hero Store, drawn from the comments left across the hop. Comment on all the blogs in the hop for more chances to win! Giveaway closes 26th February 11.59 PT. The winners will be announced on the Hero Arts Blog shortly after. 

SPRING STAMP-ALONG 2023

Before I go, I wanted to let you know about the Spring 2023 Stamp-Along event. 


Join us for two days of card classes at our sixth Stamp-Along event! During this virtual event, you will have the opportunity to create at least ten beautiful cards from start to finish, learning tips and tricks from some of your favorite cardmakers. The event will primarily take place over two days - Saturday, April 15, and Sunday, April 16, 2023. The classes will run from approximately 10:00am - 6:00pm ET both days, with a special bonus live event later Saturday evening. All of the videos will be available for replay using the links provided if you cannot attend the event live.

Thank you so much for stopping by today, I really do appreciate it. I hope you have a great time on the rest of the hop and a wonderful rest of the day! 

17 February 2023

VIDEO | MFT Stenciled Sky

Hello there, I was over on the My Favorite Things YouTube channel yesterday sharing a card using an oldie but a goodie set - Magical Dragons. I also created a stencilied sky for the dragon to fly in. 

PLEASE NOTE: This post contains affiliate links. Please see below for my full disclosure.


I started off by stamping one of the dragons from MFT Magical Dragons Stamp Set on to white cardstock using MFT Extreme Black Ink. I then coloured him using Copic Markers (the colours that I used are listed below the supplies area), adding in some dots to the top of his body for some added texture. I do not have the coordinating dies for the set, so I fussy cut him out using scissors. 


I took a panel of white cardstock and first placed the MFT Rectangle Extraordinaire Stencil on top, holding it down with Post-It Tape. I then placed the MFT Cloud Stencil on top of that before adding ink blending inside the shape I created with the stencils. I used Tim Holtz Distress Inks in Mermaid Lagoon, Prize Ribbon and Villainous Potion. I moved the cloud stencil down to create another cloud below. 


The stencils were removed and the panel adhered to a US A2 sized white card base with tape runner adhesive. The dragon was then adhered on top using thin foam tape. I stamped a sentiment from the Itty Bitty Basics Stamp Set on to black cardstock using Versamark Ink


I applied white embossing powder and heat set. It was cut in to a strip using the MFT Itty Bitty Strips Die-namics and adhered to the card with more thin foam, tape. To finish off, I added black glaze pen to the dragon's eyes, clear glaze pen to his nostrils and 0.8 white gel pen highlights to his legs. I then added 0.5 white gel pen dots, sparkles and stars to the sky. 

VIDEO:

Here is the video showing how I made the card:


If you are viewing this blog post via email subscription, you can watch the video HERE on YouTube. 

SUPPLIES:


Here are the links to what I have used on the project and in the video. Affiliate links are used on some products. This means that if you make a purchase after clicking on my link, I receive a small commission with no extra cost to you. I truly appreciate your support when using these links. Please click on the logo below the product to shop at your favourite store. All products were personally purchased except those from Clearly Besotted, Hero Arts or those marked with an asterisk (*) which were kindly sent to me to use. You can read my full disclosure here.


COPIC MARKERS: V09, V17, V15, V12. BG49, BG15, BG13, BG11, BG10/0. 

Thank you so much for stopping by to see me today. I really do appreciate it. I hope you have a wonderful rest of the day. Take care! 

16 February 2023

Simon Says Stamp | You Are Fabulous

Hello there, today I have a card to share with you using the new Be Creative release from Simon Says Stamp, which is out today. They kindly sent me the new Simply Fabulous Die to use and although I have not used the 'simply' word, I thought the 'fabulous' would work well with the Picture Book Zebra. 

PLEASE NOTE: This post contains affiliate links. Please see below for my full disclosure.


I started off my card by running a panel of white cardstock through my die cutting machine with the Simon Says Stamp Spun Glass Embossing Folder. I added a little Tim Holtz Wilted Violet Distress Ink to the bottom left hand corner with an ink blending brush


I die cut the Simon Says Stamp Simply Fabulous Die using white cardstock for the shadow and black cardstock for the word itself. I cut two of the word/letters and stacked them up on top of the shadow for some dimension. I then stamped the 'you are' from the Simon Says Stamp Tiny Words Support Stamp Set on to black cardstock with Versamark Ink. I applied white embossing powder and heat set. It was cut into a strip using the Simon Says Stamp Sentiment Labels Dies


I die cut the Simon Says Stamp Picture Book Zebra Die from white and black cardstock and adhered them to a separate piece of white cardstock. I fussy cut that out with scissors and adhered it to the embossed panel. I did cut his neck in half (I know, sounds awful!) so that I could extend to fit behind the sentiment. The sentiments were then adhered on top with thin foam tape. The panel was then adhered to a US A2 sized white card base with more thin foam tape. 

SUPPLIES:


Here are the links to what I have used on the project. Affiliate links are used on some products. This means that if you make a purchase after clicking on my link, I receive a small commission with no extra cost to you. I truly appreciate your support when using these links. Please click on the logo below the product to shop at your favourite store. All products were personally purchased except those from Clearly Besotted, Hero Arts or those marked with an asterisk (*) which were kindly sent to me to use. You can read my full disclosure here.


I know that zebra's don't usually have such long necks (this would have worked better with a giraffe!) but I still think it looks cute! Thank you so much for stopping by today, I will be back later with another post but in the mean-time, I hope you have a great day! 

15 February 2023

Spellbinders | Four Petal Tulips

Hello there, I am over on the Spellbinders Blog sharing a step-by-step tutorial using the Wonderful Tulips Hot Foil Plate along with the Wonderful Tulips Layered Stencils. I love that Spellbinders have released layering stencils to work with this hot foil plate. As much as I love colouring, using stencils to 'colour' images with ink blending is so fast and easy and I love the results! 

PLEASE NOTE: This post contains affiliate links. Please see below for my full disclosure.


The Spellbinders Wonderful Tulips Glimmer Hot Foil Plate & Die Set was foiled on to Hammermill Cardstock using Spellbinders Champagne FoilI used Distress Inks to colour the flowers, stems and leaves using the Spellbinders Wonderful Tulips Layered Stencils

The sentiment is from the Spellbinders Making Me Smile Sentiments Glimmer Hot Foil Plate & Die Set. This is a fun set that you foil in one go and also die cut in one go, so you have lots of sentiments ready for future projects! 

SUPPLIES:


Here are the links to what I have used on the project. Affiliate links are used on some products. This means that if you make a purchase after clicking on my link, I receive a small commission with no extra cost to you. I truly appreciate your support when using these links. Please click on the logo below the product to shop at your favourite store. All products were personally purchased except those from Clearly Besotted, Hero Arts or those marked with an asterisk (*) which were kindly sent to me to use. You can read my full disclosure here.


For the step-by-step photo tutorial, including some tips on what works for me with foiling, please head over to the Spellbinders Blog. Thank you so much for stopping by today, I hope you have a great day! 

11 February 2023

Alex Syberia Designs | Thank You For Being My Friend Release Instagram Hop

Hello there, I am delighted to be joining Alex Syberia Designs today to celebrate their Thank You For Being My Friend Release with a fun Instagram Hop. All the fun is going on over there, but I still wanted to share my card here along with more details. 

PLEASE NOTE: This post contains affiliate links. Please see below for my full disclosure.


I have already shared two projects using the release here. Today's card uses the beautiful Cindy Lou's Poppies. This set features poppies, stems and leaves all as separate stamps so that you can mix and match as you wish. 


I started off by stamping the images from the Alex Syberia Designs Cindy Lou's Poppies Stamp Set on to white cardstock using Hero Arts Contour Ink. This is a really pale grey colour that works perfectly for no-line colouring. They were coloured using Faber Castell Polychromos Pencils (the colours that I used are listed below the supplies area) before die cutting out with the Alex Syberia Designs Cindy Lou's Poppies Die Set


I added ink blending to the bottom left hand corner of a panel of cardstock for a pale background. I used Altenew Glacier Crisp Dye Inks and an Ink Blending Tool. I splattered on Dr. Ph. Martin's Bleed Proof White Paint and set it aside to dry. Once dry, it was adhered to a US A2 sized white card base with thin foam tape. 


The stems and leaves were adhered with Bearly Art Glue and the flower heads with thin foam tape. I stamped the Alex Syberia Designs Expressing Gratitude Sentiments Stamp Set (this is one whole stamp) on to black cardstock using Versamark Ink. I applied white embossing powder and heat set. It was die cut out using the Alex Syberia Designs Expressing Gratitude Sentiments Die Set and the sentiment adhered to the card with more thin foam tape. To finish off, I added a few Concord & 9th Dew Drops. 

SUPPLIES:


Here are the links to what I have used on the project. Affiliate links are used on some products. This means that if you make a purchase after clicking on my link, I receive a small commission with no extra cost to you. I truly appreciate your support when using these links. Please click on the logo below the product to shop at your favourite store. All products were personally purchased except those from Clearly Besotted, Hero Arts or those marked with an asterisk (*) which were kindly sent to me to use. You can read my full disclosure here.


POLYCHROMOS PENCILS: Flower petals - Black 199, Helioblue-Reddish 151, Ultramarine 120, Light Ultramarine 140, White 101/Dark Naples Ochre 184, Burnt Ochre 187, Black 199. Leaves & stems - Pine Green 267, Leaf Green 112, Light Green 171. 

To follow along with the Instagram hop, you can visit my Instagram HERE and Alex Syberia Designs HERE. Thank you so much for stopping by today, I really do appreciate it. I hope you have a wonderful day! 

10 February 2023

Spellbinders | Birthday Bloom

Hello there, today I have a card to share with you using two new releases out today for Spellbinders. The first is the new Metamorphosis Collection from Simon Hurley, which is a beautiful collection of dies featuring flowers, butterflies and sentiments. The second is called Four Petal and is filled with beautiful flowers and sentiments including dies and hot foil plates. 

PLEASE NOTE: This post contains affiliate links. Please see below for my full disclosure.


I started off my card by die cutting the Spellbinders In Bloom Etched Dies from Spellbinders Lilac Blossom, Purple Mist and Chamomile Cardstock for the flower itself. The leaves were die cut from Spellbinders Peridot Cardstock. I added ink blending to the die cuts with Tim Holtz Distress Inks (Wilted Violet, Villainous Potion, Mustard Seed and Mowed Lawn) using ink blending brushes. 


I then assembled the flowers using Bearly Art Glue. I took a 3" x 4.25" panel of white cardstock and added scoring lines on to it using a score board and bone folder. The leaves were then adhered flat to the panel using Bearly Art Glue. The flowers were adhered using thin foam tape. The panel itself was then adhered to a US A2 sized white card base with more thin foam tape. 


I took the sentiment from the Spellbinders Making Me Smile Sentiments Glimmer Hot Foil Plate & Die Set and foiled it on to white cardstock using Spellbinders Champagne Glimmer Hot Foil Roll and the Spellbinders Glimmer Hot Foil System. It was die cut out with the coordinating die and adhered to the card. To finish off, I added a few Spellbinders Prism AB Color Essentials Gems

SUPPLIES:


Here are the links to what I have used on the project. Affiliate links are used on some products. This means that if you make a purchase after clicking on my link, I receive a small commission with no extra cost to you. I truly appreciate your support when using these links. Please click on the logo below the product to shop at your favourite store. All products were personally purchased except those from Clearly Besotted, Hero Arts or those marked with an asterisk (*) which were kindly sent to me to use. You can read my full disclosure here.


Both of these collections are wonderful and I have more cards to share with you using them both later in the month. Thank you so much for stopping by today, I really do appreciate it. I hope you have a wonderful day! 

9 February 2023

Alex Syberia Designs | Thank You For Being My Friend Release Blog Hop + Giveaway

Hello there, I am delighted to be joining Alex Syberia Designs today to celebrate the Thank You For Being My Friend Release with a fun blog hop. I have two projects to share with you today and I will have another soon.

PLEASE NOTE: This post contains affiliate links. Please see below for my full disclosure.


For my projects today, I am using the new Spring Garden collection. There is a stamp set, die set and coordinating stencils to colour the images in. I am also using the fabulous new Speckled Background Stencil in two different ways. 


For the card, I started off by stamping the main floral image from Alex Syberia Designs Spring Garden Stamp Set on to white cardstock using Altenew Permanent Black Ink. I placed the Alex Syberia Designs Spring Garden Layering Stencil Set on top (one by one) and added ink blending to the image. I used Altenew Cherry Blossom Inks for the petals, Altenew Golden Sunset Inks for the flower centres and Altenew Green Valley Inks for the leaves and stems. 

I then die cut the image out using the Alex Syberia Spring Garden Die Set. I did cut the die again from white cardstock and adhered it behind the stamped one for some added dimension and stability. I took a panel of white cardstock and ran it through my die cutting machine with the Alex Syberia Designs Speckled Background Stencil to emboss it. Difficult to see in the photos, but looks lovely in real-life! 

The image was adhered on top and then the panel adhered to a US A2 sized white card base with thin foam tape. I took the Alex Syberia Designs Thanks Die and cut the shadow from white cardstock and the word itself from black cardstock. They were layered up and adhered to the card. 

The sentiment from the Alex Syberia Designs Spring Garden Set was stamped on to black cardstock using Versamark Ink. I applied white embossing powder and heat set. It was die cut using the coordinating die and adhered to the card. To finish off, I added a few Iridescent Bubbles

For my next project, I created tag using the same products but with a different look. I started off by die cutting a tag from white cardstock and then placed the Alex Syberia Designs Speckled Background Stencil on top. I added ink blending through the dots with Altenew Jet Black Ink. I then stamped the image from Alex Syberia Designs Spring Garden Stamp Set on to vellum using Versamark Ink

I applied white embossing powder and heat set. It was die cut out with the coordinating die and then adhered to the tag with tiny dabs of glue behind the embossed lines. I heat embossed a sentiment from the set on to black cardstock, die cut out out with coordinating die and adhered it to the tag with thin foam tape. To finish off, I added twine through the top of the tag and tied in a bow and to embellish, I added a few enamel dots

SUPPLIES:


Here are the links to what I have used on the projects. Affiliate links are used on some products. This means that if you make a purchase after clicking on my link, I receive a small commission with no extra cost to you. I truly appreciate your support when using these links. Please click on the logo below the product to shop at your favourite store. All products were personally purchased except those from Clearly Besotted, Hero Arts or those marked with an asterisk (*) which were kindly sent to me to use. You can read my full disclosure here.


BLOG HOP:

As mentioned this blog post is part of a fun blog hop with prizes. For the hop, you should have arrived here from the amazing Lien Leysen. Next up is the fabulous Mindy Eggen. If you get lost along the way, or want to start the hop from the beginning, please head over to the Alex Syberia Designs Blog

GIVEAWAY:

Alex Syberia Designs is giving away the full release bundle (valued at £280/$340) and giving away a £15 gift card to two lucky winners. Winners will be picked from the comments left across all the stops in the hop. Giveaway closes 19th February 2023 at midnight GMT. Winners will be announced on the Alex Syberia Designs Blog on 20th February 2023. 

It is such a wonderful release, so I hope you will check it out! Thank you so much for stopping by today, I really do appreciate it. I hope you have a wonderful time on the rest of the hop and a great rest of the day!

End of code