27 October 2015

No-Line Butterfly

Hello there, today I have a card to share using the Hero Arts Butterflies Stamp & Cut set. I decided to CASE one of my own cards today, I really liked the simple sentiment on top of the butterfly on this card, so I went with something similar for my card today.
 

I started off by taking a panel of white cardstock and stamping the butterfly wings on to it using MFT Grout Gray Hybrid Ink. This is a great ink for doing no-line Copic Colouring, as it is very light in colour and also does not bleed. I then stamped the body using black ink. The wings were then coloured using Copic Markers.

 
The sentiment, from the Hero Arts Hello Stamp & Cut set, was stamped in black on to another piece of white cardstock. This was then cut out in to a strip. The butterfly piece was adhered to a black 4-bar card base using ATG. I then added the sentiment piece with foam tape.
 
SUPPLIES:
Here are the links to what I have used on the card. Please click on the picture or wording to be taken to where I purchased it. Affiliate links are not used in this supplies list.
 

COPIC MARKERS: R85, R83, R81.
 
A simple card but I think it would be nice to send to someone to let them know you are thinking of them. Thank you so much for visiting me today. I hope you have a great day!

24 October 2015

Balloon Bear

Hello there, today I have a card to share using the Birthday Bears set from MFT. I love this set, it is great for birthday cards but you can also use the bears for other occasions too. Since I need birthday cards the most, I went with a female birthday card this time.
 
 
I started off with a panel of white cardstock. I stamped the bear, balloon and sentiment on to it with black ink. The bear and balloon were then coloured using Copic Markers. I added a little Wink of Stella to the balloon, as well as a coating of Glossy Accents.

 
I then took a white A2 card base and added a strip of paper from the MFT Fresh Squeezed Chevron paper pad to the bottom portion. The panel was then added on top with foam sheet.
 

SUPPLIES:

Here are the links to what I have used on the card. Please click on the picture or wording to be taken to where I purchased it. Affiliate links are used on some products. This means that if you make a purchase after clicking on my link, I receive a small commission with no extra cost to you. I truly appreciate your support when using these links.
 

COPICS: Bear: E29, E27, E25, E23, E21, E11, R20. Balloon: RV55, RV52. Ground: W6, W5, W3, W1. Shadow: B000, B0000.
 
I love making these simple birthday cards and it gives me an opportunity to colour as well, which I always love doing! Thank you so much for visiting me today. I hope you have a great day and an amazing weekend!

22 October 2015

Hello

Hello there, I am really loving ink smooshing at the moment. Who would have thought it? Me, a clean and simple card maker, loving ink smooshing! I think I like the artsy look of it maybe. I was inspired this card from Nichol Magouirk, I loved the inky background along with a simple sentiment.
 

I started off with a piece of TH watercolor cardstock and then went to town ink smooshing on it using Distress Inks. I started off with Mustard Seed, followed by Dried Marigold. You couldn't see the Dried Marigold that well over the Mustard Seed so I went in with Spiced Marmalade afterwards. I then finished with some Picked Raspberry. I smooshed the colours one by one on to a plastic sheet, sprayed with a water and then flipped this over and smooshed it on to my cardstock.
 
 
The sentiment, from the Hero Arts Hello Stamp & Cut set was stamped with Versafine Onyx Black ink, along with the little hearts, also from the set. the panel was then adhered to a black 4-bar notecard. I finished off by adding Glossy Accents on the hearts.
 

SUPPLIES:

Here are the links to what I have used on the card. Please click on the picture or wording to be taken to where I purchased it. Affiliate links are used on some products. This means that if you make a purchase after clicking on my link, I receive a small commission with no extra cost to you. I truly appreciate your support when using these links.
 
Thank you so much for visiting me today. I hope you are well. Have a great day!
20 October 2015

Miss You

Hello there, today I have a card to share with you using the Hey Foxy set from The Ton. What an adorable set! This little guy looked like he could be missing someone, so I went with that and made a missing you card.


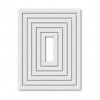
I started off with a panel of white cardstock that was cut using the ME Femme Frame rectangle die. The little fox was stamped in the bottom left corner and the sentiment slightly above to the right. He was then coloured using Copic Markers, adding a little black glaze pen to his eyes.
 
 
A sheet of paper from the MFT Fresh Squeezed Chevron paper pad was added to a white A2 card base. The panel was then added with foam sheet.
 

SUPPLIES:

Here are the links to what I have used on the card. Please click on the picture or wording to be taken to where I purchased it. Affiliate links are not used in this supplies list. 

COPIC MARKERS: Fox: E17, E15, E13, E11, E08, E09, E00, E000. Ground: W5, W3, W1. Shadow: B000.
 
Thank you so much for visiting me today. I hope you are all well and having a great day!

17 October 2015

Snow Dance Kit | Snowflake

Hello there, today is THE day! The Snow Dance kit from Create A Smile will be available to purchase at 3pm today (that is 4pm CET and 10am EST). I have another card to share with you today that I made with the kit. I just couldn't resist that beautiful snowflake die.
 

I started off by taking a panel of white cardstock and die cutting the snowflake die from it. I then took a white A2 card base, masked off the edges and blended Distress Ink over it. I used Peacock Feathers in the centre and Shaded Lilac on the outsides (combined with the Peacock Feathers, it has made a lovely blue shade). I then brushed over some Perfect Pearls for some shimmer.
 

The snowflake panel was then added on top of the card base, using foam tape. The sentiment, from the Create a Smile Make a Wish set, was stamped using Versamark ink on some more white cardstock and heat embossed in silver. This was cut out and added to the card with more foam tape. To finish off, I added a few sequins from the kit.
 

SUPPLIES:

Here are the links to what I have used on the card. Please click on the picture or wording to be taken to where I purchased it. Affiliate links are used on some products. This means that if you make a purchase after clicking on my link, I receive a small commission with no extra cost to you. I truly appreciate your support when using these links. The Snow Dance Kit will be added upon release.


Thank you so much for visiting me today. I hope you like the kit as much as I do! Remember to head over to the Create A Smile blog to be in with a chance of winning one. Have a lovely weekend!

16 October 2015

Create A Smile Snow Dance Kit Video Hop | Santa Scene

Hello there, I have the absolute pleasure to be participating in the Create A Smile Snow Dance Kit Video Hop today. You loved the summer kit so much that Christine decided to bring out a winter one.
 
 
It is stunning! The kit includes, chipboard, papers, enamel shapes, twine, sequins, stencil, a gorgeous die and an extremely cute stamp set. You can see the full contents on the Create A Smile Blog and You Tube Channel.
 

As soon as I saw the Santa in the stamp set, I knew I had to use him on my card. Isn't he just so cute? I started off with the background for him. I took a panel of white cardstock that was cut using a SSS Stitched Rectangle die. I made a mask for the snow bank and then blended on Distress Inks. I then took the stencil from the kit and added some snow using white pigment ink.
 
 
I then stamped the Santa and coloured him using Copic Markers. The sentiment was stamped on to the background panel and then added to a white card base with foam tape. Santa was added on top with more foam tape. I then added some Distress Stickles Dry Glitter to his hat, glaze to his shoes and black to his eyes.
 
VIDEO:


SUPPLIES:
 
Here are the links to what I have used on the card and in the video. Please click on the picture or wording to be taken to where I purchased it. Affiliate links are used on some products. This means that if you make a purchase after clicking on my link, I receive a small commission with no extra cost to you. I truly appreciate your support when using these links. The Snow Dance kit will be added upon release.


COPIC MARKERS: Face: R20, E13, E11, E00, E000. Beard: W1, W00. Clothes & Hat: R89, R39, R29, R27. Shoes: C8, C7, C6. Gloves: C1, C0.
 
The kit will be released tomorrow, Saturday 17th October at 3pm BST/4pm CET/10am EST. For a chance to win the kit, please visit the Create A Smile Blog and Facebook Page. The next person in the hop is the amazing Francine Vuilleme.
End of code