31 December 2020

VIDEO | 10 Craft Favourites 2020

*This is my second post of the day, please see below for my Clearly Besotted Day Four Teaser*

Hello there, this afternoon I have my craft favourites of 2020 to share with you. This year has been incredibly difficult for a lot of us but I have enjoyed using a number of different craft products this year. 


A lot of my craft favourites this year have been tools - Cricut Joy, Spellbinders Glimmer Hot Foil System, Gemini Mini, Blending Brushes ... although a lot of these are on the more expensive side, I do think they are worth the investment. I was kindly sent a few of these as part of working with companies and I am incredibly grateful for them. I only ever recommend products that I truly love. 

Here is a look at 10 of my favourite craft products of 2020:


If you are viewing this blog post via email subscription, you can watch the video HERE on YouTube. 
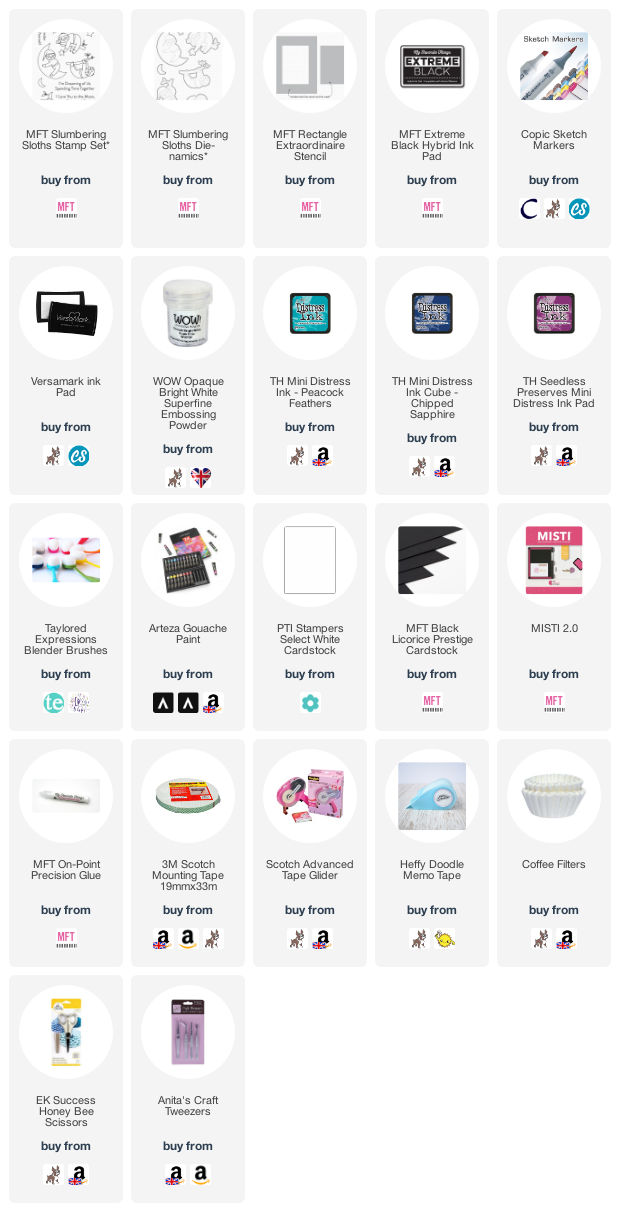
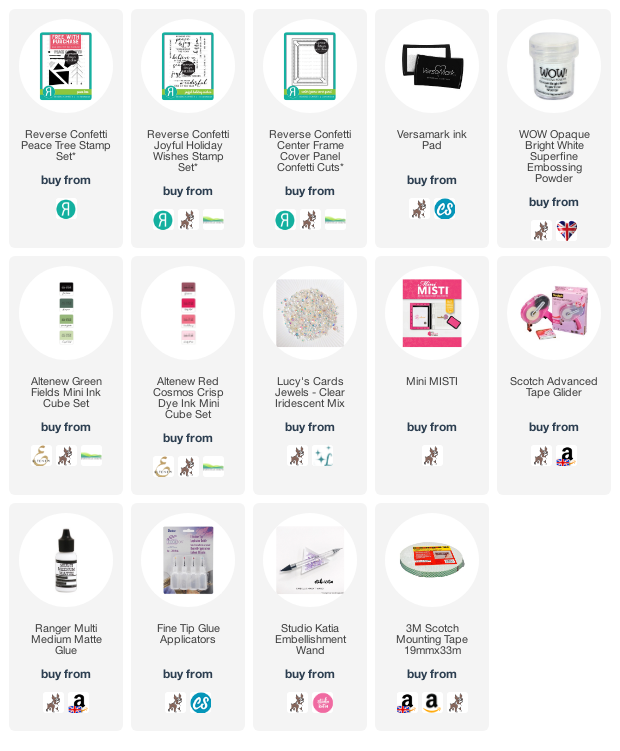
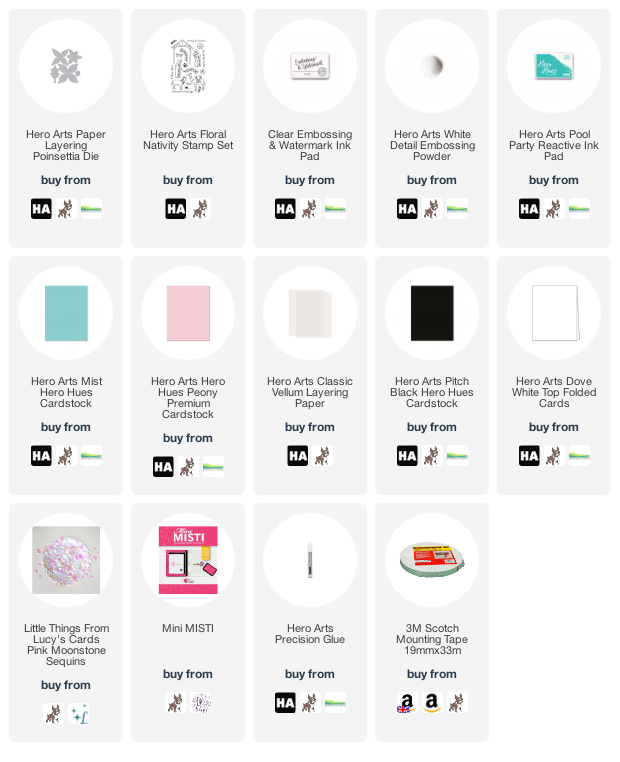
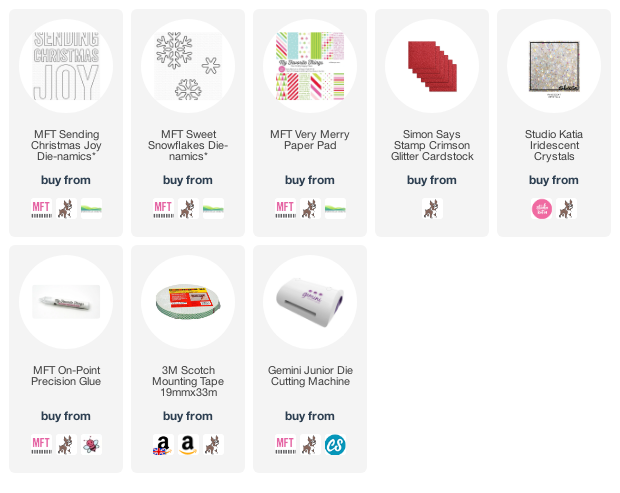
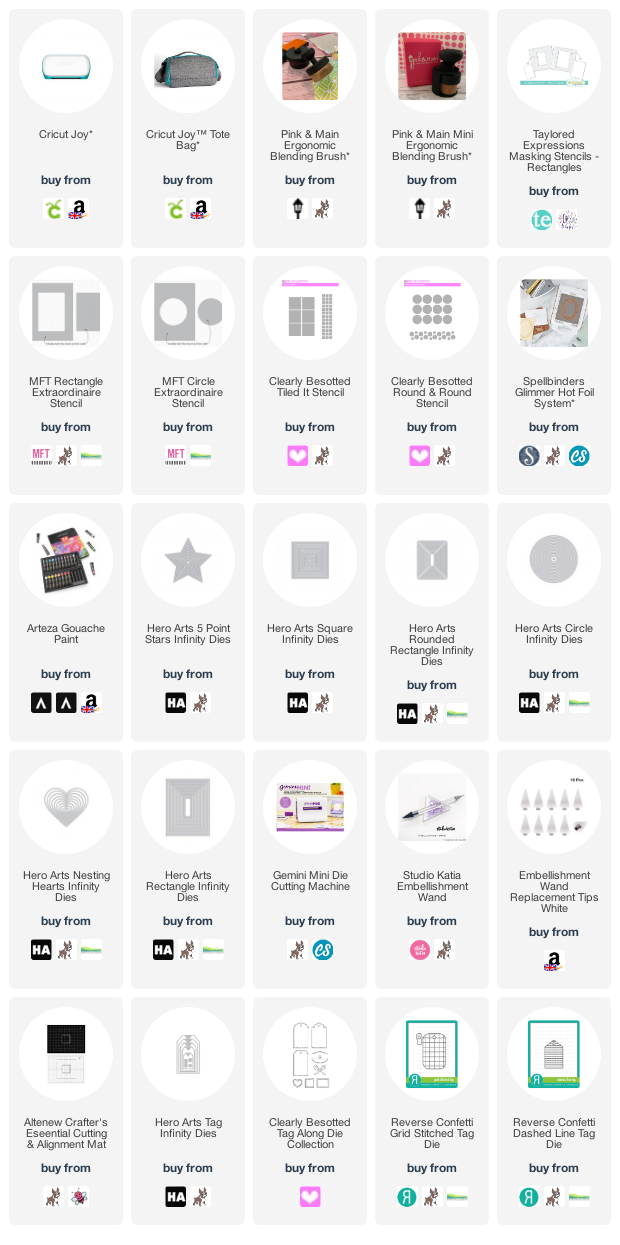
SUPPLIES:


Here are the links to what I have used on the card. Affiliate links are used on some products. This means that if you make a purchase after clicking on my link, I receive a small commission with no extra cost to you. I truly appreciate your support when using these links. Please click on the logo below the product to shop at your favourite store. All products were personally purchased except those from Clearly Besotted, Hero Arts or those marked with an asterisk (*) which were kindly sent to me to use. You can read my full disclosure here.


I would love to hear what your craft favourites have been this year. Thank you so much for stopping by, wishing you a very happy last day of 2020! Take care :) 

Clearly Besotted Teasers | Home Is Where the Heart Is

Hello there and welcome to day four of the Clearly Besotted January 2021 Teasers and happy New Year's Eve! Release day is tomorrow but I have one last teaser to share with you before the reveal tomorrow morning. Today I am using the super cute Key To My Heart set. This set features adorable locks and keys that can be used to represent love but can be used in different ways too. 

For my card, I started off by stamping the pig holding the key from the Clearly Besotted Key To My Heart Stamp Set with Memento Tuxedo Black Ink on to a panel of white cardstock. I made a mask for him and then stamped the little house/gazebo type thing behind him. I also created a mask for this and added masking tape below to so that I could ink blend above. 

Using a blending brush, I blended on Tim Holtz Peacock Feathers Distress Ink, concentrating a deeper colour at the bottom. I then splattered on some reinker for darker splatters, followed by Arteza Titanium White Gouache. The masks were removed and the panel set aside to dry. Once dry, the images were coloured using Copic Markers (the colours that I used are listed below the supplies area). 

I took the sentiment from the set and stamped it in the top right hand corner with more black ink. I then adhered the panel on to an A2 white card base with foam tape. To finish off, I added Tonic Nuvo Crystal Glaze to the heart on the house and the pig's snout/nose. 

SUPPLIES:

Here are the links to what I have used on the card. Affiliate links are used on some products. This means that if you make a purchase after clicking on my link, I receive a small commission with no extra cost to you. I truly appreciate your support when using these links. Please click on the logo below the product to shop at your favourite store. All products were personally purchased except those from Clearly Besotted, Hero Arts or those marked with an asterisk (*) which were kindly sent to me to use. You can read my full disclosure here.


COPIC MARKERS: Pig - R32, R21, R30, R000. Key - C5, C3, C1, C0. House - V17, V15, V12, R85, R83, R81, Y00, Y000. 

There are a couple of sets that I haven't used during my teasers that I will share with you in my release video tomorrow morning. In the mean time, please head over to the Clearly Besotted Blog, Keren and Lisa for more inspiration. I hope you all have a lovely and safe evening and see you tomorrow! 

30 December 2020

Clearly Besotted Teasers | Cuddle Buddies

Hello there and welcome to day three of the Clearly Besotted January 2021 Teasers. Not long to wait for the new release now, the new sets hit the shops on the 1st January. Today I am using a new set called Cuddle Buddies. This features lots of cute cuddling critters that can be used for friendship or love. I thought that I would create another anniversary card today, since that is what I send the most.

I started off with a panel of white cardstock and I placed the Taylored Expressions Rectangle Masking Stencil on top, securing with low tack tape. I then took the Clearly Besotted Cloudy Day Stencil and starting at the top and moving downwards, I blended on Tim Holtz Mermaid Lagoon Distress Ink with a blending brush. Once I had got to the bottom, I took the Clearly Besotted Freshly Cut Stencil and blended on Tim Holtz Twisted Citron and Mowed Lawn Distress Inks. I removed the stencil and then blended a little extra ink at the bottom. The rectangle masking stencil was then removed also. 

I took the bunnies from the Clearly Besotted Cuddle Buddies Stamp Set and stamped them on to white cardstock with Memento Tuxedo Black Ink. I made a mask for them and then stamped the bench on top so that once the mask was removed, it looks like they are sitting on the bench. I also stamped the lamp post and heart. They were all coloured using Copic Markers (the colours that I used are listed below the supplies area) and fussy cut out with scissors. 

The panel was adhered flat to an A2 white card base and the images added on top with foam tape (the heart was adhered flat). I then took the sentiment from the Clearly Besotted Tiny Type Stamp Set and stamped it on to black cardstock with Versamark Ink. I applied white embossing powder and heat set. It was cut in to strip and added to the card with more foam tape. To finish off, I added a few enamel dots around the sentiment. 

SUPPLIES:

Here are the links to what I have used on the card. Affiliate links are used on some products. This means that if you make a purchase after clicking on my link, I receive a small commission with no extra cost to you. I truly appreciate your support when using these links. Please click on the logo below the product to shop at your favourite store. All products were personally purchased except those from Clearly Besotted, Hero Arts or those marked with an asterisk (*) which were kindly sent to me to use. You can read my full disclosure here.


COPIC MARKERS: Bunnies - W5, W3, W2, W1. bench - E59, E57, E55. Lamp post - C7, C4, C3, C1, B00, B000, Y000. Hearts - R85, R83, R81. 

The bench actually has a heart in the back of it but the bunnies covered it up, so I drew in an extra line so that it looked like a 'normal' bench but the heart bench is adorable! For more inspiration using the new sets, please head over to the Clearly Besotted Blog, Keren and Lisa. Thanks so much for stopping by today, see you tomorrow for day four! 

29 December 2020

Clearly Besotted Teasers | Creating Chemistry

Hello there and welcome to day two of the Clearly Besotted January 2021 release. Today I am sharing two different ways to use a fun set called Creating Chemistry. This set can be a loved themed set but can also be used for different occasions too. I thought that I would create some tags today. I can either give them as tags, or add them to cards at a later date. 

For my tags, I started off by stamping the images from the Clearly Besotted Creating Chemistry Stamp Set. For the first tag, I first stamped the heart bubbles (coming out of the test tube) on to white cardstock with Memento Tuxedo Black Ink. I then made a mask for the bottom heart and stamped the adorable bunny in her lab coat on top. I removed the mask and coloured her with Copic Markers. She was then fussy cut out with scissors. 

I took the Clearly Besotted Tag Along Die Collection and cut it twice - once from white cardstock and once from red paper from the MFT Summertime Polka Dots Paper Pad. I adhered the paper one to the back of the white one (for stability and for a clean back) and then die cut a heart from pink cardstock and die cut the edge of the tag in to it for the stitching detail. This was adhered on to the tag with tape runner. 

I cut the tag reinforcer from white cardstock, adhered it on top and then tied twine through the top of the tag. I took the sentiment from the Clearly Besotted Creating Chemistry Stamp Set and stamped it on to black cardstock with Versamark Ink. I applied white embossing powder and heat set. It was cut in to a strip and added to the card with foam tape. I then added the bunny with foam tape also. To finish off, I added Tonic Nuvo Crystal Glaze to the googles. 

For the second tag, I thought I would change the lab coat in to a graduation gown! I stamped the bunny with Memento Tuxedo Black Ink, coloured him with Copic Markers and fussy cut him out. I then cut another two tags - one from white and one from MFT Black & White Polka Dot Paper. The two tags were adhered together and the tag reinforcer cut from black and added on top. 


I die cut a star from light grey cardstock and added that on top. The bunny was then added on top with foam tape. I took the sentiment from the set and stamped it on to black cardstock with Versamark Ink. I applied white embossing powder and heat set. It was cut in to a strip and added to the tag with foam tape. To finish off, I added twine through the top of the tag and Tonic Nuvo Crystal Glaze to his glasses.

SUPPLIES:

Here are the links to what I have used on the card. Affiliate links are used on some products. This means that if you make a purchase after clicking on my link, I receive a small commission with no extra cost to you. I truly appreciate your support when using these links. Please click on the logo below the product to shop at your favourite store. All products were personally purchased except those from Clearly Besotted, Hero Arts or those marked with an asterisk (*) which were kindly sent to me to use. You can read my full disclosure here.


COPIC MARKERS: Top bunny - E35, E33, E31, E30. Lab coat - C5, C3, C1, C00. Test tube - B00, B000, R85, R83, R81. Red hearts - R89, R37, R24, R14. Graduation bunny - W5, W4, W3, W1, W0. gown - C8, C6, C5. 

These characters are just so cute! There are lots more in the set too. For more inspiration using the new release, please head over to the Clearly Besotted Blog, Keren and Lisa. Thanks so much for stopping by today, I really do appreciate it. I hope you have a lovely day! 

28 December 2020

Clearly Besotted Teasers | Gnome One Like You

Hello there and welcome to the start of the Clearly Besotted teasers for the January 2021 release. Can you believe that we are already on the January release? Seems like yesterday that we were on the last January release! This month a lot of the sets are Valentine's and love related but as you will see with my cards throughout the next few days, you can change things up a little too. The new sets release on the 1st January 2021 at 8pm GMT. For my card today, I am using the adorable Gnome One Like You set. 

I started off by taking  a panel of white cardstock and stamping the trees from the Clearly Besotted Gnome One Like You Stamp Set with Memento Tuxedo Black Ink. I stamped them twice to fill the top half of the panel. On a separate piece of cardstock, I stamped the gnomes with the heart image. 

They were all coloured using Copic Markers (the colours that I used are listed below the supplies area) and the gnomes image fussy cut out using scissors. I took the sentiment from the Clearly Besotted Feeling Sentimental Stamp Set and stamped it below the trees. 

The panel was then adhered flat on to an A2 white card base with tape runner. The gnomes were added on top with foam tape. To finish off, I added a few white gel pen highlights. 

SUPPLIES:

Here are the links to what I have used on the card. Affiliate links are used on some products. This means that if you make a purchase after clicking on my link, I receive a small commission with no extra cost to you. I truly appreciate your support when using these links. Please click on the logo below the product to shop at your favourite store. All products were personally purchased except those from Clearly Besotted, Hero Arts or those marked with an asterisk (*) which were kindly sent to me to use. You can read my full disclosure here.


COPIC MARKERS: Gnomes - E13, E11, E00, E000. Beard - W5, W3, W1. Hair - E27, E25, E23. Outfits - B39, B18, B16, B12, C3, C1. Heart - V09, V17, V15, V12. Trees - G29, YG17, YG25, YG03, YG01, E59, E57, E55. Hearts - B39, B18, B16, B12/V17, V15, V12. 

These gnomes are just adorable! Since I make a lot of anniversary cards, I thought it made sense to create an anniversary card but I think these little cuties could be used for lots of different occasions too. For more inspiration using the new sets, please head over to the Clearly Besotted Blog, Keren and Lisa. Thank you so much for stopping by today, see you tomorrow for day two! Have a lovely day! 

26 December 2020

Tonic Studios Stamp Club - Shoot For The Moon Blog Hop

Hello there and welcome to the Tonic Studios Stamp Club Shoot For The Moon Blog Hop! The amazing Maria Willis has collaborated with Tonic Studios to bring us new releases every month called Stamp Club. These stamp and die sets are exclusive to Tonic Studios and limited edition so make sure to grab the sets while you can! 

This month, the bundle is called Shoot For The Moon and as you may have guessed, it is all about the moon! More details on the hop below. 

For my first card, I wanted to keep it (almost) one layer and use just the stamps from the set. I started off by taking a panel of white cardstock and placing the Taylored Expressions Rectangle Masking Stencil over the top. This masked off the edges of the panel. I then stamped the moon from the Tonic Studios Shoot For The Moon Stamp & Die Bundle using Altenew Morning Frost Ink. I made a mask for it and then blended the background with Distress Inks. 

I used Wilted Violet, Dusty Concord and Black Soot. I removed the moon mask and then stamped the trees from the set below using Versafine Clair Nocturne Ink. I removed the stencil and then set the piece aside to dry. Once dry, it was adhered flat to an A2 white card base with tape runner. 

I took the sentiment from the Tonic Studios Stamp Club Happy Mail Envelope Stamp Set and stamped it on to black cardstock with Tonic Nuvo Clear Mark Ink and applied white embossing powder. It was heat set and cut out using one of the banners from the Tonic Studios Stamp Club Banners & Strips Die Set. It was then added to the card with foam tape. 

My next card uses mainly dies from the bundle. I started off by taking a panel of white cardstock and Blending Distress Inks on to it using Tonic Nuvo Prescision Blending Brushes. I used Blueprint Sketch, Peacock Feathers, Wilted Violet and Picked Raspberry. I then spritzed on Tseukineko Sparkle Sheer Shimmer Spritz and Tim Holtz Picket Fence Distress Spray Stain and set it aside to dry. 

I took the tree dies from the Tonic Studios Shoot For The Moon Stamp & Die Bundle and die cut them from black cardstock. I cut the moon from white cardstock. This die has an embossing piece that you can add in too. It gives some lovely embossing to the moon, sadly, it is a little bit difficult to see in the photos but looks good in real life! I took a piece of white cardstock and blended on a little Tim Holtz Squeezed Lemonade Distress Ink and then cut the stars from it. 

Once the panel was dry, it was adhered flat to an A2 white card base with tape runner. I then added the trees with Tonic Nuvo Deluxe Adhesive and cut off the edges. I added a little ink blending to the moon (with the same sky colours) and adhered that with glue also, followed by the stars. I took the sentiment from the set and stamped and embossed it on to black cardstock. It was cut in to a strip and added to the card with foam tape. 

SUPPLIES:

Here are the links to what I have used on the card. Affiliate links are used on some products. This means that if you make a purchase after clicking on my link, I receive a small commission with no extra cost to you. I truly appreciate your support when using these links. Please click on the logo below the product to shop at your favourite store. All products were personally purchased except those from Clearly Besotted, Hero Arts or those marked with an asterisk (*) which were kindly sent to me to use. You can read my full disclosure here.


BLOG HOP:

Here is the full list of participants in the hop today:

GIVEAWAY:

Tonic Studios are giving away a £50/$50 gift card to the Tonic Studios store to one lucky blog hop winner, as well as the Shoot For The Moon Bundle. All you need to do to enter is to leave a comment on every stop on the hop by 11.59pm PST on 3rd January 2021. The winner will be announced on 5th January 2021. 

Next on the hop is the wonderful Mindy. Thank you so much for stopping by today. If you celebrate, I hope you are all having a lovely Christmas! Take care :) 

25 December 2020

Merry Christmas & Happy Festive Season

Hello there, I just wanted to pop on here to wish you all a very happy festive season, whether you celebrate Christmas, another festival or nothing at all,  I hope that you enjoy the next few days. This season will not be as any of us expected, but I hope that you can stay healthy and safe and have have a peaceful time. 

And to those of you who are alone at this time of year, those who are struggling and those who for this time of year is very difficult, please know that I am thinking of you. Take care. 

23 December 2020

Christmas In London

Christmas in London will be very different this year. We knew some time ago that it was going to be different. It is different for the whole world in fact, but I still wanted to make a London Christmas skyline. It actually doesn't snow that much here in London either but when it does, it is really pretty (unless you actually have to get out of your house then it is a transport nightmare!). 

I started off my card by stamping the London skyline from the Clearly Besotted Scene It City Stamp Set on to a panel of white cardstock with Memento Tuxedo Black Ink. I then made a mask for it and masked off the bottom part of the card base too. Using blending brushes, I then blended on Distress Inks for the sky. 

I used Peacock Feathers, Mermaid Lagoon, Chipped Sapphire and Seedless Preserves. I then splattered on Arteza Titanium White Gouache for the snow. The masks were removed and the London skyline coloured using Copic Markers. I wanted it to be in silhouette, so I coloured them using greys only, except for Big Ben's face. I took the sentiment from the Clearly Besotted Shake It Up Stamp Set and stamped it below. The panel was then adhered on to an A2 white card base with foam tape. 

SUPPLIES:

Here are the links to what I have used on the card. Affiliate links are used on some products. This means that if you make a purchase after clicking on my link, I receive a small commission with no extra cost to you. I truly appreciate your support when using these links. Please click on the logo below the product to shop at your favourite store. All products were personally purchased except those from Clearly Besotted, Hero Arts or those marked with an asterisk (*) which were kindly sent to me to use. You can read my full disclosure here.


COPIC MARKERS: C8, C7, C6, C5, C3. Y11. 

We have gone back in to lockdown here in London. It is sad but very much necessary. I hope you are all staying safe and keeping well. Take care of yourselves and your families. 

22 December 2020

Peace, Love & Paws!

Hello there, today I have two tags to share with you using the MFT Peace, Love & Paws Stamp Set. This is such a cute set with cats and dogs all dressed up for winter and Christmas! I thought I would use two of the cats on tags for today. 

I started off by stamping two of the cats from the MFT Peace, Love & Paws Stamp Set on to white cardstock with MFT Extreme Black Ink. I then coloured them using Copic Markers (the colours that I used are listed below the supplies area). They were then run through my die cutting machine with the MFT Peace, Love & Paws Die-namics

I took the MFT Tag Builder Blueprints 6 Die-namics and cut two of the solid tag from MFT Very Merry Paper Pad. I also cut them from white cardstock to add to the back for extra stability. I then cut the topper piece from MFT Red Hot Cardstock and adhered them on using glue. The cats were added to the tags with foam tape and the I added twine through the top and tied in a bow. 

To finish of, I added Sakura Black Glaze pen to their eyes and Tonic Nuvo White Blizzard Glitter Drops to the Santa hat. I decided to leave off adding a sentiment and will write a personal message on the back before adding to a Christmas gift. 

SUPPLIES:

Here are the links to what I have used on the card. Affiliate links are used on some products. This means that if you make a purchase after clicking on my link, I receive a small commission with no extra cost to you. I truly appreciate your support when using these links. Please click on the logo below the product to shop at your favourite store. All products were personally purchased except those from Clearly Besotted, Hero Arts or those marked with an asterisk (*) which were kindly sent to me to use. You can read my full disclosure here.


COPIC MARKERS: Cats - C8, C6, C5, C4, C3, C2, C1. R00. Scarf - R89, R37, R27, R24, R14, R85, R83, R81. Hat - R89, R37, R27, R24, R14. 

If you make Christmas cards and tags, I hope that you are doing well with yours. At the time of typing this, I just have three more to make! Thank you so much for stopping by today. I really do appreciate it. I hope you have a lovely day! 

21 December 2020

VIDEO | MFT Slumbering Sloths

Hello there, I am over on the My Favorite Things YouTube Channel today sharing a simple night sky card using the adorable Slumbering Sloths set. 

I started off my card by taking a 4.25" x 5.5" panel of white cardstock and placing the MFT Rectangle Extraordinaire Stencil on top, securing in place with memo tape. Using blending brushes, I then blended on Distress Inks in Peacock Feathers, Chipped Sapphire and Seedless Preserves. With the stencil still in place, I splattered on some white gouache for the stars. 

The stencil was removed and the panel left to dry. Whilst it was drying, I stamped the sloth and stars from the MFT Slumbering Sloths Stamp Set on to white cardstock with MFT Extreme Black Ink. I coloured them with Copic Markers (the colours that I used are listed below the supplies area) and then die cut them out using the MFT Slumbering Sloths Die-namics

I took the sentiment from the set and stamped it on to MFT Black Licorice Cardstock using Versamark Ink. I applied white embossing powder and heat set. It was then cut in to a strip. The ink blended panel was adhered to an A2 white card base with tape runner and the sentiment and sloth added on top with foam tape. The stars were adhered with liquid glue. 

VIDEO:

Here is the video showing how I made the card:

If you are viewing this blog post via email subscription. You can watch the video on the MFT YouTube channel HERE

SUPPLIES:

Here are the links to what I have used on the card. Affiliate links are used on some products. This means that if you make a purchase after clicking on my link, I receive a small commission with no extra cost to you. I truly appreciate your support when using these links. Please click on the logo below the product to shop at your favourite store. All products were personally purchased except those from Clearly Besotted, Hero Arts or those marked with an asterisk (*) which were kindly sent to me to use. You can read my full disclosure here.


COPIC MARKERS: Sloth - E49, E47, E44, E43, E42, E41. Pajamas - BG75, BG49, BG15, BG13, BG11. Branch - E59, E57, E55. Leaves - G29, YG17, YG25, YG01. Stars - YR24, Y17, Y15, Y11. 

I adore these cute sloths! Sloths are definitely one of my favourite animals, they are just adorable! Thank you so much for stopping by today, I very much appreciate it. I hope you have a great day! 

19 December 2020

Peace, Love & Joy

Hello there, today I have a card to share with you using the Reverse Confetti Peace Tree set. This is a really fun set with different components to stamp a tree. I kept mine very simple and more on the graphic side, but there is branches, trimmings, berries and lots more to add to the tree also. 

I started off by die cutting the Reverse Confetti Center Frame Cover Panel Confetti Cuts from white cardstock. I then took the elements from the Reverse Confetti Peace Tree Stamp Set and first stamped the tree pot/stand in red. I then stamped the three triangles for the tree using three shades of green ink, overlapping them as I went. 

The panel was adhered flat to an A2 white card base (I like the white on white but a coloured card base would look nice too!) with tape runner. I then took the sentiment from the Reverse Confetti Joyful Holiday Wishes Stamp Set and stamped it on to black cardstock with Versamark Ink. I applied white embossing powder, heat set and cut it in to to a strip. It was added to the card with foam tape. To finish off, I added  a few Iridescent Jewels on the tree. 

SUPPLIES:

Here are the links to what I have used on the card. Affiliate links are used on some products. This means that if you make a purchase after clicking on my link, I receive a small commission with no extra cost to you. I truly appreciate your support when using these links. Please click on the logo below the product to shop at your favourite store. All products were personally purchased except those from Clearly Besotted, Hero Arts or those marked with an asterisk (*) which were kindly sent to me to use. You can read my full disclosure here.


Although I went with traditional green and red for the tree, while I was stamping it, I thought blue might look nice too! I also think this would be a good design to mass produce for Christmas. Thank you so much for visiting me today, I really do appreciate it. I hope you have a great day and a wonderful weekend!

18 December 2020

Hero Arts | Stay Crafty With Hero Challenge #18

Hello there, I am over on the Hero Arts Blog today sharing a card made for the Stay Crafty with Hero Challenge #18. This month the challenge is to create a card inspired by a Hero Arts Creative Team Member. For my card today, I was inspired by Debi Adams. 

She created this beautiful Christmas card (see below for photo) using aqua, pink and gold with the Paper Layering Poinsettia Dies. For my card, I kept the same sort of design but omitted a few things to fit with my clean and simple style. 

I started off by taking a panel of Hero Hues Mist Cardstock and blended on Hero Arts Pool Party Reactive Ink at the top. It was cut down in to strips and added to a top folding card base with tape runner. I then cut the Hero Arts Paper Layering Poinsettia Die from Hero Hues Peony Cardstock, the centre was cut from silver glitter paper and the leaves from Hero Arts Classic Layering Vellum Paper

The poinsettia was added to the card with Hero Arts Precision Glue and the sentiment from the Hero Arts Floral Nativity Stamp Set stamped and heat embossed. It was cut out and added to the card with foam tape. To finish off, I added a few sequins. 

And here is Debi's card so that you can see how I was inspired by it:


SUPPLIES:

Here are the links to what I have used on the card. Affiliate links are used on some products. This means that if you make a purchase after clicking on my link, I receive a small commission with no extra cost to you. I truly appreciate your support when using these links. Please click on the logo below the product to shop at your favourite store. All products were personally purchased except those from Clearly Besotted, Hero Arts or those marked with an asterisk (*) which were kindly sent to me to use. You can read my full disclosure here.


For more information on how I made the card, please head over to the blog post. Thank you so much for visiting me today, I really appreciate it. Take care :) 

17 December 2020

Sending Christmas Joy

Hello there, so if you have been following me for a while, you will know that I do not mass produce cards very often. And when I say mass producing, my limit is about 10 cards of the same design anyway, so hardly en masse! I did make about 5 of these cards though, because I really liked the design and I could change up the design of the patterned paper used. 

I started off by die cutting the MFT Sending Christmas Joy Die-namics on the front of a panel of white cardstock. I popped out all of the letters but kept the inside pieces of the D and the R (I didn't bother with the A!). I then cut down paper from the MFT Very Merry Paper Pad and added it on the front of an A2 card base with tape runner. 

I added foam tape on to the back of the cut out panel and adhered it on top. Then added the insides of the letters with little pieces of foam tape also. I took the largest of the MFT Sweet Snowflakes Die-namics and cut it from red glitter cardstock. It was popped inside the O with liquid glue and a jewel added on top. 

SUPPLIES:

Here are the links to what I have used on the card. Affiliate links are used on some products. This means that if you make a purchase after clicking on my link, I receive a small commission with no extra cost to you. I truly appreciate your support when using these links. Please click on the logo below the product to shop at your favourite store. All products were personally purchased except those from Clearly Besotted, Hero Arts or those marked with an asterisk (*) which were kindly sent to me to use. You can read my full disclosure here.


They were pretty quick to make. The most time consuming part was adding the foam tape to the back of the panels! Thank you so much for stopping by today. I really do appreciate it. I hope you are staying safe and keeping well and have a lovely day!  

End of code