28 February 2022

Pinkfresh Studio | Botanicals & Butterflies

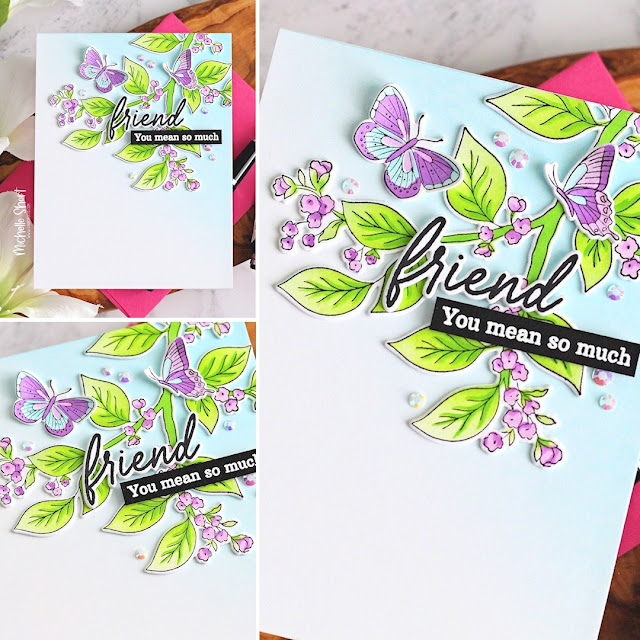
Hello there, I am delighted to be joining Pinkfresh Studio for their February 2022 release which is out today. There is so much yummyness releasing today! Lots of stamp/die/stencil/foil plate collections, as well as standalone cover plates. Today I am using the new Botanicals & Butterflies collection. 

PLEASE NOTE: This post contains affiliate links. Please see below for my full disclosure.

I started off by stamping the Pinkfresh Studio Botanicals & Butterflies Stamp on to white cardstock with Pinkfresh Detail Black Hybrid Ink. I then placed the Pinkfesh Studio Botanicals & Butterflies Layering Stencils on top. I love that everything lines up, so that you can use one colour per stencil if you want, to colour in your images, or you can mask bits off and use multiple colours. 

Using ink blending brushes, I blended on colours from the Pinkfresh Studio Over the Hills Premium Dye Ink Cube Set for the leaves and stems. For the flowers, I used Pinkfresh Studio Soul of Provence Premium Dye ink Cube Set. The butterflies use the Soul of Provence set, as well as the Pinkfresh Studio Island Oasis Premium Dye ink Cube Set. It was then die cut using the Pinkfresh Studio Botanicals & Butterflies Die

I took an A2 white card base and blended blue ink in the top right hand corner using Pinkfresh Studio Morning Sky Premium Dye Ink Cube Set. The branch/leaves and butterflies were then added on top, popping them up with another die cut, for some added dimension. I took the 'friend' sentiment from the new Pinkfresh Studio Lily Frame Stamp and stamped it on to white cardstock with black ink. It was die cut out with the Pinkfresh Studio Lily Frame Die

The accompanying sentiment is from the same set. I stamped it on to black cardstock with Versamark Ink and applied white embossing powder. It was heat set and then cut in to a strip. The friend word was popped up with two die cuts and then the strip added below with foam tape. To finish off, I added a few Pinkfresh Studio Glacier Jewels

SUPPLIES:


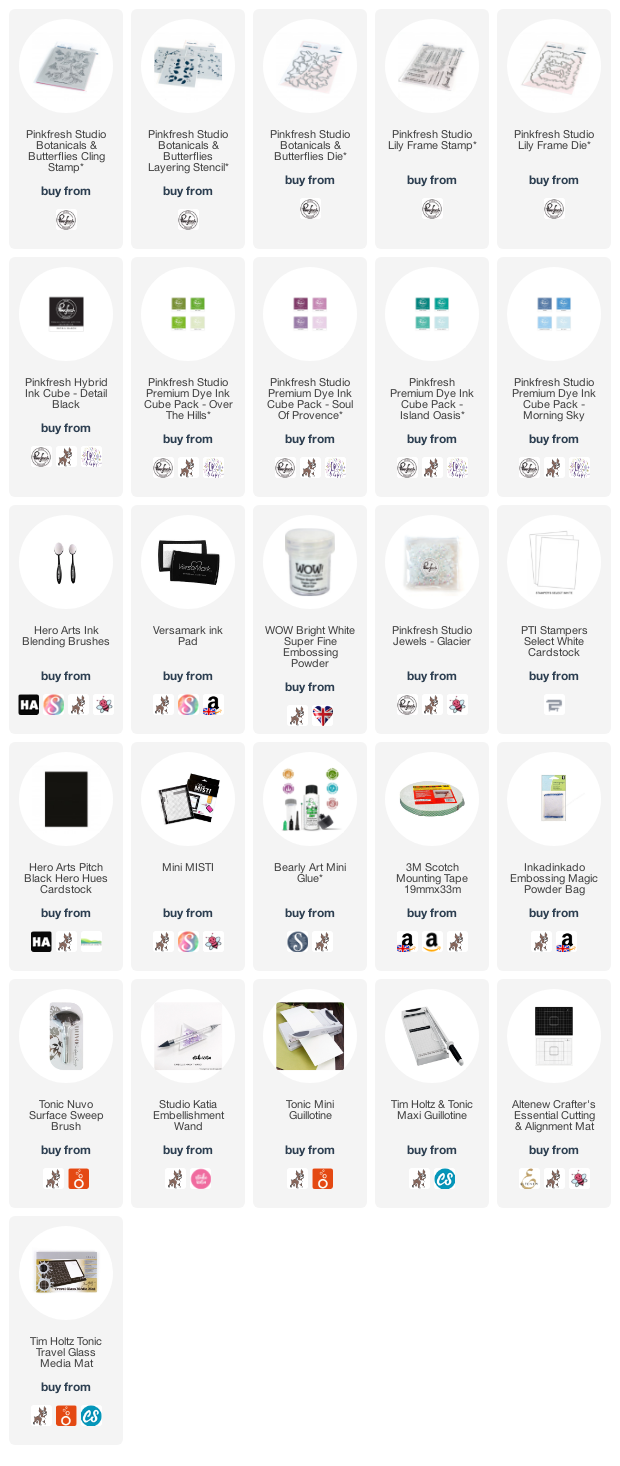
Here are the links to what I have used on the project. Affiliate links are used on some products. This means that if you make a purchase after clicking on my link, I receive a small commission with no extra cost to you. I truly appreciate your support when using these links. Please click on the logo below the product to shop at your favourite store. All products were personally purchased except those from Clearly Besotted, Hero Arts or those marked with an asterisk (*) which were kindly sent to me to use. You can read my full disclosure here.


I will be back tomorrow sharing another set with you but in the mean-time, please do head over to the Pinkfresh Studio Blog for more inspiration and to see the rest of the release. Thank you so much for stopping by today, I really do appreciate it. Have a wonderful rest of the day! 

Clearly Besotted Teasers | On The Shelf

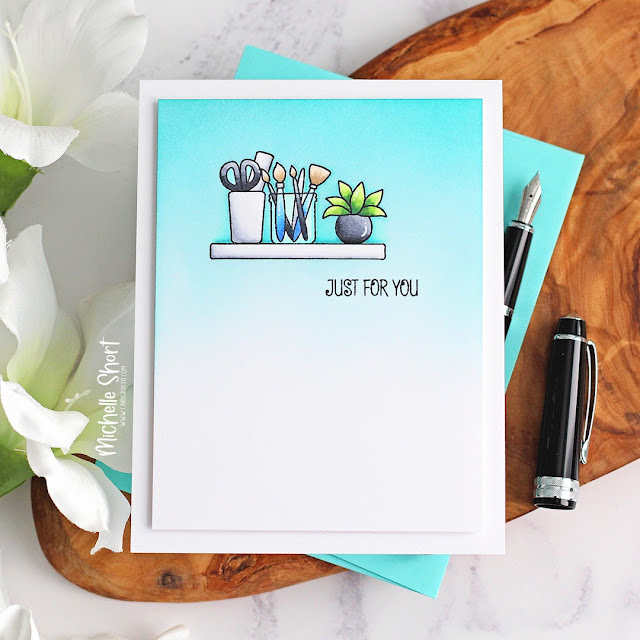
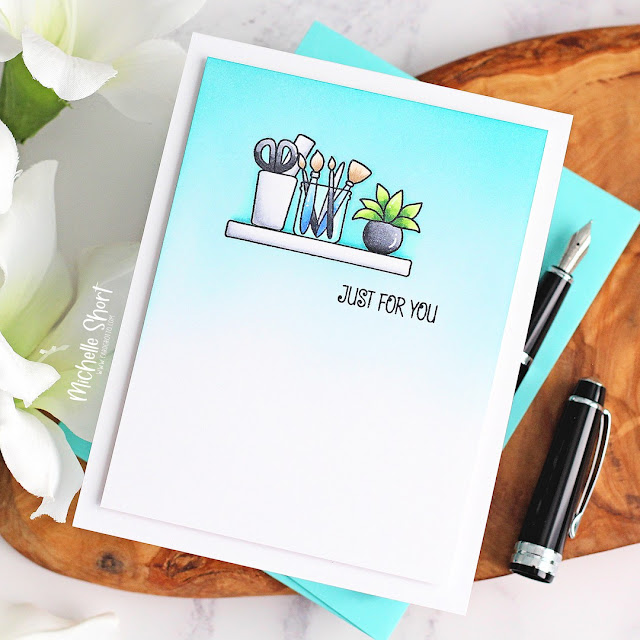
Hello there and welcome to day four of the Clearly Besotted March 2022 Release Teasers. Release day is tomorrow, so only one more sleep to go! Today I am using two new sets - On the Shelf and On the Shelf Stuff. As you can imagine by the names, one is a set full of shelf images and the other, items that fit on the shelves. The plushies that I shared on day two also work to add on the shelves - so fun!

PLEASE NOTE: This post contains affiliate links. Please see below for my full disclosure.


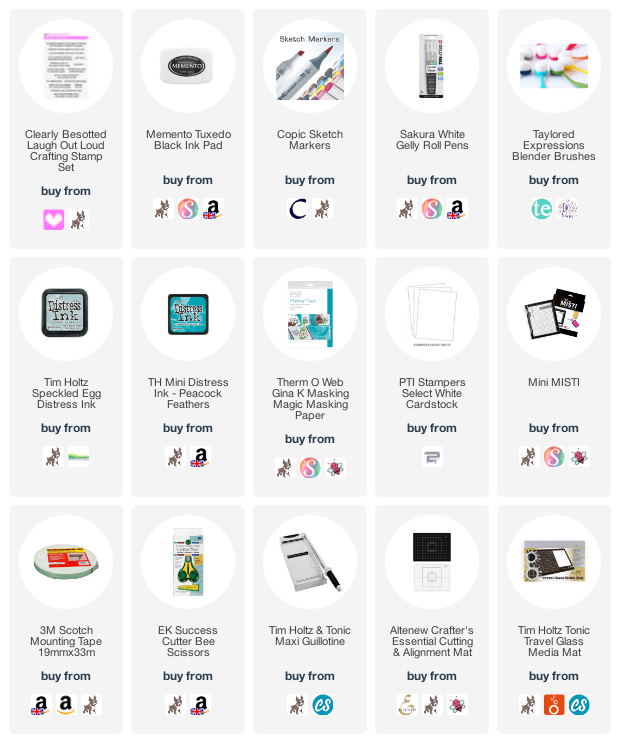
I started off by taking a panel of white cardstock and stamping the shelf from the Clearly Besotted On the Shelf Stamp Set on top with Memento Tuxedo Black Ink. I made a mask for it from masking paper and then placed it on top. I then stamped the items from the Clearly Besotted On the Shelf Stuff Stamp Set on top. 


I stamped the jug with paint brushes first and then made a mask for it. Next, I stamped the pot with scissors and ruler next to it. I also made a mask for this. To finish off, I stamped the plant and pot on the other side. I made a mask for this as well. Using an ink blending brush, I blended on Tim Holtz Distress Ink in Speckled Egg and Peacock Feathers


The masks were removed and the images coloured using Copic Markers (the colours that I used are listed below the supplies area). I took the sentiment from the Clearly Besotted Laugh Out Loud Crafting Stamp Set and stamped it underneath. The panel was then adhered to an A2 white card base with foam tape. To finish off, I added a few white gel pen highlights to the images. 

SUPPLIES:


Here are the links to what I have used on the project. Affiliate links are used on some products. This means that if you make a purchase after clicking on my link, I receive a small commission with no extra cost to you. I truly appreciate your support when using these links. Please click on the logo below the product to shop at your favourite store. All products were personally purchased except those from Clearly Besotted, Hero Arts or those marked with an asterisk (*) which were kindly sent to me to use. You can read my full disclosure here.


COPIC MARKERS: Shelf, pot and ruler - C5, C3, C1, C00. Black scissors, pot and brush handles - C10, C8, C6, C5. Blue paintbrushes - B18, B16, B12. Brush heads - E44, E43, E41. Jug - BG45, BG11. Plant - G29, YG17, YG23, YG01. 

I thought this scene looked a bit like the shelves in my craft room. I wanted to add a more crafting sentiment to the card but I couldn't get one to fit with my design. I thought the 'just for you' would work well for lots of different occasions though. For more inspiration using the sets, please head over to the Clearly Besotted Blog, Keren, Alberto, Francine and Mona. I will be back later with another blog post but in the mean-time, I hope you have a wonderful day! 

27 February 2022

Clearly Besotted Teasers | Hugs

Hello there and welcome to day three of the Clearly Besotted March 2022 Teasers. Release day is Tuesday, March 1st, so not long to wait now! Today I am using two new sets - Untouchable Scenes and Untouchable Plushies. They work perfectly together or on their own. The plushies set contains adorable hedgehogs and dragons and I have used one of the dragons on my card today. 

PLEASE NOTE: This post contains affiliate links. Please see below for my full disclosure.


I started off by stamping one of the floral scenes from the Clearly Besotted Untouchable Scenes Set on to white cardstock with Memento Tuxedo Black Ink. I think these are thistles but I wasn't too sure. I have coloured them as thistles though! 


On a separate piece of cardstock, I stamped the dragon from the Clearly Besotted Untouchable Plushies Stamp Set, also with Memento Tuxedo Black Ink. They were both cololured with Copic Markers (the colours that I used are listed below the supplies area). I fussy cut the dragon out using scissors. The background panel was adhered flat to an A2 (4.25" x 5.5") white card base with tape runner. 


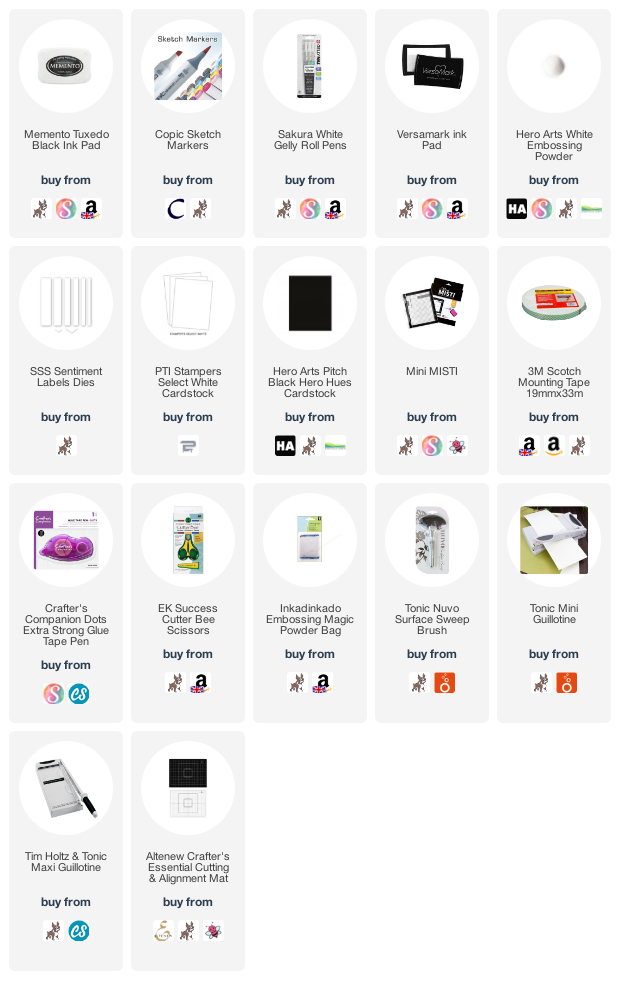
The dragon was added on top with foam tape. I took the sentiment from the Untouchables Plushies set and stamped it on to black cardstock with Versamark Ink. I applied white embossing powder and heat set. It was cut in to a strip and added to the card with foam tape. To finish off, I added white gel pen highlights to the images. 

SUPPLIES:


Here are the links to what I have used on the project. Affiliate links are used on some products. This means that if you make a purchase after clicking on my link, I receive a small commission with no extra cost to you. I truly appreciate your support when using these links. Please click on the logo below the product to shop at your favourite store. All products were personally purchased except those from Clearly Besotted, Hero Arts or those marked with an asterisk (*) which were kindly sent to me to use. You can read my full disclosure here.


COPIC MARKERS: Dragon - R39, R85, R83, R81, V09, V17, V15, V12. Thistles - G29, YG17, YG23, YG01/V09, V17, V15, V12, V000. 

Another two sets that work perfectly for lots of different occasions. For more inspiration using the new sets, please head over to the Clearly Besotted Blog, Keren, Alberto, Francine and Mona. Thanks so much for stopping by today. As always, I really do appreciate it. Wishing you a wonderful day! 

26 February 2022

Clearly Besotted Teasers | Plushie Pals

Hello there and welcome to day two of the Clearly Besotted March 2022 Teasers. Today I am using  a new set called On The Shelf Plushies. This set works perfectly with sets that I am sharing later in the week, but I wanted to use it as a standalone set and make a couple of tags. 

PLEASE NOTE: This post contains affiliate links. Please see below for my full disclosure.


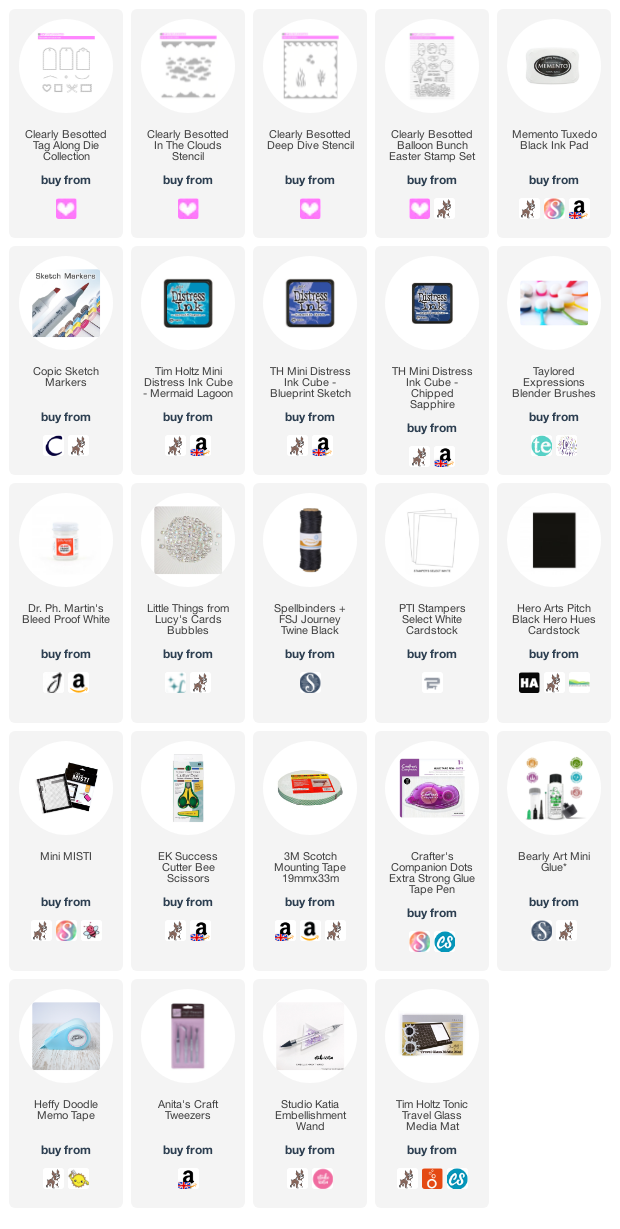
I started off my tags by die cutting two of each shaped tag from the Clearly Besotted Tag Along Die Collection from white cardstock. One for the front and one for the back. I then stamped the whale and bunny from the Clearly Besotted On the Shelf Plushies Stamp Set on to white cardstock with Memento Tuxedo Black Ink


I then stamped the balloon from the Clearly Besotted Balloon Bunch Easter Set so that it looked like the bunny was holding it. I coloured the balloon and bunny with Copic Markers (the colours that I used are listed below the supplies area) and fussy cut it out with scissors. I placed the Clearly Besotted In the Clouds Stencil on top of the tag, holding in place with memo tape. 


Using an ink blending brush and Tim Holtz Mermaid Lagoon Distress Ink, I added clouds to the tag, moving the stencil down as I went to cover the tag with clouds. I added the hole reinforcer cut from white cardstock and then adhered the tags back to back. The bunny was added on top with foam tape. To finish off, I added twine through the top of the tag and a few Little Things from Lucy's Cards Bubbles


For the other tag, I coloured the whale with Copic Markers and fussy cut him out with scissors. I placed the Clearly Besotted Deep Dive Stencil at the bottom of the tag and blended on Distress Inks in Chipped Sapphire, Blueprint Sketch and Mermaid Lagoon, moving the stencil up to create more waves. I then added a little more Mermaid Lagoon at the top for the sky. 


Dr. Ph. Martin's Bleed Proof White Paint was splattered on the waves and set aside to dry. The sentiment, from the Clearly Besotted Untouchable Corners Stamp Set, was stamped with Memento Tuxedo Black Ink and then the tags adhered back to back. I added a hole reinforcer cut from black cardstock and added twine through the top. The whale was adhered on top with foam tape. I then finished off with a few more Bubbles. 

SUPPLIES:


Here are the links to what I have used on the projects. Affiliate links are used on some products. This means that if you make a purchase after clicking on my link, I receive a small commission with no extra cost to you. I truly appreciate your support when using these links. Please click on the logo below the product to shop at your favourite store. All products were personally purchased except those from Clearly Besotted, Hero Arts or those marked with an asterisk (*) which were kindly sent to me to use. You can read my full disclosure here.


COPIC MARKERS: Bunny - T5, T3, T2, T1, T0. Balloon - YR27, Y17, Y15, Y13, Y11, Y00. Whale - B99, B97, B95, B93, B91, C5, C3, C1. 

I will be sharing more about the On The Shelf sets of stamps on Monday, but as you can see, the set works well on it's own too. For more inspiration using the new sets, please head over to the Clearly Besotted Blog, Keren, Alberto, Francine and Mona. Thanks so much for stopping by today, I really do appreciate it. Have a wonderful day! 

25 February 2022

Altenew | February 2022 Flowers & Swirls Collection Release Blog Hop + Giveaway

Hello there, today sees the release of the new Flowers & Swirls Collection from Altenew. This is mainly a standalone die release but there is a stamp set being released too! I am using three new sets on my cards today. This post is part of a fun, inspiration filled blog hop with prizes. Please see below for more details.

PLEASE NOTE: This post contains affiliate links. Please see below for my full disclosure.


My first card uses the beautiful new Altenew Wispy Feathers Layered Die Set, which were cut twice from white cardstock using the bottom and top layer (the top layer with Altenew Double-Sided Adhesive Sheet on the back). There are two different shaped feathers in the set, I used just one on my card today. Using Altenew Small Ink Blending Tools, I added Altenew Enchanted Garden Crisp Dye Inks (Hydrangea and Ultra Violet) and Altenew Sweet Dreams Crisp Dye Inks (Aqualicious and Teal Cave) on top. 


I then splattered them liberally using Altenew Iridescent Shimmer and Pure White Ink Sprays and set them aside to dry. Once dry, the top layer was adhered to the bottom layer and both adhered to an A2 white card base. I took the 'sending' from the Altenew All About Thanks Word Die Set and die cut it from white cardstock with more adhesive sheet on the back three times. I also cut the shadow from Altenew Vellum Translucent Paper


I adhered one of the white pieces on top of the vellum layer and then the other two behind, this is so that it looks like it was adhered to the card with foam tape. I took the sentiment from the Altenew Sentiment Strips 2 Stamp Set and stamped it on to black cardstock with Altenew Embossing Ink. I applied Altenew Pure White Crisp Embossing Powder and heat set. It was cut in to a strip and added to the card with Altenew Instant Dimension Foam Tape. To finish off, I added a few Bubbles embellishments. 


My next card uses the new Altenew Dainty Leaves Die Set. These were cut multiples times from white cardstock and layered two high (with more Altenew Double-Sided Adhesive Sheet). I then added ink blending to them with the same inks that I used on the first card - Sweet Dreams and Enchanted Garden. 


They were adhered to an A2 white card base and the bits overhanging cut off. Using the residual ink from the Altenew Small Ink Blending Tools, I blended a little more ink on to the card base around where the colours are on the leaves. I then splattered the card base with Altenew Iridescent Shimmer Ink Spray


To finish off, I simply stamped a sentiment from the new Altenew Magnolia Ballerina Stamp Set on to the card using Altenew Obsidian Pigment Ink and added a few Bubbles embellishments. 


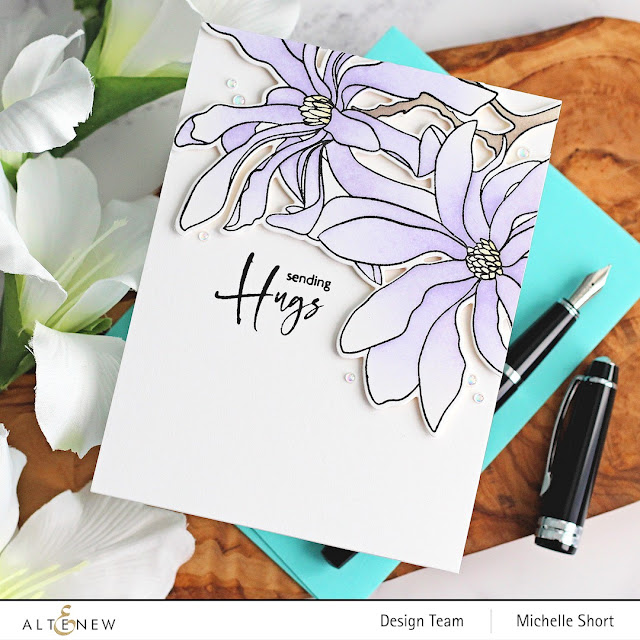
My last card today uses the new Magnolia Ballerina set, along with the die set and stencil. I first stamped the magnolia image from the Altenew Magnolia Ballerina Stamp Set on to white cardstock with Altenew Obsidian Pigment Ink. I placed the Altenew Magnolia Ballerina Simple Coloring Stencil Set 3 in 1 over the top and secured in place with Altenew Satin Masking Tape


Using Altenew Small Ink Blending Tools, I blended on Altenew Enchanted Garden Crisp Dye Inks for the petals, Altenew Fall Harvest Crisp Dye Inks for the flower centres and Altenew Warm Gray Crisp Dye Inks for the branch. It was then die cut out using the Altenew Magnolia Ballerina Die Set


I took an A2 white card base and stamped a sentiment from the stamp set on to it using Altenew Obsidian Pigment Ink. The magnolia was then added on top with Altenew Instant Dimension Foam Tape. To finish off, I added a few more Bubbles embellishments. 

SUPPLIES:


Here are the links to what I have used on the projects. Affiliate links are used on some products. This means that if you make a purchase after clicking on my link, I receive a small commission with no extra cost to you. I truly appreciate your support when using these links. Please click on the logo below the product to shop at your favourite store. All products were personally purchased except those from Clearly Besotted, Hero Arts or those marked with an asterisk (*) which were kindly sent to me to use. You can read my full disclosure here.


BLOG HOP:


As mentioned, this blog post is part of  a fun, inspirational blog hop. For the hop, you should have arrived here from the amazing Isha Gupta. Next on the hop is the fantastic LauraJane. If you get lost along the way, or want to start the hop from the beginning, please head over to the Altenew Blog

GIVEAWAY:


$300 in total prizes! To celebrate this release, Altenew is giving away a $50 gift certificate to 2 lucky winners and a $25 gift certificate to 8 winners! Please leave a comment on the
Altenew Card Blog and/or each designer’s blog post on the blog hop list below by 3rd March 2022 for a chance to win. Altenew will draw 10 random winners from the comments left on each stop of this blog hop and announce the winners on the Altenew Winners Page on 5th March 2022.

Thank you so much for stopping by to see me today. I hope you will check out the rest of the release. I think my favourite are those feathers - so pretty! Wishing you a great rest of the day! 

Clearly Besotted Teasers | New Home

Hello there and welcome to the start of the Clearly Besotted March 2022 Teasers. Release day is Tuesday 1st March 2022 and from now until then, we will be sharing teasers with you using the new sets. Today I am using a new set called Untouchable Corners. Perfect for lots of occasions but I thought I would create  a new home card today. 

PLEASE NOTE: This post contains affiliate links. Please see below for my full disclosure.


I started off my card by stamping one of the corner images from the Clearly Besotted Untouchable Corners Stamp Set on to white cardstock with Memento Tuxedo Black Ink. I then coloured the image using Copic Markers (the colours that I used are listed below the supplies area) and then fussy it it out using scissors. 


I took a panel of white cardstock and added ink blending to the bottom right hand corner with Tim Holtz Picked Raspberry Distress Ink. I then added splatter with Dr. Ph. Martin's Bleed Proof White Paint and set it aside to dry. Once dry, it was adhered to an A2 (4.25" x 5.5") white card base with thin foam tape. 


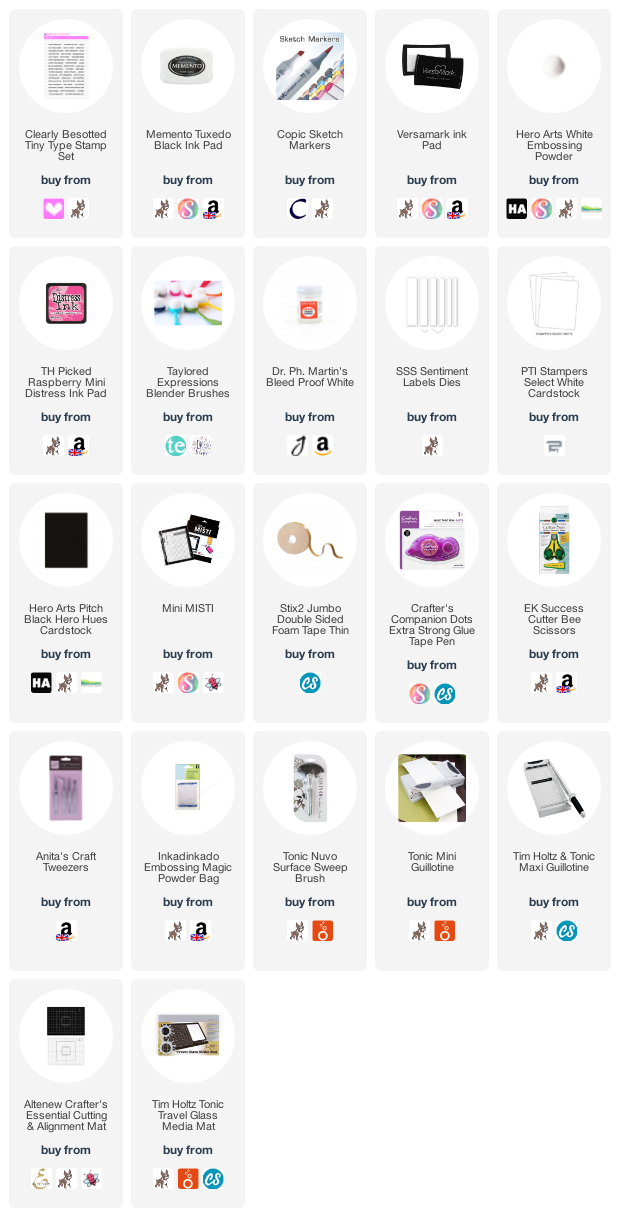
The hedgehog and cactus image was added on top with more thin foam tape. I took the sentiment from the Clearly Besotted Tiny Type Stamp Set and stamped it on to black cardstock with Versamark Ink. I applied white embossing powder and heat set. It was cut in to a strip and added to the card with a combination of thin foam tape and tape runner adhesive. 

SUPPLIES:


Here are the links to what I have used on the project. Affiliate links are used on some products. This means that if you make a purchase after clicking on my link, I receive a small commission with no extra cost to you. I truly appreciate your support when using these links. Please click on the logo below the product to shop at your favourite store. All products were personally purchased except those from Clearly Besotted, Hero Arts or those marked with an asterisk (*) which were kindly sent to me to use. You can read my full disclosure here.


COPIC MARKERS: Hedgehog - E49, E47, E44, E43, E42, E41. Cactus - G29, G09, YG09, YG07, YG01. Leaves - G29, YG17, YG23, YG01. Flowers - RV69, RV66, RV55, RV51. 

This set is super cute! There is another corner image plus two individual hedgehogs as well and lots of sentiments. The colours on this card are definitely more vibrant in real-life. The weather has not been good here in the UK, so it was difficult to get a good photo. For more inspiration on using the sets, please head over to the Clearly Besotted Blog and Keren, plus our wonderful guests Alberto, Francine and Mona. Thanks so much for stopping by today, I will be back later with another post but in the mean-time, I hope you have a wonderful day! 

22 February 2022

VIDEO | MFT Friendship Mouse

Hello there, I was over on the My Favorite Things YouTube Channel yesterday, sharing an off the edge friendship card. I love having elements hanging off the card, I usually go for the right or left side, but I like the top too, and you can still fit it in a standard sized envelope if you do a bit of cutting!

PLEASE NOTE: This post contains affiliate links. Please see below for my full disclosure.


I started off by stamping the mouse from the MFT Odd Couple Stamp Set on to white cardstock with MFT Extreme Black Ink. I coloured it usisng Copic Markers (the colurs that I used are listed below the supplies area) and then die cut it using the coordinating MFT Odd Couple Die-namics

I took the MFT Thank You for Being a Friend Die-namics and cut the friend word three times from white cardstock. On one, I added ink blending using Tim Holtz Peacock Feathers Distress Ink and an ink blending brush. Focusing most of the colour at the bottom and lightening at the top. They were stacked up one on top of another using MFT On-Point Precision Glue

I stamped the accompanying sentiment from MFT Itty Bitty Hugs & Kisses using more black ink on to an A2 white card base. The friend word was adhered on top. I then cut the card base down so that the mouse could overhang the top and it still fit in the envelope. I the mouse was then added on top, standing on the 'i'. To finish off, I added Nuvo Crystal Glaze to the balloons for some added shine. 

VIDEO:

You can see how I made the card in the video below:

SUPPLIES:


Here are the links to what I have used on the project. Affiliate links are used on some products. This means that if you make a purchase after clicking on my link, I receive a small commission with no extra cost to you. I truly appreciate your support when using these links. Please click on the logo below the product to shop at your favourite store. All products were personally purchased except those from Clearly Besotted, Hero Arts or those marked with an asterisk (*) which were kindly sent to me to use. You can read my full disclosure here.


COPIC MARKERS: Mouse - T7, T5, T3, T1, RV55, RV52. Balloons - BG49, BG15, BG13, BG11. 

Thank you so much for stopping by today, I really do appreciate it. Wishing you a lovely day! 
17 February 2022

Altenew | Dreamy Bouquet Fabric Release Blog Hop + Giveaway

Hello there, today I am sharing something very different than my usual - fabric! I was delighted to hear that Altenew was releasing their new Dreamy Bouquet Fabric Fat Quarter Collection and although I love fabric (I have a drawer of it!), I do not use it that often, so I thought this would be a great opportunity to try something different. This post is part of a fun blog hop, please see below for more information. 

PLEASE NOTE: This post contains affiliate links. Please see below for my full disclosure.


As much as I love fabric, I am not much of a sewer. I can hand sew but I am not that great on a sewing machine. I would love to get better at it though. When I saw the beautiful patterns in the Altenew Dreamy Bouquet Fabric fat Quarter Collection, I knew I had to give it a go! There are five different fat quarters in the collection (approx. 18" x 22"/50cm x 55cm). 


I thought that I would create a project without sewing and also one with. The first one is without sewing. I saw some tutorials online about how to create bows and I thought they would be great for lots of different uses - brooches, hair/headbands, pins, adding on to bags etc., so I thought that I would give that a go first. 


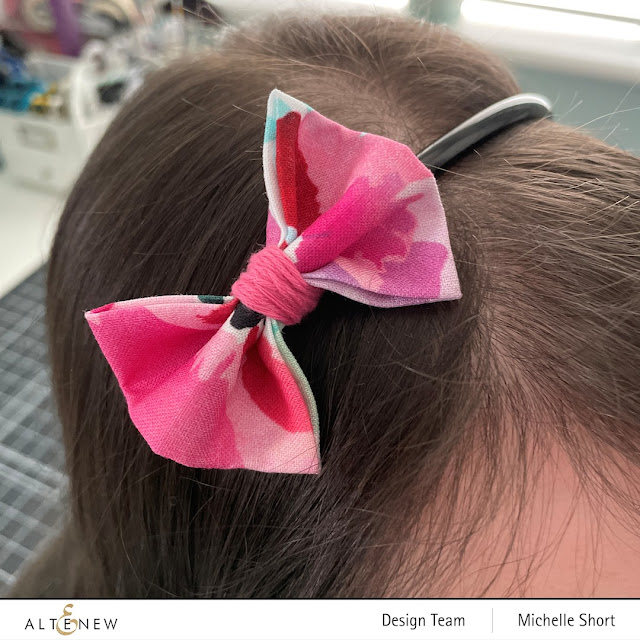
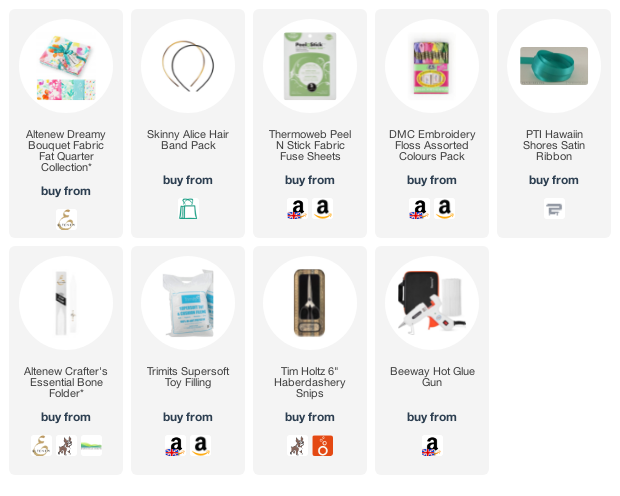
I cut a piece of fabric (the one with the beautiful watercoloured floral on) to 5" x 5" and then folded in half. Where the half way point is, I added a strip of Thermoweb Peel N Stick Fabric Fuse Sheet. This is like double sided tape but for fabric! I then folded it in half again and added another strip of the Fabric Fuse to hold it together and make a square. I then pinched the centre to create a bow. I wrapped it using embroidery thread to secure, but you could use another piece of fabric or ribbon. To make it, I followed this tutorial


I then thought it would be fun to add the bow on to a headband. I simply tied it on using more embroidery thread, so that I could take it off later if I wanted. If you knew you were going to keep it on there permanently, you could use a hot glue gun to secure it in place. 


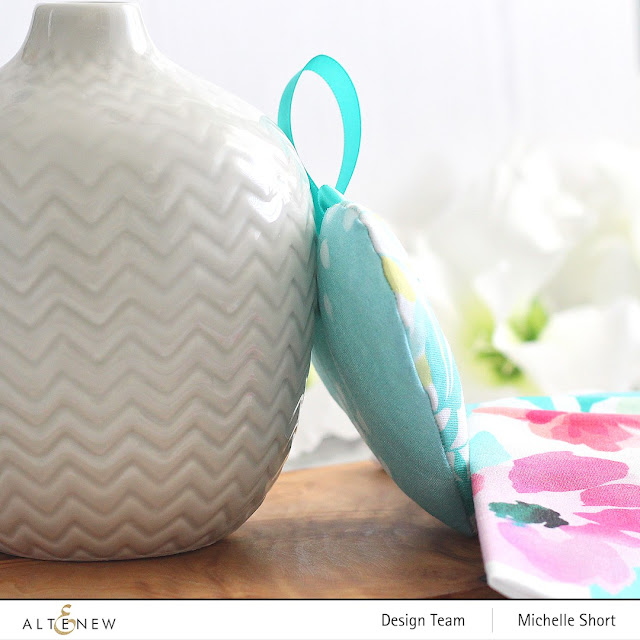
For my next project, I thought I would create a hanging heart. I just added toy stuffing in mine, but you could add lavender or any other herb/plant for some fragrance. To make the heart, I cut two hearts from the Altenew Dreamy Bouquet Fabric Fat Quarter Collection. I used the leaf pattern for the front and the aqua with white dots for the back. 


I placed the hearts back to back (so that the nice side of the fabric was inside the sandwich) and placed a piece of ribbon inbetween. It was sewn up, leaving a small hole, on a sewing machine. Since you stich it inside out, I pulled it back through so that it was the right way round. I used the Altenew Crafter's Essential Bone Folder to push it all through and then filled it with toy stuffing. 


The hole left for filling was then hand sewn. I tied more ribbon in a bow and adhered a button from my stash to the centre, adhering with a hot glue gun. I then adhered the ribbon to the heart with hot glue as well. For the back, I simply added a button at the top. I thought that I might use the heart either just as décor, or as a pin cushion. It's definitely not perfect, but for my first attempt, I am pretty happy with it! 

SUPPLIES:


Here are the links to what I have used on the project. Affiliate links are used on some products. This means that if you make a purchase after clicking on my link, I receive a small commission with no extra cost to you. I truly appreciate your support when using these links. Please click on the logo below the product to shop at your favourite store. All products were personally purchased except those from Clearly Besotted, Hero Arts or those marked with an asterisk (*) which were kindly sent to me to use. You can read my full disclosure here.


BLOG HOP:


As mentioned, this blog post is part of a fun, inspiration filled blog hop. For the hop, you should have arrived here from the amazing LauraJane. Next on the hop is the fabulous Hassena Calcuttawala. If you get lost along the hop or want to start from the beginning, please head over to the Altenew Blog

GIVEAWAY:


$300 in total prizes! To celebrate this release, Altenew is giving away a $50 gift certificate to 2 lucky winners and a $25 gift certificate to 8 winners! Please leave a comment on the Altenew Card Blog and/or each designer’s blog post on the blog hop list below by 23rd February 2022 for a chance to win. Altenew will draw 10 random winners from the comments left on each stop of this blog hop and announce the winners on the Altenew Winners Page on 25th February 2022.

I have had a peek at the other designers makes and they are so inspirational - some amazing sewers but also great ways to use the fabric on cards and non-sewing projects too. Thanks so much for stopping by today, I really do appreciate it. Wishing you a great day! 

Simon Says Stamp | Happy Birthday Cards

Hello there, today I have two cards to share with you using the new Basic Box Card Happy Birthday Die from the new Simon Says Stamp Good Luck Charm Release, which is out today. It is as great release, as always, filled with lots of new products including re-inkers for the Pawsitively Saturated Ink Pads and new colours too! 

PLEASE NOTE: This post contains affiliate links. Please see below for my full disclosure.


As mentioned, I am using the new Basic Box Card Happy Birthday Die today. This is made to work alongside the Basic Box Card Die, which creates a fabulous 3D box card that folds down flat for mailing. As you can see though, the happy birthday die works perfectly for other cards too! I thought I would create a pink/orange card today and also a blue/green one! 


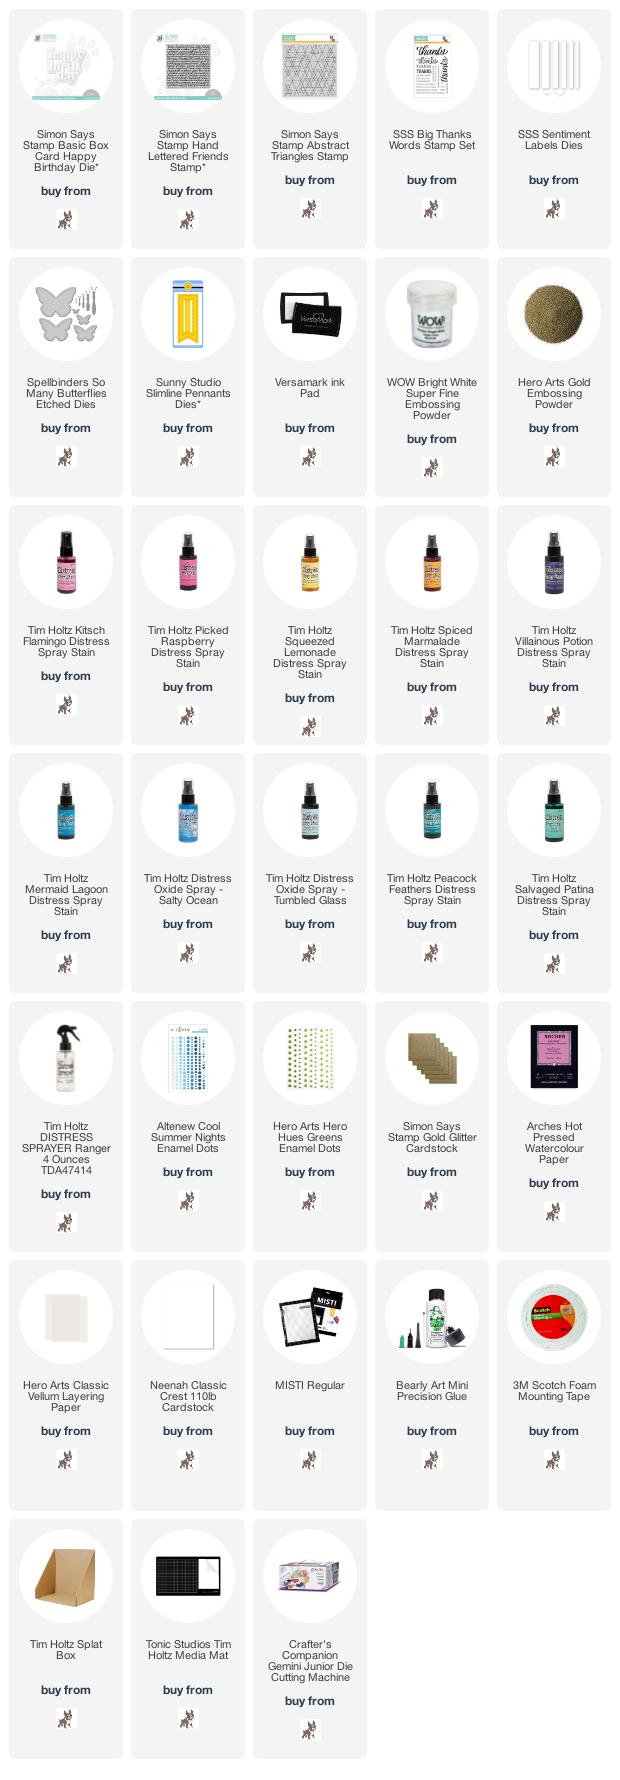
For my first card, I started off by stamping the Simon Says Stamp Hand Lettered Friends Stamp on to a panel of Arches Hot Pressed Watercolour Paper using Versamark Ink. I applied white embossing powder and heat set. I then took it to my splat box and sprayed it liberally with water first, followed by Tim Holtz Distress Spray Stains in Kitsch Flamingo, Picked Raspberry, Squeezed Lemonade and Spiced Marmalade. It was then set aside to dry before die cutting using the Sunny Studio Slimline Pennants Dies


It was adhered to an A2 white card base with foam tape. I then die cut the Simon Says Stamp Basic Box Card Happy Birthday Die three times from white cardstock and layered them up one on top of another using Bearly Art Glue. I cut the shadow from vellum and adhered the words on top. It was added to the card with more liquid glue. 


I took the sentiment from the Simon Says Stamp Big Thanks Stamp Set and stamped it on to white cardstock with Versamark Ink. I applied gold embossing powder and heat set. It was cut in to a strip and added to the card with more liquid glue and foam tape. To finish off, I die cut three Spellbinders So Many Butterflies Etched Dies from Simon Says Stamp Gold Glitter Cardstock and adhered them to the card. 


For my next card, I started off by stamping the Simon Says Stamp Abstract Triangles Stamp on to more Arches watercolour paper using Versamark Ink. I applied white embossing powder and heat set. For this piece, I used Tim Holtz Distress Sprays Stains and Oxide Sprays. 


I used Villainous Potion, Mermaid Lagoon, Peacock Feathers and Salvaged Patina Distress Spray Stains and Salty Ocean and Tumbled Glass Oxide Spray. It was then cut down in to two parts, for some added interest. 


The panels were adhered to an A2 white card base with foam tape. I then die cut the Simon Says Stamp Basic Box Card Happy Birthday Die another three times from white cardstock and the shadow from vellum. They were adhered together and added to the card. To finish off, I added a few enamel dots. 

SUPPLIES:


Here are the links to what I have used on the projects. Affiliate links are used on some products. This means that if you make a purchase after clicking on my link, I receive a small commission with no extra cost to you. I truly appreciate your support when using these links. Please click on the logo below the product to shop at your favourite store. All products were personally purchased except those from Clearly Besotted, Hero Arts or those marked with an asterisk (*) which were kindly sent to me to use. You can read my full disclosure here.


I hope you will check out the Good Luck Charm Release, it really is a great one! Thank you so much for stopping by today, I really do appreciate it. I will be back later with a blog hop but in the mean-time, have a wonderful day! 
End of code