Showing posts with label Hero Arts. Show all posts

31 October 2026

Hero Arts | Home for the Holidays

Hello there, today I have two cards to share using the Hero Arts Home for the Holidays collection that was released back in July. As you can tell, I am a little behind with releases at the moment, but sometimes it is nice to not rush the releases each month and to use them at a later date. So I hope you don't mind seeing the inspiration at a later date too! 

PLEASE NOTE: This post contains affiliate links. Please see below for my full disclosure.


The main focus of the collection are the wreath dies. There is a large wreath and a little one (I used the large one today and the little one here) and also accessories for the wreath. I decided to use the accessories for a separate card instead, creating a little winter village! 


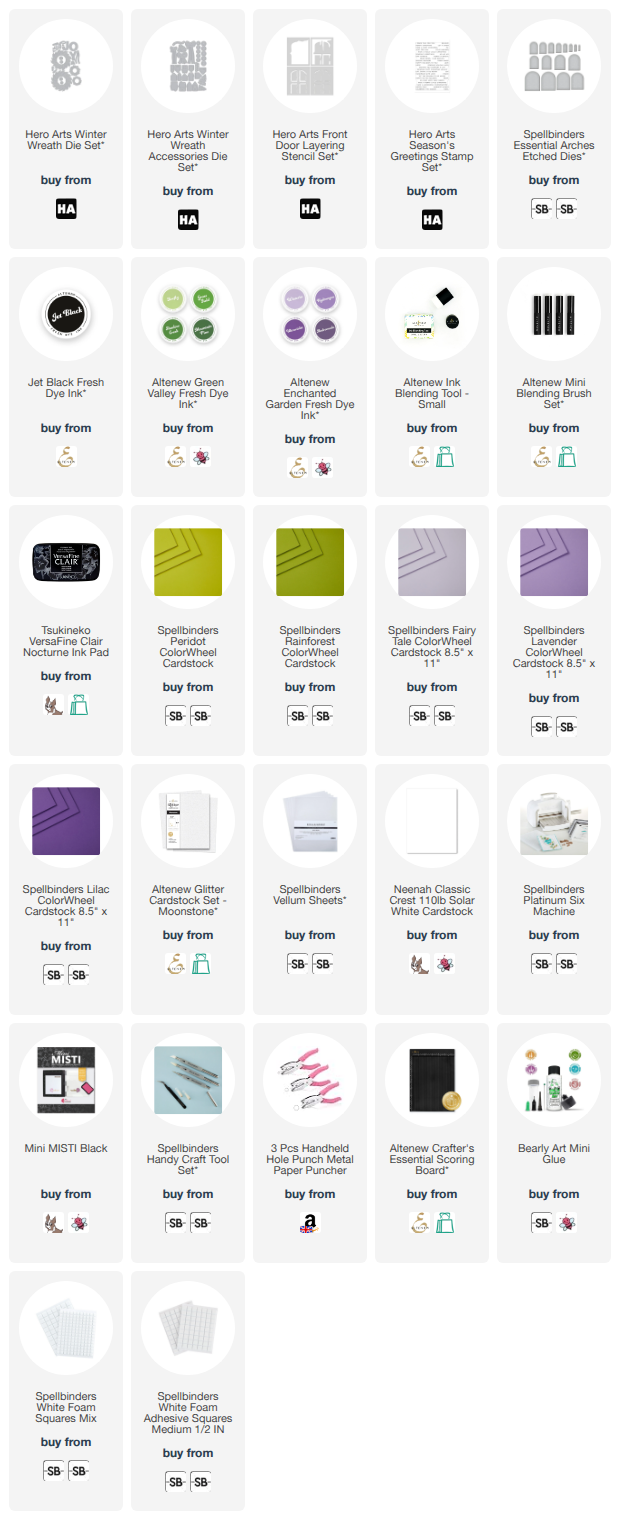
I started off my first card by using the Hero Arts Front Door Layering Stencils. I wanted my door to be black, as that is what I have in real life! It is quite tricky to achieve that in ink blending with four different layers but I tried my best, using just one ink - Altenew Jet Black Fresh Dye Ink. It was then cut into an arch shape using the Spellbinders Essentials Arches Etched Dies. 


I created an arch shaped card base and adhered the door panel on top. I then die cut the large wreath from the Hero Arts Winter Wreath Die Set from Spellbinders Peridot and Rainforest ColorWheel Cardstock. I cut the top layer twice and the bottom layer once. I added ink blending to them with Altenew Green Valley Fresh Dye Inks and then adhered them one on top of another before adhering to the door. 


I die cut the bow from Spellbinders Lavender ColorWheel Cardstock and added ink blending on top with Altenew Enchanted Garden Fresh Dye Inks. It was adhered to the top of the wreath. I die cut the berries from Altenew Moonstone Cardstock and adhered them to the wreath too. To finish, I stamped the 'Merry Christmas' from the Hero Arts Season's Greetings Stamp Set onto white cardstock using Versafine Clair Nocturne Ink. It was cut into a strip and adhered to the card. 


I kept the second card very simple! I die cut the houses from the Hero Arts Winter Wreath Accessories Die Set from Spellbinders Fairy Tale, Lavender and Lilac ColorWheel Cardstock. I cut the different parts apart (roof and door) from the houses using scissors, so that I could mix and match! I then cut the berry die from Spellbinders Rainforest ColorWheel Cardstock. 


I wanted to make them look like little wreaths hanging on the doors, so I punched a teeny tiny hole in the middle (not quite centred but actually I don't mind that!) using a handheld punch and adhered them to the doors. I also added vellum to the back of the houses to show through the windows. The trees were die cut from Spellbinders Peridot and Rainforest ColorWheel Cardstock. 


I created an arch shaped card base using the Spellbinders Spellbinders Essentials Arches Etched Dies and then stamped the 'Season's Greetings' sentiment from the Hero Arts Season's Greetings Stamp Set on top using Versafine Clair Nocturne Ink. I like to have two of these types of sentiment sets -  I keep one as is (all one stamp) and I cut the other I cut up into separate sentiments, that way I can get more from my sets! The trees were adhered to the card using liquid glue and the houses with thin foam tape. 

SUPPLIES:


Here are the links to what I have used on the projects. Affiliate links are used on some products. This means that if you make a purchase after clicking on my link, I receive a small commission with no extra cost to you. I truly appreciate your support when using these links. Please click on the logo below the product to shop at your favourite store. All products were personally purchased except marked with an asterisk (*) which were kindly sent to me to use. You can read my full disclosure here.

I really like the shape of arched cards and I think they work particularly well for these designs. Thank you so much for stopping by today, I really do appreciate it. I hope you have a wonderful weekend! 

29 October 2026

Hero Arts | Have a Cool Yule

Hello there, I hope you are well! Today I have a card to share using the Hero Arts Have a Cool Yule Die that was released as part of the Vintage Vinyl collection. I have paired it with a newer snowflake press plate for a clean and simple card! 

PLEASE NOTE: This post contains affiliate links. Please see below for my full disclosure.


I started off my card by creating the background. I pressed the Spellbinders Winter Peace Press + Foil Plate onto a panel of Spellbinders Fairy Tale ColorWheel Cardstock. I made sure to add a shim (a piece of scrap watercolour paper) into the Spellbinders Letterpress Betterpress System as the ColorWheel cardstock is standard cardstock and you need a bit more thickness to get a good impression. 


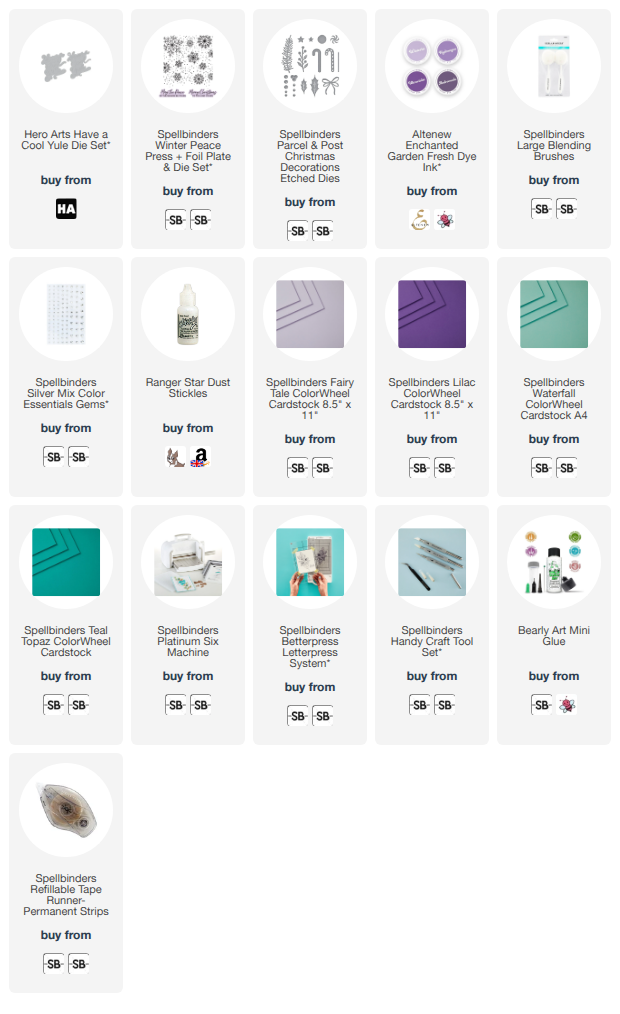
I added ink blending towards the top of the panel, fading out to the colour of the cardstock at the bottom, using Altenew Enchanted Garden Fresh Dye Inks (Wisteria, Hydrangea & a little Ultraviolet at the top). It was adhered to a US A2 sized white card base using tape runner adhesive. I die cut the Hero Arts Have a Cool Yule Die from white cardstock for the base/shadow, and Spellbinders Lilac ColorWheel Cardstock for the word. I cut the word three times. 


I added ink blending to the top layer, using Altenew Ultraviolet Fresh Dye Ink, an adhered the layers one on top of another, using liquid glue. It was then adhered to the card. I die cut the holly leaves from the Spellbinders Parcel & Post Christmas Decorations Etched Dies from Spellbinders Waterfall & Teal Topaz ColorWheel Cardstock, and the berries from white. They were adhered to the flourish on the 'e'. To finish, I added Star Dust Stickles to the berries and embellished the card with Spellbinders Silver Color Essentials Gems. 

SUPPLIES:


Here are the links to what I have used on the project. Affiliate links are used on some products. This means that if you make a purchase after clicking on my link, I receive a small commission with no extra cost to you. I truly appreciate your support when using these links. Please click on the logo below the product to shop at your favourite store. All products were personally purchased except marked with an asterisk (*) which were kindly sent to me to use. You can read my full disclosure here.


Unfortunately, the photos don't do the card justice at all! It is so much prettier in real-life! Thanks so much for stopping by today, I really do appreciate it. I hope you have a wonderful rest of the day! 

23 October 2026

Hero Arts | Kitty Squeezer

Hello there, today I have a card to share using the Hero Arts Kitty Squeezer Die Set. The kitty has arms that open so that you can pop something underneath for him/her to hold. In the set are autumn themed products, but the cat be holding anything you like, even a gift card fits! I decided to have him holding a wreath! 

PLEASE NOTE: This post contains affiliate links. Please see below for my full disclosure.


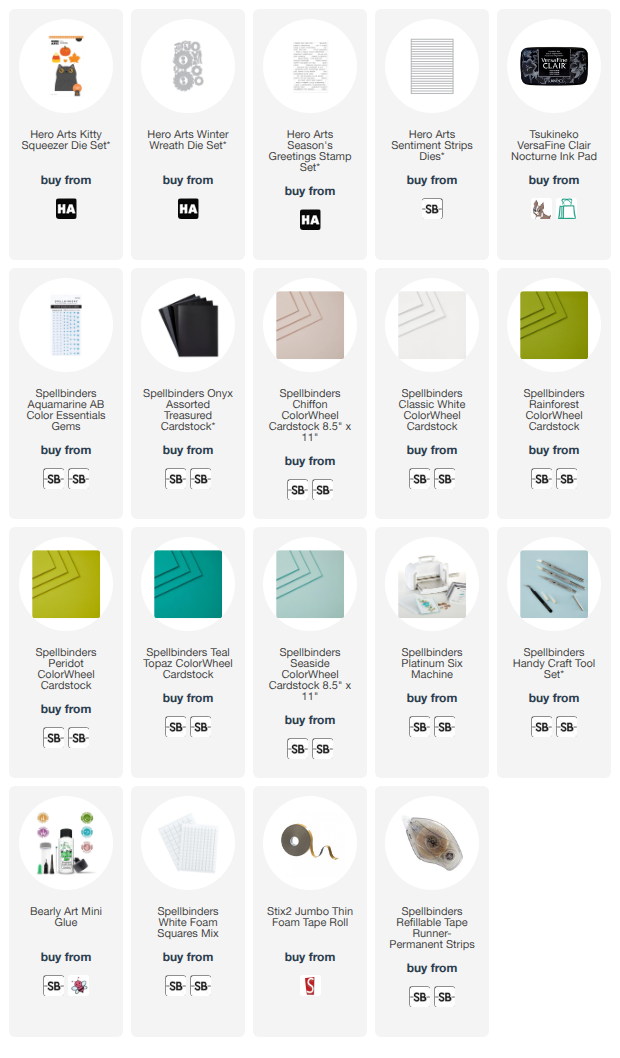
I started off by die cutting the Hero Arts Kitty Squeezer Die Set cat from Spellbinders Matte Metallic Onyx Treasured Cardstock, Chiffon ColorWheel Cardstock and Classic White ColorWheel Cardstock. His eyes, ears and nose pieces were adhered to the main layer using liquid glue. 

I then die cut the smaller of the two wreaths from the Hero Arts Winter Wreath Die Set from Spellbinders Peridot and Rainforest ColorWheel Cardstock. The bow was cut from Spellbinders Teal Topaz ColorWheel Cardstock. I adhered the layers together and then adhered it behind the cat's paws. 

I added a panel of Spellbinders Seaside ColorWheel Cardstock onto a US A2 sized (4.25" x 5.5") white card base and then the cat was adhered on top using thin foam tape. I stamped the sentiment from the Hero Arts Season's Greetings Stamp Set onto white cardstock using Versafine Clair Nocturne Ink. 

It was cut into two strips using the Hero Arts Sentiment Strips Die and adhered to the card with foam tape. To finish, I embellished with Spellbinders Aquamarine Color Essentials Gems. 

SUPPLIES:


Here are the links to what I have used on the project. Affiliate links are used on some products. This means that if you make a purchase after clicking on my link, I receive a small commission with no extra cost to you. I truly appreciate your support when using these links. Please click on the logo below the product to shop at your favourite store. All products were personally purchased except marked with an asterisk (*) which were kindly sent to me to use. You can read my full disclosure here.


I love that the cat can be used all year round to hold different objects! Thanks so much for stopping by today, I really do appreciate it. I hope you have a wonderful day! 

14 October 2026

Hero Arts | Vintage Vinyl

Hello there, today I have a card to share to share using the Hero Arts Vintage Vinyl collection. As the name suggests, this collection is about music and there are both everyday products and holiday/Christmas ones. 

PLEASE NOTE: This post contains affiliate links. Please see below for my full disclosure.


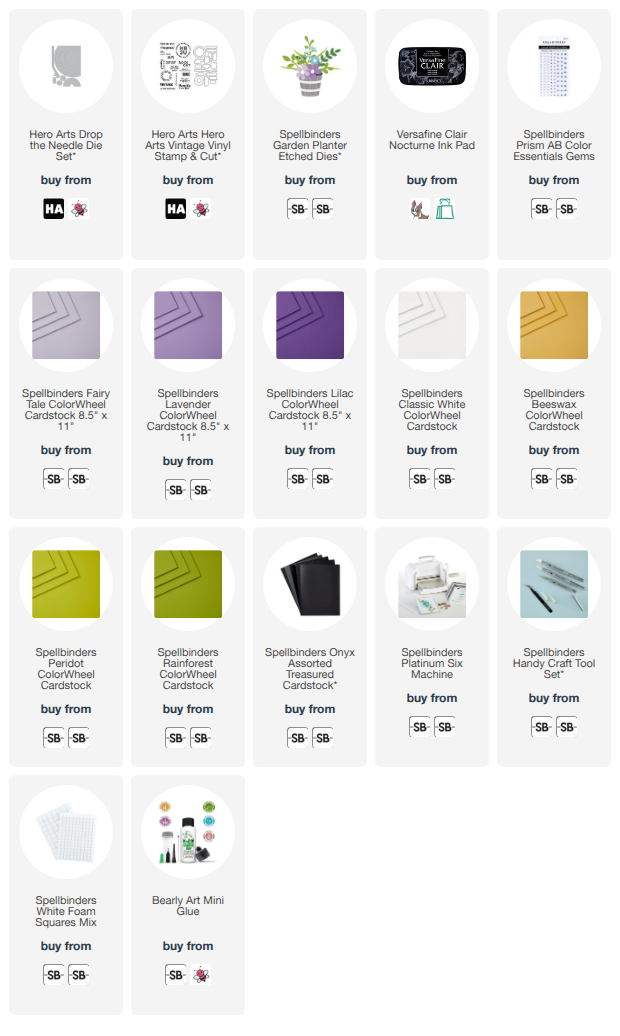
I started off my card by die cutting the vinyl record from the Hero Arts Drop the Needle Die Set from Spellbinders Matte Metallic Onyx Cardstock and Spellbinders Lavender ColorWheel Cardstock. I die cut the tonearm from Spellbinders Lilac ColorWheel Cardstock and the headshell from Spellbinders Classic White Cardstock. The dial was cut from the same Onyx and Lilac cardstocks. 


I adhered the outside of the vinyl record first, onto a US A2 sized card base made from Spellbinders Fairy Tale ColorWheel Cardstock. I then adhered the parts of the dial together and adhered that to the bottom right hand corner. I stamped the 'congrats on another year round the turntable' sentiment from the Hero Arts Vintage Vinyl Stamp Set onto the label of the record using Versafine Clair Nocturne Ink. 


It was then adhered to the centre of the vinyl part. I stamped the 'happy birthday' from the same set onto white cardstock and die cut them out using the coordinating dies. They were adhered to the centre of the label using thin foam squares. 


I die cut the flowers and leaves from Spellbinders Garden Planter Etched Dies from Spellbinders ColorWheel Cardstock in Classic White (the flowers), Beeswax (the flower centres), Peridot and Rainforest (leaves). The leaves were adhered to the vinyl record first, followed by the flowers using thin foam squares. To finish, I embellished with Spellbinders Prism AB Color Essentials Gems. 

SUPPLIES:


Here are the links to what I have used on the project. Affiliate links are used on some products. This means that if you make a purchase after clicking on my link, I receive a small commission with no extra cost to you. I truly appreciate your support when using these links. Please click on the logo below the product to shop at your favourite store. All products were personally purchased except marked with an asterisk (*) which were kindly sent to me to use. You can read my full disclosure here.


I had a lot of fun making this card! I know that flowers wouldn't go on a record player but I really like how much they add to the card! Thank you so much for stopping by today, I really do appreciate it. I hope you have a wonderful day! 

2 October 2026

18

Hello there, I hope you are well! Today I have a card to share that I made for my niece who turned 18 last month. I cannot believe I have an 18 year old niece! I thought it would be fun to have the 18 inside the champagne glass and then decorate it with flowers, adding lots of sparkle with glitter cardstock. 

PLEASE NOTE: This post contains affiliate links. Please see below for my full disclosure.


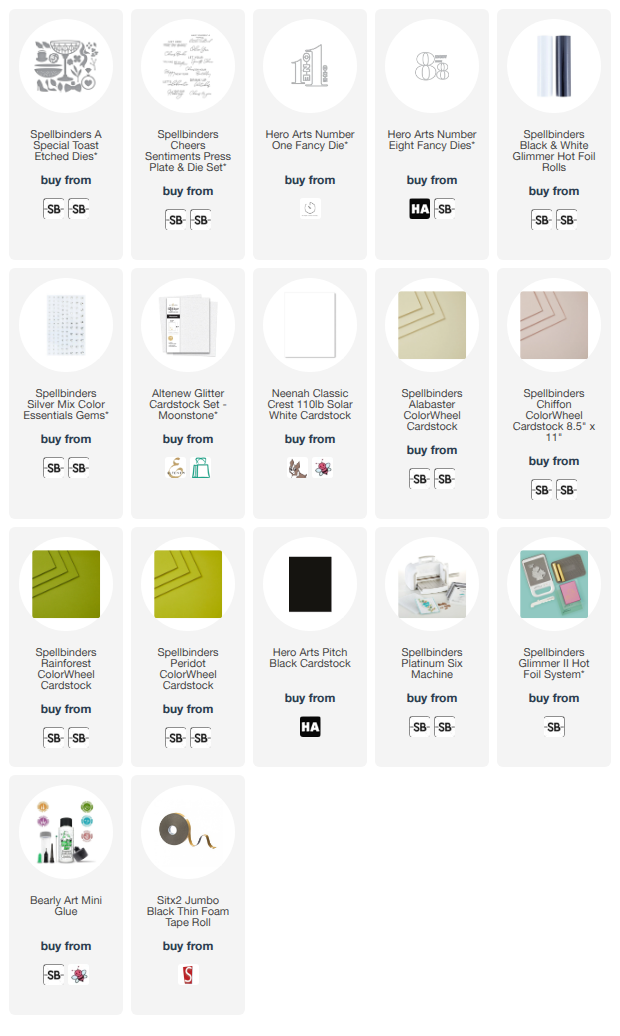
I started off by die cutting the champagne glass from Spellbinders A Special Toast Etched Dies. I die cut it three times and adhered them one on top of another. I die cut the champagne from Spellbinders Alabaster and Chiffon ColorWheel Cardstock and adhered them together. Before adhering it to the back of the glass, I die cut the Hero Arts Number One and Number Eight Dies from Altenew Moonstone Glitter Cardstock.

The numbers were adhered behind the glass first and then the champagne adhered behind them. The glass was then adhered onto a US A2 sized card base made from Hero Arts Pitch Black Cardstock. I adhered the glass using Bearly Art Glue and then added black foam tape behind the top of the numbers. 

I die cut the flowers from Spellbinders A Special Toast Etched Dies from white cardstock, the flower centres from Altenew Moonstone Glitter Cardstock, and the leaves from Spellbinders Peridot and Rainforest ColorWheel Cardstock. I then die cut the ribbon tails from the same glitter cardstock. 

I assembled the flowers first, using liquid glue, and then adhered them to the card with a combination of liquid glue and black foam tape, popping the leaves behind. The ribbon tails were adhered below, popping the tops of them underneath the flower cluster. 

I hot foiled the Spellbinders Cheers Sentiments Press Plate onto white cardstock using Spellbinders Opaque Black Foil and the Glimmer Hot Foil System. It was die cut out and then the 'cheers on your birthday' sentiment adhered to the card. To finish, I embellished with Spellbinders Silver Color Essentials Gems. 

SUPPLIES:


Here are the links to what I have used on the project. Affiliate links are used on some products. This means that if you make a purchase after clicking on my link, I receive a small commission with no extra cost to you. I truly appreciate your support when using these links. Please click on the logo below the product to shop at your favourite store. All products were personally purchased except marked with an asterisk (*) which were kindly sent to me to use. You can read my full disclosure here.


Unfortunately the Number Dies are being discontinued. Such a shame as they are perfect for customised cards. Thanks so much for stopping by today, I really do appreciate it. I hope you have a wonderful day!

18 September 2026

Spellbinders | Autumn Greetings

Hello there, today I have a card to share using the Spellbinders September 2025 Small Die of the Month Club Kit called "Owl Be There". This set features the most cutest owl, a tree stump for him to stand on, leaves, mushrooms, and stars and a moon (which I did not use). Whilst the set does have autumnal elements in (and that's the way I went with my card), the owl can definitely be used for any season. 

PLEASE NOTE: This post contains affiliate links. Please see below for my full disclosure.


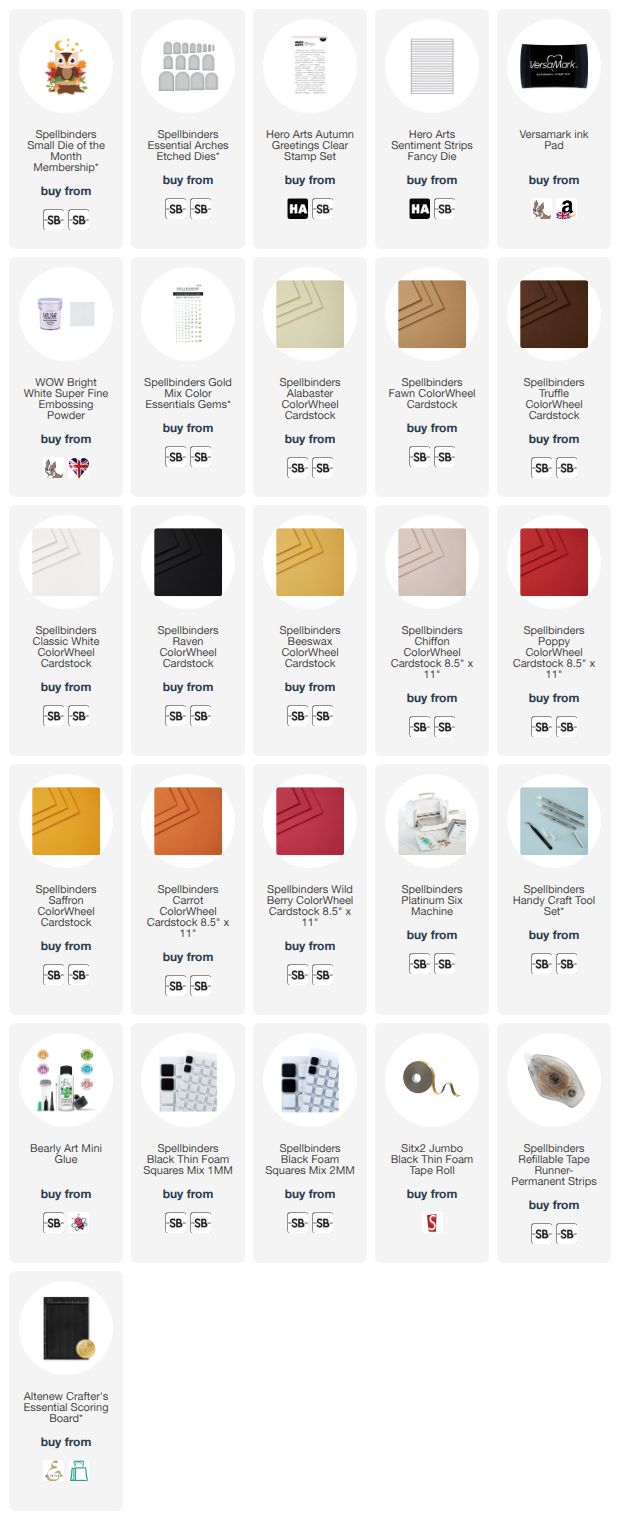
I started off my card by die cutting the owl from the Spellbinders September 2026 Small Die of the Month Club Kit from Spellbinders ColorWheel Cardstock. I used Truffle for the main body and wings, Fawn for his tummy, Alabaster for his face, Classic White and Raven for his eyes, Chiffon for his cheeks, and Beeswax for his beak and legs/feet. He was assembled and adhered using Bearly Art Glue. 


I then cut the other dies in the set from Spellbinders ColorWheel Cardstock in Poppy and Alabaster for the mushrooms, Fawn and Truffle for the tree stump, and Saffron, Carrot and Wild Berry for the leaves. The mushrooms were assembled and adhered together using liquid glue. 


I created an arch shaped card base by die cutting two arches using the Spellbinders Essential Arches Etched Dies from Spellbinders Raven ColorWheel Cardstock. I then scored a line at the top of one of them to create a hinge. I added adhesive to the hinge and adhered it to the other one to complete the card base. I adhered the leaves on top first, using liquid glue. 


I then adhered the tree stump and owl using thin foam tape. The mushrooms were adhered using foam squares. I stamped a sentiment from the Hero Arts Autumn Greetings Stamp Set onto black cardstock using Versamark Ink. I applied white embossing powder and heat set. It was die cut into a strip and adhered to the card using more thin foam tape. To finish, I embellished with Spellbinders Gold Color Essentials Gems. 

SUPPLIES:


Here are the links to what I have used on the project. Affiliate links are used on some products. This means that if you make a purchase after clicking on my link, I receive a small commission with no extra cost to you. I truly appreciate your support when using these links. Please click on the logo below the product to shop at your favourite store. All products were personally purchased except marked with an asterisk (*) which were kindly sent to me to use. You can read my full disclosure here.


I just think that owl is adorable and I will definitely try and use him again for other seasons/occasions! Thank you so much for stopping by today, I really do appreciate it. I hope you have a great day and a wonderful weekend! 

17 September 2026

Spellbinders | Classic Mouse Costume Party

Hello there, today I have a card to share using the Spellbinders Classic Mouse Costume Party Etched Dies that are perfect for Halloween to dress up the mice, but a lot of the items also fit other characters too, especially the witches hat. If you want to dress up the mice, you do need the Classic Mouse Wedding Etched Dies for this, as you need the suit and dress from the set. 

PLEASE NOTE: This post contains affiliate links. Please see below for my full disclosure.


I started off my card by die cutting the girl mouse from Spellbinders Classic Mouse Wedding Etched Dies using Spellbinders ColorWheel Cardstock. I cut her body (including the tail) and head from Raven, her face from Classic White, her mouth from Poppy, her shoes, hat and dress from Lilac, the hat band and dress band from Carrot, the buckles from Beeswax, and her cape from Fairy Tale and Lavender. 


The hat, buckles and cape are from the Spellbinders Classic Mouse Costume Party Etched Dies. She was assembled and adhered together using Bearly Art Glue. I then die cut the broom from the Spellbinders Classic Mouse Costume Party Etched Dies set from Spellbinders Truffle and Fawn Color Wheel Cardstock. 


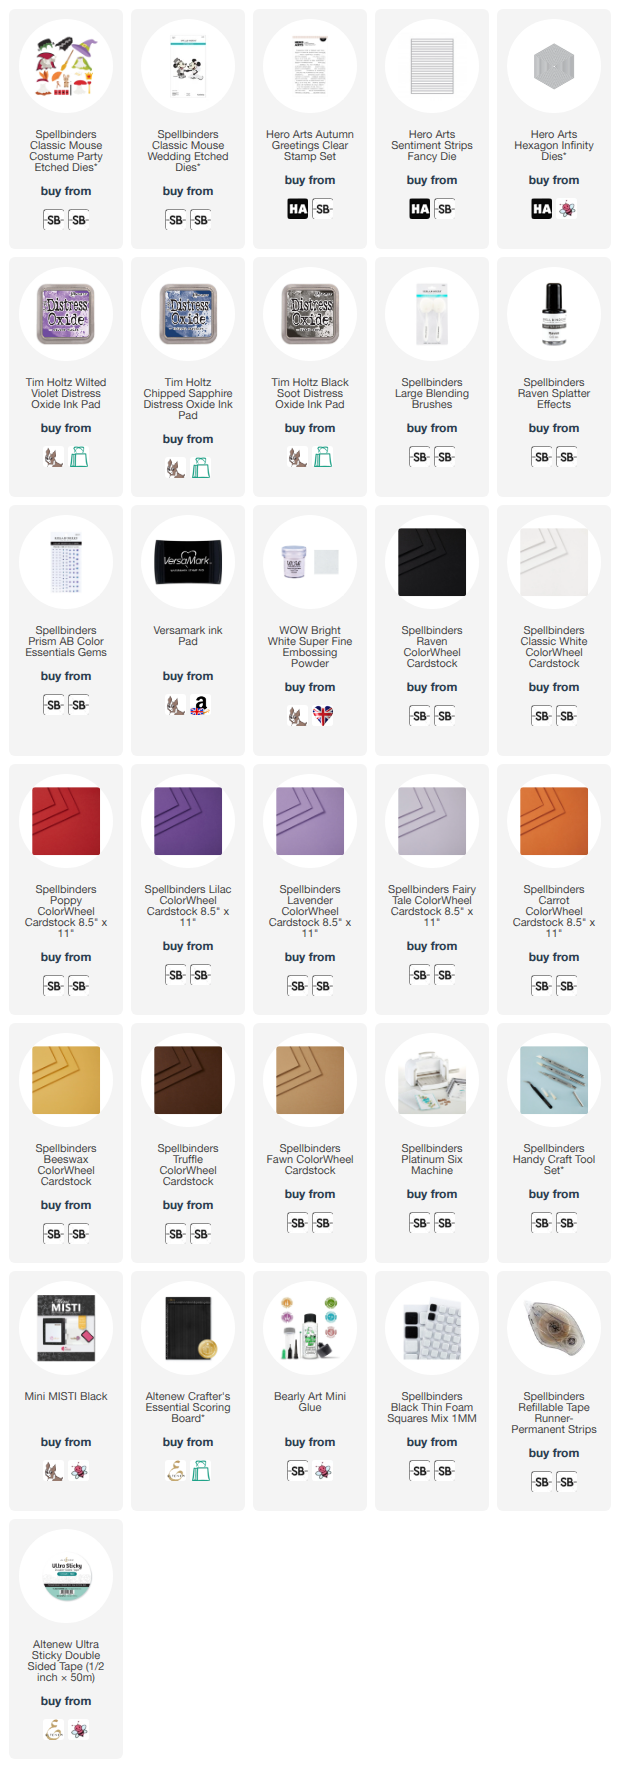
For the card base, I die cut two Hero Arts Hexagon Infinity Dies from white cardstock. I scored one towards the top to create a hinge. I added adhesive to the hinge and adhered it to the back of the other one to create the hexagon shaped card base. I then die cut another of the hexagons and added ink blending on top. I used Tim Holtz Distress Oxide Inks in Wilted Violet, Chipped Sapphire and Black Soot. I then splattered on Spellbinders Raven Splatter Effects and set it aside to dry. 


Once dry, it was adhered to the card base using tape runner adhesive. The witchy mouse was adhered on top using thin foam squares. I then adhered the broom to her hand, using a combination of liquid glue and thin foam squares. I stamped a sentiment from the Hero Arts Autumn Greetings Clear Stamp Set onto black cardstock using Versamark Ink. I applied white embossing powder and heat set. It was then cut into two strips and adhered to the card using more thin foam squares. To finish, I embellished with Spellbinders Prism AB Color Essentials Gems. 

Before I go, I just wanted to mention that Spellbinders have a Warehouse Sale going on at the moment with lots of bargains to be had! You can visit the sale for the US site here and the UK one here. 

SUPPLIES:


Here are the links to what I have used on the project. Affiliate links are used on some products. This means that if you make a purchase after clicking on my link, I receive a small commission with no extra cost to you. I truly appreciate your support when using these links. Please click on the logo below the product to shop at your favourite store. All products were personally purchased except marked with an asterisk (*) which were kindly sent to me to use. You can read my full disclosure here.


She looks so cute dressed up as a witch, and of course, I had to use purple! Thanks so much for stopping by today, I really do appreciate it. I hope you have a wonderful day! 

13 September 2026

Hero Arts | Free Spirit

Hello there, I hope you are well! Today I have a card to share that is technically a Halloween card, but you wouldn't really know it! Back in July, Hero Arts released a collection called Summerween and the Free Spirit Dies were part of that. Whilst it is no longer summer here in the UK, I still thought it would be fun to create a card using it with a non-traditional colour scheme, since the ghost is non-traditional too! 

PLEASE NOTE: This post contains affiliate links. Please see below for my full disclosure.


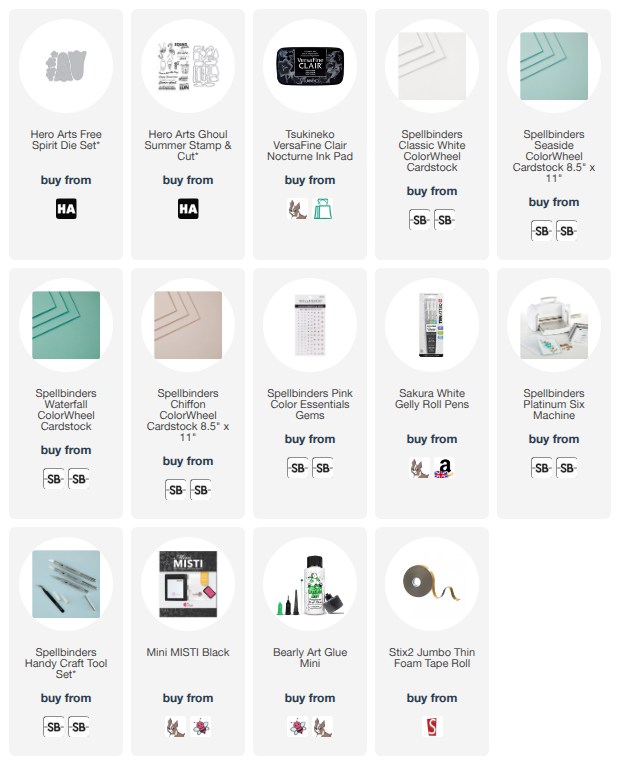
I started off my card by die cutting the ghost from the Hero Arts Free Spirit Die Set from Spellbinders ColorWheel Cardstock. There is a layer for the main part of the ghost and then a separate one that includes the flowers. I die cut them both once from Classic White. I then cut the flower layer again, this time from Seaside and Waterfall. 

I adhered the white flower layer on top of the plain white one first, adhering with liquid glue. I then inlayed the flowers and centres. I added a piece of Spellbinders Raven ColorWheel Cardstock behind to show through the eyes and added a white gel pen dot on top. 

I created a US A2 sized card base (4.25" x 5.5") from Spellbinders Chiffon ColorWheel Cardstock. I stamped the sentiments from the Hero Arts Ghoul Summer Stamp & Cut on top using Versafine Clair Nocturne Ink. The ghost was adhered beside the sentiments using thin foam tape. To finish, I embellished with Spellbinders Pink Color Essentials Gems. 

SUPPLIES:


Here are the links to what I have used on the project. Affiliate links are used on some products. This means that if you make a purchase after clicking on my link, I receive a small commission with no extra cost to you. I truly appreciate your support when using these links. Please click on the logo below the product to shop at your favourite store. All products were personally purchased except marked with an asterisk (*) which were kindly sent to me to use. You can read my full disclosure here.


I do still have some more traditional Halloween cards to share and will do that next week! Thank you so much for stopping by, I really do appreciate it. I hope you have a wonderful day! 

21 August 2026

Spellbinders | Number Field Eclipse

Hello there, today I have a card to share that I made for my brother for his birthday at the beginning of the month. When I saw the new Spellbinders Number Field Embossing Folder, I thought it would be great for masculine cards. I then added personalisation to the card using the eclipse technique to spell his name but I think it would look good with numbers too for the age! 

PLEASE NOTE: This post contains affiliate links. Please see below for my full disclosure.


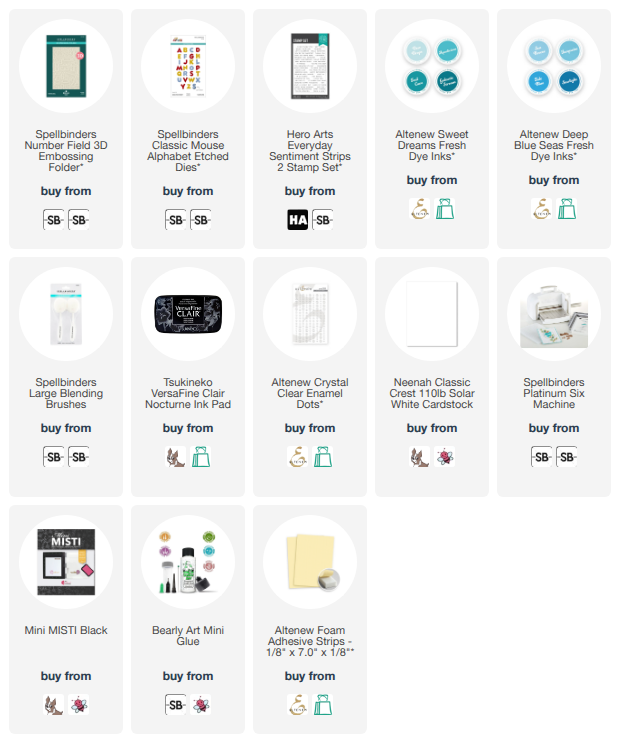
I started off by taking a panel of 4.25" x 5.5" white cardstock and added ink blending on top using Altenew Fresh Dye Inks in (top to bottom) Aqualicious (Sweet Dreams collection), Tide Blue and Starlight (Deep Blue Seas collection) using blending brushes. 

Once the panel was dry, I die cut out the letters MARK from the panel using the Spellbinders Classic Mouse Alphabet Etched Dies. Keeping the letters in the panel, I placed it inside the Spellbinders Number Field 3D Embossing Folder and ran it through my die cutting machine. I then popped the letters out, making sure to keep hold of the inside pieces for letters and adhered the panel to a US A2 sized white card base using Bearly Art Glue. 

I die cut the letters again five times from white cardstock. I adhered the first layer of white die cuts onto the card, followed by all the inside pieces for the letters (since you want these to be the same level as the panel). I then adhered the white die cut letters one on top of another. To finish the eclipse look, I adhered the embossed and inked ones on top. 

I stamped the 'happy birthday' sentiment from the Hero Arts Everyday Sentiment Strips 2 Stamp Set onto white cardstock using Versafine Clair Nocturne Ink. It was cut into a strip and adhered to the card using a combination of liquid glue and Altenew 1/8" Foam Adhesive Strips. To finish, I embellished with Altenew Crystal Clear Enamel Dots. 

SUPPLIES:


Here are the links to what I have used on the project. Affiliate links are used on some products. This means that if you make a purchase after clicking on my link, I receive a small commission with no extra cost to you. I truly appreciate your support when using these links. Please click on the logo below the product to shop at your favourite store. All products were personally purchased except marked with an asterisk (*) which were kindly sent to me to use. You can read my full disclosure here.


Obviously, this embossing folder isn't just for masculine projects but I do think it works well for them! Thank you so much for stopping by today, I really do appreciate it. I hope you have a wonderful day and a great weekend! 
16 August 2026

Spellbinders | Halloween Ghosts

Hello there, I am delighted to be over on the Spellbinders Blog sharing a step by step tutorial using the Spellbinders Halloween City Holiday Decorations Etched Dies. I already shared one card using the set/collection, which you can see here. Today I wanted to show that the decorations can be used without the house. 

PLEASE NOTE: This post contains affiliate links. Please see below for my full disclosure.


As you can see, I just used the ghosts for my card from the Spellbinders Halloween City Holiday Decorations Etched Dies because I thought they would work well for design (the bat would have worked well too). I used the Hero Arts Clouds & Grass Scenic Stencil inside an Everlasting Circle DIY stencil for the background and then simply popped the ghosts and sentiment on top. 

SUPPLIES:


Here are the links to what I have used on the project. Affiliate links are used on some products. This means that if you make a purchase after clicking on my link, I receive a small commission with no extra cost to you. I truly appreciate your support when using these links. Please click on the logo below the product to shop at your favourite store. All products were personally purchased except marked with an asterisk (*) which were kindly sent to me to use. You can read my full disclosure here.


For more information on how I made the card, please head over to the blog post here. Thank you so much for stopping by today, I really do appreciate it. I hope you have a great rest of the weekend! 

12 August 2026

Hero Arts | Whimsical Wheels

Hello there, today I have two cards to share using the new Hero Arts Whimsical Wheels collection, which is out now! This is a fun collection! There is the car and then you can decorate it with Christmas accessories or autumn/fall ones. I opted for the Christmas ones! 

PLEASE NOTE: This post contains affiliate links. Please see below for my full disclosure.


The car is made to have the steering wheel on the left side of the car, but since here in the UK we have it on the right, for one of my cards, I cut it off and popped it on the right instead! It was easy to do and makes sense if I sent the card to someone in the UK (I know there are other countries that have it on the right too!). 


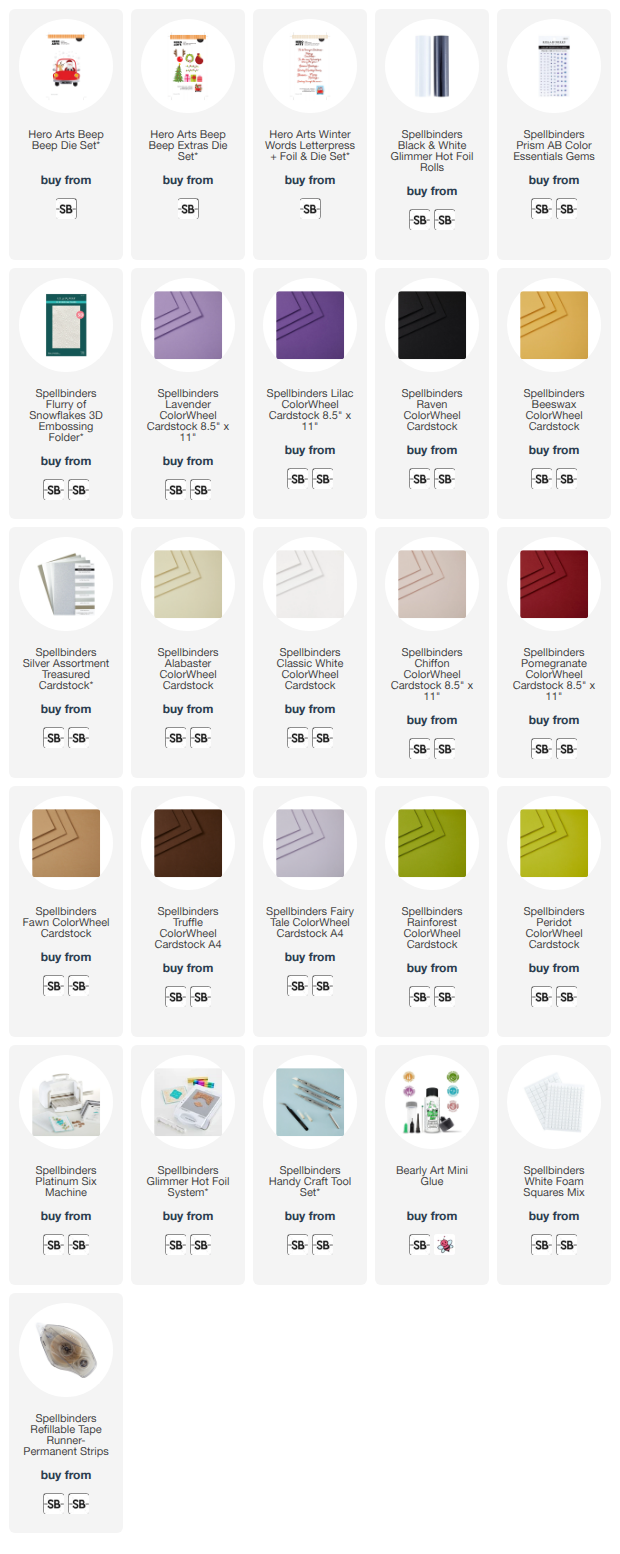
For my first card, I started off by die cutting the car from the Hero Arts Beep Beep Die Set from Spellbinders ColorWheel Cardstock in Lavender, Lilac, Raven, and Beeswax, as well as Spellbinders Treasured Brushed Silver. I assembled the pieces and adhered them using Bearly Art Glue. I die cut Santa from the set from Spellbinders ColorWheel Cardstock in Alabaster, Chiffon, Classic White, Pomegranate, and Raven. The pieces were assembled and adhered using Bearly Art Glue. 


For the reindeer, I die cut him from Spellbinders ColorWheel Cardstock in Fawn, Truffle and Pomegranate. Again, the pieces were assembled and adhered together with liquid glue. I adhered Santa and the reindeer to the back of the car using a combination of liquid glue and a little tape to secure in place. I then adhered Santa's gloves to the steering wheel. 


For the background, I took a panel of white cardstock and partially placed it inside the Spellbinders Flurry of Snowflakes 3D Embossing Folder before running it through my die cutting machine. The panel was adhered to a US A2 sized white card base using tape runner adhesive. I adhered the car, Santa and reindeer on top, adding foam squares to just the back of the car and liquid glue to the back of Santa and the reindeer. 


I die cut the wreath from the Hero Arts Beep Beep Holiday Extras Die Set from Spellbinders Rainforest & Peridot ColorWheel Cardstock for the wreath itself, and Lilac for the bow. It was assembled and adhered to the the car using liquid glue. I hot foiled a sentiment from the Hero Arts Winter Words Letterpress + Foil & Die Set onto white cardstock using Opaque Black Foil. It was die cut out and adhered to the card. To finish, I added a Spellbinders Prism AB Color Essentials Gem to the bow on the wreath. 


For my second card, I die cut the car from the Hero Arts Beep Beep Die Set from the same colours of cardstock as the first. This time, I cut off the steering wheel base using scissors and then adhered the die cut one on the left. It did mean that it was a little lower down as intended but I still thought it looked ok! Santa was die cut and assembled in the same way also and adhered behind the car. His gloves were adhered to the steering wheel. 


I die cut the wreath again from the Hero Arts Beep Beep Holiday Extras Die Set but this time, adhered it hanging from the wing mirror. I die cut the tree from the set from Spellbinders Rainforest ColorWheel Cardstock, and the presents from Spellbinders Lilac and Fairy Tale Cardstock. They were adhered together and then adhered behind the car. 


I embossed a panel of white cardstock using the Spellbinders Flurry of Snowflakes 3D Embossing Folder in the same way as the first card and adhered it to a US A2 sized white card base. The car was adhered on top. I used foam squares behind the car and liquid glue behind the presents, tree and Santa. 


I hot foiled a sentiment from the Hero Arts Winter Words Letterpress + Foil & Die Set onto white cardstock using Opaque Black Foil and die cut it out. I also cut the die again from white cardstock and adhered it behind the foiled one for dimension before adhering to the card. To finish, I added Spellbinders Prism AB Color Essentials Gems to the bows on the wreath and presents. 

SUPPLIES:


Here are the links to what I have used on the project. Affiliate links are used on some products. This means that if you make a purchase after clicking on my link, I receive a small commission with no extra cost to you. I truly appreciate your support when using these links. Please click on the logo below the product to shop at your favourite store. All products were personally purchased except marked with an asterisk (*) which were kindly sent to me to use. You can read my full disclosure here.


I had a lot of fun making these cards, I love that you can mix and match the different accessories! In the Christmas set, there are also antlers and a nose that can be added to the car, as well as twinkly lights, ornaments for the tree, and a Santa sack! Thank you so much for stopping by today, I really do appreciate it. I hope you have a wonderful day! Take care!
End of code