31 March 2016

VIDEO | Card Making Haul - March 2016

Hello there, today I have a haul to share with you. Along with my previous Simon Says Stamp haul, I did purchase a few additional items in March.
 
 
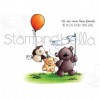
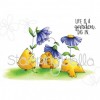
I mainly bought stamps and dies this month. I am loving Stamping Bella stamps again, they are so nice to colour. I also treated myself to the Mini MISTI. Here is a look at what I got:


SUPPLIES:

Here are the links to the products that I shared in the video. Please click on the picture or wording to be taken to where I purchased it. Affiliate links are used on some products. This means that if you make a purchase after clicking on my link, I receive a small commission with no extra cost to you. I truly appreciate your support when using these links.

Thank you so much for visiting me today. I hope you have a great day!

28 March 2016

VIDEO | Popped Up Die Cut Inlay

Hello there, today I have the pleasure of Guest Designing for The Greeting Farm. I am using the super cute Mini Fleurs stamp set, as well as the Hello & Smile die cutting set.


For my card, I started off with a piece of white cardstock which was cut using a SSS Stitched Square die. I then took the centre of the flower from the Mini Fleur set and stamped this on tot the panel using MFT Orange Fizz ink. The flower image was then stamped using MFT Razzle Berry ink. I also created a mask of this stamp and placed it over the image. The leaves were then stamped on top using MFT Sour Apple ink. The mask was then removed.

 
I then took the Hello die and placed this over the top of the panel in the middle of the flower. I ran this through my Cuttlebug and made sure to keep all of the little pieces from the letters safe to inlay afterwards. I die cut three of the hello die using white cardstock and stacked them together using Multi Medium Matte. These were inlaid in to the panel, as well as all of the little pieces from the letters. I then added the final layer of the hello (the one die cut from the panel) on top which then finished the pattern.

 
To finish off the card, I added the panel on to a 4"x4" Razzle Berry card base using foam sheet. I also added a coating of Spectrum Noir Clear Sparkle Pen on top of the hello die cut.


VIDEO:


SUPPLIES:

Here are the links to what I have used on the card and in the video. Please click on the picture or wording to be taken to where I purchased it. Affiliate links are used on some products. This means that if you make a purchase after clicking on my link, I receive a small commission with no extra cost to you. I truly appreciate your support when using these links.


For more inspiration using The Greeting Farm products please take a look at their blog and You Tube channel. I will be back later in the month with another Guest Design post. Thank you so much for visiting me today. I hope you have a lovely day!

27 March 2016

Easter Bunny Chick

Hello there and happy Easter Sunday to you! Today I have a card to share that I made for my brother, SIL, niece and nephews for Easter. I used another Stamping Bella image for this card, this time the Easter Bunny Chick.
 

I started off with a panel of white cardstock that had been cut using a SSS Stitched Rectangle die. I then stamped the image on top using Memento Tuxedo Black. The sentiment, from the same set, was stamped to the side. The image was coloured using Copic Markers.
 
 
I took an A2 sized white card base and added a piece of MFT Lucky Prints patterned paper on to the front. The stamped image was then added on top with foam tape. To finish off, I added white dots to the top egg with a Gelly Roll pen, I also added Spectrum Noir Sparkle Pen to all of the middle egg. I also added Glossy Accents to the chick's beak and feet.
 
SUPPLIES:
Here are the links to what I have used on the card. Please click on the picture or wording to be taken to where I purchased it. Affiliate links are used on some products. This means that if you make a purchase after clicking on my link, I receive a small commission with no extra cost to you. I truly appreciate your support when using these links.


COPIC MARKERS - Chick: Y19, Y17, Y15, Y13, YR09, YR07, YR04. Bunny Ears: C3, C00, BV00, R83, R81. Top Egg: B04, B02, B00. Middle Egg: BV13, BV11, BV00. Bottom Egg: R85, R83, R81 plus colours from the other eggs. Ground: W5, W3, W1. Sky/Background: B00, B000, B0000.
 
I am loving these cute Stamping Bella images. Thank you so much for visiting me today, wishing you all a lovely day!

26 March 2016

Liam Bunny Plushie

Hello there, today I have another felt plushie to share with you. This time using the Plush Liam Bunny die from Memory Box.
 
 
I started off by die cutting all the elements twice using felt. I stitched the feet, the ears and the carrot first and then stitched the main bunny's body. I added soft toy filling in all the parts. I used my hot glue gun to add the pads on the bunny's feet.
 
 
I then stuck the carrot to the bunny's hands. I added black Doodlebug Sprinkles for the eyes and then cut a little piece of pink felt for the nose and added this with more hot glue. To finish off, I added a white pom pom to the back for his tail.
 
SUPPLIES:
Here are the links to what I have used on the card. Please click on the picture or wording to be taken to where I purchased it. Affiliate links are used on some products. This means that if you make a purchase after clicking on my link, I receive a small commission with no extra cost to you. I truly appreciate your support when using these links.


I think he is absolutely adorable and was so fun to make! Thank you so much for visiting me today. I hope you have a lovely Easter weekend.
End of code