Showing posts with label Concord & 9th. Show all posts

14 September 2025

Concord & 9th | Accordion Tree Farm

Hello there, I am both delighted and honoured to be guest designing with Concord & 9th this month for their amazing holiday/Christmas release! I have loads to share with you but first up is the Accordion Tree Farm Bundle. This set is made to be used with the Accordion Card Base Dies but you can use it on it's own too! 

PLEASE NOTE: This post contains affiliate links. Please see below for my full disclosure.


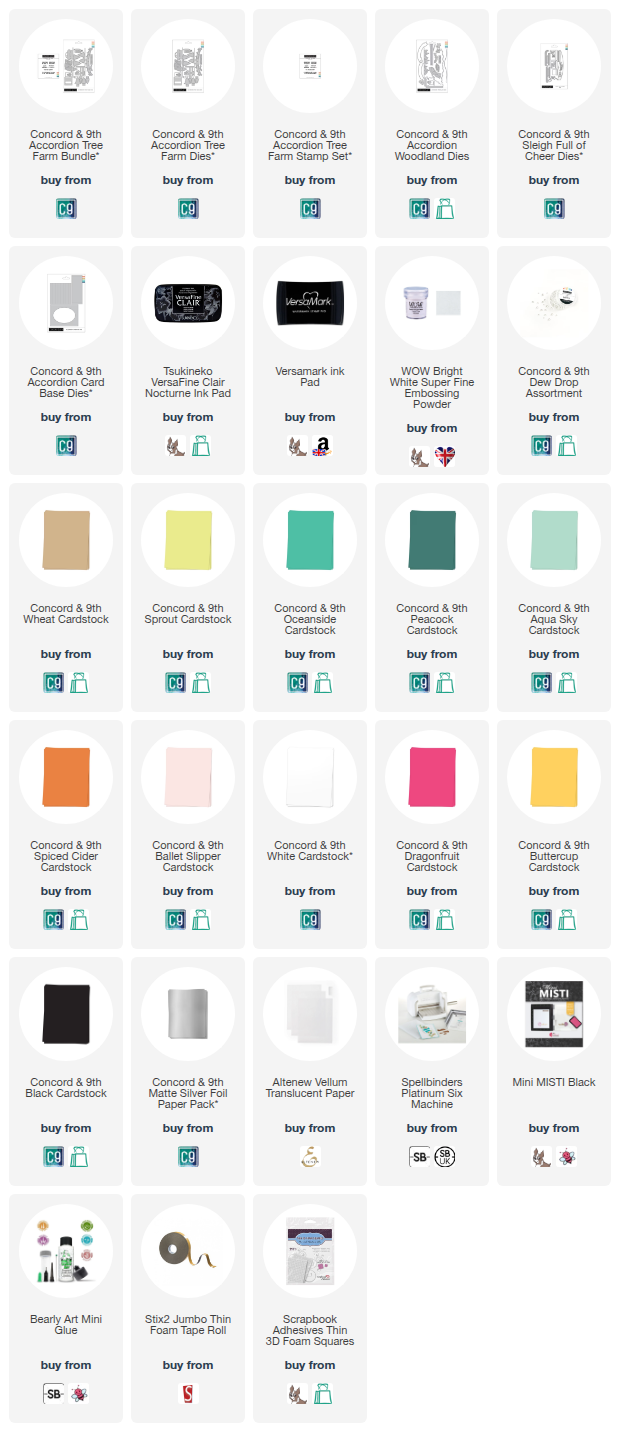
For my first card, I die cut the base layer of the trees in the Concord & 9th Accordion Tree Farm Die Set from Concord & 9th Wheat Cardstock. I then cut the top layers from Concord & 9th Sprout, Oceanside and Peacock Cardstock. I adhered the tops onto the bases with liquid glue. 


I took the adorable little fox from the Concord & 9th Accordion Woodland Dies and die cut him from Concord & 9th Spiced Cider, White and Ballet Slipper Cardstock. He was assembled and adhered using liquid glue. I then die cut the slope/landscape from the Concord & 9th Sleigh Full of Cheer Dies from white cardstock. 


I die cut a panel of white cardstock and stamped the sentiment from the Concord & 9th Accordion Tree Farm Stamp Set on top using Versafine Clair Nocturne Ink. I then adhered the trees below using liquid glue, as well as thin foam squares. 


The snowbank was adhered on top, followed by the fox. I adhered a panel of Concord & 9th Aqua Sky Cardstock to a white A2 sized card base and then adhered the tree panel on top using thin foam tape. 


For my second card, I die cut the base layer of the trees, as well as the layer with the tree farm stand on, from Concord & 9th Wheat Cardstock. The top layer of trees were cut from Concord & 9th Sprout, Oceanside and Peacock Cardstock. I adhered the trees down first to an A2 sized white card base, followed by the tree farm stand on top. I cut the wreath from Concord & 9th Sprout Cardstock and the bow from Concord & 9th Dragonfruit Cardstock. The wreath was adhered to the stand. 


I took a panel of white cardstock and die cut it using the front oval panel die from the Concord & 9th Accordion Card Base Dies. I cut the string of lights from Concord & 9th White Cardstock and the lights themselves from Concord & 9th Aqua Sky Cardstock. They were adhered together and then adhered so that either side is adhered to the back of the oval panel. 


I added foam tape onto the back of the oval panel and then adhered it on to the card. I cut the car from the Concord & 9th Accordion Tree Farm Die Set from Concord & 9th Ballet Slipper, Buttercup, Black, White and Matte Silver Cardstock. The pieces were adhered together and then I added vellum on the back for the windows. I cut the tree for the top from Concord & 9th Sprout Cardstock and the stump and ties from Concord & 9th Wheat Cardstock


It was adhered on top of the car and then the car adhered to the card with liquid glue. I stamped the sentiment from the Concord & 9th Accordion Tree Farm Stamp Set onto Concord & 9th Black Cardstock using Versamark Ink. I applied white embossing powder and heat set. It was cut into a strip and adhered to the card with foam tape. To finish, I embellished with Concord & 9th Dew Drops

SUPPLIES:


Here are the links to what I have used on the projects. Affiliate links are used on some products. This means that if you make a purchase after clicking on my link, I receive a small commission with no extra cost to you. I truly appreciate your support when using these links. Please click on the logo below the product to shop at your favourite store. All products were personally purchased except marked with an asterisk (*) which were kindly sent to me to use. You can read my full disclosure here.


I absolutely love the cut line detail on those tree dies! They make perfect Christmas trees but trees for all year round too, I think! Thank you so much for visiting me today, I really do appreciate it. I hope you have a wonderful day! 

24 December 2024

Happy Christmas Poinsettia

Hello there, I still have two Christmas cards to share with you, so I hope you are not too bored of them yet! This one uses the Concord & 9th Festive Blooms Dies again. If you didn't see my previous cards using the set, you can see them HERE. I wanted to use the set again, but this time, without the base plate. 

PLEASE NOTE: This post contains affiliate links. Please see below for my full disclosure.


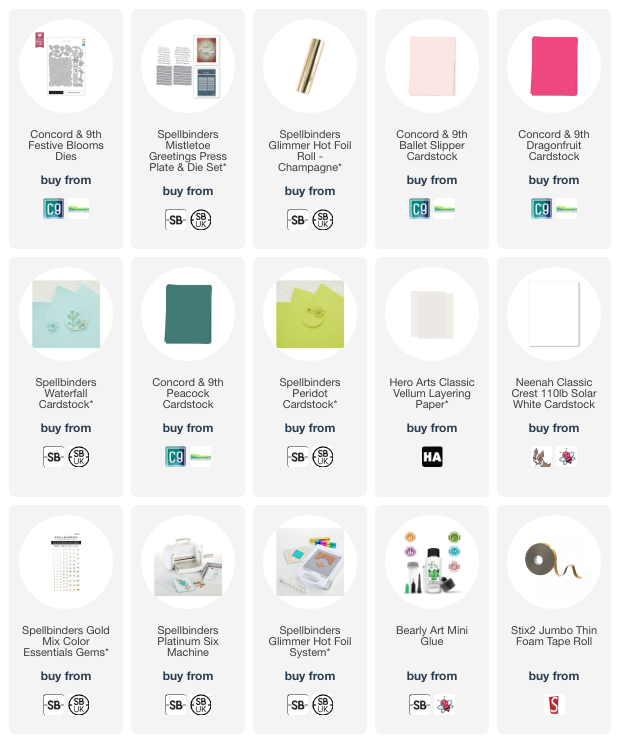
I started off by die cutting the flowers and foliage from the Concord & 9th Festive Blooms Die Set from cardstock. I cut the poinsettia from Concord & 9th Ballet Slipper Cardstock, the other flower from white cardstock, as well as Spellbinders Chamomile Cardstock (retired) for the flower centre.


I adhered the foliage first onto a US A2 sized white card base using liquid glue, the flower pieces were adhered together first and then adhered onto the card base using thin foam tape. 


I hot foiled the sentiment from the Spellbinders Mistletoe Greetings Press Plate & Die Set onto white cardstock using Spellbinders Champagne Foil and the Spellbinders Glimmer Hot Foil System. It was die cut out using the coordinating die and adhered to the card using more foam tape. To finish, I embellished with Spellbinders Gold Color Essentials Gems

SUPPLIES:


Here are the links to what I have used on the project. Affiliate links are used on some products. This means that if you make a purchase after clicking on my link, I receive a small commission with no extra cost to you. I truly appreciate your support when using these links. Please click on the logo below the product to shop at your favourite store. All products were personally purchased except those from Clearly Besotted, Hero Arts or those marked with an asterisk (*) which were kindly sent to me to use. You can read my full disclosure here.


Whilst not traditional, I really love the colour combo on this card! Apart from maybe the poinsettia, I do think you could use this set all year round. Thank you so much for stopping by today, I really do appreciate it. I hope you have a great day. I am off to wrap up some presents! 

17 December 2024

Festive Blooms

Hello there, today I have a card to share using the Concord & 9th Festive Blooms die. I was so eager to get my hands on this die back when it was released, even stalking the Seven Hills Crafts website daily, but then once I got it, it just sat in my Rashult for months not being used! Is buying craft supplies and actually using them two completely different things? Haha! Thankfully, last weekend, I finally got a chance to play!

PLEASE NOTE: This post contains affiliate links. Please see below for my full disclosure.


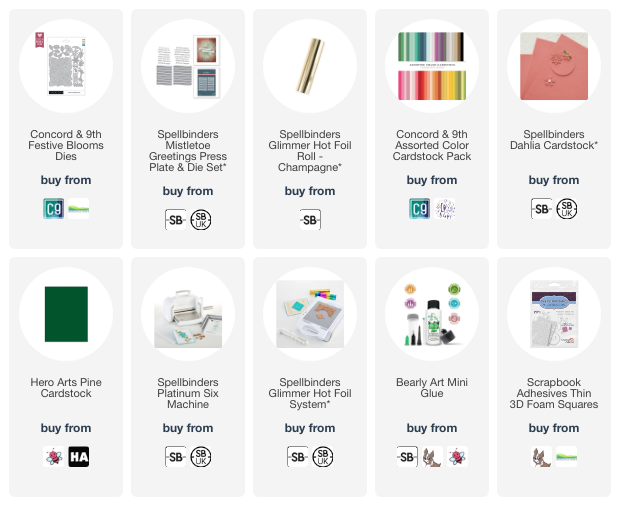
I started off by die cutting all of the flowers and foliage from the Concord & 9th Festive Blooms Die Set from various shades of Concord & 9th Cardstock, as well as the lighter shade on the poinsettias being Spellbinders Dahlia Cardstock and the flower centres being Spellbinders Chamomile Cardstock (sadly now discontinued). 

I assembled the flowers using Bearly Art Glue and set them aside while I worked on the card base. I folded a panel of Hero Arts Pine Cardstock in half and then placed the large base layer die on top, overlapping the die slightly with the folded edge of the card base to keep it intact. It was then run through my die cutting machine. 

To hide the folded edge, I die cut another of the base layer die from the same Pine Cardstock and adhered it on top. I then adhered the foliage first, followed by the berries and then the flowers. I adhered almost everything with Bearly Art Glue. The poinsettias were adhered with thin foam squares. 

I hot foiled the Spellbinders Mistletoe Greetings Press Plate onto white cardstock using Spellbinders Champagne Foil and the Spellbinders Glimmer Hot Foil System. It was cut out using the coordinating die and adhered to the card with more thin foam tape. 

SUPPLIES:


Here are the links to what I have used on the project. Affiliate links are used on some products. This means that if you make a purchase after clicking on my link, I receive a small commission with no extra cost to you. I truly appreciate your support when using these links. Please click on the logo below the product to shop at your favourite store. All products were personally purchased except those from Clearly Besotted, Hero Arts or those marked with an asterisk (*) which were kindly sent to me to use. You can read my full disclosure here.


I really wanted to add gems to the centres of the poinsettias but I needed to mail/post these cards out and so wanted to keep them as flat as possible! Thank you so much for stopping by today, I really do appreciate it. I hope you have a wonderful day! 

5 November 2024

Primrose Garden Birthday Wishes

Hello there, today I have a card to share with you that I made my mum for her birthday. She really loves flowers, so I thought that I would use the Concord & 9th Primrose Garden Die Set for her card. 

PLEASE NOTE: This post contains affiliate links. Please see below for my full disclosure.


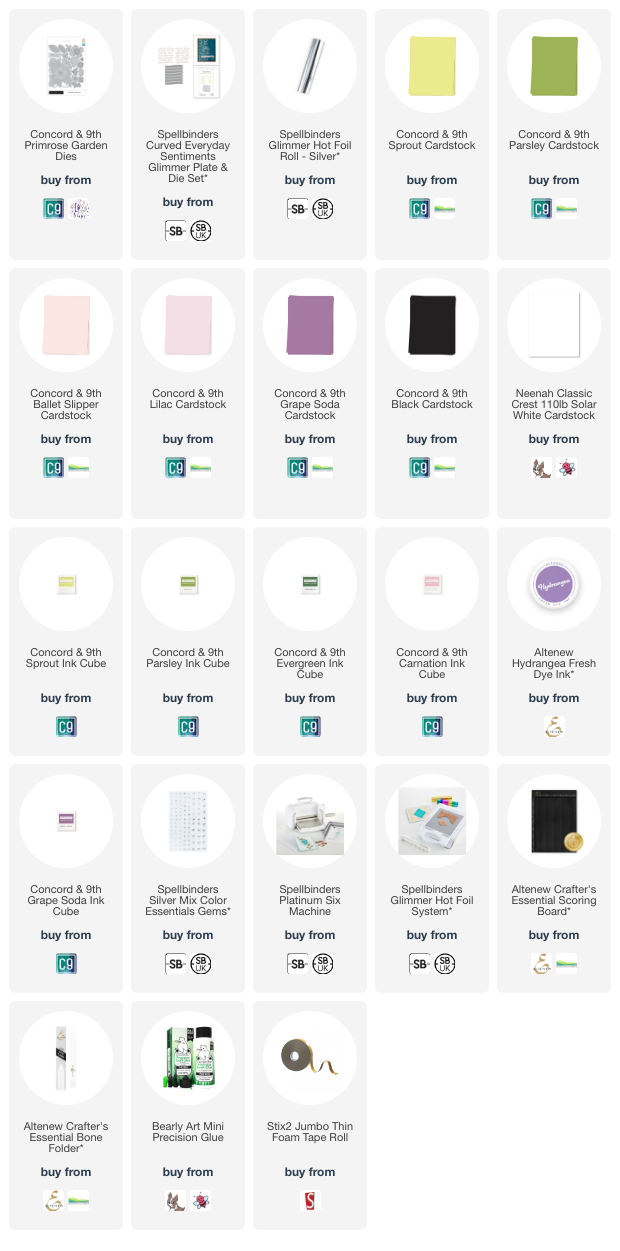
I started off by die cutting the base layer from the Concord & 9th Primrose Garden Die Set twice from Concord & 9th Black Cardstock. I made a score line at the top of one piece and adhered it to the back of the other piece at the top to create a hinge. This created my card base. 

I die cut the flowers in the set from Concord & 9th Lilac, Grape Soda and Ballet Slipper Cardstock. I cut the berries and flower centres from white cardstock and the foliage from Concord & 9th Sprout and Parsley Cardstock. I added ink blending to the pieces using Concord & 9th Grape Soda Ink for the dark purple flowers and Altenew Hydrangea Fresh Dye Ink for the light purple flowers. 

I used Concord & 9th Carnation Ink for the pink flowers and Concord & 9th Sprout, Parsley and Evergreen inks for the foliage/leaves. I adhered the layers to the base using a combination of Bearly Art Glue and thin foam tape. 

I hot foiled the sentiment from the Spellbinders Curved Everyday Sentiments Glimmer Hot Foil Plate & Die Set onto Concord & 9th Grape Soda Cardstock with Spellbinders Silver Foil and the Glimmer Hot Foil System. It was cut into a strip and adhered to the card with foam tape. To finish, I embellished with Spellbinders Silver Color Essentials Gems

SUPPLIES:


Here are the links to what I have used on the project. Affiliate links are used on some products. This means that if you make a purchase after clicking on my link, I receive a small commission with no extra cost to you. I truly appreciate your support when using these links. Please click on the logo below the product to shop at your favourite store. All products were personally purchased except those from Clearly Besotted, Hero Arts or those marked with an asterisk (*) which were kindly sent to me to use. You can read my full disclosure here.


I am happy to report that my mum really liked the card! The base probably should be cut from green cardstock for the illusion of more foliage but I went with black for something different! Thank you so much for stopping by today, I really do appreciate it. I hope you have a great day! 

3 April 2024

Simon Says Stamp | Groovy Blooms

Hello there, apologies once again for my lack of blog posts lately. I had a procedure to try and help with my migraines and unfortunately (although as to be expected), it made them worse for some time. I am finally back in my craft room today and wanted to share a card that I made before the procedure using the latest Simon Says Stamp Be Bold release. They kindly sent me the Groovy Blooms Layering Stencils to play with and they are a lot of fun! 

PLEASE NOTE: This post contains affiliate links. Please see below for my full disclosure.


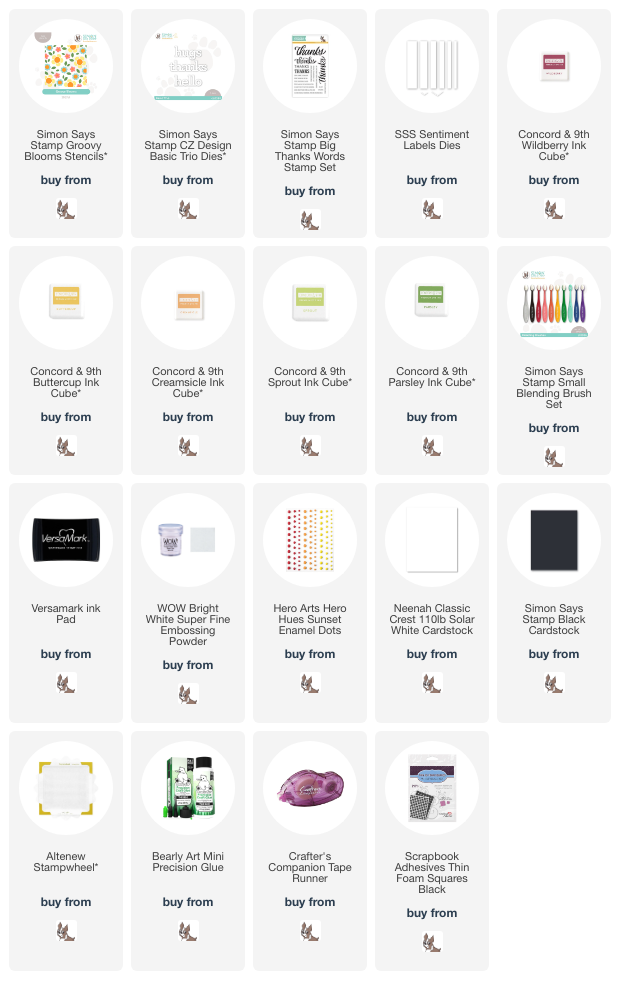
I started off my card by taking a panel of white cardstock and placed it in the corner of the Altenew Stampwheel. I then placed the first Simon Says Stamp Groovy Blooms Layering Stencils on top. These stencils are really easy to line up and I think you can use them in any order. 


I then added ink blending on top using Ink Blending Brushes. For the flowers I used Concord & 9th Wildberry Ink, the flower centres use Concord & 9th Buttercup and Creamsicle Inks. For the leaves, I used Sprout & Parsley Inks. It was then cut into panel and adhered to a US A2 (4.25" x 5.5") sized white card base. 


I die cut the 'thanks' sentiment from the Simon Says Stamp CZ Design Basic Trip Dies three times from black cardstock. They were adhered one on top of another and then onto the card using Bearly Art Glue. I stamped a sentiment from the Simon Says Stamp Big Thanks Words Stamp Set onto black cardstock using Versamark Ink. I applied white embossing powder and heat set. It was cut into a strip and adhered to the card with foam tape. To finish off, I added a few Hero Arts Sunset Enamel Dots

SUPPLIES:


Here are the links to what I have used on the project. Affiliate links are used on some products. This means that if you make a purchase after clicking on my link, I receive a small commission with no extra cost to you. I truly appreciate your support when using these links. Please click on the logo below the product to shop at your favourite store. All products were personally purchased except those from Clearly Besotted, Hero Arts or those marked with an asterisk (*) which were kindly sent to me to use. You can read my full disclosure here.


There are so many colour combinations that can be used with these stencils. I kept the flowers all the same colour, but they can be different colours, you would just have to do a bit of masking. Thank you so much for stopping by today, I really appreciate it. I hope you have a wonderful day! 

9 March 2024

Concord & 9th | Contempo Alpha

Hello there, today I have a card to share using a few products from the Concord & 9th February 2024 release. I have to admit, I made this card a while ago for my uncle and (not so) cleverly didn't write down the colours of inks that I used! I am pretty certain that I got it right, but if it is wrong, I apologise! 

PLEASE NOTE: This post contains affiliate links. Please see below for my full disclosure.


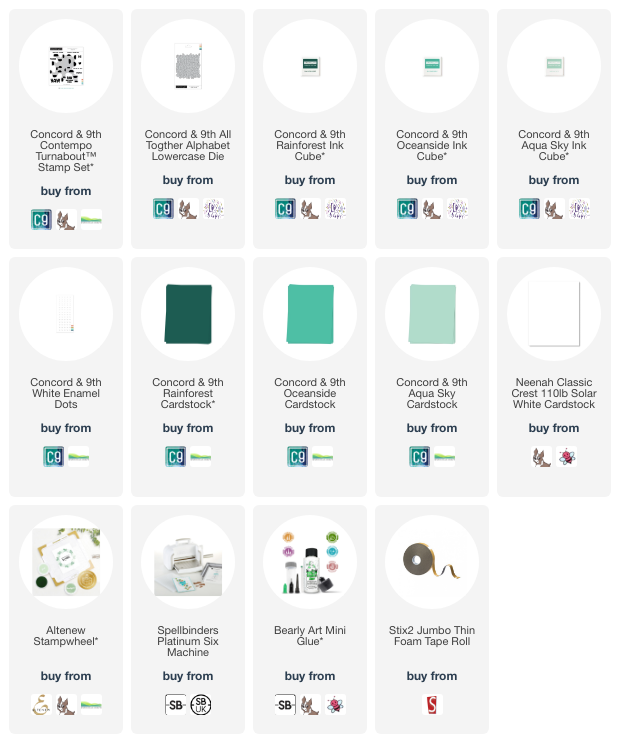
I started off by stamping the Concord & 9th Contempo Turnabout Stamp onto white cardstock. I used the Altenew Stampwheel for this, which made the turning of the stamp very easy to do. However, I realised on my second turn that my cardstock was not cut perfectly straight so a few of the stamped images overlap, when they shouldn't be. I still thought it looked good though, so I continued with it! 


I used Concord & 9th Inks in Rainforest, Oceanside and Aqua Sky (this is the colour that I am not 100% certain on!). I only completed three turns of the stamp as I liked the white space. I took a US A2 sized white card base and added a sheet of Concord & 9th Oceanside Cardstock on top. I then cut the background piece down and adhered it on top using thin foam tape. 


I die cut the Concord & 9th All Together Alphabet Lowercase Die set so that I had two layers each of white cardstock for all the letters and then die cut it again using Concord & 9th Rainforest, Oceanside and Aqua Sky Cardstock. I stacked up the white cardstock layers first and adhered them to the card. I then adhered the colourful ones on top randomly. To finish the card, I added a few Concord & 9th White Enamel Dots

SUPPLIES:


Here are the links to what I have used on the project. Affiliate links are used on some products. This means that if you make a purchase after clicking on my link, I receive a small commission with no extra cost to you. I truly appreciate your support when using these links. Please click on the logo below the product to shop at your favourite store. All products were personally purchased except those from Clearly Besotted, Hero Arts or those marked with an asterisk (*) which were kindly sent to me to use. You can read my full disclosure here.


Concord & 9th are my go-to company for creating cards for the men in my family! I love the modern feel of this background and although the card is a little busier than I would normally make, I think the alphabet set works well with the background! I am looking forward to using the Turnabout again but maybe in neutral tones for a subtle background! Thank you so much for stopping by today, I really appreciate it. I hope you have a wonderful day! 

16 February 2024

Concord & 9th | You're The Best

Hello there, today I have a card to share using some more new goodies from Concord & 9th. I love the new 2024 colours and I am using three on my card today. I would have never picked this colour combo myself, so it has been great receiving these colours as it has pushed me a little out of my comfort zone! 

PLEASE NOTE: This post contains affiliate links. Please see below for my full disclosure.


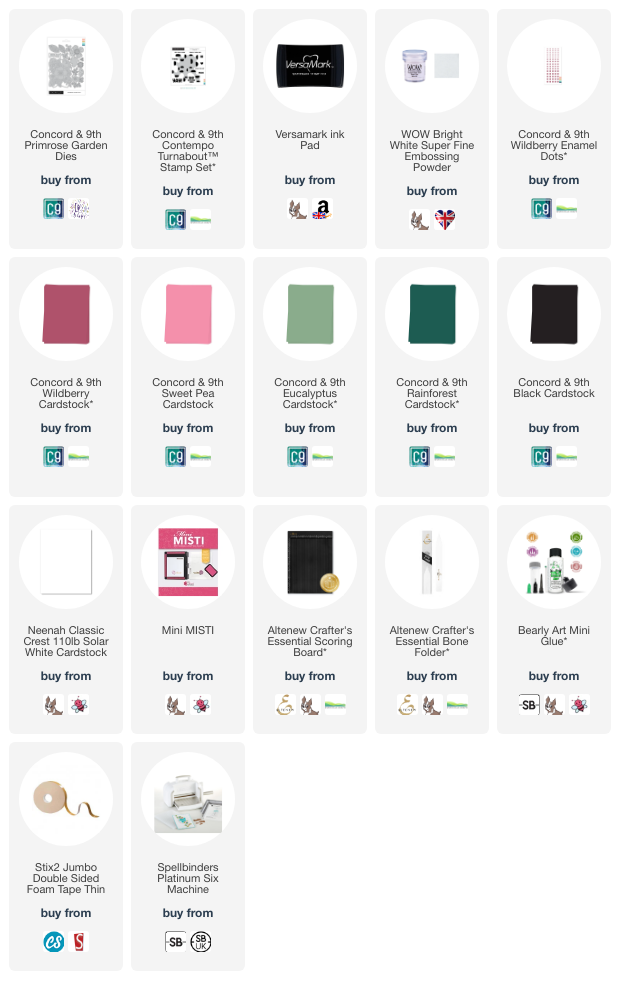
I started off my card by die cutting the flowers and leaves from the Concord & 9th Primrose Garden Die Set. I cut the big flower, as well as the back of the closed flower from Concord & 9th Wildberry Cardstock. The front of the flower, as well as the smaller flower were cut from Concord & 9th Sweet Pea Cardstock. The flower centres, as well as the small flowers were cut from white cardstock. 


I cut the larger leaves from Concord & 9th Rainforest Cardstock and the smaller leaves from Concord & 9th Eucalyptus Cardstock. The flowers were assembled and adhered using Bearly Art Glue. I took a white US A2 sized white card base and added horizontal scoring lines on it. Sadly, they are pretty impossible to see in the photos, but in real life, they add a nice finishing touch to the card!


I adhered the leaves onto the card first, using liquid glue and then added the flowers with thin foam tape. I took the sentiment from the Concord & 9th Contempo Turnabout Stamp Set and stamped it onto black cardstock using Versamark Ink


I applied white embossing powder and heat set. It was cut into a strip and adhered to the card using foam tape. To finish off, I added a few Concord & 9th Wildberry Enamel Dots to the centres of the flowers. 

SUPPLIES:


Here are the links to what I have used on the project. Affiliate links are used on some products. This means that if you make a purchase after clicking on my link, I receive a small commission with no extra cost to you. I truly appreciate your support when using these links. Please click on the logo below the product to shop at your favourite store. All products were personally purchased except those from Clearly Besotted, Hero Arts or those marked with an asterisk (*) which were kindly sent to me to use. You can read my full disclosure here.


The colours do look brighter in the photos than in real life. They are more muted in person. Thank you so much for popping by today, I really do appreciate it. I hope you have a wonderful day and a great weekend too! 

9 February 2024

Concord & 9th | You Are Amazing + New 2024 Color Collection

Hello there and happy Friday to you! The other day I received the most beautiful box of goodies from Concord & 9th. I am not a fan of surprises in general, but this was the most beautiful and happy surprise ever! 

They kindly sent me the new 2024 Color Collection, as well as some of the new stamps and dies from the February 2024 release. I have a card to share using some of them today, as well as a look at the new colours. 

PLEASE NOTE: This post contains affiliate links. Please see below for my full disclosure.


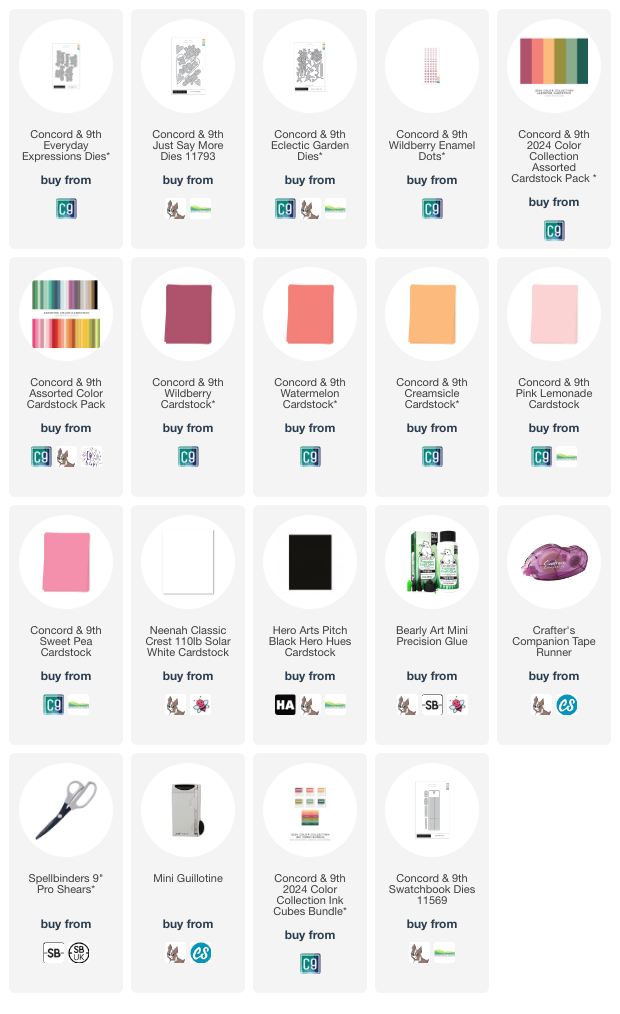
For my card, I started off by creating a heart shaped card base using the large heart die in the Concord & 9th Just Say More Die Set. I cut it twice from white cardstock, scored a line at the top on one to create a hinge and adhered it to the back of the other heart. I did cut a little notch off of the bottom so that it stands up okay. 


I then took five colours of cardstock and cut them into strips, varying the widths. I used Wildberry, Watermelon and Creamsicle from the new collection, and Pink Lemonade and Sweet Pea from the older Core Collection. They were adhered to the heart using liquid glue and the excess cut off the sides using scissors. I then die cut the flowers & stems from the Concord & 9th Eclectic Garden Set twice from white cardstock. 


I cut the flowers down and then adhered the two layers, one on top of another for some dimension, onto the card. I die cut the sentiment from the new Concord & 9th Everyday Expressions Die Set from white cardstock for the shadow and black for the word itself (both cut twice) and adhered them together, before adhering to the card. To finish off, I added some of the new Concord & 9th Wildberry Enamel Dots to the centres of the flowers. 

2024 COLOR COLLECTION

Here is a look at the new 2024 Color Collection. There is (top to bottom on the swatches) Wildberry, Watermelon, Creamsicle, Grasshopper, Eucalyptus and Rainforest. 


I swatched the cardstock on the left (with the new patterned cardstock in the same colours peeking from the left) and blended the inks on the right. I think they look great as a whole colour combo but also work beautifully with the core collection too. 

SUPPLIES:


Here are the links to what I have used on the project. Affiliate links are used on some products. This means that if you make a purchase after clicking on my link, I receive a small commission with no extra cost to you. I truly appreciate your support when using these links. Please click on the logo below the product to shop at your favourite store. All products were personally purchased except those from Clearly Besotted, Hero Arts or those marked with an asterisk (*) which were kindly sent to me to use. You can read my full disclosure here.


Thank you so much for stopping by today, I really appreciate it. I hope you have a wonderful rest of the day and a great weekend! 

17 May 2023

Birthday Stripes

Hello there, I don't know about you, but I tend to struggle a bit with masculine cards. I think it is ok of they are into a certain hobby but if you just want a generic one, I do find it a little more difficult. I find with masculine cards, simple is best and these are very simple indeed!

PLEASE NOTE: This post contains affiliate links. Please see below for my full disclosure.


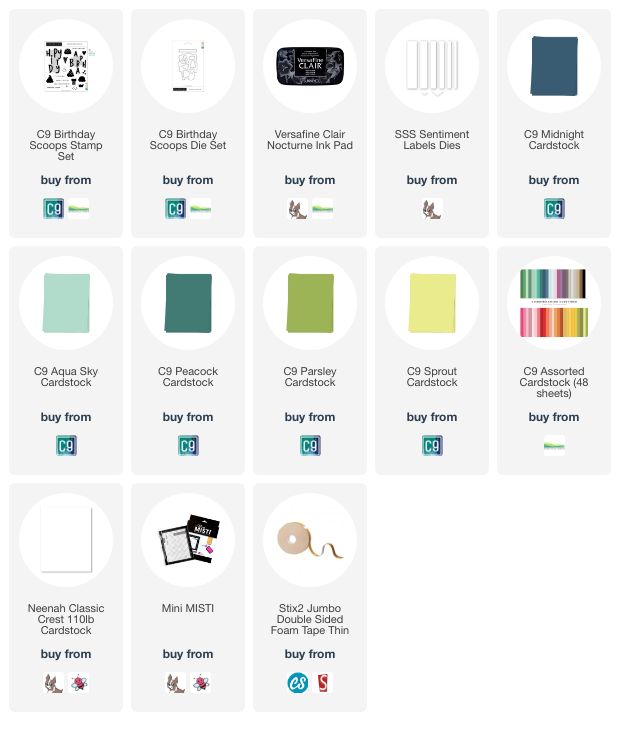
I started off by stamping the happy birthday sentiment from the Concord & 9th Birthday Scoops Stamp Set on to white cardstock using Versafine Clair Nocturne Ink. This stamp is in two parts so that you can combine different colours for the letters but I went with all black for today. They were then die cut out using the Concord & 9th Birthday Scoops Die Set


I took five colours of Concord & 9th Cardstock in Midnight, Peacock, Aqua Sky, Sprout and Parsley and die cut the sheets using the Simon Says Stamp Sentiment Labels Die. I took panels of white cardstock and adhered the strips on top, at a diagonal. 


The panels were adhered to US A2 sized white card bases with thin foam tape and the sentiments adhered on top with more thin foam tape. I thought about adding some embellishments but actually, I liked them as is, even if they are very plain! 

SUPPLIES:


Here are the links to what I have used on the projects. Affiliate links are used on some products. This means that if you make a purchase after clicking on my link, I receive a small commission with no extra cost to you. I truly appreciate your support when using these links. Please click on the logo below the product to shop at your favourite store. All products were personally purchased except those from Clearly Besotted, Hero Arts or those marked with an asterisk (*) which were kindly sent to me to use. You can read my full disclosure here.


These cards would be a good one to mass produce as I still have lots of strips left to make more! Thank you so much for stopping by my blog today, I really do appreciate it. I hope you have a great day! 

22 March 2022

Simon Says Stamp | Flowers Bloom Hope

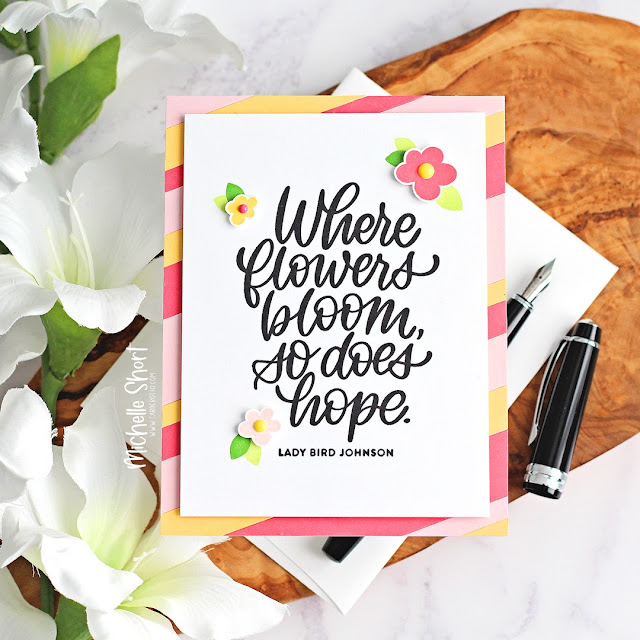
Hello there, today I have a card to share with you using the Simon Says Stamp XL Spring Greetings set that is part of the new Hello Gorgeous collection, which is out today. This is such a beautiful set with lots of big, spring themed sentiments. There are also a few flowers and leaves in the set, too. 

PLEASE NOTE: This post contains affiliate links. Please see below for my full disclosure.


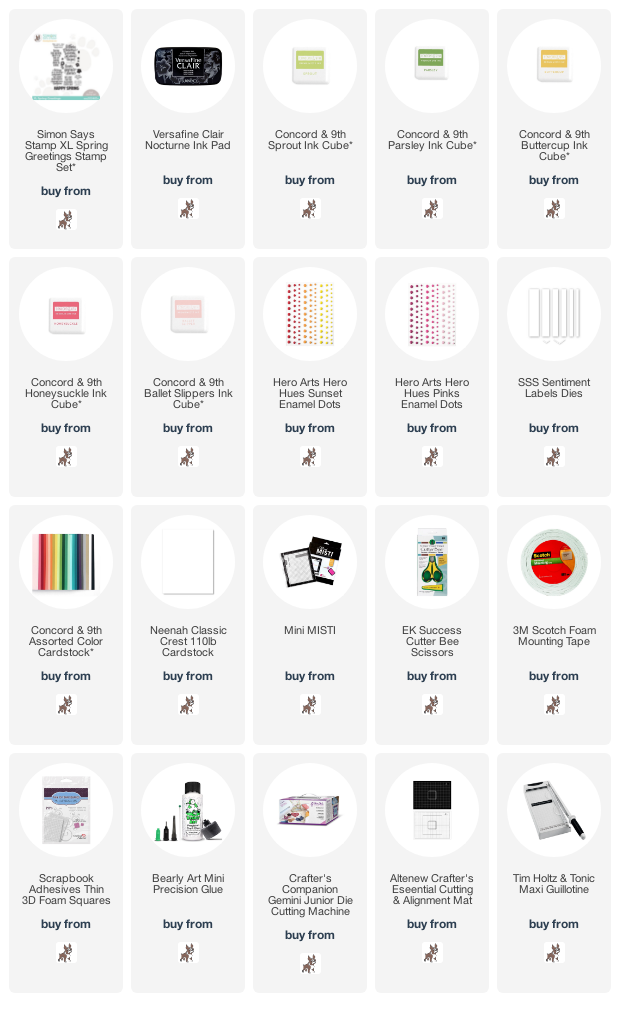
I started off my card by stamping the sentiment from the Simon Says Stamp XL Spring Greetings Stamp Set on to a panel of white cardstock using Versafine Clair Nocturne Ink. I then took the leaves from the set and stamped them on to the panel using Concord & 9th Sprout and Parsley Ink Cubes. 


On a separate piece of cardstock, I stamped three of the flowers from the set using Concord & 9th Buttercup, Honeysuckle and Ballet Slippers Ink Cubes. They were fussy cut out using scissors. I took Concord & 9th Cardstock in Buttercup, Honeysuckle and Ballet Slippers and die cut them using the Simon Says Stamp Sentiment Labels Dies


The strips of cardstock were adhered to the front of an A2 white card base with Bearly Art Glue. The sentiment panel was then added on top with foam tape. The flowers were then added on top of that with thin foam squares. To finish off, I added Hero Arts Pinks and Sunset Enamel Dots to the centres of the flowers. 

SUPPLIES:


Here are the links to what I have used on the project. Affiliate links are used on some products. This means that if you make a purchase after clicking on my link, I receive a small commission with no extra cost to you. I truly appreciate your support when using these links. Please click on the logo below the product to shop at your favourite store. All products were personally purchased except those from Clearly Besotted, Hero Arts or those marked with an asterisk (*) which were kindly sent to me to use. You can read my full disclosure here.


I hope that you will check out the new Hello Gorgeous collection, as always, its a great release. Thank you so much for stopping by today, I really do appreciate it. Wishing you a wonderful day! 
End of code