30 March 2021

VIDEO | 5 Tips For Getting Your Mojo Back + Celebrating 10K with Jessica Frost-Ballas Video Hop

Hello there, I am delighted to be joining Jessica Frost-Ballas today to celebrate her reaching 10K subscribers on YouTube. We are celebrating with a fun video hop. The fun starts over there but I still wanted to share here over on my blog too. 

Our brief for the hop was to simply use products that we love and so that's what I did for my projects! I thought I would also talk about some tips for getting your mojo back if you have lost it. To be honest, I do lose my mojo quite a lot and these are tips that have helped me in the past, so I wanted to share them with you too, in case you ever feel the same! 

5 TIPS TO BRING BACK YOUR MOJO

  1. Try a new colour combination. 
  2. Organise your supplies/create swatches.
  3. Use techniques and products that you love.
  4. Try a size different than you are used to/will be less intimated by e.g. tags, mini slimline, ATC, gift box, art journal page, bookmark. 
  5. Be inspired by others. 

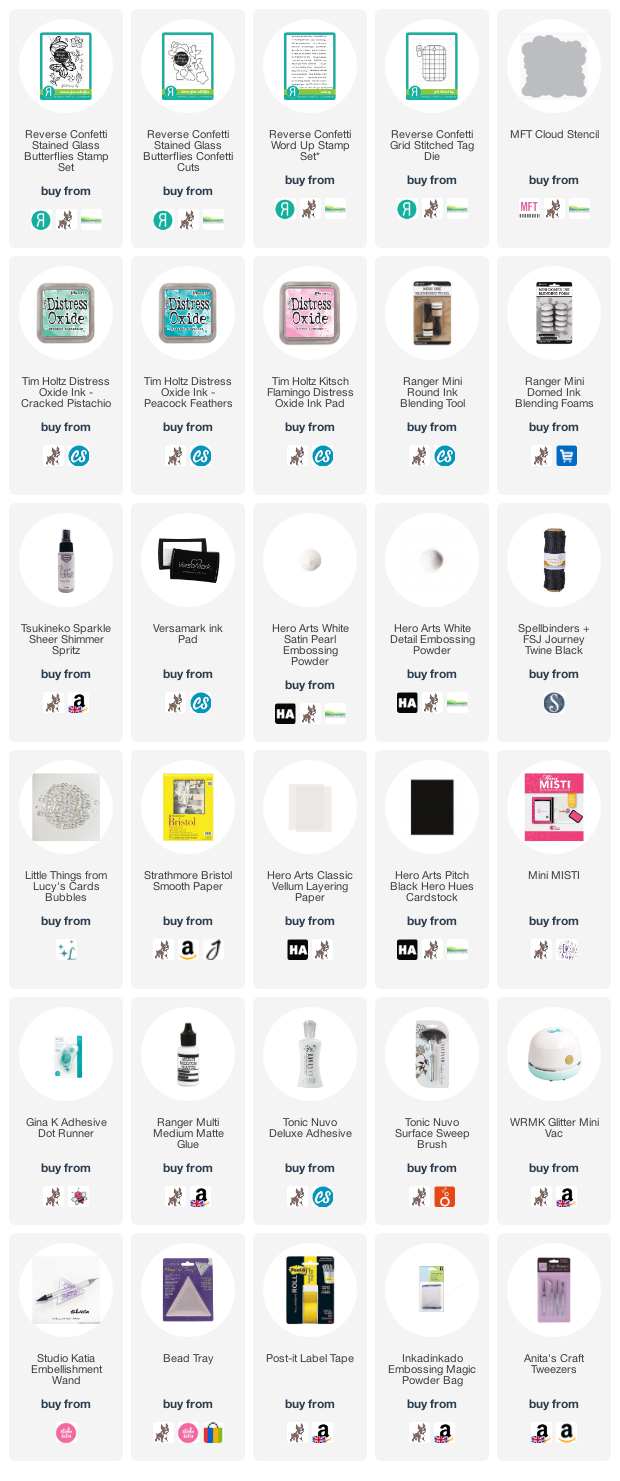
I wanted to create some tags today, since that is what I love making. I started off by die cutting the Reverse Confetti Grid Stitched Tag Die four times from Bristol Smooth Cardstock (two for each tag - front and back). I wanted to do some ink blending on the tags but I wanted to try a new colour combination (the first tip on my list) so I found a colour combination by our host Jessica of Cracked Pistachio, Peacock Feathers and Kitsch Flamingo Distress Oxide Inks. 

On one tag, I blended the colours as a solid layer and on the other, I created clouds using the MFT Cloud Stencil. I used the new mini domed ink blending foams from Ranger. It was my first time using them and I think that I will use them from now on for my Oxides. I then splattered some Tseukineko Sheer Shimmer Spritz on top of the tags and left them to dry. 

Whilst they were drying, I stamped two of the butterflies from the Reverse Confetti Stained Glass Butterflies Stamp Set on to Hero Arts Classic Vellum Layering Paper with Versaamrk Ink. I applied Hero Arts White Satin Pearl Embossing Powder and heat set. They were then die cut out using the Reverse Confetti Stained Glass Butterflies Confetti Cuts

I took the sentiment from the Reverse Confetti Word Up Stamp Set and stamped it twice on to Hero Arts Pitch Black Cardstock with Versamark Ink. I applied Hero Arts White Detail Embossing Powder, heat set and cut in to strips. I adhered the tags back to back (the clean one on the back so that it looks nice if I will give these as tags) and then added the topper to the top of the tag (cut from black cardstock) and cut the top off. 

The butterflies were adhered on top the tags with small dabs of Multi Medium Matte adhesive, making sure to keep the adhesive behind the embossing only so that it would not be visible from the front. The sentiment strips were added with foam tape. To finish off, I added twine through the top of the tags and embellished with Lucy's Bubbles

VIDEO:

Here is the video showing how I made the tags:

If you are viewing this blog post via email subscription, you can watch the video HERE on YouTube. 

SUPPLIES:

Here are the links to what I have used on the project. Affiliate links are used on some products. This means that if you make a purchase after clicking on my link, I receive a small commission with no extra cost to you. I truly appreciate your support when using these links. Please click on the logo below the product to shop at your favourite store. All products were personally purchased except those from Clearly Besotted, Hero Arts or those marked with an asterisk (*) which were kindly sent to me to use. You can read my full disclosure here.


I do love creating tags! I will probably add these to the front of card bases but it is nice to have options if I wanted to send them as tags or add to a gift. For more details on the hop itself and how to enter, please head over to Jessica's Blog. I will also have the details in the description bar on my video on YouTube. Thank you so much for stopping by today, I really do appreciate it. I hope you have a lovely rest of the day! 

29 March 2021

Spellbinders | Glimmering Peony

Hello there, today I have a card to share with you using the gorgeous new Glimmering Peony from Spellbinders Yana's Blooming Birthday Collection. This is such a gorgeous collection but I particularly fell in love with the Glimmering Peony.

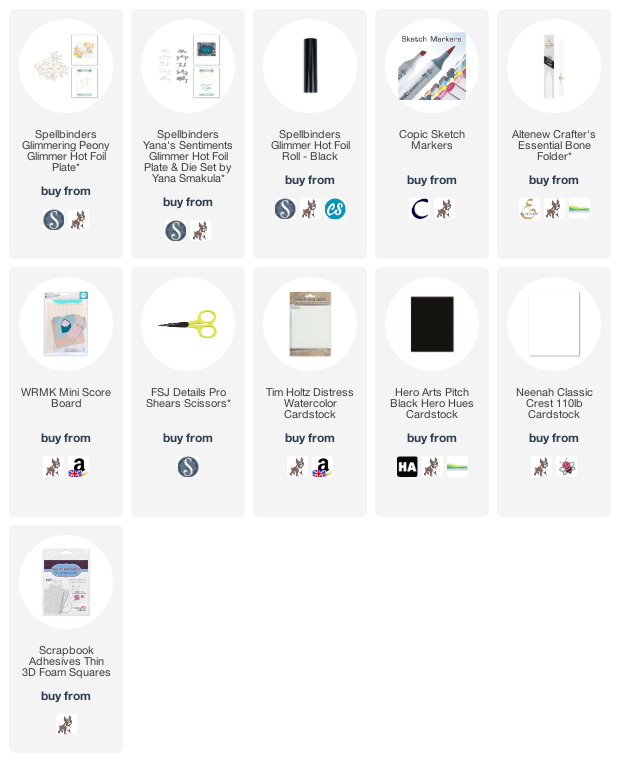
I started off by foiling the Spellbinders Glimmering Peony Glimmer Hot Foil Plate on to watercolour paper using Spellbinders Black Hot Foil. I used watercolour paper because I had planned to watercolour it but at the last minute changed my mind. So I could have used normal cardstock, but never mind! The black foil gives a slight shimmer but it doesn't give the bright foiling effect so I do like using black foil with certain images. 

The peony was coloured with Copic Markers (the colours that I used are listed below the supplies area) and fussy cut out with scissors. I then foiled the sentiment from the Spellbinders Yana's Sentiments Glimmer Hot Foil & Die Set on to white cardstock with more black foil. It was then die cut out using the coordinating die. 

I took a panel of black cardstock and debossed lines in to it using a score board and bone folder (I apologise that it is difficult to see in the photos but in real life, it gives a lovely detail to the card). The panel was then adhered flat to an A2 white card base and the peony added on top with thin foam tape, followed by the sentiment with more thin foam tape. To finish of, I added a few sequins. 

SUPPLIES:

Here are the links to what I have used on the project. Affiliate links are used on some products. This means that if you make a purchase after clicking on my link, I receive a small commission with no extra cost to you. I truly appreciate your support when using these links. Please click on the logo below the product to shop at your favourite store. All products were personally purchased except those from Clearly Besotted, Hero Arts or those marked with an asterisk (*) which were kindly sent to me to use. You can read my full disclosure here.


COPIC MARKERS: RV19, RV66, RV55, RV52. G28, YG17, YG23, YG01. 

I hope you will check out the rest of Yana's Blooming Birthday Collection, it is really stunning and if you love hot foiling, you are in for a real treat with this collection! Thank you so much for stopping by today, I really do appreciate it. I hope you have a lovely day! 

27 March 2021

Reverse Confetti | Happy Birthday to YOU

Hello there, today I am here to share two very CAS birthday cards using new products from Reverse Confetti. I thought that they would work well for masculine birthday's. I also find that simple seems to be best for generic masculine birthday cards. 

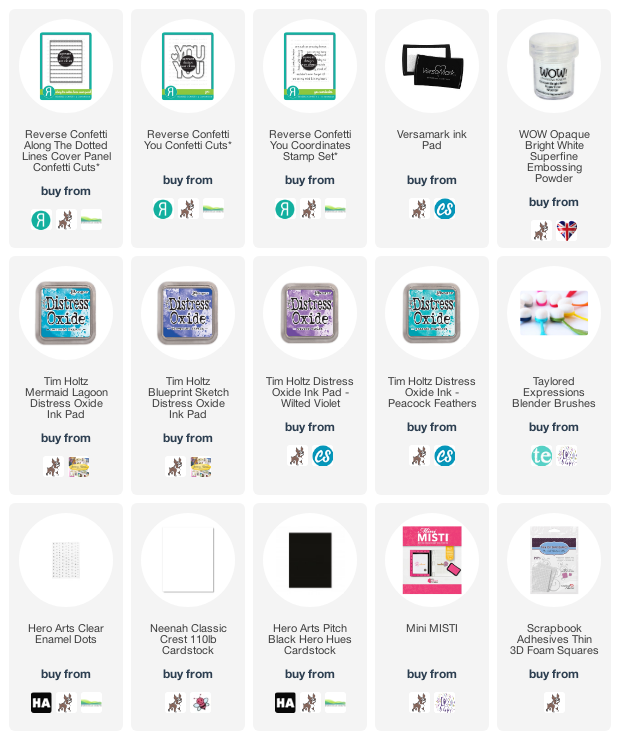
I started off by taking panels of white cardstock and die cutting them with the new Reverse Confetti Along The Dotted Lines Cover Panel. This is THE perfect die for adding subtle interest to a card base. They were added flat to A2 white card bases and then I ran the new Reverse Confetti You Confetti Cuts through my die cutting machine three times each for the larger of the word and then once for the inside piece. 

The outside pieces (bottom layer) were adhered one on top of another (for some added dimension) and then for the top pieces, I added colour with Tim Holtz Distress Oxide Inks. I used Mermaid Lagoon, Blueprint Sketch and Wilted Violet on one and Peacock Feathers, Blueprint Sketch and Wilted Violet on the other. They were then adhered on to the bottom layer with liquid glue. 

I took the sentiment from the Reverse Confetti You Coordinates Stamp Set and stamped the sentiment twice on to black cardstock with Versamark Ink. I applied white embossing powder and heat set. They were cut in to strips. 

I adhered the You die cuts on to the cards first with liquid glue and then the sentiment strips with thin foam tape on top. To finish off, I added a few Hero Arts Clear Enamel Dots. 

SUPPLIES:

Here are the links to what I have used on the project. Affiliate links are used on some products. This means that if you make a purchase after clicking on my link, I receive a small commission with no extra cost to you. I truly appreciate your support when using these links. Please click on the logo below the product to shop at your favourite store. All products were personally purchased except those from Clearly Besotted, Hero Arts or those marked with an asterisk (*) which were kindly sent to me to use. You can read my full disclosure here.


I think these would work well with a balloon background or something like that too but I do like the clean and simple look of these! Thanks so much for stopping by today, I really do appreciate it. I hope you have a lovely day! 

25 March 2021

Simon Says Stamp | All The Feels

Hello there, the new All The Feels Release from Simon Says Stamp is out today and I have two cards to share with you using a few new products. They kindly sent me their new Spring Flowers Background and I thought it was so pretty but I often do emboss resist with background stamps, so I wanted to something a little different with this one. 

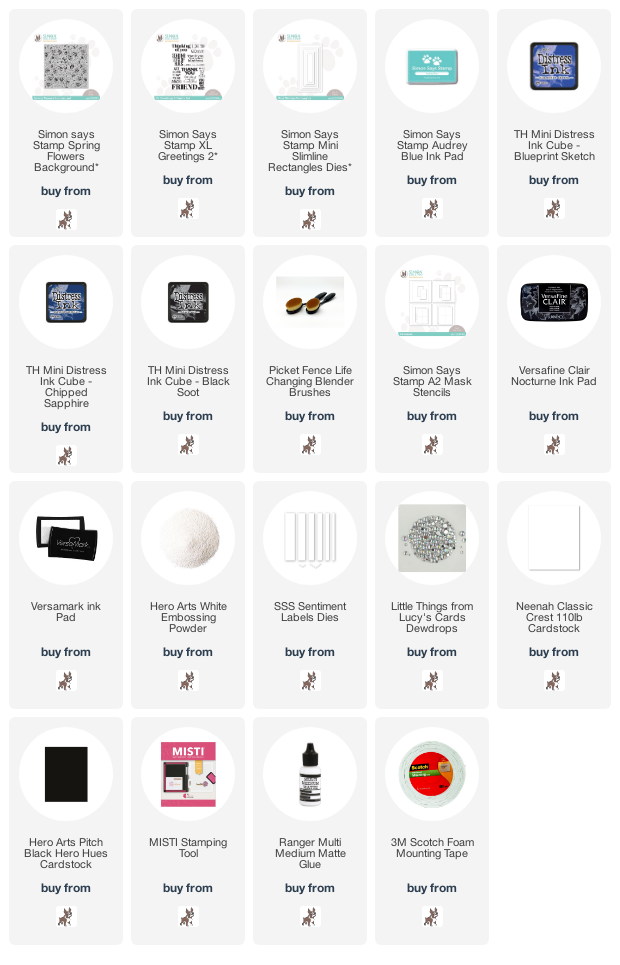
I thought that I would create two cards using the same design but different orientation - one being A2 size (finished card size 4.25" x 5.5") and one being mini slimline (3.15" x 6.25"). I started off the mini slimline card by die cutting a panel of cardstock using one of the new Simon Says Stamp Mini Slimline Rectangles Dies from white cardstock. 

I then stamped the Simon Says Stamp Spring Flowers Background on top with Simon Says Stamp Audrey Blue Ink. Using blending brushes, I blended on more of the Audrey Blue ink, focusing most of the colour on the outside edges. I then went in with Tim Holtz Distress Inks in Blueprint Sketch, Chipped Sapphire and Black Soot

I did the same thing for the A2 card but instead of creating a layer, I masked of the card base with a stencil and then did the same process of stamping and ink blending before removing the stencil. For the A2 card, I simply then stamped the sentiment from the new Simon Says Stamp XL Greetings 2 Stamp Set on top with Versafine Clair Nocturne Ink

For the mini slimline, I adhered the layer on the card card base with foam tape and then added the sentiment on top. It is also from the Simon Says Stamp XL Greetings 2 Stamp Set but this time, I stamped it in Versamark Ink, applied white embossing powder, heat set and then cut it in to strips using the Simon Says Stamp Sentiment Labels Dies. To finish off, I added a few Lucy's Dewdrops

SUPPLIES:

Here are the links to what I have used on the projects. Affiliate links are used on some products. This means that if you make a purchase after clicking on my link, I receive a small commission with no extra cost to you. I truly appreciate your support when using these links. Please click on the logo below the product to shop at your favourite store. All products were personally purchased except those from Clearly Besotted, Hero Arts or those marked with an asterisk (*) which were kindly sent to me to use. You can read my full disclosure here.


Thank you so much for stopping by today, I really do appreciate it. I hope you will check out the rest of the wonderful release and have a wonderful day! 

23 March 2021

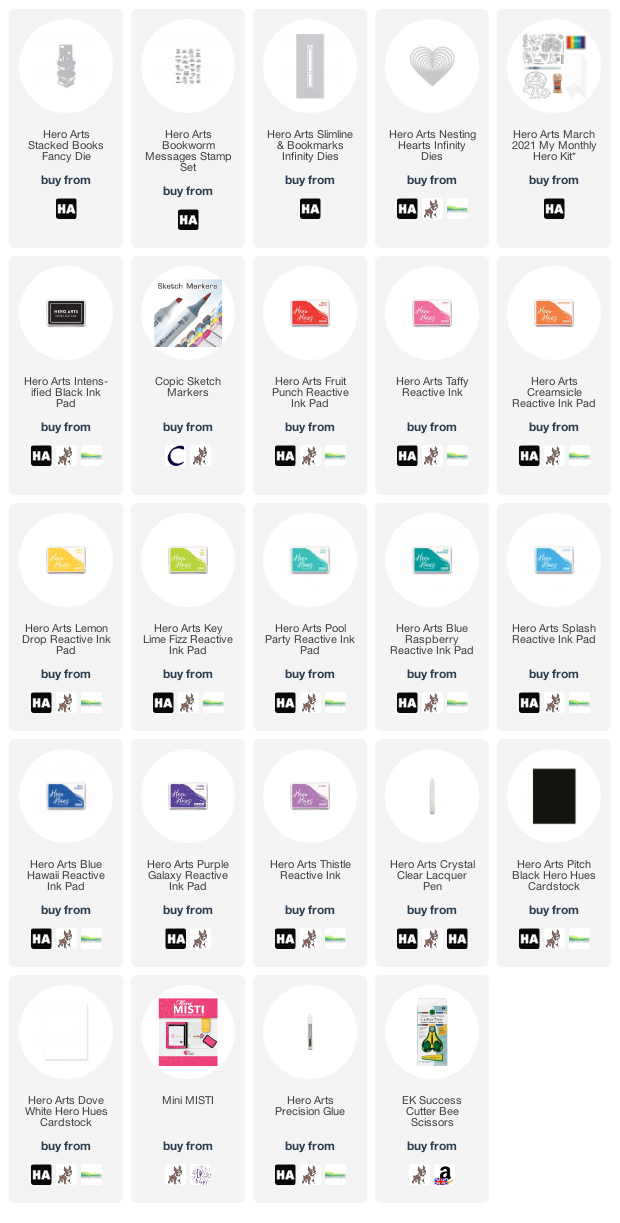
Hero Arts | Bookworm Bookmark

Hello there, today I am over on the Hero Arts Blog sharing a bookmark created with the new Slimline & Bookmarks Infinity Dies. These dies can be used in so many different ways - as layers for slimline cards, for bookmarks and the smaller of the dies are perfect for creating sentiment strips too! 

For my bookmark, I used one of the middle sized layers of the Hero Arts Slimline & Bookmarks Infinity Dies and cut it from Hero Hues Pitch Black Cardstock. There is a die to cut a hole in the top of the bookmark if you so wish, but I thought I would do something a little different and use a Hero Arts Nesting Hearts Infinity Die for the hole on my bookmark instead!

For the images on my bookmark, I first took the Hero Arts Stacked Books Fancy Die and cut it from Hero Hues Dove White Cardstock. I then used a rainbow selection of Hero Arts Reactive Ink to ink blend the books, colouring the pages with Copic Markers. I stamped three little bookworms from the Hero Arts Bookworm Messages Stamp Set, coloured them with Copic Markers and fussy cut them out. All of the images were added to the bookmark with Hero Arts Precision Glue

The tassel for the bookmark was made using the rainbow hemp cord from the Hero Arts March 2021 My Monthly Hero Kit

SUPPLIES:

Here are the links to what I have used on the bookmark. Affiliate links are used on some products. This means that if you make a purchase after clicking on my link, I receive a small commission with no extra cost to you. I truly appreciate your support when using these links. Please click on the logo below the product to shop at your favourite store. All products were personally purchased except those from Clearly Besotted, Hero Arts or those marked with an asterisk (*) which were kindly sent to me to use. You can read my full disclosure here.


For more information on how I made the bookmark, please head over to the Hero Arts blog post. Thanks so much for stopping by today, I really do appreciate it. I hope you are well and have a lovely rest of the day! 

19 March 2021

VIDEO | Altenew Story Book Fantasy Collection Video Hop

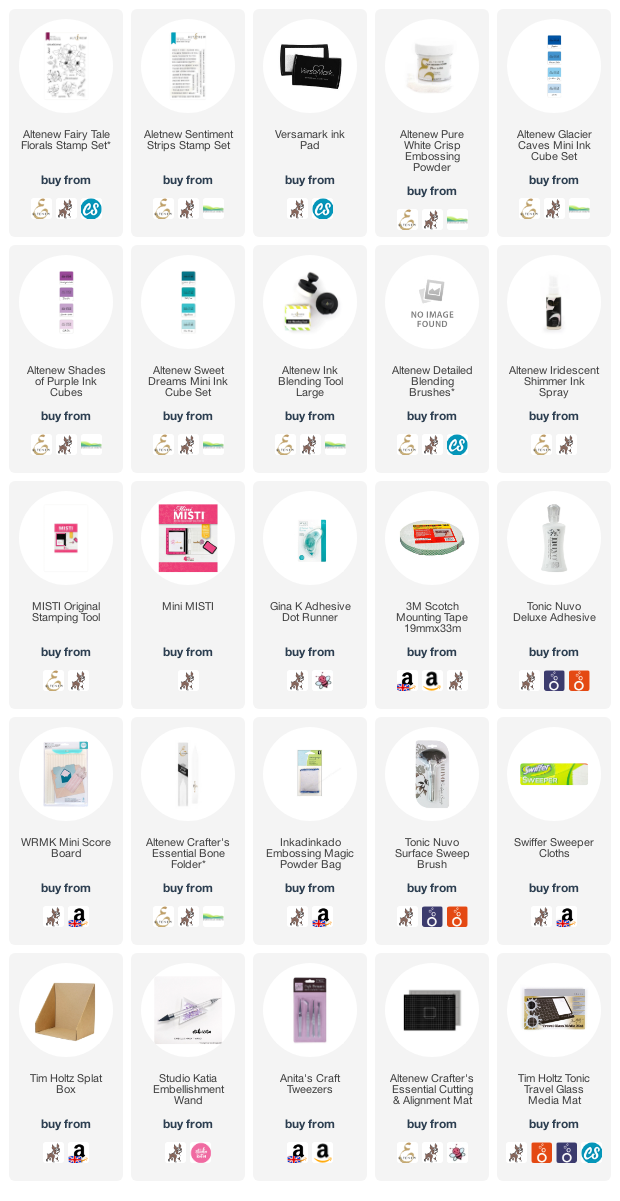
Hello there, I am delighted to be joining Altenew today for a fun video hop to celebrate the Storybook Fantasy Collection. If you haven't already seen my projects that I shared with the collection, you can see them HERE. Today, I am using the Fairy Tale Florals set again as I just fell in love with it. This time I am doing some detailed ink blending with it. 

I started off my card by stamping the large image from the Altenew Fairy Tale Florals Stamp Set onto a panel of white cardstock using Versamark Ink. I then applied Altenew Pure White Crisp Embossing Powder and heat set. Using the Altenew Large Ink Blending Tool, I applied a soft layer of Caribbean Sky from the Altenew Glacier Caves Crisp Dye Ink Mini Cube Set

I then took the new Altenew Detailed Blending Brushes and applied colour to the petals on the images using Persian Blue and Sapphire Inks (from the same Glacier Caves Set), as well as Lavender Fields Ink from the Altenew Shades of Purple Crisp Dye Ink Mini Cube Set. I used Aqualicious from the Altenew Sweet Dreams Crisp Dye Ink Mini Cube Set for the leaves. 

I then placed the panel in my splat box and sprayed on a mist of Altenew Iridescent Shimmer Ink Spray followed by splatters of that for bigger drops. I set the panel aside to dry while I stamped the sentiment. I took the sentiment from the Altenew Sentiment Strips Stamp Set and stamped it on to black cardstock with more Versamark Ink. I applied the same embossing powder, heat set and cut it in to two strips. 

The panel was added to an A2 white card base with tape runner and then the sentiment strips added with foam tape. To finish off, I added a few sequins that are sadly now discontinued (but I love them so wanted to use them up, sorry!). 

VIDEO:

If you are viewing this post via email subscription, please click HERE to watch the video on YouTube. 

SUPPLIES:

Here are the links to what I have used on the card. Affiliate links are used on some products. This means that if you make a purchase after clicking on my link, I receive a small commission with no extra cost to you. I truly appreciate your support when using these links. Please click on the logo below the product to shop at your favourite store. All products were personally purchased except those from Clearly Besotted, Hero Arts or those marked with an asterisk (*) which were kindly sent to me to use. You can read my full disclosure here.


To enter the giveaway to win an Altenew gift certificate, you need to leave a comment my video on YouTube. If you get lost along the way on the hop, please head over to Altenew's video here. Thank you so much for stopping by today, I really do appreciate it. I hope you have a lovely rest of the day! 

13 March 2021

Sunny Studio | Balloon Rides & Lovable Llamas

Hello there, I am delighted to be guest designing with Sunny Studio Stamps today. I have quite a few projects to share with you using Balloon Rides, Lovable Llama and Slimline Pennants Dies so please grab a drink and a snack and I hope you enjoy! 

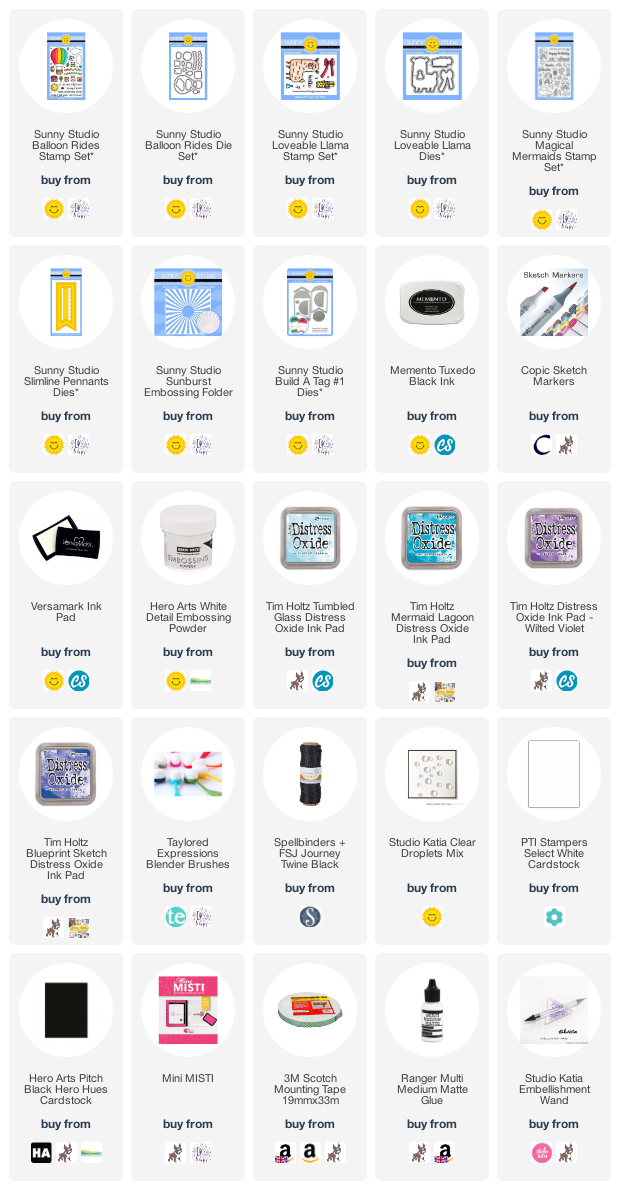
My first projects use the Balloon Rides Stamp and Dies, plus the Slimline Pennants Dies. As the name suggests, these dies work perfectly for slimline cards but as you will see, you can use them on A2 sized cards as well :) 

I started off my card by die cutting the largest of the Sunny Studio Slimline Pennants Dies from white cardstock. Using blending brushes, I blended on Mermaid Lagoon and Tumbled Glass Distress Oxide Inks. It was adhered to an A2 white card base with foam tape. I took the images from the Sunny Studio Balloon Rides Stamp Set and stamped them on to white cardstock with Memento Tuxedo Black Ink.

They were coloured with Copic Markers and die cut out using the Sunny Studio Balloon Rides Dies. The clouds were added to the card with tape runner and the hot air balloon with foam tape. The bunny was then added on top inside the hot air balloon. The sentiment was stamped on to black cardstock with Versamark Ink. I applied white embossing powder, heat set and cut it in to a strip. It was adhered to the card with thin foam tape. To finish off, I added a few Clear Droplets

As I was making the card, I stamped a few extra images as I wasn't sure what I was going to use. I didn't want them going to waste, so I thought I would create a little tag with them. I die cut the Sunny Studio Build A Tag 1 Die from white cardstock and blended on the same Distress Oxide Inks. The extra images were added on top with tape runner. 

I then stamped the little bear and mortar board from the Balloon Rides set and die cut them out as well. The sentiment was stamped, heat embossed and cut out and added to the tag with foam tape. I then popped the little bear behind so that it looks like he is popping up from behind it. To finish off, I added twine through the top of the tag. 

My second card and tag use the Lovable Llama Stamp Set, which is a smaller stamp set but does pack a big punch with that adorable llama! I started off by die cutting the second largest die from the Sunny Studio Slimline Pennants Die Set from white cardstock. Using blending brushes, I blended on Wilted Violet, Blueprint Sketch and Mermaid Lagoon Distress Oxide Inks. 

I then ran the panel through my die cutting machine using the Sunny Studio Sunburst Embossing Folder. I took the llama, presents and party hat from the Sunny Studio Lovable Llama Stamp Set and stamped them on to white cardstock with Memento Tuxedo Black Ink. They were coloured with Copic Markers and die cut out using the Sunny Studio Lovable Llama Die Set

I took the sentiment from the Sunny Studio Magical Mermaids Stamp Set and stamped it on to black cardstock with Versamark Ink. I applied white embossing powder and heat set. It was cut in to a strip and added to the card with foam tape. The presents were adhered flat with tape runner and the llama popped up with thin foam tape. 

I thought that I would create a tag with this little guy too. I die cut another Sunny Studio Build A Tag 1 Die from white cardstock and blended on the same Distress Oxide colours as on the card. I then ran it through my die cutting machine with the Sunny Studio Sunburst Embossing Folder again. 

I stamped, coloured and die cut another llama and party hat and then also stamped, coloured and die cut the bunting from the Sunny Studio Balloon Rides set. The bunting was added to the tag with tape runner and the llama added on top with foam tape. To finish off, I added twine through the top of the tag. 

SUPPLIES:

Here are the links to what I have used on the card. Affiliate links are used on some products. This means that if you make a purchase after clicking on my link, I receive a small commission with no extra cost to you. I truly appreciate your support when using these links. Please click on the logo below the product to shop at your favourite store. All products were personally purchased except those from Clearly Besotted, Hero Arts or those marked with an asterisk (*) which were kindly sent to me to use. You can read my full disclosure here.


A big thank you goes to Mendi and her team for having me guest with them again. It is always a pleasure! For more inspiration using the sets, please head over to the Sunny Studio Blog. Thank you so much for stopping by today, I hope you have a wonderful rest of the day!  

10 March 2021

Spellbinders | March 2021 Small Die of the Month Club

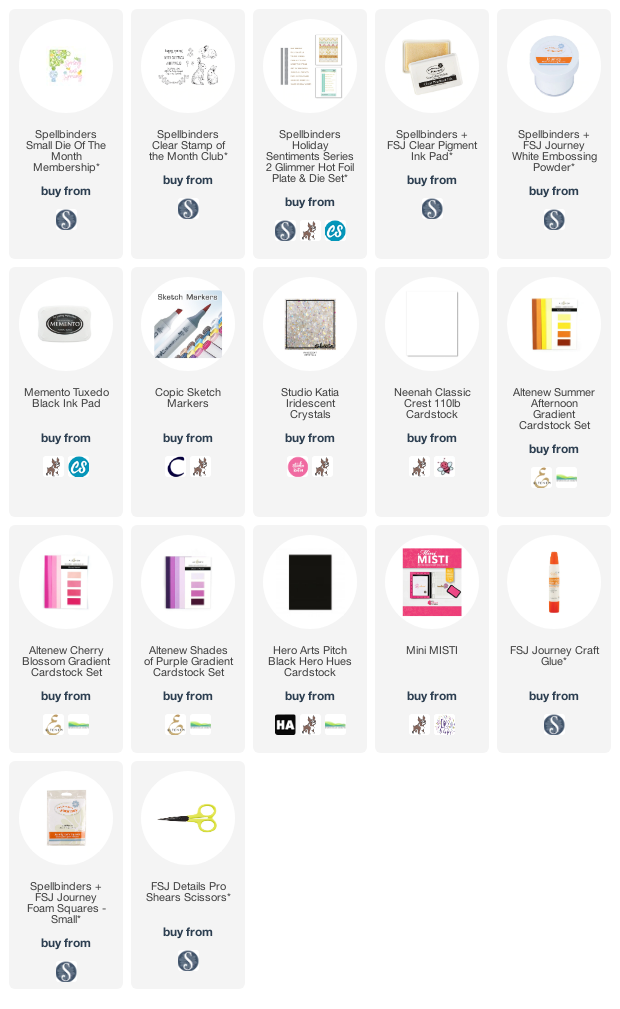
Hello there, today I have a card to share with you using the Spellbinders March 2021 Small Die of the Month Club, plus the Clear Stamp of the Month Club. The Spring Flowers Card Creator (dies) are made to create a frame on a card, the corners of the pieces fit in to the corners of the card panel and then there is connecting pieces to go in-between. I wanted to do something a little different, so I have added the corner pieces in to the middle of the card instead.

I started off by die cutting the frame elements from the Spellbinders March 2021 Small Die of the Month Club Kit from white cardstock. I then cut the flowers from pink, yellow and purple cardstock. The white pieces were adhered on to a 4.5" x 4.5" white card base with FSJ Craft Glue. I then added the flowers on top. 

I took the one of the bunnies from the Spellbinders March 2021 Clear Stamp of the Month Club Kit and stamped it on to white cardstock with Memento Tuxedo Black Ink. I coloured him using Copic Markers (E59, E57, E55, E53, R00) and fussy cut him out with scissors. He was added to the bottom left hand corner of the card with FSJ Foam Squares

The sentiment from the same stamp set was stamped on to black cardstock with FSJ Clear Pigment Ink and FSJ White Embossing Powder applied. I heat set it and then die cut it out using a sentiment strip die (from the Spellbinders Holiday Sentiments Series 2 Glimmer Hot Foil Plate & Die Set). It was added to the card with more foam squares. To finish off, I added jewels to the centres of the flowers. 

SUPPLIES:

Here are the links to what I have used on the card. Affiliate links are used on some products. This means that if you make a purchase after clicking on my link, I receive a small commission with no extra cost to you. I truly appreciate your support when using these links. Please click on the logo below the product to shop at your favourite store. All products were personally purchased except those from Clearly Besotted, Hero Arts or those marked with an asterisk (*) which were kindly sent to me to use. You can read my full disclosure here.


I hope that you will check out the Spellbinders Small Die of the Month Kit. It is a wonderful monthly subscription where you receive the kit each month. Designers like myself share inspiration using the kit at the beginning of the month to show you lots of different ways that you can use it. There are also lots of other club kits too, like the Clear Stamp of the Month that I used as well, so there is something for everyone! If you do subscribe, you will get other benefits from Spellbinders too. Please see here for more information. You can also buy older kits here too. 

Thank you so much for stopping by today, I really do appreciate it. I hope you have a lovely day! 

9 March 2021

Altenew | Storybook Fantasy Stamps/Dies/Stencils/Embossing Folders Collection Release Blog Hop + Giveaway

Hello there, I am delighted to be joining Altenew today to celebrate the release of the new Storybook Fantasy Collection. This is such a wonderful release that includes lots of beautiful florals and fairytale images. I have lots to share with you today, so I hope you will grab a coffee and join me as I take a look at some of the collection. This post is part of a fun blog hop, more details on that below. 

My first projects use the new Book Engravings Stamp Set and Dies, plus the wonderful new Whimsical Herringbone set that I have used for the backgrounds. 

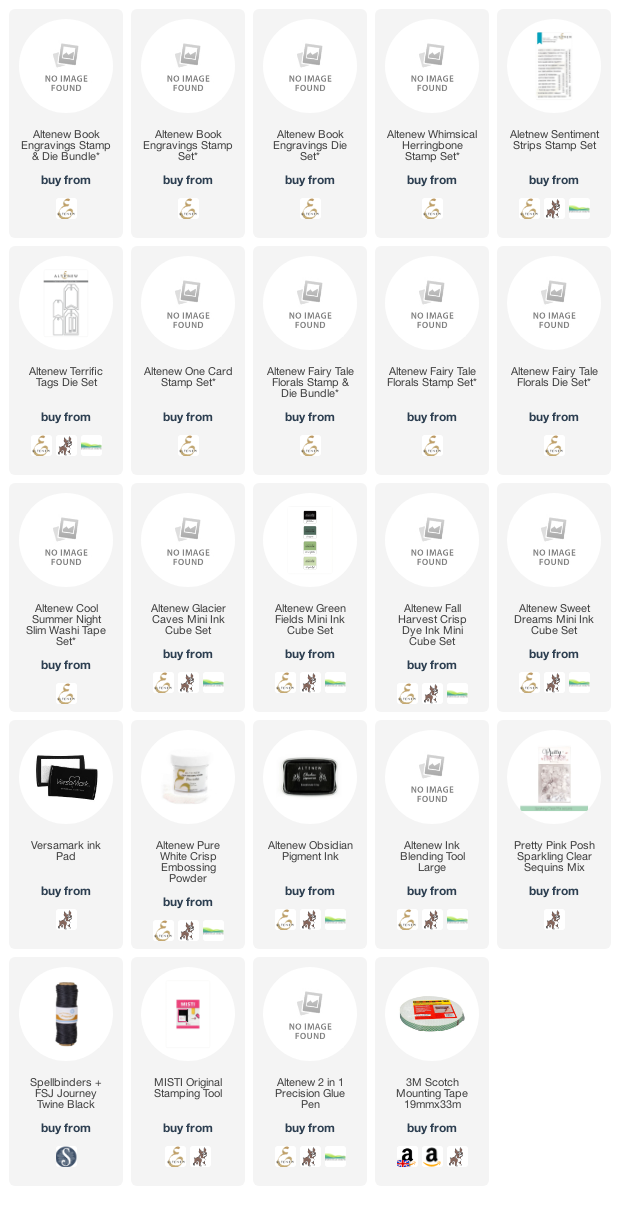
For my card, I started off by stamping the flowers and leaves from the Altenew Book Engravings Stamp Set on to white cardstock. I used black for the outlines and then Altenew Glacier Caves Crisp Dye Ink Mini Cubes for the layers. For the leaves I used Altenew Green Fields Crisp Dye Ink Mini Cubes. The centres were stamped using Altenew Fall Harvest Crisp Dye Ink Mini Cubes. There is a colouring stencil available also that works with the set, so that you can ink blend the white areas. I quite liked them though! They were then cut out using the Altenew Book Engravings Die Set

I took an A2 white card base and masked off the edges of the front panel. I then stamped the background stamp from the Altenew Whimsical Herringbone Stamp Set on top. I tried it first with a brown/grey ink but didn't like it. So I stamped it again with the lightest shade in the Glacier Caves set. I think there was still a bit of residual ink on the stamp from the first stamp, so the colour is a little different, but I liked it! 

The leaves were added to the card with Altenew 2 in 1 Precision Glue Pen and the flowers with foam tape. I took the sentiment from the Altenew Sentiment Strips Stamp Set and stamped it on to black cardstock with Versamark Ink. I applied Altenew Pure White Crisp Embossing Powder, heat set and cut it in to a strip. It was added to the card with foam tape and glue. To finish off, I added a few Sparkling Clear Sequins. 

To accompany the card, I used the Altenew One Card Stamp Set (which is a mini set) and stamped half of the sentiment on to the front of the envelope. 

And the other half on the back flap. Something a little fun to add to envelopes but can be used on cards and tags too. 

I have an obsession with tags again at the moment so I couldn't resist creating a coordinating tag with the same images as the card. The Altenew Terrific Tag Die was cut from white cardstock and the  background from the Altenew Whimsical Herringbone Stamp Set was stamped on top with the same ink as the card. 

The leaves were adhered with glue and the flowers with foam tape. The sentiment from the Altenew Book Engravings Stamp Set was stamped on to black cardstock and heat embossed. It was cut in to a strip and added to the tag with thin foam tape. To finish off, I added a few sequins and then twine through the top of the tag. 

Next up is the beautiful new Fairy Tale Florals stamp and dies. This is such a beautiful set that can be used with the etching layers to create the colour, can be coloured with a variety of mediums or can be used with the coordinating colouring stencil to add the colour with ink blending. 

For my card, I started off by stamping the main image from the Altenew Fairy Tale Florals Stamp Set on to white cardstock with black ink. I then stamped the insides of the flowers using Aqualicious ink from the Altenew Sweet Dreams Crisp Dye Ink Mini Cube Set. The leaves were stamped with Forest Glades ink from the Altenew Green Fields Crisp Dye Ink Mini Cube Set. 

The flowers were die cut out using the Altenew Fairy Tale Florals Die Set. I took an A2 white card base and blended Aqualicious Ink on to it using an Altenew Ink Blending Tool, focusing most of the colour in the top left. I stamped the sentiment from the set in the bottom right with black ink. 

The flowers were adhered to the card with foam tape (cutting off the excess image that went over the edge of the card). To finish off, I added Sparkling Clear Sequins. 

I couldn't resist creating another tag with this beautiful set! To start with, I stamped the Altenew Fairy Tale Florals Set on to white cardstock with black ink. I then stamped the additional layers with grey ink. I took the largest of the straight edged tags from the Altenew Terrific Tags Die Set and die cut the image out. I then die cut it again using the Altenew Fairy Tale Florals Die Set to create the panel to go on the tag. 

I took a panel of white cardstock and the new Altenew Cool Summer Night Slim Washi Tape Set and placed the different washi tapes on to the panel alternating the colours. I did not use the lightest colour in the set, just the three darkest. I then die cut this panel using the same tag die. The floral panel was added on top with tape runner and the sentiment from the Altenew Sentiment Strips Stamp Set was stamped, heat embossed and cut out and added with foam tape. To finish off, I added twine through the top of the tag. 

SUPPLIES:

Here are the links to what I have used on the card. Affiliate links are used on some products. This means that if you make a purchase after clicking on my link, I receive a small commission with no extra cost to you. I truly appreciate your support when using these links. Please click on the logo below the product to shop at your favourite store. All products were personally purchased except those from Clearly Besotted, Hero Arts or those marked with an asterisk (*) which were kindly sent to me to use. You can read my full disclosure here.


BLOG HOP:

As mentioned this post is part of a fun, inspiration filled blog hop. For the hop, you should have arrived here from Virginia Lu and next on the hop is Lileth Eeckels. If you get lost along the way, please head over to the Altenew Card Blog for the full list of participants. 

SPECIAL OFFERS:

Here are three ways to get a freebie to kickstart your creativity with the Storybook Fantasy collection:

  • Get a FREE brand new Storybook Fantasy Stamp & Die Release Inspiration Guide (worth $5.99) with every order of high-value Storybook Fantasy release bundles (exclusions apply).
  • Get a FREE brand new Creative Jump Start Class with every order from the new Storybook Fantasy release collection from 9th March 2021 to 15th March 2021.
  • Get a FREE brand new Storybook Fantasy Stamp & Die Release Mini Inspiration Guide with every order from 9th March 2021 to 11th March 2021. 

GIVEAWAY:

$300 in total prizes! To celebrate this release, Altenew is giving away a $50 gift certificate to 2 lucky winners and a $20 gift certificate to 10 winners! Please leave a comment on the Altenew Card Blog and/or each designer’s blog post on the blog hop list below by 15th March 2021 for a chance to win. Altenew will draw 12 random winners from the comments left on each stop of this blog hop and announce the winners on the Altenew Winners Page on 17th March 2021. Good luck!

I hope that you will check out the rest of the Storybook Fantasy Collection. There are a lot of fairy tale sets that I didn't use today. Thank you so much for stopping by, I really do appreciate it. I hope you have a wonderful rest of the day! 

End of code