31 May 2022

Clearly Besotted Teasers | Viking Plushies

Hello there and welcome to day four of the Clearly Besotted June 2022 Teasers. Just one more sleep to go before the sets release tomorrow at 8pm BST. I have one last teaser to share with you today using the new Viking Plushies set. This is such a fun set that is wonderful for lots of different occasions. 

PLEASE NOTE: This post contains affiliate links. Please see below for my full disclosure.


I started off my card by stamping the penguin Viking from the Clearly Besotted Viking Plushies Stamp Set on to white cardstock with Memento Tuxedo Black Ink. I added in lines where the different colours would be on the penguin (between the darker areas and his face and tummy) with a black Copic Multiliner.


I also stamped three hearts - one from the new Plushies In Wonderland Stamp Set twice (which I shared on day one) and the other from Ice Ice Plushies Stamp Set. They were all coloured with Copic Markers (the colours that I used are listed below the supplies area) and fussy cut out with scissors.  I then took a panel of white cardstock and placed the Clearly Besotted Have A Heart Stencil on top and then using Ink Blending Brushes, blended Tim Holtz Distress Oxide Inks inside the heart. 


I used (top to bottom) Kitsch Flamingo, Picked Raspberry, Seedless Preserves and Villainous Potion. I splattered on some water, removed the stencil and set it aside to dry. Once dry, I adhered the panel to an A2 white card base with tape runner and then added the sentiment, penguin and hearts on top with thin foam tape. To finish off, I added Tonic Nuvo Crystal Glaze to the hearts and a couple of white gel pen highlights to the penguin. 

SUPPLIES:


Here are the links to what I have used on the project. Affiliate links are used on some products. This means that if you make a purchase after clicking on my link, I receive a small commission with no extra cost to you. I truly appreciate your support when using these links. Please click on the logo below the product to shop at your favourite store. All products were personally purchased except those from Clearly Besotted, Hero Arts or those marked with an asterisk (*) which were kindly sent to me to use. You can read my full disclosure here.


COPIC MARKERS: penguin - BV29, BV25, BV23, C3, C1, Y11, Y000, YR27, Y17, Y15. Hat - C8, C5, C3, C1/E44, E43, E2, E41. Hearts - V09, V17, V15, V12. 

This really is a fun set with lots of other Viking characters in it too and sentiments for lots of different occasions. There is also a table of food that they can feast from as well! For more inspiration using the new sets, please head over to the Clearly Besotted Blog, my amazing teamie Keren and our fabulous resident guests Francine and Alberto. Thank you so much for stopping by today, I very much appreciate it. I hope you have a great rest of the day! Take care!

30 May 2022

Clearly Besotted Teasers | Gym Plushies

Hello there and welcome to day three of the Clearly Besotted June 2022 Teasers. Not long to wait now, the release will hit the shops on Wednesday 1st June 2022 at 8pm BST. We hope that you are enjoying the teasers so far! Today I am using the super cute Gym Plushies set. This fun set features lots of critters exercising, a park backdrop and fun sentiments. 

PLEASE NOTE: This post contains affiliate links. Please see below for my full disclosure.


I started off my card by stamping the mouse, duck and cat from the Clearly Besotted Gym Plushies Stamp Set on to white cardstock with Memento Tuxedo Black Ink. I coloured them with Copic Markers (the colours that I used are listed below the supplies list for reference) and fussy cut them out with scissors. 


I took a panel of white cardstock and placed the Clearly Besotted Six A Side Stencil on top, securing in place with Post-It Tape. I then added ink blending with blending brushes inside the hexagons. I used Tim Holtz Distress Inks in Squeezed Lemonade, Mustard Seed, Kitsch Flamingo, Picked Raspberry, Wilted Violet and Villainous Potion. With the stencil still in place, I splattered on Dr. Ph. Martin's Bleed Proof White on top. I removed the stencil and set it aside to dry. 


Once dry, the panel was adhered to a 3.5" x 6" white card base with tape runner adhesive. The plushies were adhered on top with thin foam tape. The sentiment from the set was stamped on to black cardstock with Versamark Ink. I applied White Detail Embossing Powder and heat set. It was cut in to a strip and added to the card with more foam tape. To finish off, I added white gel pen highlight to the images, glaze pen to their noses and then to embellish I added Lucy's Cards Bubbles

SUPPLIES:


Here are the links to what I have used on the project. Affiliate links are used on some products. This means that if you make a purchase after clicking on my link, I receive a small commission with no extra cost to you. I truly appreciate your support when using these links. Please click on the logo below the product to shop at your favourite store. All products were personally purchased except those from Clearly Besotted, Hero Arts or those marked with an asterisk (*) which were kindly sent to me to use. You can read my full disclosure here.


COPIC MARKERS: Cat - C7, C6, C5, C4, C3, C1/RV34, RV32, RV10. Mouse - W7, W5, W3, W1/RV34, RV32, RV10/C8, C6, C4, C3. Duck - YR27, Y17, Y15, Y11/YR18, YR15, YR12/V09, V17, V15, V12. 

Such a fun set! For more inspiration using the new sets, please head over to the Clearly Besotted Blog, my amazing teamie Keren and our fabulous resident guests Francine and Alberto. thank you so much for stopping by, I very much appreciate it. Wishing you a fantastic day and I will see you tomorrow for day four! 

29 May 2022

Clearly Besotted Teasers | Jungle Corners

Hello there and welcome to day two of the Clearly Besotted June 2022 Teasers. Today I am using the super cute Jungle Corners set. This is such a fun set! As the name suggests, the set features two corner images - one that I have used today and another with an adorable monkey in it. It also features a separate image plus lots of fun sentiments. 

PLEASE NOTE: This post contains affiliate links. Please see below for my full disclosure.


I started off my card by stamping the bottom corner from the Clearly Besotted Jungle Corners Stamp Set on to white cardstock with Memento Tuxedo Black Ink. I coloured it with Copic Markers (the colours that I used are listed below the supplies area for reference) and then fussy cut it out with scissors before setting it aside.


For the background, I took a panel of white cardstock and added ink blending to it with ink blending brushes. I used Tim Holtz Evergreen Bough and Mermaid Lagoon Distress Inks. I then splattered it with Dr. Ph. Martin's Bleed Proof White and set it aside to dry. Once dry, the panel was adhered flat to an A2 white card base with tape runner. 


The image piece was adhered on top with thin foam tape. I took the sentiment from the set and stamped it on to black cardstock with Versamark Ink. I applied White Detail Embossing Powder and heat set. It was cut in to a strip and added to the card with more thin foam tape. To finish off, I added a few Lucy's Cards Raindrops and then white gel pen highlights to the images.  

SUPPLIES:


Here are the links to what I have used on the project. Affiliate links are used on some products. This means that if you make a purchase after clicking on my link, I receive a small commission with no extra cost to you. I truly appreciate your support when using these links. Please click on the logo below the product to shop at your favourite store. All products were personally purchased except those from Clearly Besotted, Hero Arts or those marked with an asterisk (*) which were kindly sent to me to use. You can read my full disclosure here.


COPIC MARKERS: Leaves - G29, YG17, YG23, YG01/G28, G46, G43/BG78, BG75, BG72, BG70. Giraffe - YR27, YR24, YR31/E39, E99, E97/E18, E39. Lion - E25, E23, E21, YR31, YR30/E49, E39, E37, E35. 

These images are so cute and perfect for lots of different occasions, I think! For more inspiration using the new release, please head over to the Clearly Besotted Blog, Keren, Alberto and Francine. Thanks so much for stopping by today, I really appreciate it. Wishing you a great rest of the weekend! 

28 May 2022

Clearly Besotted Teasers | Plushies In Wonderland

Hello there and welcome to the Clearly Besotted June 2022 Teasers. Release day is Wednesday 1st June 2022 and from now until then, us on the Design Team (and fabulous guests) will be sharing teasers with you using the new sets. For my card today, I am using the new Plushies In Wonderland set. This fun set is inspired by Alice In Wonderland and features lots of fun critters and sentiments. 

PLEASE NOTE: This post contains affiliate links. Please see below for my full disclosure.


I started off my card by stamping the koala/mad hatter image from the Clearly Besotted Plushies In Wonderland Stamp Set on to a panel of white cardstock with Memento Tuxedo Black Ink. I then made a mask for him and stamped the mushroom/toadstool image from the Clearly Besotted Sweet Floral Gnomes Stamp Set on top, so that he was sitting in front of the mushroom. 


I made a mask for this too and then added ink blending on top with Distress Inks. I used Mermaid Lagoon for the sky and a little Twisted Citron and Mowed Lawn for the grass. I removed the masks and coloured the images with Copic Markers (the colours that I used are listed below the supplies area for reference) and also added a little shadow in places with a black Polychromos Pencil. 


I took the sentiment from the Clearly besotted Sweet Floral Scenes Stamp Set and stamped it on to black cardstock with Versamark Ink. I applied White Detail Embossing Powder and heat set. It was cut in to a strip. I adhered the panel to an A2 white card base with thin foam tape and then the sentiment on top (with the same foam tape). To finish off, I added white gel pen highlights and black glaze pen to his eyes and nose. 

SUPPLIES:


Here are the links to what I have used on the project. Affiliate links are used on some products. This means that if you make a purchase after clicking on my link, I receive a small commission with no extra cost to you. I truly appreciate your support when using these links. Please click on the logo below the product to shop at your favourite store. All products were personally purchased except those from Clearly Besotted, Hero Arts or those marked with an asterisk (*) which were kindly sent to me to use. You can read my full disclosure here.


COPIC MARKERS: Koala - W7, W5, W3, W1. Hat - BG49, BG15, BG13, BG11/BG09, BG57, BG49, BG13/C3, C1, C0. Mushroom - E57, E55, E53, E51, E50/R89, R39, R37, R35, R32/C3, C1, C0. Grass - G29, YG17, YG23, YG03, YG01. 

There is also a background stamp set - Picture It Wonderland, that would work perfectly with the images in the Plushies In Wonderland Set. I will share a look at that in my release video next week. 

For more inspiration using the new sets, please head over to the Clearly Besotted Blog and my amazing teamie Keren. We also have our fabulous resident guests Francine and Alberto with us this month too, so please do pop over and see what they have been up to as well. Thank you so much for stopping by today, I really do appreciate it. I hope you have a lovely day! 

26 May 2022

VIDEO | MFT Fairy Special

Hello there, I am over on the My Favorite Things YouTube channel today, sharing a card with a simple night sky using the Fairy Special set. This is such a sweet set, the fairies are pretty small but there are other elements in the set to make lovely scenes with. I just decided to use one fairy and a sentiment on my card today, though. 

PLEASE NOTE: This post contains affiliate links. Please see below for my full disclosure.


I started off by stamping one of the fairies from the MFT Fairy Special Stamp Set on to white cardstock with MFT Extreme Black Ink. I coloured her with Copic Markers (the colours that I used are listed below the supplies section for reference) and die cut her out with the MFT Fairy Special Die-namics (watch the video to see a trick on how I lined it up!). 


I took a panel of white cardstock (eventual size being 3.75" x 5") and added ink blending to it with Ink Blending Brushes and Tim Holtz Distress Oxide Inks. I used Chipped Sapphire at the top, followed by Shaded Lilac in the middle and Kitsch Flamingo at the bottom. I then splattered it with water and Sparkle Sheer Shimmer Spritz before setting it aside to dry. 


The panel was adhered to an A2 white card base with thin foam tape. I then stamped the sentiment using Versamark Ink on to MFT Black Licorice Cardstock. I applied white embossing powder and heat set. It was cut in to a strip and added tot he card with more thin foam tape, along with the fairy. To finish off, I added Copic Lilac Spica Pen sots to the wings, followed by 05 white pen. I added Clear Glaze Pen to the wand and then 08 white gel pen highlights to the fairy. To embellish, I added a few Lucy's Cards Sprinkles: Wisteria Circles. 

VIDEO:

Here is the video showing how I made the card:


If you are viewing this blog post via email subscription, you can watch the video HERE on YouTube. 

SUPPLIES:


Here are the links to what I have used on the project. Affiliate links are used on some products. This means that if you make a purchase after clicking on my link, I receive a small commission with no extra cost to you. I truly appreciate your support when using these links. Please click on the logo below the product to shop at your favourite store. All products were personally purchased except those from Clearly Besotted, Hero Arts or those marked with an asterisk (*) which were kindly sent to me to use. You can read my full disclosure here.


Thank you so much for stopping by today, I really do appreciate it. I hope you have a lovely day! 

20 May 2022

Your Heart Is So Big

Hello there, today I have a card to share with you using the beautiful Lily Frame from Pinkfresh Studio. I guest designed with them for the February release and although I used this set, I only used it for a sentiment, not the frame itself, so I wanted to use it on my card today. 

PLEASE NOTE: This post contains affiliate links. Please see below for my full disclosure.


I started off by stamping the Pinkfresh Lily Frame Stamp Set image on to MFT Heavyweight Translucent Vellum using Versamark Ink. I applied white embossing powder and heat set. I also stamped two butterflies from the Pinkfresh Studio Botanicals & Butterflies Stamp Set and heat embossed those on vellum too. I added Altenew Double-Sided Adhesive Sheet on to the back of the Lily Frame and then die cut out using the coordinating die. 


When die cutting the butterflies, I also die cut them from solid colours of cardstock too. Speaking of cardstock, I took Concord & 9th Cardstock in Ballet Slippers, Honeysuckle, Sprout, Aqua Sky and Oceanside and cut them in to strips. They were added to a white card base in a diagonal. The lily frame was then adhered on top. 


I took the sentiment, from the Pinkfresh Studio Just A Hello Floral Set, and stamped it on to white cardstock with Versafine Clair Nocturne Ink. It was die cut with the coordinating die and added to the card with thin foam tape. The butterflies were adhered to the cardstock layers with vellum adhesive (just on the bodies) and then adhered to the card. To finish off, I added a few Pinkfresh Studio Glacier Jewels

SUPPLIES:


Here are the links to what I have used on the project. Affiliate links are used on some products. This means that if you make a purchase after clicking on my link, I receive a small commission with no extra cost to you. I truly appreciate your support when using these links. Please click on the logo below the product to shop at your favourite store. All products were personally purchased except those from Clearly Besotted, Hero Arts or those marked with an asterisk (*) which were kindly sent to me to use. You can read my full disclosure here.


The card did end up a little busier than I would usually go, but I like the colours and embossing on vellum is always pretty! Thank you so much for stopping by today, I really do appreciate it. Wishing you a wonderful day and a great weekend! 

18 May 2022

Hero Arts | Mixed Media Release Blog Hop + Giveaway

Hello there, today is a super fun day as the new summer 2022 release from Hero Arts is out now! This release is focused on mixed media, but if you are not in to that, the products can be used in lots of different ways. 

PLEASE NOTE: This post contains affiliate links. Please see below for my full disclosure.

There are new stamps and lots of different mediums in this release - pearlescent paste, waxes, liquid pearls plus new tools like a beautiful palette knife and scrubber block to clean stamps whilst in the MISTI (so helpful!) plus more! There are also new colours of cardstock and we have revamped some of our inks too as part of the new Hero Arts Color System. These will be released on 20th June, but there are some sneaky peeks over on the website now, as well as the full photo in the catalogue.

We are celebrating the release with a fun, inspiration filled blog hop, along with prizes. More details on that below. Apologies for the long blog post but I hope you enjoy the inspiration!

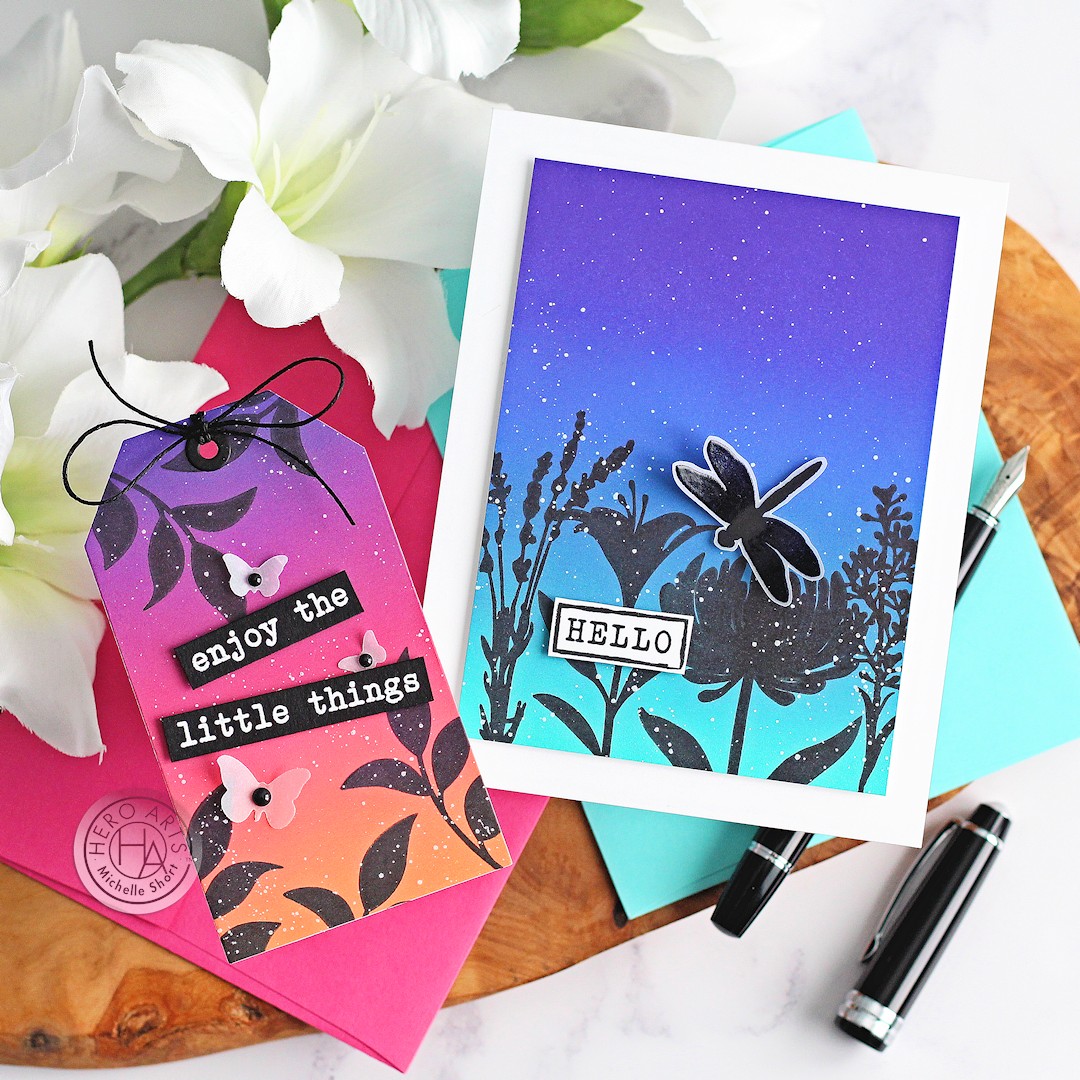
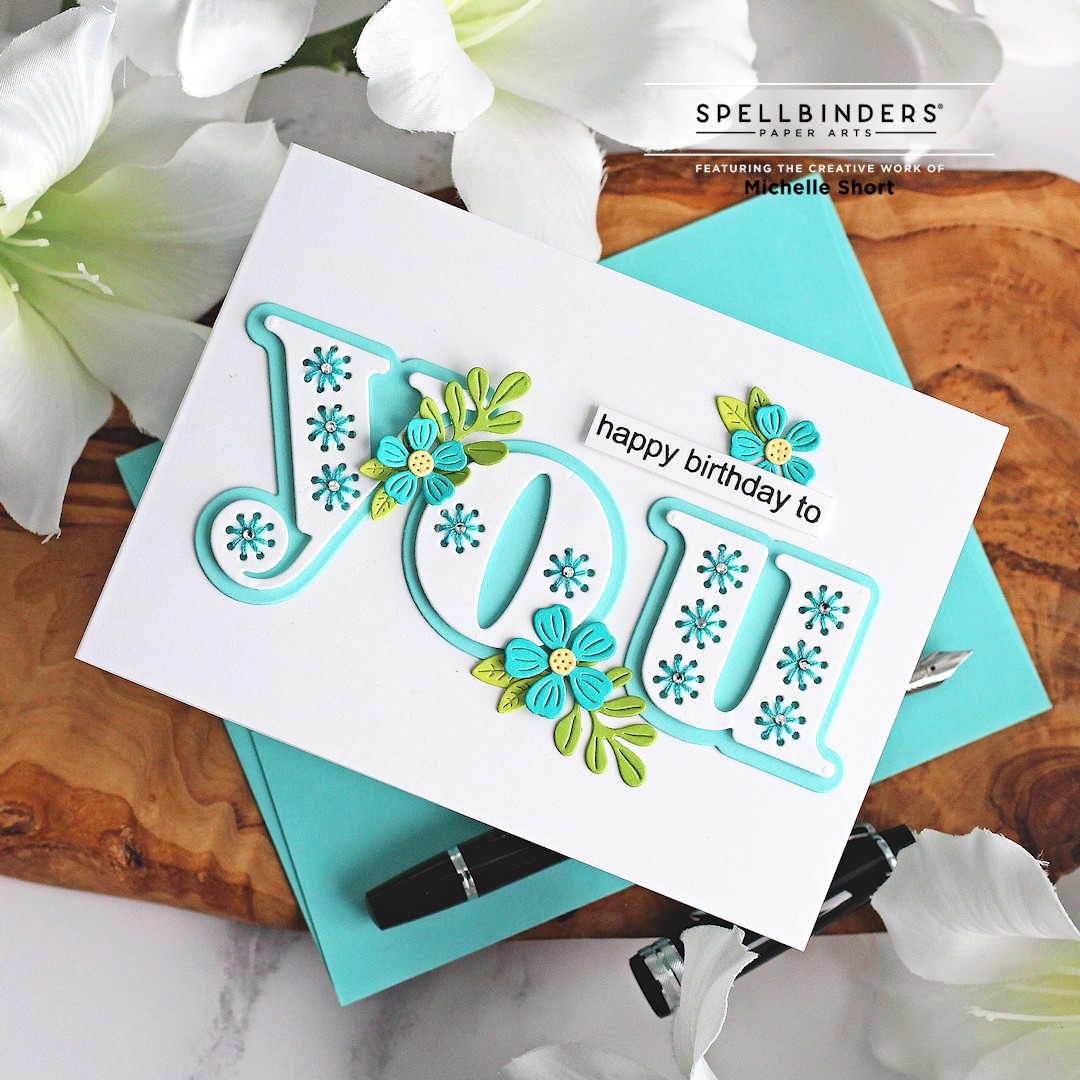
I am starting off by sharing two projects featuring three of the new stamp sets - Floral Silhouettes, Critter Silhouettes and Art Journal Messages. The messages set is perfect for art journaling, as the name suggests, but also good for cards and other papercraft projects too. 

I started off my taking a panel of Hero Arts Deluxe Smooth White Cardstock and blended Reactive Inks on top using Hero Arts Extra Large Ink Blending Brushes. I used (bottom to top) Pool Party, Blue Raspberry, Blue Hawaii and Purple Galaxy. I then took the Hero Arts Floral Silhouettes Stamp Set and stamped four of the flowers towards of the bottom of the panel, using Hero Arts Intensified Black Ink

I did stamp them a few times, to get a nice dark impression. I then splattered on a little Hero Arts Rose Gold & White Glimmer Metallic Inks (the white), before setting aside to dry. Once dry, it was adhered to an A2 white card base with thin foam tape. The dragonfly, from the Hero Arts Critter Silhouettes Stamp Set, was stamped on to Hero Arts Vellum Layering Paper with Hero Arts Clear Embossing & Watermark Ink

I applied Hero Arts Black Detail Embossing Powder and heat set. It was fussy cut out with scissors and added to the card with black foam tape. I then stamped the sentiment, from the Hero Arts Art Journal Messages Stamp Set, with Hero Arts Intensified Black Ink onto white cardstock, fussy cut it out and adhered it to the card with more thin foam tape. 

For my tag, I started off by die cutting the Hero Arts Tag Infinity Dies from Hero Arts Deluxe Smooth White Cardstock. Using Hero Arts Extra Large Ink Blending Brushes, I blended on Reactive Inks. I used (bottom to top) Creamsicle, Taffy, Berry Smoothie and Blue Hawaii. I took the leaf image from the Hero Arts Floral Silhouette Stamp Set and stamped it multiple times using Hero Arts Intensified Black Ink

I added more Glimmer Ink splatters and then set it aside to dry. Once dry, I adhered it back to back with another white tag. I also added the hole reinforcer cut from Hero Arts Pitch Black Cardstock. The sentiment, from the Hero Arts Art Journal Messages Stamp Set, was stamped on to black cardstock with Hero Arts Clear Embossing & Watermark Ink. I applied Hero Arts White Embossing Powder and heat set.

It was cut in to two strips using the dies in the Hero Arts Message Strips Stamp & Cut XL set and adhered to the tag with thin foam tape. I die cut small butterflies from the Hero Arts Butterfly Confetti Fancy Die from vellum and adhere them to the tag with vellum adhesive. To finish off, I added a black enamel dot to each (from the Hero Arts Neutrals Enamel Dots pack) and then twine through the top of the tag. 
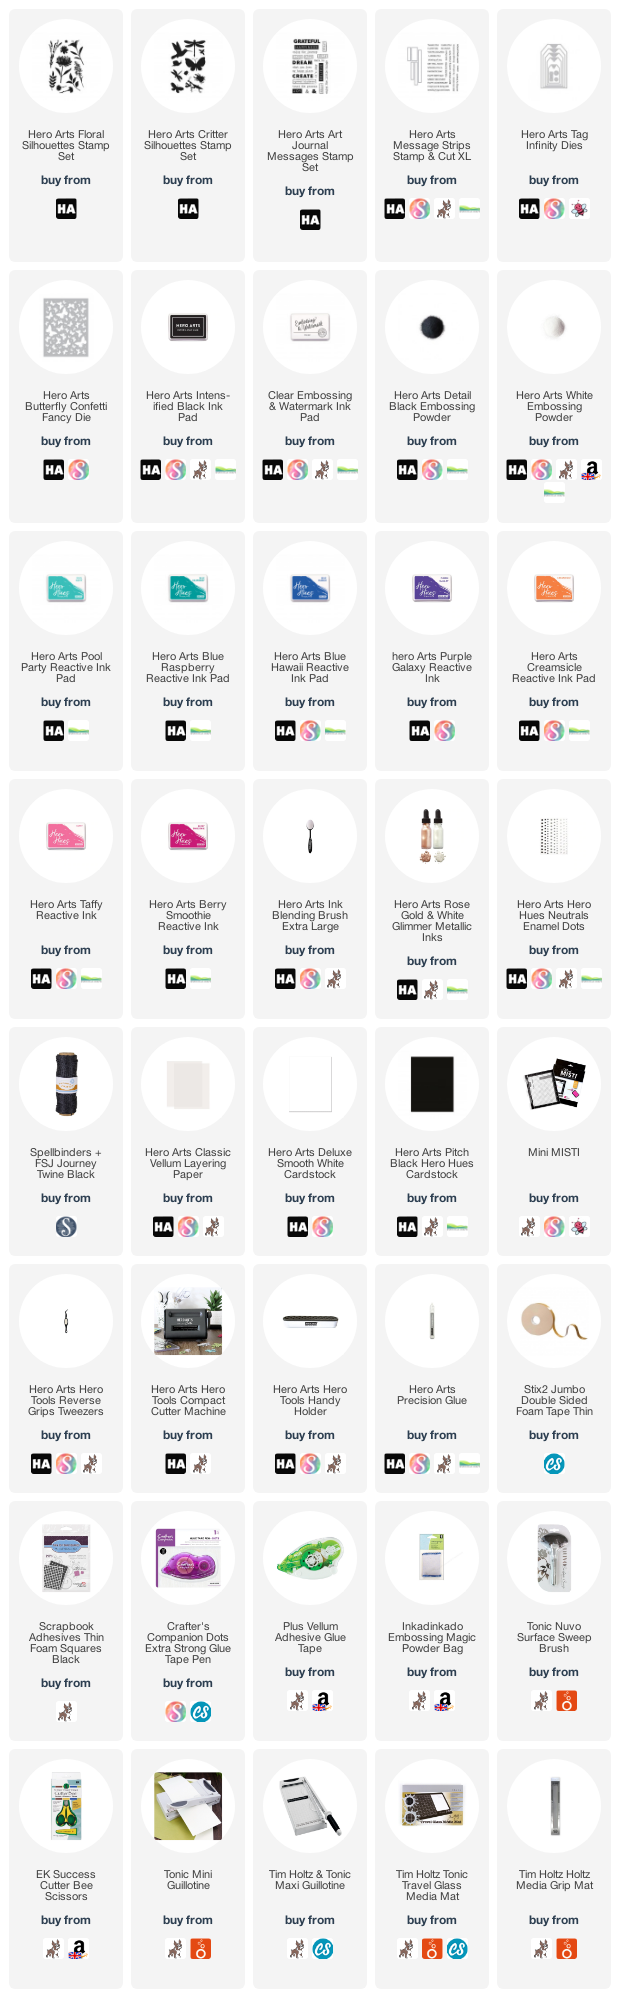
SUPPLIES:


Here are the links to what I have used on the projects. Affiliate links are used on some products. This means that if you make a purchase after clicking on my link, I receive a small commission with no extra cost to you. I truly appreciate your support when using these links. Please click on the logo below the product to shop at your favourite store. All products were personally purchased except those from Clearly Besotted, Hero Arts or those marked with an asterisk (*) which were kindly sent to me to use. You can read my full disclosure here.


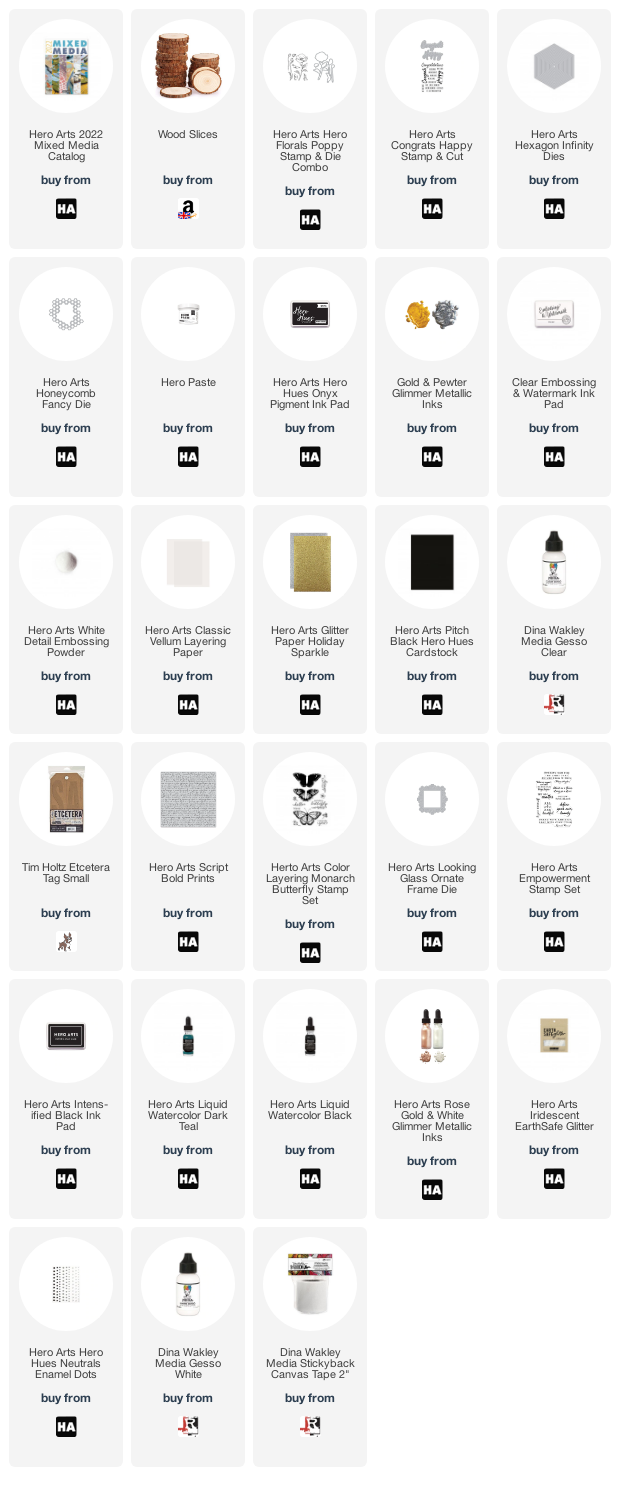
I also wanted to share with you two projects that I made for the catalogue using older products that work well for mixed media. Now, I have to admit, mixed media has never really been my thing, but I did enjoy creating these! First up is a little wood slice ...

It uses the Hero Floral Poppy embossed on to vellum. I prepped a small wood slice with clear gesso and then added Hero Paste through a stencil that I made by die cutting the Hero Arts Honeycomb Fancy Die from cardstock. Once dry, I added ink blending on top using Hero Hues Onyx Pigment Ink; wiping off the excess ink from the embossing paste. I then splattered with Gold Glimmer Metallic Ink

I die cut the Hero Arts Hexagon Infinity Dies from Hero Arts Glitter Paper Holiday Sparkle (gold) and adhered them on top, followed by the poppy. I did add a sentiment from the Hero Arts Congrats Happy Stamp & Cut set but we decided for the catalogue to take it off. I prefer it without the sentiment, but I didn't get a photo before sending it to Hero HQ. You can see it in the Hero Arts 2022 Mixed Media Catalog (and the graphic below) without the sentiment though! 

Next up is a large (Tim Holtz Etcetera 5.5" x 10") wooden tag. I primed it with white gesso and then  added Dina Wakley Stickyback Canvas Tape on top. I messily stamped Hero Arts Script Bold Prints on top using Hero Arts Intensified Black Inkbefore adding colour with Hero Arts Liquid Watercolor in Dark Teal and Black. I also splatted on the same white metallic ink used above, as well as some white acrylic paint.

I stamped the butterfly from Hero Arts Color Layering Monarch Butterfly with Intensified Black Ink and coloured with the watercolours before fussy cutting out. I die cut the Hero Arts Looking Glass Ornate Frame from Pitch Black Cardstock three times, layered them up and then added them to the tag, with the butterfly in the middle. The sentiment is from the Hero Arts Empowerment Stamp Set. I finished off with Hero Arts EarthSafe Glitter and black enamel dots. 

I did create two cards using the same design as my mixed media projects, but I will share them another day!
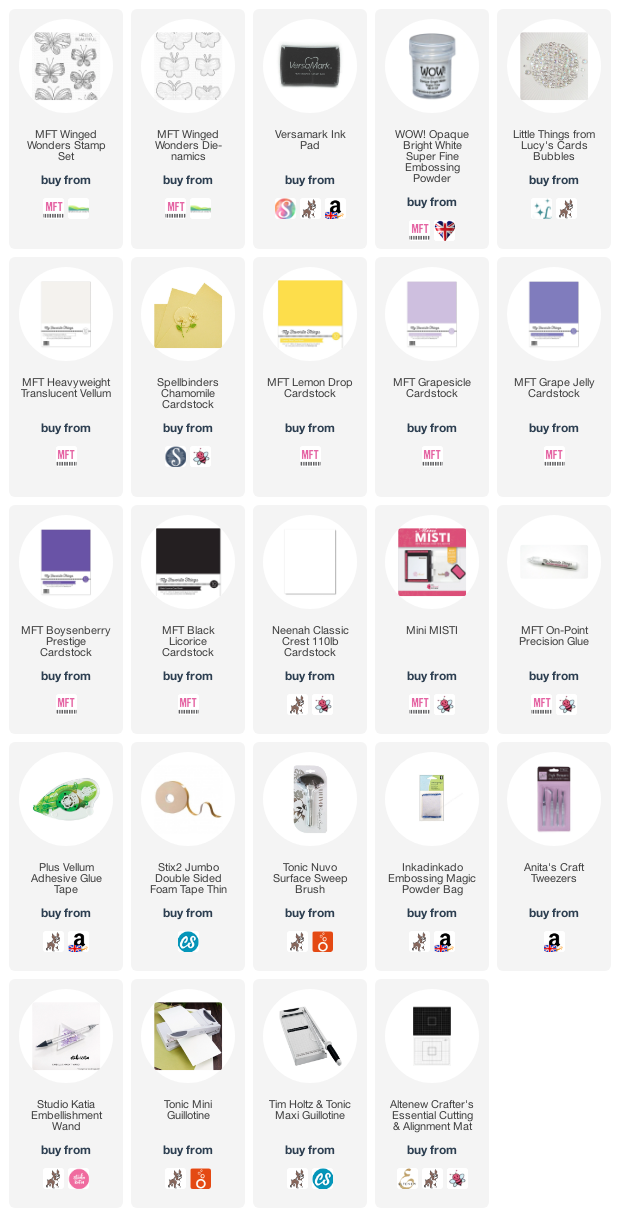
SUPPLIES:


Here are the links to what I have used on the projects. Affiliate links are used on some products. This means that if you make a purchase after clicking on my link, I receive a small commission with no extra cost to you. I truly appreciate your support when using these links. Please click on the logo below the product to shop at your favourite store. All products were personally purchased except those from Clearly Besotted, Hero Arts or those marked with an asterisk (*) which were kindly sent to me to use. You can read my full disclosure here.


BLOG HOP:

As mentioned, this post is part of  a fun, inspiration filled blog hop (with prizes!). For the hop, you should have arrived here from the amazing Maria Willis. Next on the hop is the fantastic Mindy Eggen. If you get lost along the way, or want to start the hop from the beginning, please head over to the Hero Arts Blog

GIVEAWAY:

Hero Arts are giving away a prize pack of new release products drawn from the comments left across all the stops in the hop. 

Leave a comment by Sunday 22nd May 2022 at 11.59pm PT to enter. The winner will be announced on the Hero Blog the following week. Good luck!

Thank you so much for stopping by today, I really do appreciate it. Wishing you a lovely time on the rest of the hop and a great rest of the day too!

16 May 2022

VIDEO | Vellum Butterflies

Hello there, I am over on the My Favorite Things YouTube Channel today, sharing a card using the Winged Wonders set. This set is so pretty! I love butterflies and thought that this set was perfect for colouring, ink blending and embossing on vellum, which is what I am doing today. 

PLEASE NOTE: This post contains affiliate links. Please see below for my full disclosure.


I started off my card by stamping two of the MFT Winged Wonders butterflies on to MFT Heavyweight Translucent Vellum using Versamark Ink. I applied white embossing powder and heat set. They were then die cut out using the MFT Winged Wonders Die-namics


I took a panel of white cardstock and added strips of cardstock to the bottom right hand corner. I used Spellbinders Chamomile, MFT Lemon Drop, MFT Grapesicle, MFT Grape Jelly and MFT Boysenberry. I adhered the strips with MFT On-Point Precision Glue and then cut off the excess using my guillotine. The panel was adhered to a white A2 card base with thin foam tape. 


The sentiment, from the MFT Winged Wonders Stamp Set, was heat embossed in white on to MFT Black Licorice Cardstock. It was then cut in to a strip. it was adhered to the larger butterfly and then using tape runner, I added adhesive behind the sentiment strip and added it to the card. The smaller butterfly was adhered with Vellum Adhesive Tape Runner. To finish off, I added a few Lucy's Cards Bubbles. 

VIDEO:

Here is the video showing how I made the card:


If you are viewing this blog post via email subscription, you can watch it HERE on YouTube. 

SUPPLIES:


Here are the links to what I have used on the project. Affiliate links are used on some products. This means that if you make a purchase after clicking on my link, I receive a small commission with no extra cost to you. I truly appreciate your support when using these links. Please click on the logo below the product to shop at your favourite store. All products were personally purchased except those from Clearly Besotted, Hero Arts or those marked with an asterisk (*) which were kindly sent to me to use. You can read my full disclosure here.


A very simple card but pretty too, I think! Thank you so much for stopping by today, I really do appreciate it. I wish you a lovely day and a wonderful week ahead! 

14 May 2022

Spellbinders | Stitched Alphabet

Hello there, today I have a card to share with you using the new Stitched Alphabet Collection from Spellbinders. This collection features the letters from the alphabet with holes in so that you can stitch patterns on them. You can use them without too, if you wanted to! The dies also feature the shadow too, so lots of different ways you can use them! 

PLEASE NOTE: This post contains affiliate links. Please see below for my full disclosure.


I chose which letters to use before I had seen this month's Large Die of the Month Club Kit, which funnily enough, also features a stitched you! The shadow die on that one is all one piece, whereas these ones are singular. The size of the letters is the same though, so you can mix and match! You can see my card using that set here


I started off my card by die cutting the Spellbinders Stitched Y, O and U Etched Dies from white cardstock. I then stitched them using aqua embroidery floss. You can do the stitching in different ways, I decided to keep mine very simple! I then die cut the shadow pieces from Spellbinders Waterfall Cardstock. I cut these twice. 


I adhered the two shadow layers one on top of another and then the stitched letters on top, with small pieces of foam tape. The letters were adhered to an A2 white card base with Bearly Art Glue. I stamped the sentiment, from the Clearly Besotted A Little Sentimental Stamp Set, on to white cardstock with Versafine Clair Nocturne Ink. It was cut in to a strip and added to the card with foam tape. 


I die cut the Spellbinders Mini Blooms and Sprigs Etched Dies from Spellbinders Cardstock - the flowers from Teal Topaz, the centres from Chamomile and the leaves and sprigs from Peridot and Rainforest. They were adhered to the card with Bearly Art Glue and foam squares. To finish off, I added teeny gems from the Spellbinders Silver Mix Color Essentials Gems to the centres of the stitching flowers. 

SUPPLIES:


Here are the links to what I have used on the project. Affiliate links are used on some products. This means that if you make a purchase after clicking on my link, I receive a small commission with no extra cost to you. I truly appreciate your support when using these links. Please click on the logo below the product to shop at your favourite store. All products were personally purchased except those from Clearly Besotted, Hero Arts or those marked with an asterisk (*) which were kindly sent to me to use. You can read my full disclosure here.


I will have another card coming up later in the month using different letters but in the mean-time, I hope you will check out the new collection! Thank you so much for stopping by today, I really do appreciate it. I hope you have a wonderful weekend!

12 May 2022

Spellbinders | May 2022 Clubs Inspiration Blog Hop

Hello there, today we are celebrating Spellbinders Club Kits with a fun blog hop. If you didn't already know, Spellbinders have a number of different monthly subscription kits - Large Die of the Month, Small Die of the Month, Glimmer Hot Foil Kit of the Month, Embossing Folder of the Month, Card Kit of the Month, Stamp of the Month ... plus many more! Today I am sharing another look at the May 2022 Large Die of the Month. 

This kit is so versatile as you can use stitching with the large 'you' or you can use it without, you can also use the individual words separately (like I have today) or combined with the 'you'. You can see my first card using the kit here. More details on the hop below.

PLEASE NOTE: This post contains affiliate links. Please see below for my full disclosure.


I started off my card by die cutting the shadow of the happy and birthday from the Spellbinders May 2022 Large Die of the Month Club Kit from Spellbinders Snowdrift Cardstock. I then cut the individual letters from Spellbinders Pop-Up Die Cutting Glitter Foam Sheets - Peacock Feathers. They were adhered together using Bearly Art Glue.

I took a panel of white cardstock and blended Tim Holtz Wilted Violet Distress Ink towards the bottom, fading up to white. I then adhered die cut flowers on top which were cut using the Spellbinders Be Bold Blooms Etched Dies and Spellbinders Delicious Decorations Etched Dies. I cut them from Spellbinders Cardstock in Purple Mist, Lilac Blossom, Royal Amethyst and Chamomile for the flowers. I used Peridot and Rainforest for the leaves.

Once adhered with Bearly Art Glue, I then adhered the sentiment on top with thin foam tape. The panel was then adhered to a mini slimline card base (3.5" x 6.5") with thin foam tape. To finish off, I added a few Spellbinders Crystal Mix Color Essential Gems

SUPPLIES:


Here are the links to what I have used on the project. Affiliate links are used on some products. This means that if you make a purchase after clicking on my link, I receive a small commission with no extra cost to you. I truly appreciate your support when using these links. Please click on the logo below the product to shop at your favourite store. All products were personally purchased except those from Clearly Besotted, Hero Arts or those marked with an asterisk (*) which were kindly sent to me to use. You can read my full disclosure here.


BLOG HOP:

As mentioned, this post is part of a fun blog hop celebrating the Spellbinders Club Kits. For the hop you should have arrived here from Birgit Norton. The next stop on the hop is Melody Rupple. If you get lost along the way, please visit the Spellbinders Blog.

GIVEAWAY:

To celebrate the club kits release, Spellbinders are giving away a $25 gift certificate to three lucky blog hop readers that comment on the Spellbinders blog post. Giveaway closes Sunday 15th May 2022 at 11.59pm MST. The winners will be announced on the Spellbinders Blog the following Wednesday. The winner will be responsible for any shipping costs, duties and taxes. Store credit/gift certificates cannot be applied to Club Subscriptions.

SPELLBINDERS CLUB KITS

I hope that you will check out the Spellbinders Club Kits. It is a wonderful monthly subscription where you receive the kit each month. Designers like myself share inspiration using the kit at the beginning of the month to show you lots of different ways that you can use it. If you do subscribe, you will get other benefits from Spellbinders too. Please see here for more information. You can also buy older kits here too. 

If you do want to get hold of this month's kits, you would need to subscribe by 24th May 2022 to receive them. Subscribers can cancel their membership at any time. 

UK SUBSCRIBERS

GREAT NEWS! If you are in the UK, Spellbinders will now ship the kits directly from here in the UK for Club Kit Subscribers (Club Kits only). That means reduced shipping costs and no extra fees! If you have been putting off subscribing to the kits because of this, now is the time to do it! 

End of code