31 August 2021

Clearly Besotted Teasers | Sweet Dreams

Hello there and welcome to day four of the Clearly Besotted September 2021 Teasers. Release day is tomorrow but I have one last teaser to share with you before the big reveal tomorrow. Today I am using the super cute Sweet Dreamzzz set. This features the most adorable ponies that remind me of My Little Pony. There are also lots of clouds, stars and a moon plus lovely sentiments too. The set works perfectly on it's own but can be combined with lots of other sets as well. 


I started off my card by stamping one of the sleeping ponies from the Clearly Besotted Sweet Dreamzzz Stamp Set on to white cardstock with Memento Tuxedo Black Ink. I then made a mask (from masking paper) for her and placed it over the top. I then stamped the moon image on top so that when you remove the masking paper, it looks like she is laying sleeping on the moon - so cute! 


She was coloured with Copic Markers (the colours that I used are listed below the supplies area) and fussy cut out with scissors. I took a panel of white cardstock and using the MFT Circle Extraordinaire Stencil, blended Distress Inks inside the circle for a night sky. I first blended Blueprint Sketch and Chipped Sapphire around the edges and then took the Clearly Besotted Cloudy Day Stencil and blended on clouds in the same colours. Before removing the stencils, I added a little Black Soot around the edges to darken it further. 


After leaving it to dry for a little while, I stamped the sentiment on top from the Clearly Besotted Chitter Chatter Stamp Set, using Versamark Ink. I applied white embossing powder and heat set. The panel was adhered flat to an A2 white card base and then the pony image added on top with foam tape. To finish off, I added white gel pen stars to the sky. 
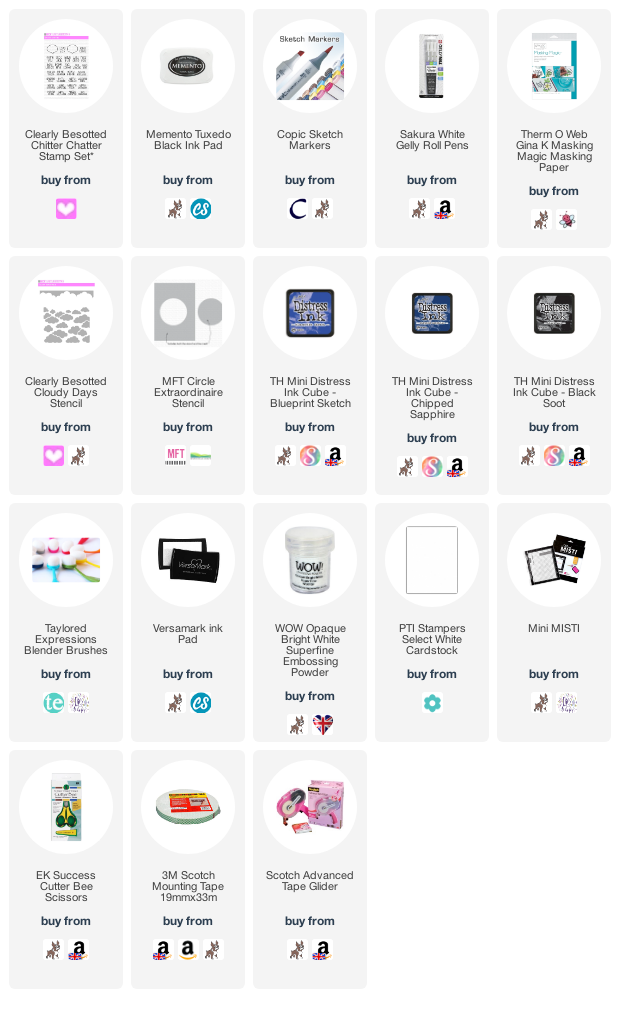
SUPPLIES:


Here are the links to what I have used on the project. Affiliate links are used on some products. This means that if you make a purchase after clicking on my link, I receive a small commission with no extra cost to you. I truly appreciate your support when using these links. Please click on the logo below the product to shop at your favourite store. All products were personally purchased except those from Clearly Besotted, Hero Arts or those marked with an asterisk (*) which were kindly sent to me to use. You can read my full disclosure here.


COPIC MARKERS: Pony - C4, C1, C0/V17, V15, V12, V01/RV66, RV55, RV52/BG49, BG13, BG11. Moon - E53, Y02, Y00, Y000. Stars - YR24, YR23, Y18, Y17, Y15. 

As mentioned, I think the clouds and moon in the set would work really well with other image sets too. Or make lovely sky scenes on there own but those ponies are just adorable! For more inspiration using the new sets, please head over to the Clearly Besotted Blog, Keren, Lisa and our wonderful guests AdelleFrancine and Keeway. There are quite a few sets that I haven't shared this month but I will share them in my release video tomorrow. Thanks so much for stopping by, wishing you a wonderful day! 

30 August 2021

Clearly Besotted Teasers | Best Witches

Hello there and welcome to day three of the Clearly Besotted September 2021 Teasers. Release day is Wednesday 1st September, so not long to wait now! For today's projects, I thought I would use some of the new Halloween sets being released this month. To be honest, I do not really celebrate Halloween but the sets are super fun to create with! 


For my card, I started off by taking the pumpkin house and cat witch from the Clearly Besotted Frightening Friends Stamp Set and stamped them on to white cardstock with Memento Tuxedo Black Ink. I coloured them with Copic Markers (the colours that I used are listed below the supplies area) and fussy cut them out with scissors. 


I took a panel of white cardstock and placed the Taylored Expressions Rectangle Masking Stencil on top and ink blended inside with Tim Holtz Distress Inks. I used Twisted Citron, Mowed Lawn, Rustic Wilderness and Pine Needles. With the masking stencil still in place, I splattered on Arteza Black Gouache and set it aside to dry. 


Once dry, I stamped the sentiment from the Clearly Besotted Says It All Again Stamp Set on to the panel and then adhered it flat to an A2 white card base with tape runner. The house and cat were added on top with thin foam tape. To finish off, I added a few white gel pen highlights. 


Another Halloween set releasing this month is Tricky Treatzzz and I couldn't resist the adorable sloths! I started off my tag by stamping one of the sloths from the Clearly Besotted Tricky Treatzzz Stamp Set on to white cardstock with Memento Tuxedo Black Ink. She was coloured with Copic Markers and fussy cut out with scissors. I then die cut a Clearly Besotted Tag Along Die from white cardstock. 


I die cut a circle from masking paper and then placed it on to the tag before ink blending with Distress Inks. I used Wilted Violet, Dusty Concord and Black Soot. The mask was removed and the moon lightly coloured with Copics. I stamped the 'zzz' from the set and then sleepy witchy sloth was added with foam tape. To finish off, I added twine through the top of the tag and tied in a bow. 

SUPPLIES:


Here are the links to what I have used on the projects. Affiliate links are used on some products. This means that if you make a purchase after clicking on my link, I receive a small commission with no extra cost to you. I truly appreciate your support when using these links. Please click on the logo below the product to shop at your favourite store. All products were personally purchased except those from Clearly Besotted, Hero Arts or those marked with an asterisk (*) which were kindly sent to me to use. You can read my full disclosure here.


COPIC MARKERS: Pumpkin house - E19, YR27, YR18, YR16, YR15, YR12/G28, YG17, YG23, YG01/E59, E57, E55/Y11, Y00. Cat - W10, W8, W7, W5, W4, W3, W1. Hat - C10, C8, C7, C6, C5, V09, V17, V15, V12. Broomstick - E59, E57, E55, E53, E51. Sloth - E47, E44, E43, E42, E41, E40. Hat - C10, C8, C6, C5, V17, V15, V12. Broomstick - E59, E57, E55, E53, E51, E50. Moon - E51, E50, 0. 

I think it is the colours that I am drawn to with Halloween cards. I have never been a huge fan of green but it seems to work really well with black, orange and purple! For more inspiration using the new sets, please head over to the Clearly Besotted Blog, Keren and Lisa and our wonderful guests Adelle and Francine. Thanks so much for stopping by today, I really do appreciate it. See you tomorrow for day four. Have a lovely day! 

29 August 2021

Clearly Besotted Teasers | I'll Always Look Out For You

Hello there and welcome top day two of the Clearly Besotted September 2021 Teasers. Today I have a card to share with you using the most adorable meerkats! The set is called Meerkat Mischief and as you would expect, contains lots of adorable meerkats, a landscape image, plus lots of wonderful sentiments. 


I started off my card by stamping two of the meerkats from the Clearly Besotted Meerkat Mischief Stamp Set on to a panel of white cardstock with Memento Tuxedo Black Ink. I made a mask for them from masking paper and then stamped the landscape on top. I removed the masks so that it looks like the meerkats are on top of the mounds/stones. 


I took the sentiment from the set and stamped it below. They were then coloured using Copic Markers, adding dot details for the sky and ground (the colours that I used are listed below the supplies area). The panel was adhered to an A2 Sand card base and then I finished off with some white gel pen highlights. 

SUPPLIES:


Here are the links to what I have used on the project. Affiliate links are used on some products. This means that if you make a purchase after clicking on my link, I receive a small commission with no extra cost to you. I truly appreciate your support when using these links. Please click on the logo below the product to shop at your favourite store. All products were personally purchased except those from Clearly Besotted, Hero Arts or those marked with an asterisk (*) which were kindly sent to me to use. You can read my full disclosure here.


COPIC MARKERS: Meerkats - E37, E35, E33, E31, E30. Rocks/earth mounds - E47, E44, E43, E42, E41. Grass - G28, YG17, YG23, YG01. Ground - colours from the mounds and grass. Sky - B02, B01, B00, B000, B0000. 

These meerkats just have the sweetest little faces! For more inspiration using the new release, please head over to the Clearly Besotted Blog, Keren and Lisa. Plus our wonderful guests AdelleAlberto and Francine. Thank you so much for stopping by today, I hope that you are well. See you tomorrow for day three. Wishing you a fabulous day! 

28 August 2021

Clearly Besotted Teasers | Mythical Monsters

Hello there and welcome to the start of the Clearly Besotted September 2021 Release Teasers. Release day is Wednesday 1st September and from now until then, we will be sharing teasers with you using the new sets. It is a wonderful release, so I hope that you will enjoy spending the next few days with me as we look at the sets. 

For my projects today, I am using the new super cute Mythical Monsters set. This is a fun set filled with mythical (or some real in my opinion!) critters plus a wonderful background and some fun sentiments.


I started off my card by stamping the yeti and background from the Clearly Besotted Mythical Monsters Stamp Set on to white cardstock with Memento Tuxedo Black Ink. The yeti and tree from the background (I just wanted the tree but the background is bigger) were coloured with Copic Markers (the colours that I used are listed below the supplies area) and fussy cut out with scissors. 


I set them aside while I worked on my background. I took the Clearly Besotted Around About Stencil and placed it on top of a panel of white cardstock, securing in place with tape. I then blended Distress Inks through for the sky. I used Wilted Violet and Dusty Concord. With the stencil still in place, I splattered on Dr. Ph. Martin's Bleed Proof White paint for snow. The stencil was removed and the panel left to dry. 


Once dry, it was adhered to an A2 white card base with thin foam tape. The tree was adhered flat with tape runner and the yeti with more thin foam tape. I took the sentiment from the Clearly Besotted Tiny Talk Stamp Set, stamped it on to black cardstock with Versamark Ink, applied white embossing powder and heat set. It was cut in to a strip and added to the card with more thin foam tape. To finish off, I added white gel pen dots to the tree for more snow. 


I couldn't resist using bigfoot from the set too so I stamped him, as well as the tree again from the Clearly Besotted Mythical Monsters Stamp Set on to white cardstock with Memento Tuxedo Black Ink. They were coloured with Copic Markers and fussy cut out. I took a Clearly Besotted Tag Along Tag Die and cut it from white cardstock (the hole reinforcer from black). 


I placed the Clearly Besotted Cloudy Day Stencil on top and using a blending brush, blended on Tim Holtz Mermaid Lagoon Distress Ink, moving the stencil down as I went to create the cloudy sky. I then blended Twisted Citron and Mowed Lawn Distress Inks at the bottom for grass. The sentiment from the set was stamped with black ink. The tree was added with tape runner and bigfoot adhered on top with foam tape. To finish off, I added twine through the top. 

SUPPLIES:


Here are the links to what I have used on the project. Affiliate links are used on some products. This means that if you make a purchase after clicking on my link, I receive a small commission with no extra cost to you. I truly appreciate your support when using these links. Please click on the logo below the product to shop at your favourite store. All products were personally purchased except those from Clearly Besotted, Hero Arts or those marked with an asterisk (*) which were kindly sent to me to use. You can read my full disclosure here.


COPIC MARKERS: Yeti - B04, B02, B01, B00, B000, B000, E51, E50. Trees - E59, E57, E55, G28, YG17, YG23, YG01. Bigfoot - E59, E57, E55, E53, E51, E50. 

There are lots of other wonderful critters in this set two but these too caught my eye instantly! For more inspiration using the new release, please head over to the Clearly Besotted Blog, Keren and Lisa. Plus our wonderful guest designers AdelleAlberto and Francine. Thanks so much for stopping by today, I really do appreciate it. See you tomorrow for day two. Have a wonderful day! 

27 August 2021

Spellbinders | Holiday 2021 Inspiration Blog Hop

Hello there, I am delighted to be joining Spellbinders today to celebrate new Holiday 2021 products. There have been lots of new collections hit the shop in the past month or two and some more still to come too! For the blog hop, we are sharing lots of inspiration using the new sets plus giveaways as well. More on that below. 


For my card today, I wanted to use the Chill Bear from the Be Merry Collection again because quite frankly, I love him! I started off by die cutting the Spellbinders Chill Bear Etched Dies from Spellbinders Snowdrift, Alabaster, Pink Sand and Onyx Cardstock. I cut his scarf from Wild Berry. The layers were adhered together with Bearly Art Glue and set aside while I worked on my background. 


I took a panel of Spellbinders Raindrop Cardstock and blended Distress Oxides on top using blending tools. I used Salty Ocean, Blueprint Sketch and Chipped Sapphire. I then splattered on Dr. Ph. Martin's Bleed Proof White paint and set it aside to dry. I also cut the trees from the Chill Bear set from Fern and Rainforest Cardstock and splattered those too. Once dry, the panel was adhered flat to an A2 white card base and a snow bank added on top. The trees were popped behind. 


Chill Bear was added on top with foam squares. I took the sentiments from the Mini Christmas Sentiment Strips Glimmer Hot Foil Plate & Die Set (from the Tis The Season Collection) and foiled them on to white cardstock with Silver Foil. They were cut out with the die and adhered to the card with more foam squares. I cut three snowflakes from the set from glitter cardstock and added them around the sentiment. To finish off, I added Spellbinders Silver Mix Color Essentials Gems to the centres of the snowflakes. 

SUPPLIES:


Here are the links to what I have used on the project. Affiliate links are used on some products. This means that if you make a purchase after clicking on my link, I receive a small commission with no extra cost to you. I truly appreciate your support when using these links. Please click on the logo below the product to shop at your favourite store. All products were personally purchased except those from Clearly Besotted, Hero Arts or those marked with an asterisk (*) which were kindly sent to me to use. You can read my full disclosure here.


BLOG HOP:


As mentioned, this blog post is part of a fun inspiration filled blog hop with prizes (see below). For the hop, you should have arrived here from the wonderful Betty Wright. Next on the hop is the fantastic Norine Borys. If you get lost along the way or want to start from the beginning, please head over to the Spellbinders Blog

GIVEAWAY:

To celebrate this event, Spellbinders are giving away a $50 gift certificate to 3 lucky blog readers – selected from the comments on our blog. Giveaway closes on Sunday, August 29th 11:59 pm EDT. The winners will be announced in the blog hop post the following Wednesday. Winner is responsible for shipping cost, duties and taxes.

Thank you so much for stopping by today, I really do appreciate it. I hope you have a wonderful rest of the day! 

26 August 2021

Altenew | Plentiful Patterns Stand-alone Dies/Stencils Collection Release Blog Hop + Giveaway

Hello there, I am delighted to be joining Altenew today to celebrate the release of the new Plentiful Patterns Collection. This collection features stand-alone dies and stencils and is wonderful! I have a few different products to share with you today on my projects. We are celebrating the release with a fun blog hop, more details on that below. 


My first project uses the beautiful new Altenew Itty Bitty Flowers Die Set. I cut the the stem from black cardstock and the flowers from Altenew Sea Shore Gradient Cardstock. I took one of the new frames from the Altenew Mix & Match Frames Die Set and cut it from a panel of white cardstock. I adhered the stem on top and then cut off the bottom part that was overhanging with scissors. 


I then arranged the flowers on top, adhering the layers with Altenew 2 in 1 Precision Glue and then the  flowers to the stem with Altenew Instant Dimension Foam Tape. The panel was adhered to a 4" x 5.25" white card base, which is the size of the framed panel. I took the sentiment from the Altenew Sentiment Strips 2 Stamp Set and stamped it on to white cardstock with Altenew Obsidian Black Ink. It was cut in to a strip and added to the card with more foam tape. To finish off, I added a few Iridescent Jewels. 


My next project uses the new Bountiful Butterflies stencil and dies. These can be purchased as a set or separately. I started off by die cutting one of the butterflies from the Altenew Bountiful Butterflies Die Set from white cardstock. I then took the Altenew Bountiful Butterflies Builder Stencil Set 3 in 1 and placed the single stencil on top to ink blend the body of the butterfly first with black ink. I then used Altenew Shades of Purple Crisp Dye Inks for the wings. 


I die cut an Altenew Terrific Tags Die from white cardstock, as well as one from the Altenew Essential Black & White Paper Pad. The paper one was cut down and adhered at the bottom of the white one. I stamped a sentiment from the Altenew Sentiment Strips Stamp Set on to black cardstock with Altenew Embossing Ink, applied Altenew Pure White Embossing Powder and heat set. It was cut in to a strip and added to the tag with foam tape. The butterfly was then adhered above with more foam tape and twine added to finish off. 


My final project today uses the new Altenew Brick Rosette Builder Stencil Set 2 in 1. This set consists of two stencils with a wonderful brick rosette pattern. The circles are a lot bigger than this but I thought it would look nice as a way to add a floral focal point to a card. I started off by taking a white A2 card base and placing the first stencil on top. 


I masked off the parts that I didn't want and then using an Altenew Small Ink Blending Tool, I blended on black ink (from the Altenew Green Fields Crisp Dye Ink set). I removed the stencil and then placed the other one on top and did the same thing, to create the circle pattern. I took the Altenew Craft-A-Flower: Morning Glory Layering Die Set and cut the flowers from Altenew Cherry Blossom Gradient Cardstock and Altenew Summer Afternoon Gradient Cardstock


The leaves were cut from Altenew Green Meadows Gradient Cardstock. They were all layered up using Altenew 2 in 1 Precision Glue and added to the card with tape runner. I took the sentiment from the Altenew Sentiment Strips Stamp Set and stamped it on to white cardstock with Altenew Obsidian Black Ink. It was cut in to a strip and added to the card with Altenew Instant Dimension Foam Tape

SUPPLIES:


Here are the links to what I have used on the project. Affiliate links are used on some products. This means that if you make a purchase after clicking on my link, I receive a small commission with no extra cost to you. I truly appreciate your support when using these links. Please click on the logo below the product to shop at your favourite store. All products were personally purchased except those from Clearly Besotted, Hero Arts or those marked with an asterisk (*) which were kindly sent to me to use. You can read my full disclosure here.


BLOG HOP:


As mentioned, this post is part of a fun, inspiration filled blog hop with prizes (se below!). For the hop, you should have arrived here from the amazing Emily Midgett. Next on the hop is the fabulous Virginia Lu. If you get lost or want to start the hop from the beginning, please head over to the Altenew Blog

FREEBIES:

Here are TWO ways to get a FREEBIE to kickstart your creativity! Free gift will be added to cart automatically.

  • Get a FREE brand new Plentiful Patterns Release Inspiration Guide (worth $5.99) with every order of high-value Plentiful Patterns release bundles. *Exclusions apply.
  • Get a FREE brand new Plentiful Patterns Release Mini Inspiration Guide with every order from 26th August 2021 through 28th August 2021.

GIVEAWAY:

$300 in total prizes! To celebrate this release, Altenew is giving away a $50 gift certificate to 2 lucky winners and a $25 gift certificate to 8 winners! Please leave a comment on the Altenew Card Blog and/or each designer’s blog post on the blog hop list below by 30th August 2021 for a chance to win. Altenew will draw 10 random winners from the comments left on each stop of this blog hop and announce the winners on the Altenew Winners Page on 2nd September 2021.


Thank you so much for stopping by to see me today, I really do appreciate it. I hope you are well and staying safe. Wishing you a wonderful rest of the day! 

Sending a Happy Hello

Hello there, I am over on the Hero Arts Blog today, sharing a hexagon shaped card for the latest Stay Crafty with Hero Challenge, which is rainbow cards. 


I started off my card by cutting hexagons using the Hero Arts Hexagon Infinity Dies and cutting cloud layers using the Hero Arts Cloudy Sky Scene Fancy Dies. The rainbow was die cut using the Hero Arts Rainbow Infinity Dies using purple and pink cardstock. 


The sentiment is from the Hero Arts Message Strips Stamp & Cut XL. To finish off, I added some stars die cut from the beautiful new Glitter Paper Basics set. 

SUPPLIES:


Here are the links to what I have used on the project. Affiliate links are used on some products. This means that if you make a purchase after clicking on my link, I receive a small commission with no extra cost to you. I truly appreciate your support when using these links. Please click on the logo below the product to shop at your favourite store. All products were personally purchased except those from Clearly Besotted, Hero Arts or those marked with an asterisk (*) which were kindly sent to me to use. You can read my full disclosure here.


For more details on how I made the card, please head over to the blog post. Thank you so much for stopping by, see you soon for an Altenew post. 

23 August 2021

Birthday Galaxy

Hello there, today I have a card to share with you that I made for my brother for his birthday. Male cards are always tricky to make (I think!) but you can't go wrong with a galaxy background!


I started off by die cutting the Reverse Confetti Stitched Rays Cover Panel Confetti Cuts from white cardstock. I then randomly blended on Distress Inks in Peacock Feathers, Twisted Citron, Mermaid Lagoon and Wilted Violet. I filled in the gaps with Chipped Sapphire and Black Soot. I took it to my splat box and splattered on water using a Distress Sprayer first, botted off the excess and then splattered on Dr. Ph. Martin's Bleed Proof White paint and set aside to dry. 


I took the Reverse Confetti Happy Confetti Cuts and cut the shadow from MFT Heavyweight Vellum. I then cut the letters from black cardstock five times each. I layered them up one on top of another and then on to the vellum shadow. I also die cut the clouds from the Reverse Confetti Bear Up There Confetti Cuts, as well as the Reverse Confetti Sealiously Confetti Cuts sets. They were cut from white cardstock and the same vellum (with double sided adhesive on the back). 


I adhered the clouds on to the panel and cut the overlapping parts with scissors. The panel was then adhered to an A2 white card base with tape runner. The happy word was adhered and then I took the sentiment from the Reverse Confetti Happy Coordinates Stamp Set and stamped it on to black cardstock with Versamark Ink. I applied white embossing powder and heat set. It was cut in to a strip and added below the happy word with foam tape. To finish off, I added a few Lucy's Raindrops

SUPPLIES:


Here are the links to what I have used on the project. Affiliate links are used on some products. This means that if you make a purchase after clicking on my link, I receive a small commission with no extra cost to you. I truly appreciate your support when using these links. Please click on the logo below the product to shop at your favourite store. All products were personally purchased except those from Clearly Besotted, Hero Arts or those marked with an asterisk (*) which were kindly sent to me to use. You can read my full disclosure here.


Thank you so much for stopping by to see me today, I really do appreciate it. I hope you have a wonderful day and a great week ahead! 

22 August 2021

Altenew | Paint-A-Flower White Swan Echinacea Release Blog Hop + Giveaway

Hello there, I am delighted to be joining Altenew today to celebrate the release of the new Paint-A-Flower White Swan Echinacea Outline Stamp. I have echinacea in my garden, so I had to colour this one up! The set can be purchased separately or as a bundle with watercolours. We are celebrating the release with a fun blog hop. More details on that below. 


I started off my card by stamping the Altenew Paint-A-Flower White Swan Echinacea Outline Stamp Set on to white cardstock with Altenew Permanent Black Ink. I then coloured the image with Copic Markers. Although I am assuming that the white swan variety is supposed to be white in colour, I coloured these pink like the ones in garden! I fussy cut them out with scissors and then set them aside. 


I took an A2 white card base and embossed circle dies in to the front of the panel with my die cutting machine. I love the subtle interest this gives! The sentiment from the set was stamped on to black cardstock with Versamark Ink and Altenew Pure White Crisp Embossing Powder applied. It was heat set and cut in to a strip. Both the flowers and sentiment were adhered to the card base with Altenew Instant Dimension Foam Tape. To finish off, I added a few clear gems. 

SUPPLIES:


Here are the links to what I have used on the project. Affiliate links are used on some products. This means that if you make a purchase after clicking on my link, I receive a small commission with no extra cost to you. I truly appreciate your support when using these links. Please click on the logo below the product to shop at your favourite store. All products were personally purchased except those from Clearly Besotted, Hero Arts or those marked with an asterisk (*) which were kindly sent to me to use. You can read my full disclosure here.


BLOG HOP:


As mentioned, this post is part of a fun, inspiration filled blog hop with prizes (see below!). For the hop, you should have arrived here from the amazing Jaycee Gasper. Next on the hop is the fantastic Tenia Nelson. If you get lost along the way, or want to start the hop from the beginning, please head over to the Altenew Blog

GIVEAWAY:

$200 in total prizes! To celebrate this release, Altenew is giving away a $50 gift certificate to 2 lucky winners and a $20 gift certificate to 5 winners! Please leave a comment on the Altenew Card Blog and/or each designer’s blog post on the blog hop list below by 28th August 2021 for a chance to win. Altenew will draw 7 random winners from the comments left on each stop of this blog hop and announce the winners on the Altenew Winners Page on 30th August 2021.


Thank you so much for stopping by today, I really appreciate it. I hope you have a wonderful rest of the weekend! 

20 August 2021

Spellbinders | Open House Collection

Hello there, today I have three cards to share with you that I created for Spellbinders using their new Open House Collection. This die cutting collection features four sets that you can mix and match to create wonderful front door scenes. 


These are perfect for Christmas/winter cards, like I have used them today, but these would work equally well for non-holiday cards too; there may also be some products releasing soon that work well with his collection for other holidays too ;)

FROM HOUR HOME TO YOURS

My first card is a card that would be lovely to send to holiday guests inviting them to stay (if safe to do so during the pandemic), or simply as a holiday card in general. It could even be used as a non-holiday card. I started off by die cutting the Spellbinders Open House Door Base Etched Dies elements from Spellbinders Cardstock. I used Onyx for the main door and Snowdrift and Glacier for the windows. The hardware was cut from Brushed Gold Cardstock.

I took an A2 white card base and added a strip of Silver Fox Cardstock at the bottom for the ground. I adhered the elements to the door with Bearly Art Glue and adhered the door to the card base with thin foam squares. The window piece was added above, adhered flat. I took the Spellbinders Open House Topiary Etched Dies and die cut the elements from Fern, Rainforest, Pomegranate and Poppy Field Cardstock. The plant stems were cut from Timber. They were assembled in to topiary trees and adhered to the card with foam tape. 


I die cut foliage for above the door and embellished with a gold bow, as well as adding gold bows to the topiary plants. To finish off, I foiled a sentiment from Spellbinders Mini Christmas Sentiment Strips Glimmer Hot Foil Plate & Die Set on to white cardstock with Spellbinders Gold Foil. It was cut in to a strip and added to the card with thin foam tape. To finish off, I added Spellbinders Gold Mix Color Essentials Gems to the bows.

CHRISTMAS GNOME GREETINGS

For my next card, I thought I would create a mini slimline card and combine the door elements with Dancin’ Gnome from the Be Merry Collection. I started off by die cutting the door elements the same as the first card - using Onyx, Snowdrift and Glacier Cardstock. I used Brushed Silver Cardstock for the post box plate and door handle. I used Graphite for the top door piece, Fern for the foliage and Snowdrift for the flowers.


I die cut the Spellbinders Open House Sentiment Steps Etched Dies from Alabaster and Graphite Cardstock and adhered them together with Bearly Art Glue. There are sentiments in the set that you can die cut words from the steps, but I did not use them on my card today. They were adhered to a 6.5" x 3.5" white card base with Bearly Art Glue. I adhered the door above and then die cut the railings from Graphite and Blue Spruce Cardstock and adhered them on top. I stamped the sentiment from the Spellbinders Mini Christmas Greetings Stamp & Die Set on to the middle step with black ink.

I took the Spellbinders Dancin’ Gnome Etched Dies and die cut them from Bearly Peach, Silver Fox, Snowdrift, Waterfall and Teal Topaz Cardstock. The pieces were adhered together and then adhered to the card with Foam Squares. To finish off, I die cut the snowflakes from the Spellbinders Chill Bear Etched Dies from Snowdrift Cardstock. I adhered the small one to the gnome’s hat and the two larger ones to the steps. To finish off, I added a few Spellbinders Silver Mix Color Essential Gems to the snowflakes and the flowers.  

CHRISTMAS HELLO

My last card for today could also be used for any occasion. If you take the poinsettia off, I think it could be a non-holiday card as well as a holiday one. I started off by die cutting the Spellbinders Open House Door Base Etched Dies like the first card and second card. For the hardware, I used Brushed Silver Cardstock. I created a 6.5" x 3.5" white card base and added a strip of Silver Fox Cardstock at the bottom for the ground.


I die cut the door mat from Poppy Field and Pomegranate Cardstock and added a panel of Snowdrift to the back. The door mat was added to the card on top of the ground and then the door and elements adhered above with Bearly Art Glue. The foliage above the door was cut from Rainforest Cardstock and I die cut a bow from Spellbinders Open House Topiary Etched Dies from Pomegranate.


I wanted to embellish the door with something Christmassy, so I die cut the poinsettia from the Spellbinders Christmas Blooms Etched Dies and adhered it to the front of the door, like you would a wreath, with a foam square. To finish off, I embellished with Spellbinders Silver Mix Color Essential Gems.

SUPPLIES:


Here are the links to what I have used on the project. Affiliate links are used on some products. This means that if you make a purchase after clicking on my link, I receive a small commission with no extra cost to you. I truly appreciate your support when using these links. Please click on the logo below the product to shop at your favourite store. All products were personally purchased except those from Clearly Besotted, Hero Arts or those marked with an asterisk (*) which were kindly sent to me to use. You can read my full disclosure here.


I am looking forward to trying out the collection for non-holiday cards as well! For more inspiration using the new collections, please head over to the Spellbinders Blog. Thank you so much for stopping by today. I hope you have a wonderful day!

End of code