Showing posts with label Spellbinders. Show all posts

13 September 2025

Spellbinders | Autumn Cheer

Hello there, today I have two cards to share using products from the Spellbinders Autumn Archives Collection by Kelly Bangs. This collection, as the name suggests, is all about autumn. I have two clean and simple cards to share using some of the products from the collection. 

PLEASE NOTE: This post contains affiliate links. Please see below for my full disclosure.


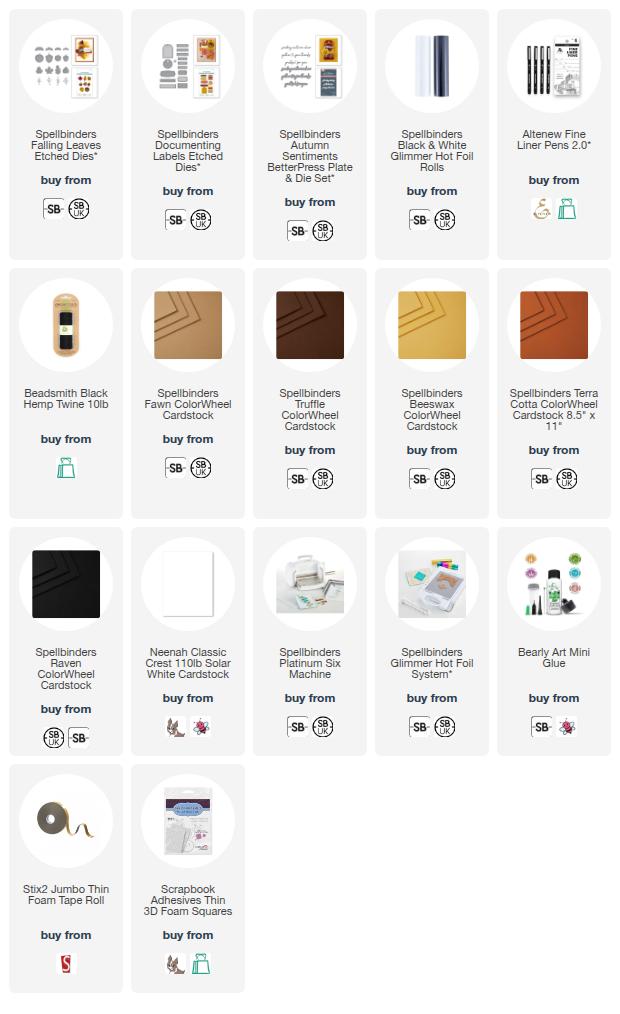
For both cards, I used the Spellbinders Falling Leaves Etched Dies. You cut the base of the leaves and the veining separately, so you can cut the veins from a darker or lighter colour of cardstock, or something like gold would be nice too. For my cards, I went tone-on-tone! 


I started off my first card by die cutting the acorns from the Spellbinders Falling Leaves Etched Dies from Fawn ColorWheel Cardstock for the base layers and Spellbinders Truffle ColorWheel Cardstock for the top pieces. They were adhered together using Bearly Art Glue. 


I cut the leaves from Spellbinders Beeswax and Terra Cotta ColorWheel Cardstock and adhered the veins on top with Bearly Art Glue. I took a white US A2 sized white cardstock and arranged them on top. Once I was happy with the placement, I adhered the leaves down first with Bearly Art Glue, followed by the acorns with thin foam squares. 


I hot foiled the Spellbinders Autumn Sentiments BetterPress Plate & Die Set onto white cardstock using Spellbinders Opaque Black Foil and the Glimmer Hot Foil System. They were then die cut out with the coordinating die. I cut the dies again from white cardstock and adhered the die cut behind the foiled sentiment. It was then adhered on top of the acorns and leaves. 


For the second card, I started off by die cutting the tag from the Spellbinders Documenting Labels Etched Dies from white cardstock with the hole reinforcer from Spellbinders Raven ColorWheel Cardstock. I adhered the hole reinforcer on top and then threaded black twine through and tied in a bow. 


When die cutting the acorns and leaves from the Spellbinders Falling Leaves Etched Dies for the first card, I die cut extras to use on the second card. The leaves were adhered flat to the tag with Bearly Art Glue and the acorns with thin foam tape on top. The tag was then adhered to a US A2 sized white card base with more thin foam tape. 


I adhered the sentiment on top, from the Spellbinders Autumn Sentiments BetterPress Plate & Die Set, that was foiled with the first card's sentiment. To finish both cards, I added black dots using Altenew Finer Line Pens

SUPPLIES:


Here are the links to what I have used on the projects. Affiliate links are used on some products. This means that if you make a purchase after clicking on my link, I receive a small commission with no extra cost to you. I truly appreciate your support when using these links. Please click on the logo below the product to shop at your favourite store. All products were personally purchased except marked with an asterisk (*) which were kindly sent to me to use. You can read my full disclosure here.


Whilst spring is my favourite season, autumn comes a close second! I am so ready for some cosy/cozy days! Thank you so much for stopping by today, as always, I really do appreciate you taking the time to visit. Wishing you a wonderful weekend! 

12 September 2025

Spellbinders | Boo Crew

Hello there, I'm delighted to be over on the Spellbinders Blog today sharing a card with a step by step photo tutorial using the Spellbinders Spooktacular Collection by Simon Hurley. 

PLEASE NOTE: This post contains affiliate links. Please see below for my full disclosure.


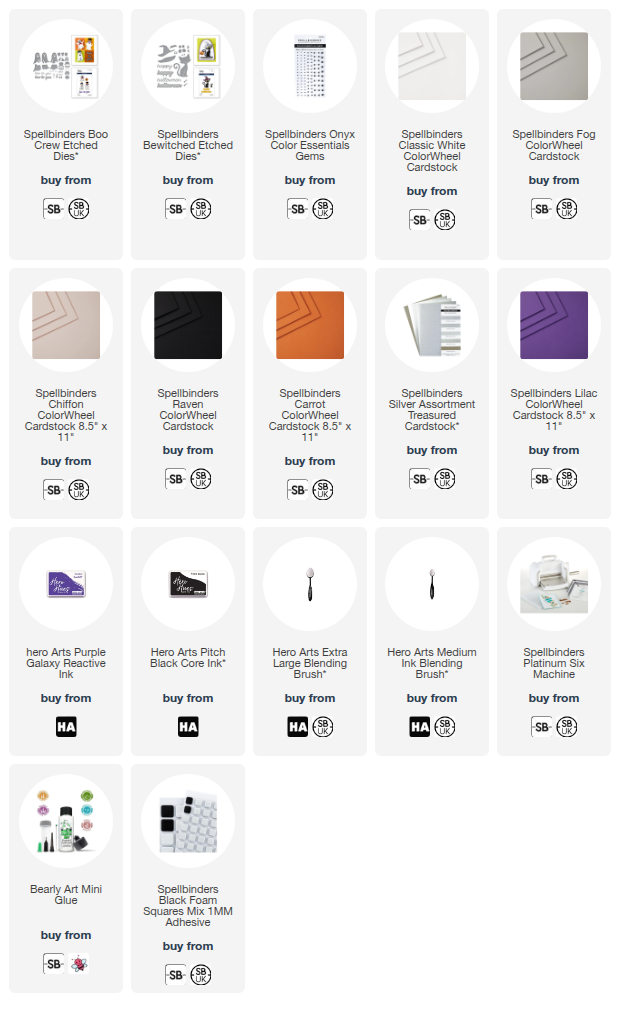
I thought it would be cute to have the ghost from Spellbinders Boo Crew wearing the witches hat from the Spellbinders Bewitched! I then added the glasses over the top because, well, I had too! So cute! I added ink blending to the card base and then simply added the ghost and sentiment on top. 

SUPPLIES:


Here are the links to what I have used on the project. Affiliate links are used on some products. This means that if you make a purchase after clicking on my link, I receive a small commission with no extra cost to you. I truly appreciate your support when using these links. Please click on the logo below the product to shop at your favourite store. All products were personally purchased except marked with an asterisk (*) which were kindly sent to me to use. You can read my full disclosure here.


For more details on how I made the card, please head over to the Spellbinders Blog. Thank you so much for stopping by today, I really do appreciate it. I hope you have a great day! 

11 September 2025

Spellbinders | Spooky Hugs

Hello there, I hope you are well! Today I have a card to share using the Spellbinders September 2025 Small Die of the Month Club Kit called Harvest Magic. The set features a pumpkin, a cat, a ghost, a skull, flowers, and foliage. I did not use the ghost or skull but used everything else. 

PLEASE NOTE: This post contains affiliate links. Please see below for my full disclosure.


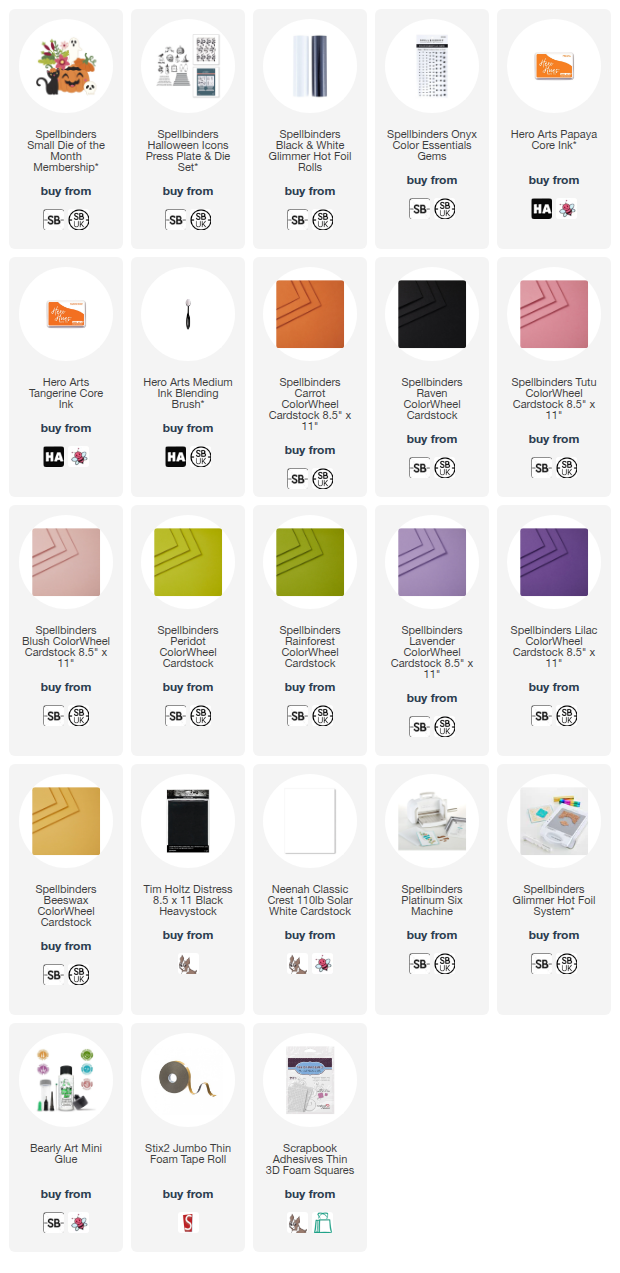
I started off my card by creating the pumpkin/jack-o'-lantern. I started off by die cutting the face and body from the Spellbinders September 2025 Small Die of the Month Club Kit from Spellbinders Carrot ColorWheel Cardstock, as well as the layer that goes inside to make the carved parts look 3D. I added ink blending to these using Hero Arts Core Inks in Papaya and Tangerine. I cut the base layer from Spellbinders Raven ColorWheel Cardstock


I cut the tongue from Spellbinders Tutu ColorWheel Cardstock and then adhered the pieces together leaving the front part without glue, so that I could pop the cat inside. The cheeks were cut from Spellbinders Blush ColorWheel Cardstock and adhered on top. The cat was cut from Tim Holtz Distress Black Heavystock. The eyes were cut from Spellbinders Beeswax ColorWheel Cardstock and the nose from Blush. The ears were cut from Tutu


She was assembled and adhered inside the pumpkin. I die cut the top of the pumpkin from Carrot and Rainforest ColorWheel Cardstock and adhered them on to her head. I added thin foam tape to the back of the cat and pumpkin and adhered them to an A2 sized white card base. I cut the foliage from Spellbinders Peridot and Rainforest ColorWheel Cardstock and adhered them around the pumpkin. 


The flowers were cut from Spellbinders Lavender and Lilac ColorWheel Cardstock and the centres from Beeswax. They were adhered to the card with Bearly Art Glue, as were the leaves. I hot foiled the sentiment plate from the Spellbinders Halloween Icons Press Plate & Die Set onto white cardstock using Spellbinders Opaque Black Foil and the Glimmer Hot Foil System. It was die cut out using the die and adhered below the pumpkin. To finish, I embellished with Spellbinders Onyx Color Essentials Gems

SUPPLIES:


Here are the links to what I have used on the project. Affiliate links are used on some products. This means that if you make a purchase after clicking on my link, I receive a small commission with no extra cost to you. I truly appreciate your support when using these links. Please click on the logo below the product to shop at your favourite store. All products were personally purchased except marked with an asterisk (*) which were kindly sent to me to use. You can read my full disclosure here.


SPELLBINDERS CLUB KITS

To buy the kit - if you are a current subscriber to the Small Die of the Month Club Kit (or any kit), you do not need to do anything. You will be charged as normal on the 5th of the month and your kit will be shipped to you. If you are a new subscriber, you can purchase the kit from the 6th - 27th September 2025. Members can cancel their membership at any time. If you are not keen on subscribing to the kit but still want it, you can purchase it individually (without a subscription) on the 10th of the following month but the price will be higher. 


If Halloween isn't your thing, you could definitely use the cat and foliage from this kit on their own. Whilst Halloween cards aren't really my thing (I don't generally send them), I really love how this one turned out. I think it's spooky cute! Thanks so much for stopping by today, I really do appreciate it. I hope you have a wonderful day! 

5 September 2025

Spellbinders | All About Christmas

Hello there, I am delighted to be over on the Spellbinders Blog today sharing a step by step tutorial using new products from the All About Christmas Collection by Lisa Horton. This is such a wonderful collection as there are products for Christmas in it, but lots of staples too that can be used all year round. 

PLEASE NOTE: This post contains affiliate links. Please see below for my full disclosure.


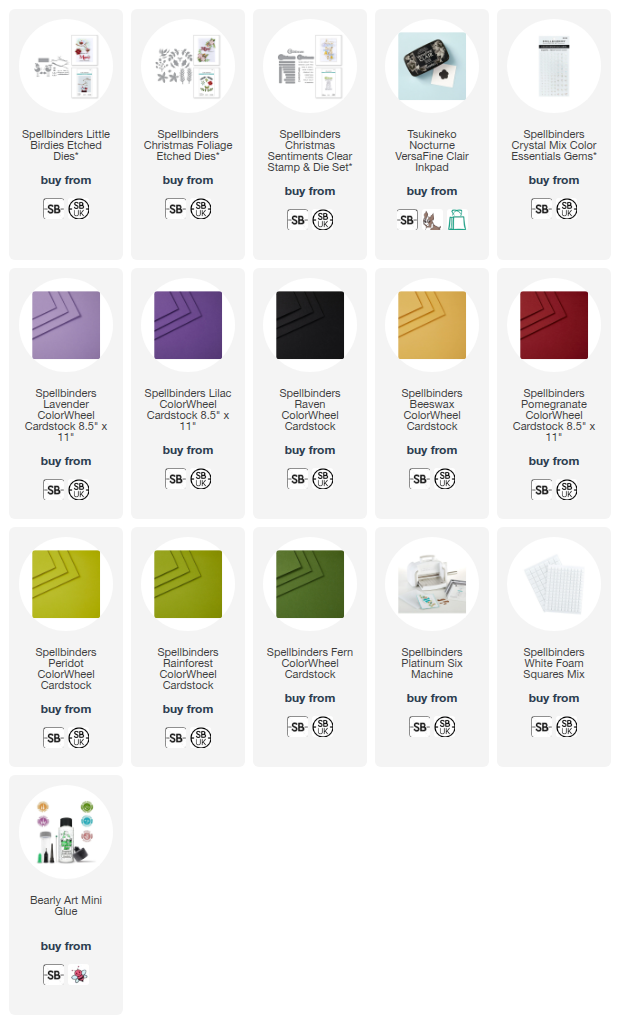
I used the Spellbinders Christmas Sentiments Clear Stamp & Die Set as my main focal point and then built around it from there. I used the Spellbinders Christmas Foliage Etched Dies and then of course had to add one of the super cute birds from the Spellbinders Little Birdies Etched Dies wearing a hat, scarf and boots! 

SUPPLIES:


Here are the links to what I have used on the project. Affiliate links are used on some products. This means that if you make a purchase after clicking on my link, I receive a small commission with no extra cost to you. I truly appreciate your support when using these links. Please click on the logo below the product to shop at your favourite store. All products were personally purchased except marked with an asterisk (*) which were kindly sent to me to use. You can read my full disclosure here.


For more details and photos of how I made the card, please head over to the Spellbinders Blog Post. Thank you so much for stopping by today, I really do appreciate it. I hope you have a wonderful day! 

4 September 2025

Spellbinders | Foliage 2 Ways + New Tools

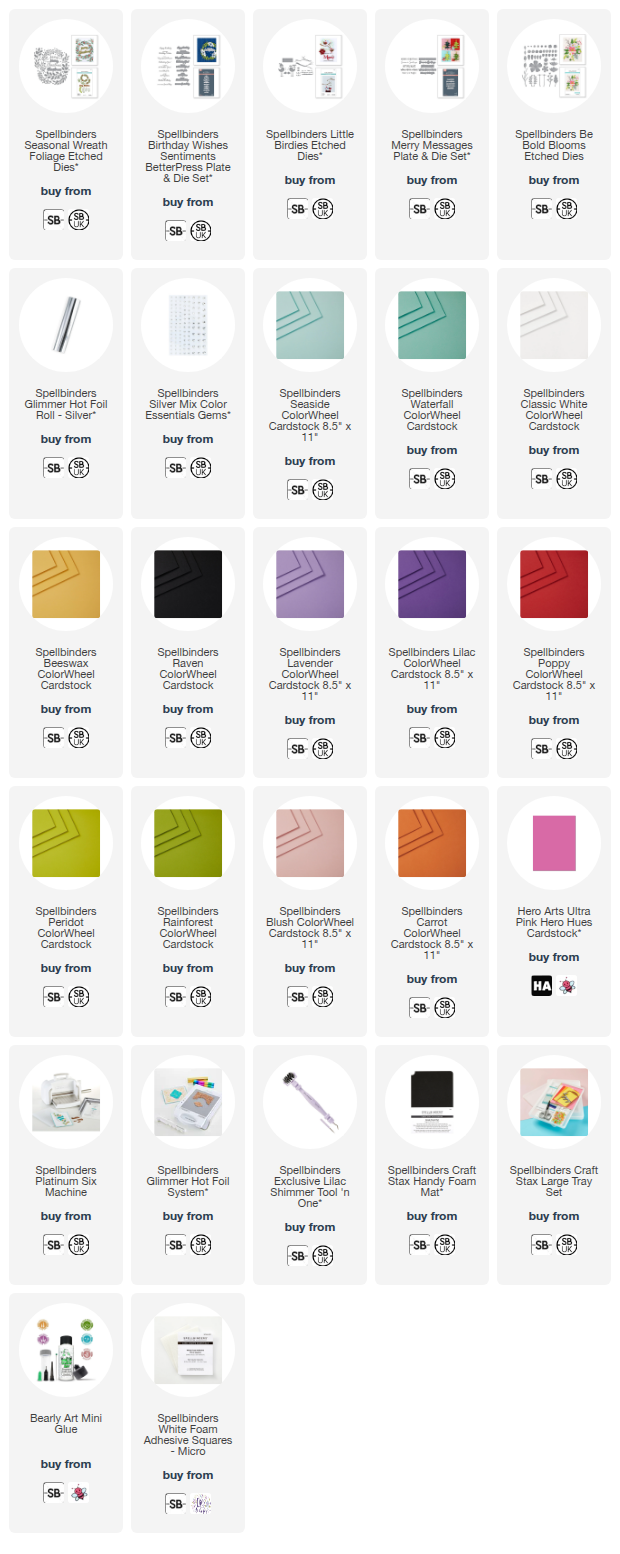
Hello there, I hope you are well! Today I have two cards to share using the new Spellbinders Seasonal Wreath Etched Dies. I wanted to show that the set isn't just for Christmas and the holidays but can be used all year round too! 

PLEASE NOTE: This post contains affiliate links. Please see below for my full disclosure.


I started off my Christmas card by die cutting the greenery die in the Spellbinders Seasonal Wreath Etched Dies set three times from Spellbinders Waterfall ColorWheel Cardstock. I adhered them to the front of an A2 sized white card base with Bearly Art Glue, popping the end of each one behind the end of the next one. 


I then cut the dies that look like mistletoe (to me!) from Spellbinders Seaside ColorWheel Cardstock. They were adhered on top of the greenery ones but you could definitely just use one or the other and not both! I die cut the berries from Classic White ColorWheel Cardstock and adhered them on top. 


I then die cut the bird from Spellbinders Little Birdies Etched Dies from Spellbinders ColorWheel Cardstock. I used Lavender for the body of the bird, Lilac for the wing, Raven for the eye, Beeswax for the beak, and Poppy and Classic White for the hat. I adhered the pieces together and then onto the wreath, adding Spellbinders Micro Foam Squares behind his head. 


For the sentiment, I hot foiled the Spellbinders Merry Messages Plate onto white cardstock using Spellbinders Silver Foil and the Glimmer Hot Foil System. It was die cut out using the coordinating die and adhered overhanging the wreath. To finish, I embellished with Spellbinders Silver Color Essentials Gems


For my next card, I used just the greenery dies from the Spellbinders Seasonal Wreath Etched Dies set. To me they looked like generic leaves so I thought they would work for all year round. I die cut the die three times from Spellbinders Rainforest ColorWheel Cardstock and three times from Spellbinders Peridot Cardstock


They were adhered to an A2 sized white card base with Bearly Art Glue. I then die cut the bird again, this time using Spellbinders ColorWheel Cardstock in Seaside for the body, Waterfall for the wing, Raven for the eye and Beeswax for the beak. I also cut flowers from the Spellbinders Be Bold Blooms Etched Dies set from Spellbinders ColorWheel Cardstock in Blush, Carrot, Beeswax, Classic White and Hero Arts Ultra Pink Cardstock


The flowers were assembled and adhered using Bearly Art Glue and adhered to the wreath, the bird was then popped in between so it looked like it was sitting in amongst them. For the sentiment, I hot foiled the Spellbinders Birthday Wishes Sentiments BetterPress Plate & Die Set onto white cardstock using Spellbinders Silver Foil. It was die cut out using the coordinating die.  I then adhered the 'happy birthday' one on to the card. To finish, I embellished with Spellbinders Silver Color Essentials Gems.

NEW SPELLBINDERS TOOLS


Before I go, I just wanted to share some new tools from Spellbinders with you in case you haven't seen them. These are great for die cutting. There is the new  Lilac Shimmer Tool 'n One. This is the same as the other Tool 'n One's, so if you already have one you don't need another, but of course, I love the new Lilac Shimmer colour that matches my Platinum Scout! The Tool 'n One is great for removing the little bits inside the die cuts that you don't want - whether that be using the brush end or the pokey end. The pokey end is great for placing down gems too! 


There is also the new Handy Foam Mat. This fits inside the Large Craft Stax Trays. The idea is that you would place your die cuts on top and use the brush end of the Tool 'n One to pop out the inside pieces. This also works for the dies themselves too. You can do this on any surface but the foam mat gives a nice resistance to the tool. You can also just use the pokey end of the Tool 'n One and I found that works as well. The benefit of using the mat inside the tray is that all the little die cut pieces stay contained and not strewn across your desk! You can then use lift out the foam insert and slide the pieces into the bin. Is it necessary? No, but I have found it hand when doing a lot of die cutting! 

SUPPLIES:


Here are the links to what I have used on the projects. Affiliate links are used on some products. This means that if you make a purchase after clicking on my link, I receive a small commission with no extra cost to you. I truly appreciate your support when using these links. Please click on the logo below the product to shop at your favourite store. All products were personally purchased except marked with an asterisk (*) which were kindly sent to me to use. You can read my full disclosure here.


I think the birds are a cute addition to the wreaths but they would look beautiful one their own too! Thank you so much for stopping by today, I really do appreciate it. I hope you have a wonderful day! 

17 August 2025

Spellbinders | Christmas Cracker

Hello there, I am delighted to be over on the Spellbinders Blog today sharing a step by step photo tutorial on how I made the card in the peek below. 

PLEASE NOTE: This post contains affiliate links. Please see below for my full disclosure.


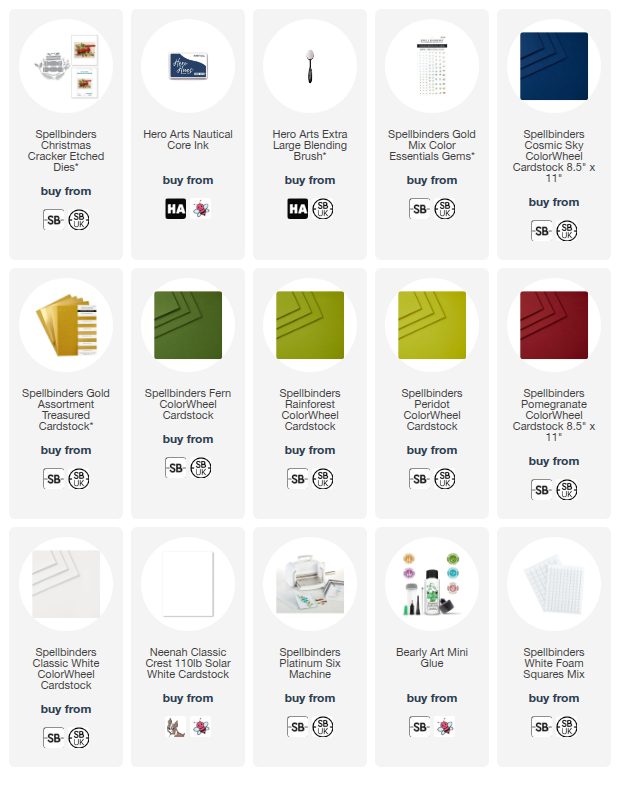
The card uses the fabulous new Spellbinders Christmas Cracker Etched Dies from the new City Holiday Collection by Yana Smakula. I already shared one card using the collection which you can see here. I used a similar colour scheme to that card but changed the silver for gold. I always love a blue and gold colour combo for Christmas! The foliage is from the same set, as well as the sentiment. I embellished with Gold Color Essentials Gems

SUPPLIES:


Here are the links to what I have used on the project. Affiliate links are used on some products. This means that if you make a purchase after clicking on my link, I receive a small commission with no extra cost to you. I truly appreciate your support when using these links. Please click on the logo below the product to shop at your favourite store. All products were personally purchased except marked with an asterisk (*) which were kindly sent to me to use. You can read my full disclosure here.


For the full step by step tutorial on how I made the card, please visit the Spellbinders Blog here. Thank you so much for stopping by today. I hope you have a great rest of the weekend! 

15 August 2025

Hero Arts | Hocus Pocus

Hello there, today I have a card to share using the Hero Studio August 2025 Die Set of the Month which is called Haunted Gallery. The set consists of lots of different frames and icons that can go inside the frames. For today's card, I just used the icons. 

PLEASE NOTE: This post contains affiliate links. Please see below for my full disclosure.


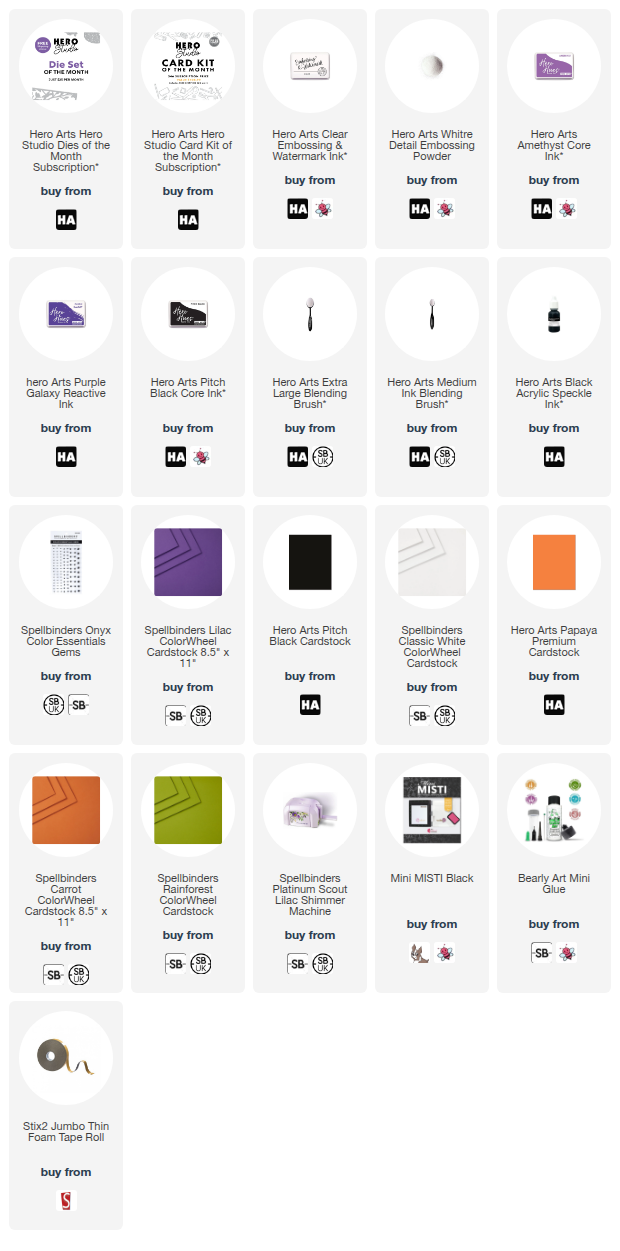
I started off by die cutting the icons from the Hero Arts Hero Studio August 2025 Die Set of the Month. I cut the cat, hat, bats and base layer of the skull from Hero Arts Pitch Black Cardstock. I cut the moon and top layer of the skull from Spellbinders Classic White ColorWheel Cardstock, and the pumpkin from Spellbinders Carrot ColorWheel Cardstock for the base layer and Hero Arts Papaya Cardstock for the top layer. 


The layers were adhered together using liquid glue. I then added a little Spellbinders Rainforest ColorWheel Cardstock behind the cat to show though for his eyes. I took the sentiment from the Hero Arts Hero Studio August 2025 Card Kit of the Month and stamped it onto Hero Arts Pitch Black Cardstock using Hero Arts Clear Embossing & Watermark Ink. I applied Detail White Embossing Powder and heat set. It was die cut out using the coordinating dies. 


I die cut the die another two times from the same black cardstock and adhered them one on top of another for added dimension. I then took a 4.25" x 5.5" panel of Spellbinders Lilac ColorWheel Cardstock and added ink blending around the edges. I used Hero Arts Amethyst Core Ink, followed by Hero Arts Purple Galaxy Reactive Ink and lastly, Hero Arts Pitch Black Core Ink


I then splattered on new Hero Arts Black Acrylic Speckle Ink around the edges and set it aside to dry. Once dry, It was adhered to a white A2 sized white card base. I adhered the icons on top with a combination of liquid glue and thin foam tape. The sentiment was adhered with liquid glue. To finish, I added Spellbinders Onyx Color Essentials Gems to the centres of the bats. 

SUPPLIES:


Here are the links to what I have used on the project. Affiliate links are used on some products. This means that if you make a purchase after clicking on my link, I receive a small commission with no extra cost to you. I truly appreciate your support when using these links. Please click on the logo below the product to shop at your favourite store. All products were personally purchased except marked with an asterisk (*) which were kindly sent to me to use. You can read my full disclosure here.


Please check out the Hero Arts website for more examples using this set, including ones using the frames. Thank you so much for stopping by today, I really do appreciate it. I hope you have a wonderful day! 

14 August 2025

Spellbinders | August 2025 Clubs Blog Hop + Giveaway

Hello there, I am delighted to be joining Spellbinders today to celebrate the August 2025 Club Kits with a fun blog hop. Each stop on the hop is sharing a different club. Mine is the Small Die of the Month Club Kit called "The Deep Blue Two". In case you missed it, I already shared one card using the kit here

PLEASE NOTE: This post contains affiliate links. Please see below for my full disclosure.


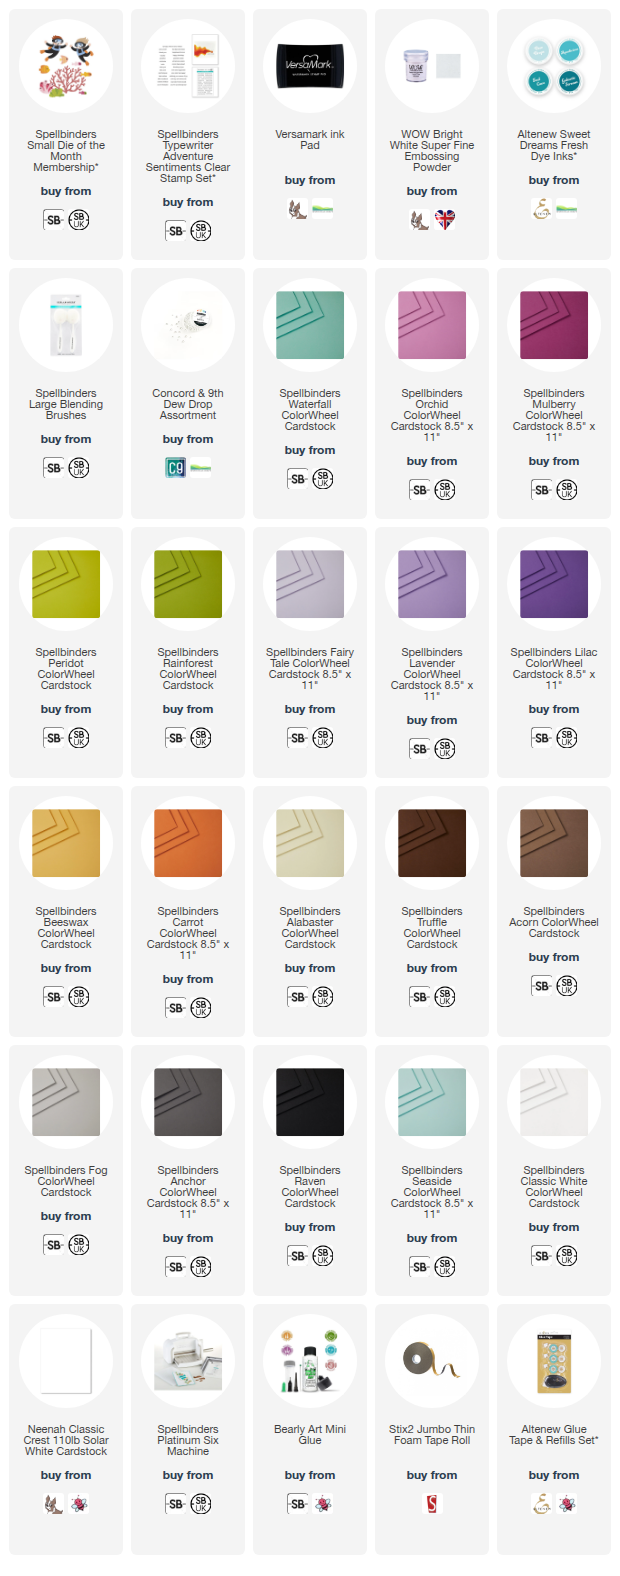
For my card, I started off by die cutting the coral, seaweed and fish from the Spellbinders August 2025 Small Die of the Month Club Kit from Spellbinders ColorWheel Cardstock. I used Orchid and Mulberry for the large coral, Lilac, Lavender and Fairy Tale for the tube pipe coral, and Peridot and Rainforest for the seaweed. 

For the fish, I used Lavender and Lilac for the small fish, cutting the base layer from Raven for the eyes. The two bigger fish were cut from Beeswax and Carrot, again with Raven for the eyes. 


For the scuba divers, I cut their faces and hands from Alabaster, the hair for the one on the left from Truffle, the hair for the one on the right from Acorn, their scuba wetsuits from Lilac and Raven, their flippers from Beeswax, and their oxygen tanks from Fog. For the masks I used layers of (bottom to top) Raven, Classic White, Seaside and Raven again. I used Anchor for the mouth part. 

I adhered all the layers together for the divers and sea life using Bearly Art Glue and set them aside while I worked on the card base. 


I took a 4.25" x 5.25" panel of Spellbinders Waterfall ColorWheel Cardstock and added ink blending at the bottom using Altenew Sweet Dreams Fresh Dye Inks (Aqualicious & Teal Cave) using a Large Blending Brush. It was adhered to a US A2 sized white card base using tape runner adhesive. The coral was adhered first, followed by the seaweed. I adhered the fish using liquid glue and the divers using thin foam tape. 


I stamped the sentiment from the Spellbinders Typewriter Adventure Sentiments Clear Stamp Set onto black cardstock using Versamark Ink. I applied white embossing powder and heat set. It was cut into a strip and adhered to the card using thin foam tape. To finish, I embellished with Concord & 9th Dew Drops

BLOG HOP:


Please click on the participants' links below to visit their blogs:


GIVEAWAY:

To celebrate, Spellbinders are giving away a $25 gift certificate to 3 lucky blog readers – selected from the comments on our blog. Giveaway closes Sunday, August 17th, 11:59 pm MST. The winner will be announced in this blog hop post the following Wednesday. The winner is responsible for shipping costs, duties, and taxes. Please note, store credit (gift certificate) cannot be applied to Club Subscriptions. Store credit can be applied to shop past Club products, Club extras and regular releases.

SUPPLIES:


Here are the links to what I have used on the project. Affiliate links are used on some products. This means that if you make a purchase after clicking on my link, I receive a small commission with no extra cost to you. I truly appreciate your support when using these links. Please click on the logo below the product to shop at your favourite store. All products were personally purchased except marked with an asterisk (*) which were kindly sent to me to use. You can read my full disclosure here.


Thank you so much for stopping by today, I hope you have a wonderful time on the rest of the hop and a great rest of the day too! Take care! 

13 August 2025

Spellbinders | You're Fintastic

Hello there, I hope you are doing well. Today I have a card to share using the Spellbinders August 2025 Small Die of the Month Club Kit called "The Deep Blue Two". The theme this month for all the kits is under the sea and this kit features coral, seaweed, fish and two deep sea divers. I excluded the deep sea divers for this card and just focussed on the fish and coral, but I will have another card to share tomorrow featuring the divers! 

PLEASE NOTE: This post contains affiliate links. Please see below for my full disclosure.


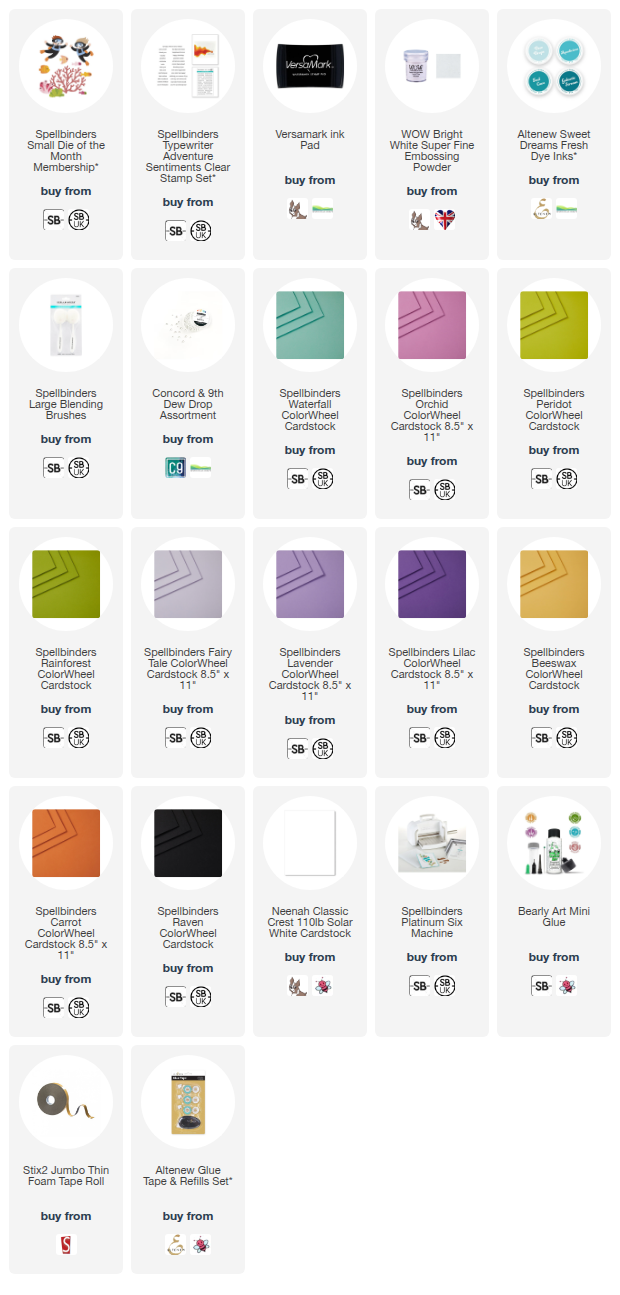
I started off by die cutting the coral, seaweed and fish from the Spellbinders August 2025 Small Die of the Month Club Kit from Spellbinders ColorWheel Cardstock. I used Orchid for the large coral piece, die cutting it twice to layer up one on top of another for some dimension. I used Lilac, Lavender and Fairy Tale for the tube pipe coral, and Peridot and Rainforest for the seaweed. 


For the fish, I used Lavender and Lilac for the small fish, cutting the base layer from Raven for the eyes. The two bigger fish were cut from Beeswax and Carrot. I adhered all the layers together using Bearly Art Glue and set them aside while I worked on the card base. 


I took a 4.25" x 5.25" panel of Spellbinders Waterfall ColorWheel Cardstock and added ink blending at the bottom using Altenew Sweet Dreams Fresh Dye Inks (Aqualicious & Teal Cave) using a Large Blending Brush (love these brushes for getting a soft smooth blend!). It was adhered to a US A2 sized white card base using tape runner adhesive. 


The coral was adhered first, followed by the seaweed. I adhered the smaller fish using liquid glue and the larger fish using thin foam tape. I stamped the sentiment from the Spellbinders Typewriter Adventure Sentiments Clear Stamp Set onto black cardstock using Versamark Ink. I applied white embossing powder and heat set. It was cut into a strip and adhered to the card using thin foam tape. To finish, I embellished with Concord & 9th Dew Drops

SUPPLIES:


Here are the links to what I have used on the project. Affiliate links are used on some products. This means that if you make a purchase after clicking on my link, I receive a small commission with no extra cost to you. I truly appreciate your support when using these links. Please click on the logo below the product to shop at your favourite store. All products were personally purchased except marked with an asterisk (*) which were kindly sent to me to use. You can read my full disclosure here.


SPELLBINDERS CLUB KITS

To buy the kit - if you are a current subscriber to the Small Die of the Month Club Kit (or any kit), you do not need to do anything. You will be charged as normal on the 5th of the month and your kit will be shipped to you. If you are a new subscriber, you can purchase the kit from the 6th - 27th August 2025. Members can cancel their membership at any time. If you are not keen on subscribing to the kit but still want it, you can purchase it individually (without a subscription) on the 10th of the following month but the price will be higher. 


As mentioned, I will be back tomorrow to share another card using the kit. Thank you so much for stopping by today, I really do appreciate it. I hope you have a wonderful day! 

10 August 2025

Spellbinders | Joy

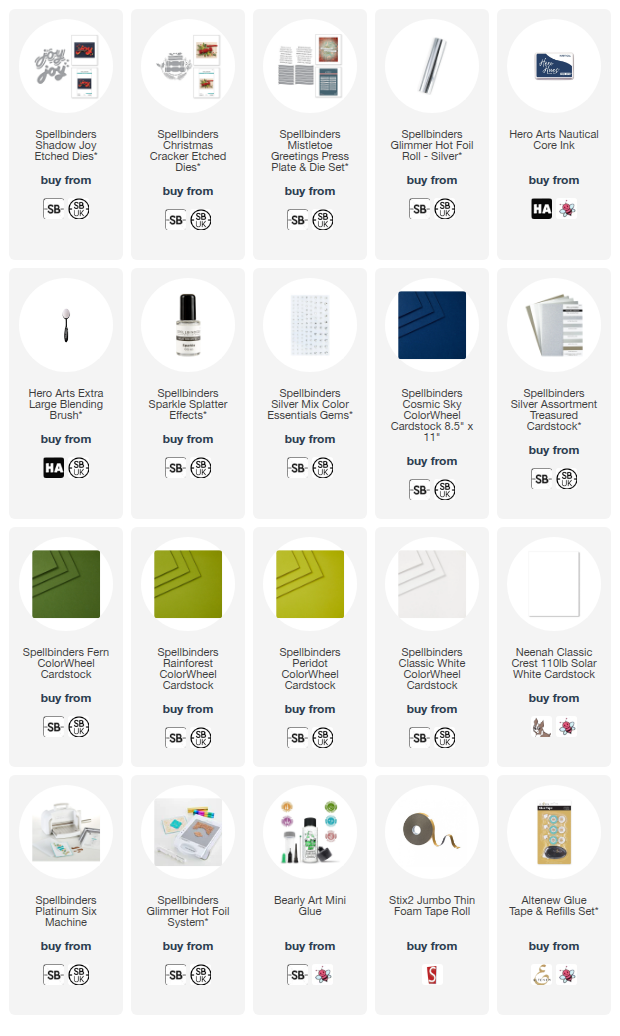
Hello there and happy Sunday to you! Today I have a card to share using the new Spellbinders City Holiday Collection by Yana Smakula, which is out today along with lots of other fabulous collections. The Shadow Joy Dies have three different layers to them to create, as the name suggests, a shadow on the word joy. I used just one layer on this card but you change it up and add two! 

PLEASE NOTE: This post contains affiliate links. Please see below for my full disclosure.


I started off my card by creating the card base, since I wanted to give it time to dry. I took a 4.25" x 5.5" panel of Spellbinders Cosmic Sky ColorWheel Cardstock and added ink blending around the edges using Hero Arts Nautical Core Ink and an Extra Large Blending Brush. I then splattered the new Spellbinders Sparkle Splatter Effects (this has a lovely silvery shimmer to it!) on top and set it aside to dry. Once dry, it was adhered to a US A2 sized white card base. 


I then took the base layer of the joy from Spellbinders Shadow Joy Etched Dies and die cut it from Spellbinders Brushed Metallic Silver Treasured Cardstock. I cut the top layer from Spellbinders Cosmic Sky ColorWheel Cardstock twice. I adhered them on top of each other and then onto the silver layer. 


I took the foliage from Spellbinders Christmas Cracker Etched Dies and cut the holly from Spellbinders Rainforest ColorWheel Cardstock, the evergreen sprigs from Spellbinders Fern ColorWheel Cardstock, and the berry sprig from Spellbinders Peridot ColorWheel Cardstock. The berries were cut from Spellbinders Classic White ColorWheel Cardstock. I adhered the berries onto the sprigs and then arranged and adhered all the foliage onto the card, using the joy word as a guide for placement. 


The joy word was then adhered on top. I took the sentiments from the Spellbinders Mistletoe Greetings Press Plate & Die Set and foiled them onto white cardstock using Spellbinders Silver Foil and the Glimmer Hot Foil System. They were die cut out and the 'Christmas Greetings' one adhered onto the card (with liquid glue on the left and thin foam tape on the right). To finish, I embellished with Spellbinders Silver Mix Color Essentials Gems

SUPPLIES:


Here are the links to what I have used on the project. Affiliate links are used on some products. This means that if you make a purchase after clicking on my link, I receive a small commission with no extra cost to you. I truly appreciate your support when using these links. Please click on the logo below the product to shop at your favourite store. All products were personally purchased except marked with an asterisk (*) which were kindly sent to me to use. You can read my full disclosure here.


This collection from Yana is absolutely stunning! I have another card that I made using the collection, for the Spellbinders Blog, which I will share next week. Thank you so much for stopping by today, I hope you have a wonderful rest of the weekend! Take care! 
End of code