30 April 2023

Clearly Besotted Teasers | The Cow Jumped Over the Moon

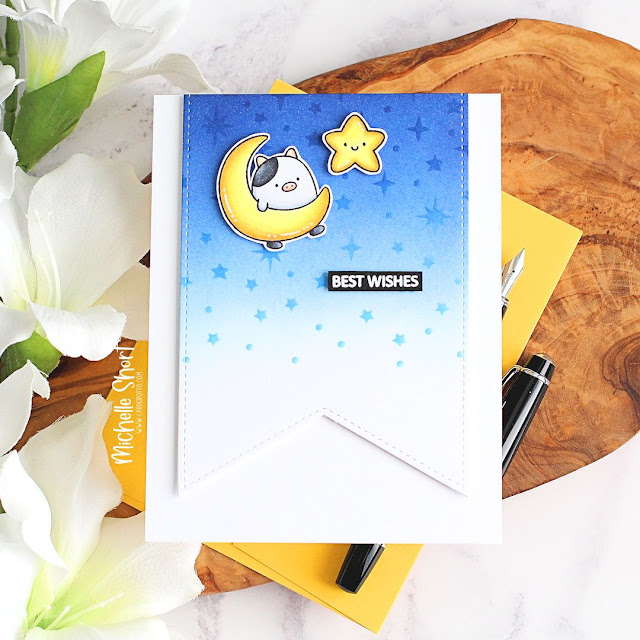
Hello there and welcome to day four of the Clearly Besotted May 2023 Release Teasers. Only one more sleep until release day tomorrow, 1st May 2023. Today I am using the super cute Rhyme Time set. This is so fun because the images represent characters/lines in nursery rhymes. Like the cow jumped over the moon! 

PLEASE NOTE: This post contains affiliate links. Please see below for my full disclosure.


I started off my card by stamping the cow/moon and star images from the Clearly Besotted Rhyme Time Stamp Set on to white cardstock with Memento Tuxedo Black Ink. They were coloured using Copic Markers (the colours that I used are listed below the supplies area for reference) and then fussy cut out with scissors. 


I took a panel of white cardstock and cut it using one of the Sunny Studio Stamps Slimline Pennants Dies. I blended Tim Holtz Distress Inks on top with blending brushes, fading to white at the bottom. I used (top to bottom) Villainous Potion, Prize Ribbon and Mermaid Lagoon. I then placed the Clearly Besotted Sprinkled Stars Stencil on top and using the residual ink on the brushes, blended through the stencil to apply stars to the panel. 


The panel was adhered to a US A2 sized white card base with thin foam tape, the images were then adhered on top. I took the sentiment from the Clearly Besotted Tiny Type Stamp Set and stamped it on to black cardstock with Versamark Ink. I applied white embossing powder and heat set. It was cut into a strip and added to the card. To finish off, I added a few white gel pen highlights to the images. 

SUPPLIES:


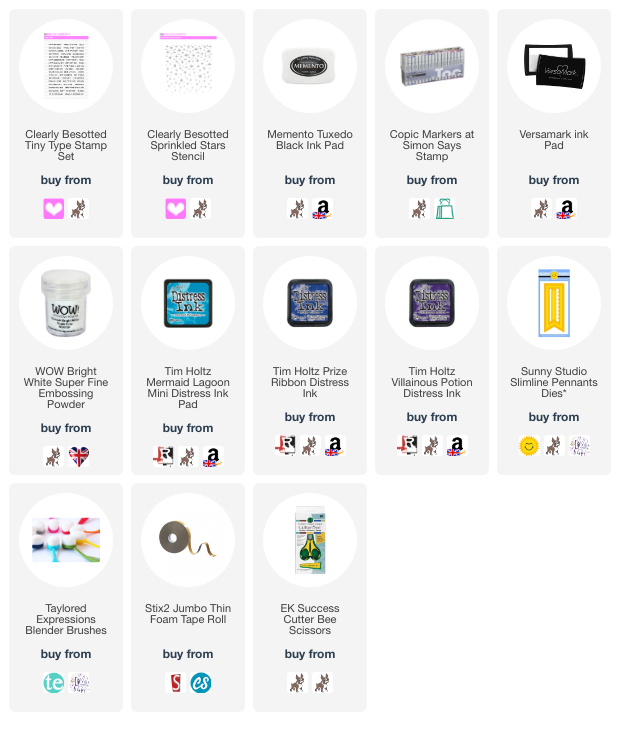
Here are the links to what I have used on the project. Affiliate links are used on some products. This means that if you make a purchase after clicking on my link, I receive a small commission with no extra cost to you. I truly appreciate your support when using these links. Please click on the logo below the product to shop at your favourite store. All products were personally purchased except those from Clearly Besotted, Hero Arts or those marked with an asterisk (*) which were kindly sent to me to use. You can read my full disclosure here.


COPIC MARKERS: Cow - C10, C7, C5, C3, C1/E53, E51/R02, R01. Moon and star - YR24, Y17, Y15, Y08, Y04, Y02. 

That is all from me for this release. I will share a look at the two sets that I haven't used tomorrow in my release video. Until then, please do visit the Clearly Besotted Blog, Keren, Kitty, Francine and Alberto for more inspiration. Thank you so much for stopping by, I hope you have a lovely rest of the weekend! 

29 April 2023

Clearly Besotted Teasers | I Love Big Books

Hello there and welcome to day three of the Clearly Besotted May 2023 Release Teasers. Release day is Monday, 1st May 2023, so not long to wait now! Continuing with the book theme, my card today uses the Clever Corners set. This set has two corner images in it but as you can see, I modified one to make it a non-corner image!

PLEASE NOTE: This post contains affiliate links. Please see below for my full disclosure.


I started off by stamping the image from the Clearly Besotted Clever Corners Stamp Set on to white cardstock using Memento Tuxedo Black Ink. Since the image is larger, before stamping I masked off the images to the left. It only meets the books in two places, so was not difficult to mask with a bit of post-it tape. The image was coloured using Copic Markers (the colours that I used are listed below the supplies area for reference). 


I then fussy cut the image out using scissors. I took a panel of white cardstock and added Altenew Dotted Washi Tape to it, before trimming off the edges. The panel was adhered to a US A2 sized black card base with thin foam tape. I then adhered the image on top with more thin foam tape. 


I stamped the sentiment from the set on to black cardstock using Versamark Ink. I applied white embossing powder and heat set. It was cut into a strip and then adhered to the card. To finish off, I added Nuvo Crystal Glaze to the owl's beak and also to some areas on the books. 

SUPPLIES:


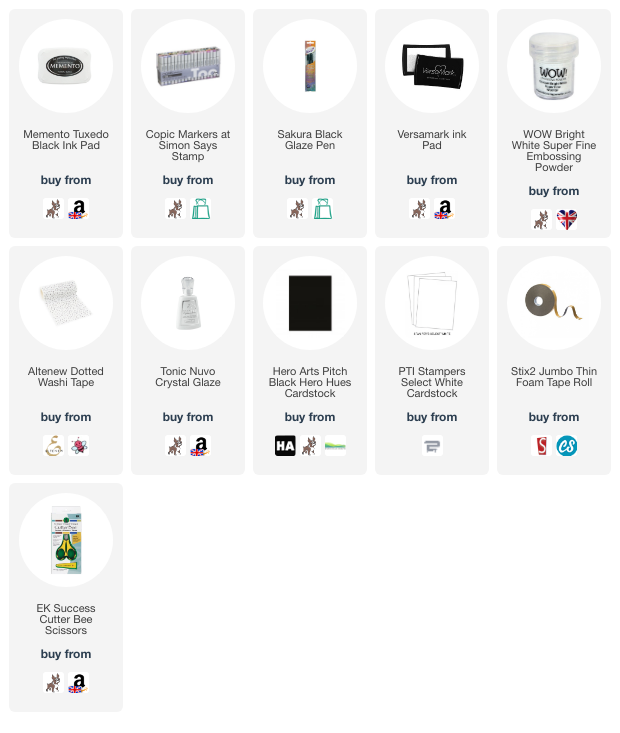
Here are the links to what I have used on the project. Affiliate links are used on some products. This means that if you make a purchase after clicking on my link, I receive a small commission with no extra cost to you. I truly appreciate your support when using these links. Please click on the logo below the product to shop at your favourite store. All products were personally purchased except those from Clearly Besotted, Hero Arts or those marked with an asterisk (*) which were kindly sent to me to use. You can read my full disclosure here.


COPIC MARKERS: Owl/bird/chick - W7, W5, W4, W3, W1, YR24, Y17. Books - R39, R85, R83, R81/YR18, YR16, YR15, YR12/YR27, Y17, Y15, Y13, Y11/G29, YG17, YG23, YG01/B18, B16, B12/V17, V15, V12/E53, E51, E50. 

Although I have made this into a generic card, I think it would be great as a graduation/congratulations on exams type card too! For more inspiration using the new sets, please head over to the Clearly Besotted Blog, Keren, Kitty, Francine and Alberto. Thank you so much for stopping by today, I very much appreciate it. See you tomorrow for day four. Have a great Saturday!

28 April 2023

Hero Arts | May 2023 My Monthly Hero Countdown to Creativity

Hello there and welcome as we countdown to the release of the Hero Arts May 2023 My Monthly Hero Kit. The kits release on Monday, 1st May 2023. We are sharing inspiration all weekend long, so do head over to the Hero Arts Blog for more inspiration. 

PLEASE NOTE: This post contains affiliate links. Please see below for my full disclosure.


My card today uses elements from the Premium Kit. I started off by die cutting one of the Tri-Fold Fancy Dies from the kit from Hero Arts Deluxe White Cardstock. These dies are meant to create a tri-fold design, but I decided to cut just one for my card today. 


I then took a 3.5" x 4.75" panel of white cardstock and added ink blending towards the bottom. Using a Hero Arts Extra Large Ink Blending Brush, I blended on Hero Arts Paradise Core Ink, fading to white at the top. The die cut was then adhered on top with thin foam tape, followed by the panel being adhered to a US A2 sized white card base with more thin foam tape. 


I stamped the sentiment from the kit stamp set (in both the Classic and Premium Kit) on to Hero Arts Pitch Black Cardstock using Hero Arts Clear Embossing & Watermark Ink. I applied Hero Arts White Embossing Powder and heat set. It was cut into a strip using a sentiment strip die from the Hero Arts Message Strips Stamp & Cut XL Set


It was adhered to the card with more thin foam tape. To finish off, I die cut the heart from the coordinating die set (in both the Classic & Premium Kit) from Hero Arts Paradise Cardstock three times. They were layered up one on top of another and adhered to the tree using Hero Arts Precision Glue. I then applied Hero Arts Clear Lacquer Pen on top for some added shine. 

SUPPLIES:


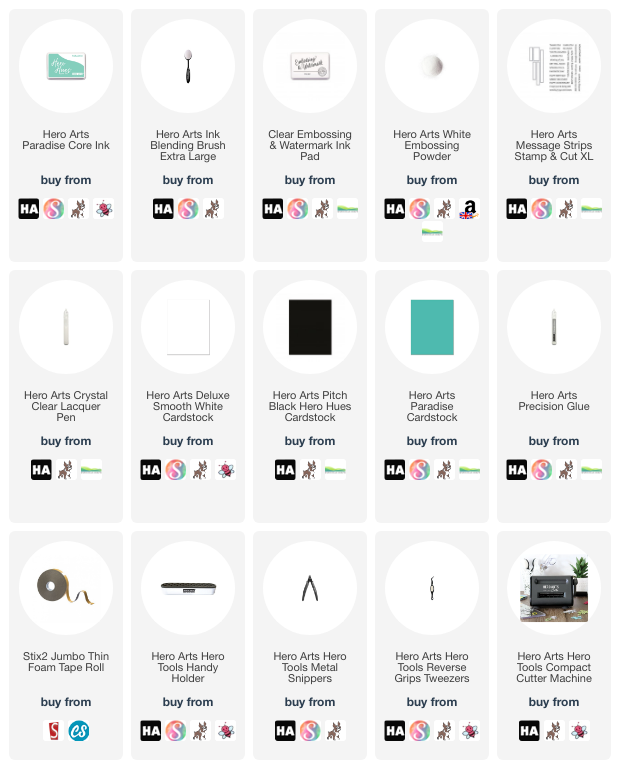
Here are the links to what I have used on the project. Affiliate links are used on some products. This means that if you make a purchase after clicking on my link, I receive a small commission with no extra cost to you. I truly appreciate your support when using these links. Please click on the logo below the product to shop at your favourite store. All products were personally purchased except those from Clearly Besotted, Hero Arts or those marked with an asterisk (*) which were kindly sent to me to use. You can read my full disclosure here.


When I know what occasion I am sending the card for, I will stamp an accompanying sentiment inside to finish off the sentiment. For example 'just a little note to say ... thank you'. For more inspiration using the kit, please head over to the Hero Arts Blog. Also, be sure to leave a comment over there for a chance to win a kit! Thank you so much for stopping by today, I really appreciate it. I hope you have a great rest of the day! 

Clearly Besotted Teasers | Happy Birthday, Bookworm

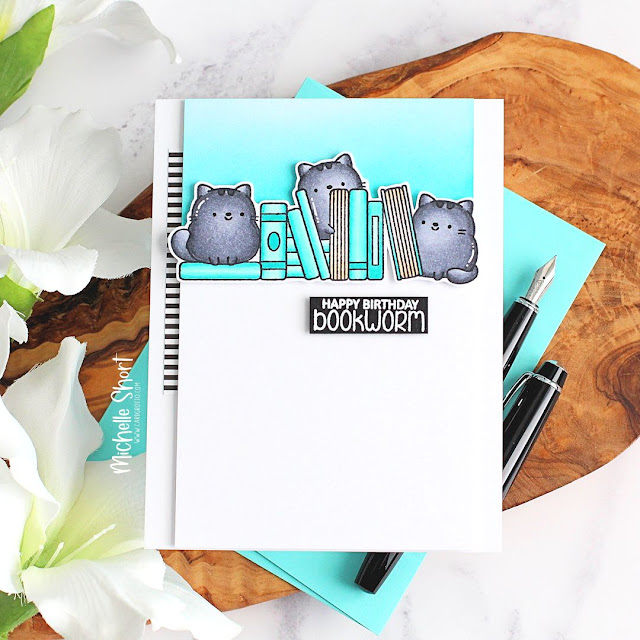
Hello there and welcome to day two of the Clearly Besotted May 2023 Release Teasers. Release day is 1st May 2023 and we are sharing sharing teasers until then using the new sets. My card today uses the Bookworm Line Up set. Perfect for the bookworms in your life! 

PLEASE NOTE: This post contains affiliate links. Please see below for my full disclosure.


I started off my card by stamping the cats and books image from the Clearly Besotted Bookworm Line Up Stamp Set on to white cardstock using Memento Tuxedo Black Ink. I then coloured it using Copic Markers (the colours that I used are listed below the supplies area for reference). It was fussy cut out with scissors and set aside while I worked on my background. 


I took a panel of white cardstock and added ink blending to the top with Tim Holtz Peacock Feathers Distress Ink and an ink blending brush. The image was adhered on top with thin foam tape. I added a strip of MFT Black & White Stripes Paper Pad to the side of a US A2 sized white card base and then adhered the panel on top with more thin foam tape. 


I took the sentiment from the set and stamped it on to black cardstock using Versamark ink. I applied white embossing powder and heat set. It was cut into a strip and adhered to the card with thin foam tape. To finish off, I added white gel pen highlights to the images and black glaze pen to the cat's eyes. 

SUPPLIES:


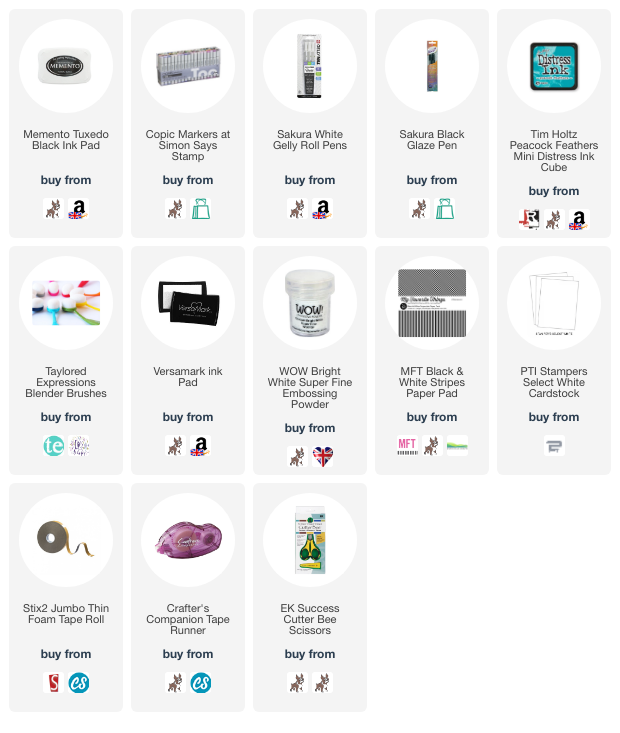
Here are the links to what I have used on the project. Affiliate links are used on some products. This means that if you make a purchase after clicking on my link, I receive a small commission with no extra cost to you. I truly appreciate your support when using these links. Please click on the logo below the product to shop at your favourite store. All products were personally purchased except those from Clearly Besotted, Hero Arts or those marked with an asterisk (*) which were kindly sent to me to use. You can read my full disclosure here.


COPIC MARKERS: Cats - C10, C8, C6, C4, C2. Books - BG49, BG15, BG13, BG11, BG10/E53, E51, E50. 

Although I have used the image on a card, I think these images would work great for bookmarks too! For more inspiration using the new sets, please head over to the Clearly Besotted Blog, Keren, Kitty, Francine and Alberto. Thank you so much for stopping by today, I really do appreciate it. I hope you have a wonderful day and I hope to see you tomorrow for day three! 

27 April 2023

Clearly Besotted Teasers | Telling Tales

Hello there and welcome to the start of the Clearly Besotted May 2023 Release Teasers. The new stamps release Monday, 1st May 2023 and from now until then, we will be sharing teasers with you. This release has a fun book/stories/nursery rhyme theme to it. My card and tag today use the Telling Tales Line Up set. 

PLEASE NOTE: This post contains affiliate links. Please see below for my full disclosure.


For my card, I started off by stamping the underwater scene from the Clearly Besotted Telling Tales Stamp Set on to a panel of white cardstock that was cut using a Simon Says Stamp Mini Slimline Rectangles Die. I then stamped it again on to Altenew Masking Paper before fussy cutting out with scissors. The mask was then placed on top of the image on the panel. 


At the top of the image, I added ink blending with brushes. I used Tim Holtz Mermaid Lagoon and Prize Ribbon Distress Inks to create the effect of water. The mask was removed and the image coloured using Copic Markers (the colours that I used are listed below the supplies list for reference). The panel was then adhered to a mini slimline card base (6.25" x 3.15") which has a piece of Doodlebug Paper on the front, with thin foam tape. 


I stamped then sentiment from the Clearly Besotted Tiny Type Stamp Set on to black cardstock with Versamark Ink. I applied white embossing powder and heat set. It was cut into a strip and adhered to the card with more thin foam tape. To finish off, I added white gel pen highlights to the images. 


I loved this set so much that I had to create another project with it. I took the other image in the Clearly Besotted Telling Tales Line Up Stamp Set (the fairytale scene) and stamped it on to white cardstock. I then coloured only the dragon and cat part with Copic Markers and fussy cut it out with scissors. Since there were some extra lines around the image, I coloured over them with a white gel pen. 


I die cut a Clearly Besotted Tag Along Die from white cardstock and also from a sheet in the Altenew Essential Black & White Paper Pad. The paper piece was cut down further and adhered to the bottom of the white tag, followed by a strip of black cardstock.  


The image was then adhered on top with thin foam tape. I die cut a hole reinforcer from black cardstock and adhered that on top. I then tied a bow at the top of the tag with twine/cord. To finish off, I added black glaze pen to their eyes and a few white gel pen highlights too. 

SUPPLIES:


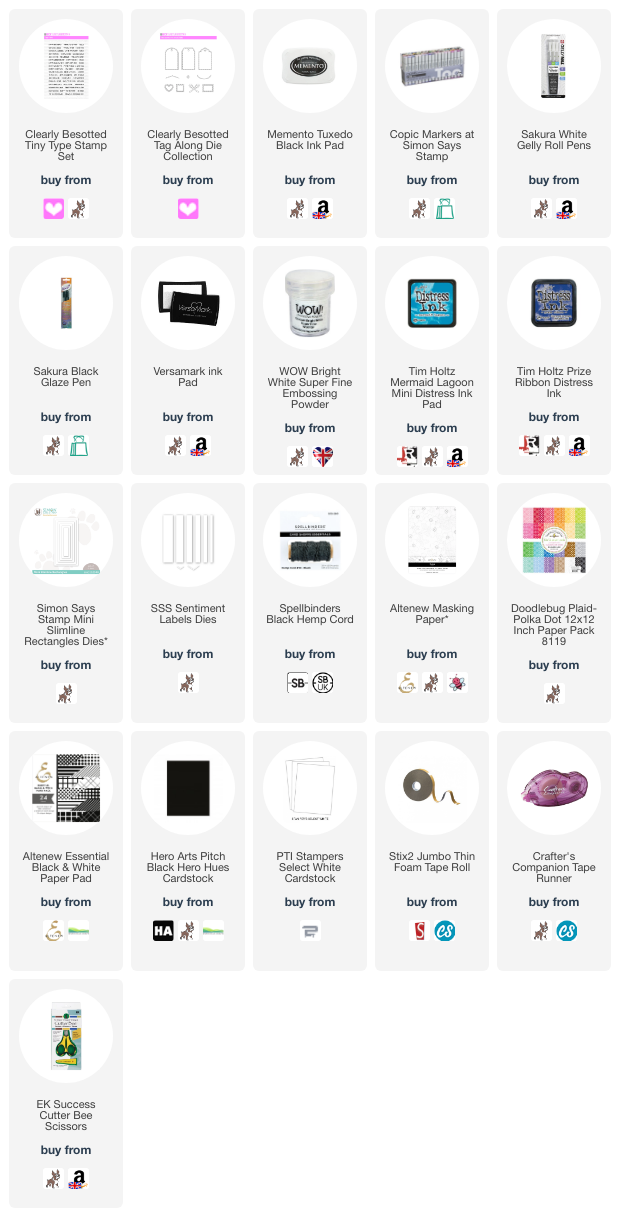
Here are the links to what I have used on the projects. Affiliate links are used on some products. This means that if you make a purchase after clicking on my link, I receive a small commission with no extra cost to you. I truly appreciate your support when using these links. Please click on the logo below the product to shop at your favourite store. All products were personally purchased except those from Clearly Besotted, Hero Arts or those marked with an asterisk (*) which were kindly sent to me to use. You can read my full disclosure here.


COPIC MARKERS: Narwhals - B99, B97, B95, B93, B91, E53, E50. Mer-cats - C8, C6, C4, C2, C00/BG49, BG15, BG13, BG11, BG10/V09, V17, V15, V12, V01. Seaweed - G29, YG17, YG23, YG01. Coral/Starfish - RV66, RV55, RV52. Sand - E47, E44, E43, E42, E41. Dots in water - B16, B12. Dragon - V09, V17, V15, V12, V01/YR27, YR24, Y08, Y04. Cat - C8, C6, C4, C2/V09, V17, V15, V12, V01/YR27, YR24, Y08, Y04. 

Shhh ... don't tell the others but I think this might be my favourite set this month. I just love the scenes already created for you! For more inspiration using the new sets, please head over to the Clearly Besotted Blog and to my fabulous teamie Keren. We also have the fabulous Kitty, Francine and Alberto back guesting with us this month, so I hope you will check out what they have been up to as well. Thanks so much for stopping by today, I hope you have a great day! 

26 April 2023

Spellbinders | Seahorse Kisses

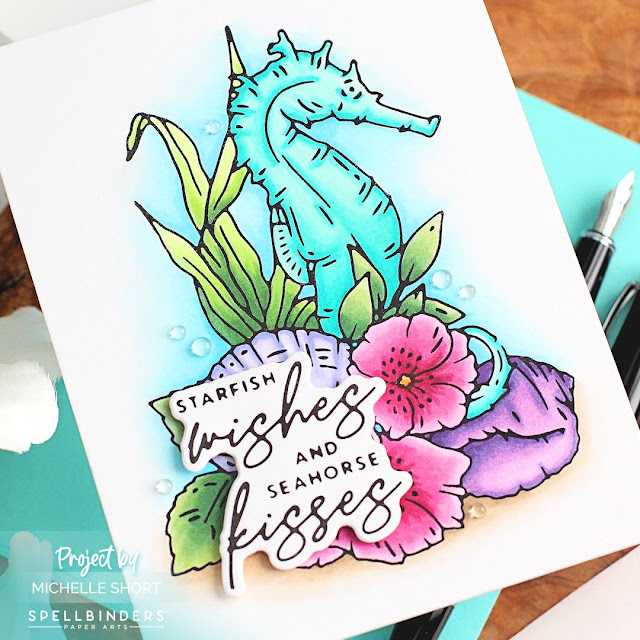
Hello there, I hope you are well. Today I have a card to share using the new Seahorse Kisses Collection from Spellbinders and Dawn Woleslagle. It is such a beautiful collection of underwater loveliness! Today I am using the two of the foiling plates from the collection. 

PLEASE NOTE: This post contains affiliate links. Please see below for my full disclosure.


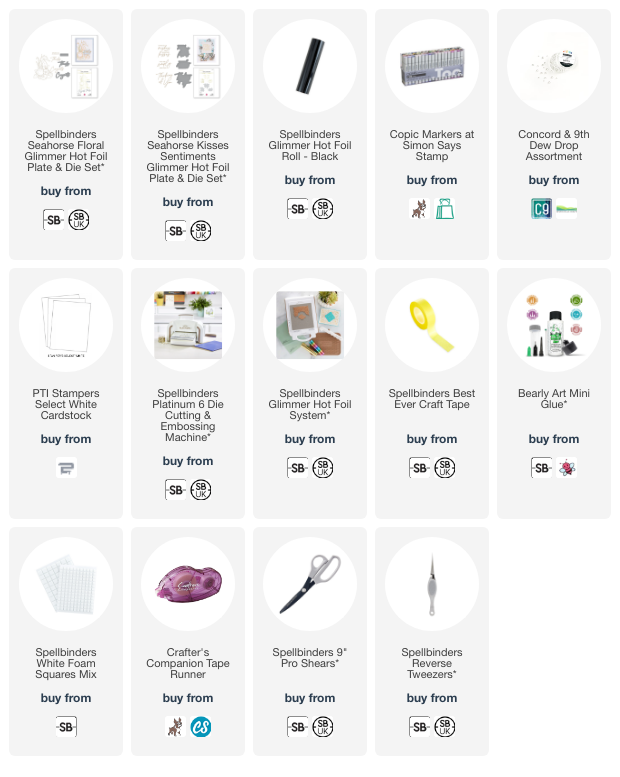
I started off my card by foiling Spellbinders Seahorse Floral Glimmer Hot Foil Plate & Die Set on to white cardstock using Spellbinders Black Glimmer Hot Foil Roll and the Spellbinders Glimmer Hot Foil System. I really love foiling with black foil but I think this image would look great in metallics as well! 


The panel was coloured using Copic Markers (the colours that I used are listed below the supplies area for reference) and then the panel was adhered flat to a US A2 sized white card base with tape runner adhesive. I took the sentiment from the Spellbinders Seahorse Kisses Sentiments Glimmer Hot Foil Plate & Die Set and foiled it on to more white cardstock with black foil. 


It was die cut out with the coordinating die and adhered to the card with foam squares. To finish off, I added a few Concord & 9th Dew Drops, adhering with Bearly Art Glue. 

SUPPLIES:


Here are the links to what I have used on the project. Affiliate links are used on some products. This means that if you make a purchase after clicking on my link, I receive a small commission with no extra cost to you. I truly appreciate your support when using these links. Please click on the logo below the product to shop at your favourite store. All products were personally purchased except those from Clearly Besotted, Hero Arts or those marked with an asterisk (*) which were kindly sent to me to use. You can read my full disclosure here.


COPIC MARKERS: Seahorse - BG49, BG15, BG13, BG11, BG10. Flowers - RV69, RV66, RV55, RV52/YR16, YR12. Shells - V09, V17, V15, V12/BV13, BV11, BV02, BV00. Seaweed/plants - G29, YG17, YG23, YG01/G28, G46, G43. Sand - E44, E43, E42, E41. Water - B04, B02, B00, B000, B0000.

Another beautiful collection from Spellbinders! If you are not in to foiling, there are beautiful stamps with similar images too. Thank you so much for stopping by today, I really do appreciate it. I hope you have a lovely day! 

25 April 2023

Hero Arts | Creating a Focal Point from a Background

Hello there, I am over on the Hero Arts Blog today, sharing a card where I created a focal point from a background stamp. Hero Arts Bold Prints are essentially background stamps, but if you use just a portion of it, you can quickly an easily create a focal point!

PLEASE NOTE: This post contains affiliate links. Please see below for my full disclosure.


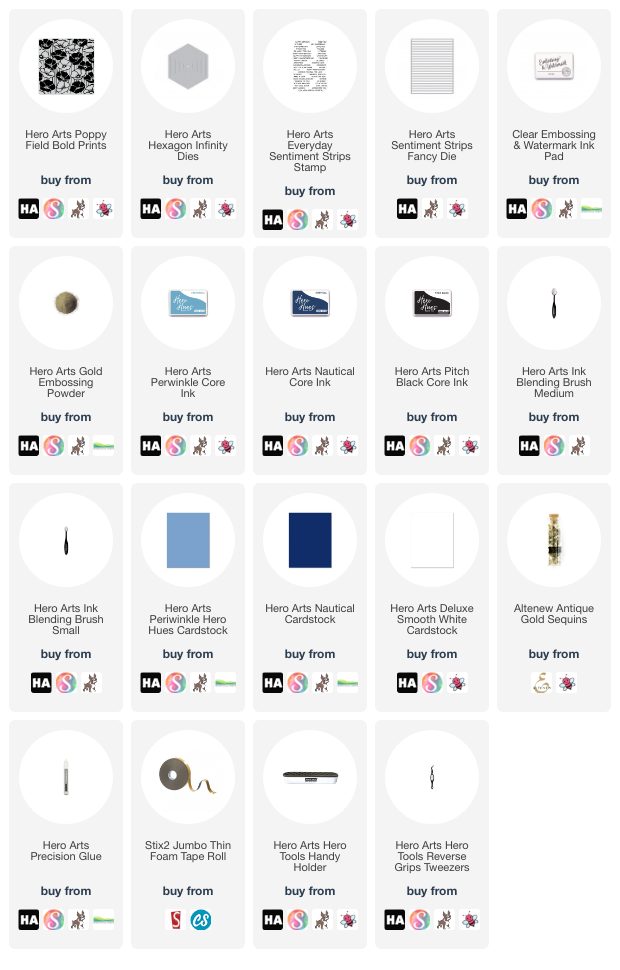
I used Hero Arts Poppy Field Bold Prints, stamped onto Hero Arts Periwinkle Cardstock using Hero Arts Nautical Core Ink. The image was die cut out using Hero Arts Hexagon Infinity Dies and ink blended with Hero Arts Periwinkle, Nautical and Pitch Black Core Inks. 


The sentiment, from Hero Arts Everyday Sentiment Strips Set was gold heat embossed and die cut using the Hero Arts Sentiment Strips Fancy Die. I thought it would be fun to create a hexagon shaped card today but the focal point would look good on an A2 or other shaped card as well! 

SUPPLIES:


Here are the links to what I have used on the project. Affiliate links are used on some products. This means that if you make a purchase after clicking on my link, I receive a small commission with no extra cost to you. I truly appreciate your support when using these links. Please click on the logo below the product to shop at your favourite store. All products were personally purchased except those from Clearly Besotted, Hero Arts or those marked with an asterisk (*) which were kindly sent to me to use. You can read my full disclosure here.


For more information on how I made the card, please head over to the Hero Arts Blog. Thank you so much for stopping by today, I really appreciate it. I hope you have a wonderful day! 

24 April 2023

VIDEO | Best Buds

Hello there, I hope you are well and having a good day so far! I am over on the My Favorite Things YouTube channel today sharing a clean and simple card using the RAM Best Buds set. 

PLEASE NOTE: This post contains affiliate links. Please see below for my full disclosure.


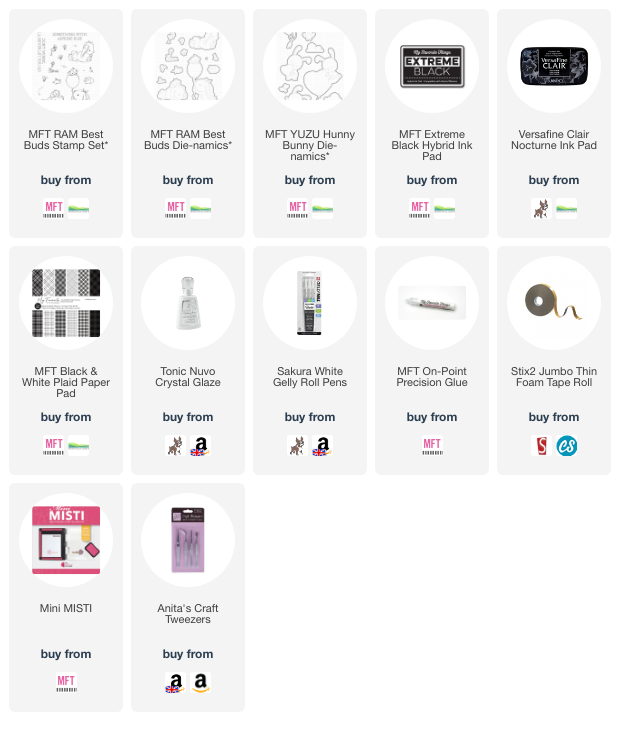
I started off my card by stamping the rabbit, balloon and guinea pig image from the MFT Best Buds Stamp Set on to white cardstock using MFT Extreme Black Ink. I then coloured it using Copic Markers (the colours that I used are listed below the supplies section) before die cutting out using the MFT Best Buds Die-namics


While die cutting, I also die cut two clouds from the MFT Hunny Bunny Die-namics set. I cut each one twice and layered them up for added dimension. I took a 4.25" x 5.25" panel of white cardstock and stamped the sentiment from the MFT Best Buds Stamp Set towards the bottom using Versafine Clair Nocturne Ink.  


I took a sheet of MFT Black & White Plaid Paper Pad and adhered it to the front of a US A2 sized white card base. The panel was then adhered on top with thin foam tape. The clouds were adhered with MFT On-Point Precision Glue and the image with more thin foam tape. To finish off, I added a  white gel pen highlight to the balloon and Nuvo Crystal Glaze to the bunny's nose. 

VIDEO:

Here is the video showing how I made the card:


If you are viewing this blog post via email subscription, you can watch the video HERE on YouTube. 

SUPPLIES:


Here are the links to what I have used on the project. Affiliate links are used on some products. This means that if you make a purchase after clicking on my link, I receive a small commission with no extra cost to you. I truly appreciate your support when using these links. Please click on the logo below the product to shop at your favourite store. All products were personally purchased except those from Clearly Besotted, Hero Arts or those marked with an asterisk (*) which were kindly sent to me to use. You can read my full disclosure here.


COPIC MARKERS: Rabbit - C7, C5, C3, C1, C0, RV55, RV52, RV00. Guinea pig - C5, C3, C1, C0, E37, E35, E33, E31, R55. Balloon - V09, V17, V15, V12, V01. 

I just think that image is so cute! Lovely having guinea pigs in a set too, I think they are adorable! Thank you so much for stopping by today, I really do appreciate it. I hope you have a lovely rest of the day and a great week ahead! 

22 April 2023

Spellbinders | Stylish Ovals

Hello there and happy Saturday to you! Today I have a card to share using the Spellbinders Stylish Ovals Collection. This collection is really pretty and I love the fun oval shape. These ovals are not your average oval shape, they have straight side edges, so something a little bit different and I really like them! 

PLEASE NOTE: This post contains affiliate links. Please see below for my full disclosure.


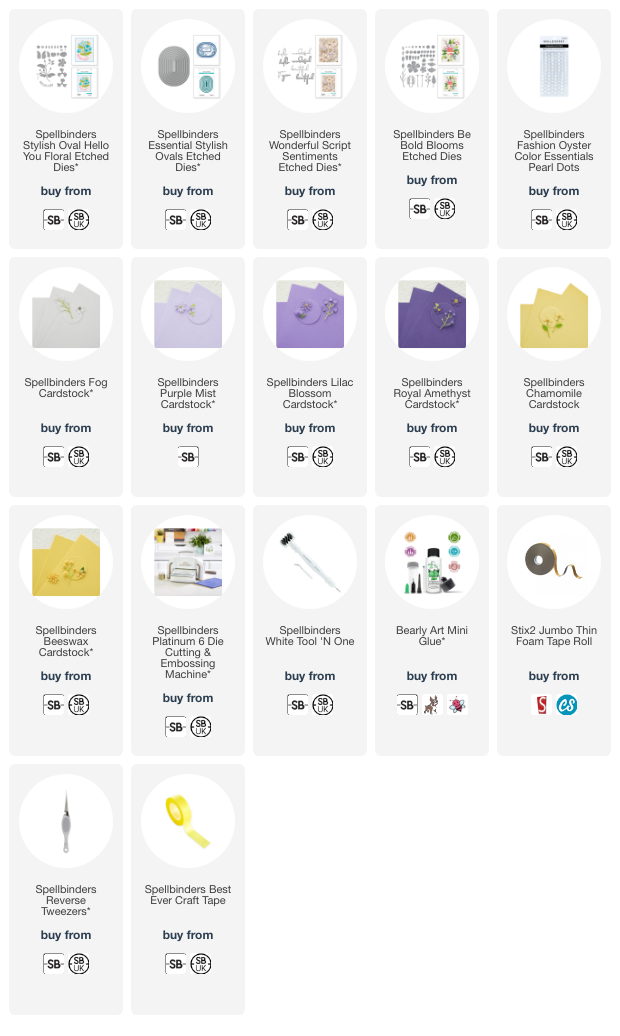
I started off my card by die cutting the Spellbinders Stylish Oval Hello You Floral Etched Dies. I cut the base layer twice from the new Spellbinders Fog Cardstock and then I also cut the leaf layers with this too. The flowers were die cut from Spellbinders Purple Mist, Lilac Blossom and Royal Amethyst Cardstock. I cut the flower centres from Spellbinders Chamomile and Beeswax Cardstock. 


I wanted an extra layer for the flower centres, since I didn't use the detailed layer in the set, so I cut an additional layer from Spellbinders Be Bold Blooms Etched Dies to place on top. The flowers and leaves were assembled and adhered with Bearly Art Glue


I cut a panel of white cardstock using one of the Spellbinders Essential Stylish Ovals Etched Dies and adhered the base layer of the image on top with Bearly Art Glue. The flowers were adhered with thin foam tape. I die cut a panel of Spellbinder Purple Mist Cardstock from a slightly larger Stylish Oval and then adhered to a card base made using the same oval die from white cardstock (I made a side-folding card base and placed the die on top, making sure overhang the die slightly to not cut the fold). 


The flower panel was then adhered on top with thin foam tape. I die cut the hello sentiment from Spellbinders Wonderful Script Sentiments Etched Dies from Spellbinders Purple Amethyst Cardstock for the word itself and white cardstock for the shadow. They were adhered together and then added to the card. To finish off, I embellished with a few Spellbinders Fashion Oyster Color Essentials Pearls.  

SUPPLIES:


Here are the links to what I have used on the project. Affiliate links are used on some products. This means that if you make a purchase after clicking on my link, I receive a small commission with no extra cost to you. I truly appreciate your support when using these links. Please click on the logo below the product to shop at your favourite store. All products were personally purchased except those from Clearly Besotted, Hero Arts or those marked with an asterisk (*) which were kindly sent to me to use. You can read my full disclosure here.


Although the flowers are made to fit in an oval shape, they work wonderfully with different shapes too. You could even just use the flowers and leaves without the base layer as well! Thank you so much for stopping by today, I really appreciate it. I hope you have a wonderful weekend! 

20 April 2023

Simon Says Stamp | Yarn Love

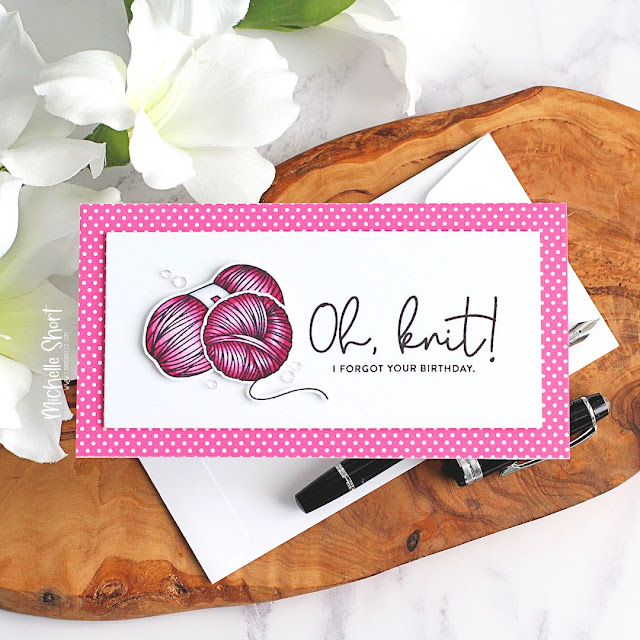
Hello there, I hope you are well! Today I have a card to share using the Simon Says Stamp Yarn Love set that was kindly sent to me to use as part of their April Beautiful Days Release. This is a fun set for all the knitters/crocheters out there. 

PLEASE NOTE: This post contains affiliate links. Please see below for my full disclosure.


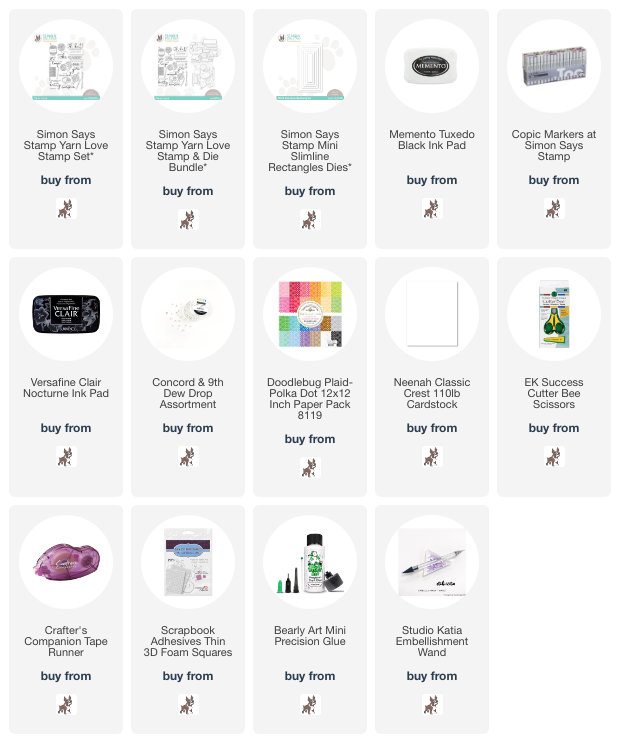
I started off by stamping two of the yarn/wool images from the Simon Says Stamp Yarn Love Stamp Set using Memento Tuxedo Black Ink. I coloured them using Copic Markers. I used RV69, RV66, RV55 and RV52 for the yarn/wool itself and C5, C3, C1 for the label. I then fussy cut them out with scissors, but there are dies available. 


I took a panel of white cardstock and die cut it using the second largest die in the Simon Says Stamp Mini Slimline Rectangles Die Set. On this panel, I stamped the sentiment from the Simon Says Stamp Yarn Love Stamp Set using Versafine Clair Nocturne Ink


I added a panel of paper from the Doodlebug Plaid-Polka Dot 12x12 Paper Pad on to the front of a mini slimline white card base (3.15" x 6.25") using tape runner adhesive. The stamped panel was then adhered on top with thin foam tape. The yarn/wool was adhered beside the sentiment with more thin foam tape. To finish off, I added a few Concord & 9th Dew Drops

SUPPLIES:


Here are the links to what I have used on the project. Affiliate links are used on some products. This means that if you make a purchase after clicking on my link, I receive a small commission with no extra cost to you. I truly appreciate your support when using these links. Please click on the logo below the product to shop at your favourite store. All products were personally purchased except those from Clearly Besotted, Hero Arts or those marked with an asterisk (*) which were kindly sent to me to use. You can read my full disclosure here.


Although I am not a knitter/crocheter myself, I do have some friends who are. There are lots of other fun sentiments in this set too, along with other images. Thank you so much for stopping by today, I really do appreciate it. I hope you have a great day! 

19 April 2023

Altenew | New Dual Tip Pens

Hello there, have you seen that Altenew have released three new sets of Dual Tip Pens? These pens are water based and have a fine tip on one end and a brush tip on the other, so great for different applications. I am using the pens today to watercolour the beautiful Gracious Peonies set. 

PLEASE NOTE: This post contains affiliate links. Please see below for my full disclosure.


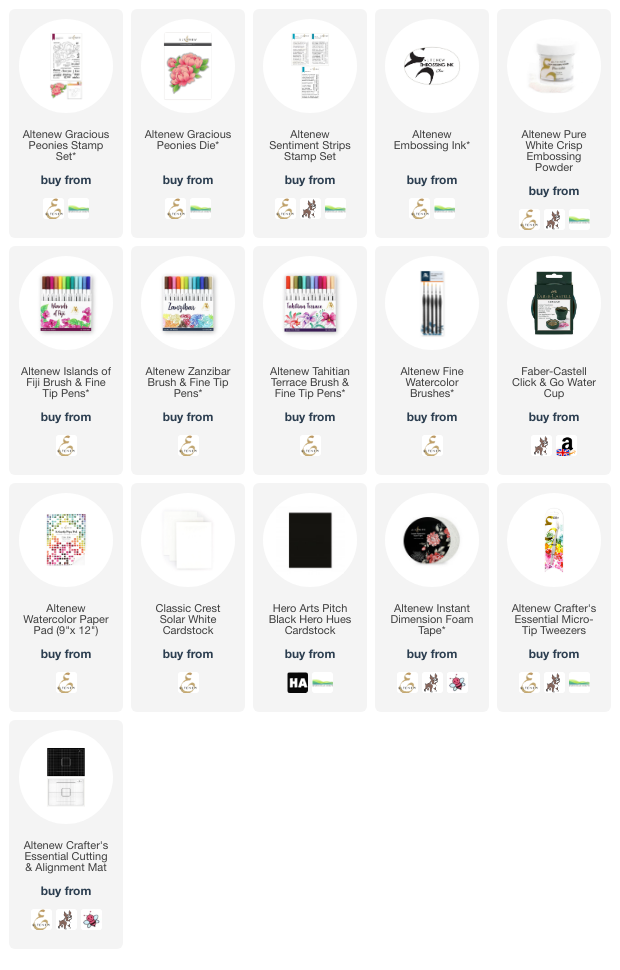
I started off my card by stamping the peonies image from Altenew Gracious Peonies Stamp Set on to Altenew Watercolor Paper using Altenew Embossing Ink. I applied Altenew Pure White Crisp Embossing Powder and heat set. I then coloured the image with the new pens. 


I first applied Rubellite to the flower petals from the Altenew Tahitian Terrace Dual Tip Pens Set and then using an Altenew Fine Watercolor Brush, blended the colour using water. For the other colours, I applied some of the colour from the pen onto an acrylic block and then picked it up with the paint brush to paint the image. I used Fuchsia from the Altenew Islands of Fiji Dual Tip Pens Set, Baby Pink from Altenew Zanzibar Dual Tip Pens Set and finished with Pink Pearl from the Tahitian Terrace Set. 


For the leaves, I used Emerald, Grass Field and Bamboo, all from the Altenew Islands of Fiji Dual Tip Pens Set. The image was then die cut using the Altenew Gracious Peonies Die Set and adhered to a US A2 sized white card base with Altenew Instant Dimension Foam Tape. I stamped the sentiment from the Altenew Sentiment Strips Stamp Set on to black cardstock and heat embossed in white. They were cut into a strips and adhered to the card. To finish off, I added a few (now retired, sorry) sequins. 

SUPPLIES:


Here are the links to what I have used on the project. Affiliate links are used on some products. This means that if you make a purchase after clicking on my link, I receive a small commission with no extra cost to you. I truly appreciate your support when using these links. Please click on the logo below the product to shop at your favourite store. All products were personally purchased except those from Clearly Besotted, Hero Arts or those marked with an asterisk (*) which were kindly sent to me to use. You can read my full disclosure here.


These are really beautiful pens to use. They blend easily with water, whether you apply them directly to the paper, or use an acrylic block like I did. I love the colour selection in the sets too! Thank you so much for stopping by today, I very much appreciate it. I hope you have a great day! 

18 April 2023

VIDEO | Floral Envelope

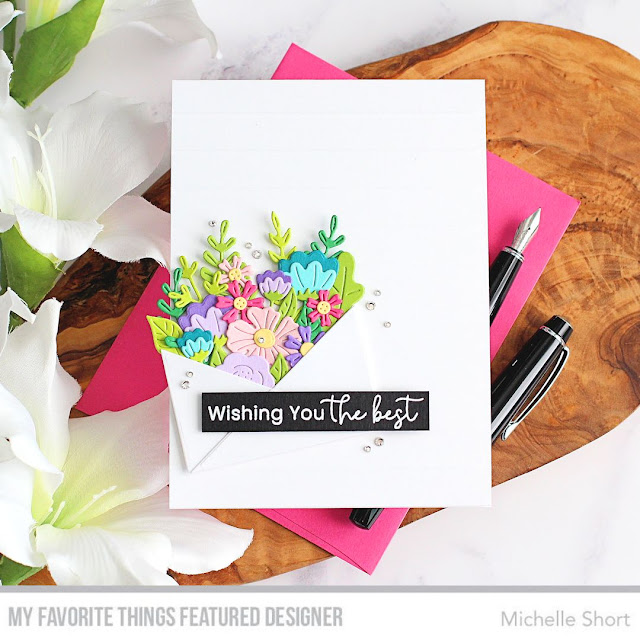
Hello there, I am over on the My Favorite Things YouTube Channel today sharing a clean and simple die cutting card using some products from the April 2023 release. 

PLEASE NOTE: This post contains affiliate links. Please see below for my full disclosure.


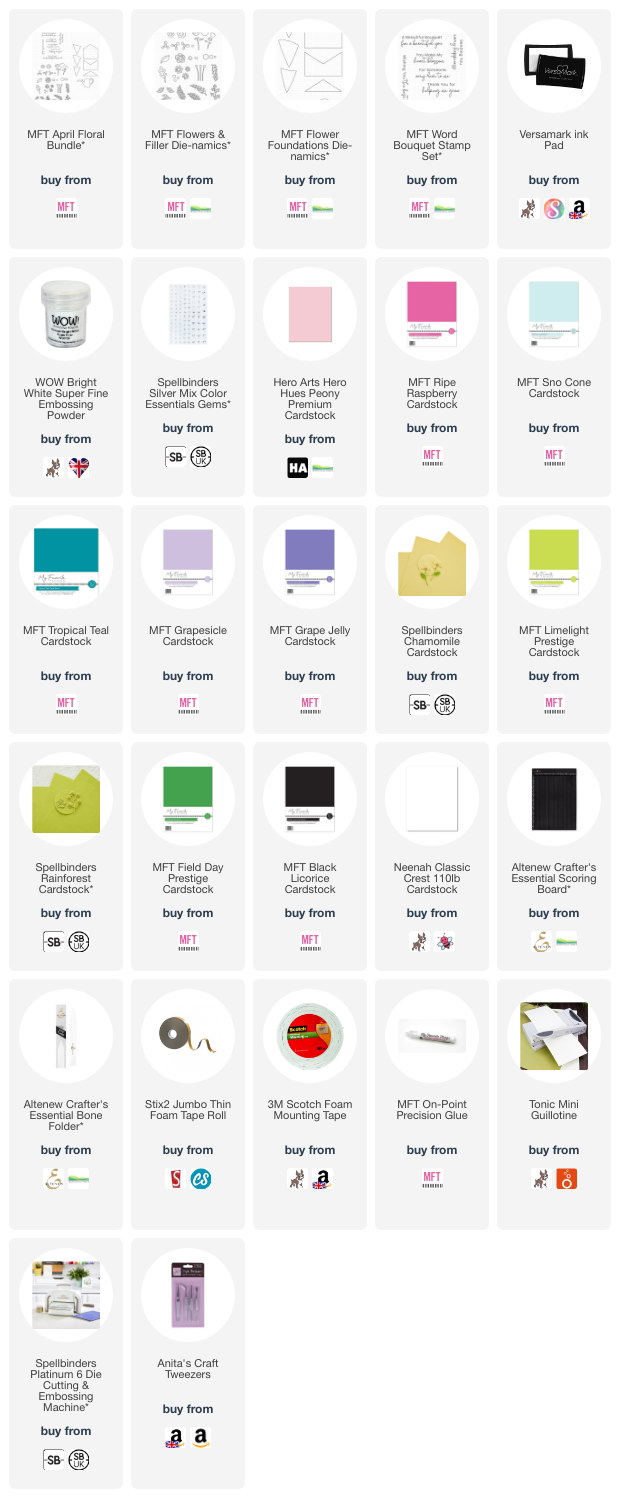
I started off my card by die cutting the MFT Flowers & Filler Die-namics from scraps of cardstock. These flowers are small, so perfect for using up those scraps! I used purples, pinks and aquas/teals for the flowers and three shades of green for the leaves/foliage. All of the colours that I used are listed in the supplies list for reference. 


Some of the flowers needed assembly, so I layered them up and adhered using MFT On-Point Precision Glue. I also die cut the envelope from MFT Flower Foundations Die-namics from white cardstock. I then got to work arranging the flowers in the envelope. I worked from the back to the front, adding some foliage first and then the flowers on top, all adhering with liquid glue. I then adhered the front pieces of the envelope on top. 


I stamped the sentiment from the MFT Word Bouquet Stamp Set on to MFT Black Licorice Cardstock using Versamark Ink. I applied white detail embossing powder and heat set. It was then cut into a strip. I took a 4" x 5.5" white card base and added scoring lines to the front with a score board and bone folder. This adds some nice subtle detail to a CAS card. 


The floral envelope was adhered on top with thin foam tape, making sure to only overlap the card base slightly, so that it would still fit in a standard sized envelope. The sentiment was adhered on top. To finish off, I added a few Spellbinders Silver Mix Color Essentials Gems

VIDEO:

Here is the video showing how I made the card:


If you are viewing this blog post via email subscription, you can watch the video HERE on YouTube. 

SUPPLIES:


Here are the links to what I have used on the project. Affiliate links are used on some products. This means that if you make a purchase after clicking on my link, I receive a small commission with no extra cost to you. I truly appreciate your support when using these links. Please click on the logo below the product to shop at your favourite store. All products were personally purchased except those from Clearly Besotted, Hero Arts or those marked with an asterisk (*) which were kindly sent to me to use. You can read my full disclosure here.


You can do so much with these flower dies. They are so pretty and perfect for lots of different occasions! Thank you so much for stopping by today, I really do appreciate it. I hope you have a lovely day! 
End of code