31 December 2019

VIDEO | Five New, Old & Potential Craft Favourites

Hello there and happy New Year's Eve to you! Today I am back with my last video of the year and decade, sharing five of my favourite craft products of 2019, five of my favourite older craft products and five of my potential craft favourites for 2020.
 
 
I thought it would be fun to have a look at five products that came out or that I discovered in 2019. Then look at five craft products that I have used throughout the last few years but continued to love in 2019. Last but not least, I thought I would share five products (actually, one is a technique) that I am looking forward to using in 2020. Here is the video showing the products:


If you are viewing this post via email subscription, you can watch the video HERE on YouTube.
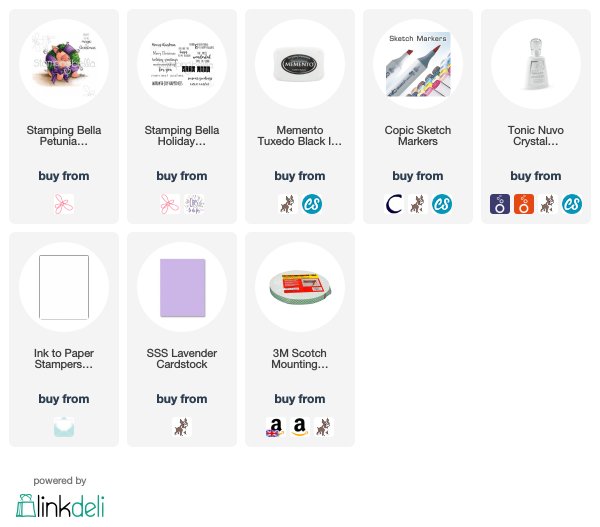
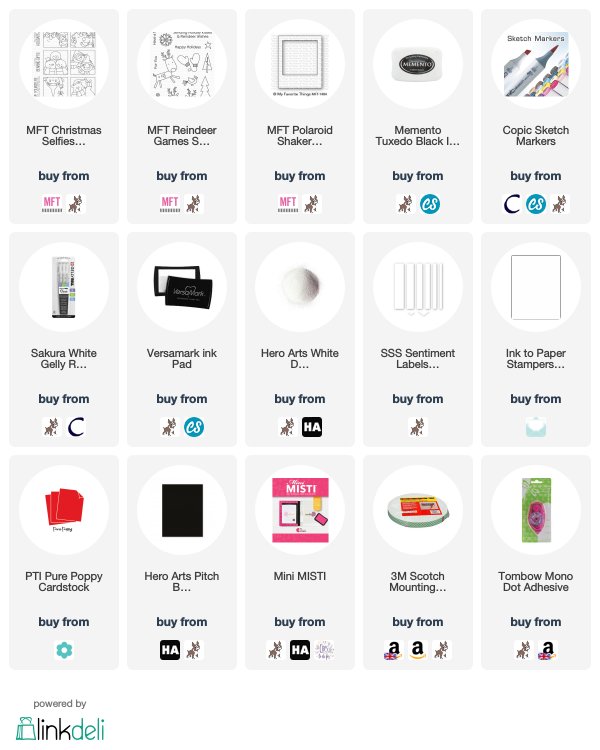
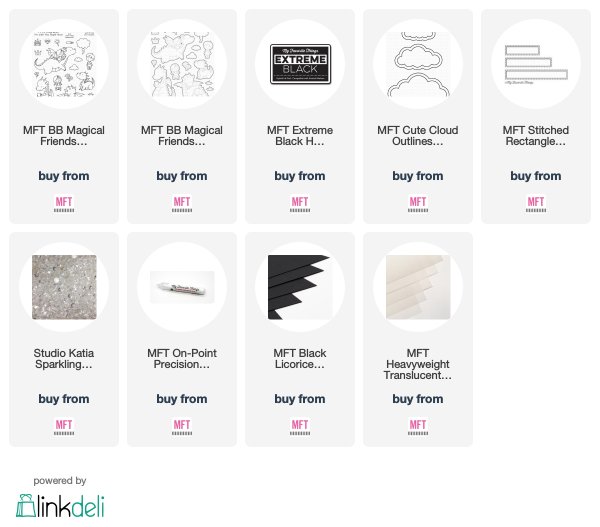
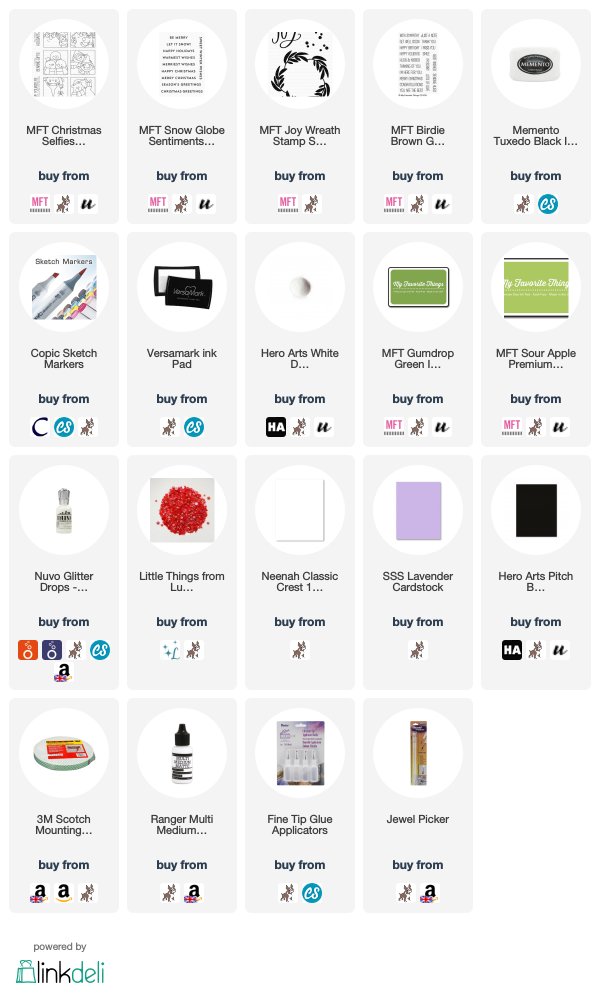
 
SUPPLIES:

Here are the links to what I have used on the card. Affiliate links are used on some products. This means that if you make a purchase after clicking on my link, I receive a small commission with no extra cost to you. I truly appreciate your support when using these links. Please click on the logo below the product to shop at your favourite store. All products were personally purchased except those from Clearly Besotted, Hero Arts or those marked with an asterisk (*) which were kindly sent to me to use. You can read my full disclosure here.
 
 
I hope that you enjoyed hearing about my favourite products. I would love to hear what yours are! Thank you so much for your support this year, it really does mean a lot to me. Here's to a wonderful 2020!

28 December 2019

Merry Everything & Happy Always

Hello there, today I have my last Christmas card of the season to share with you. I actually did create  a few more that I haven't shared, but didn't manage to get photographs of them all. I couldn't get a great photograph of this one but as I love the image so much, I had to share!
 

I started off by taking a 4" x 5.25" panel of white cardstock and stamped Stamping Bella Petunia Loves Christmas on to the top portion. I then stamped the sentiment from the Stamping Bella Winter Holiday Sentiment Set below. I coloured Petunia and the wreath with Copic Markers (the colours that I used are listed below the supplies area) and then added shadow beneath her for the ground.
 
 
The panel was added to a 5" x 7" card base made from SSS Lavender Cardstock with foam tape. To finish off, I added Nuvo Crystal Glaze to the berries on Petunia's head.
 
SUPPLIES:
 
Here are the links to what I have used on the card. Affiliate links are used on some products. This means that if you make a purchase after clicking on my link, I receive a small commission with no extra cost to you. I truly appreciate your support when using these links. Please click on the logo below the product to shop at your favourite store. All products were personally purchased except those from Clearly Besotted, Hero Arts or those marked with an asterisk (*) which were kindly sent to me to use. You can read my full disclosure here.
 
 
COPIC MARKERS: Petunia - R32, R30, R00, R000. Bow - V09, V17, V15, V12, V01. Wreath & Holly - G46, YG67, YG17, YG25, YG03. Berries - R89, R37, R27, R24. Ground - W5, W3, W1.
 
Right! Now time to move on to New Year cards :) Thanks so much for visiting me today, I really do appreciate it. I hope you have a fantastic weekend!

27 December 2019

Christmas Selfies

Hello there, today I have a Christmas card to share that I made for my brother and his family. One of my favourite sets this year has been the MFT Christmas Selfies set and I thought it would be cute to use two of the image with the polaroid frame.
 
 
I started off by stamping two of the images from the MFT Christmas Selfies Stamp Set on to white cardstock with Memento Tuxedo Black Ink. I then coloured them using Copic Markers (the colours that I used are listed below the supplies area) and cut around the images with scissors. I took the MFT Polaroid Shaker Frame Die-namics and cut this four times - twice from white cardstock and twice from black cardstock.
 
 
I adhered the image piece behind the window on the white polaroid frames and then added the black ones behind to create the shadow. I then added white gel pen to the images for snow. I took a red A2 card base and stamped snowflakes on to it from the MFT Reindeer Games Stamp Set. I used Versamark Ink for tone-on-tone look. The polaroid's were then added on top with tape runner. 
 

I took the sentiment from the MFT Christmas Selfies Stamp Set and stamped it on to black cardstock with Versamark Ink. I applied White Detail Embossing Powder and heat set. It was then cut in to a strip using the SSS Sentiment Labels Dies and added to the card with foam tape.
 
SUPPLIES:

Here are the links to what I have used on the card. Affiliate links are used on some products. This means that if you make a purchase after clicking on my link, I receive a small commission with no extra cost to you. I truly appreciate your support when using these links. Please click on the logo below the product to shop at your favourite store. All products were personally purchased except those from Clearly Besotted, Hero Arts or those marked with an asterisk (*) which were kindly sent to me to use. You can read my full disclosure here.
 
 
COPIC MARKERS: Sky - B18, B16, B12. Snowmen - BG11, BG000, YR18, YR15, YR12. hat - C10, C8, C6, C5. Scarves - R89, R39, R27, R24. Santa skin - E13, E11, E000, R20. Hair - W3, W1, W0. Outfit - R89, R39, R29, R27, R24, C1. Rudolph - E59, E57, E55, E53, E50. Nose - R89, R39, R27, R24. Collar - E59, E57, Y28, Y26, YR31.
 
Since I had the photos hanging off the side of the card, I did create a handmade envelope for this card but it would have fitted in a standard square envelope too. Thank you so much for visiting me today. I hope you have a wonderful day!

25 December 2019

MFT Sketch Chellenge | Magical Friends

Hello there and welcome to the last MFT Sketch Challenge of the year, I am delighted to be taking part again this week as a guest designer. We are on to sketch 469 and I thought it worked perfectly with the BB Magical Friends Set.
 

I started off my card by stamping the dragon with the girl from the MFT BB Magical Friends Stamp Set on to white cardstock with MFT Extreme Black Ink. I then coloured them using Copic Markers (the colours that I used are listed below the supplies area) and cut out using the MFT BB Magical Friends Die-namics. I then embellished the dragon using white gel pen dots and set them aside while I worked on my background.
 
 
I took a panel of watercolour paper and blended Distress Inks on to it. I used Seedless Preserves at the top, followed by Chipped Sapphire, Blueprint Sketch, Mermaid Lagoon and then Peacock Feathers at the bottom. The panel was spritzed with water and then set aside to dry. Once dry, it was adhered flat to an A2 white card base with tape runner. I die cut three clouds using the MFT Cute Cloud Outlines Die-namics from white cardstock and adhered these on to vellum. I then fussy cut them out using scissors.
 
 
I ran them through my Xyron machine (so that the adhesive completely covers the back) and adhered them to my card. I took the sentiment from the BB Magical Friends set and stamped it on to MFT Black Licorice Cardstock using Versamark Ink. I applied white embossing powder and heat set. It was then cut in to a strip using the MFT Stitched Word Window Die-namics (the stitching gets removed but it was a perfect size for the sentiment). I added it to the card with foam tape and then added the dragon and girl on top. To finish off, I added a few Sparkling Crystals.
 
SUPPLIES:

Here are the links to what I have used on the card. Affiliate links are used on some products. This means that if you make a purchase after clicking on my link, I receive a small commission with no extra cost to you. I truly appreciate your support when using these links. Please click on the logo below the product to shop at your favourite store. All products were personally purchased except those from Clearly Besotted, Hero Arts or those marked with an asterisk (*) which were kindly sent to me to use. You can read my full disclosure here.
 
 
COPIC MARKERS: Dragon - V09, V17, V15, V12, V01, V000, BG49, BG15, BG11, W5, W3. Girl skin - E13, E11, E00, E000, E50. Hair - E49, E27, E25, E23. Dress - B18, B16, B12.
 
SKETCH CHALLENGE:
 
Here is sketch 469. Create and share a card using it and you could be in with a chance of winning a $50 gift certificate to the MFT Boutique. For more information, please visit the MFT Blog.
 
A big thank you goes to Stephanie and MFT for having me guest with them this month. It has been so much fun! Thank you also for stopping by today, I really do appreciate it and if you celebrate Christmas, I wish you a very Merry Christmas or if not, a wonderful day!

24 December 2019

Christmas Card Catch Up!

Hello there, I hope you are well doing well. If you celebrate Christmas then you will know how much of a rush it is to get everything done before the big day! I am writing this the day before the post goes up and I still need to wrap presents and make handmade crackers. Since I have run out of days to post Christmas cards (there will be a couple going up after Christmas, I hope that is ok) I thought I would add two in one post.


My first card uses the MFT Christmas SELFies Stamp Set. I did make another card using this set as well which I will share soon. I took the bear image from the set and stamped it on to a panel of white cardstock using Memento Tuxedo Black Ink. I then coloured him using Copic Markers (the colours that I used are listed below the supplies area).


I stamped the sentiment from the MFT Snow Globe Sentiments Stamp Set below. The panel was adhered to an A2 card base made from Simon Says Stamp Lavender Cardstock. To finish off, I added Nuvo White Blizzard Glitter Drops to the bear's hat.


My second card is the main card design that I used this year. I rarely make multiples of the same card but I do at Christmas time because of the amount of cards that I need to make. I hope that the recipients know that I still make them with as much love and care as the other cards throughout the year. For this card, I used the MFT Joy Wreath Stamp Set. I took A2 white card bases and stamped the wreath on to it using MFT Sour Apple Ink.


I then moved the stamp slightly and stamped the it again, this time with MFT Gumdrop Green Ink. I took the sentiment from the MFT Birdie Brown Greetings Galore Stamp Set and stamped it on to black cardstock using Versamark Ink. I applied White Detail Embossing Powder and heat set. It was cut in to a strip and added to the card with foam tape. To finish off, I added Lucy's Glossy Berry Mix Pearls to the wreath.


SUPPLIES:

Here are the links to what I have used on the card. Affiliate links are used on some products. This means that if you make a purchase after clicking on my link, I receive a small commission with no extra cost to you. I truly appreciate your support when using these links. Please click on the logo below the product to shop at your favourite store. All products were personally purchased except those from Clearly Besotted, Hero Arts or those marked with an asterisk (*) which were kindly sent to me to use. You can read my full disclosure here.


COPIC MARKERS: Bear - E53, E51, E50, W9, W6. Scarf - B18, B16, B12, V17, V15, V12. Sky - B01, B00, B000.

Thank you so much for visiting me today. I really do appreciate it. I hope you have a wonderful day, whatever you are up to!

23 December 2019

Earth Nature

Hello there, I am over on the Hero Arts Blog and YouTube channel today, sharing a card using the beautiful Earth Nature Fancy Die with Frame. I love this die and think that you can use it in many ways but I thought I would create simple sunset and sea using ink blending for my card today.
 
 
I originally had planned to create the die cut panel and card base from white cardstock but I think the black looks really striking against the ink blending. I finished it off with a simple sentiment from the Beautiful World set.
 
SUPPLIES:

Here are the links to what I have used on the card. Affiliate links are used on some products. This means that if you make a purchase after clicking on my link, I receive a small commission with no extra cost to you. I truly appreciate your support when using these links. Please click on the logo below the product to shop at your favourite store. All products were personally purchased except those from Clearly Besotted, Hero Arts or those marked with an asterisk (*) which were kindly sent to me to use. You can read my full disclosure here.
 
 
For more information on how I made the card, please head over to the Hero Arts Blog or you can watch the video here on YouTube. Thanks so much for stopping by today, I hope you have a wonderful day!

21 December 2019

Reindeer Games

Hello there, today I have a card to share using the MFT Reindeer Games set. I fell in love with these adorable reindeers and thought they would work perfectly for the previous Sketch 459.
 

I started off by stamping the reindeer and trees from the MFT Reindeer Games Stamp Set on to white cardstock using Memento Tuxedo Black Ink. They were coloured using Copic Markers and then die cut out using the coordinating dies. I took two panels of watercolour paper and stamped the snowflakes from the set on to them multiples times using Versamark Ink. I applied Clear Ultra Fine Embossing Powder and heat set. I then applied Distress Inks to the panels.
 
 
I applied Wilted Violet, Blueprint Sketch and Peacock Feathers, trying to line up the colours on the smaller panel (which is at the front) with the larger piece at the back. I removed any excess ink on top of the embossing with a cloth and then spritzed the piece with Sparkle Shimmer Spray and Picket Fence Distress Spray Stain. I then added some splatters of Copic Opaque White paint and set aside to dry.
 
 
I took piece of white cardstock and die cut them using the MFT Stitched Snow Drifts Dies (lining up the smaller piece so that the image lines up across the card) and added them to the bottom of the inked panels for snow banks. I took an A2 white card base and stamped the sentiment from the MFT Snow Globe Sentiments Stamp Set on to the front using black ink. The back inked panel was added to the card with tape runner and the front piece with foam tape. The trees were added with tape runner and the reindeer with foam tape. To finish off, I added Nuvo Crystal Glaze to the reindeer's nose.
 
SUPPLIES:

Here are the links to what I have used on the card. Affiliate links are used on some products. This means that if you make a purchase after clicking on my link, I receive a small commission with no extra cost to you. I truly appreciate your support when using these links. Please click on the logo below the product to shop at your favourite store. All products were personally purchased except those from Clearly Besotted, Hero Arts or those marked with an asterisk (*) which were kindly sent to me to use. You can read my full disclosure here.
 
 
COPIC MARKERS: Reindeer - E59, E57, E55, E53, E50, R89, R27, R24. Scarf - V17, V15, V12. Trees - YG17, YG25, YG03, YG01, E57, E55.
 
After making this card, I decided to make a couple more, changing the trees and reindeers although I forgot to get photos of those. I do love this set though and hope to use it again next year. Thanks so much for stopping by today, I really appreciate it. I hope you have a great day and wonderful weekend!

20 December 2019

Zippy Zebras

Hello there, today I have a card to share with you using the new Zippy Zebras set from MFT. They are just so cute and perfect if you do not like colouring much, as they really do not require much atll! I fell in love with this one on the scooter instantly so I had to make a card with him first!
 

I started off by stamping the zebra and butterfly from the MFT Zippy Zebras Stamp Set on to white cardstock using MFT Extreme Black Ink. I then coloured them using Copic Markers (the colours that I used are listed below the supplies area) and cut them out using the MFT Zippy Zebras Die-namics.
 
 
I took an alcohol ink background that I had made previously using the left over ink on my mat after creating another background. I wipe the Yupo paper in the ink and it often gives a nice soft, blended look. This was cut down using an MFT Stitched Circle Stax Die-namics die. I then took an A2 white card base and embossed the next size up of circle die on to the front panel. The alcohol ink piece was added inside.
 
 
The zebra and butterfly were added foam tape. I took the sentiment from the MFT Essential Sentiments Stamp Set (I had to mask off to get the 'hello' on it's own) and stamped it on to black cardstock with Versamark Ink. I applied white detail embossing powder and heat set. It was cut in to a strip using the MFT Skinny Strips Die-namics and added to the card with foam tape also. To finish off, I added a few clear droplets around the sentiment.
 
SUPPLIES:

Here are the links to what I have used on the card. Affiliate links are used on some products. This means that if you make a purchase after clicking on my link, I receive a small commission with no extra cost to you. I truly appreciate your support when using these links. Please click on the logo below the product to shop at your favourite store. All products were personally purchased except those from Clearly Besotted, Hero Arts or those marked with an asterisk (*) which were kindly sent to me to use. You can read my full disclosure here.
 
 
COPIC MARKERS: Zebra - W5, W3, W1. Scooter - V17, V15, V12, C8, C6, C4. Butterfly - V17, V15, V12, E50.
 
I am looking forward to using the other zebras in the set too, they are very cute indeed! Thank you so much for visiting me today. I hope you are well and have a great day!

19 December 2019

Ho Ho Ho!

Hello there, today I have a Christmas tag to share with you. This year I am going with a rose gold/or copper and black theme for my wrapping and I thought it would be nice to make a few tags to coordinate. Sadly, I won't have time to make them all but it is nice to do one or two!
 

I started off by die cutting the Hero Arts Tag Fancy Die from Hero Hues Pitch Black Cardstock. I partially cut the tag at the bottom so that I could extend the length of the tag to fit my tree on top. I then cut the Hero Arts Color Layering Nordic Tree Frame Cuts and the tag reinforcer from Simon Says Stamp Copper Glitter Cardstock. The tree and hole reinforcer were added to the tag with Precision Glue, I then die cut the snowflakes from the Hero Arts Layering Snow Globe Fancy Die set from Hero Hues Dove White Cardstock and added them with more liquid glue.
 
 
I took the sentiment from the Hero Arts Snarky Christmas Messages Stamp Set and stamped it on to more black cardstock using Hero Arts Clear Embossing & Watermark Ink. I applied Hero Arts White Embossing Powder and heat set. It was cut in to a strip and added to the tag with foam tape. I added twine through the top of the tag and then embellished with black enamel dots from the Hero Hues Neutrals Enamel Dots selection.
 
SUPPLIES:

Here are the links to what I have used on the card. Affiliate links are used on some products. This means that if you make a purchase after clicking on my link, I receive a small commission with no extra cost to you. I truly appreciate your support when using these links. Please click on the logo below the product to shop at your favourite store. All products were personally purchased except those from Clearly Besotted, Hero Arts or those marked with an asterisk (*) which were kindly sent to me to use. You can read my full disclosure here.
 
 
Do you make your own tags for presents? I love making tags but sadly never manage to make them all for Christmas presents. This one is really pretty in real-life but sadly, wasn't that easy to photograph! Thanks so much for visiting me today, I hope you are well and have a fabulous day!

18 December 2019

MFT Sketch Challenge | Rose Garden

Hello there and welcome to another MFT Sketch Challenge Wednesday! We are on sketch 468 and I have to be honest, I used a little bit of artistic licence with this sketch! First I flipped it so that the elements are on the left, rather than the right and my elements are also not one on top of another but I hope that you can still see the sketch in card!
 

I started off by stamping the MFT Rose Garden Stamp Set on to a panel of white cardstock with MFT Extreme Black Ink. Keeping the stamp in my Mini MISTI, I re-stamped it on to the front of an A2 card base. I took the panel piece and die cut four circles in to it (these represent the hearts in the sketch) using MFT Stitched Circle Die-namics.
 

I also die cut the circles from plain white cardstock three times each. The flower images inside the circles were coloured using Copic Markers (the colours that I used are listed below the supplies area). I then stacked the image pieces up with the plain ones, so that each circle image is 4 layers high.
 
 
These were adhered on to the card base, lining up the image so that it made it whole again. I took the sentiment from the MFT Essential Sentiments Stamp Set and stamped it on to MFT Black Licorice Cardstock with Versamark Ink. I applied white embossing powder and heat set. It was then cut in to a strip using an MFT Skinny Strip Die-namics and added to the card with tape runner. To finish off, I added a few Sparkling Clear Crystals.
 
SUPPLIES:

Here are the links to what I have used on the card. Affiliate links are used on some products. This means that if you make a purchase after clicking on my link, I receive a small commission with no extra cost to you. I truly appreciate your support when using these links. Please click on the logo below the product to shop at your favourite store. All products were personally purchased except those from Clearly Besotted, Hero Arts or those marked with an asterisk (*) which were kindly sent to me to use. You can read my full disclosure here.
 
 
COPIC MARKERS: Flowers - B37, B18, B16, B12. Leaves - YG17, YG25, YG03, YG01. Background - BG11, BG10, BG000.
 
SKETCH CHALLENGE:


Here is sketch 468. Create and share a card using it and you could be in with a chance of winning a $50 gift card to the MFT Boutique. For more information on the challenge, please head over to the MFT Blog.
 
Thank you so much for stopping by to see me today, I really do appreciate it. I hope you have a fantastic rest of the day!

17 December 2019

Monarch Butterfly

Hello there, I am over on the Hero Arts Blog today sharing a card and tag using the beautiful Color Layering Monarch Butterfly set which can be purchased separately, or as part of the Color Layering Butterfly Kit which includes the stamp set, dies, inks and a free stencil.
 

For my card, I thought I would create a window using the Ballroom Window Fancy Die. I think the butterfly looks really pretty on top of it and I love the blue shades. The sentiment is from the Chameleon Stamp & Cut set. For the inside, I added some ink blending to a piece of Hero Hues Arctic Cardstock for an ombre look.
 
 
I also made a tag using the Tag Fancy Die and the ink colours from the kit. These are more of  a traditional colour palette for the Monarch Butterfly but I do love both colour combinations. I did stamp a sentiment on the back of the tag from the stamp set, as well as embellishing with enamel dots.
 
SUPPLIES:

Here are the links to what I have used on the card. Affiliate links are used on some products. This means that if you make a purchase after clicking on my link, I receive a small commission with no extra cost to you. I truly appreciate your support when using these links. Please click on the logo below the product to shop at your favourite store. All products were personally purchased except those from Clearly Besotted, Hero Arts or those marked with an asterisk (*) which were kindly sent to me to use. You can read my full disclosure here.
 
 
For more information on how I made the card and tag, please head over to the Hero Arts blog post. Thanks so much for popping by today, I hope you are well and have a wonderful day!

16 December 2019

Christmas Ornament

Hello there, today I have a card to share using the beautiful Hero Arts Poinsettia & Ornament Fancy Die. This is a wonderful die that can be used in different ways - a whole ornament, an ornament with the poinsettia layer or the poinsettia layer on it's own.
 

I started off by die cutting the solid ornament layer of the Hero Arts Poinsettia & Ornament Fancy Die from a panel of alcohol ink background that I had made in the past and kept. I added drops of Alcohol Ink on to Yupo Paper and used a spritzer tool to move the colour around, adding Isopropyl Alcohol for some added interest as well as Silver Mixative.
 
 
I took the ornament frame die and added the poinsettia piece inside. This was then cut three times from Hero Arts Dove White Cardstock. I layered these up on top of the alcohol inked piece using Hero Arts Precision Glue. I took the sentiment from the Hero Arts Off-Beat Holiday Messages set and stamped it on to Hero Arts Pitch Black Cardstock with Hero Arts Clear Embossing & Watermark Ink.
 
 
I applied Hero Arts White Detail Embossing Powder and heat set. It was then cut in to a strip. I took a top folding card base and added the ornament in middle using tape runner. I then added the sentiment on top with a combination of thin foam tape and tape runner. I added a twine bow at the top and then finished off by adding Iridescent Jewels on the ornament.
 
SUPPLIES:

Here are the links to what I have used on the card. Affiliate links are used on some products. This means that if you make a purchase after clicking on my link, I receive a small commission with no extra cost to you. I truly appreciate your support when using these links. Please click on the logo below the product to shop at your favourite store. All products were personally purchased except those from Clearly Besotted, Hero Arts or those marked with an asterisk (*) which were kindly sent to me to use. You can read my full disclosure here.
 
 
How pretty is that ornament die? It is one of my favourites from the winter release. I apologise though that the photos are not great. The winter sun is really not my friend at the moment! Thank you so much for stopping by today, I very much appreciate it. I hope you have a wonderful day!

14 December 2019

Just For You

Hello there, today I have a tag to share with you using the adorable Clearly Besotted Love Story set. I did share this tag in my release video, so I apologise if you have already seen it but I am only now just getting around to blogging it.


I started off the tag by stamping the skunk with the balloon from Clearly Besotted Love Story Stamp Set, as well as the cloud and sun image from the Clearly Besotted Balloon Bunch Backdrops Stamp Set on to white cardstock with black ink. I coloured them using Copic Markers (the colours that I used are listed below the supplies area) and fussy cut them out with scissors.
 
 
I took the Clearly Besotted Tag Along Die Collection and cut the straight edged tag twice from white cardstock. I also cut it from a piece of paper from the Doodlebug Smitten Kitten Paper Pad. This piece was further cut down using the MFT Grassy Fields Die. I adhered the grass to the bottom of the tag with tape runner and then added the skunk on top with foam tape. I added the sun and clouds to the top of the tag with more tape runner.

I took the sentiment from the Clearly Besotted Tiny Type Stamp Set and stamped it on to black cardstock with Versamark Ink. I applied White Detail Embossing Powder and heat set. It was then cut in to a strip and added to the tag with foam tape.
 
 
I took the other tag and blended on Mermaid Lagoon Distress Ink using the Clearly Besotted Cloudy Days Stencil. I then stamped the sentiment from the Clearly Besotted With A Flourish Stamp Set on top with more black ink. The tags were adhered back to back with tape runner and then I added twine through the top and tied it in a bow. To finish off, I added a few Lucy's Raindrops.
 
SUPPLIES:

Here are the links to what I have used on the card. Affiliate links are used on some products. This means that if you make a purchase after clicking on my link, I receive a small commission with no extra cost to you. I truly appreciate your support when using these links. Please click on the logo below the product to shop at your favourite store. All products were personally purchased except those from Clearly Besotted, Hero Arts or those marked with an asterisk (*) which were kindly sent to me to use. You can read my full disclosure here.
 
 
COPIC MARKERS: Skunk - C10, C7, C6, C5, C3, C2, C1. Balloon - V17, V15, V12. Sun - Y17, Y15, Y13, Y11. Clouds - BG11, BG000, BG0000.
 
Although the Love Story set is geared more towards love, as you can see, you can use it in different ways too. Thanks so much for popping by today. I hope you have a wonderful weekend!

13 December 2019

SSS Love You More | Congratulations!

Hello there, today I have a card to share with you using the new Love You More release from Simon Says Stamp which is out today. They kindly sent me the Weddings Rings Dies and I thought it would be perfect for an engagement card.
 

I started off by die cutting the Simon Says Stamp Wedding Rings Dies from white cardstock. The wedding/engagement ring with the stone has three parts - the ring itself, the stone and the little clasp to hold the stone on. This is great so that you can cut them from different colours of cardstock if you wanted to. I just went with white on white for my card, though. I layered the pieces with Multi Medium Matte Glue and then set aside to work on my card base.
 
 
I took a white A2 card base and scored lines in to it to create some subtle interest. The ring was then added on top with foam tape. I took the sentiment from the Simon Says Stamp Messages For Everyday Stamp Set and stamped it on to Hero Arts Pitch Black Cardstock with Versamark Ink. I applied Hero Arts White Detail Embossing Powder and heat set. It was cut in to a strip using the Simon Says Stamp Sentiment Labels Dies and added to the card with more foam tape. To finish off, I added a red Disco Ball Jewel to the ring.
 
SUPPLIES:

Here are the links to what I have used on the card. Affiliate links are used on some products. This means that if you make a purchase after clicking on my link, I receive a small commission with no extra cost to you. I truly appreciate your support when using these links. Please click on the logo below the product to shop at your favourite store. All products were personally purchased except those from Clearly Besotted, Hero Arts or those marked with an asterisk (*) which were kindly sent to me to use. You can read my full disclosure here.
 
 
There is another solid round ring in the set too so they would work well together or on their own for wedding cards as well. I hope you will check out the rest of the release. Thanks so much for popping by today. I hope you have a great day!
End of code