Showing posts with label Altenew. Show all posts

27 July 2026

VIDEO | Altenew Holiday Products for a Non-Holiday Card

Hello there, today I am sharing a card (and video) using Altenew holiday products for a non-holiday card. This is a great way to stretch your products and use them not just for seasonal projects. I am also sharing two ways to enhance die cuts. 

PLEASE NOTE: This post contains affiliate links. Please see below for my full disclosure.

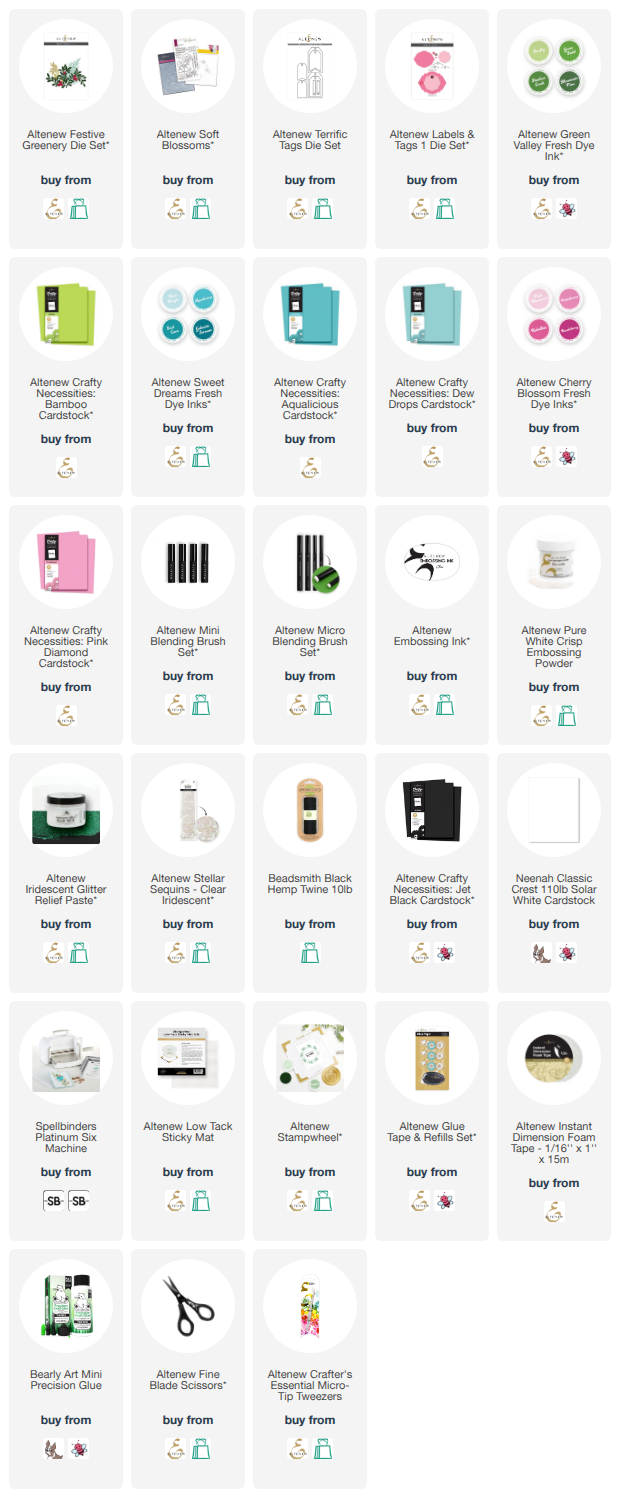
I started off my card by die cutting the Altenew Festive Greenery Dies from Altenew Crafty Necessities Cardstock in Bamboo, Aqualicious, Dew Drops and Pink Diamond. I added ink blending to them (the first way to enhance die cuts) using Altenew Fresh Dye Inks. I used the following combinations:

  • Fern - Firefly, Grass Field and Shadow Creek (Green Valley collection).
  • Leaf branch - Firefly and Grass Field. 
  • Darker berry branch - Aqualicious, Teal Cave and Galactic Stream (Sweet Dreams collection).
  • Lighter berry branch - Dew Drops, Aqualicious and Teal Cave. 
  • Berries - Pinkalicious and Razzleberry (Cherry Blossom collection).


I adhered the berries to the branches using liquid glue. I cut multiple of the smaller individual berry so that I could layer them up on the cluster for some added dimension. I cut one of the larger tags from the Altenew Terrific Tags Die Set from white cardstock. I then cut the hole reinforcer from the Altenew Labels & Tags 1 Die Set and adhered it on top. 


The greenery was adhered on top using a combination of liquid glue and Instant Dimension Foam Tape. I then threaded black twine through the top of the tag and tied in a bow. I adhered a panel of Altenew Crafty Necessities: Dew Drops Cardstock onto a US A2 sized white card base (finished size 4.25" x 5.5") using Glue Tape. The tag was adhered on top using Altenew Instant Dimension Foam Tape


I stamped a sentiment from the Altenew Soft Blossoms Stamp Set onto Altenew Crafty Necessities: Jet Black Cardstock using Altenew Embossing Ink. I applied Altenew Pure White Crisp Embossing Powder and heat set. It was cut into a strip and adhered to the card with more foam tape. To finish, I applied Altenew Iridescent Glitter Relief Paste to the berries using a paintbrush (the second way to enhance die cuts) and then embellished with Altenew Clear Iridescent Stellar Sequins

VIDEO:

Here is the video showing how I made the card:


If you are viewing this post via email subscription, you can watch the video HERE on YouTube. 

SUPPLIES:


Here are the links to what I have used on the project. Affiliate links are used on some products. This means that if you make a purchase after clicking on my link, I receive a small commission with no extra cost to you. I truly appreciate your support when using these links. Please click on the logo below the product to shop at your favourite store. All products were personally purchased except marked with an asterisk (*) which were kindly sent to me to use. You can read my full disclosure here.


I used the glitter paste like glitter glue here, applying it to the berries to add some frostiness to them. Applying it with a brush gave some dimension to them too and I really like how it looks on the berries. Thank you so much for stopping by today, I really do appreciate it. I hope you have a wonderful day and a great week ahead! 

20 July 2026

Altenew | Tone-on-Tone Willow Branches

Hello there, today I have a card to share using the Altenew Willow Branches Stencils. Since I was a child, I have loved willow trees. They always felt a little magical to me, I am not sure why! Although I love the traditional greens, for this card, I was thinking along the lines of the Japanese pink willow trees, but instead of using pink, I went with purple!

PLEASE NOTE: This post contains affiliate links. Please see below for my full disclosure.


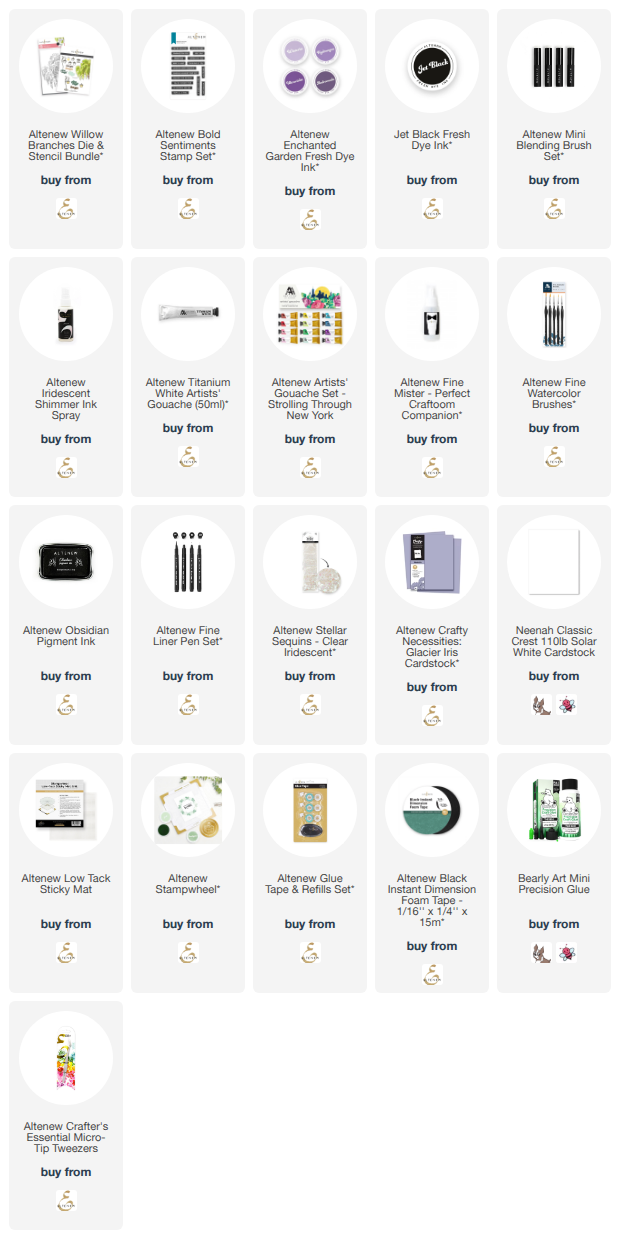
I started off with a panel of Altenew Crafty Necessities: Glacier Iris Cardstock. I placed the Altenew Willow Branches Stencils on top, one by one, to add ink blending using Mini Blending Brushes with Altenew Enchanted Garden Fresh Dye Inks

I used the following inks for the layers: 
  • Stencil 1 - Wisteria
  • Stencil 2 - Hydrangea
  • Stencil 3 - Ultraviolet
  • Stencil 4 - Andromeda
  • Stencil 5 - Andromeda with a light layer of Jet Black Fresh Dye Ink on top
  • Stencil 6 - Jet Black

I did offset the branches layer slightly, so that I had a slight highlight on the top of the branches. 


To add some interest onto the card, I added splatter in the three different ways: 


The panel was adhered to a US A2 sized white card base using Altenew Glue Tape. I stamped the sentiment from the Altenew Bold Sentiments Stamp Set onto white cardstock using Altenew Obsidian Pigment Ink. It was cut into a strip and the edges 'painted' using a black Fine Liner Pen to cover up the white core.


It was adhered to the card using Altenew Black Instant Dimension Foam Tape. To finish, I embellished with Altenew Clear Iridescent Stellar Sequins

SUPPLIES:


Here are the links to what I have used on the project. Affiliate links are used on some products. This means that if you make a purchase after clicking on my link, I receive a small commission with no extra cost to you. I truly appreciate your support when using these links. Please click on the logo below the product to shop at your favourite store. All products were personally purchased except marked with an asterisk (*) which were kindly sent to me to use. You can read my full disclosure here.


I really like the tone-on-tone look with the stencilling on top of the light purple cardstock. I think it gives an almost silhouette look to the tree. Thank you so much for stopping by today, I really do appreciate it. I hope you have a wonderful day and a great week ahead! 

11 July 2026

Altenew | July 2026 Release Blog Hop + Giveaway

Hello there, thank you so much for being here! Today I am delighted to be joining Altenew to celebrate the July 2026 release with a fun blog hop. As always with Altenew, the July release is full of festive products, but there are some non-festive ones too, if that is not your thing! There is also a new cardstock pack releasing, as well as new foam adhesive. 

I am going to start off by sharing my festive cards first, then move onto the non-festive ones. 

PLEASE NOTE: This post contains affiliate links. Please see below for my full disclosure.

FESTIVE GREENERY

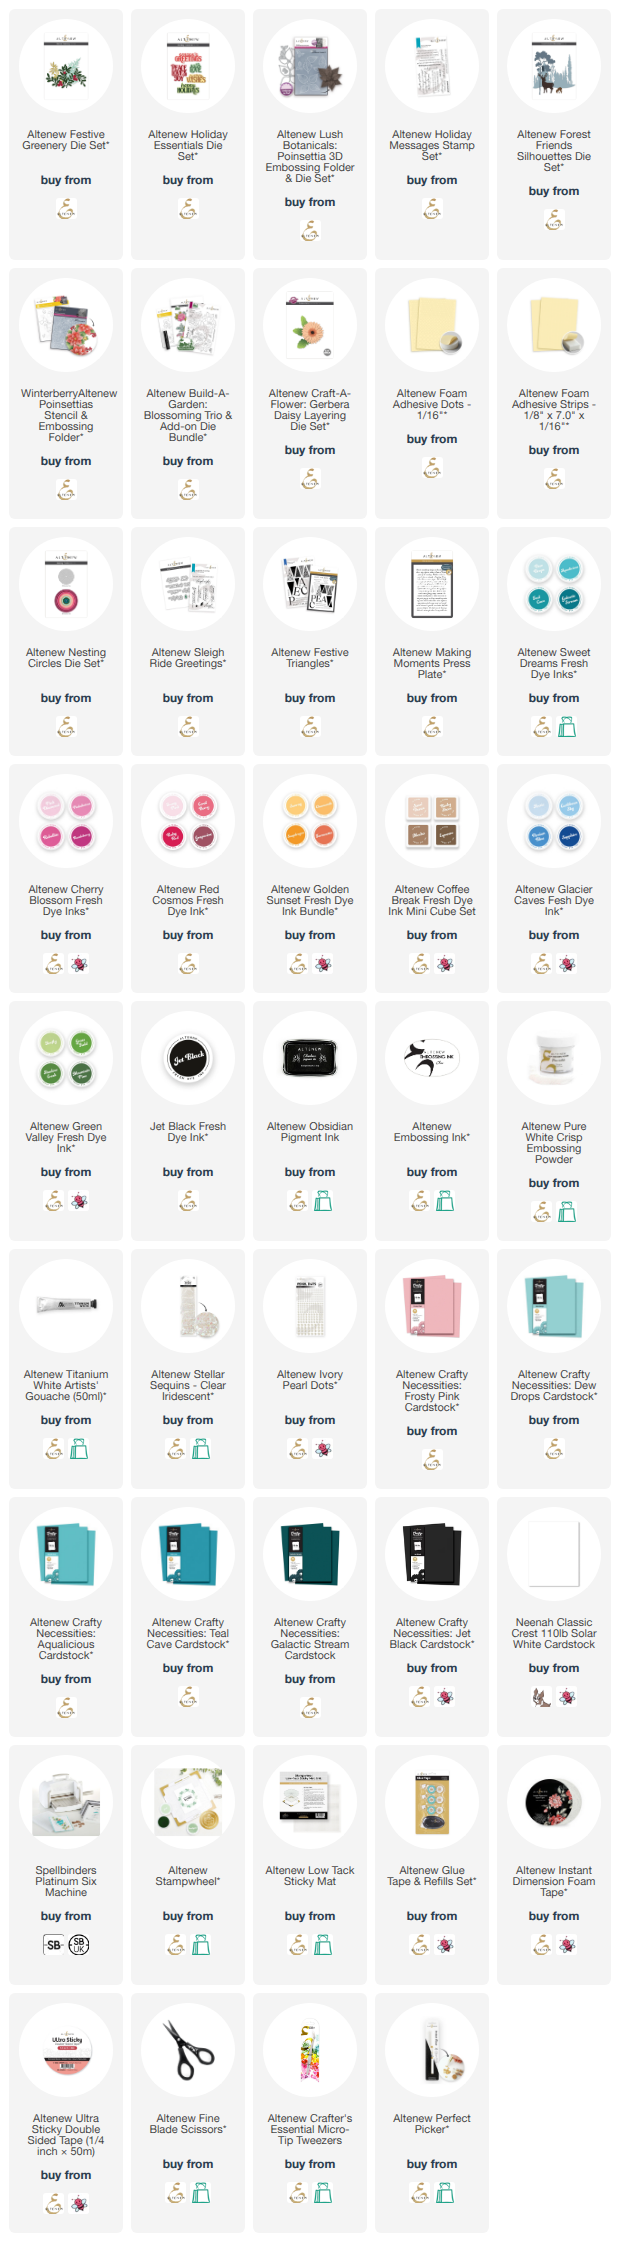
My first card today uses the new Altenew Festive Greenery Die Set. This wonderful set features, as the name suggests, different greenery/foliage. My card uses just one of the foliage pieces to create a wreath. I cut it multiple times from Altenew Crafty Necessities: Dew Drops Cardstock. The berries were die cut from Altenew Crafty Necessities: Frosty Pink Cardstock

I added ink blending to the foliage with Altenew Aqualicious and Teal Cave (Sweet Dreams) Fresh Dye Inks and for the berries, I used Altenew Pinkalicious and Razzleberry (Cherry Blossom) Fresh Dye Inks. The berries were adhered to the foliage pieces using liquid glue. I took a US A2 sized white card base and drew a faint circle on top with pencil (using a Nesting Circle Die as a template). 

I then used the circle as a guide of where to place the foliage. I die cut the 'happy holidays' sentiment from the new Altenew Holiday Essentials Die Set from white cardstock five times. I adhered them one on top of another for dimension and then onto the card. To finish, I embellished with Altenew Clear Iridescent Stellar Sequins

LUSH BOTANICALS: POINSETTIA

My next card uses the Altenew Lush Botanicals: Poinsettias 3D Embossing Folder & Die Set. I die cut the petals from Altenew Crafty Necessities: Frosty Pink Cardstock, and the flower centres from white cardstock. I placed the die cuts into the embossing folder and ran them through my die cutting machine to add the embossed details on them (so pretty!). 

I added ink blending to the petals using Altenew Coral Berry Fresh Dye Ink. Once the ink was dry, the flowers were assembled using liquid glue. I took a US A2 sized white card base and stamped the sentiment from the new Altenew Holiday Messages Stamp Set on top using Altenew Obsidian Pigment Ink

The poinsettias were adhered to the card using the new Altenew Foam Adhesive Dots 1/6". I then cut off the excess from the sides using scissors. To finish, I embellished with Altenew Clear Iridescent Stellar Sequins

FOREST FRIENDS

My next card uses the beautiful new Altenew Forest Friends Silhouettes Die Set, which I die cut using Altenew Crafty Necessities Cardstock, die cutting each layer three times. I added ink blending to the top layer with Altenew Sweet Dreams Fresh Dye Inks and adhered the other non-inked ones underneath for added dimension. 


I then added ink blending to the bottom of a panel of Altenew Crafty Necessities: Dew Drops Cardstock using Aqualcious Ink. This was adhered to the US A2 sized white card base first, leaving a gap at the bottom for the snow, followed by the die cut layers. I then mixed Altenew Titanium White Artists' Gouache with a little water and splattered it on top before setting it aside to dry. 


I stamped the sentiment from the Altenew Sleigh Ride Greetings Stamp Set onto white cardstock using Altenew Obsidian Pigment Ink. It was die cut out using the coordinating die and the die cut again another two times from white cardstock and adhered behind, before adhering to the card. To finish, I embellished with Altenew Clear Iridescent Stellar Sequins.

WINTERBERRY POINSETTIAS


My next card uses the new Altenew Winterberry Poinsettias 3D Embossing Folder and Stencils. I started off by placing a panel of white cardstock inside the embossing folder and ran it through my die cutting machine. I then placed the stencils on top, one by one, to add ink blending. 


I used Altenew Cherry Blossom Fresh Dye Inks (all four) for the poinsettia petals, Altenew Golden Sunset Fresh Dye Inks (Sunray and Chamomile) for the centres, Altenew Sweet Dreams Fresh Dye Inks (three lightest) for the foliage, Altenew Coffee Break Fresh Dye Inks (Mocha) for the branches, and Altenew Cherry Blossom Fresh Dye Inks (Pink Diamond) for the berries. 


The panel was adhered to a US A2 sized white card base with Altenew Glue Tape. I stamped a sentiment from the Altenew Festive Triangles Stamp Set onto Altenew Crafty Necessities: Jet Black Cardstock using Altenew Embossing Ink. I applied Altenew Pure White Crisp Embossing Powder and heat set. It was cut into a strip and adhered to the card using the new Altenew Foam Adhesive Strips 1/16". To finish, I embellished with Altenew Clear Iridescent Stellar Sequins.

Now for the non-festive cards: 

BLOSSOMING TRIO


For my card, I started off by stamping the flower from the Altenew Build-A-Garden: Blossoming Trio Stamp Set onto white cardstock using Altenew Obsidian Pigment Ink. I then used the coordinating stencils to add ink blending to colour it in. I used Altenew Glacier Caves Fresh Dye Inks for the flower, Altenew Green Valley Fresh Dye Inks for the leaves, and Altenew Sweet Dreams Fresh Dye Inks for the foliage. 


It was die cut out using the coordinating die. I then die cut two circles from white cardstock using the Altenew Nesting Circles Die Set. I ran one of them through my die cutting machine to deboss the Altenew Making Moments Press Plate on top. I then added a score line towards the top of the other one to create a hinge, before cutting a little off the bottom to help the card stand up. 


I added Altenew Ultra Sticky Tape to the hinge and then adhered it to the back of the debossed one. The flower was adhered on top using Altenew Instant Dimension Foam Tape. I stamped a sentiment from the set onto white cardstock and die cut out out before adhering onto the card. To finish, I embellished with Altenew Ivory Pearl Dots

GERBERA DAISY


In case you missed them, I shared these cards in my release post, which you can see here. They use the new Altenew Craft-A-Flower: Gerbera Daisy Layering Die Set

BLOG HOP:


As mentioned, this post is part of a fun, inspirational blog hop. Please click on the other participants below to visit their blogs: 

You are invited to the Inlinkz link party!

Click here to enter

GIVEAWAY:


$300 in total prizes! To celebrate this release, Altenew is giving away a $100 gift certificate to 1 lucky winner and a $50 gift certificate to 4 winners! Please leave a comment on the Altenew Blog and/or each designer’s blog post on the blog hop list below by July 16th 2026 for a chance to win. Altenew will draw 5 random winners from the comments left on each stop of this blog hop and announce the winners on the Altenew's Blog Hop Post on July 18th, 2026. The winner of the $100 gift certificate will be chosen from comments left on the Altenew blog. 

SUPPLIES:


Here are the links to what I have used on the projects. Affiliate links are used on some products. This means that if you make a purchase after clicking on my link, I receive a small commission with no extra cost to you. I truly appreciate your support when using these links. Please click on the logo below the product to shop at your favourite store. All products were personally purchased except marked with an asterisk (*) which were kindly sent to me to use. You can read my full disclosure here.


Thank you so much for stopping by today, I really do appreciate it. I hope you have a wonderful time on the rest of the hop and a wonderful rest of the day too! Take care!

6 July 2026

Altenew July 2026 Release | Gerbera Daisy

Hello there, today I have two cards to share with you using the new Craft-A-Flower: Gerbera Daisy Die Set from the Altenew July 2026 release. As per tradition with Altenew, the July release is packed full of festive products. There are also non-festive products in the collection though, and that is what I am sharing today. Please come back on Saturday to see my festive ones! 

PLEASE NOTE: This post contains affiliate links. Please see below for my full disclosure.


As you can see, both card use the same design, just different colours. I had a actually planned on putting both flowers on one card but when I tried, the card just felt a little too busy for me, so in the end, I made two cards with one flower on each! 


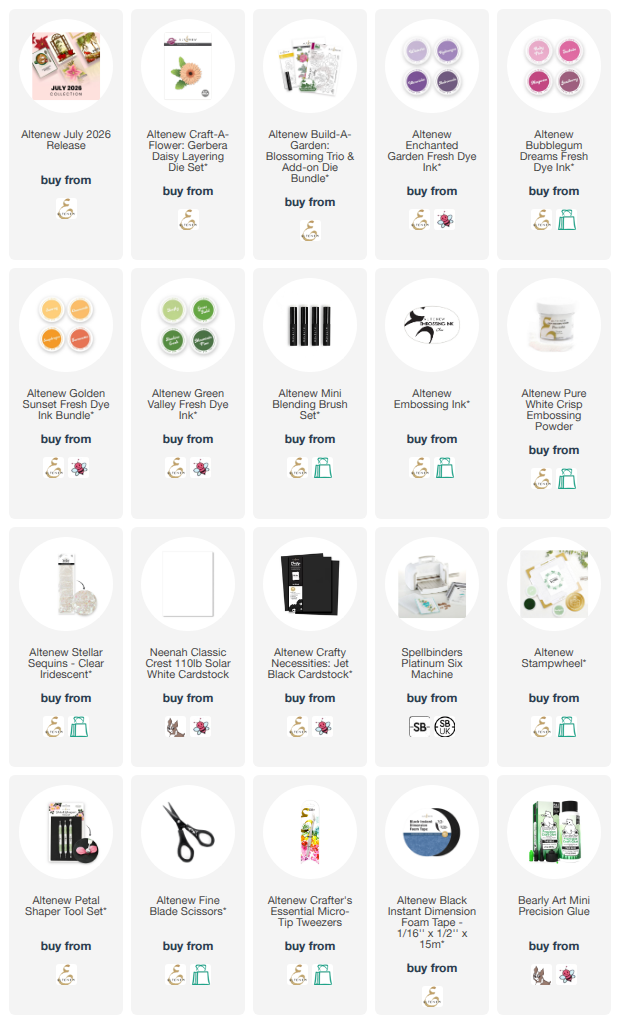
I started off by die cutting the Altenew Craft-A-Flower: Gerbera Daisy Layering Die Set from white cardstock. I added ink blending to the petals using Altenew Bubblegum Dreams Fresh Dye Inks for the pink flower, and Altenew Enchanted Garden Fresh Dye Inks for the purple one. 


The flower centres were ink blended using Altenew Golden Sunset Fresh Dye Inks, and the leaves using Altenew Green Valley Fresh Dye Inks. The flowers were adhered together but before adding in the flower centres, I used the Altenew Petal Shaper Tool Set to shape the petals. The flower centres were then adhered on top. 


I adhered the leaves to the US A2 sized card bases first, followed by the flowers, both using liquid glue. I then stamped the sentiment from Altenew Build-A-Garden: Blossoming Trio twice onto Altenew Crafty Necessities: Jet Black Cardstock using Altenew Embossing Ink


I applied Altenew Pure White Crisp Embossing Powder and heat set. They were cut into strips and adhered to the cards using Altenew Black Instant Dimension Foam Tape. In hindsight, I wish I had stamped the sentiment on the pink flower card using black ink onto white cardstock. Looking at it now, I think that would have been better and I will probably change it before sending it out! To finish, I embellished with Altenew Clear Iridescent Stellar Sequins

SUPPLIES:


Here are the links to what I have used on the projects. Affiliate links are used on some products. This means that if you make a purchase after clicking on my link, I receive a small commission with no extra cost to you. I truly appreciate your support when using these links. Please click on the logo below the product to shop at your favourite store. All products were personally purchased except marked with an asterisk (*) which were kindly sent to me to use. You can read my full disclosure here.


As mentioned, I will back on Saturday to share more projects using the Altenew July 2026 release. Until then, I hope you will check out the release, it is a fabulous one!


Thank you so much for stopping by today, I really do appreciate it. I hope you have a wonderful day and a great week ahead! 

8 June 2026

VIDEO | Creating a Simple Underwater Scene Using Die Cuts

Hello there, today I have a card to share using the Altenew Mini Delight: Graceful Seahorse set. This set was one of my favourites from the June 2026 release. You can see the other cards that I made using this release so far here

This set has a die set with the seahorse (multiple layers), as well as seaweed. The stamp set has sentiments and more seaweed. My focus is mainly on the die set but I do use a sentiment from the stamp set too!

PLEASE NOTE: This post contains affiliate links. Please see below for my full disclosure.


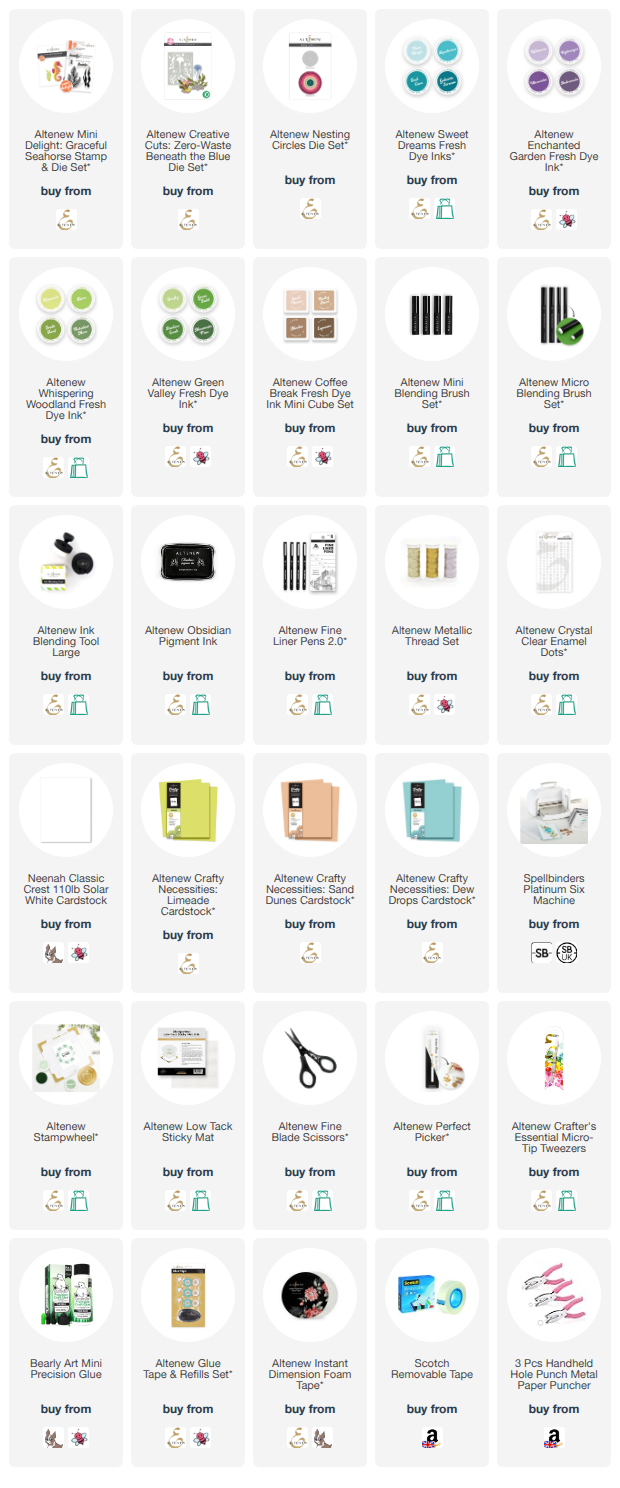
I started off my card by die cutting the seahorse from Altenew Mini Delight: Graceful Seahorse from white cardstock. I added ink blending using Altenew Sweet Dreams Fresh Dye Inks on the right, and Altenew Enchanted Garden Fresh Dye Inks on the left. Once the inks had dried, I assembled and adhered the seahorse using liquid glue, adding a dot for his eye using a Fine Liner Pen


I die cut the seaweed from the set from Altenew Crafty Necessities: Limeade Cardstock three times and added ink blending on top using Altenew Lime, Grass Field and Shadow Creek Fresh Dye Inks. I cut the rock, from Altenew Creative Cuts: Zero-Waste Beneath the Blue from Altenew Crafty Necessities: Sand Dunes Cardstock. I added ink blending to it with Altenew Coffee Break Fresh Dye Inks


I took a panel of Altenew Crafty Necessities: Dew Drops Cardstock and added ink blending to the bottom using Altenew Sweet Dreams Fresh Dye Inks (Dew Drops and Aqualicuous). It was adhered to a white US A2 sized card base using Altenew Glue Tape


I layered up the rock with another two die cuts and adhered it to the card. Before the glue dried, I popped one of the seaweed piece behind. The seahorse was adhered on top using a combination of liquid glue and Altenew Instant Dimension Foam Tape. I added one of the seaweed pieces in front of the rock, followed by another behind. 


I stamped a sentiment from Altenew Mini Delight: Graceful Seahorse onto Altenew Crafty Necessities: Dew Drops Cardstock using Altenew Obsidian Pigment Ink. It was cut into a circle using the Altenew Nesting Circles Die Set. I punched a 1.5mm hole in the top and threaded Altenew Silky Lilac Metallic Thread through and tied in a bow. It was adhered to the card and then to finish, I embellished with Altenew Crystal Clear Enamel Dots

VIDEO:

Here is the video showing how I made the card:


If you are viewing this blog post via email subscription, you can watch the video HERE on YouTube. 

SUPPLIES:


Here are the links to what I have used on the project. Affiliate links are used on some products. This means that if you make a purchase after clicking on my link, I receive a small commission with no extra cost to you. I truly appreciate your support when using these links. Please click on the logo below the product to shop at your favourite store. All products were personally purchased except marked with an asterisk (*) which were kindly sent to me to use. You can read my full disclosure here.


Thank you so much for stopping by today, I really do appreciate it. I hope you have a wonderful day and a great week ahead! Take care! 

6 June 2026

Altenew | June 2026 Release Blog Hop + Giveaway

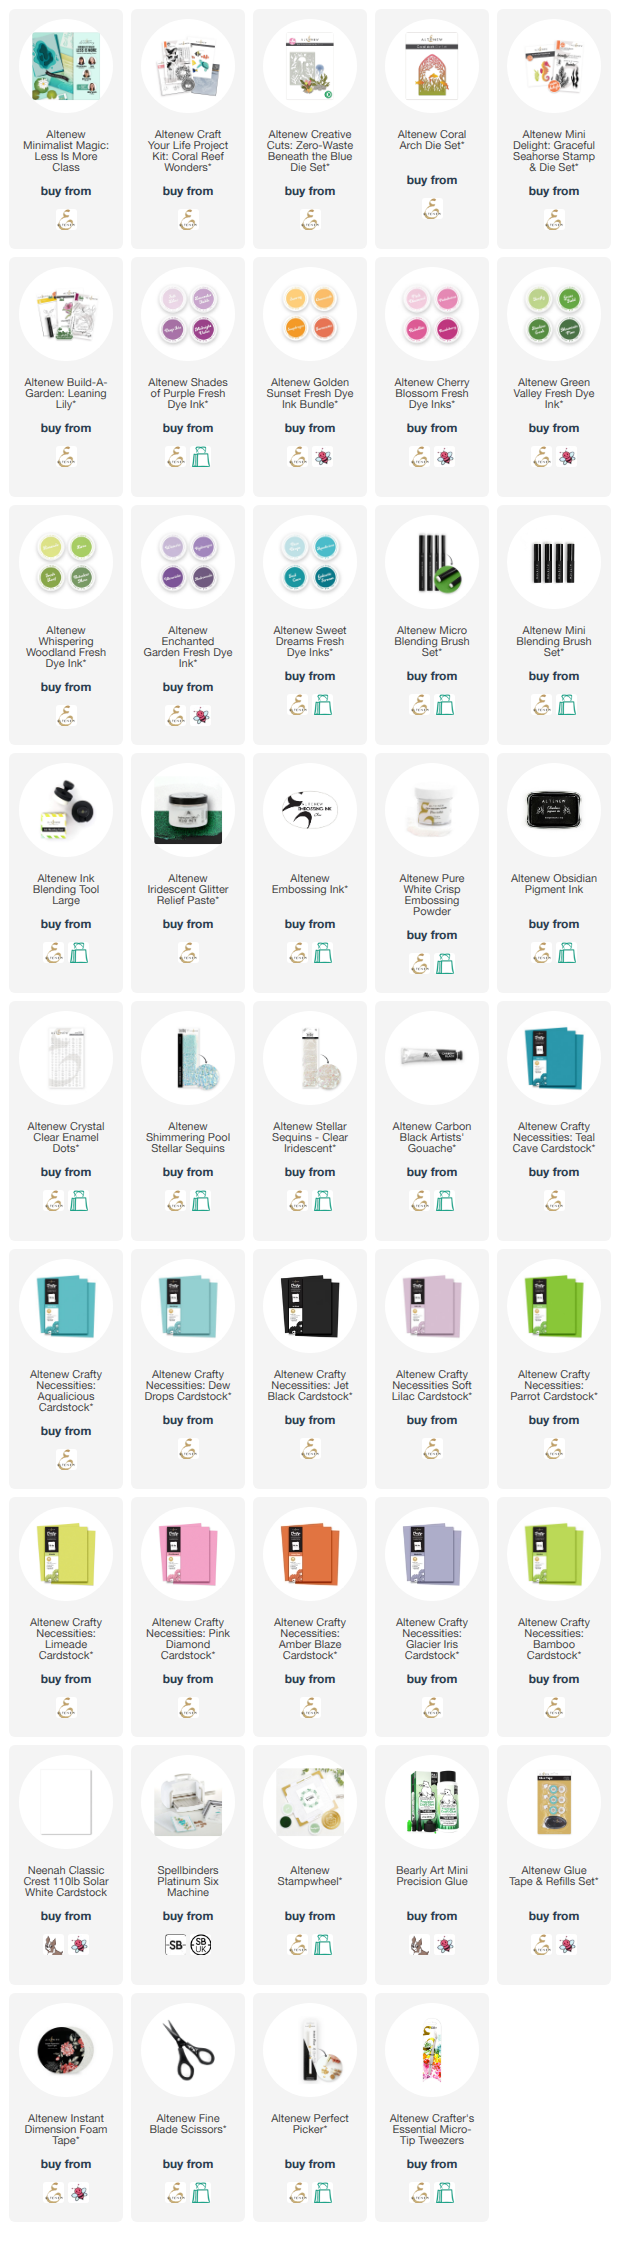
Hello there, thank you so much for joining me here on my blog. I am delighted to be joining Altenew today to celebrate the June 2026 release with a fun blog hop. I already shared one card using the release here and today I have five more to share! Most of the cards feature an underwater theme and they were so fun to make and I love that you can mix and match a lot of the sets together!

PLEASE NOTE: This post contains affiliate links. Please see below for my full disclosure.


CORAL REEF WONDERS


My first card uses the Altenew Craft Your Life Project Kit: Coral Reef Wonders. This fabulous kit includes a stamp set (with images and sentiments), a die set full of fabulous sea creatures, a reef embossing folder, and coordinating stencils for the embossing folder and also stencils to create an ocean. I started off my card by embossing a panel of white cardstock using the embossing folder. 


I then coloured the image using ink blending with the stencils. I went colourful as you can see, using Altenew Fresh Dye Inks in Cherry Blossom, Shades of Purple, Green Valley and Golden Sunset. The panel was adhered to a white A2 sized card base using Glue Tape. I die cut the turtle from the die set using Altenew Crafty Necessities: Dew Drops, Aqualicious, Teal Cave and Jet Black (for the eye) Cardstock. He was assembled and adhered using liquid glue then adhered to the card using Altenew Instant Dimension Foam Tape


The sentiment, from the stamp set, was stamped onto Altenew Crafty Necessities: Jet Black Cardstock using Altenew Embossing Ink. I applied Altenew Pure White Crisp Embossing Powder and heat set. It was cut into a strip and adhered to the card using more foam tape. To finish, I embellished with Altenew Crystal Clear Enamel Dots

BENEATH THE BLUE


My second card uses Creative Cuts: Zero-Waste Beneath the Blue combined with the fish from Craft Your Life Project Kit: Coral Reef Wonders. I die cut the coral first from the Altenew Creative Cuts: Zero-Waste Beneath the Blue Die Set from Crafty Necessities Cardstock. This is a zero-waste die set so in theory, you would cut it all at once, but since I wanted to use different colours of cardstock, I just placed the small pieces of cardstock onto the die and cut them out that way. 


I then added ink blending to the die cuts for some added interest. I used Soft Lilac Cardstock with Lavender Fields Ink, Pink Diamond Cardstock with Pinkalicious Ink, Limeade Cardstock with Lime Ink, and Parrot Cardstock with Grass Field Ink. The fish were die cut from Altenew Craft Your Life Project Kit: Coral Reef Wonders using Altenew Crafty Necessities: Jet Black and Amber Blaze Cardstock, plus a little white cardstock too. 


I took a panel of Altenew Crafty Necessities: Dew Drops Cardstock and added ink blending at the bottom using Altenew Dew Drops and Aqualicious Fresh Dye Inks. I stamped a sentiment onto the panel from Altenew Craft Your Life Project Kit: Coral Reef Wonders using Altenew Obsidian Pigment Ink. It was adhered to a US A2 sized white card base using Glue Tape. The coral was adhered on top, followed by the fish. To finish, I embellished with Altenew Crystal Clear Enamel Dots

CORAL ARCH


My next card uses the super cute Altenew Coral Arch Die Set. This little set includes the arch as well as three fish. I die cut the arch three times from Altenew Crafty Necessities: Dew Drops Cardstock. I added ink blending using Altenew Sweet Dreams Fresh Dye Inks (all four shades) onto one of the arches. 


The non-inked arches were adhered behind the ink blended one and then adhered onto a white A2 sized card base using liquid glue. I die cut the fish three times each from Altenew Crafty Necessities: Glacier Iris Cardstock. I added ink blending to the top layer using Altenew Hydrangea Fresh Dye Ink and then layered them up before adhering to the card. 


I stamped a sentiment from Altenew Craft Your Life Project Kit: Coral Reef Wonders onto Altenew Crafty Necessities: Jet Black Cardstock and heat embossed it using Altenew Pure White Crisp Embossing Powder. To finish, I applied Altenew Iridescent Glitter Relief Paste to the fish using a paint brush. This gave the most beautiful sparkle to the fish!

GRACEFUL SEAHORSE


My next card uses the beautiful Altenew Mini Delight: Delightful Seahorse. I die cut the seahorse from the die set from Altenew Crafty Necessities: Aqualicious Cardstock. It was assembled and adhered using liquid glue. I then added ink blending on top using Altenew Teal Cave Fresh Dye Ink


I die cut the seaweed from Altenew Crafty Necessities: Bamboo and Parrot Cardstock and added ink blending to both with Altenew Grass Field Fresh Dye Ink. I took a panel of Altenew Crafty Necessities: Dew Drops Cardstock and stamped the sentiment from the Altenew Mini Delight: Delightful Seahorse stamp set on top using Altenew Obsidian Pigment Ink


The panel was adhered to an A2 sized white card base using Glue Tape. I adhered one of the seaweed pieces first, using liquid glue, followed by the seahorse and other seaweed piece using Altenew Instant Dimension Foam Tape. To finish, I embellished with Altenew Shimmering Pool Stellar Sequins

LEANING LILY


My final card today uses the new Altenew Build-A-Garden: Leaning Lily. I stamped the lily image onto white cardstock using Altenew Obsidian Pigment Ink. I then used the coordinating stencils to colour it using ink blending. I used Altenew Cherry Blossom Fresh Dye Inks for the petals, Golden Sunset Fresh Dye Inks for the stamens, and Green Valley Fresh Dye Inks for the stems and leaves. 


It was die cut out using the coordinating die. I mixed some Altenew Carbon Black Artists' Gouache with a little water and splattered it onto a white A2 sized card base. Once it has dried, I adhered the lily on top using Altenew Instant Dimension Foam Tape. The sentiment from the set was heat embossed onto black cardstock, cut into a strip and adhered using more foam tape. To finish, I embellished with Altenew Clear Iridescent Stellar Sequins

MINIMALIST MAGIC: LESS IS MORE CLASS


In case you haven't already seen it, I am delighted to be teaching a lesson in the new Altenew Minimalist Magic: Less Is More class. The class uses the June release, sharing ways to use the products in a clean and simple way. There are three ways to take the class - the class pass only, the class along with the regular kit, and the class with the deluxe kit. The Altenew website shows what you get in the kits. 

My lesson uses a product that I have not shared here and explains how to use the rule of thirds and add a spin on it! If you like clean and simple cards, I hope you will check it out! 

BLOG HOP:


As mentioned, this post is part of a fun, inspirational blog hop with prizes. Please click on the other participants below to visit their blogs. 

You are invited to the Inlinkz link party!

Click here to enter

GIVEAWAY:


$300 in total prizes! To celebrate this release, Altenew is giving away a $100 gift certificate to 1 lucky winner and a $50 gift certificate to 4 winners! Please leave a comment on the Altenew Blog and/or each designer’s blog post on the blog hop list below by June 11th for a chance to win. Altenew will draw 5 random winners from the comments left on each stop of this blog hop and announce the winners on the Altenew's Blog Hop Post on June 13th, 2026. The winner of the $100 gift certificate will be chosen from comments left on the Altenew blog. 

SUPPLIES:


Here are the links to what I have used on the project. Affiliate links are used on some products. This means that if you make a purchase after clicking on my link, I receive a small commission with no extra cost to you. I truly appreciate your support when using these links. Please click on the logo below the product to shop at your favourite store. All products were personally purchased except marked with an asterisk (*) which were kindly sent to me to use. You can read my full disclosure here.


I did rush through the descriptions of the cards a bit as I didn't want the post to be too long. If there is anything you are not sure of, please ask in the comments and I will get back to you as soon as possible. Thank you so much for stopping by today, I really do appreciate it. I hope you have a wonderful day and a great weekend! Take care! 
End of code