Showing posts with label Simon Says Stamp. Show all posts

10 September 2025

Simon Says Stamp + Altenew STAMPtember 2025 Collaboration

Hello there, today I have a card to share using the Simon Says Stamp + Altenew STAMPtember 2025 collaboration set called Joyful Bouquet. As the name suggests, it features a beautiful bouquet plus lots of lovely sentiments. 

This set is exclusive to Simon Says Stamp and once it sells out it will not be restocked, so if you like it, grab it while you can! 

PLEASE NOTE: This post contains affiliate links. Please see below for my full disclosure.


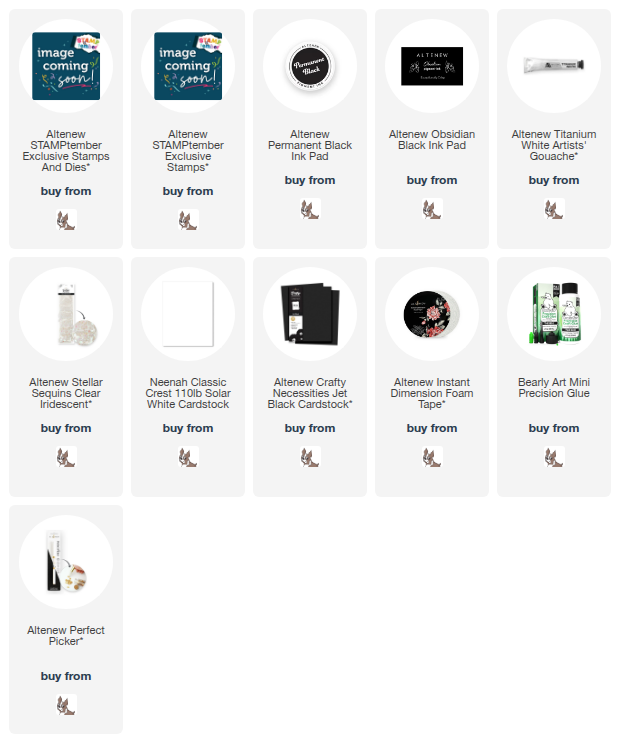
I started off my card by stamping the bouquet image from the Simon Says Stamp + Altenew STAMPtember 2025 stamp set onto white cardstock using Altenew Permanent Black Ink. I then coloured the image using alcohol markers, adding some shadows with colour pencils. 


The image was die cut out using the coordinating die. I stamped the sentiment using Altenew Obsidian Pigment Ink onto the same white cardstock and die cut that out as well. I cut the die another two times from white cardstock and adhered them behind the stamped one for dimension. 


I adhered a panel of Altenew Crafty Necessities Jet Black Cardstock onto a US A2 sized white card base and mixed a little Altenew Titanium White Gouache with water. I splattered it onto the card and set it aside to dry. Once dry, the image was adhered on top using foam tape, cutting the image overhanging the sides of the card base with scissors. To finish, I embellished with Altenew Clear Iridescent Stellar Sequins

SUPPLIES:


Here are the links to what I have used on the project. Affiliate links are used on some products. This means that if you make a purchase after clicking on my link, I receive a small commission with no extra cost to you. I truly appreciate your support when using these links. Please click on the logo below the product to shop at your favourite store. All products were personally purchased except marked with an asterisk (*) which were kindly sent to me to use. You can read my full disclosure here.


This is such a pretty image, perfect for lots of different occasions! Thank you so much for stopping by today, I really do appreciate it. I hope you have a wonderful day! 

6 September 2025

Simon Says Stamp + Hero Arts STAMPtember 2025 Collaboration

Hello there,  today I have a card to share using the Simon Says Stamp + Hero Arts STAMPtember 2025 collaboration set. It is called Snowy & Bright and features mountains, trees, a snowman, a little dog, two skaters and sentiments. I loved the design of the mountains, so used those as my focal point today. 

This set is exclusive to Simon Says Stamp and once it sells out that's it! So if you like it, grab it while you can! 

PLEASE NOTE: This post contains affiliate links. Please see below for my full disclosure.


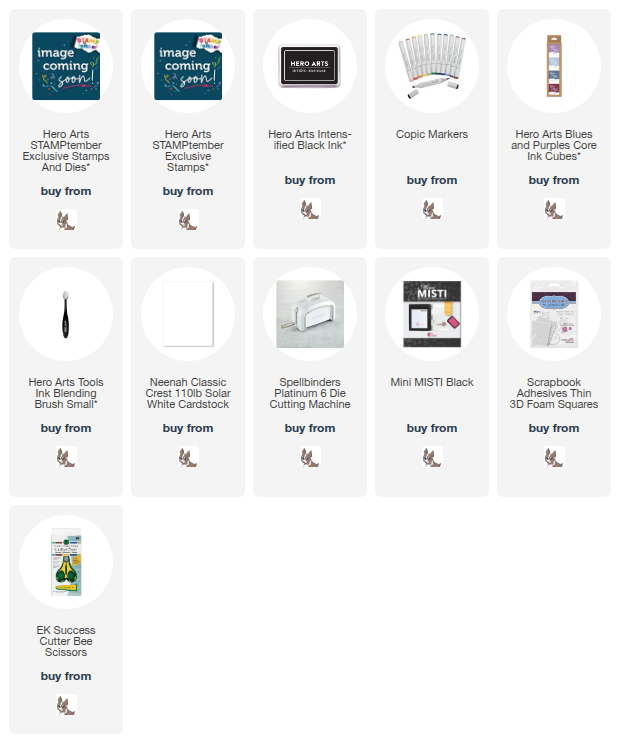
I started off by stamping the bottom of the mountains from the Simon Says Stamp + Hero Arts STAMPtember 2025 Stamp Set onto white cardstock using Hero Arts Orchid Core Ink. For the snow at the top, I wanted a light layer of ink, so I grabbed a Hero Arts Small Ink Blending Brush and just dabbed Hero Arts Passion Flower Core Ink at the top of the stamp before stamping them above the bottom part of the mountains. 

There are two mountains in the set, so I stamped one of them twice. I then stamped the dog from the set onto white cardstock using Hero Arts Intens-ified Black Ink. I added a teeny tiny bit of Copic Marker colouring using V15 & V12 for the scarf and C1 for the shading on the dog. I then cut the dog out using the coordinating dies. I cut the dog die another two times from white cardstock and adhered them behind the stamped one. 

Since the mountains are cut in two pieces with the dies, I decided to fussy cut these out using scissors instead. I took a US A2 sized white card base and stamped the sentiment on top using Hero Arts Intensified Black Ink. I also stamped the snow flurries from the set too. The mountains were adhered on top with thin foam tape, followed by the dog.  

SUPPLIES:


Here are the links to what I have used on the project. Affiliate links are used on some products. This means that if you make a purchase after clicking on my link, I receive a small commission with no extra cost to you. I truly appreciate your support when using these links. Please click on the logo below the product to shop at your favourite store. All products were personally purchased except marked with an asterisk (*) which were kindly sent to me to use. You can read my full disclosure here.


This is such a cute set, very whimsical in feel! Thank you so much for stopping by today, I really do appreciate it. I hope you have a great day! 

2 September 2025

Simon Says Stamp | STAMPtember 2025 Party

Hello there, I am delighted to be joining Simon Says Stamp today to celebrate all things STAMPtember with a fun party! Loads of designers have come together to share tons of inspiration using the new release. 

For today's party, each designer has a prize promotion to share, so make sure to stop off on as many guests blogs/social media as you can to find all the prizes! More info on that below. 

PLEASE NOTE: This post contains affiliate links. Please see below for my full disclosure.


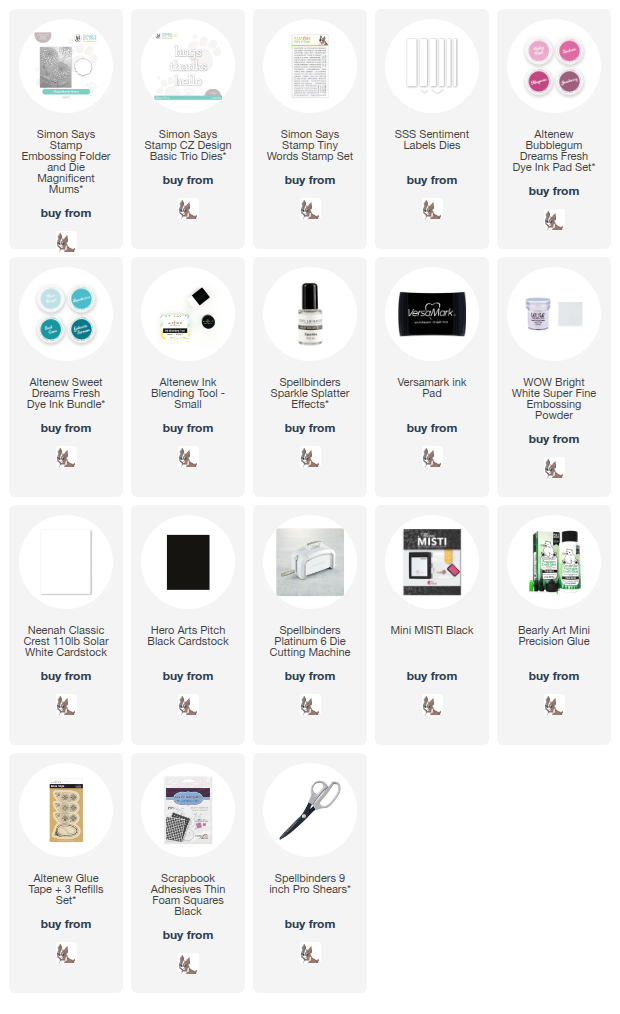
For my card today, I am using the new Simon Says Stamp Magnificent Mums Embossing Folder and Cutting Die. I started off by placing a 4.25" x 5.5" panel of white cardstock inside the folder and ran it through my die cutting machine. I then die cut the die in the set four times from white cardstock. I placed these inside the embossing folder, behind the flower heads, and ran it through my die cutting machine again. 

I added ink blending to the main panel with Altenew Sweet Dreams Fresh Dye Inks (Dew Drops and Aqualicious) and added ink blending to the flower heads using Altenew Bubblegum Dreams Fresh Dye Inks (Baby Pink, Fuchsia and Magenta). I adhered the main panel onto a white A2 sized card base, followed by the flower heads, cutting off the excess hanging over the sides with scissors. 

I popped the card into my splat box and splattered over Spellbinders Sparkle Splatter Effects for some added shimmer. I die cut the 'thanks' sentiment from the Simon Says Stamp CZ Design Basic Trio Dies four times from white cardstock. I adhered them one on top of another and then onto the card. 

I stamped the 'forever grateful' sentiment from the Simon Says Stamp Tiny Words Stamp Set onto black cardstock using Versamark Ink. I applied white embossing powder and heat set. It was cut into a strip using the Simon Says Stamp Sentiment Labels Dies and adhered to the card using thin foam squares. 

STAMPTEMBER PARTY TIME!

As mentioned, this is a fun party and you are all invited! It is also a scavenger hunt of sorts as you need to find all of the free gifts/promotions. All of the guests at the party are listed over on the Simon Says Stamp Blog. Visit their blogs/Instagram to find their prizes! 

My promotion for you is a free Simon Says Stamp Pinwheels 3x3" stencils with any purchase. Use the code in the graphic. Valid until 3rd September 2025 11.59pm ET. 


SUPPLIES:


Here are the links to what I have used on the project. Affiliate links are used on some products. This means that if you make a purchase after clicking on my link, I receive a small commission with no extra cost to you. I truly appreciate your support when using these links. Please click on the logo below the product to shop at your favourite store. All products were personally purchased except marked with an asterisk (*) which were kindly sent to me to use. You can read my full disclosure here.


Thank you so much for stopping by today, I really do appreciate it. I hope you have a wonderful time at the party and a great day too! Take care! 

1 September 2025

Simon Says Stamp | STAMPtember 2025

Hello there and happy STAMPtember to you! If you haven't heard of STAMPtember before, it's a month long event hosted by Simon Says Stamp that features lots of fun, new products, inspiration and collaborations. Today is the main STAMPtember release for the Simon exclusive products. Tomorrow we are celebrating with a fun party and then after that, the collaborations start with all your favourite craft companies! 

PLEASE NOTE: This post contains affiliate links. Please see below for my full disclosure.


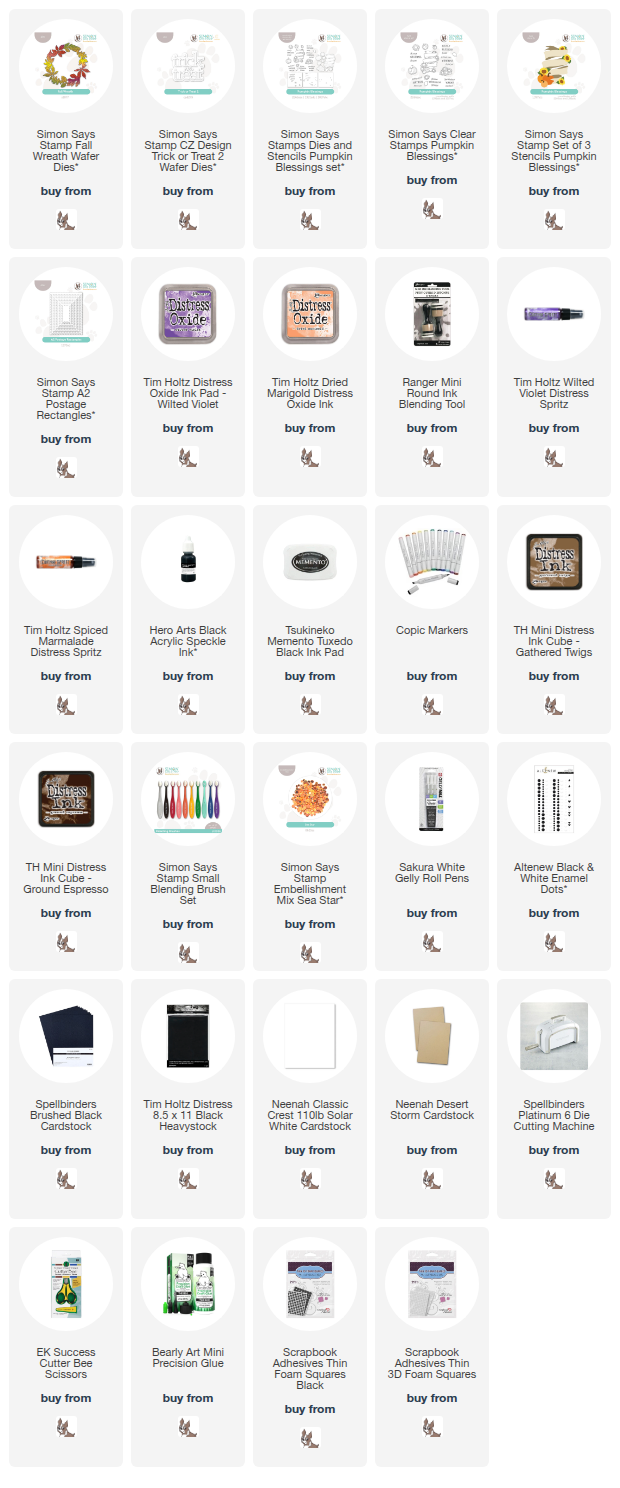
My first card today uses the new Simon Says Stamp Fall Wreath Die. This set features two semi circle leaf designs that you can put together to create a wreath. I die cut both parts from Spellbinders Brushed Black Cardstock. Using a Blending Tool, I pounced Tim Holtz Distress Oxides in Wilted Violet and Dried Marigold on top. 


I then took them to my splat box and spritzed Tim Holtz Wilted Violet and Spiced Marmalade Distress Spritz on top. I felt like I lost a little of the black, so I added Hero Arts Black Acrylic Speckle on top. Whilst it was drying, I die cut my sentiment. I used the new Simon Says Stamp Trick or Treat 2 Die. I die cut it five times from Tim Holtz Distress Black Heavystock and adhered them one on top of another. 


I created a US A2 sized card base from the same heavystock cardstock and adhered the wreath pieces on top using black thin foam squares. The sentiment was adhered in the centre. To finish, I added Simon Says Stamp Sea Star Sequins


My next card uses the new Simon Says Stamp Pumpkin Blessings. There is a stamp set, as well as a stencil set to colour/ink blend the main image in the set. I started off by stamping the image onto white cardstock using Memento Tuxedo Black Ink. I then stamped the sentiments (there are lots of different options) onto the banners.  


I coloured the pumpkins and sunflowers using Copic Markers. I then grabbed the Simon Says Stamp Pumpkin Blessings Stencils and used these to colour/ink blend the banners. I started off with a layer of Tim Holtz Gathered Twigs Distress Ink and then to add a little more depth, went in with Ground Espresso Distress Ink. The image was then fussy cut out using scissors. 


I die cut the second largest die in the new Simon Says Stamp A2 Postage Rectangles Dies from Neenah Desert Storm Cardstock. I then created a mini card to adhere behind. I adhered the stamped image to the front using thin foam squares. I added a few white gel pen dots and then embellished with Altenew White Enamel Dots

SUPPLIES:


Here are the links to what I have used on the projects. Affiliate links are used on some products. This means that if you make a purchase after clicking on my link, I receive a small commission with no extra cost to you. I truly appreciate your support when using these links. Please click on the logo below the product to shop at your favourite store. All products were personally purchased except marked with an asterisk (*) which were kindly sent to me to use. You can read my full disclosure here.


A big thank you to Simon Says Stamp for sending me these products to use. I will be back tomorrow to share another card, but until then, thank you so much for stopping by, I really do appreciate it. I hope you have a great day! 

6 August 2025

Simon Says Stamp | I Dig You!

Hello there, today I have a clean and simple card to share with you using the Rooting for You set that was kindly sent to me to use as part of Simon Says Stamp's Happy Camper release. This is such a fun set perfect for gardening enthusiasts! 

PLEASE NOTE: This post contains affiliate links. Please see below for my full disclosure.


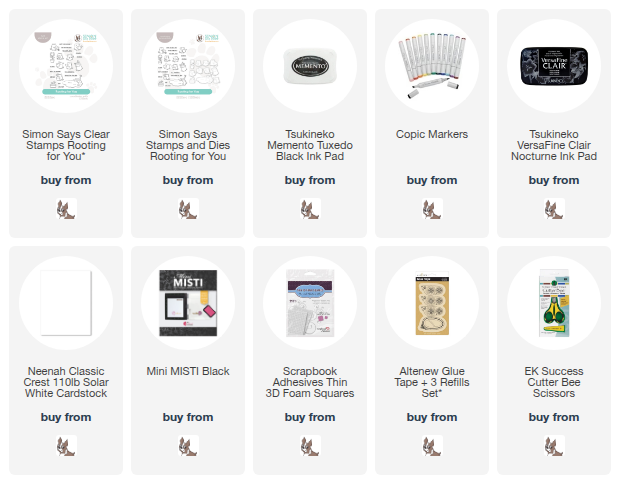
I started off my card by stamping the ground from the Simon Says Stamp Rooting for You Stamp Set onto a panel of white cardstock using Memento Tuxedo Black Ink. I then stamped the cat with the wheelbarrow image from the set onto a separate panel of white cardstock using the same ink. 


Both were coloured using Copic Markers (the colours that I used are listed below the supply area). I fussy cut out the cat and wheelbarrow using scissors, but there are dies available if fussy cutting is not your thing! 


I stamped the sentiment from the set onto the panel using Versafine Clair Nocturne Ink. The panel was then adhered to a US A2 sized white card base with tape runner adhesive. The cat and wheelbarrow were adhered on top using thin foam squares. 

SUPPLIES:


Here are the links to what I have used on the project. Affiliate links are used on some products. This means that if you make a purchase after clicking on my link, I receive a small commission with no extra cost to you. I truly appreciate your support when using these links. Please click on the logo below the product to shop at your favourite store. All products were personally purchased except marked with an asterisk (*) which were kindly sent to me to use. You can read my full disclosure here.


COPIC MARKERS: Cat - W10, W8, W7, W5, W3, W2, W1. Wheelbarrow - V17, V15, V12. Spade - V17, V15, V12/C6, C5, C3, C1. Carrot - YR18, YR15/G29, YG17, YG23, YG01. Soil - E57, E55, E53. 

I really like how these images work well for clean and simple cards, although you don't have to use them for that, there are lots of characters in the set, so you could definitely make a big scene with them too! Thank you so much for stopping by today, I hope you have a wonderful day! 

31 July 2025

Simon Says Stamp | Hello, Friend

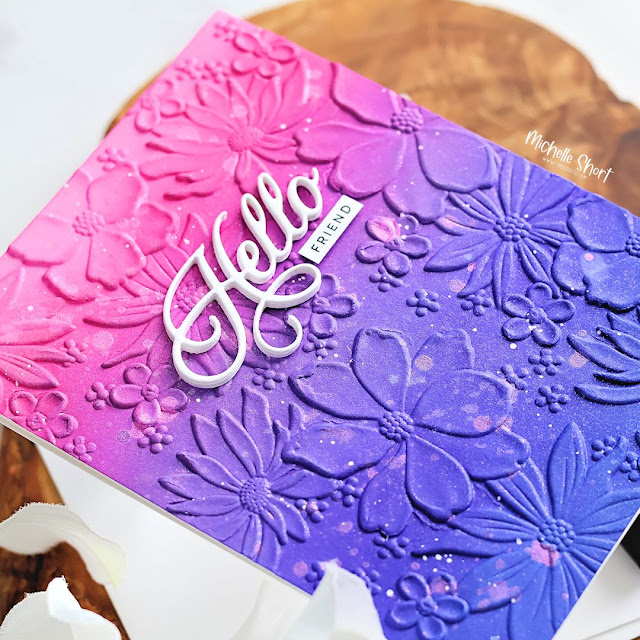
Hello there, I am delighted to be joining Simon Says Stamp today to share inspiration using their new Happy Camper release, which is out now! My card today uses the beautiful new Blossom Burst Embossing Folder, as well as a new sentiment die. 

PLEASE NOTE: This post contains affiliate links. Please see below for my full disclosure.


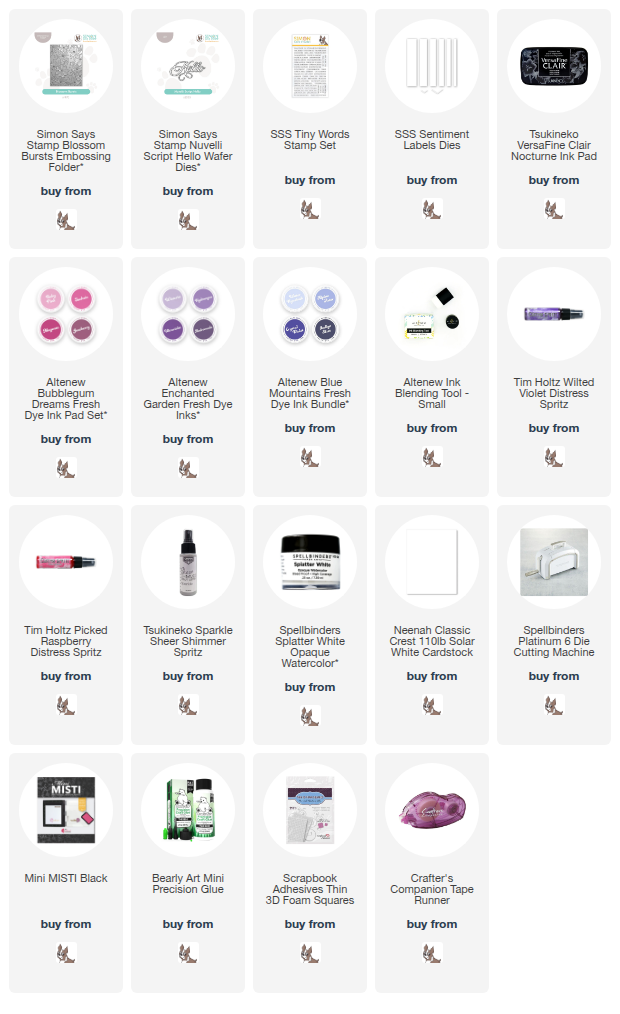
I started off my card by adding ink blending to a panel of white cardstock. Using an Altenew Small Blending Brush, I applied Altenew Baby Pink at the top, followed by Fuchsia, Hydrangea, Ultraviolet and then finishing with Crystal Violet at the bottom. I placed the panel inside the new Simon Says Stamp Blossom Burst Embossing Folder and ran it through my die cutting machine. 


Once I removed it, I then went over the panel with the same inks. This grabs on to the raised areas and makes them slightly darker. I then splattered on Tim Holtz Distress Spritz in Wilted Violet and Picked Raspberry. There wasn't enough shimmer for my liking, so I spritzed on a light layer Sparkle Sheer Shimmer Spritz on top too. 


Finally, I mixed Spellbinders Splatter White with a little water and splattered that over too before setting it aside to dry. Once dry, it was adhered to an A2 sized white card base using tape runner adhesive. I took the new Simon Says Stamp Nuvelli Script Hello Die and die cut it four times from white cardstock. 


They were adhered one on top of another (for dimension) and then adhered onto the card. I stamped the 'friend' from Simon Says Stamp Tiny Words (masking off from a larger sentiment) onto white cardstock using Versafine Clair Nocturne Ink. It was cut into a strip and adhered under the hello with thin foam tape to finish. 

SUPPLIES:


Here are the links to what I have used on the project. Affiliate links are used on some products. This means that if you make a purchase after clicking on my link, I receive a small commission with no extra cost to you. I truly appreciate your support when using these links. Please click on the logo below the product to shop at your favourite store. All products were personally purchased except marked with an asterisk (*) which were kindly sent to me to use. You can read my full disclosure here.


I do have another card to share with you using the release on Saturday, but in the mean-time, I hope you will check out the release! Thank you so much for stopping by today, I really do appreciate it. I hope you have a wonderful day! 

3 July 2025

Simon Says Stamp | Ahoy Matey!

Hello there, I am delighted to be joining Simon Says Stamp today to celebrate the Friend Like You release with a fun Instagram hop. I already made one card using the release which you can see here. Today I am using the super cute Ahoy, Matey set designed by the amazing Alberto Gava

PLEASE NOTE: This post contains affiliate links. Please see below for my full disclosure.


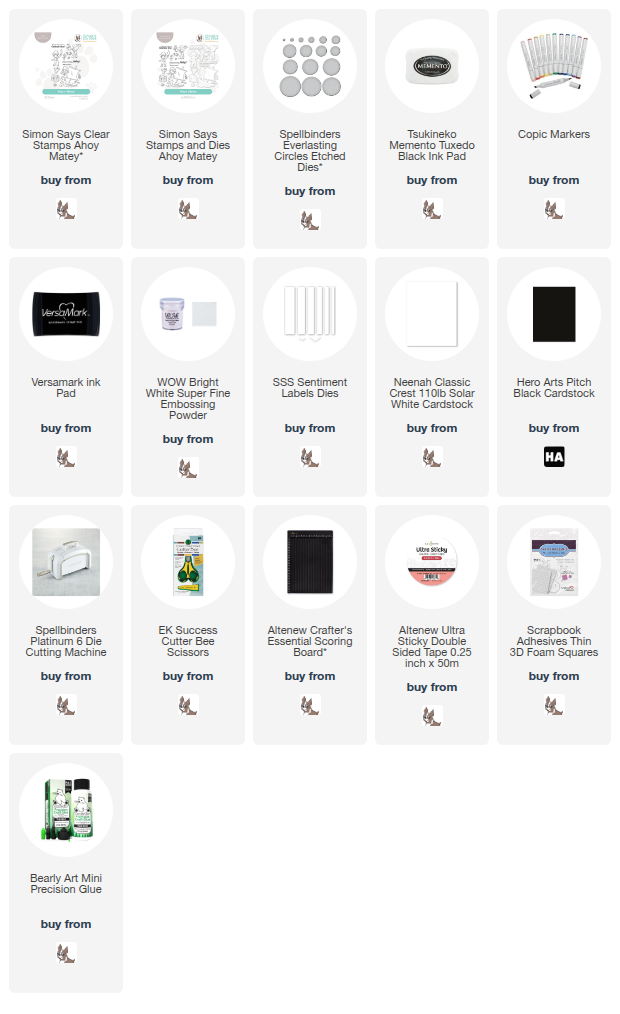
I started off my card by die cutting a circle of cardstock using a Spellbinders Everlasting Circles Etched Dies. I then stamped the pirate girl and boat (one image) from the Simon Says Stamp Ahoy, Matey Stamp Set onto the circle using Memento Tuxedo Black Ink. I coloured the image using Copic Markers (the colours that I used are listed below the supplies list). 


It is always a bit intimidating colouring one of Alberto's images with him being the king of colouring, but I tried my best! I then die cut two more circles of white cardstock and on one, I cut a little off the bottom so that the card could stand up easily. At the top, I scored a line using a scoring board a stylus to create a hinge. I added adhesive to the hinge and adhered it to the other circle to create a card base. I then adhered the image circle on top (to hide the colouring bleed-through on the back). 


I stamped the sentiment from the set onto black cardstock using Versamark Ink. I applied white embossing powder and heat set. It was cut into a strip using the Simon Says Stamp Sentiment Labels Dies and adhered onto the card with thin foam squares. I felt that the card was lacking, so I stamped the macaw from the set and coloured him using Copic Markers. I fussy cut him out using scissors and adhered him onto the card so that he was sitting on top of the sail. 

SUPPLIES:


Here are the links to what I have used on the project. Affiliate links are used on some products. This means that if you make a purchase after clicking on my link, I receive a small commission with no extra cost to you. I truly appreciate your support when using these links. Please click on the logo below the product to shop at your favourite store. All products were personally purchased except marked with an asterisk (*) which were kindly sent to me to use. You can read my full disclosure here.


COPIC MARKERS: Girl skin - E13, E11, E00, E000, R20. Hair - E29, E27, E25, E23. Hat - N10, N8, N5, N3/YR27, YR24, YR23, Y08. Shirt - W3, W1, W0. Jacket and shoes - N10, N8, N5, N3. Trousers - V09, V17, V15, V12. Boat - E49, E59, E57, E55. Sail - W5, W3, W1, W0, W00, 0. Water - BG49, BG15, BG13, BG11. Macaw - V09, V17, V15, V12/C8, C6, C3/C1/Y17, Y13, Y11. 

Would it have looked better if I had stamped and masked the macaw instead of making him a separate layer? Maybe! But I am glad that I added him on, he is super cute! All the fun for the hop is happening over on Instagram. You can see my feed here and Simon Says Stamp's here. Thank you so much for stopping by today, I really do appreciate it. I hope you have wonderful day! 

26 June 2025

Simon Says Stamp | Tilted Daisies

Hello there, today is release day over at Simon Says Stamp and they kindly sent me some products to play with! My projects today use the new Tilted Daisies Dies. There are two layers to the petals, one for the flower centre and one for the stems. You get a larger and smaller daisy in the set and I really like the shape of them! 

PLEASE NOTE: This post contains affiliate links. Please see below for my full disclosure.


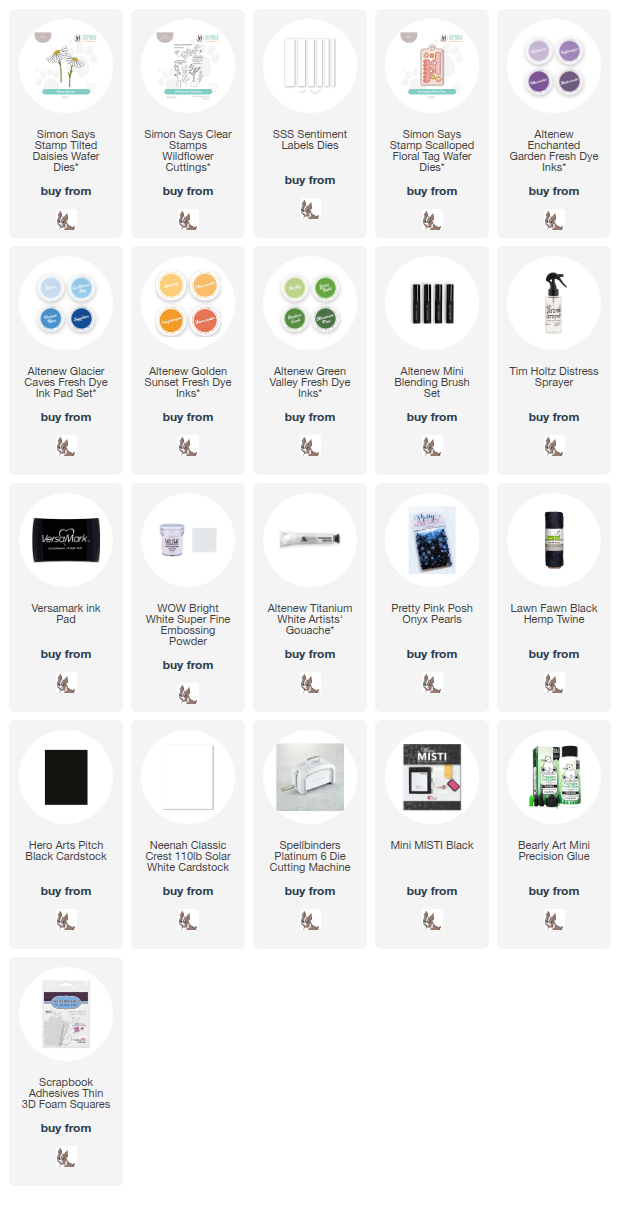
I started off by die cutting the Simon Says Stamp Tilted Daisies Dies from white cardstock. I then added ink blending to them using Altenew Fresh Dye Inks. I used Caribbean Sky first on the petals and then added Hydrangea and Ultraviolet at the ends. I used Sunray and Chamomile for the centres and Green Valley collection for the stems (Firefly, Grass Field and Shadow Creek). 


I wanted to add some detail to the petals, so I sprayed a little water onto my mat and picked it up with a paint brush. I then splatted it on to the petals. Since the ink reacts with water, it made water droplets on them and just adds a little interest. I then set them aside to dry before adhering the flowers together using Bearly Art Glue. 


For the card, I took a panel of Hero Arts Pitch Black Cardstock and mixed a little Altenew Titanium White Artists' Gouache with water, picked it up with a paintbrush and splattered it onto the the panel. I then set this aside to dry while I stamped the sentiment. I took the 'just for you' from the new Simon Says Stamp Wildflower Cuttings Stamp Set and stamped it onto more black cardstock using Versamark Ink


I applied white embossing powder and heat set. It was then cut into a strip using the Simon Says Stamp Sentiment Labels Dies. The splattered panel was adhered to a US A2 sized white card base and then the flowers adhered on top. I used Bearly Art Glue for the stems and thin foam squares for the flower heads. The sentiment was adhered with thin foam squares too. To finish, I embellished with Pretty Pink Posh Onyx Pearls.


I had two flowers leftover and didn't want them to go to waste, so I die cut the Simon Says Stamp Scalloped Floral Tag Die from black cardstock and added white gouache splatter onto that too. Once dry, I adhered the flowers on top with Bearly Art Glue and thin foam squares. 


I added twine through the top of the tag and tied in a bow. I finished by embellishing with Pretty Pink Posh Onyx Pearls. I decided to leave a sentiment off of the tag. Does a tag always need a sentiment? I am not sure but I thought it looked nice without one! 

SUPPLIES:


Here are the links to what I have used on the project. Affiliate links are used on some products. This means that if you make a purchase after clicking on my link, I receive a small commission with no extra cost to you. I truly appreciate your support when using these links. Please click on the logo below the product to shop at your favourite store. All products were personally purchased except marked with an asterisk (*) which were kindly sent to me to use. You can read my full disclosure here.


Thank you so much for stopping by today, I really do appreciate it. I hope you have a wonderful day! 

12 June 2025

Simon Says Stamp | Snake Plant

Hello there, today I have a card to share using the Simon Says Stamp Snake Plant Stencils that they kindly sent me to use as part of the Moments in Time release. I already shared some projects using other products in the release which you can see here and here

PLEASE NOTE: This post contains affiliate links. Please see below for my full disclosure.


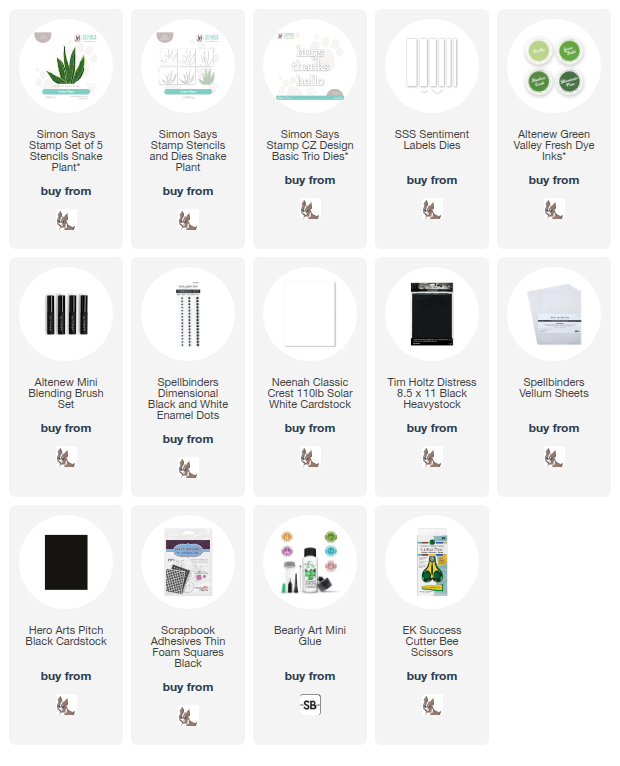
For my card today, I started off by taking a sheet of white cardstock and one at a time, placed the 5 stencils from the Simon Says Stamp Snake Plant Stencils Set on top and added ink blending using Altenew Green Valley Fresh Dye Inks and Altenew Mini Blending Brushes.


I used Firefly for the first layer, Firefly for the second layer, Mountain Pine for the third layer, Grass Field for the fourth layer, and Shadow Creek for the fifth layer. I then fussy cut the image out using scissors, but there is a bundle you can get with the stencils and dies if you are not keen on fussy cutting! It was adhered to a US A2 sized black card base with thin black foam squares. 


I die cut the 'hugs' die from the Simon Says Stamp Basic Trio Dies five times from Tim Holtz Black Heavystock Cardstock. I adhered them one on top of each other for dimension. I die cut a banner from vellum using the Simon Says Stamp Sentiment Labels Dies and adhered the hugs on top. I added glue on the back (just behind where the die cut is on top so you don't see any glue through the vellum) and adhered it to the card. To finish, I embellished with Spellbinders Black Enamel Dots

SUPPLIES:


Here are the links to what I have used on the project. Affiliate links are used on some products. This means that if you make a purchase after clicking on my link, I receive a small commission with no extra cost to you. I truly appreciate your support when using these links. Please click on the logo below the product to shop at your favourite store. All products were personally purchased except marked with an asterisk (*) which were kindly sent to me to use. You can read my full disclosure here.


I had planned to put the snake plant on a white card base, but it popped so well on the black, that I went with that instead! Thank you so much for stopping by today, I really do appreciate it. I hope you have a wonderful day! 
30 May 2025

Simon Says Stamp | Bold Bird Branches

Hello there, I am back today to share another project using the Simon Says Stamp Moments in Time release. Today I am using the Bold Bird Branches Embossing Folder & Die Set. The dies cut out the birds so that you can pop them up on top of the background or you can use them separately on other projects. 

PLEASE NOTE: This post contains affiliate links. Please see below for my full disclosure.


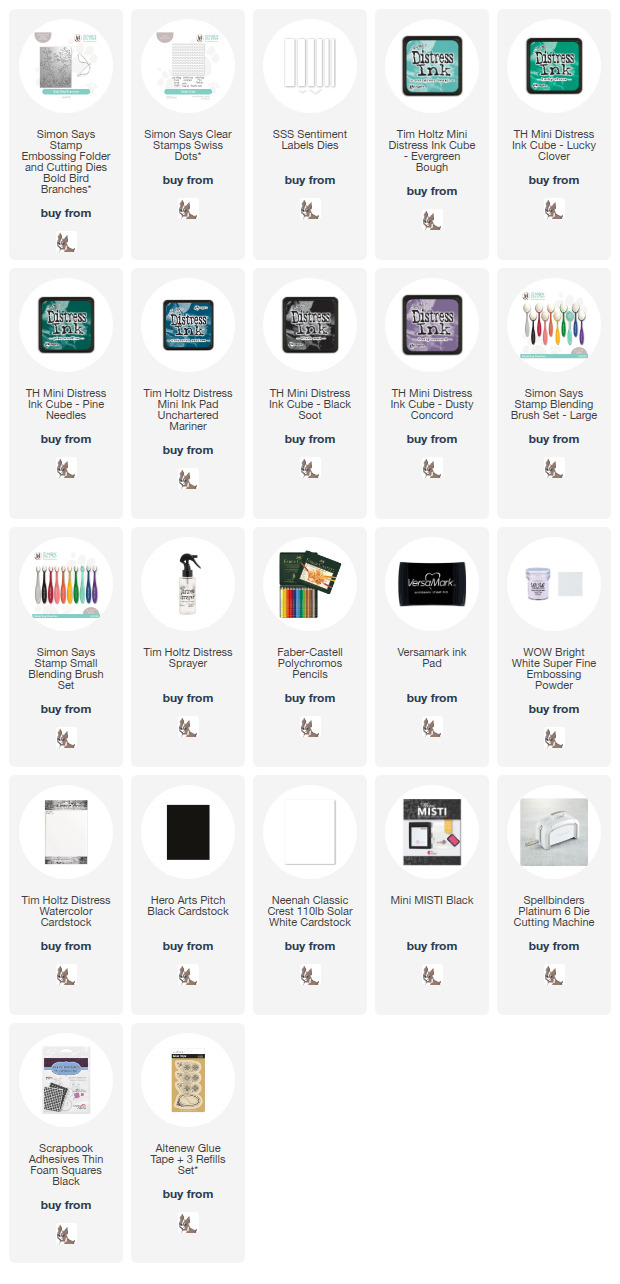
I started off my card by placing a panel of Tim Holtz Distress Watercolor Cardstock inside the Simon Says Stamp Bold Bird Branches Embossing Folder. I ran it through my die cutting machine to emboss the image onto the cardstock. I then added ink blending on top using Distress Inks and Ink Blending Brushes


I will be honest with you, I am not sure what order I added the Tim Holtz Distress Inks in, as I was playing around a bit! However, I know that I used Evergreen Bough, Lucky Clover and Pine Needles initially. I wanted the corners to be darker, so I added ink some Unchartered Mariner. I then added a little Black Soot to the bottom corners too, to darken them further. As I was going, I spritzed on water using the Tim Holtz Distress Sprayer


For the birds, I die cut them first and then placed them inside the folder before running through my die cutting machine. I added ink blending to them with Dusty Concord and Evergreen Bough Distress Inks. I used Polychromos Pencils to fill in the eyes and beaks. The panel was adhered to an US A2 sized white card base with tape runner adhesive and the birds adhered on top with thin foam squares. 


I took the 'hello friend' sentiment from the Simon Says Stamp Swiss Dots Set and stamped the 'hello' and 'friend' separately onto black cardstock using Versamark Ink. I applied white embossing powder and heat set. They were cut into strips using the Simon Says Stamp Sentiment Labels Dies and adhered to card using thin foam squares. 

SUPPLIES:


Here are the links to what I have used on the project. Affiliate links are used on some products. This means that if you make a purchase after clicking on my link, I receive a small commission with no extra cost to you. I truly appreciate your support when using these links. Please click on the logo below the product to shop at your favourite store. All products were personally purchased except marked with an asterisk (*) which were kindly sent to me to use. You can read my full disclosure here.


It was nice to get my inks out and play around a bit on this card. There are so many different ways to add colour to embossing folder panels and usually I like to highlight the raised areas, but for today's card, I like the more moody darker look! Thank you so much for stopping by today, I really do appreciate it. I hope you have a great day! 
End of code